
This is a guide to answer all questions and give a detailed explanation of the game. It will also explain how to complete the game and what you need to do, plus tips on the best ways to play.
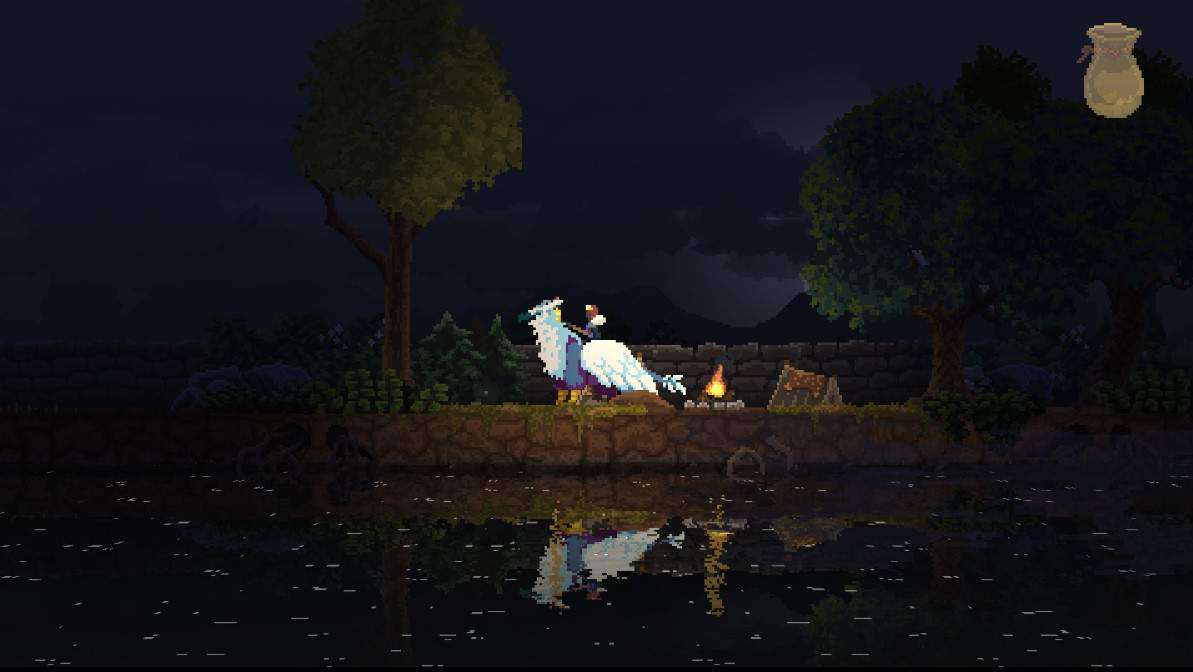
Everything Involving Hermits
- Baker – Small granny for making the bakery!
- Ballista – Rugged fellow for the ballista!
- Rancher – Sweet little Johnny Appleseed for the Stable!
- Knight – Grandpa in armor for the Knight Stand!
- Horn – Little Viking guy for the Horn Wall!
How To Use Them?
Each Hermit Has Different requirements but they function all the same: Upgrading a building.
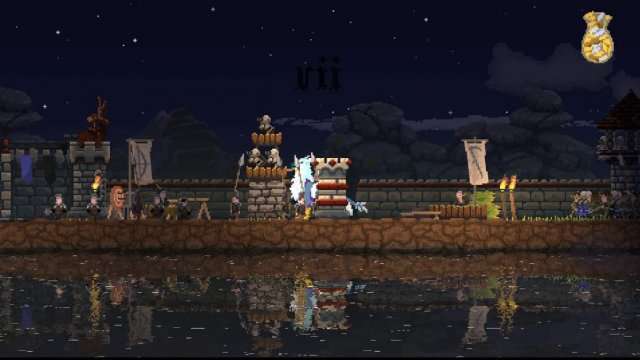
The Ballista / Baker / Knight hermits upgrade this tower to their respective tower. It is possible to upgrade the tier 1 iron tower, however its basically a waste of gold. Best to upgrade these. How to upgrade: You only need to have the desired hermit riding with you, walk to them, give them a coin then they will ride with you. Go and upgrade this tower and instead of iron tier 1, you will now have a hermit tower!
What about the Horn / Rancher hermits?
Horn and rancher are a little different than the norm. A Horn hermit will upgrade a Maxed iron wall to a slightly different “Horn Wall” (Don’t know official name). While the Rancher will upgrade a maxed farm to a Stable.
What Does Each Building Do?
The Ballista Hermit Tower will replace a towers archers with a single builder. This allows them to leave and go hunt for you. It also has increased range + piercing. Super valuable building from behind an extra wall check that range!
The Knight Hermit Tower changes the tower into something different. It is like a small castle, a place for a knight. Instead of archers or a builder, it lets you get another Squire or Knight. This can help when going to a new island with three Squires. (More on this later.) But, this building is not very useful. Two groups of fighters can almost always destroy the portal, unless they fight enemies along the way.
The Baker Hermit Tower will replace the tower as well with a small bakery. By spending some coins, you will purchase bread. This bread will attract vagrants no matter how far they are. This is my personal FAVORITE tower. Very useful on maps where the camps are far away. The vagrants will grab the bread and eat it, then stick around for awhile, useful for when you leave! You can hire them before they touch the bread and save some coin too!
The Rancher Hermit will replace a farm with a Stable. The Stable is used to store a mount for easy swapping. Personally, never used it or cared since I was happy with 1 mount. However for an optimal playthrough, it would definitely be a benefit.
The Horn Hermit Wall introduces a horn that can be used to call defenders. Personally have never used it, but it may be useful when expanding. To keep your troops behind higher quality wall or maybe a greed attack coming during the day.
Help! My Hermit was taken!
You actually are either in an ok place or a bad place. However, your hermit is not actually gone. In the event your hermit is taken, you are now locked out of getting another one of that type, BUT you can save him! If your hermit is stolen, after clearing the final portal, they will be freed! However you are locked out of going and getting another until you lose your crown and start a new rein.
Safety Tip!
Hermits have a tendency to walk outside the walls. For optimal safety, make sure you extend each side to the 2nd wall / tower combo!
Mounts Breakdown
Mounts:
- Pony – It’s basically the exact same as the horse. Don’t Do it. (Couldn’t remember what island it was on but the spawn is a open field.)
- Bear – Ok stamina but the really neat thing is this mount can attack. While you run the bear will slash, killing almost anything. You literally run into the greed! This is also useful for killing deer and bunnies. Overall a decent mount but I think there’s better.
- Lizard – Ok this mount is really interesting. It has the WORST stamina I have ever seen. It feels like it runs 2 feet and it’s tired. By hitting Left Shift, or just trying to run, you will breathe fire. It functions the exact same as the flame barrel. This mount is pretty useful for defense, probably the best. But the stamina is abysmal. Great defensively if you’re not running anywhere but terrible for moving around.
- Warhorse – This mount is like an enhanced horse, with a shield! Whenever you run, you and all workers around you will have a shield, making none of you receive damage. It has a small cooldown but it’s neat! Overall, I didn’t find it useful because your archers are almost always behind a wall. You also shouldn’t have an issue with invading the greed realm because they typically survive with little damage taken. Cool mount but again I think you can get better.
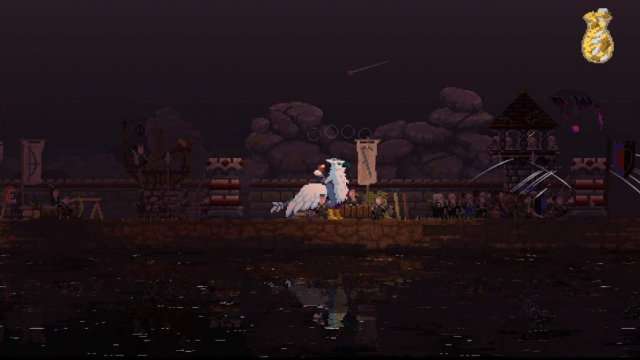
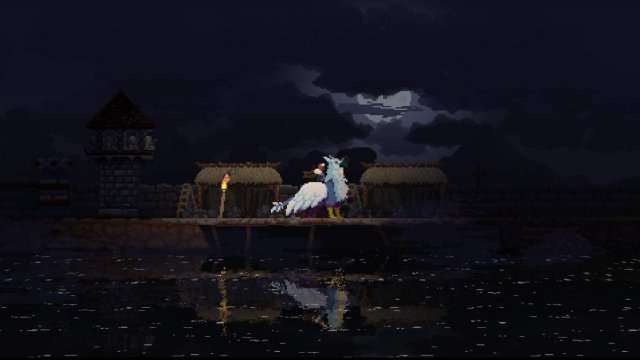
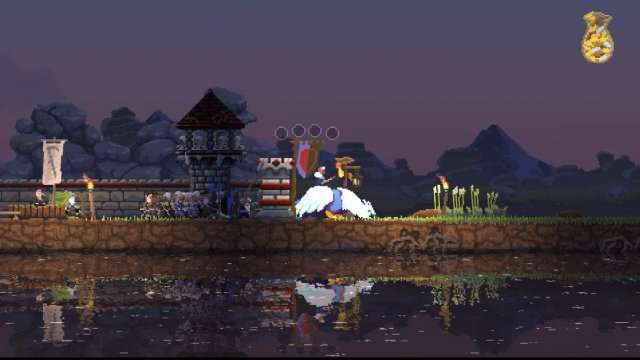
- Gryphon – Greatest stamina I’ve ever seen. Imo, Best mount in the game. Decent speed, phenomenal stamina, and a neat pushback ability. By hitting Left Shift you will blow in front of you which will knock back and stun greed for a couple seconds. Another amazing thing is the mount can “graze” wherever and whenever. Winter? Still can. Middle of the forest? Yep for sure!
- Stag – Really solid mount for the early game. Highest speed of all mounts and decent stamina. Also can charm deer to follow you, cool for early game hunting. I grab this mount every playthrough but usually swap to Gryphon or Unicorn.
- Unicorn – Have you had money problems? Want infinite gold? Want to POOP GOLD? This is the mount for you! Everytime you graze the Unicorn will poop out 3 coins. Also, it seems like the grazing is shortened to around a 5-10 second cooldown. The stamina / speed however, feel identical to the normal horse. This horse is aboslutely amazing for early game money problems and saving for Winter. However once winter comes, it is one of the most useless mounts. You lose your grazing ability and thus the real reason to have this mount.
What is Grazing?
Grazing is the way to replenish your stamina and enhance your speed. By stopping on a patch of grass, (Can’t be in the forest, must be the bright green around your camp) your mount will lower its head and eat. After a few seconds it will raise back up and now be replenished. You will know it worked if you notice a white particle effect around your mounts legs while running. The Gryphon is unique in the way that it can graze ANYWHERE.
Base Buildings
Builders (Hammers): This is your beginning building on the left side. Useful for grabbing a few builders then you forget about it. Not used past getting a few builders.
Archers (Bows): This is your beginning building on the right side. Very very useful and you will constantly be going to it! Archers are the backbone of your defense and your economy. Spamming these is always good!
Farmers (Scythes): This building will appear on your first expansion outward. It will allow you to purchase a scythe to make a villager a farmer. Depending on playstyle, you will either love this building or forget it exists.
Spearmen (Spears): This building will usually appear on your second expansion on the opposite side. Could also be the catapult. I haven’t found a concrete reason for either spawn. Spearmen are aboslutely great!….with some issues. They will constantly poke into the water and bring fish! They are absolutely great because they will do this no matter the season! These are pretty much your only income in winter aside from the banker. They will also jab through your wall at night for defense! Unfortunately though, they have a chance to lose their spears. I’m not entirely sure the cause but you need to constantly have them stockpiled. This may seem like a big issue, but they will typically grab enough fish to make it equal or a small gain! Not including the usefulness of defense!
Catapult Station: This building will sometimes appear on your second expansion on the opposite side, or your third expansion overall. It can appear on both sides and sometimes multiple will spawn. I have yet to understand the spawn pattern for this, however it is VERY useful. They gave it a good buff since its New Lands days! The range is pretty far and you may purchase flame barrels that will leave a pit of fire on the ground. If greed walk on it they will light on fire and take Damage over Time. Functioning just like the Lizard mount. It is manned by builders and a valuable asset for surviving the later waves.
Double catapult on the same side?
Forge: This building caused me a lot of pain to even discover. According to the wiki you just need to expand to the cliff portal. To break it down more for anyone else confused!: you need to have your wall be maxed at Iron. It must also be all Iron connected! The trick is, you don’t need to build every building along the way. An easy way to get this to spawn is to build a single wall really far away from your base (Towards the cliff portal only!) This building allows you to purchase swords that will automatically turn your squires into knights! Knights are superior to squires in the way they can have more coins for HP. This building will also allow you to purchase the bomb. After buying the bomb you must escort it into the portal and blow it up! (Explained in another section)
Greed Portal Breakdown + (Squire / Knight Breakdown)
Setting up:
Now this is easy! After obtaining the quarry, you may now upgrade your main campfire to a castle! After buying a shield, a villager without a job will grab it and become a squire! A few archers will automatically begin to follow him as a small army. After having a squire, you must extend your wall out from the base walls. Then a banner will spawn. After paying your coins, they will go to the nearest portal on their side and attempt to destroy it.
Banner:
Setting up a Portal:
After a portal is destroyed, it will leave a magical remnance! You may build on it to create your own portal! These are super useful for moving around the map faster! After the portal is built, you may spend coins to move around. Pan the camera towards the direction you want, and then press the button you use to drop coins (varies on controller vs keyboard). If you’re in an open space, it will create a temporary remnance that can also be built to make them permanently linked! However if you walk away, it will dissipate.
Destroyed portal:
Built portal:
The Banker
Who is he?
After you upgrade your tents to a more, castle-esque building, you will now have the Banker! One of the most powerful tools in the game! This fellow will store your gold and draw interest every night. He is very important for a successful economy and to help survive winter if you don’t have spearmen / don’t use them.
How to effectively use him?
This is the interesting part. It’s a little meh to focus on hard numbers. Just make sure his stockpile is full, and doesn’t go up or down anymore. (No decreases on withdrawal / No increases on deposit.) This will allow you to spam infinite money.
- You cannot withdraw after you deposit. If you give him 10 coins you now must wait for the next day.
- You can deposit any amount you want per day. You may also withdraw as many times as you want as long as you don’t deposit.
- To deposit coins, drop a coin and he will pick it up, after he grabs 10 coins, he will do a nice animation of depositing them.
- If you drop coins for him and he doesn’t do the deposit animation, Ex: Giving him 8 coins and he goes in for the night. This will still count, those coins did NOT disappear.
- To withdraw your money, he will either give you 1/3 of the bank, or fill your bag, whichever comes first.
- Example Full bank.
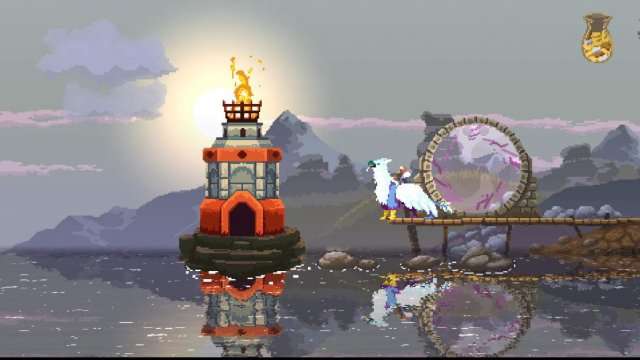
Lighthouses
Where are they and what do they look like?
Tier 1 Wood

Tier 2 Stone
Tier 3 Iron
Why build them? How to build them? Where to build them?
I’m glad you asked! It’s actually both simple, and difficult!
Their Purpose.
You use these to save your ship. If you sail to this island again, you will now have a chance to save your ship! No more rebuilding! I’m not entirely sure the odds but I would guess it’s something like Tier 1 = 25% Tier 2 = 50% Tier 3 = 100%(Could be inaccurate, will update if solid numbers are found) I have never lost a ship with an Iron lighthouse and highly recommend you get to iron so you don’t play with luck!
Where to build them?
You may only build them at the dock to the ocean. This will be found at the end of one side, while the cliff portal is on the other.
Any requirements to build?
The tiers work just like the castle. Tier 1 is always available, however Tier 2 and 3 require the iron mine and quarry respectively. Other than that, simply walk to the very end of the dock and you will have a coin prompt to build! Also don’t worry, they build themselves! No builders needed!
Iron Mine + Quarry
Quarry
The Quarry will be located on island 3 and will only require gold. This will allow you to upgrade your base to a castle and hire squires!
Iron Mine
The Iron Mine will be located on island 4 and will only require gold. This lets you upgrade your castle to a fancy iron castle with lovely statues!
The Statues + Thoughts on Usefulness
What are statues and how do they work?
Statues are buildings that will give you a permanent upgrade to a respective type of unit. They appear on several islands with varying usfulness.
Each statue?
- Archer Statue – This is an INCREDIBLY powerful statue. It will double the damage your archers deal which is just absolutely needed for later waves. It will also help them hunt deer and overall provide you with a wayyyy better defense. Aboslutely mandatory for your playthrough
- Builder Statue – Another VERY powerful statue. Not sure how the numbers are but I can say that it will increase the durability of your walls. While this statue isn’t needed to beat the game, it certainly makes it less scary against large waves. Highly useful and would get every playthrough for sure.
- Farmer Statue – This statue is a bit of a mix for me. My playstyle avoids farmers entirely so I actually never get it. However it does help improve your farms. Before getting this upgrade I would look around and make sure you have a farm nearby, otherwise it’s a waste. Not needed at all and depends on playstyle.
- Knight Statue – HOLY MOLY I DON’T LIKE YOU. Sorry, some bias there. This statue will give your knights a new ability which will let them charge forward and kill greed. There’s a problem though……They do it at night for no reason. At later stages when the big spawners come, I have had knights charge out to instantly die to the big spawners. Overall, that completely killed this statue for me. It put me at a disadvantage against larger waves and stacking knights. I wouldn’t recommend it at all but it could be cool to watch your knights charge?
Dog
You may find a dog in your travels. He can be useful, or just a good boy who keeps you company! ^-^ But seriously, you may find a dog trapped between a couple logs and may wonder, how do you free him? Simple! Simply drop a coin and he will now follow you! You even get to keep the coin!
But What does he do?
Well besides being the goodest boy. He will detect greed for you. When he barks the greed have spawned, and the direction he is facing is where they are coming from. This is only useful on a blood moon but it can still come in handy if you happen to be adventuring outside your walls!
Tips / Tricks (Including How to Do Split Screen!)
How do I actiavte split screen!?
Press “J” in game. Yeah I was angry too. Player 2 will use HJK to play and there is no way (to my knowledge) to change the controls. Also don’t know how to use abilities on player 2, right shift didn’t work 🙁
Squire / Knight Stacking
The boat will hold up to 3 Squires/Knights. A useful tip to help your next land is to use the Knight hermit to grab the third Squire/Knight and send him on the ship to help in the next land!
Your sides may hold infinite Squires/Knights. If you find yourself struggling late game, you can actually sail back to another island you completed. Grab knights and go right back. (Must have lighthouse done!) Infinite on the new land!
Winter Income
You can actually use trees to get some income. You are guaranteed your coin back, and have a chance to get another. Useful for when you’re struggling. You also can collect income from spearmen in the winter. Highly useful to have around 8-10 spearmen at all times.
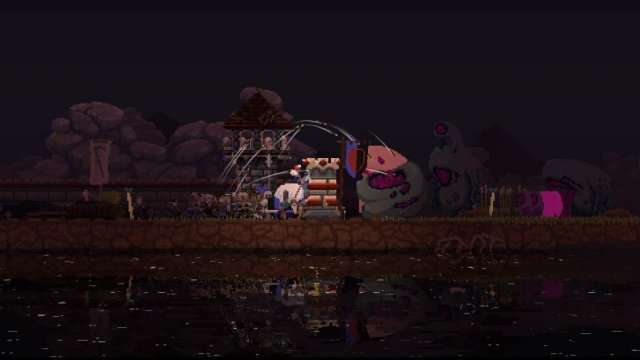
Types of Greed (Enemies)
I will be referring to my own names for them but you will still get it.
- Little Guy – These are the regular greed you will always see starting on day 1. They jump at you for their attack.
- Little Masked Guy – These are the same as the regular greed but they have some protection and take more to bring down.
- Flying Guy – These actually are not after you at all. They will fly over your walls and aim to take out tower archers or just take any villager they can find. Once abducted they will fly back to the portal with their prey.
- Big Spawning Guy – The big meatshield that scares us all! Every few seconds will spawn more little guys and will pack quite a punch against a wall, or even you. Will send most of your bag flying and kill even a fully coined up knight instantly. Has area damage so beware grouping!
- The Leaping Guy of Nightmares – Now this is actually a really interesting and scary idea! This is a strange fellow that will be atop the Big Spawning Guy and will actually attmept to jump over your wall! Ahhhh!
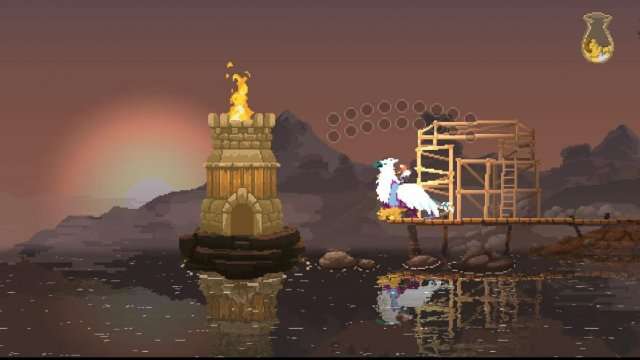
Iron Towers Breakdown
A Fully Upgraded Iron Tower.
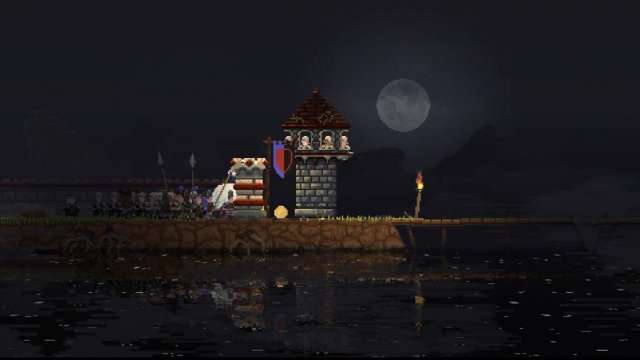
Why Spend all the money to get these?
The thing that is the most exciting… They are safe from flying guys!

They cannot be taken and are safe forever! This means that building a tower on the other side of your wall is now safe! They also will hold up to four archers rather than three!
Are They Even Useful?
I definitely think so. Keeping your towers safe from Flying Guys is awesome! It also gives them improved accuracy since they are at a higher vantage point. However the only real area you NEED them is if you have a tower outside your wall like the picture above ^. They are not as needed anywhere else. I would place it lower on my priority list but this will vary on playstyle!
Vagrant Camps / Ship Breakdown
Ship Breakdown
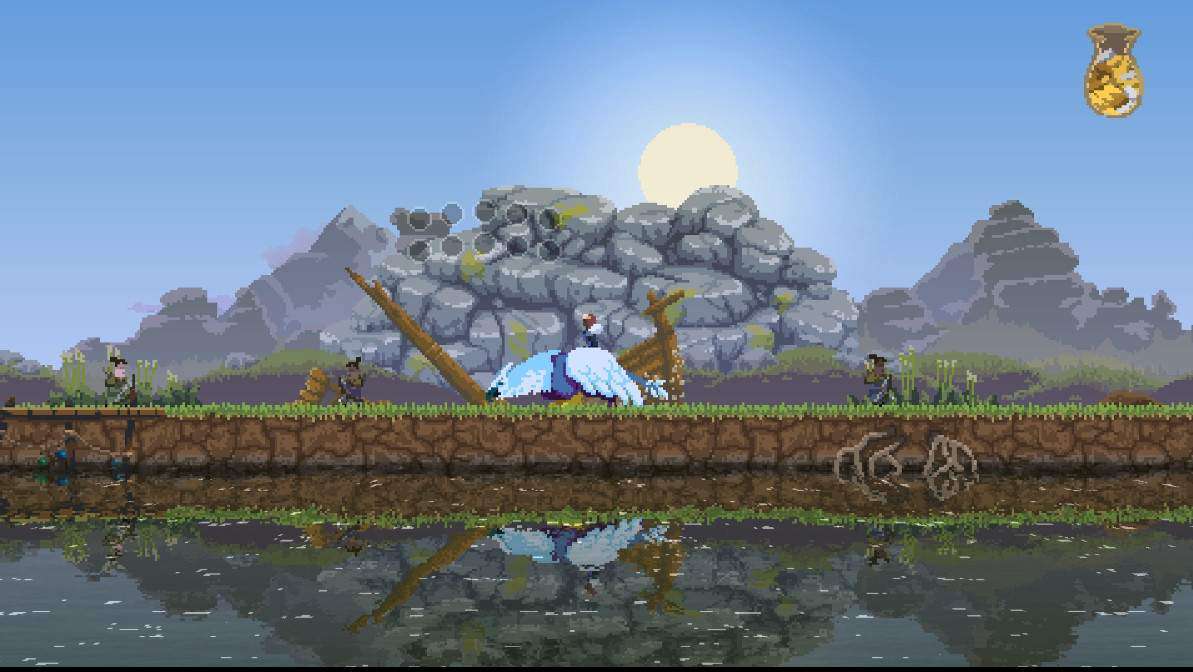
Broken ship ^
The ship is how you will move from every island! It’s super easy to understand, all you need is build it then sail away! However keep in mind. The pieces can be taken by the greed, your builders are also vulnerable while going to build it. You also lose valuable hunters if you drop it to the water / lose builders too. Keep in mind your bag persists between islands! If you leave with a full bag, you will enter the next island with that same full bag! You will know when you are going to drop it based on a couple things.
- If you suddenly can’t buy any more parts, the ship is now done. If you purchase again it will drop the ship into the water.
- How it looks visually, is it a normal looking boat?
Will my hermits come or can I only bring one?
When you board your ship all your hermits will actually run over and jump in to join you!
The most valuable thing ever: Vagrant camps!
A vagrant camp ^
These will be how you grow! You need to constantly find these camps and hire them as you go! Keep in mind the limit is two. For maximum efficiency, never let it get to two! These will spawn a new vagrant every half day. So you must continue to check in and pay them!
Tips / Tricks
Squire / Knight Stacking
- The boat will hold up to 3 Squires/Knights. A useful tip to help your next land is to use the Knight hermit to grab the third Squire/Knight and send him on the ship to help in the next land!
- Your sides may hold infinite Squires/Knights. If you find yourself struggling late game, you can actually sail back to another island you completed. Grab knights and go right back. (Must have lighthouse done!) Infinite on the new land!
AFK Vagrant hiring
After buying both vagrants from a camp. You may actually leave a coin (Don’t if it’s close to night!) If you do, when the next vagrant spawns, he will automatically grab it and be hired!
Keeping Vagrant Camps in your walls

Proof you can!
This can be a little difficult to do but it is possible. If you can’t afford to lose the camp, go past it and look for a clearing to clear trees. Now build your wall there and it will automatically extend there! And you get to keep the vagrant camp!
How to Win? (Strategy)
It’s a lot easier than you think it may be! Core Unlocks! (In order of getting).
(Quarry + Iron mine you just get those the second you’re on the island. This is for gem requirements.)
- Stag – Useful mount for getting around fast, however only useful for island 2 and then you ditch it.
- Gryphon – Honestly the only mount you really need. The push back ability is great for defense and the stamina is great for exploring the sides. Also having the graze feature anywhere allows for easy adventuring!
- Archer Statue – Picking this up ASAP will allow you to have minimal defenses and still survive.
- Baker Hermit – This is extremely needed for the islands where your vagrant camps are far away.
- Builder Statue – This will give your walls a lovely boost that again, allows you to focus on other things rather than upgrading walls! Typically with this upgrade the first stone wall is all you need for awhile.
- Knight Hermit – Nice for spamming three Squires/Knights to send on the boat but this is the only real use.
- Unicorn – Great for Spamming the grazing to get infinite gold! However loses its usefulness during winter and would swap back to Gryphon.
- Horn Hermit – This guy isn’t needed but his upgraded wall is also a nice commodity to have!
Be the first to comment