
A guide covering everything about the Tank, from the roles in the 3 seats, to controls, to interactions between the crew and allied soldiers.
Introduction
Being a tank crew member in the game can be a really good time, or it can be frustrating like your vehicle stopped working in the middle of nowhere and the other two people helping you out aren’t very coordinated. Hopefully, this guide will make the experience more enjoyable and help you avoid looking incompetent.
The Basics
To get the fun going, the first step is to enlist in an Armor squad, once you have selected a faction. Note that you can’t use or enter a tank unless you are part of that kind of squad.
Armor squads are similar to infantry ones, holding up to 6 players and having Commander roles too. The main difference being that there are only 2 roles available, Commander and Crewman.
Here is the loadout of the Commanders:
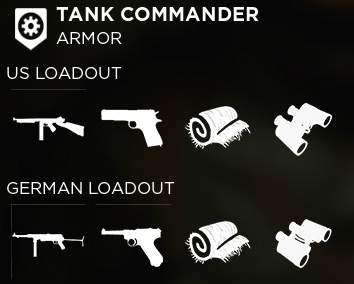
Has you can see, the commander has some decent firepower if caught out of he tank but more importantly he has binoculars to spot and mark for the crew and allies.
Here is the loadout of the Crewmen:
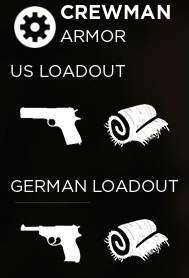
Unlike the commanders, the crewman have really little to offer when out of the tank but they still have the very basics to survive.
The Seats / Roles
Tanks, for both Allied and German forces, have 3 seats. Each seat can be filled by either a Tank Commander or a Crewman.
The game hint that the Commander should get the Periscope seat and use his binoculars to spot and mark, both for realism and optimal output but truth is, you want the most skilled player at each position. At times it means the Commander should be the Driver or Gunner while crewman are on the Periscope.
Once you get enough experience with handling the tank and each role/seat, then you can go for realism but for now, while most random players are still learning the game, it may be wiser to go with flexibility over realism.
Below, you will find a description of all 3 seats/roles. I made separate sections for clarity purposes.
Driver Seat

The first seat being filled in an empty tank, the Driver seat requires the most skills.
While there is an interdependence between the roles to effectively maneuver the tank and engage the enemy, there are two main reasons why the Driver role requires skills (and practice).
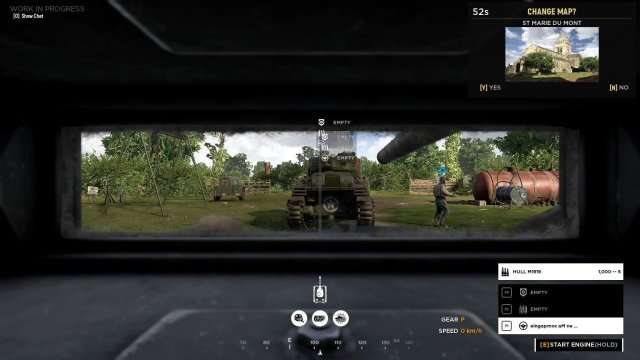
The first one is the view.
For Allied forces:
For German forces:
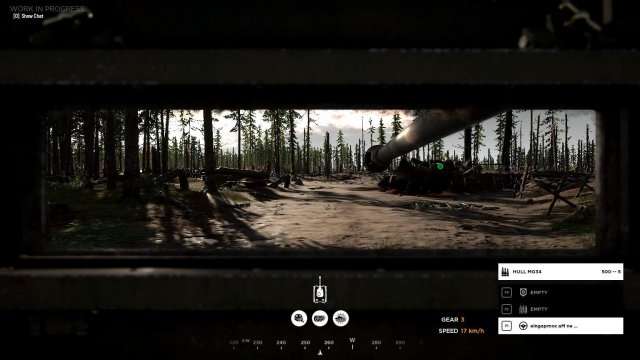
That’s all you get to see and it’s the only seat from which you can’t zoom or slightly change the angle.
The second reason is the Tank transmission is a manual one. Yup, knowing and understanding how a manual transmission work an help you a bit.
The gears are : 4-3-2-1-Park-Reverse
You see in which gear the transmission is set at the bottom of your screen, on the right side, between the compass and the seats logo.
Just like in real life, you’ll need to change gear to really get the most of it.
Lower gears (1-2) and Reverse are great for turning and maneuvering (in fights or going around buildings or narrow roads) while gear 3 can be used for high mobility in a fight on an open field with little relief. Gear 4 is for speed, to get to the frontline from spawn or get out of the fight quickly.
You can find the controls in options, but here are the default keys for the Driver seat:
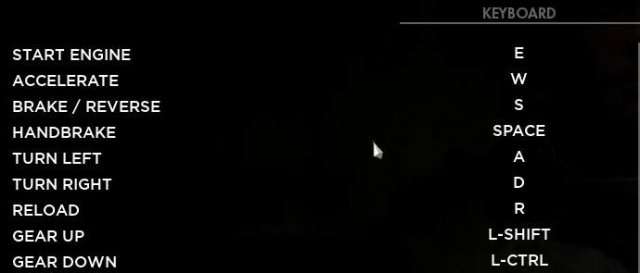
Starting the engine is the very first step to getting the tank moving. As far as I know, once it’s done, the tank is always on afterwards.
Now, for Reverse. You need to press W, not S, to get moving. It might be a bit counterintuitive but that’s how it works.
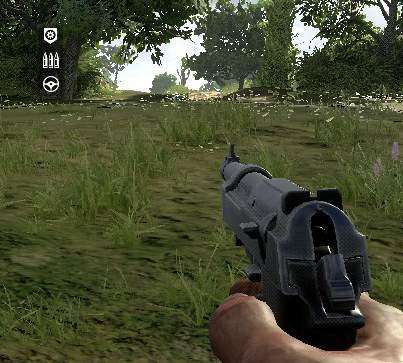
The driver also has a small machine gun but it doesn’t pivot. It shoots straight and the only option to change the angle is to move the whole tank in the direction you want to fire. Not shown in the picture above, to fire that machine gun, press the Left Mouse Button.
Also, you need to be careful when driving the tank because the game lets you accidentally drive over your teammates. So, pay attention to where they are and it’s a good idea to use the voice chat to tell them what you are planning to do before you move.
Gunner Seat

The Gunner seat is the second to be filled, after the Driver one.
The Gunner role requires some skills to move the gun (cannon) and still aim properly while the tank is moving and it requires a bit of coordination with the other roles and the info you have.
Unlike the Driver you get to zoom in or out (using the Mouse Wheel Up and Down) to get either a global view or a more precise view for long distance shots.
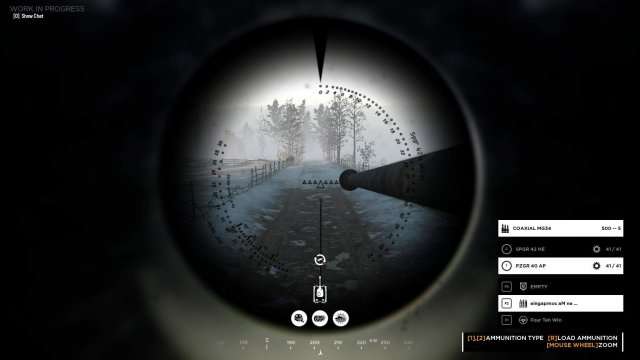
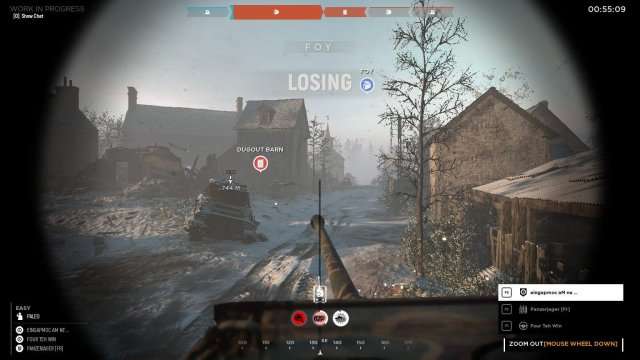
Here is an example of you basic view from that seat:
If allies are nearby you can also see their icons:

In case only the Driver and Gunner seats are filled (Periscope being empty), with your view , you can help the driver by guiding him around obstacles. You can also become an obstacle if the turret gun hits some buildings or trees. There is an icon at the center and bottom of the screen to indicate if the gun is in the same axis as the body or not. You can see that icon in the two pictures above, where the gun is aligned with the body and below were it is slightly turned to the right:

Since we’re talking about the turret movement, here are the controls for the Gunner:
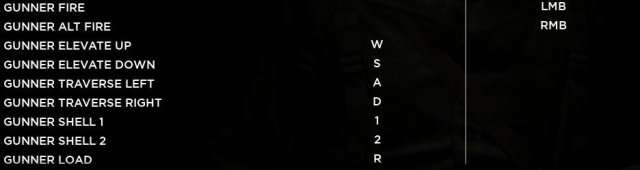
Never forget to load shells in the main gun. There is only one shell at the time in the main gun and it takes a few seconds to reload so always be prepared and in fight, don’t waste any time reloading right after you fired. You can keep track of the remaining ammunition on the right side of the screen.
Don’t forget that friendly fire is on so if you’re not careful you may be blowing up your teammates, in which case you will see a message saying you killed a friendly unit. Be careful.
Periscope

The Periscope role is often misunderstood. While it is true that you can achieve great things with only a Driver and a Gunner (Shout-out to Four Teh Win with whom we killed 2 tanks and helped capture 3 points without a Periscope player), the Periscope is the one that make life even easier and coordinate the whole thing.
The actual roles of the Periscope are first and foremost a Navigator and then a Spotter.
With the best view available (scroll up and down with the mouse wheel to alternate between the views and zoom in or out) and no real instruments like the steering or gun in charge, your first job is to bring up the map and find the best paths for the tank. In the Periscope seat you’re the best seated to call the details of the terrain ahead and make the call to the driver so he can maneuver properly.
The view from inside is rather limited:

But once you scrolled enough to use the periscope, it becomes obvious that you have the best view (from which you can zoom in or out too). You actually see from above the main gun:

The Spotter part is for helping the Gunner. Since you got a great view and you’re in charge of the map you can easily confirm whether or not the infantry units or the tank you see in the distance is friendly or foe.
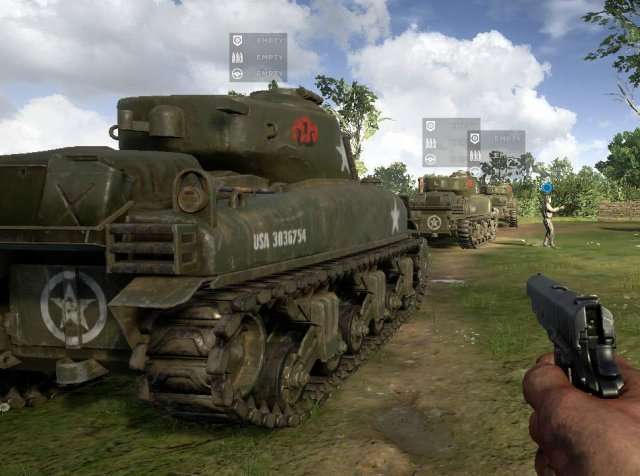
For example, in the picture below, had our Gunner started shooting on our left he would have hit friendly units while anything on our right would be actual enemies:
Having a Tank Commander in the Periscope allows him to better mark and spot targets but even if you’re a Crewman, by bringing up the map you can quickly and easily validate the faction of the units around you.
While it may not be a “hands-on” role like the others, the Periscope can still bring a lot to the table by “reading” the map properly and keeping communications going with his crew.
Finding a Seat
Once a game start and you spawn at an HQ, make your way to the nearby tank. If you spawn away from them, look around and you should see the 3 seats icons somewhere (top left in the picture):
If the map just started, then you may have the choice between which tank to get in:
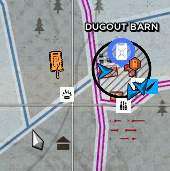
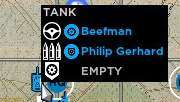
Otherwise you may have to find an available seat somewhere. When looking at the map before spawning, you can see tank icons. Move the mouse over the icons and you should see if there is a free seat. White tank icons mean the tank is completely free, blue icons mean there are at least 1 person in it and yellow/gold icons is the tank you are in. Here is an example:
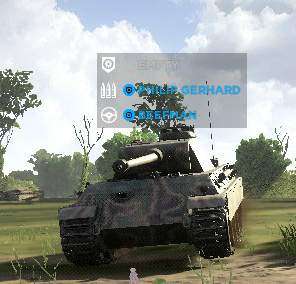
If the fight already started then you should deploy to the nearest spawn point and catch a ride with one. Don’t forget to use the squad or local voice chat to help. Here is the same tank viewed from the field:
You can get in while it passes next to you simply by pressing and holding F once you see the action icon prompt.
If there are empty seats you can always switch place by pressing F1, F2 or F3, depending on what is available. Once again, By default, the driver seat is filled first, then gunner and then periscope:

A Tank Crew Dynamic
This section is a short reminder of some of the info said above, before going into the combat dynamics.
The Driver is actually maneuvering the tank. The Periscope (or Gunner if there is no Periscope) alternate between the terrain in front and the map to help the Driver move properly.
The Periscope also help the Gunner by finding targets out of his sight or validating the fact they are enemies and not allies (little reminder there is friendly fire).
Playing Periscope doesn’t make you the chief or leader of the tank. A tank crew is a collaboration not a dictatorship.
Still, do not forget that you will get better results with the most skilled players at their best positions rather than have everybody at realistic seats where they struggle.
Communication is also a key part of success.
Combat Dynamic
Now that you know how to operate a tank (practice makes perfect), here is the section about what happens in combat.
The first difference that should be seen and should happen is a transition in the communications. You go from travel communications (getting to the frontline from a safe area) to combat communications. That transition should see more precise calling from the Periscope (or Gunner if you miss the Periscope).
While you can get by easily with commands like “ahead”, “on your right” or “take the left” outside of combat, when the fight begins you should use the compass. It’s much more precise for movements and especially for the gunner. Even out of the tank you still see the compass at the bottom of your screen:

Here is an example, using a picture seen above:
You can barely see the shadow but there was actually an enemy tank down the road. Had I called “on the right” and “more on the right, more, stop” instead of “at 150”, we may not have won that fight. Making calls using the degrees make it much easier for the gunner to get his target, especially if he doesn’t see them very well.
When shooting at infantry units, it’s also easier to use the degrees because it can help differentiate allies from opponents quickly. Don’t forget to bring up the map to validate.
If there are allied infantry units around, use the short range local communication channel to get info on enemy locations and if they need help to kill snipers, machine guns or even a tank .
That covers the communication changes but there is also the change in movement. Usually, the driver should use lower gears (1 or 2) while in combat to allow the Gunner to aim more easily and steadily. You can also provide cover to your infantry from opposing forces with the body of the tank, so be creative and try not to roll over them.
Tank Damage
Now that you know how to operate in fights, time to talk about the tank damage system.
Once seated in a tank you see 3 icons, at the bottom of your screen, in the middle:

First icon is the turret. The more damage it takes, the slower it will turn and eventually you won’t be able to even use the machine gun mounted on it.
The middle icon is the Continuous tracks. The more damage they are dealt, the slower you will turn and move around, eventually being limited in the gears you can select.
The third Icon is the Body. That’s the overall state of the tank but also the main part. If this blows up, the tank blows up with you (unless you leave the tank and run for safety).
Here is how those icons can look like after a few fights:

As a tank gunner you may target the different areas to pin down or disable an enemy tank. Personally, I prefer to shoot directly at the body to blow it up. Note that only straight shots will deal damage but shots taken at really weird angles can ricochet instead.
Now, how many shots does it take to blow up a tank?
Shooting at the body takes 3 shots from main gun of a tank and 2 from the rocket launcher of an anti-tank infantry unit. A combination of the two can bring down a tank very quickly. That’s why you should try to take down those enemy anti-tank units quickly, before they make their shots. Make the call to your allied infantry units if you need help.
If you survived the fight and your tank is damaged, no need to panic. Use the local voice chat and try to get an allied Engineer to come make some repairs. If there isn’t any nearby, ask the infantry units around you to relay the call to their squads and hope they send someone your way.
You can also drive back all the way to HQ and get some repairs at the stations there but in most cases that mean you will leave the frontline for quite a while.
If you’ve been blown to pieces, then redeploy either at a spawn point near another friendly tank in which there is an available seat or wait at HQ and a brand new tank should appear after a while.
Be the first to comment