
This guide advises you on a few key things imo that are important to set up and also specifically tells you how to set up a TUTORIAL for yourself to learn the game. As of June 2019 there is no official tutorial but this guide can help you learn the game it will take work done by you but only in setting up a simple Skirmish which I will walk you through then you can easily learn stuff. If you want to try out the game and see if you want a refund or not within I think the time is 2 hours then this guide probably is not for you.
If you like WWII games and can handle RTS games then you should definitely get this game.
Finally this guide helps you with Skirmish mode, a few tweaks of the options, a little bit on basic tactics, and that is it. NOTHING much else. Skirmish mode includes how to fight and how to use the Interface of the Game. Go somewhere else for Multiplayer, Historical Battles, and General Mode; however, being proficient at Skirmish mode will help you with all of these.
Set Up the Game Using the Options
When you start up Steel Division 2 (SD2) you see this screen.

So click on Options and you should see this next screen below: If you do not see this same screen here under options click on the word Gameplay at the top left let’s tweak that first you should see this screen shot below.

Allow the map to scroll – this is done by going to the gameplay screen.
Great, the main thing to do here is to set the “set mouse border scroll” to yes – this enables you to move around the map to view the map simply by moving your mouse to the edge of the screen in the event this is set to no you must use the w, a, s, d keyboard keys or the arrow keys on your keyboard to move the map – these keys can still be use after setting this to yes. So where it reads “set mouse border scroll” (about halfway down on this gameplay screen) set this to yes – you should see little white triangles or down arrows click on these to change things.
The other options on the gameplay screen you can tweak later.
Interface – change the size of stuff and nato counters.
So now click on the word interface you are still in options at this screen (interface) you can change the sizes of many things you see on the map labels and other stuff so after playing come back here and tweak it like you want. Notice you can also use nato counters some have a fetish about this and there were concerns brought up in the forums that we do not have the option to use nato counters but perhaps this option will allow that this is done at the top choice tactical icons type. Set it to nato to see if nato counters are shown in the event you want this.
Controls – keyboard shortcuts here they are make notes.
Audio is vastly important to me I do not play some games because of the silly voice overs anyway let’s first look at controls
click on the word controls use the wonderful brain god gave you and figure out a way to remember these keyboard shortcuts – copy all these down on paper ? Or take screenshots ? Or whatever if you have fraps you can take a screen shot that way. Since there is no manual this is an important area in options to be aware of. The online manual also has an area that shows keyboard hot keys – but I think it does not show all of them well, hear they all are.
Ok now to my favorite audio click on the word audio.
Audio tweak all of the sounds.
Here you can turn on or off thank the lord !!! , Music, the voices – your units babbling stuff to you all the time, ambiance, this is the volume control for the constant background “war” noise you can hear – this can be done away with so that if you do hear a noise it is either one of your units an enemy unit or both – remember a mod that someone comes out with may improve this background noise currently it repeats itself to much and is silly to me. I constantly hear rockets going off – anyway enough whining – if you turn off sfx volume it seems to cut most everything off the good news is there are many audio options so set them how you like them because of the me too movement I am sorry if I offended anyone by mentioning my leanings towards audio.
Video – enable mouse map scrolling.
Video is important – click on video you must set “window types” to fullscreen in order to be able to tweak, manipulate, set the gamma as you would like it. The game for me is to dark so set window types to fullscreen then fiddle with the gamma.
You can also if you have a decent monitor do it via your monitor but try having the game satisfy your cravings so do it in options.
Click apply often so it locks in your changes.
Making a Tutorial for Yourself so That You Can Learn the Game without Chaos
Instruction here on how you can make a “tutorial” for yourself is explained here because it seems to be a major problem that this game does not come with a tutorial – again, if you want to do this tutorial and then decide if you want a refund or not this tutorial will probably be a waste of time for you. This tutorial is geared to those that have never played this type of game if you own and play steel division 44 normandy why are you wasting your ability to read .. Here.
Ok, great, this tutorial that you set up will help you with the interface how the game works how to kill stuff and blow stuff up.
We will do this using skirmish mode. We will set up a skirmish mode so that you have only a few units to deal with and only a few enemy units to deal with. This way you can learn the interface also you can if you want set up a skirmish with no enemy to also learn the interface; however, your making of this tiny skirmish should suffice even though there is enemy. Then you will hopefully be properly instructed via other sections of this guide to put units on the map move them and use them at least somewhat effectively.
So first we will set up a skirmish in order to accomplish this make sure you are at the main screen the first screen you see when the game starts up next click on solo – earlier you may have clicked on options – solo is at the top – if you can’t see solo sitting there I would suggest a head transplant.

Then at this next screen [not pictured] slick on SKIRMISH – the word Skirmish is at the top of this next screen so click on it then you will see something like this

On the right side of this pic it reads LOBBY in White, then it reads Player List you should see the words “Random Axis Premade Battlegroup” at then end of this phrase is a white Triangle looking thing. Notice all of the other White Triangle looking things on this screen this is how to make it the way you want it how you make a skirmish the way that you want it. These triangles are often called down arrows they present when clicked on a “drop down box” which allows you to choose something – enough with the computer jargon
For the Tutorial you need to make your screen looks like this picture below.

So in order to do this on the far right click the down arrows the white triangle things and make sure everything says close some slots will already say this. You want to leave yourself and an enemy to play around with so if you are playing axis allow an allies slot to remain which has a battlegroup in it, then by choosing very easy you will have made an enemy battelgroup that will be on the skirmish map that has the ai of it set to very easy. Make sure you select close for all the other slots.
How to switch sides or switch teams
Please choose very easy for this tutorial. You are the host – you can also switch teams there is a button at the bottom of the screen that allows you to switch teams the button may be greyed out don’t panic – like I do every second of my life – instead click on yourself, the host, click on your name or your steam icon on this “slot” now the switch teams button is lit up click on it and wham you should move to the other team which is either allies or axis depending on where you were at when you clicked switch teams.
This is important – game parameters area let’s you customize further.
Now that you have yourself and only yourself in the skirmish against one enemy set to very easy tweak the left side of this screen – the left side game parameters – this area enables you to specify other things about this skirmish. Notice the tiny word game parameters this is what we do next you will click on the little white arrows the “down arrows” on this side too.
Only mess with “starting resources”, “income rate”, and “duration”. For starting resources set it to 250 set income rate to none then set duration to high
This is what is great and fantastic about the improved skirmish choices that eugen systems has provided – this skirmish that you have set up will now have only 250 deployment points for each side this is a buying power of 250 for each side as time goes by while you are playing the skirmish neither side will get any more income. Finally setting the duration to high means the skirmish will last a long time much longer than if set to low.
So you will have 250 deployment points to buy stuff with.
So now click on launch this takes you to the skirmish map screen – takes you to the skirmish, the skirmish does not immediately start – first, you place units then you start the skirmish.
Here is the screen.

Your screen may be slightly different according to the map also I have clicked on in the box at the top left so it shows all the different unit names – so anyway notice the number 250 in the black box at the top left this is the amount deployment points available to you at the start of this skirmish and because we set income rate to none you will get no more deployment points during this entire skirmish. So you have 250 showing of deployment points so you can deploy 250 amount of stuff.
Again, you will not get more deployment points each “minute” of play – this timer will be shown at the top left once the skirmish starts – in future skirmishes you can make sure you get income each minute of play – this is what makes steel division so wonderful, among other things.
Suggestion: first put map on pause
now if you were to click on “launch battle” at the bottom of the screen the skirmish would start so let’s not do that yet; furthermore, the skirmish would start at normal speed, why? Because normal speed is selected by default. On the top right there is a mini map it reads “phase a” directly under this it shows remaining 10:00 this means 10 minutes are remaining in phase a next to remaining 10:00 are speed controls for the skirmish how fast the real time progresses – from left to right these buttons are pause [two ll), slowest speed [i>], normal >, faster, then fastest. Notice normal is in a brighter white so this is what is selected by default.
Turn off normal put it on pause – this way when you start the map if will be on pause then you can click slowest speed – make sure all your units are moving and go from there.
The blue and red flags on the map
In the forums you are not allowed to call these flags if you do your an idiot. They are strategic capture points {caps} which determine if you win the map or not. If you control more of these than the enemy you will eventually win. However he is trying to do the same thing if you move near one of the enemy caps you will probably wish you were never born as you may get attacked.
This is important about caps
Back to the top right again the mini map area you see two flags one of them is your flag it has your name next to it let’s suppose it is german that is what it is for me in this skirmish. There is the german flag then a blue flag then the number 12 below this is my war face name (bach) which means buddy, ah, … Charge , hither ??
It shows 12 for you and 12 for them you want it to be more for you and less for them – capture and keep captured more than 12 of the caps the more the merrier.
Making a Tutorial Continued B – Placing Units
Placing Units
Top left shows 250 your deployment points click on this which shows different types of units you can deploy click on recon – recon units are good for spotting enemy etc. Clicking on 250 toggles the view of the unit list clicking on a shown unit type such as recon shows all of the recon units in your battlegroup notice the screen shot below

So if you click on Recon and hover your mouse over the 1st unit on the list the one on the left you also get info about that unit. There are 4 slots of Recon units in this battlegroup. The first two slots are clearly seen the 2nd two slots are greyed out. You can ONLY place units that are clearly seen IF you have enough Deployment Points to do so – Deployment Points is the number at the top left it should read 250.
When you click on a recon unit in order to place it on the map you must LEFT MOUSE CLICK the recon unit the one at the far left costs 15 deployment points so click on this and place it on the map. Place it on the map by Left Mouse Clicking again on the map – You must place it in your territory this is the blue area – place it BEHIND THE BLUE LINE the further back the longer it takes to get where its going also put it on a road to get there faster.
Left mouse click a unit in your battlegroup and left mouse click the map.

If you try to place it in front of the blue line you will get red text telling you that you cannot.
Important – explanation of the blue and red lines on the map.
The blue area is your side where you can place units the red line in the center of the map is the main front battleline the enemy is somewhere behind this line unless … unless an enemy recon unit is in your area of the map recon units do not move the battle line this means YOUR recon units do not move the battleline they can sneak around and …. recon. Also if you have a strong presence on the map the battleline may move over and past ENEMY UNITS for example if you have 4 infantry units and a tank near each other the battleline will move towards the enemy even though there may be one stupid enemy unit nearby maybe something like a bazooka team that you do not see that can take out your tank. NOTE: at map start there will be NO enemy units on YOUR side of the Battleline NOT even Recon I hope I did not confuse you earlier this was referring to after the skirmish has been going on for awhile and units have been moving around. Actually at map start the enemy as mentioned earlier can ONLY put stuff in its darker RED area at the top of the map – he to must give order for his units to move forward.
THE RED area at top or back of map is where the bad guys can place units. Now when the skirmish starts you will only see ONE LINE and your side of the map will be blue and the bad guys red.
More on Placing Units – UNPLACING A UNIT so when you placed this unit worth 15 the Deployment Points amount went down to 235. Because you have not started the skirmish yet you can Right mouse click – on the unit card of the placed unit and the unit will be taken OFF the map and placed back into its slot. THE UNIT CARD is the name of the thing you clicked on in order to place a unit on the map. What this means is that for you to unplace a unit you must Right Mouse Click on the correct unit card – of the unit that you want to take off of the map. If you Right Mouse Click a unit card that represents a unit that has been placed on the map then that unit will be removed from the map IF YOU HAVE NOT started or “launched” the skirmish. So make sure you double check yourself to ensure you have placed, unplaced, and placed correctly the specific units you want to start off with.
Go ahead and place all the units that you can on the map – things to consider:
- Recon units cannot move the Battleline so perhaps use them sparingly but they do have advantages.
- You only have a few units in this skirmish because you are starting off with only 250 Deployment Points AND this is all you get for the ENTIRE skirmish. Therefore perhaps pick low cost units.
- You could pick a massive tank that could hopefully take out anything – but this tank can only control part of the map and move the battleline forward but only in one area. Maybe 3 infantry would be better.
- Try to guess what the enemy is going to deploy if you have infantry with no bazookas, and you have no tanks, and you have no AT guns what are you going to do if a tank shows up. Some infantry have tank grenade type things but these work only in close range and if they get lucky.
- There are 24 Capture Points – 24 CAPS so pick many units that you can spread all over the mapt if you decide you need to do this or you may decide to spread them out at map start – you are the Commander.
Giving units orders prior to starting the skirmish
Notice the screen shot below:

This is an infantry unit a non recon infantry unit these guys when they move forward will move the battleline forward – the blue and red battleline – moving this line towards the enemy helps everything.
In order to give this units orders prior to starting the map you simply left mouse click [lmb] on the unit that you placed onto the map – lmb the icon – in this instance the truck icon then you will see at the bottom right of the screen the orders area – click on “move fast” left mouse button move fast make sure you are giving the correct order to the correct unit do this by making sure the unit that you clicked on has a lighter colored highlight – simply hovering your mouse over a unit will give it a lighter colored highlight but if you click on a unit – and move your mouse off it the unit icon color will be grey in color this unit is selected now click on move fast and tell it where to move fast to – when you click on move fast your mouse pointer will change and then left click on where you want it to go. Send the infantry unit to a flag a cap point. This unit will not move until you start the skirmish.
Ok, so all of your units are placed next section will cover starting the map, and more on giving orders prior to map start etc.
Starting the Skirmish Tutorial Fighting with Your Units – Winning
So at this point you have placed all units on the map you know how to give them movement orders so give them movement orders and then you are ready to start the skirmish so now click on “launch battle”.
You can before map start of even after that give elaborate orders that include waypoints that allows your unit to do something different at each way point for example move forward to a spot you choose unload then move into a building. (This is explained in a later section – let’s finish up so other junk first).
The real time begins your units should start moving out where you told them to go. Because cap points are important you are strategically moving to those areas taking into consideration what the enemy may think are the most important caps maybe you will confront him now maybe recon some and hit em later maybe control the map center maybe the left or right side or maybe just wing it.
Important: pause key is your friend
If you gave all units move orders and some or one are not moving then don’t panic hit the p key to pause the game then give your unit a move order hit a speed button either slowest, normal, etc then see what happens. Use pause whenever you want to use it. Maybe you need to stop and check something out maybe your getting attacked but you are focusing on a certain other part of the map.
Capturing a cap point – strategic point – a flag
Also info on the battleline!
Point number 1 irregardless of whether or not any unit yours or theirs is near a cap point a cap point can be captured you do not have to be within a certain distance this occurs as the battleline moves and changes. The battleline moves and changes according to how your units and the enemies units are moving on the map. The closer one or more of your units – unless a recon unit – gets near a cap point the battleline will move and can go past a cap point meaning a red flag is in a red zone but you move towards the flag and the blue red line moves and the line moves past the red flag changing the flags color to blue and wham you have captured the point. In the event the line is not moving though you are moving towards the flag this means … Enemy are somewhere … Aaahh!
So what does all of this mean it means a lot of things you can roll up to a cap point cap it and leave a unit near the cap point you can put units at cap points that you already “own” in case the enemy tries to do a push in that sector.
You win or loose according to controlling most of the cap points so this therefore defines your base strategy – control the most cap points.
Trucks are vulnerable when transporting troops and always so
When you move an infantry unit forward it is in a vehicle these are very vulnerable – especially if it is a truck – some transport vehicles have some armor protection and machine guns etc. Anwyway, so make sure you unload the unit when you get to the cap use the unload order there is an order unload at location and also an order that allows you to unload exactly where you are at now again, go to options > controls > and write down and learn the keyboard shortcuts.
Also at times you will feel its fine to drive all the way up to a cap and unload other times it may look fine but you may want to unload way before it and sneak in and recon the area.
Explanation on the phases of steel division and placing units.
I also failed to mention earlier the phases – so the skirmish mode has phase a, then phase b then phase c. Remember when some of the units at the start of the skirmish were greyed out and you could not choose them this is because they were going to be available during phase b the greyed out unit card should readily show a large letter b in the card. Or a card may even show a phase c. This card will be greyed out until phase c then you can deploy this unit if you have enough deployment points.
Basic Tactics, Waypoints (Multiple Orders to One Unit) and Game Info
Have a balance of forces tanks cannot see good unless another unit is able to spot for them so infantry is needed. If you are in a tanks sight range and you are another tank it seems like they always see you period.
How do you deal with one strong tank when you have two lighter or smaller tanks that can barely pierce the enemy tanks armor ? Tactics by ideally placing your two tanks behind cover on opposite sides of the tank or something similar use hunt move to move one of your tanks out to fire at the tank – then enemy tank will turn towards this tank and you will see its gun loading up to fire or in other words the tank sighing in. Pause the action and or quickly move your tank back into cover using the reverse move and at the same time move your other tank on or near the opposite side in a hunt move out the enemy hopefully will lose sight picture of the first tank and you will get a shot off and move back before the tank can turn onto your other tank. You can also use arty to “weaken” the tank then it will take less shots to finish it off.
Don’t forget to use smoke from arty units. Consider what infantry to bring it may be great to have some with smoke or some with anti tank grenades or flame throwers for tight areas of the map.
If you and the enemies tanks are basically the same strength meaning though they can take each other out it may take a shot or two because of the armor defense values of each is significant then you can usually group your tanks into twos or better yet three’s then you can move in hunt move in open areas and take out a lone enemy tank quickly before it takes out one of yours.
Ammo trucks are needed to fix tanks and replenish arty units.
You should not move a unit out by itself unless it can take care of itself otherwise assume it is going to get shot and then … What are you going to do about it. So maybe move infantry forward with a tank that has proper line of sight “protecting” it or in observation of the area the infantry are moving in. Have arty available when you are attacking to get pinned infantry out of a jam. Move in cover.
Learn the hotkeys go to options > controls > make note of all of the keys.
Waypoints
Give a unit an order hold down the Shift key give the unit another order you now have made a waypoint – release the Shift key now when you click on this unit that has been given waypoints you can then hold down the shift key this will show you the waypoints when a unit gets to the end of the waypoint it is currentlly doing it will do the next one. The colors of each type of waypoints have a specific color. For example, if you place a hunt waypoint it looks like the waypoint color is orange. Light blue is something else dark blue is I think move fast.
You can use waypoints to move fast to an area then unload a unit then move to a specific area to get set up like a building.
Line of sight and weapon range
At the bottom right of the screen there is the order window thing next to the word orders there is an iocn looks kind of like and eye or something – click on a unit click on this – if it is an infantry unit it may need to be out of the truck – anyway click on a unit and click on this. You will see your units line of sight according to the location it is in at that precise moment so do this when a unit is stopped. The darker areas are the areas that the unit cannot see. Also and very important is the shaded circle line that is shown this is the range of the unit how far away it can fire at stuff. Units having multiple weapons makes this a little tricky. This line is the range of the weapon that this unit has that can shoot the most far. For example, click on an infantry unit it would be nice if this infantry unit has a bolt action rifle, a tommy gun type weapon, and a bazooka type weapon all these have 3 different distances. So you click on the infantry unit it shows a circle with the number 500 m – notice the screen below:

See the 500M ring this is the gun with the longest range of this unit. I have ALSO pressed the I key this is the letter i like I baked a cake. I = INFO so this info window shows you the 3 different weapons this infantry unit has AND in this info window it shows among other things the ranges of each of these weapons the bolt action rifle has a range of 500 meters which is the longest range so hence we see the 500 M greyed circle but ALSO there is a sub machine gun type weapon that has a range of 100 and the Panzerfaust has a range of 120. Notice that ONLY the rifle has the range indicator in BLUE in the info panel.
This Is Helpful – In order to get a quick perspective of the ranges of your Panzerfaust and submachine guns. click again on the eye icon looking thing next to orders then press the C key – the C key is the line of sight key for anywhere on a map a unit does not need to be clicked on you can put it in the middle of woods – the mouse pointer and press the C key – in the middle of the woods you will see the line of sight is about 120 meters. Anyway point is you can press the C key and move it over your unit and it will show how far 120 meters is this gives you a basic understanding of how far your shorter range weapons can fire this gives a reference point.
Here is the C key in action – I hope your drooling at this point.

Turning On And Off Specific Guns
You can prevent or allow certain guns to be able to fire that a unit has this is great when you for example want to light up a vehicle with small arms and not use your bazooka etc. So you press the H key to turn all guns off then Left Mouse Click on the guns you want to be able to fire. The ones that will not fire will be greyed out and will say deactivated. IF YOU PAUSE and press the H key it will not grey out anything but when you start back the battle they will be greyed out. Practice this in the tutorial battle you made.
Think outside the box so this means you can do this with your tanks too – YES. Sometimes you may want to save those special 5 rounds of deadly lethal armor piercing rounds so I think you can click that off maybe not but something like that you can do.
So learn the different waypoint colors of the orders you give – don’t just give the order shown in the orders area window but figure out the keyboard shortcuts and use those orders and keyboard commands too as needed. Make small tiny skirmishes to lean the best way you like to do things. You can set up a battle with maybe 500 to start off with that is it. or 250 then LOW as the amount of Deployment points you get after that. Keep the AI on Very Easy until your out of boot camp.
Armor Values and Units Being Transported
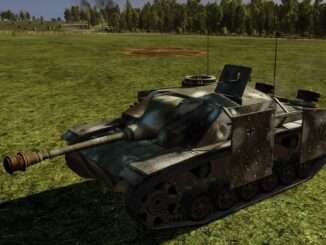
Look there is my cool looking unit below looks like a tank – see the pic below – but what is that at the bottom of the screen a PAK Gruber what …

I have clicked on a unit not shown on this screen but have looked at my tank so let’s talk about the tank. The Top number in Orange shown next to the tank is the amount of armor this tanks gun can penetrate it means something like this basically this tank can supposedly take out another tank that has an amour rating of 135 or less. – what is the number 75 – THAT is MY armor thickness at its strongest point or my armor rating. – so beware. Anything packing a 75 orange number – anything having a gun that can penetrate 75 or higher can take my tank out – an enemy tank that has an orange number of 80 can take out my tank – WHAT YOU WILL FIND IN COMBAT IS THAT most anything can damage and suppress your tank but it will need in this example to be near to 75 or higher in order to quickly take it out. The higher the better and quicker.
The screenshot below shows we have hovered the mouse over my unit so it tells it what it is a Panzer IV H – as you become an authority on WWII you can simply do this all over the map with each of your units AND the enemies and know that it is basically time to retreat.

This screenshot shows I have finally clicked on my tank notice the info box below showing the two guns this tank has so I get more info so hear I can press H and click on the main gun and keep it from firing endlessly at infantry and just let the tanks machine gun suppress and take out the infantry if so desired.

I should have screen shotted this tank with the I info key pressed in order to compare armor thickness vs the white number on bottom I think we would have found various armor thickness on various areas of the tank with the front being the most thick at a 75 rating yeah I just did that it read front 75 m and less thick areas were on other parts so the info key use it!
Main Gun Deactivated

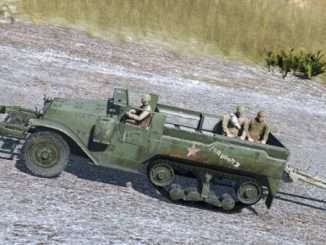
Vehicles Transporting A Units
This shows my infantry unit outside my vehicle notice this vehicle also has armor ratings .. anyway

Shows Unit It Is Transporting
Notice the screenshot below clicking on a vehicle which is what I think I did hear shows you a name which is what the vehicle is transporting so learn the names the small start indicates by visual that this is an officer unit.

Read the online guide about officer units.
Be the first to comment