
A comprehensive guide to all skills for all classes, including the expansions, aimed at beginners who don’t know where to start.
Basic Concepts
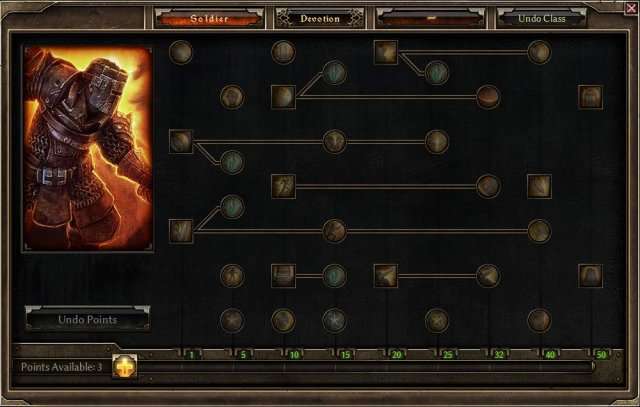
Mastery Bar
The mastery bar is a really important thing to understand in Grim Dawn and Titan Quest. It’s something you don’t see in a lot of other similar games. I’m mentioning it first because if you’re new to these games, this is one of the main things you should know. People often miss it.
If you look at the bottom of the Skills screen for a character class, you’ll see a bar with a large plus symbol on the left side. This bar shows your ‘mastery’ in that specific class. By increasing this bar, you unlock new abilities within that class. It’s also the main way you get more character stats like physique, health, and energy. To add a point to the bar, just click the big plus sign.

The Mastery bar can be levelled up to 50 for each of your classes, for a total of 100 skillpoints required to max out both classes. There are checkpoints at levels 1, 5, 10, 15, 20, 25, 32, 40, and 50 where the skills directly above the checkpoint will unlock. If somebody says you need “32 nightblade” to use a skill, this is what they are referencing, not the overall character level.
Skill Points
If you’ve ever played an RPG before, this section should be relatively straightforward. Every level you unlock a certain number of Skill Points to spend on skills and mastery. From levels 2-50 you unlock 3 points per level, from 50-90 you unlock 2 per level, and from 90-100 you unlock 1 per level. If you’re playing with the base game, your max level will be 85.
With Ashes of Malmouth the cap increases to 100. You can also unlock skill points from a few quests, some of them relatively well hidden. To spend a skill point, open the skill screen and click the + next to the mastery bar or click on an unlocked skill node. Certain skills require a pre-requisite skill, indicated by a line connecting them. You do not need all previous nodes to be able to spend points in connected nodes, so feel free to skip nodes you don’t like.
Attributes
All characters have three main attributes in addition to Health and Energy, which should be self explanatory. The three main attributes are Physique, Cunning, and Spirit. Physique is how sturdy and buff you are. It affects your critical defense and dodge (called Defensive Ability in Grim Dawn), greatly increases your health, increases your health regeneration, and is needed to equip most armor, axes, and maces. In general these requirements are quite high, so physique is usually the barrier between you and that next super awesome piece of armor.
Cunning is how swift, deadly, and coordinated you are. It affects your crit/hit chance (called Offensive Ability in Grim Dawn), slightly increases your health, and boosts all types of Physical damage (see below). It is also needed to equip guns and swords. Spirit is how magically attuned you are. It affects your Energy, Energy regeneration, slightly increases your health, and boosts all types of Magical damage (see below). It is also needed to equip amulets and rings, as well as for certain caster weapons, caster armor, and caster offhands such as tomes and effigies.
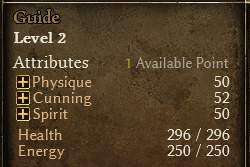
The vast majority of your attributes will come from levelling your Mastery Bars, but you also get 1 attribute point to spend each level and from certain quests, which will increase the chosen attribute by 8.
Active or Passive
Every skill node is either a square or a circle, indicating that the skill is either Active or Passive. Active skills require user input to activate, either as a toggled effect that remains active, or a temporary one that will eventually need to be recast. Passive skills will be in effect at all times that their conditions are met. Some have weapon requirements, some trigger when your health drops below a threshold, some are connected to an active skill and are in effect when that skill is in use. The lines connecting skills on the tree indicated dependencies of this type. A square node with a line connected to two circular nodes indicates an active skill that causes two passive effects when it is used.
The skill tooltip will list the requirements to activate a passive if there are any.
Ultimate Skills
Some classes offer a choice of ultimate Exclusive Skills at mastery level 50, all of which take the form of immensely powerful toggled buffs. These skills are mutually exclusive! You can only activate one ultimate skill at a time, even if you have more than one unlocked and leveled. Keep these in mind when picking your class, as it is usually recommended to gain access to one of these.
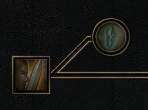
Transforming a skill
Some skills have the unique ability to ‘mutate’ into a totally different version of the same base skill by selecting a connected node. These nodes are called, appropriately, Mutators, and are represented by a skill node with a special icon connected to the base skill by a diagonal line. Mutators usually require only 1 point to completely transform your skill!
Some extremely high level items grant similar changes to base skills. These are called ‘item skill modifiers’ and you will only see them in the late game as the final entry on an item tooltip. Many top-tier builds rely on special item skill modifiers to re-imagine the functions of a particular skill, but for beginners this is not going to impact your play.
Global vs Local
Some skill effects are linked to particular skills or contexts. These are “Local” modifiers. An example would be a damage buff on a node linked to an active skill that deals damage. This buff would be applied to damage that the connected skill deals, but not to damage dealt by a different skill altogether.
Conversely, “Global” modifiers apply to everything, at all times. A passive skill that increases your damage bonus would apply that bonus to all sources of the appropriate damage that you deal.
It can be hard to figure out which effects are global and which are local, so I will endeavor to clearly delineate between them in the coming pages.
Devotions: The Big Scary Skies
The star chart is a crucial feature of the Grim Dawn character system, but this guide will not go into great detail about each constellation. Suffice it to say that, as you progress through the game you will encounter ‘Shrines’ which require you to sacrifice materials or defeat a group of enemies to unlock a devotion point.
You can then spend the devotion point on a single star on the star chart. Completely filled out constellations will increase your ‘affinity’ for particular attributes, represented by colors on the left, and unlock further constellations of increasing power. Some constellations grant special triggered abilities when you activate a particular star. These abilities, when unlocked by spending devotion points on the appropriate star, must be bound to a regular skill. Only when the bound skill is in use will the constellation ability have a chance to trigger.
Respec
You can always spend iron to unspend skill points spent on skills, as well as iron and an aether crystal per star to unspend devotion points, at the spirit guide in Devil’s Crossing and some other locales. Some items in the expansions allow total removal of all spent skill or devotion points, or even attribute points. This means that it’s exceptionally hard to get stuck with a ‘bad’ character, since you can easily undo everything about it! The one thing you are stuck with is a mastery choice. Once you spend and confirm even a single point in a mastery, that mastery is permanently tied to your character.
A Note on Skill Bonuses
You can only spend so many points on a skill, but the maximum level of that skill is always 10 points above the ‘softcap’ where you can’t spend any more points. To achieve the maximum value is only possible with equipment items that include skill bonuses. Depending on the skill in question, those final ten levels may scale faster, or slower, than the initial levels did. It’s up to you to read the tooltips and figure out exactly how high you need to go with a given skill.
By the end of Ultimate, you should be on the lookout for items that grant +1 to all skills, or +1 to all skills in one or both of your masteries. These items are very powerful, and you won’t get enough skillpoints without them to fill out a good build. While leveling, however, it is more important to get large bonuses to specific skills that you are using a lot. +3 to your main skill is more useful than +1 to a bunch of other skills that you don’t use.
Offense and How to Kill Everything and / or Everyone
Damage Types
Grim Dawn has a lot (and I do mean a lot) of different types of damage. They can be roughly categorized into Physical (physical, piercing, internal trauma, bleeding) and Magical (everything else).
The whole list is:
- Physical: Physical, Internal Trauma, Piercing, Bleeding
- Magical: Fire, Burn, Cold, Frostburn, Lightning, Electrocute, Acid, Poison, Vitality, Vitality Decay, Aether, and Chaos
- Misc: Energy Leech, Life Leech, Life Reduction
Special mention is given to Elemental Damage, which is a little complex. If you see a number such as 30 elemental damage, that means 10 fire, 10 cold, 10 lightning damage. However, % elemental damage is applied in whole to all components. +30% elemental is +30% fire, +30% cold, and +30% lightning.
Damage over Time
You may have noticed that some of the damage types above seem slightly redundant, such as Fire and Burn. This is because some of the listed types are applied as Damage over Time effects. DoT’s ‘tick’ every second and apply their listed damage each tick for as long as the effect persists. DoT attacks check for a critical hit on every tick! Re-applying a DoT from the same source will not stack the values, but will renew the duration. Applying a second DoT from a different source, even one of the same damage type, will stack damage but count down duration separately from the first one. The DoT damage types and the necessary resistance to combat them are as follows:
- Internal Trauma: Physical Resistance (but not armor)
- Bleeding: Bleeding Resistance
- Burn: Fire Resistance
- Frostburn: Cold Resistance
- Electrocute: Lightning Resistance
- Poison: Poison & Acid Resistance
- Vitality Decay: Vitality Resistance
Offensive Ability
Offensive Ability affects your ability to successfully land a hit, your chance to land a critical hit, and how powerful that critical hit will be. Derived from Cunning, skills, stars, and gear, Offensive Ability is crucial for every single build that exists, barring summoners whose pets have their own Offensive Ability scores. If your Offensive Ability is too low, your hit chance can drop as low as 60%.
Damage Conversion
It is possible to change damage from one type to another using Conversion. This takes the form of a specified source damage type and a specified target damage type, such as 100% physical damage converted to cold, which would change all physical damage into cold damage and all internal trauma damage into frostburn. These modifiers are usually Global, but are sometimes linked to particular skills. The math behind Conversion is complicated, and this guide will not cover the fine details. However, I will say that damage can only be converted once. You can’t change fire into aether, then into physical, then into cold etc etc.
Total Damage Modifiers
Some rare mutators and skills will give a boost in the form of a “Total Damage” modifier. This is not to be confused with “% All Damage”, which is just a boost to the % damage modifier in all normal damage types rather than a specific one. Total Damage modifiers are multiplicative and are applied at the end of a calculation, taking your already beefed up damage total and further multiplying it to yield astronomically higher (or lower) total numbers.
Attack Replacers
At the beginning of the game, your basic attack will be bound to the left mouse button but you want to quickly do away with that. Nobody wants to be basic, after all. Many classes and some items offer special active skills called Default Attack Replacers which offer many benefits over the default attack, while still functioning in a similar way (click and hold to continue attacking with the skill). The available attack replacers will be listed in their respective class sections. If you want to be a spellcaster, you can usually skip getting an Attack Replacer because most of your damage will come from spells instead.
Attack Skills
Kind of a broad term for any skill that isn’t a default attack replacer that uses your weapon to apply damage to a target. Most often these have cooldowns and deal very high damage or deal damage over a large area, making them similar to Spells, but they scale based on your weapon damage and attack speed.
Weapon Pool Skills
A commonly mis-understood skill type is the Weapon Pool Skill (or WPS for short). WPS are Passive skills that have a chance of triggering when a Default Attack or Default Attack Replacer is used. It is important to understand that WPS will never trigger when using an Attack Skill, only the basic Default Attack or a Replacer will do. WPS modifiers stack (!!) with the modifiers of the attack replacers, allowing for very powerful combinations.
Every WPS lists a % chance to trigger, and all your WPS skills contribute together to a single pool of possible attacks based on that % value. If you have two WPS with 20% chance to trigger, a default attack or replacer has a 20% for one of them, a 20% chance for the other, and a 60% chance for neither of them. If, due to certain class and item combinations, your total chance of WPS exceeds 100%, all values will scale down proportionally to maintain a 100% total chance of a WPS happening. In this scenario, you will see each individual WPS less frequently (a 20% chance might become a 16% chance), but every attack will be a WPS of some type. The available WPS will be listed in their respective class sections.
Spells
Spells are really just skills that don’t care what weapon you have equipped. A beam of fire and lightning doesn’t really care how hard your sword would hit an enemy when you swing it, so the majority of Spells have flat damage built into their description that scales with skill level instead of using the % weapon damage value like attack skills, attack replacers, and WPS. Your global modifiers still apply here. Spells use Casting Speed to determine their speed.
Pets and Pseudo-Pets
Some skills generate separate entities in the world that can be commanded to do your bidding. The majority of these skills are summons that generate a pet, such as a skeleton warrior, a hellhound, or a raven. These pets scale off of an entirely separate pool of bonuses, called pet bonuses, than your player character does. This makes summoning usually an all-or-nothing business, since filling gear slots with gear that grants pet bonuses usually precludes player bonuses and vice versa.
Some skills generate less conventional things, such as a trio of land mines, a whirling vortex of blades, or a fiery apparition of divine vengeance. These ‘pseudo-pets’ tend to be invulnerable and scale off of player bonuses. Sounds great right? Unfortunately these tend to be limited in other ways, such as being ignored by enemies, requiring very high mastery level, or being immobile.
Retaliation Damage
Retaliation damage is a damage effect that is applied not when you attack, but when an enemy attacks you. This damage only hits enemies that hit you in melee, and it cannot crit, making it severely limited as a primary source of damage. However, as of Forgotten Gods, some skills have received a new skill modifier that adds some of your retaliation damage to direct attacks using those skills. This has rejuvenated the possibilities of retaliation builds, and, as of 1.1.4.2, they are quite the hot item. Retaliation damage benefits from its own pool of global modifiers and does not include the regular +% damage modifiers that normal damage uses.
Defense and How to Not Die Like a Chump
Resistances
All damage types are opposed by Resistances which I put in bold because they are the single most important factor in keeping your character alive, and I do mean that. Resistance to a damage type applies a multiplicative modification to all damage of the corresponding type that the character receives. I say modification instead of reduction because it is possible to have a negative resistance value that actually increases incoming damage of the respective type. This will normally not happen until you get to Elite or Ultimate difficulty.
Resistances are capped at 80% but some items and some constellations on the devotion star chart boost the cap of specific resistances. There are a couple of skills that can temporarily boost the cap as well. Be aware that some enemies can reduce your resistances, so having more than the cap can still be useful to combat these types of abilities. Inversely, you can also reduce enemy resistances! This allows you to make resistant enemies vulnerable, or further increase the vulnerability of an already vulnerable enemy.
Resistances and what they protect against are as follows:
- Physical Resistance: Physical and Internal Trauma damage
- Piercing Resistance: Piercing damage
- Bleeding Resistance: Bleeding damage
- Fire Resistance: Fire and Burn damage
- Cold Resistance: Cold and Frostburn damage
- Lightning Resistance: Lightning and Electrocute damage
- Poison & Acid Resistance: Acid and Poison damage
- Vitality Resistance: Vitality and Vitality Decay damage
- Aether Resistance: Aether damage
- Chaos Resistance: Chaos damage
There are other resistance values hidden in the character sheet too! Things such as resistance to freeze, resistance to stun, and resistance to slow are important to be aware of at later levels along with your primary damage resistances.
Armor
Your equipment and some skills provide Armor, which will be applied as an additive reduction to incoming physical damage (specifically Physical, not bleeding or pierce or internal trauma or any kind of magic). Higher values can negate incoming physical damage entirely, but this is not common. Incoming hits will target different body sections at random, so the armor value of each individual item you are wearing is important, not just the total overall value. To see the breakdown of your armor values and the chance for each region to be hit, hover over the Armor section of the character sheet.
Armor Absorption
Armor values on your equipment are modified by your Armor Absorption stat, which is the % value of your listed armor value that actually applies to incoming hits. Strive for 100% so that your armor is at its full efficacy. If you have 70% absorption, you’re only getting 70% of the listed armor value for any equipped item!
Defensive Ability
An extremely common complaint among inexperienced players seems to be ‘I died instantly from full health and I don’t know why.’ If this sounds familiar, most likely your character has a low Defensive Ability, and received a powerful critical hit from a high level enemy as a result. Defensive ability is derived from your Physique stat, as well as bonuses from equipment, devotions, and skills, and decreases the chances of an enemy scoring a Crit or even a regular hit on you. The enemy chance to hit cannot drop below 60%, but chance to crit can and should be 0.
Getting Health Back
There are several basic ways to restore health in Grim Dawn. The first and most basic is Health Regeneration. You will be recovering health at a steady rate at all times, even in combat, without any input from you. This value starts marginal at best, but can be boosted extremely high with proper care. Regeneration will dramatically accelerate after several seconds outside of combat (ie, not using any skills or taking any damage) as long as your character still has Constitution. Constitution is represented by the level of the yellow glow overlaid on your health bar. If you run out, you can pick up a Vital Essence, a Food Ration, or an Untouched Meal, or speak to a cook in settlements that have them.
The second is Healing Effects, or just Heals for short. Some skills or constellation abilities will, when activated, restore a fixed portion of your health. It’s very straightforward and very helpful, and you should strive to have at least one of these unless your regeneration is absurdly high or you have the third option…
Attack Damage Converted to Health, also called ADCtH, or just lifesteal, is a % value of damage applied by your weapon attacks and skills that include % weapon damage in their description which is added to your health upon a successful attack. Be warned that some enemies can resist this, leaving you without healing when you need it most!
Finally, there is the ubiquitous Health Tonic, with can be quaffed (with a cooldown!) by pressing R or binding it to a skill slot and pressing the appropriate key. The healing is applied as a healing effect as well as accelerated regeneration for a short time thereafter.
Circuit Breakers
Some skills activate when your health drops to grant you damage resistance, healing, invulnerability, super powers, or other cool stuff. These are called circuit breakers and will save your life when you’re in trouble, but don’t usually contribute much in day-to-day monster slaying.
Damage Absorption and Damage Reduction
Damage Absorption is a value, either additive or multiplicative, of incoming damage that is simply not dealt to you when it would have been otherwise. This trait is quite powerful because it is applied very late in the defensive formula, but is also quite rare and hard to stack. Damage Reduction is a multiplicative reduction of the damage output of effected enemies and is usually applied through offensive skills rather than defensive ones, but it is a very powerful means of limiting your damage levels in large groups of enemies.
Dodge and Deflect
A relatively uncommon stat, mostly relegated to the realm of Nightblades and Inquisitors, this is the chance for your character to nullify an incoming melee (dodge) or ranged (deflect) attack. This is NOT the hit/miss chance of your enemy, or the block chance of a shield (see below). Dodge and Deflect are applied to successful hits before the rest of your defenses come into play to see if your character manages to evade the blow and therefore take no damage.
Shields
If you equip a shield in your off-hand, you sacrifice some damage potential (usually, see Oathkeeper section below) for the ability to block some incoming blows. Blocks are an absolute, final reduction of incoming damage based on your shield and how good you are at using it. Once an incoming hit has gone through the whole defensive formula, been reduced by your resistances, and so-on, the block chance is checked and if you are successful the value is additively reduced by the listed value.
Blocking has a cooldown, represented with the ‘block recovery’ statistic on the shield and on the third page of your character sheet. Shields will list a damage value as though they were a weapon, but this damage value is only applied by specific skills that include shield damage.
Soldier Levels 1-10
Overview
The tough and brave, highly durable Soldier is your primary source of physical damage skills and buffs. Soldiers possess many passive and toggled abilities that can be helpful to any build type, and as such they are a common second class used to boost the power of a primary class. They can also be a solid first class choice and are recommended for beginners to the genre who aren’t familiar with even the basics of an ARPG due to their simple mechanics and hard-to-kill nature.
Primary Damage Types: Physical, Internal Trauma, Bleeding
Primary Playstyles: Melee, Gunner, Tank, Shield-User
Attributes per Mastery point:
- 5 Physique / 3 Cunning / 2 Spirit / 28 Health / 10 Energy on Odd numbered levels
- 5 Physique / 4 Cunning / 1 Spirit / 28 Health / 10 Energy on Even numbered levels
Level 1 Skills
Markovian’s Advantage
A basic WPS that deals damage and reduces the target’s defensive ability for a short while. Markovian’s Advantage will always deal 128% of your weapon damage, plus some bonus physical damage, no matter what level it is. As such, it does not scale as high as other WPS but is also stronger at low levels. Notably, this skill can use the damage of both weapons at once if you are dual wielding. I recommend aiming for 9 ranks so as to achieve the maximum 25% chance per attack for it to occur.
Forcewave
A core Attack Skill that can carry you into the end game if you focus on it, forcewave fires a wave of damage in a straight line towards a target in range or in a direction if you use the force-attack button. The wave deals a portion of your weapon damage, plus some bonus physical damage, to all enemies in its path as well as applying Stun. Forcewave has a short cooldown. Forcewave requires the use of either a shield or a 2 handed melee weapon, no rifles allowed here.
Cadence
A core Default Attack Replacer and one of the reasons the soldier is so popular. Cadence is a little weird, because it occurs in 3 strike combos. The first two swings using Cadence are not any stronger than usual, but the third receives a huge % weapon damage boost according to your level in the skill, as well as some bonus physical damage. WPS skills cannot trigger on the final cadence strike, so bear in mind that using Cadence reduces your window for triggering any WPS to 2/3 of what it would normally be. Each of the first two strikes gives you a ‘charge’ which will last for 8 seconds, so if you hit two enemies but wait five seconds to hit a third, you will still use the powerful final blow that you had charged from the first two enemies. Special note: constellation skills bound to Cadence can trigger on all three strikes, not just the final strike.
Level 5 Skills
Fighting Spirit
A Passive buff to Offensive Ability and global damage with a chance to activate any time you take damage. Fighting Spirit makes you hit like a truck and score more criticals in combat. It also has a relatively long cooldown but lasts a pretty long time. 8 seconds is enough to clear most groups of enemies with time to spare, so Fighting Spirit will usually fire at the onset of a battle, last the duration, then recharge between groups of enemies.
Tremor
A Mutator for Forcewave, Tremor does nothing on its own and requires at least one point in Forcewave to unlock. Tremor dramatically reduces the damage output of forcewave and removes the Stun effect entirely, but also removes the cooldown and heavily cuts the energy cost of the skill. Tremor only works when wielding a 2 handed melee weapon. If you find that you use forcewave constantly and other skills aren’t measuring up, consider getting this so you can spam it without pausing.
Menhir’s Will
One of the better Circuit Breaker skills, Menhir’s Will functions kind of like an automatic health potion. If you get hurt past the listed health threshold, but don’t die instantly, then Menhir’s Will will trigger and restore a bunch of your health. Menhir’s Will only functions when you have a shield or a 2 handed melee weapon equipped, again, no rifles allowed. Most Soldiers should take Menhir’s Will to at least level 4 as long as they are using the requisite weapons.
Military Conditioning
Do you like having more health? Then Military Conditioning is for you! A passive that is always in effect once you spend points on it, it simply increases your health and physique by the listed % values. This has the connected effect of increasing your defensive ability, your regeneration, and your ability to equip axes, armor, and maces.
Level 10 Skills
Zolhan’s Technique
The partner skill to Markovian’s Advantage, this WPS deals % weapon damage, plus some bonus internal trauma damage, to enemies in an arc in front of your character if you have a melee weapon equipped. If you are using a gun, it just boosts the damage to whatever the bullet hits and does not include an AoE effect. It also applies a minor Slow to enemy attacks. Zolhan’s Technique scales very well at high levels, and can reach fairly high % weapon damage numbers, making it particularly good for builds using single powerful weapons like 2 handers, but it will not use both weapons if you are dual wielding.
Blade Arc
An alternative to Forcewave, Blade Arc deals % weapon damage, with some bonus bleeding damage, to a maximum of five targets in a 180 degree arc in front of your character. It also applies a chance for knockdown that many stronger enemies and all bosses will resist, so don’t put too much weight on that ability. Blade Arc has no cooldown, but it is NOT an attack replacer and as such cannot trigger WPS such as Markovian’s Advantage or Zolhan’s Technique. Many people recommend Blade Arc as a leveling skill, since it applies solid damage to lots of targets at once.
Blitz
For a long time, Blitz was one of only 2 options for moving around a battlefield quickly. Now that Forgotten Gods has added movement runes, the glory days have passed for this old warhorse, but it can still carry you gloriously into battle. Blitz is an enemy-targeted charge across the battlefield culminating in a burst of AoE % weapon damage, with some bonus physical damage, at the site of the impact with your target. It applies a knockdown effect that takes the form of enemies flying backwards from the impact point, and as such it can be used to scatter tight packed groups of trash.
As always, many stronger enemies resist knockdown. Blitz has a fairly long cooldown, so it is best used either at the beginning of a fight to initiate from a long way away, or shortly after the battle lines have been drawn so you can bypass blocking tanks and directly attack healers and support units.
Overguard
An immensely useful Active Buff that makes you extremely hard to kill for a long time, but then has a very long cooldown. Overguard applies a range of buffs that make you better with shields, make you regenerate health faster, absorb a portion of incoming damage, and make you very resistant to Stun effects. Overguard requires a shield.
Shield Training
The main reason, next to overguard, that soldiers are one of the best classes with a shield. This global passive makes you more likely to block damage with a shield and reduces the recovery time before you can block another attack. Enough said.
Soldier Levels 15-25
Level 15 Skills
Clean Sweep
A Mutator for Blade Arc, Clean Sweep only functions if you have at least one point in Blade Arc. Clean Sweep adds a long cooldown to Blade Arc and reduces the effect your Weapon Damage has on the skill’s damage output, but massively increases the overall damage output through a huge Total Damage modifier. This changes Blade Arc from spammable to a powerful burst of damage that is intended to clear the space around your character in one blow.
Rending Force
The second node of Forcewave, this local passive adds some piercing damage to Forcewave for some reason that nobody quite understands. More importantly though, it boosts the critical damage multiplier and base physical damage output of Forcewave while also extending its range by 2 meters. Even just one point in Rending Force will yield the full range increase, so you should pick this up ASAP to maximize the potential of your Forcewaves.
Fighting Form
The second node of Cadence, this local passive has different functions depending on whether you are using a ranged or a melee weapon. This can make the tooltip a bit confusing. When using a ranged weapon, this skill adds a chance for your final Cadence attack to pass through initial target(s) and hit enemies behind them in a straight line. When using a melee weapon, it adds additional target(s) to the final Cadence attack, up to a total of 3 extra targets at softcap, in a 160 degree arc centered on the initial target of the Cadence strike. It also adds bleeding damage and boosts local physical and piercing damage regardless of weapon type. This skill turns Cadence from a boss killer to a universally useful attack. Don’t skip it if you’re planning on using Cadence.
Markovian’s Defense
A relatively recent addition to the skill tree, this Mutator for Overguard greatly reduces the damage and retaliation damage output of the user in exchange for greatly reducing the cooldown of Overguard and increasing its effect on your shield recovery rate. Most people who use Overguard use this due to the benefits of a near-permanent state of nigh-invincibility.
Veterancy
Poor Veterancy, nobody loves you. Some particularly defensive, regeneration oriented builds maybe, but nobody else. Veterancy is a global passive that adds to your health regeneration and increases your overall regeneration rate while also making it easier to equip high level armor and increasing your constitution. I recommend skipping this one. The regeneration bonuses have to be stacked with many others of their kind to become relevant, and a Soldier won’t be lacking for Physique to equip armor anyway. Constitution boosts are completely useless, as vital essences and food rations drop like rain in monsoon season. However, if your build is focused on regeneration, this skill becomes a golden must-have.
Level 20 Skills
Warcry
A skill that everyone wants and can use effectively, even with minimal skillpoint investment. Warcry is an active burst effect centered on the player. Not really an Attack Skill, but not really a spell either, Warcry is most accurately classified as a Debuff that does damage. Warcry applies a % life reduction to enemies across a huge area, taunts them so that they target your character instead of others, and heavily cuts down on enemy damage output through a Damage Reduction debuff. The 33% life reduction is resisted by high level enemies and all bosses, but can make a mob of trash much weaker in a single burst of really loud yelling. The real meat of the skill is the Damage Reduction, which applies to every enemy equally, and will keep you alive in the face of overwhelming odds.
Field Command
An active toggled ability that buffs you and all nearby friendly entities while active, but also reduces your maximum energy. Field Command directly increases both Offensive and Defensive Ability and increases armor values of all slots by a %.
For the love of the Menhir, max this skill. It can be worth it to take Soldier as a secondary class exclusively for this skill.
Level 25 Skills
Terrify
A Mutator for Warcry, this skill does nothing and cannot be selected without at least one point in Warcry. Terrify does exactly what it says on the label, it Terrifies enemies with an increasing success rate depending on how many points you spent on Terrify (capping at 33% chance with 3 points spent). This takes the form of enemies turning around and running away for the duration of the effect. It also reduces all their resistances by a tiny amount, but this doesn’t stack with other reduction of the same type, so it doesn’t usually matter.
Internal Trauma
The confusingly named Internal Trauma skill is a local passive connected to Forcewave. It adds Internal Trauma damage and Bleeding damage components to your Forcewave and slows the attacks of enemies who are hit by the Forcewave. If you’re using Forcewave, you should probably have some points in this to maximize your damage output.
Decorated Soldier
Decorated Soldier is a global passive that boosts physical and internal trauma damage from all sources as well as granting resistance to the elements and to slow effects. Slow resistance can be hard to find, so most Soldiers will want some points in this skill by the end of Ultimate.
Soldier Levels 32-50
Level 32 Skills
Laceration
Laceration is a local passive connected to Blade Arc that boosts local bleeding damage, adds some physical and internal trauma damage, applies it to a larger area, and increases the maximum target count. If you’re using Blade Arc, you want this skill too. Oh, and it makes critical hits with Blade Arc hit even harder.
Blindside
Blindside is a local passive connected to Blitz. It increases the maximum number of targets that can be effected by the AoE attack at the end of a Blitz, adds some internal trauma damage, and boosts local physical and internal trauma damage output while also making the enemies hit by Blitz more vulnerable to subsequent critical hits. A good investment if you are using Blitz to kill things. Not a good investment if you are just using Blitz to get around.
Squad Tactics
Squad Tactics is a passive connected to Field Command. As Field Command is a global buff, the effects of Squad Tactics are also applied globally. Squad Tactics boosts all damage types and increases your attack and cast speed while further reducing your max energy. It’s great, it’s simple, you want it.
Level 40 Skills
Break Morale
Break Morale is a local passive connected to Warcry, and as such its effects are applied by the use of the Warcry active. It increases the energy cost of the Warcry but shreds the targets’ physical resistances and disrupts their ability to use skills for a little while. This skill is crucial for any physical damage Soldier, because it instantly renders tough enemies very vulnerable to your primary damage type.
Counter Strike
Not a chance to pull off a 360-no-scope with an AWP, but rather a toggled Active that gives you a chance of dealing % weapon damage AND % retaliation damage plus some bonus physical and bleeding damage to any enemy that strikes you from within the rather small range of the skill. Counter Strike also adds some Physical Retaliation damage while active, and boosts the % damage of all Retaliation damage dealt. This skill is obviously helpful for Retaliation builds, but the direct damage output of Counter Strike is not exactly small either, particularly the Bleed.
Deadly Momentum
The second and final passive connected to Cadence, this one is, much like the rest of Cadence, pretty weird in how it functions. Deadly Momentum is a temporary buff that re-applies to you every time you launch a final Cadence strike and remains in effect for a few seconds thereafter. Effectively, if you are continually attacking with Cadence, Deadly Momentum will remain active until you stop. Deadly Momentum adds a substantial amount of physical and internal trauma damage to all weapon damage attacks while active, as well as boosting the % damage for physical, pierce, bleed, and internal trauma damage from all sources. The effects of Deadly Momentum are global, even though it is tied to an attack like Cadence, so it would be theoretically possible to use Deadly Momentum’s buffs to boost Blade Arc or Blitz if you used it fast enough after the final Cadence strike.
Scars of Battle
Scars of Battle is a global passive that boosts resistance to Bleeding, Stun, and Freeze, while also increasing your armor absorption value. This indirectly increases armor values across all slots. This skill scales very well to high levels and grants some really helpful resistances, so most builds that take Soldier end up taking Scars of Battle to some degree.
Level 50 Skills
Oleron’s Rage
The more offensive of the two Exclusive skills that Soldier offers, Oleron’s Rage is a toggled buff that offers tremendous power, but, like all Exclusive skills, cannot be used simultaneously with any other Exclusive skill. Oleron’s Rage adds bonus internal trauma damage to all weapon damage attacks, boosts the % damage value for physical, internal trauma, and piercing damage from all sources, increases your movement speed, and massively increases your Offensive Ability. If you want to hit hard and crit often, Oleron’s Rage is the perfect choice.
Menhir’s Bulwark
The more defensive of the two Exclusive skills that Soldier offers, Menhir’s bulwark is a toggled buff that offers tremendous power, but, like all Exclusive skills, cannot be used simultaneously with any other Exclusive skill.
Menhir’s Bulwark adds some physical damage to all weapon damage attacks, absorbs a % of incoming damage, increases the duration of stun effects that you apply to your enemies, increases your health regeneration, increases the power of heals that target you, makes you resistant to effects that reduce your life by a %, and increases all forms of Retaliation damage. Phew, that’s a long list of things. There is a lot to love about Menhir’s Bulwark, but you must have a shield equipped for it to do anything at all.
Demolitionist Levels 1-10
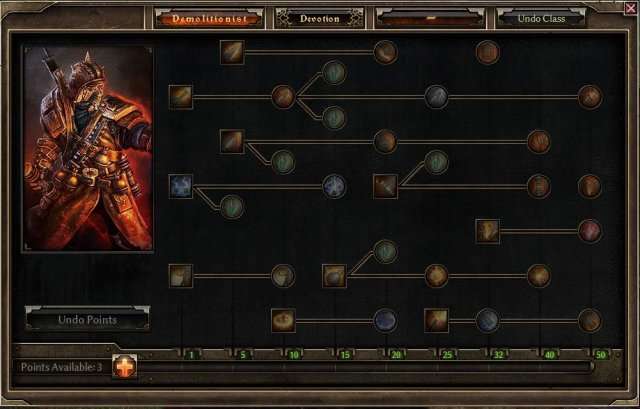
Overview
The master of fiery death and big explosions, the Demolitionist is often viewed as a damage dealing class, but possesses several notable defensive skills and buffs that should not be underestimated. Most Demolitionists specialize in the use of guns, either rifles or pistols, and are great at creating powerful AoE explosions with their plethora of thrown explosives.
Primary Damage Types: Fire, Physical, Lightning, Chaos
Primary Playstyles: Gunner, Grenadier, Caster
Attributes per Mastery point:
- 4 Physique / 4 Cunning / 3 Spirit / 24 Health / 14 Energy on Odd numbered levels
- 3 Physique / 3 Cunning / 3 Spirit / 24 Health / 14 Energy on Even numbered levels
Level 1 Skills
Fire Strike
The core skill of most Demolitionist builds, especially for new players, Fire Strike is a default attack replacer that boosts your weapon damage value, adds some bonus fire damage and a % bonus for physical damage, and then applies it to a single target with every attack. Fire Strike is the tried and true baseline for attack replacers, functioning consistently well in basically every situation and providing solid bang for your buck no matter how high you level it. It costs a small amount of energy with every attack, so make sure you don’t run out or you’ll revert to using the default attack without noticing. For it to really shine, you need to fill out the connected nodes, which I will describe later in this guide.
Stun Jacks
For those of you who prefer crowd control and AoE over damage output and reliability, the Stun Jacks active skill lobs a set of arcing projectiles that each burst for a small amount of physical and lightning damage and apply a Stun effect to enemies in the blast radius. Stun Jacks has a medium cooldown. This skill is not exactly A tier, but you can get good utility out of it at low levels when enemies are still susceptible to the Stun effect. If you focus on it, the damage can eventually become quite respectable too.
Flashbang
The first ‘grenade’ type skill for the Demolitionist, this active skill does not a single point of damage but instead applies debuffs across a huge area with a very short cooldown. The base skill just comes with a chance to Confuse and a powerful debuff to Defensive Ability that renders enemies vulnerable to subsequent critical hits. The Defensive Ability debuff makes this a universally helpful utility skill, and you’ll often see builds using Flashbang as a support for other abilities.
Level 5 Skills
Flame Touched
A toggled active skill that buffs the user and all friendly entities in range while it is active, Flame Touched is very straightforward. It adds fire damage to weapon damage attacks, boosts fire and lightning damage and the affiliated DoT effects globally, and boosts your Offensive Ability, making it easier to hit and crit enemies. Basically everyone should max this skill for the Offensive Ability benefits, but classes that focus on fire damage particularly love this one.
Blackwater Cocktail
The second ‘grenade’ type skill for the Demolitionist, this one arcs a single projectile to a target location which bursts on contact, creating a patch of fiery death that persists for several seconds while applying fire and burn damage to those within it every second. It also reduces target Offensive Ability, making it harder for them to hit or crit against you. It is important to note that the radius of the patch of flames grows as the skill levels up, so if you want it to be more than a nuisance to your foes, you need several ranks in it. Builds that focus on Blackwater Cocktail into the end game will find that it scales very well and can create a very high damage output, despite having relatively low individual target numbers, simply by covering large areas and hitting nearly every enemy on the screen at once.
Quick Jacks
A Mutator for the often overlooked Stun Jacks active skill, this skill does nothing and cannot be selected unless you have spent at least one point on Stun Jacks. Quick Jacks reduces the blast radius and damage output of each projectile fired by Stun Jacks and removes the Stun effect but also removes the cooldown and greatly reduces the energy cost of the skill. If you want to spam Stun Jacks all over the place, Quick Jacks makes it possible.
Level 10 Skills
Explosive Strike
The first connected node of Fire Strike, Explosive Strike adds a secondary effect to the Fire Strike default attack replacer that applies a small % of your weapon damage with some bonus burn damage and a chance of bonus physical damage across a small radius at the impact point of the original Fire Strike attack. The numbers on Explosive Strike function separately from those on Fire Strike, as the explosion is technically not a part of the actual Fire Strike hit. Explosive Strike is commonly used to add much-needed AoE functionality to the basic Fire Strike early in the game, but it doesn’t deal enough damage to be your only AoE source by late game. It still helps though.
High Potency
A Mutator for the active Blackwater Cocktail skill, High Potency has a slightly confusing tooltip because it lists its own duration and radius which seem to conflict with those listed in the tooltip for the base skill. These values are added to the base skill, resulting in a much greater duration and radius than the original skill had. High Potency’s main function is to apply a massive Total Damage modifier to the Blackwater Cocktail, causing it to deal tremendously more damage on every tick, but it also reduces enemy Physical Damage output while they are in the flames and for 2 seconds afterwards.
Searing Light
This local passive is connected to the active Flashbang skill and is only applied when Flashbang is used. Searing Light expands the crippling effect of the base Flashbang by adding a Slow, a Fumble chance (chance for melee attacks to fail), and an Impaired Aim chance (chance for ranged attacks to fail). These last two in particular are notable, as there is no defense against these debuffs and even high level nemesis bosses and celestials can be partially impaired by an upgraded Flashbang using Searing Light. It also slightly increases the energy cost of Flashbang.
Vindictive Flame
Vindictive Flame is a toggled Active skill that provides a global buff and a triggered active effect when on. These two effects are listed in the same tooltip so it can be a little confusing. In short, you lose some max energy and pay a small amount of energy per second to maintain a passive buff to your health regeneration, fire retaliation, and total speed. As an added bonus, if an enemy hits you while the skill is active, there is a burst of fire and physical damage in a small area around your character. The burst of damage also has a chance to apply Stun to any enemies caught in the target area. This skill is very helpful for any build because it grants Total Speed, which applies to spells, attacks, and movement alike.
Demolitionist Levels 15-25
Level 15 Skills
Searing Might
The first of two Mutators for Fire Strike, this skill increases the Total Damage and Critical Damage of the Fire Strike attack and all connected effects such as Explosive Strike. It requires a 2 handed weapon, either melee or ranged, to be used for it to apply. As such, it is mutually exclusive with its partner skill, Searing Strike.
Searing Strike
The second of two Mutators for Fire Strike, this skill increases Total Damage and Critical Damage of the Fire Strike attack and all connected effects such as Explosive Strike, albeit to a lesser extent than Searing Might does. It also reduces the energy cost of the Fire Strike attack. It requires at least one 1 handed melee weapon to be in use to take effect. As such, it is mutually exclusive with its partner skill, Searing Might.
Full Spread
If you felt like Stun Jacks weren’t doing enough damage, the Full Spread skill makes them better. It adds more projectiles that fly out. Each of these projectiles also hits a slightly bigger area. Plus, each one does some internal trauma and electrocute damage. On top of that, while Full Spread is active, it gives a damage bonus to your lightning and physical damage, but only for the damage dealt by the regular Stun Jacks skill. So, if you use Stun Jacks, getting this skill is important to make them actually do some good damage instead of just being annoying.
Grenado
The third ‘grenade’ type skill for the Demolitionist, Grenado is pretty much what it says on the label. It’s a thrown grenade that arcs to a target location and explodes, dealing a lot of physical damage and some piercing damage to all enemies within the blast radius. It also has a chance to apply knockdown to those enemies that receive damage from it. As always, knockdown is resisted by bosses and high level mobs, so be aware of the limitations of this skill. Grenado has a relatively high energy cost compared to the other skills we’ve seen so far, but it’s nothing you can’t handle. Grenado does not use % weapon damage, but rather uses flat damage that scales with skill level. This makes it more of a Spell than an Attack.
Level 20 Skills
Temper
The physical counterpart to its elemental parent skill, Flame Touched, Temper is only in effect while Flame Touched is active, but its benefits are global. Temper adds physical damage to all weapon damage attacks, boosts physical, pierce, and internal trauma % damage globally, boosts all % retaliation damage globally, and adds to your Defensive Ability. Most builds will benefit from the Defensive Ability boost regardless of their reliance on physical damage types, so consider picking this up even with spellcasters to mitigate the risk of deadly critical hits ending your hardcore journey early. As with most toggled skills, it lowers your max energy and also costs a small amount of energy per second.
Demon Fire
Up until now, Demolitionist has been pretty focused on fire, lightning, and physical damage, so some of you may be asking “Halcyon, why did you include chaos in the recommended damage types?” Demon Fire gives us our first sneak peak at the sinister side of the Demolitionist, adding chaos damage and a local % burn damage bonus to the effects of the Blackwater Cocktail active skill. Don’t worry, there’s plenty more Chaos to come~!
Canister Bomb
The fourth and final ‘grenade’ type skill for the Demolitionist, Canister Bomb is a cluster grenade that starts out as a single thrown projectile that bursts into a set of smaller grenades after the initial explosion. It applies piercing, fire, and burn damage to all enemies in the initial or secondary blast areas. Canister Bomb has a long cooldown and a relatively high energy cost for relatively low damage output, but it applies the damage over a large area and can apply multiple times to the same target due to the cluster mechanics.
Skyfire Grenado
Did you ever want your grenade to do something other than physical damage? Skyfire Grenado converts 100% of the physical damage of the base Grenado active skill to lightning damage.
Ulzuin’s Wrath
A passive triggered effect tied to the Vindictive Flame toggled buff, Ulzuin’s Wrath applies fire, lightning, and electrocute damage to a chain of enemies and slows their attacks for a short time any time the burst damage effect of Vindictive Flame is triggered. It also has a chance of applying knockdown. A small percentage of the damage dealt by this chain lightning effect will be returned to the player as health. This skill has longer range than the base skill, so enemies outside the reach of your Vindictive Flame may still be hit by Ulzuin’s Wrath.
Level 25 Skills
Static Strike
The next upgrade for Fire Strike is focused on lightning damage. Static Strike adds a % chance of adding a large amount of lightning damage to the base Fire Strike attack (but not the Explosive Strike explosion) as well as increasing % fire damage locally and adding a small chance of knockdown to the base Fire Strike attack. Helpful if you’re doing multiple damage types and want to add some lightning to the mix.
Concussive Bomb
Skyfire Grenado, but for the Canister Bomb active skill. This skill adds a stun chance and increasingly larger conversion values that convert the physical and piercing components of the Canister Bomb into lightning. If you’re using Canister Bomb, this skill is very nice because it converts all of the damage output into two compatible damage types that go well with the Demolitionist’s skillset.
High Impact
This passive skill is connected to the Grenado active skill and only applies its effects as part of the Grenado explosion. High Impact adds fire damage to the Grenado, increasing its lethality and pairing well with Skyfire Grenado. It also adds a chance of increasing physical and internal trauma % damage locally.
Mortar Trap
Sort of a summon, but sort of not. The Mortar Trap is a pseduo-pet that remains stationary and cannot be slain but expires after 24 seconds. It has a high energy cost, long cooldown, and you can only have one active at once (for now!) but it will fire explosive fireballs that deal physical and fire damage at your foes continuously along a parabolic arc. The tooltip lists a ‘target area’ and a ‘radius’. The target area is the variance in accuracy of the shot, think of it as a cone of fire if you are an FPS veteran. The radius is the size of the explosion when the attack lands.
Demolitionist Levels 32-50
Level 32 Skills
Blast Shield
A defensive Circuit Breaker skill, Blast Shield has a long cooldown and a short duration, but costs no energy and has tremendous effects on your survivability. If your health drops below 60% but you don’t die, Blast Shield will activate for 4 seconds. It grants you big amounts of Damage Absorption, a chance to deflect incoming projectiles, and both pierce and elemental resistances. It also boosts your fire retaliation values a bit. The biggest effect of Blast Shield, however, is that it increases the maximum cap on your resistances. If you were at 80% resistance before and had some overcap, when Blast Shield is active you might instead be at 83, 84, or 85% resistance. It doesn’t always matter that you have Blast Shield, but when you need it, it really delivers.
Thermite Mine
Thermite Mines are polarizing. Many people detest them, others think they’re absolutely crucial to any Demolitionist build that uses the appropriate damage types. Thermite Mine is an active skill that lobs a projectile to a target location, where it splits into a group of 3 mines that remain in place and deal Fire and Burn damage every second to enemies standing on them. These Pseudo-Pets are unkillable and last quite a while (usually long after the encounter is done, even) but you can only have six active mines at once (two groups of 3) and they are obviously unable to move from their landing point. The most important feature of Thermite Mines is that they apply an massive reduction to enemy elemental resistances while the enemy is standing on them, making all your elemental attacks deal much more damage.
Heavy Ordnance
Heavy Ordnance is a passive skill connected to the pseudo-pet Mortar Trap. As such, the effects listed are only applied by projectiles fired by the Mortar Trap. If you want to make your mortars deal more damage, Heavy Ordnance adds lightning damage to every shot as well as boosting the % damage for physical and fire damage locally. It also applies a chance to Stun targets and somewhat increases the blast radius of each shot.
Level 40 Skills
Agonizing Flames
The final connected node for Blackwater Cocktail, this passive skill adds yet more fire damage to the Blackwater Cocktail active skill as well as increasing both fire and chaos % damage locally. Even better, it also reduces the resistances of enemies caught in the flames, making them more susceptible to good old fashioned death while in the flames and for a little while after leaving the area of effect.
Improved Casing
A passive skill linked to the Canister Bomb active, this skill only applies its effects through the explosions caused by the Canister Bomb and it’s child bombs. It increases the blast radius of all explosions, making the Canister Bomb’s AoE potential truly exceptional. It also adds a bunch of Internal Trauma damage to the blast and increases pierce, fire, and burn % damage locally. It does increase the energy cost of the skill however. If you’re using Canister Bomb, you should probably get this as well.
Shattering Blast
The final upgrade to the Grenado active skill, this one boosts the Grenado’s damage by adding Internal Trauma damage to the mix as well as applying a % of your Retaliation damage to the explosion. It also increases pierce and fire % damage locally and boosts critical hit damage of the Grenado.
Level 50 Skills
Brimstone
This is it everyone, the final upgrade to the very long Fire Strike line, and in my opinion the most devastating of the bunch. Brimstone adds bonus fire and chaos damage to the Fire Strike attack (but not the explosion from Explosive Strike) and, if you’re using a gun, causes the bullet to explode in a burst of fiery, chaotic shrapnel when it hits a target. Brimstone is really aimed at ranged attackers, but melee strikes will still benefit from the damage buffs even if they can’t use the fragmentation attack. If you can somehow find one of the very uncommon guns that allows bullets to pass through enemies, Brimstone shots will fragment upon hitting each enemy along the trajectory of the shot, causing massive AoE damage.
Ulzuin’s Chosen
A niche but still powerful skill, the effects of Ulzuin’s Chosen are specifically only applied to 3 skills: Stun Jacks, Grenado, and Canister Bomb. Each of the three skills will receive a Total Damage boost, a chance to instantly reset cooldown when used, and reduced energy cost. Grenadiers and users of Stun Jacks will obviously want this, but everyone else can give it a pass. In fact, it doesn’t even unlock unless you have points in one of the prerequisite skills!
Hellfire Mine
This passive skill is linked to Thermite Mine and applies its effects through the flame jets generated by the deployed mines. It’s very straightforward. It grants more damage, this time chaos, and also boosts fire and burn % damage locally while extending the resistance reduction effect of the base Thermite Mine from elemental to chaos and aether resistance as well.
The Big One
I’m not very familiar with The Big One, having never used it myself. It causes the Mortar Trap pseudo-pet to fire a single large projectile with a huge blast radius that deals lots of physical and fire damage while also applying a Slow to the enemy for some reason. Mortar focused builds can probably benefit from the AoE and damage output on this one, but obviously others should not bother splashing points into abilities for a pseudo-pet that isn’t heavily utilized.
Occultist Levels 1-10
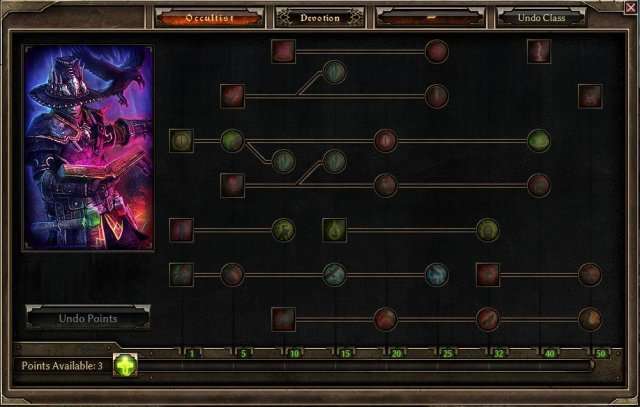
Overview
The sinister Occultist is a worshipper of dark, forbidden gods and the user of unholy magic. A very versatile support class and one of the most focused summoner classes, Occultists possess a mix of offensive spells, debuffs, and summons that make them very good at controlling the battlefield and applying damage over time from a distance. Occultist can also be taken as a secondary class to support the usage of chaos or acid damage by another class.
Primary Damage Types: Chaos, Vitality, Acid, Poison, Vitality Decay
Primary Playstyles: Summoner, Caster, Support
Attributes per Mastery point:
- 3 Physique / 3 Cunning / 5 Spirit / 20 Health / 18 Energy on Odd numbered levels
- 2 Physique / 3 Cunning / 4 Spirit / 20 Health / 18 Energy on Even numbered levels
Level 1 Skills
Dreeg’s Evil Eye
A core spell for the Occultist, and one that can carry you to Ultimate and beyond if done right. Dreeg’s Evil Eye is an active spell that fires a single projectile at a target and has a small burst on impact. It deals acid and poison damage to anything inside the burst radius. Notably, this skill has no cooldown and is only limited by your casting speed modifier and energy levels.
Curse of Frailty
Arguably one of the best debuffs available, Curse of Frailty is an active skill that applies a movement speed reduction and reduces resistance to physical and bleeding damage across a relatively small area. The effects last for a relatively short time. As you level the skill, the radius gets much larger and the duration increases a lot too, until at max level you can affect entire groups of enemies for the entire remaining duration of their miserable lives.
Summon Familiar
The first of two pets available to the Occultist, an arcane storm raven comes to your calling. You can only summon one at a time, only have one active at once, and there’s a long cooldown between summons. The storm raven fires triple bursts of lightning projectiles that deal lightning and electrocute damage to targets and can be upgraded with several interesting abilities further down the skill tree. The raven is relatively fragile as pets go, and does best when sitting back from the fray to fire on enemies and cast spells in peace.
Level 5 Skills
Solael’s Witchfire
Similar to the Demolitionist’s Flame Touched, this is an active toggled skill that applies a global buff to you (and just you) while active at the cost of some max energy and a small energy cost per second. The buff adds chaos damage to all weapon damage attacks, increases your attack speed, and increases your global % vitality damage modifier. Weapon attackers particularly benefit from this skill because it combines a damage buff with an attack speed buff.
Blood Burst
Blood Burst is the first connected node to Dreeg’s Evil Eye and as such only applies its effects to the Dreeg’s Evil Eye active skill. This skill increases the blast radius of the eyeball impact by a lot, as well as increasing the Acid and Poison damage output of the burst. It also brings in a small portion of your weapon damage value, allowing at least some small portion of your weapon power to boost the spell.
Bloody Pox
This nasty number inflicts a contagious DoT effect. This means that the effect can literally spread from the original target to inflict others in the nearby vicinity. There are limitations on this spread, but it is not particularly strict, so you will probably hit a lot of targets if you cast it into a tightly packed group. The Bloody Pox inflicts vitality and bleeding damage every second while it lasts, and also causes health reduction by a % of the targets current health every second. This means that it is strongest against enemies that are at full health. A relatively energy-expensive skill, thankfully you usually only need to cast Bloody Pox once or twice per battle.
Mend Flesh
Mend Flesh grants the storm raven pet a heal that it will sometimes cast on damaged allies. Though listed as a passive, this is really an active skill that the raven gets to activate instead of you. You can’t really control when, or who, the raven will choose to heal, so I hope you brought other ways to stay alive.
Level 10 Skills
Sigil of Consumption
The Sigil of Consumption is a stationary damaging field that applies vitality and vitality decay damage to any enemies within it every second. A substantial portion of the inflicted damage is returned to the caster as health, giving considerable healing powers if you catch a large group of enemies in it. The radius increases with higher levels. This is a staple for any spellcaster that deals vitality damage because it is a solid way to restore health while still dealing damage, an ability which many spellcasters lack.
Focused Gaze
This Mutator for Dreeg’s Evil Eye adds a somewhat lengthy cooldown to the base skill but greatly increases its burst radius, acid and poison damage, critical damage, and Total Damage. It also applies a reduction to enemy’s physical damage for a few seconds. In effect, this changes the base skill from a spammable skill to a cooldown burst effect that can inflict a lot more damage in one go.
Vulnerability
The second node of Curse of Frailty, this skill only applies its effects through the Curse of Frailty active spell. Vulnerability adds a moderate reduction of enemy defensive ability and extends the resistance reduction effect to vitality, acid/poison, and elemental resistances. This is exceptionally valuable for builds that deal one of these damage types but doesn’t help anyone else very much.
Summon Hellhound
The second pet available to the Occultist, the Hellhound is bigger and nastier than the raven but possesses fewer utility abilities. The base skill only allows the hellhound to attack with its claws/teeth for physical and fire damage and to explode when killed in a burst of fire, chaos, and physical damage plus some life reduction. Later nodes will grant more options for the puppy.
Occultist Levels 15-25
Level 15 Skills
Consecrated Blade
This is one of the more boring Mutators out there, but it’s really useful if you can make use of it. If you take it, Solael’s Witchfire gains the function of converting some of your physical damage to chaos damage globally.
Fevered Rage
Just try it. ( ͡° ͜ʖ ͡°)
Nah, just kidding, don’t actually do that. This Mutator dramatically alters the function of Bloody Pox by tremendously boosting its life reduction values and Total Damage multiplier. Enemies will die by the droves when infected with Fevered Rage, which sounds all fine and dandy until you read the rest of the tooltip. Enemies infected with Fevered Rage gain +25% Offensive Ability and +150% total speed in addition to a reduction in the energy cost of their skills and an equivalently massive reduction in their Defensive Ability. You can crit them more easily, but they move and attack at lightning speed and will land more (a lot more) and deadlier (a lot deadlier) critical blows.
User discretion advised.
Blood of Dreeg
A combination of a Heal and a Buff, Blood of Dreeg restores the health of the user and all friendly entities (take note, would-be summoners) within the range of the skill as well as granting a long lasting buff to acid damage and acid retaliation, greatly accelerated health regeneration, and a big boost to Offensive Ability. In my opinion, every Occultist should have the max number of points in this one.
Storm Spirit
The second node connected to the Summon Familiar’s storm raven pet, this grants the raven a wide reaching aura that grants friendly entities boosted elemental damage for their weapon attacks, boosted global elemental % damage, a chance of lightning retaliation, and some elemental resistance. There are a lot of good applications for this in builds that do elemental damage or use elemental pets (like the raven and the hellhound) so keep it in mind if you’re looking for a way to buff up the damage output of anything elemental.
Level 20 Skills
Terrifying Gaze
The second connected node to Dreeg’s Evil Eye, this one boosts the vitality damage of the eponymous eyeball as well as granting a local % damage boost to acid and poison, adding some of your retaliation damage to the spell, and adding a small chance to confuse or stun enemies caught in the blast. If you’re using Evil Eye, you should probably max this so as to max the damage potential of the spell.
Wasting
The first connected node for Bloody Pox, this skill only applies its effects through the Bloody Pox active spell. Wasting adds vitality damage to every tick and boosts local % bleeding damage while also decreasing enemies’ Offensive Ability values.
Ember Claw
The ‘Blade Arc’ of the Hellhound world, Ember Claw grants your puppy the ability to deal a large portion of its weapon damage, plus some bonus fire and chaos damage, to up to 5 enemies in an arc. It also generates additional threat, increasing the chance that the Hellhound will be targeted by enemy attacks. Sort of. Not really. Aggro is kind of wonky in Grim Dawn, so YMMV.
Level 25 Skills
Destruction
With a name like Destruction, you might expect a bit more from this skill than it actually delivers, but it is still a great addition to the Sigil of Consumption. Points spent on Destruction add increasing amounts of fire and chaos damage to the Sigil, as well as boosting local % vitality damage. As a connected node, it only applies its effects through the Sigil of Consumption active skill.
Second Rite
Not quite enough Rites to make a Left, but the Second Rite is still enough to make a powerful skill even better. Second Rite adds vitality damage and vitality decay to the effects of the Solael’s Witchfire buff as well as global % chaos damage and some resistance to vitality damage.
Lightning Strike
This final node for the Summon Familiar line grants the storm raven another active skill, this time the ability to call down lightning bolts on your enemies. The lightning bolt deals, predictably, lightning damage and electrocute damage as well as a portion of the raven’s base weapon damage. Criticals from this skill are boosted, and every lightning bolt will Stun enemies in the area of effect.
Occultist Levels 32-50
Level 32 Skills
Aspect of the Guardian
This passive is connected to the Blood of Dreeg active skill and adds its effects to those of the base skill. Aspect of the Guardian grants the user a small buff to acid/poison and vitality/vitality decay damage types, but more importantly it grants an astronomical amount of poison & acid resistance and a reasonable amount of the rare and coveted physical resistance. It also boosts your retaliation damage. I find Aspect of the Guardian overhyped, mostly because I hate having to re-cast Blood of Dreeg every 30 seconds just to keep my poison & acid resistance from dropping, but the benefits of the skill are significant. If you don’t mind the micro, and are prepared to get wrecked by acidic enemies if you forget to renew the buff, then definitely take this one.
Bonds of Bysmiel
A toggled active buff that doesn’t apply any effects to the player, Bonds of Bysmiel greatly increases the health and the energy regeneration of any pet you summon. It’s good to have so that your pets don’t die instantly against higher level enemies, but don’t overspend on it. Your pets just need enough health to not die and enough energy to keep using their skills.
Hellfire
Hellfire is a passive connected to the Hellhound summon that takes the form of a passive aura emanating from the Hellhound. Sadly not paired with a skill called Damnation, this skill brings a bit of the underworld everywhere your puppy goes by adding chaos damage to weapon attacks, globally boosting chaos, fire, and burn damage, and adding some fire retaliation to any friendly entity in the field of effect, including the hellhound.
Level 40 Skills
Doom Bolt
The heavy artillery of the Occultist repertoire, Doom Bolt calls down a crackling red bolt of chaotic energy on the head of a target of your choice. It affects a small area at the impact point, and thus can hit multiple enemies with a large amount of chaos and vitality damage. Critical damage from Doom Bolt is boosted. It is saddled with a hefty cooldown and high energy cost, but it’s worth it, and there are ways to mitigate these limitations in the late game.
Blood Burst
The final node of the Dreeg’s Evil Eye chain, this passive is connected to the active skill Dreeg’s Evil Eye, and only applies its effects through its parent skill. Blood Burst causes the Eye to burst into smaller projectiles at the point of impact, spreading acid and vitality damage to nearby targets. Highly recommended for Eyeball casters.
Black Death
The final node of the Bloody Pox chain, this passive adds poison and a chance to confuse, as well as a local vitality and bleeding % damage boost, to every tick of the Bloody Pox. The confuse is not reliable enough to really make this a defensive mainstay, but it helps, and the damage boost is really helpful if you’re using Bloody Pox as a main damage skill.
Level 50 Skills
Possession
At some point, somebody thought “wouldn’t it be cool if I let a sinister deity inhabit my body?” and came up with this skill. The sole Exclusive Skill available to the Occultist, Possession is, like all Exclusive Skills, an active toggled skill that remains in effect once turned on and is targeted at any build that uses weapons to deal chaos damage particularly, but can help with other damage types too. It absorbs a % of incoming damage, adds chaos damage to your weapon damage attacks, globally increases % damage for acid, poison, chaos, vitality, and vitality decay, adds to your chaos resistance, and makes you nearly immune to skill disruption. SImultaneously a powerful offensive and defensive boost, most Occultists will want to max this skill.
Manipulation
A passive connected to the Bonds of Bysmiel toggled skill, this one adds an offensive component to the buffs from Bonds of Bysmiel by increasing % damage in all categories and total speed for all pets. If you have summons, this skill is highly recommended.
Infernal Breath
An AoE active for the Hellhound, Infernal Breath blasts enemies in a cone in front of the puppy with fire, burn, and chaos damage as well as a portion of the Hellhound’s base weapon damage. Its damage numbers aren’t exceptional, and some people would argue that it decreases the damage potential of the Hellhound by distracting it from using actually helpful abilities like ember claw. I personally think Infernal Breath is fine, if maybe not really suited to be at level 50 of the mastery bar.
Nightblade Levels 1-10
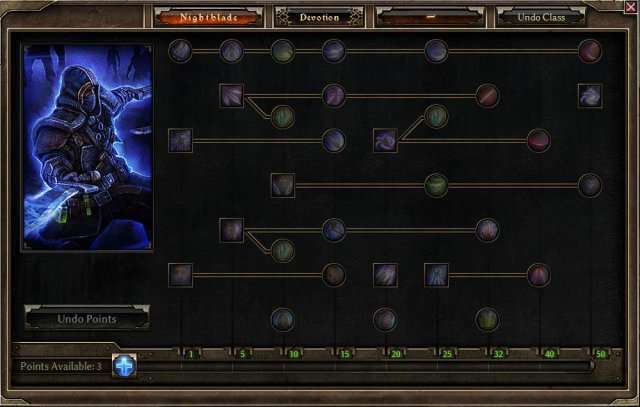
Overview
The original glass cannon, the initially fragile but deadly Nightblade is focused on high risk, high reward melee using a set of dual-wielding skills that allow them to use two melee weapons at once to apply massive damage to single targets or small groups. At higher level, nightblades gain the ability to effectively teleport, dodge attacks entirely, and heal themselves with a very short cooldown, mitigating their otherwise somewhat squishy nature.
Primary Damage Types: Pierce, Cold, Frostburn, Acid, Poison
Primary Playstyles: Melee, Dual Wield, DPS
Attributes per Mastery point:
- 4 Physique / 4 Cunning / 3 Spirit / 25 Health / 13 Energy on Odd numbered levels
- 3 Physique / 4 Cunning / 2 Spirit / 25 Health / 13 Energy on Even numbered levels
Level 1 Skills
Dual Blades
This passive skill is at the heart of the Nightblade class. If you spend even a single point in this skill, the restrictions on wielding multiple melee weapons are lifted and you become able to wield a one handed weapon in each hand. Certain items offer this ability as well, but they are uncommon. It also adds some piercing damage to all weapon attacks, boosts your % cold and % pierce damage globally, and adds to your physical resistance. All bonuses are dependent on your character having two melee weapons equipped. If you switch to a 2 handed weapon, a shield, or any combination of weapons that isn’t dual wielding melee weapons, all benefits are instantly lost.
Amarasta’s Blade Burst
The newbie Nightblade’s answer to the default attack replacer, Amarasta’s Blade Burst is actually an attack skill, not an attack replacer. As such, it CANNOT trigger WPS such as whirling death and execution. However, it has a cooldown, and if you bind it to your mouse button you will use default attacks while the skill is on cooldown, yielding a rhythm of Blade Bursts every few second interspersed with regular attacks that can trigger WPS. This is not ideal from a WPS perspective, but it’s better than nothing.
The Blade Burst itself is actually pretty good, creating a burst of cold and frostburn damage, plus a % of your weapon damage, in a respectable radius around the point of impact with a short cooldown between bursts. It also applies a chance of freeze to enemies in the burst area. The Blade Burst only uses your offhand damage, if I recall correctly, so it loses some of its lustre if you are dual wielding.
Veil of Shadow
This toggled active skill generates a debuffing aura around the user which reduces enemy speed and offensive ability while they remain in the area of effect. This isn’t particularly exceptional on its own, but the second node is a real powerhouse and will likely mean that you take this skill anyway.
Level 5 Skills
Belgothian’s Shears
The first of the dual wield WPS, Belgothian’s Shears gives you a chance of causing 128% of your weapon damage, plus some bonus physical damage, to up to 3 enemies in an arc in front of your character. It also boosts % pierce damage locally and applies a Stun to enemies hit by the arc. The 128% value does not scale no matter how many points you put in the skill, but the bonus damage and the chance to trigger do scale. You want to aim for at least 5 ranks in this skill to get the maximum 20% chance of it triggering. Like all of the Nightblade WPS skills, this only works when you are dual wielding one handed melee weapons.
Phantasmal Blades
This skill fires a set of spectral blades in a straight line from your character, but they have some variance in flight trajectory so not all the blades will follow the same straight line. Each blade deals a % of your main hand weapon damage plus bonus piercing and bleeding damage to the first target they hit. This skill has a medium cooldown and costs a pretty sizeable amount of energy, but it does respectable damage to several targets, or repeatedly to a single target.
Pneumatic Burst
Just breathe… An active heal / buff, Pneumatic Burst is one of the main ways Nightblades stay alive. Pneumatic Burst heals you for a % of your total health when used and applies a buff that increases your speed and health regeneration. Every 10 seconds you can fire the heal and re-apply the buff, although the buff lasts much longer than the cooldown on the heal. It is possible and recommended to keep this buff active at all times. I recommend aiming for at least 6 ranks in this skill to maximize the speed gains per point spent, but more ranks will make it easier to stay alive.
Level 10 Skills
Nidalla’s Hidden Hand
This passive skill modifies the effects of Belgothian’s Shears, Amarasta’s Quick Cut, and Whirling Death. It has no effect on its own. It adds acid and poison damage to the listed skills, boosts acid and poison damage locally, applies a slow to targets, and converts some piercing damage to acid locally. This conversion is only applied to piercing damage dealt by the listed WPS! If you are trying to deal acid and poison damage, this one is great, but otherwise it can actually lower your DPS.
Frenetic Throw
A Mutator for Phantasmal Blades that reduces the damage output, converts all the local piercing damage to vitality damage, and removes the skill’s cooldown while halving the energy cost. It’s amazing if you want to deal vitality damage or want to use phantasmal blades as your primary skill, but it can be a huge decrease in the efficacy of the skill if you don’t build for it.
Shadow Strike
The second of the original ‘movement’ type skills, shadow strike used to be the boss of the roost due to its exceptional damage output and the fact that it makes you invincible while in use. Now, there are better options due to the addition of movement runes, but Shadow Strike remains a competitive selection. Shadow Strike requires that you select a target enemy when you use the skill. It then ‘teleports’ you to the target and unleashes a powerful blow with both weapons if dual wielding that deals cold and piercing damage plus a large % of your weapon damage. It also applies a stun to the target enemy. You aren’t really teleporting, but it makes you invisible and makes you move at 500% speed, so you might as well be! You cannot traverse impassable terrain using Shadow Strike. Use it to initiate combat or bypass the front line to strike important targets in the back row.
Breath of Belgothian
This Mutator shortens the cooldown on Pneumatic Burst and make the buff increase your health regeneration by an even larger amount. It only works when you are dual wielding. More frequent healing means less dying, so you should definitely pick this up if you are planning to dual wield. Interestingly, this skill also enables the ability to dual wield, so you could skip taking Dual Blades entirely if you wanted to for some reason.
Phantasmal Armor
A passive that boosts your armor on all slots, your pierce resistance, your freeze resistance, and your petrify resistance. It also grants the ability to absorb energy when you are hit with spells or when hit with a melee attack. Useful, but not game changing. I recommend a small investment here but you probably don’t need to max it.
Nightblade Levels 15-25
Level 15 Skills
Amarasta’s Quick Cut
The second dual wielding WPS, Amarasta’s Quick Cut (or AQC) fires off three quick strikes at slightly reduced % weapon damage, plus some bonus piercing damage, instead of a single blow. I believe it uses the offhand for two of them and the main hand for the final one. Critical damage for these three strikes is increased. Maximum chance of triggering is 20% at rank 5.
Heart Seeker
A crucial upgrade for anyone using Phantasmal Blades, Heart Seeker adds some vitality damage and a boost to local bleeding damage, returns some of the damage dealt by the Phantasmal Blades as health to the user, and most importantly adds a chance for the blades to pass through enemies and hit the ones behind them. The base skill can’t hit anyone behind the initial target, so this is really important to ensure that you are dealing lots of damage to lots of targets.
Lethal Assault
A must-have if you’re using Amarasta’s Blade Burst, the passive Lethal Assault functions by applying a buff to your character for a few seconds after a blade burst. This buff adds cold and acid damage to all weapon damage attacks, boosts % damage for acid, poison, cold, and frostburn globally, and boosts your Offensive Ability.
Shadow Dance
A passive connected to Pneumatic Burst, the effects of Shadow Dance are only in effect while the buff from Pneumatic Burst is active. Shadow Dance adds a non-negligible chance to dodge melee attacks and deflect ranged attacks to your character as well as boosting your Defensive Ability and your resistance to entrapment effects. The dodge and deflect chance do not scale well past the softcap, so I recommend aiming for 12 ranks in this and no more unless you really need more Defensive Ability.
Night’s Chill
Remember Veil of Shadow? Well this skill is why you want to take Veil of Shadow. Night’s Chill adds a damaging effect to enemies in the area of effect from Veil of Shadow, causing them to take cold and frostburn damage every second. The real power of this skill though is that it greatly reduces enemy resistance to cold, pierce, and acid damage and affiliated DoTs. Since nearly every Nightblade skill deals one of those damage types, this skill is basically just a multiplier to all damage you deal to enemies in range.
Level 20 Skills
Ring of Steel
One of the best ways for a Nightblade to deal with large groups, Ring of Steel is an active burst of damage centered on the player that deals a large % of your main hand weapon damage plus a bunch of bonus piercing damage to all enemies in range. It also applies a short stun to all enemies in the area of effect. There’s a bit of a cooldown to deal with, but it is otherwise amazing.
Blade Barrier
An active defensive skill, Blade Barrier immobilizes your character when used, but makes you literally invincible for its duration. It also greatly boosts your health regeneration and adds physical retaliation damage for the duration of the effect. It increases your resistance to a bunch of crowd control effects, but since it immobilizes you while in effect, it doesn’t really matter.
Anatomy of Murder
A passive buff that has a couple of different functions, Anatomy of Murder isn’t necessary for all builds, so think critically about using it. It globally boosts your vitality damage, bleeding damage, and vitality decay damage, globally boosts your damage dealt to Human subtype enemies, and boosts your Cunning stat by a %. A single point to boost your Cunning is usually a good investment, but extra points are not always necessary unless you’re dealing the right damage types or struggling against human enemies.
Level 25 Skills
Whirling Death
The third dual wielding WPS, Whirling Death adds a chance for a spinning attack that deals % weapon damage, plus some bonus piercing and bleeding damage, to up to 8 enemies in a circle around your character. You can only get up to a 20% chance of using this skill at rank 5 and above.
Ring of Frost
This Mutator converts all of the piercing damage from Ring of Steel into cold damage and adds a freezing effect. If your Nightblade is focused on cold damage instead of piercing, this can really boost the damage of the Ring of Steel.
Nidalla’s Justifiable Ends
A passive node connected to Shadow Strike, this skill decreases the cooldown of Shadow Strike and adds poison damage and a local % damage boost to poison. It also boosts critical damage dealt by Shadow Strike. Notably, this skill does not boost acid damage, just poison.
Blade Trap
An under-performer, Blade Trap has never really been a strong addition to a Nightblade’s arsenal. In certain circumstances, it can be quite helpful, but it is unreliable. It applies an entrapment effect to enemies in the target area that applies piercing and bleeding damage to entrapped enemies while greatly decreasing their Defensive Ability. It sounds good in theory, but the effects are only applied to enemies who are entrapped, and most enemies are resistant or immune to entrapment effects, which renders them untouchable by this skill.
Nightblade Levels 32-50
Level 32 Skills
Nether Edge
The final node of Phantasmal Blades, Nether Edge adds Chaos and Cold damage to each projectile of the base skill while boosting critical damage locally. Not a lot to say here, except that you should be very conscious of which damage type you want your blades to deal. Nether Edge doesn’t synergize well with the basic piercing/bleeding damage, but does synergize well with the vitality damage from Frenetic Throw and Heart Seeker.
Elemental Awakening
The final node of Pneumatic Burst, this skill adds its effects to the buff applied by Pneumatic Burst. While the buff is active, Elemental Awakening adds frostburn damage to all weapon damage attacks, boosts elemental (fire, cold, lightning) and frostburn damage globally, and increases your resistance to elemental damage of all kinds while slightly reducing your maximum energy. It’s really excellent for those looking to deal cold/frostburn damage with weapon attacks, but it can be helpful for other builds that deal elemental damage or need elemental resistances.
Merciless Repertoire
This passive applies poison damage to all weapon damage attacks, moderately boosts acid, cold, poison, and frostburn damage % globally, and boosts all retaliation damage types. Retaliation builds particularly want this one, but the damage buffs can be nice for anybody dealing the right damage types, especially poison.
Level 40 Skills
Circle of Slaughter
A passive connected to the Ring of Steel active skill, Circle of Slaughter adds bleeding damage, boosts % piercing damage locally, increases the damage of critical hits from Ring of Steel, and applies a Fumble chance to enemies in the area of effect (preventing some melee attacks from landing). Unless you’re focusing on bleeding damage, the real benefit is the irresistible fumble chance.
Devouring Blades
This modifier to the Blade Trap active skill doesn’t eliminate the inherent limitations of the parent skill, but it does add Vitality damage to every tick while boosting local % pierce and % bleed damage. It also adds a chance for the blade trap to pass through enemies and affect more than the initial target and returns some of the damage dealt each second to the user as health. If Blade Trap weren’t so bad, this would actually be really nice, but you probably don’t need to take this since you probably aren’t going to get much usage out of Blade Trap.
Level 50 Skills
Execution
The final dual wield WPS for the Nightblade, Execution is also the most powerful by a long shot. As usual, it only works when dual wielding and can only have at max a 20% chance of triggering per attack. When it does trigger, it deals a huge amount of % weapon damage from both weapons and some bonus cold damage to the target enemy while also reducing their health by a % of its current value. This means it is strongest against enemies at full health, but it will probably kill basically any normal enemy in one hit regardless of health level.
Blade Spirit
A permanent Pseudo-Pet, the Blade Spirit active summons an invincible whirling tornado of pointy death to follow you around and slice up your enemies with little or no input from you. It deals quite respectable piercing, cold, and bleeding damage every second to all enemies in a small area around the spirit. You can have 2 going at once, but each use of the skill only summons one.
Nightfall
The final node of Shadow Strike adds a moderately large AoE effect centered on the target enemy that deals a small-medium % weapon damage plus some cold damage, frostburn damage, and vitality decay damage to all enemies in range. A portion of the inflicted damage is returned to the user as health. It also has a chance to put enemies to sleep, but nobody really cares about that function since sleep is the least useful crowd control effect and is easily resisted by powerful enemies.
Arcanist Levels 1-10
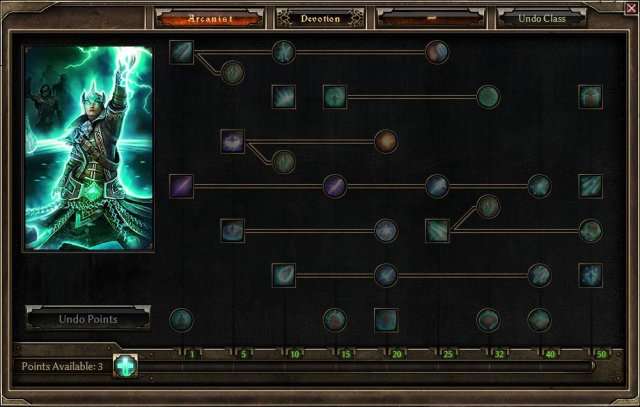
Overview
The name implies arcane might, and the Arcanist delivers this in spades. At first glance just the purveyor of nuclear options, deadly laser beams, and explosions of elemental fury, the Arcanist is surprisingly flexible in its available pairings due to its support auras and buffs, including one that makes you temporarily invincible!
Primary Damage Types: Fire, Burn, Cold, Frostburn, Lightning, Electrocute, Aether
Primary Playstyles: Caster, Support, DPS
Attributes per Mastery point:
- 2 Physique / 3 Cunning / 5 Spirit / 18 Health / 20 Energy on all levels
Level 1 Skills
Iskandra’s Elemental Exchange
This active toggled aura applies a passive buff to all friendly entities in range while it is toggled on. The buff adds elemental damage to all weapon damage attacks, adds energy leech to all weapon damage attacks, and globally boosts elemental damage and energy regeneration. This buff is best suited for classes that plan to use weapon attacks, not spells, but it can be helpful if you’re experiencing energy issues as a caster.
Panetti’s Replicating Missile
Pretty standard fare for mage type characters, the Replicating Missile fires a projectile of elemental energy that bursts into several smaller projectiles upon impact with a target. It deals only elemental damage at first, but later nodes buff up its aether damage output and add some nifty effects. No cooldown and a meager energy cost mean that you can fire it like a machine gun and not run out of energy. This skill is really point-hungry, since it has 4 nodes and the first node costs 16 points. If you’re planning on using it, you should keep in mind that a lot of your other skills will suffer.
Inner Focus
This global passive increases your Offensive Ability and your Spirit by a % value. This means that it gets more effective the more Offensive Ability and Spirit you have from other sources. Highly recommended for everyone except summoners.
Level 5 Skills
Manifestation
This Mutator causes Iskandra’s Elemental Exchange to convert some of your physical damage to elemental damage globally and applies the same effect to all pets along with some bonus elemental damage for their attacks. Not that helpful for most builds, but very helpful if you’re looking to do exclusively elemental damage or support elemental pets.
Callidor’s Tempest
A blast of fire and aether damage centered on the player, Callidor’s Tempest has no cooldown and can be cast as fast as your casting speed allows. A bit of an oddity in the spellcasting world, this one includes a portion of your % weapon damage in its attack values as well, which enables it to apply effects such as lifesteal and energy leech. It is possible to use this skill right up into Ultimate, but it doesn’t go well with some of the Arcanist’s other spells such as Replicating Missile due to its short range.
Olexra’s Flash Freeze
Another burst effect centered on the player, but this time dealing cold damage and freezing affected enemies for its duration. This skill has great range compared to other burst spells but deals mediocre damage and the freeze effect can be easily resisted by powerful enemies. All enemies successfully frozen suffer from a penalty to their fire resistance for as long as they remain frozen. Similar to Blade Trap, enemy resistance to the secondary effect of this skill prevents it from really shining past the mid-game.
Level 10 Skills
Overload
A passive in the Iskandra’s Elemental Exchange group, Overload applies its effects through the buff from elemental exchange. Overload gives each of your weapon attacks a random elemental DoT bonus and increases your Offensive Ability. It also increases your aether resistance by a moderate amount. Keep in mind that the DoTs are not applied through spells unless those spells have a % weapon damage component.
Mirror of Ereoctes
Now this is a skill. Hit the button and laugh at your feeble foes as their attacks cease to affect you, but be prepared for the effect to end since it only lasts 3 seconds. In numerical terms, this gives you a 100% damage absorption value for the duration, plus some lightning retaliation damage. It has a very long cooldown and costs a lot of energy, but it’s a small price to pay for immortality! Higher levels in the skill reduce the cooldown and increase the retaliation bonus, but even 1 point is enough to make you invulnerable.
Wrath of Agrivix
A Mutator for Callidor’s Tempest that adds a long cooldown but dramatically increases the Total Damage and % weapon damage of the skill while adding a 100% chance to knockdown enemies that aren’t immune to knockdown. If you don’t need to cast Callidor’s Tempest often, but want it to really count when you do, this skill is for you.
Trozan’s Sky Shard
A staple for Arcanists since the days of early access, Trozan’s Sky Shard drops three shards of ice from the sky onto a target area or enemy. It has some variance in targeting, so don’t expect every projectile to hit, but each projectile causes significant lightning and cold damage in a radius around the point of impact. It has a cooldown and moderate energy cost, so if you expect to cast it a lot, be sure you have energy regeneration boosts.
Arcanist Levels 15-25
Level 15 Skills
Maiven’s Sphere of Protection
Pretty much what you’d expect from a magical forcefield, this active toggled skill grants your character a % damage absorption bonus while it is active but at a fairly significant energy cost per second. For a long time, this skill was saddled with a total damage penalty that applied to all damage your character dealt while it was active. No longer! As such, you should take it and max it and have it up at all times.
Distortion
The first connected passive for Panetti’s Replicating Missile, this one adds aether damage to every projectile (including the ones that burst from the point of impact), locally boosts % fire damage, and adds a chance for the initial missile to pass through enemies while still fragmenting as it passes through each one. Pass through chance is a rare trait for projectiles, especially ones that cause AoE effects each time they hit an enemy, so if you plan on using the Replicating Missile you probably want to max this skill as well.
Arcane Will
Technically a Circuit Breaker, this skill has an extremely high health threshold to trigger its effects, making it more of a passive triggered buff rather than a circuit breaker. If your health drops below 75% while this skill is not on cooldown, and you don’t die instantly, it will buff you for 6 seconds with greatly increased % all damage, Defensive Ability, and Energy Regeneration. It’s really useful and requires no micro-management, so I recommend at least some points in it for any Arcanist.
Level 20 Skills
Inferno
A connected passive for Callidor’s Tempest that boosts the % fire and % aether damage values locally while also adding some bonus lightning and burn damage and slightly increasing the energy cost. If you’re using the Tempest more than incidentally, this skill is wise to pick up to increase its damage output.
Absolute Zero
A connected passive for Olexra’s Flash Freeze, this skill adds frostburn damage to the burst, boosts % cold damage locally, adds a slow effect to enemies that are hit by the burst, and reduces the physical resistance of enemies that are frozen by the freeze effect from the parent skill. It isn’t bad, per-se, but it suffers the same limitations as Flash Freeze because in most cases the same enemies that resist the freeze will also resist the slow from Absolute Zero. More frostburn damage is nice though, especially given the massive range of Flash Freeze.
Frozen Core
The first connected passive for Sky Shard, this one adds a lot of frostburn damage to each projectile, locally boosts % cold damage, and adds both a freeze effect and a slow effect to enemies hit by the parent skill. Cold or cold/lightning Arcanists benefit a lot from this one, but if your focus is lightning, you might want to skip this or put just one point in for the freeze.
Nullification
An overlooked gem, this skill strips buffs from your enemies and debuffs (including DoTs) from you and friendly entities. It also applies a long lasting damage reduction to effected enemies, but only for elemental damage types. It costs a sizeable amount of energy and has a long cooldown, but its ability to render bosses vulnerable or remove a deadly DoT from your character is priceless.
Level 25 Skills
Elemental Balance
The second and final node for Iskandra’s Elemental Exchange, this skill adds a global % damage buff to all elemental DoTs you deal and boosts the damage multiplier on every critical hit you land. The critical damage buff is really nice to have, especially given the typically high offensive ability of Arcanists, but the damage buffs are kind of meh unless you specialize in an elemental DoT like frostburn for Nightblades or burn for Demolitionists.
Supercharged
The second passive for Replicating Missile, this skill adds electrocute damage to the main and child projectiles of the skill, boosts % elemental damage and critical damage locally, and adds a chance to stun every target hit. Again, if you’re using the Replicating Missile you want to max this, and if you aren’t you want to skip it.
Albrecht’s Aether Ray
More of a ‘bweeeoooommm’ kind of laser than a ‘pew pew pew’ kind of laser, Aether Ray fires an unstoppable beam of aether and fire damage that penetrates all enemies to hit every target along a straight line. This channeled skill requires you to remain stationary and hold down the skill button to maintain its effects and also requires that you have a Caster Off Hand item equipped. Its damage output is huge, but it’s risky to stay standing still for too long at higher levels, and while you’re channeling the Aether Ray you can’t do anything else. The tooltip can be a bit hard to understand, but the skill deals the listed damage every .3 seconds (or faster if you have high casting speed) but drains the listed energy cost per 1 second.
Arcanist Levels 32-50
Levels 32 Skills
Conversion
This passive is connected to Maiven’s Sphere of Protection and modifies the effects of that skill. It doesn’t actually convert anything, but makes you resistant to stun, freeze, slow, petrify, and entrapment effects while also absorbing some energy from incoming spells. It increases the energy reserved and per-second cost of the Sphere of Protection. Crowd control effects become a big threat in the later levels, so this skill is very helpful for any Arcanist.
Tainted Power
This Mutator for Albrecht’s Aether Ray converts 100% of its aether damage into chaos and 100% of its lightning damage into vitality. These are local effects, just the Aether Ray will benefit from this skill. This skill is not recommended for most Arcanists, but if you’ve taken Occultist as your second class, this can help ensure that your damage output is in desired damage types.
Mental Alacrity
This passive skill is the spellcaster’s best friend. It increases your energy, reduces the energy cost of all skills, and increases your casting speed modifier. I would recommend at least one point in this for any Arcanist, but even more for Arcanists who use spells directly benefiting from casting speed such as Callidor’s Tempest and Albrecht’s Aether Ray. Keep in mind that the energy cost reduction affects all skills, not just spells.
Level 40 Skills
Proliferation
This final node for the Panetti’s Replicating Missile line adds more aether and elemental damage to the missile and child fragments, increases the burst radius, and adds more fragments. Pretty straightforward; max it if you are using the missile, ignore it if you aren’t.
Shattered Star
The final node for Trozan’s Sky Shard, Shattered Star adds a chance for extra lightning damage to the shards, boosts % lightning damage locally, and greatly increases the critical damage of the sky shards. It’s kind of inconsistent, but this skill will greatly increase the damage ceiling of the sky shard, particularly in cases of critical hits. If you’re using the sky shard line, you should have some points here too.
Fabric of Reality
For the Arcanist who doesn’t want to use elemental damage, this skill adds aether and chaos damage to all weapon attacks, globally boosts % damage for aether and chaos, and increases your damage multiplier vs enemies with the Aetherial, Aetherial Corruption, or Ch’thonic subtype. These subtypes are often resistant to aether or chaos damage, respectively, so this skill can help you if you are lacking ways to reduce enemy resistances to your main damage type. This skill really shines when Arcanist is being used as a support class for a weapon attack build due to the flat damage bonuses only applying to weapon damage attacks. Callidor’s Tempest users can get some mileage out of it as well.
Level 50 Skills
Reckless Power
The first of two Exclusive Skills available to the Arcanist, this active toggled buff applies a host of benefits oriented towards aether damage builds and spellcasters that use spells without cooldowns. It adds aether damage to all weapon damage attacks, globally boosts % fire, aether, and burn damage, converts some of your physical damage to aether damage globally, increases both your attack and casting speed modifiers, adds some fire retaliation damage, and gives you a chance to stun melee attackers who hit you. Like all Exclusive Skills, this is exclusive of any other Exclusive Skill. I like this skill on aether damage attackers like a Death Knight, or for Callidor’s Tempest builds, but pure casters are missing out on some of the benefits this skill offers and might consider looking elsewhere for their Exclusive.
Devastation
Devastation summons waves of aetherial meteors to pummel a target location several times across the duration of the spell. You can only have one Devastation spell going at once, so cooldown reduction doesn’t help much with this one, and you have to have a Caster Off Hand equipped. The meteors deal aether and fire damage and have a spread, so they may or may not hit enemies in the target area directly. They also have a medium burst radius when they land, so it may not matter if you get a direct hit or not. Devastation is a solid skill that dishes out a lot of damage to a lot of enemies, so most spellcasters who deal the right damage types want to use this one.
Disintegration
Add some ‘zap zap’ to your ‘bweeeooom’ with Disintegration, a passive connected to the Albrecht’s Aether Ray channeled spell that adds lightning and electrocute damage to every damage tick from the aether ray. It also adds local % fire and % aether damage boosts and a boost to critical damage for the parent skill. The listed energy cost is applied per damage tick, as opposed to the listed energy cost per second on the parent skill, so increased casting speed will increase the energy drain applied by Disintegration. Another case of ‘if you use it, max it’, this skill is mandatory for Aether Ray users but completely useless for anybody else.
Star Pact
The second Exclusive Skill available to the Arcanist, Star Pact is oriented towards cold/lightning builds that use cooldown skills. Notably, this skill synergizes incredibly well with Trozan’s Sky Shard. Star Pact is a toggled active buff that applies global boosts to your % cold, lightning, frostburn, and electrocute damage modifiers, adds some frostburn damage to your weapon damage attacks, converts a small amount of physical damage into cold globally and a large amount of aether damage into cold globally, and most importantly adds a cooldown reduction multiplier that lets you cast cooldown spells more frequently.
Shaman Levels 1-10
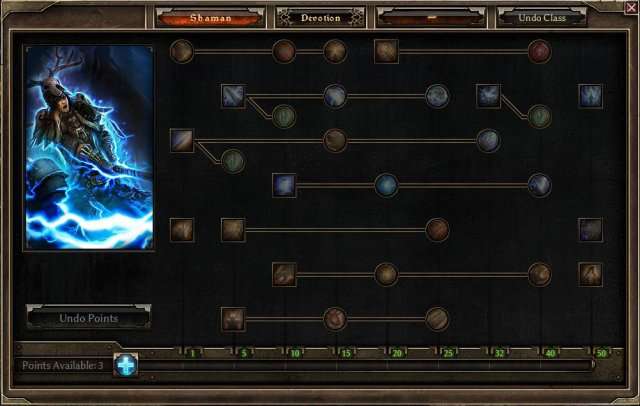
Overview
The mix of big weapons and a set of totemic and beastly summons mark the shaman as a ‘hybrid’, but most people will choose one path or another for this powerful natural warrior. The shaman excels in close combat, where it hits hard and fast(ish) with 2 handed weapons and calls down the fury of lightning storms on its opponents, but is also a competent summoner or elemental mage.
Primary Damage Types: Lightning, Physical, Electrocute, Bleeding, Vitality
Primary Playstyles: All
Attributes per Mastery point:
- 4 Physique / 3 Cunning / 3 Spirit / 26 Health / 12 Energy on all levels
Level 1 Skills
Brute Force
This passive skill adds lightning damage to all weapon damage attacks, globally boosts % physical and internal trauma damage, and boosts your health by a flat value. It only functions when a 2 handed weapon is equipped. It makes you hit harder and survive longer when wielding any 2 handed weapon, so most Shamans will find some use from this skill. It is also required to unlock the Shaman WPS skills, so weapon attackers in particular will want to take at least one point here.
Savagery
The core Shaman attack replacer, Savagery functions by adding stacking ‘charges’ to your character with every Savagery attack. These charges go away over time if you aren’t actively attacking with Savagery, and each charge increases the portion of the listed bonuses that are applied to every Savagery strike. This means that the first couple of hits with Savagery will actually be weaker than a default attack, particularly at low levels in the skill, but once you have a few charges built up the power level skyrockets. Savagery applies a % of your weapon damage, plus some bonus lightning and bleeding damage, while locally boosting % lightning and bleeding damage. Like Fire Strike, there is a minimal energy cost affiliated with Savagery, so be sure you have at least some energy in the tank or you’ll start using default attacks again without noticing.
Devouring Swarm
This active spell is the first step for any Shaman that wants to deal vitality or bleeding damage (or both). It fires a ‘projectile’ that is really a swarm of locust-like insects along a straight line, passing through and affecting all targets along its path with vitality and bleeding damage every second for the listed duration. A sizeable portion of inflicted damage from this spell is returned as health to the caster. Most importantly, this spell applies a big reduction to enemy resistance to vitality and bleeding damage for the duration of the damaging effect. Devouring Swarm doesn’t deal a lot of damage on its own, but when combined with other skills that deal the appropriate damage types, it becomes a real killer.
Level 5 Skills
Primal Strike
This active attack skill usually competes with Savagery for the position of main damage dealer for most Shamans. Primal Strike blasts a target enemy and all its nearby friends with a huge % of your weapon damage, plus some lightning, physical, and bleed damage. It also stuns every enemy in the area of the lightning blast. It is applied via a 2 handed weapon strike, so if you are using a melee weapon, you have to be at melee range to use it. No one handed weapon can be used with this skill, only the big guns can handle this much power. It does use a lot of energy and have a medium cooldown though.
Might of the Bear
A passive Mutator connected to Savagery, this functions by applying a passive buff to physical resistance and a local Total Damage modifier to your character for as long as even a single charge of Savagery is stacked. All benefits are lost when there are no more stacked charges, or if your character stops using a 2 handed weapon (switching between 2 handers is fine).
Grasping Vines
This active spell applies a slow effect, some physical damage, and some bleeding damage every second to all enemies within a stationary field of effect. Its radius starts relatively small but gets larger as you level the skill. Great at stopping mobs of fast moving trash enemies from reaching your character, the damage output of Grasping Vines is not really anything to write home about even at max level, and high level enemies can resist the slow. I recommend this spell for low-mid level Shamans that are trying to make a living as a spellcaster or a gunner. Some builds will be able to make good use of it even in the late game, but don’t be afraid to respec any points you spent in it if you find its utility dropping off as you go.
Mogdrogen’s Pact
A toggled active buff, this skill applies a boost to health and energy regeneration to all friendly entities in range of the user while also adding some physical damage to their weapon attacks. It has a secondary effect of boosting the physical damage of pets of the user. These bonuses aren’t amazing on their own, but the later nodes of this skill are, so basically everybody ends up taking at least one point here anyway.
Level 10 Skills
Feral Hunger
The more traditional of the two Shaman WPS options, Feral Hunger applies a large % of your weapon damage, plus some bonus bleeding damage, to up to 5 enemies in an arc centered on the initial target with a melee attack. If you’re using a ranged weapon you lose the ability to hit multiple enemies but still gain the damage boost. A large portion of the inflicted damage is returned to the attacker as health. This skill is a connected node to Brute Force, and as such it will only trigger when Brute Force is in effect. This means Feral Hunger only works with 2 handed default attacks and attack replacers. It scales very well at high levels, so if you are using 2 handers and default attacks or a replacer, you should definitely max this.
Thunderous Strike
This Mutator for Primal Strike greatly reduces the % weapon damage and Total Damage of Primal Strike and removes the stun effect in exchange for eliminating the skill’s cooldown and cutting the energy cost by more than half. This is the recommended way to use Primal Strike in most cases, since the bonuses and effects from the parent skill will trigger with every attack. This means blasts of lightning constantly hitting huge areas without pause. It remains an attack skill, and cannot trigger WPS such as Feral Hunger.
Wind Devil
The Wind Devil is a pseudo-pet that can be summoned on a medium cooldown that wanders around the battlefield from target to target dealing physical damage, electrocute damage, and applying a fumble chance to enemy melee attacks every second to enemies close enough to the Wind Devil. They move slower than a player and only last 12 seconds, so it is recommended to summon them at the start of combat or thereafter, not in advance. You can have 3 of them going at once, but that’s hard to achieve given the length of the skill cooldown. Wind Devils are a crucial component of the Shaman’s arsenal, but the base skill alone is pretty underwhelming. Consider holding off on getting them until you can pick up the second node at the same time.
Summon Briarthorn
One of two actual Pets available to the Shaman, and the only one that has a permanent duration, the Briarthorn is a mainstay of any summoner build that includes Shaman. The Briarthorn summon creates a nasty, spiky, tanky critter called a Briarthorn that will follow you around and pound your enemies into the ground. The Briarthorn has a ton of health and deals physical and bleeding damage with its attacks. It has some physical retaliation damage as well, so it does best against melee attackers with low armor and a high attack speed. Summoning one costs a lot of energy and has a long cooldown, and you can only have one active at once.
Shaman Levels 15-25
Level 15 Skills
Upheaval
The second, less traditional WPS for Shamans, Upheaval deals a blast of % weapon damage, plus some lightning and bleeding damage, in a radius around the target of the attack. I say it is less traditional because Upheaval has a slightly different trigger mechanic than other WPS do. When you attack with a default attack or an attack replacer, you have a pool of possible outcomes composed of your normal WPS probabilities, and any attack that doesn’t trigger a WPS comes out as a regular attack. Upheaval comes into the mix after your other WPS have failed to trigger and it has been determined that you are launching a normal attack.
As long as you have at least 1 point in this skill, any critical strike that doesn’t trigger some other WPS will come out as an Upheaval strike instead. This means that if you have a net 100% chance of triggering a non-Upheaval WPS, you will NEVER see an Upheaval strike, even if you land a critical hit with a default attack. As such, Upheaval has negative synergy with other WPS, and will be at its strongest when you have a high Offensive Ability and no competing WPS to stop you from triggering Upheaval on every critical hit.
Torrent
Think ‘Chain Lightning’ from Dungeons and Dragons, but triggered every time you hit something with a giant hammer. Torrent is a passive that is connected to the Primal Strike parent skill that functions separately from the Primal Strike blow, but is triggered every time you hit a target with Primal Strike. Torrent generates an arcing chain of electricity that deals a small % of your weapon damage, plus some lightning damage, to a string of enemies standing close together. The last time I used Torrent was several patches ago, but at the time it only affected secondary targets and not the primary target of the Primal Strike. That may have changed in recent patches, but I’m not sure.
Tenacity of the Boar
A passive node connected to Savagery, the full effects of this skill are active at all times when your character has at least 1 stack of Savagery. Tenacity of the Boar adds a large amount to both your Offensive and Defensive Ability, boosts your health regeneration rate, and makes you resistant to slow effects. Notably, and in contrast with Might of the Bear, you can still gain the benefits of this skill if you are wielding a one handed weapon (or dual wielding one handed weapons). Every Shaman who uses Savagery should have this skill at the absolute maximum, no exceptions. Some Shamans will even pick up a point in Savagery just so that they can activate this buff and then use other skills while it lasts.
Heart of the Wild
The real reason to take Mogdrogen’s Pact, Heart of the Wild adds a huge % boost to your health and health regeneration while Mogdrogen’s Pact is active. In addition, it decreases the duration of bleeding and poison DoTs on your character, directly reducing the amount of damage they deal. If you like being alive, this skill is a must. Splashing just 15 levels in Shaman to get to this and Tenacity of the Boar is not unheard of, which should give you some idea how good it is.
Level 20 Skills
Wendigo Totem
Maybe not the most polite way to stay alive, but Wendigo Totem adds a huge amount of survivability to you and friendly entities nearby by inflicting pulses of vitality and vitality decay damage on your foes and healing friendlies standing near the totem with each pulse. The heal pulses every .5 seconds. The damage output is not actually linked to the heal efficacy even though thematically it is turning enemy life force into heals, so even with enemies that are immune to vitality damage or to lifesteal, the totem still heals you. Vitality totem casters will want to max this skill, but anyone can benefit from the healing it grants.
Raging Tempest
The heart and soul of the Wind Devil, Raging Tempest adds cold damage to the ticks from the parent skill while absolutely devastating enemy resistance to all forms of elemental damage. It also applies a small slow effect. Any Shaman build that deals elemental damage will want to max this skill, even if they only have a single point in Wind Devil.
Ground Slam
Remember when I said the Briarthorn would pound your enemies into the ground? Well I was being literal. Ground Slam grants the Briarthorn pet the ability to smash the ground and unleash a radial burst of spines, causing a big chunk of % weapon damage, physical damage, and bleeding damage to enemies hit by one of the projectiles. These projectiles pass through enemies, so they will hit everyone in a tight group at once. Each hit applies a lengthy stun effect (which powerful enemies will resist) and increases aggro generation by the Briarthorn (maybe kinda sorta) in addition to the powerful damage effects.
Level 25 Skills
Storm Surge
A passive buff connected to Primal Strike, Storm Surge makes the blast from the parent skill hit harder, with more lightning and electrocute damage applied to primary targets and a local % damage boost to physical and bleeding damage. This does not affect Torrent’s damage output, just the parent skill. Primal Strikers should max this, but everyone else can ignore it.
Entangling Vines
A sort of sideways attempt to make the Grasping Vines parent skill a viable damage dealer, Entangling Vines adds a host of effects to Grasping Vines. It adds vitality decay damage for some reason, boosts physical and bleeding % damage locally, adds a chance to immobilize targets and a separate chance to slow their attacks, and adds a small % of your retaliation damage to the damage of the parent skill. If you have decided that you want to use Grasping Vines as a killing spell instead of a way to slow down enemies so you can cast spells or fire guns in peace, Entangling Vines is critically important to keep the skill relevant into the late game. Everybody else can ignore it.
Oak Skin
The other real reason to take Mogdrogen’s Pact, Oak Skin increases the armor, aether resistance, and pierce resistance of those effected by Mogdrogen’s Pact while globally boosting their % retaliation damage. It cannot be overstated how important it is to have max resistances by the end of Ultimate, and this skill helps make it happen.
Shaman Levels 32-50
Level 32 Skills
Storm Totem
The second Shaman totem skill, Storm Totem applies lightning and electrocute damage to multiple targets in a ‘chain lightning’ style attack with each blast. As a totem, it scales with player bonuses, so lightning attackers can still get some mileage out of this skill if they have points to spare after filling out Savagery or Primal Strike. Also as a totem, it can be destroyed by enemy attacks should they reach it. Storm Totem is quite useful as a way to trigger Devotion skills that have little to no cooldown, as it fires quickly and hits many targets sequentially with each shot.
Storm Touched
The final passive connected to the Savagery line, Storm Touched is a buff that remains active while Savagery has at least 1 stack active. Storm Touched adds electrocute damage to weapon attacks and global % physical damage, boosts your attack speed while it is active, and adds a small local chance of a big % lightning damage boost with each strike.
Level 40 Skills
Blood Pact
Blood Pact is a passive skill that works with the Wendigo Totem. If you and your allies are near the totem, you get a buff. This buff adds vitality damage to any weapon attacks. It also gives a general damage boost to vitality, bleeding, and vitality decay damage. Plus, you get a little bit of health back when you hit enemies with weapon attacks.
It’s good to know that the buff doesn’t start working right away after you put the totem down. It seems like it checks for allies around it every second to apply the buff. The healing and damage from the Wendigo Totem itself might check more often, like every half-second, but I’m not completely sure about that and would need to test it more to be certain.
Corrupted Storm
Really only helpful for the vitality focused Shaman, this Mutator for Storm Totem transforms the lightning and electrocute damage from the Storm Totem into vitality and vitality decay without changing the targeting behavior of the parent skill. Since the Wendigo Totem also deals vitality damage, Vitality Totems is a solid build choice for a Shaman who doesn’t want to get their hands dirty with all the close up melee skills earlier in the skill tree.
Maelstrom
Somewhat overshadowed by its younger cousin, Raging Tempest, Maelstrom can still provide a powerful boost to the connected parent skill, Wind Devil. Maelstrom adds arcing blasts of lightning to the Wind Devil, dealing lightning and electrocute damage to chains of enemies who are in range of the skill. Since it is a chain effect, only the initial target needs to be in range of the Wind Devil, and the damage will chain to subsequent targets within range of each impacted enemy.
If the Wind Devils were smarter and faster, this would be a real powerhouse, but you may find that even after maxing this skill, the damage output of the Wind Devil remains lacking when compared to its ability to reduce enemy resistances to more reliable elemental attacks like Primal Strike.
Emboldening Presence
Emboldening Presence adds an aura to the Briarthorn pet that boosts all forms of damage, Offensive Ability, retaliation damage, and physical and bleeding resistances for all friendly entities in range of the Briarthorn. Because who doesn’t feel better knowing the big nasty spine monster is on their side?
Level 50 Skills
Stormcaller Pact
The first of two Exclusive Skills available to Shamans, this one is focused on lightning damage output with a small secondary focus on cold damage output. Like all Exclusives, it is exclusive with others of its kind, and functions as a toggled buff that remains active once enabled. Stormcaller Pact adds electrocute damage to all weapon damage attacks, globally boosts % cold, electrocute, and frostburn damage, has a chance of massively boosting % lightning damage, greatly increases your critical damage multiplier, converts some of your physical damage to lightning globally, and reduces the duration of stun effects applied to your character.
The lightning damage boost is somewhat inconsistent (only 33% chance) and honestly not that necessary when you add up all your other lightning damage buffs, so the real benefit of this one is usually the critical boost. I recommend Stormcaller Pact in situations where you desperately need to increase your physical to lightning conversion rate, or when you don’t have access to other, better Exclusives for lightning or elemental damage.
Conjure Primal Spirit
The final Pet option for Shamans, these nasty manticore-like creatures have a short lifespan, but deal a lot of physical and bleeding damage with their normal attacks and have a special tail strike that deals poison, piercing, and a % of their weapon damage, plus stuns enemies. I’ll be honest, I don’t like this skill very much.
The 20 second lifespan, 40 second recharge, and huge energy cost make them kind of a situational skill, and they don’t really perform that much better than a fully upgraded Briarthorn. In their favor, it only takes 12 points to max Primal Spirit as opposed to 40 for Briarthorn, but I find that if I’m running a summoner, I almost never use Primal Spirits. Either my other pets are enough for the encounter, or the temporary addition of one more won’t make the difference.
Primal Bond
The second (and superior, IMHO) Exclusive Skill available to Shamans, Primal Bond is focused on bleeding damage, physical damage, and pets. It is, as usual, a toggled active buff that cannot be active at the same time as any other Exclusive Skill.
Primal Bond grants a damage absorption buff to the user, along with globally increased % physical, internal trauma, and bleeding damage, a bleeding damage bonus to all weapon attacks, and a reduction in damage received from beast subtype enemies (which is not really that important but can be nice against particular bosses). For Summoners, it increases the damage output of all your pets in all damage types, multiplies their critical hit damage, and adds bleeding damage to all their weapon damage attacks.
Inquisitor Levels 1-10
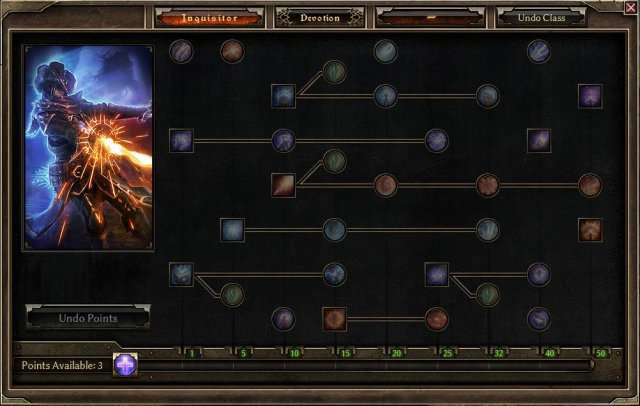
Overview
Widely decried as overpowered at the time of its release, the Inquisitor has been subsequently rebalanced to fit the power level of other classes, but still holds the position of ‘most powerful’ in my mind. Inquisitors possess skills oriented towards the use of ranged weapons, especially dual pistols, or runic traps and spells to unleash massive amounts of elemental damage on enemies at medium range. They can heal themselves and lay down sigils that make them very hard to kill when within the boundaries of the ritual circle, and can apply powerful debuffs to enemy damage output. There really isn’t anything the Inquisitor can’t do, except summon. Requires Ashes of Malmouth DLC
Primary Damage Types: Fire, Burn, Cold, Frostburn, Lightning, Electrocute, Pierce
Primary Playstyles: Gunner, Dual-Wield, Caster, DPS, Support
Attributes per Mastery point:
- 3 Physique / 4 Cunning / 4 Spirit / 23 Health / 15 Energy on Odd numbered levels
- 2 Physique / 4 Cunning / 3 Spirit / 23 Health / 15 Energy on Even numbered levels
Level 1 Skills
Ranged Expertise
The heart and soul of the Inquisitor is the ability to dual wield pistols, and this skill is how the magic happens. When you put even a single point in this skill, you become able to wield a one handed ranged weapon in each hand. Some items grant this ability as well, but they are rare. It also adds piercing damage to every weapon damage attack, boosts your % damage to piercing and elemental damage types, and increases your attack speed. All bonuses are instantly lost if you switch to any non-ranged weapon, but they do apply if you are using a rifle!
Word of Pain
A core spell for the Inquisitor, the word of pain applies a ticking effect to all enemies in the target area that applies fire and cold damage every second. The base skill isn’t great but as you level it and fill out the attached nodes, it becomes quite powerful and gains important abilities such as resistance reduction and increased target area and duration. Low level Inquisitors will probably find it underwhelming, but the pros know that this one is a must if you’re dealing piercing, chaos, or aether damage. Alternatively, you could focus on elemental damage and let the damage ticks wear down enemies before you finish them off with other powerful elemental spells.
Storm Box of Elgoloth
The first of the single elemental spells for the Inquisitor, the storm box is affiliated with…Lightning. Bet you weren’t expecting that. Storm Box is an active spell that applies a lasting effect to a target creature that applies lightning and electrocute damage to the target and nearby enemies every second while reducing their defensive ability as well. The effect is centered on the original target, so if it moves, the spell’s effects move with it. It has a short cooldown and a low energy cost, so it can be cast frequently to spread lots of lovely lightning all over the battlefield.
Level 5 Skills
Bursting Round
The first of three elemental WPS available to the Inquisitor, this one deals a % of your weapon damage, plus some bonus fire and physical damage, in a blast radius around the initial target. Bursting Round and its sisters can only trigger when wielding a ranged weapon of some type. It scales better than the other two Inquisitor WPS, so if you’re using guns and default attacks or replacers, you should probably max it. Pass-through effects make this one a beast since it will explode on contact with each target it hits along the initial trajectory.
Rune of Hagarrad
For a while after Ashes of Malmouth came out, this was basically the only skill anybody talked about or considered using in high level play. The first of two ‘rune’ type skills and the second of the single elemental spells the Inquisitor can use, this skill is affiliated with Cold. The Rune of Hagarrad places a stationary rune on the ground that takes a short time to become active, but once it is active it will explode into a radial burst of icicles that spread outward along straight lines from the point of origin. Each icicle deals piercing and cold damage to enemies along its path, and will pass through all enemies along the way to its maximum range.
The tooltip mentions that the icicles deal reduced damage the closer to the point of origin they are. This is because a target at the very center of the rune could possibly be hit by all of them at once for massive damage! They can be stopped by terrain features, so this skill is best used in either extremely tight or extremely open spaces to maximize the number of foes you can hit with the initial shotgun or maximize the number of foes that can be hit once the icicles reach full power
Allagast’s Arcane Net
This Mutator for Storm Box of Elgoloth converts 100% of the lightning damage from the Storm Box into aether. This does not effect electrocute damage because aether has no DoT component, so you’ll be left dealing a mix of aether and electrocute damage. It also applies a small Total Damage boost to the Storm Box. There is a particular max level item set that plays very well with this skill, but unless you are focused on aether damage or using that set, it doesn’t add much in my opinion.
Level 10 Skills
Word of Renewal
Sweet, delicious healing, plus some awesome buffs. Word of Renewal is an active skill that applies an instant healing effect to the caster and all nearby friendly entities as well as applying a buff that lasts a long time. The buff grants damage reduction versus eldritch and ch’thonic enemies, increases Defensive Ability by a large amount, and increases movement speed. I recommend some points in this for every Inquisitor, if not necessarily max.
Word of Agony
The first connected node to Word of Pain, this skill adds lightning damage to every tick of the parent skill, boosts % fire and cold damage locally, and increases the target area of the Word of Pain. It also applies a reduction to enemy health regeneration rates and a chance for impaired aim (prevents ranged attacks from landing) to anyone inflicted with the Word of Pain. If you are using Word of Pain, you need a few ranks here to make the target area not miniscule.
Flames of Ignaffar
The Flames of Ignaffar skill is a channeled effect that creates a conic flamethrower in the direction you are facing, dealing fire and burn damage plus a small % of your weapon damage every .3 seconds (or faster with increased casting speed). It costs a lot of energy to maintain and doesn’t deal that much damage, but it includes some of your % weapon damage in the total which enables it to steal life and energy and trigger other weapon-damage effects. It’s…ok. It costs a lot of skill points to get all its nodes filled out, and even then it doesn’t measure up to other channeled spells like Albrecht’s Aether Ray while still suffering from the drawbacks of a channeled spell. You could probably make a build that would take you to UItimate with it if you wanted to, but I recommend other options from the Inquisitor’s vast arsenal.
Deadly Aim
A triggered passive buff in the vein of Fighting Spirit from the Soldier tree, but with different trigger conditions. Deadly Aim applies a big global % all damage boost, a global boost to critical damage, and a truly massive % boost to Offensive Ability while active. This makes it most effective if your character already has a lot of sources for Offensive Ability that can be boosted by the buff. To trigger the skill, simply land a critical hit on any target with any skill or attack. It lasts a short time but it has an equivalently short cooldown.
Inquisitor Levels 15-25
Level 15 Skills
Word of Arms
This Mutator for Word of Renewal drastically reduces the cooldown of the parent skill and adds a bonus to energy regeneration. It’s a pure upgrade, but you can only gain the benefits of Word of Arms when you have a 2 handed weapon equipped.
Biting Cold
This passive is connected to the active skill Rune of Hagarrad and as such only applies its benefits through the effects of the parent skill. Biting Cold increases % cold and piercing damage locally for the icicles from the Rune of Hagarrad and applies a massive Defensive Ability debuff to enemies hit by an icicle. If an enemy is hit by multiple icicles, the debuffs do not stack. It also applies a slow effect to attacks from enemies who aren’t resistant to slow. Any rune user should have some points here for the defensive debuff alone.
Lightning Tether
A bit challenging to use well, but worth it if you can master it. Lightning Tether is a passive connected to the Storm Box of Elgoloth active skill that generates a continuous arc of electricity between you and the target of the Storm Box for as long as the enemy is under the effects of the Storm Box. It deals lightning and electrocute damage to all enemies in the path of the arc, and applies a slow effect to them if they aren’t resistant. If the distance between you and the target grows too great (think about a screen’s length) then the tether will dissipate and will not come back without re-casting Storm Box even if you get closer to the target again. If you are using Allagast’s Arcane Net to mutate Storm Box, Lightning Tether is unaffected by the modifiers from Arcane Net.
Rune of Kalastor
The second of two ‘rune’ type skills for the Inquisitor, the Rune of Kalastor active skill places a runic symbol on the ground that takes a short time to arm. Once armed, the rune will shatter into several explosive child projectiles if an enemy comes into contact with it, dealing physical, piercing, and fire damage to all enemies in the blast radius of a projectile while applying a chance for knockdown to enemies that aren’t resistant. Kind of a funky mix between Canister Bomb and Thermite Mine, Rune of Kalastor has never quite made it into any of my Inquisitor Builds. It isn’t a bad skill, but I have always found other things to spend skill points on.
Level 20 Skills
Chilling Rounds
The second Inquisitor WPS is aligned with cold. Chilling Rounds gives you a chance to fire a barrage of three shots from your gun(s) that deal a moderate % of your weapon damage, plus cold, frostburn, and piercing damage, with a chance to freeze targets hit by the projectiles. For Tri-Elemental or cold focused Inquisitors, this skill is a great way to boost the potency of your basic attacks. It only works when you have a ranged weapon equipped. It scales quite well up to level 8 but then you hit diminishing returns.
Vigor
This passive is connected to the Word of Renewal and only applies its effects to those under the effects of the parent skill. Vigor increases your health and makes you resistant to petrify, freeze, and entrapment effects for the duration of the Word of Renewal. More health is always nice, but the amount it grants doesn’t scale terribly well. The crowd control resistance is great though. It’s a pretty good skill, but I find it frustrating that the health buff is applied after the healing from the parent skill, so you end up using constitution every time you cast the spell.
Intensify
This passive is connected to the Flames of Ignaffar and makes the parent skill deal extra lightning damage and reduce enemy defensive ability each tick. If the Flames of Ignaffar weren’t so bad, this would be a nice skill, but you probably don’t want to waste your points here unless you’re making a focused flamethrower build.
Level 25 Skills
Death Sentence
The real killer in the Word of Pain skill line, Death Sentence adds elemental damage to every tick of the parent skill and, crucially, reduces enemy resistance to piercing, aether, and chaos damage. You may have noticed by now that skills granting a reduction to enemy resistances are rare and I usually recommend maxing them if they match your damage type. The same logic applies here. Any piercing damage, aether damage, or chaos damage you deal will be greatly increased against enemies under the effects of Death Sentence.
Inquisitor Seal
A really amazing defensive skill that often gets ignored by new players, the Inquisitor Seal functions by placing a runic circle on the ground at the target location near the player. When you stand in the circle, you receive damage absorption, elemental resistance buffs, and increased health regeneration. When enemies stand in it, they take fire damage every second, with a big local boost to the damage output if the enemy has the aetherial, ch’thonic, eldritch, or aether corruption subtype.
Ignition
Adds some boom to the parent active, Rune of Kalastor, by making the initial detonation deal more damage. This skill adds fire and burn damage to the Rune of Kalastor and applies a chance to stun enemies in the initial blast radius. For runecasters, this could be really good, but anyone not using the Rune of Kalastor as a main skill can skip it.
Inquisitor Levels 32-50
Level 32 Skills
Steel Resolve
This passive adds its effects to the connected parent skill, Word of Renewal. All entities affected by the parent skill will receive extra physical damage for weapon damage attacks, a global boost to % physical, internal trauma, and elemental damage, a global boost to damage dealt to enemies with the ch’thonic or eldritch subtype, and increased aether and chaos resistance. It’s a great skill to splash a couple points in for the resistance boost, and if you’re dealing physical damage or converting physical into something else, it gets even better.
Infernal Purge
Another node for Flames of Ignaffar, this one adds electrocute damage to each tick of the parent skill while locally boosting % fire and lightning damage and locally boosting critical damage multipliers. Same as before, if you’re using the flamethrower as your primary skill, max it. Otherwise, skip it.
Chillsurge
The final upgrade for Rune of Hagarrad, this skill adds its effects to the parent skill by increasing the number of icicles generated by the rune, adding frostburn damage to each icicle, and adding a chance to freeze enemies hit with an icicle. It makes an already very powerful skill even better, so I recommend all users of Rune of Hagarrad to level this as high as possible.
Null Field
This Mutator for the Inquisitor’s Seal adds a large chance to deflect incoming projectiles to all friendly entities in the seal, but at the cost of reduced casting speed. If you’re not using casting speed, eg for a weapon attack build, then this skill is a no-brainer. Casters should think twice about it but may still find it helpful to have a 1/4 chance of not getting hurt by every projectile.
Level 40 Skills
Storm Spread
The final Inquisitor WPS is aligned with lightning, rounding out the WPS options and providing something for any element. Storm Spread adds a chance to fire a conic spray of electrically charged projectiles that deal a small % weapon damage, plus some lightning, electrocute, and piercing damage. The spread on this is pretty broad, and each projectile deals a relatively small amount of damage, but if you want to hit many targets at once it can still be a good addition to your arsenal. I recommend aiming for level 7 to get the fourth projectile, but the low scaling of the damage output means you should probably not go higher.
Horn of Gandarr
The Horn of Gandarr is a burst active centered on the player that deals % weapon damage plus some piercing damage to all enemies in the radius of the skill. It also applies damage reduction to all elemental and physical damage dealt by effected enemies with a long lasting confuse effect thrown in for good measure.
I’m unsure why the inquisitor has this skill, since it doesn’t really fit thematically with any of the other skill types the Inquisitor uses. I’m not complaining though, since this is a real powerhouse when fully levelled, capable of blasting a huge area with good damage output and some helpful debuffs.
Arcane Empowerment
This passive adds its effects to the buffing effect of the Inquisitor’s Seal, granting friendlies in the bounds of the field bonus piercing and elemental damage to all weapon attacks, increased global % all damage, increased global critical damage, and some fire retaliation damage. The Seal is a great defensive tool for any Inquisitor, but this effect is really at its best for weapon users since most spells do not benefit from the piercing and elemental boosts. That said, the % all damage and % critical damage can help anyone.
Artifact Handling
Artifact Handling functions similarly to Ulzuin’s Chosen from the Demolitionist tree in that it is a passive whose effects only apply to a specific set of skills, in this case the two Runes (Hagarrad and Kalastor). Artifact Handling grants a cooldown reduction to the two runes while boosting their Total Damage modifier and their critical damage. It’s a real powerhouse because the Inquisitor has many other ways to boost critical damage and offensive ability, so you can deal some truly stupid damage numbers with the Rune of Hagarrad in particular using this skill.
Level 50 Skills
Aura of Conviction
The first Exclusive Skill available to Inquisitors, the Aura of Conviction is a powerful toggled buff that adds piercing damage to all weapon damage attacks, globally boosts % piercing, burn, frostburn, and electrocute damage, adds a bunch of Offensive Ability, increases the very valuable physical resistance, and reduces the duration of burn effects on your character. The damage types may seem strange at first, but due to the way conversion works, characters who convert elemental damage to piercing damage will still deal burn, frostburn, and electrocute along with a bunch of piercing damage. The elemental DoTs cannot be converted to piercing because piercing has no DoT component. Aura of Conviction is a staple of piercing builds and especially builds that convert elemental damage to piercing, but it is often overshadowed by its cousin, Aura of Censure.
Endless Flame
Here is the final node of Flames of Ignaffar, for those doughty few who have endured my criticisms and persisted in using the flamethrower as their primary skill. It increases the % burn and electrocute damage modifiers locally, adds a chance for enemies to fumble melee attacks, and decreases the skill energy cost. I find this particular node to be kind of…bad. It’s at level 50, darn it, shouldn’t it actually do something useful? If you want to make Flames useful, max it, otherwise don’t.
Aura of Censure
Finally. I’ve been looking forward to this. Aura of Censure, aka the best damn skill in the game, causes a burst effect centered on your character every second while it is toggled on. This burst effect deals a small amount of fire and burn damage, has a chance to disrupt enemy skills (rendering them unusable for the duration listed), reduces all (!!) enemy damage output for the duration listed, and reduces enemy elemental resistance by a sizeable amount across a medium range. If you deal elemental damage (and most inquisitors do), then this skill is the ultimate and best thing you can possibly spend points on. Max it, hunt for items that boost it, have it on at all times.
It does so many good things and it does them without active input from the player. If you don’t deal elemental damage it loses some of its lustre, but it can still be useful for the disruption and damage reduction effects. Its range is shorter than that of most firearms, so keep in mind that enemies at the extreme edge of your range will not be disrupted or debuffed by this skill.
Necromancer Levels 1-10
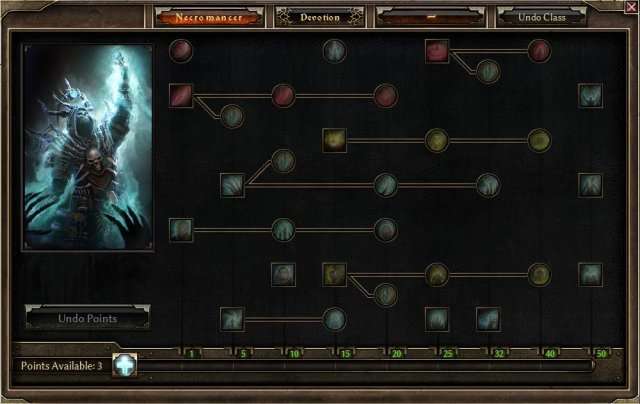
Overview
The second expansion class from Ashes of Malmouth, after the Inquisitor, the Necromancer is a forbidding spellcaster and summoner who can be paired with other classes to become a powerful melee fighter instead. The Necromancer has many abilities that steal life from enemies, giving it great sustain. Split between summons, direct damage spells, and some particularly powerful buffs and auras, the Necromancer can excel in any role but is best used in conjunction with another class that fleshes out the chosen archetype. Requires Ashes of Malmouth DLC.
Primary Damage Types: Aether, Vitality, Vitality Decay, Cold, Poison
Primary Playstyles: Any
Attributes per Mastery point:
- 4 Physique / 2 Cunning / 4 Spirit / 19 Health / 19 Energy on all levels
Level 1 Skills
Reaping Strike
The first WPS for the Necromancer, Reaping Strike deals a good % of your weapon damage, plus some aether and vitality damage, while converting a big chunk of this damage to health for you. It also applies an energy leech effect to opponents which can be a real boon if you have problems with energy regeneration.
Drain Essence
The core spell for a caster Necromancer, Drain Essence is a channeled spell that requires you to remain stationary and hold down the skill button while using it. It deals aether damage and vitality decay damage every .3 seconds (or faster with improved cast speed) and converts a lot of that damage to health for you. It is a fairly uncomplicated skill to use and has respectable damage output even without any of the connected nodes, but later skills can make it obsolete if you don’t focus on upgrading it continuously.
Raise Skeletons
The core summon for a pet focused Necromancer, Raise Skeletons summons a trio of skeletons to do your bidding. The exact type of skeleton is randomized, with the chance for more powerful types increasing as you level the skill. At level 1 it’s mostly going to be skeleton warriors, but by level 16 you’ll see a lot of different types of skeleton. These are not the most durable pets, even when fully upgraded, but they deal respectable vitality and physical damage and can be powerful in large numbers. The base skill only allows 3 skeletons to be active at once, but later nodes change that.
Level 5 Skills
Gravechill
This Mutator changes the basic Drain Essence spell by adding a Total Damage buff, reducing the lifesteal effect, adding a slow effect to targeted enemies, and converting all of the aether damage of the skill into cold. Most Necromancers won’t want to take this, since aether damage is much easier for a Necromancer to boost, but some cold focused builds can get immense utility out of this mutation.
Bone Harvest
A core skill for melee oriented Necromancers, Bone Harvest functions in a similar way to Forcewave from the soldier tree, but with a broader target area and different damage types. Bone Harvest is an attack skill that creates a conic blast of sharpened bone shards that erupt from the ground to eviscerate your foes in the target area. It deals a bunch of % weapon damage, plus some cold, vitality, and piercing damage, and slows the movement of enemies struck by the blast.
Spectral Binding
A really great buff, this toggled active adds aether damage to all weapon damage attacks, boosts % aether damage globally, and increases your health and offensive ability while active. Every Necromancer except the most dedicated of summoners should have points here for just the health and offensive ability buffs. Aether weapon users benefit even more.
Level 10 Skills
Hungering Reach
This connected node modifies the parent Drain Essence skill by adding a chance to affect multiple targets in the vicinity of the primary target. The chance is pretty low, but it is really important for making the spell viable in later levels because it spreads damage to many targets at once and therefore heals you even more. Speaking of healing, Hungering Reach also boosts the lifesteal of the parent skill, as well as the critical damage multiplier.
Harvester of Death
This Mutator for Bone Harvest requires that you have a 2 handed weapon equipped. If you do, your Bone Harvest gains a bunch of % weapon damage and a Total Damage buff, but has its range substantially reduced. Most importantly, this mutator converts all physical damage into cold locally, which can be unhelpful and lower your DPS if you aren’t specced for cold (but what if you use a weapon that deals non-physical damage in the first place….)
Undead Legion
Increases the summon limit for skeletons, allowing you to have more active at the same time. Does not increase the number you summon per cast of the parent skill, so you’ll need to summon more than once to fill out the limit. It also reduces the cooldown and energy cost of the parent skill by a lot. If you are summoning skeletons at all, you want to have this skill maxed.
Ill Omen
A skill that never really caught my eye, Ill Omen is an active skill that applies its effects in a small radial burst centered on the target. It deals a tiny amount of cold and vitality decay damage, reduces enemy physical damage output, and slows enemy movement speed for a duration. It can be used as a trigger skill for certain devotion effects, but otherwise it’s kind of meh.
Necromancer Levels 15-25
Level 15 Skills
Necrotic Edge
The second Necromancer WPS, Necrotic Edge adds cold damage and vitality decay damage along with a reasonable % of your weapon damage to your attack and applies it to multiple targets in an arc centered on the initial target of your attack. If Reaping Strike was Markovian’s Advantage, Necrotic Edge is Zolhan’s Technique. Interestingly, users on Reaping Strike will be dealing different damage types than users of Necrotic Edge, so I don’t usually recommend them both for the same character unless you know what you’re doing.
Ravenous Earth
Another spell for the caster type Necromancer, Ravenous Earth creates a rupture in the ground that spews forth projectiles that deal vitality and poison damage to any enemy in a small radius around where they strike. It’s particularly useful for casters looking to trigger bound devotion skills repeatedly and consistently, but it can do a lot of damage on its own too.
Summon Blight Fiend
The bigger and beefier summon available to the Necromancer, the Blight Fiend fills the role of front line tank better than the skeletons do, but there’s only one Blight Fiend at your disposal at any given time. The Blight Fiend deals physical and poison damage with its base attack and will explode when slain, dealing acid and poison damage to all nearby enemies.
Spectral Wrath
A bit of confusion often ensues when newbie necromancers see this skill, because it applies negative effects but it is connected to an active buff that is applied to the player. Spectral Wrath adds a retaliatory effect to the Spectral Binding parent skill that will fire bolts of ghostly energy at targets that strike you (ranged attacks too!) when the skill is not on cooldown. These bolts cause vitality and aether damage every second and a lasting debuff to enemy resistances to vitality, aether, and physical damage as well as decreasing their attack speed. These effects are applied in a radius around the initial target (the enemy who hit you) and can easily affect a whole group of foes.
Level 20 Skills
Decomposition
The final node of the Drain Essence skill line, this passive adds its effects to the parent skill. Decomposition adds a hefty amount of vitality damage to each tick of the parent skill (every .3 seconds or faster, remember), adds a local % vitality decay damage boost, and debuffs enemy Offensive Ability. As usual, it increases the energy cost of the parent skill. Any drain essence caster can benefit from this skill since it adds damage and a strong debuff.
Dread
Dread is a passive connected to the Bone Harvest parent skill, and applies its effects to that skill. It adds a huge amount of vitality decay to the Bone Harvest damage total, increases the effect range (crucial if you’re using the mutator!), adds a chance to confuse targets, and locally boosts % piercing, cold, and vitality damage. If you plan on ever using Bone Harvest, you need a point in this to maximize your range. If you plan on frequently using Bone Harvest, you should max it to increase the damage output
Will of the Crypt
Make your skellies a little more ominous with this passive skill. It adds vitality damage to all skeleton attacks, locally boosts their % elemental and vitality damage, converts a bunch of their physical damage to vitality, increases their vitality resistance by a lot, and increases their armor by a lot. It’s pretty much mandatory for skelemancers of any variety to max this skill, but sometimes you want to skip it to prevent damage conversion from taking part of their physical damage and making it vitality.
Level 25 Skills
Siphon Souls
This active spell applies a burst effect centered on the player. All enemies in the blast radius will be inflicted with a ticking effect that deals vitality damage every second, reduces health regeneration rate, and returns some of the inflicted damage as health to the caster. It covers a broad area and, since it ticks every second, can trigger bound devotion skills on every tick. The damage output isn’t too shabby either.
Decay
This effect adds local % poison and % vitality buffs to the Ravenous Earth parent skill and applies a damage reduction effect to any enemy hit by the parent skill. It’s pretty good, if you’re using Ravenous Earth much, you should probably have at least one point in it.
Rotting Fumes
This passive adds an aura of ticking poison damage to the Blight Fiend that also applies some really hefty debuffs to enemies in the vicinity. Any effected enemy will have its Defensive Ability cut drastically, have a small fumble and impaired aim chance, and will be encouraged to target the Blight Fiend over other enemies (ha ha, aggro control still doesn’t work)
Call of the Grave
Makes pets better, period. When you activate this skill, your pets will deal a lot more % all damage, with extra buffs to % vitality and poison damage, will deal extra critical damage, and will regenerate health very fast. It lasts a very respectable 10 seconds, but has a long cooldown.
Necromancer Levels 32-50
Level 32 Skills
Sear Souls
This Mutator modifies the Siphon Souls active skill by decreasing the Total Damage per tick, decreasing the health steal effect, increasing the duration of the skill, and converting the vitality damage it deals into aether. It can yield a net damage gain if you are better with aether than vitality, but otherwise it’s not worth the reduction in Total Damage and lifesteal just to make the skill last longer. Enemies shouldn’t be alive so long that you need the extra six seconds anyway.
Soul Harvest
This skill is the ‘Deadly Momentum’ of Bone Harvest in that it applies a temporary buff to your character every time you use the parent skill. The buff increases cold and vitality damage dealt by all weapon damage attacks, globally boosts % cold, frostburn, vitality, and vitality decay damage, and increases your pets’ % all damage and vitality damage on weapon attacks. The numbers on this are quite good, so if you’re dealing cold or vitality damage with a weapon, it’s definitely worth your time to take this skill to its ceiling.
Mark of Torment
The second best active skill for not dying, after Mirror of Ereoctes, Mark of Torment applies an active effect to you and a target enemy that reduces the damage you take and transfers an amplified percentage of that damage to the target enemy. If the linked enemy dies, you lose the benefits of the damage reduction until you apply the mark to another enemy. This skill is a life-saver that can make you near invulnerable for respectable periods of time and gains effectiveness the more powerful the target enemy is (since they won’t die quickly), so basically every Necromancer should put some points here. It has a long cooldown and reasonably high energy cost, unfortunately. Korvaak help your enemies if you somehow were to gain access to both Mirror and Mark on the same character…
Level 40 Skills
Blood Boil
Blood Boil lends its benefits to the ticking effects of the parent skill, Siphon Souls. It adds bleeding and vitality decay damage to each tick and applies an Offensive Ability debuff to enemies under the effects of Siphon Souls. I recommend thinking carefully before investing here, since you will be gaining nominal damage output increases and a relatively small Offensive Ability reduction for your first few skill points. However, if you max the skill, these ‘small’ numbers become quite large indeed, and can be applied quickly to many enemies with the large radius of the parent skill. Dedicated vitality casters should especially consider picking this one up.
Foul Eruption
In my opinion, this is one of the few ‘great on paper, not in practice’ skills in Grim Dawn. Foul Eruption causes enemies slain by the Ravenous Earth parent skill to explode in a burst of aether and vitality damage while also reducing enemy health by a direct % and reducing their resistances to all types of damage. It sounds great, especially the resistance reduction, but I find that the ‘on death’ trigger condition is too restrictive.
Ravenous Earth deals reasonable damage, but it’s not a nuke. Further, the resistance reduction is of a type that doesn’t stack with other reductions of the same type, so you might not be getting any benefit from that portion of the skill anyway. I’d recommend that you try it out for yourself if you’re using Ravenous Earth and draw your own conclusions on its usability. It definitely gains in effectiveness as you level the parent skill, so don’t splash a couple points in this line and hope for good returns.
Blight Burst
The final node for the Blight Fiend, Blight Burst allows the Fiend to release a burst of acid, poison, and vitality damage, plus some % weapon damage, on all enemies in a large radius centered on the Fiend. It also applies a confuse effect and theoretically increases Aggro generation against all enemies in the blast radius. It’s quite a good skill for increasing the damage output of the Fiend, but don’t count on that Aggro increase doing anything for your survivability.
Level 50 Skills
Harbinger of Souls
The first Exclusive Skill for the Necromancer, this toggled buff is oriented towards dealing vitality damage and stealing health. Like all skills of its type, you can only have one going at once. Harbinger of Souls adds vitality damage and vitality decay damage to all your weapon damage attacks, adds a big % lifesteal to all your weapon damage attacks, globally boosts % aether, vitality, and vitality decay damage, converts some of your physical damage to vitality globally, and boosts your attack and casting speed.
This skill is the recommended Exclusive for any weapon damage attacker who is using vitality or aether damage due to its massive damage synergy and lifesteal increase. Vitality and aether casters can also gain good benefits here, but might be able to do better in another class.
Reap Spirit
Sort of a mix between an attack, a spell, and a summon, Reap Spirit has two stages. The first stage is a directed attack that deals a large % weapon damage, plus a lot of bonus aether and vitality decay damage, to a target enemy at a large energy cost. In the aftermath of this blast of damage, a spectral wraith is torn from the enemy’s soul and placed under your control for 18 seconds before disappearing.
You can only have one wraith active at once, and each casting of this spell will dispel any previous wraith to make room for a new one. Wraiths deal a lot of cold and vitality damage with their attacks but are relatively fragile when it comes to health pool. Wraiths also scale with Pet bonuses, while the initial blast of damage scales with Player bonuses.
Master of Death
The second Necromancer Exclusive Skill is oriented towards Pets and critical hits. It is exclusive, like all others of its type, and applied as a toggled buff. While active, it boosts your character’s Offensive Ability by a huge %, your Defensive Ability by a more moderate flat value, and your vitality resistance. The real power of the skill is in the pet bonuses it grants though.
While active, your pets will benefit from a moderate global boost to % all damage, with further global boosts to % acid, poison, and vitality damage, will have a portion of their physical damage converted to vitality, will have their Offensive Ability greatly boosted, and will benefit from increased vitality resistance. This is a real boon to summoner Necromancers since its damage boosts synergize well with the damage types of all the Necromancer pets, but other classes may find limited utility here. The boost to Offensive Ability is great, but I would recommend finding another Exclusive if you aren’t a summoner.
Oathkeeper Levels 1-10

Overview
The final expansion class, the devout Oathkeeper is a whirlwind of powerful single target and area attacks with a smattering of passives and self-buffs and a notably powerful pseudo-pet available at high mastery levels. The Oathkeeper specializes in the use of a shield, gaining several abilities that grant damage bonuses and other cool stuff when wielding a shield, as well as the unique ability to throw that shield Capt. America style while still somehow magically using it to block attacks…don’t ask how. This class requires Forgotten Gods to unlock.
Primary Damage Types: Fire, Burn, Physical, Internal Trauma, Acid, Poison, Vitality, Vitality Decay
Primary Playstyles: Melee, Shield User, Tank, DPS, Support
Attributes per Mastery point:
- 5 physique / 3 cunning / 3 spirit / 25 health / 13 energy on Odd numbered levels
- 5 physique / 2 cunning / 2 spirit / 25 health / 13 energy on Even numbered levels
Level 1 Skills
Safeguard
Right out of the gate, the Oathkeeper is making known that you should be using a shield. Safeguard applies a global passive buff to your character while you have a shield equipped that increases the physical damage dealt by weapon damage attacks and globally boosts % physical, internal trauma, and fire damage. It also boosts the armor value of all slots by a flat number. This is a great skill, especially for Warlords (soldier/oathkeeper) who will probably want to be using a shield to benefit from the shield specific skills in both of their classes anyway. If you’re playing a non-shield Oathkeeper, which is totally viable despite the shield specific skills in this class, then you can skip this skill.
Aegis of Menhir
Throw your shield at a target enemy to deal a large % of your weapon damage, plus some bonus physical and fire damage, and apply both a stun and a taunt effect to enemies hit by the shield. This is a core skill for the Oathkeeper, and anyone with a shield in the off-hand slot can benefit from this skill. It is particularly good for weapon attackers dealing fire or physical damage, obviously. Later nodes make the skill a real beast.
Righteous Fervor
A default attack replacer that boosts damage output based on active charges the same way Savagery does, Righteous Fervor will start out weak and grow in power the more charges you’ve built up from hitting things with it.
Charges decay every 2 seconds when not using the skill. Every attack with Righteous Fervor deals a % weapon damage, plus some bonus physical and burn damage, and locally boosts % physical and burn damage. I have found Righteous Fervor to be somewhat inferior to other attack replacers when it comes to damage output, but it’s still a strict upgrade over the basic attack and has some really cool connected effects later down the skill line.
Level 5 Skills
Smite
Not a MOBA built on the tortured remains of various religious traditions around the world, Smite is instead the first WPS for the Oathkeeper. Also unlike the MOBA with the same name, it’s really good! Smite applies a different effect depending on the weapon type being used. The core function, and most powerful if you ask me, is with melee weapon and shield, which launches an attack in a smallish arc centered on the initial attack target that can hit up to 3 targets. It deals % weapon damage for your weapon and your shield with some bonus physical and fire damage.
It also stuns targets briefly and applies a local racial damage boost against ch’thonic and undead subtype enemies. If you are using a 2 handed weapon, or dual wielding melee weapons, you will get the same effect minus the damage from the shield. If you are using a ranged weapon or dual wielding ranged weapons, it fires a shot that pierces through enemies along a straight line to its maximum range and applies the same damage and effects, minus shield damage.
Avenging Shield
The first connected node for Aegis of Menhir, Avenging Shield gives the shield the ability to ricochet between multiple targets within a small area, applying the damage and effects of the parent skill to all targets hit. It also locally boosts critical damage. It’s a skill you must max if you want to use Aegis past the early game.
Dreeg’s Reproach
If your Oathkeeper is a little less righteous than most, there are several options throughout the skill tree to convert the ‘holy’ damage output of fire and physical into the more sinister acid and vitality. Here’s the first one. This Mutator converts 100% of physical and fire damage into acid and vitality, respectively, for the Righteous Fervor parent skill.
Presence of Virtue
This toggled active applies a buff to you and all nearby friendly entities that boosts Offensive Ability, energy regeneration, and physical retaliation damage. It also makes effected entities deal either extra internal trauma or extra bleeding damage with weapon damage attacks, with a 50/50 chance to get either effect with each attack. It reduces your max energy while active.
Level 10 Skills
Vire’s Might
A latecomer to the movement skill cadre, Vire’s Might causes your character to bulldoze through all opposition in a straight line towards a target destination. It cannot bypass impassable terrain, but it can path around it somewhat in the same manner as Blitz and Shadow Strike. Vire’s Might will deal a good % of your weapon damage, plus some physical, piercing, and internal trauma damage, to all enemies along the trajectory of the charge. It also theoretically increases your aggro generation.
Aegis of Thorns
This nasty Mutator changes the parent skill, Aegis of Menhir, by locally converting all fire damage to acid. It also reduces the Total Damage of the skill slightly, but it adds a % of your retaliation damage to compensate for this reduction. This is best used by acid retaliators, but other retaliation builds can get some utility here as well.
Resilience
A circuit breaker that triggers at 66% health, Resilience makes your character…more resilient. It boosts your Defensive Ability tremendously, boosts your physical resistance, boosts the efficacy of heals applied to your character, and most importantly it boosts the maximum value of all resistances for its duration. It has a moderate recharge, but costs no energy. Combine with Blast Shield from the Demolitionist tree for truly stupid resistance values. I recommend 5 ranks in this one to get the extra 1% resistance maximum without going all the way to 10 ranks for the next one.
Oathkeeper Levels 15-25
Level 15 Skills
Volcanic Might
This Mutator applies its effects to the parent skill Vire’s Might by converting all physical damage into fire damage locally and adding a tiny knockdown effect to all enemies hit by the skill. Knockdown is somewhat underwhelming and the duration is so low that you can basically ignore it, but conversion, especially 100% conversion, to a desired damage type can be very valuable. Fire users should consider getting this.
Judgment
If I could type the noise a vacuum cleaner makes, I would type it here. Judgment is an active burst spell centered on the player that deals physical and internal trauma damage over a moderate to large area depending on the level of the skill. The damage is not bad, but the real use of this skill is the knockdown effect, which takes the form of a vacuum sending all effected enemies tumbling towards your character. Now, knockdown is resisted by stronger enemies, and on the whole is not very good, but in Judgment it is great for condensing groups of weaker enemies so they can be eliminated quickly instead of one-by-one.
Consecration
The first connected node to Righteous Fervor, Consecration applies a global buff to the character while they have at least one charge of Righteous Fervor stacked, but increases the energy cost of each swing from Righteous Fervor slightly. The buff increases your Defensive Ability, attack speed, and elemental resistance as well as boosting armor in all slots by a %. It’s one of the main reasons to take Righteous Fervor over another attack replacer because that Defensive Ability boost is so precious, so if you plan to use Righteous Fervor instead of say Fire Strike or Cadence, max this skill.
Haven
A defensive buff connected to the Presence of Virtue line, Haven adds a % health boost to all entities effected by the parent skill and increases the efficacy of heals targeting them. For those who are using shields, it grants an additional chance to block successfully and increases the amount of damage blocked with each successful block.
Ascension
Was Possession a little too unsavory for your tastes, but you still wanted the ability to let a divine entity take over your body? Ascension lets you channel divine power for a moderate time, applying a flat damage absorption effect to your character, adding fire retaliation damage, and globally boosting % damage for all damage types and all retaliation damage types for the duration of the effect. It has a long cooldown but doesn’t cost a lot of energy, so you will be able to use it a lot. It’s quite powerful and quite easy to use, plus the second node is great, so most Oathkeepers will probably want at least one point in Ascension.
Level 20 Skills
Shattering Smash
The second Oathkeeper WPS is less flexible than Smite, but also very powerful in the right hands. Shattering Smash will only work when your character has a shield and a melee weapon equipped. When it triggers it will apply a % weapon damage, plus some bonus physical and internal trauma damage, with a sizable reduction in physical resistance to all enemies along a line extending behind the initial target of the strike. This resistance reduction does not stack with other effects of the same type, so shattering smash can replace Warcry or the Manticore constellation granted skill as a source of physical resistance reduction.
Volcanic Stride
This passive is linked to Vire’s Might and applies its effects through the parent skill. When you use Vire’s Might, Volcanic Stride causes you to leave a trail of flames in your wake that will continue to harm enemies in range for a short duration with fire and burn damage as well as a minor slow effect. Fire builds will love this, but everyone else can skip it.
Reprisal
Want to throw your shield not just once, but over and over and over? Reprisal is a connected node to Aegis of Menhir and adds a chance for instantaneous 100% cooldown reduction to the skill when you use it. It will make a specific sound effect to let you know that the skill cooldown was reset, so you don’t have to watch your skillbar like a hawk to get good use out of this. As if that weren’t enough, this skill adds a % of your retaliation damage to the damage of the Aegis, along with some burn damage, and reduces the energy cost of casting it. All Aegis users want to max this skill.
Level 25 Skills
Eye of Reckoning
The progenitor of the Spin 2 Win meme for Grim Dawn, Eye of Reckoning is a channeled active attack skill that causes your character to launch into a whirling tornado of offensive fury for as long as you hold the button. Importantly, this skill still allows you to move while channeling, unlike Aether Ray or Drain Essence.
This skill requires a melee weapon of some sort, and attacks absurdly quickly (every .16 seconds or faster with boosted attack speed), but deals relatively little damage with each hit. The base skill deals a small % of your weapon damage, plus some physical and fire damage, in a small area around your character on each tick. This makes it most useful against many enemies with low defenses, but it can easily carry you through boss fights or crucible if you build it well. It’s an energy drinker, so be sure you have good energy regen if you want to spin for any length of time.
Crushing Verdict
This passive is linked to Judgment, and adds a local % physical and internal trauma damage boost, applies a hefty slow to impacted enemies, and applies a moderate to large Defensive Ability debuff to all impacted enemies. I recommend some ranks here just for the Defensive Ability reduction, but you can also use it to increase the damage output of Judgment if you are planning on using it as a damage dealing skill instead of just a re-organizer of enemies.
Rebuke
The last node connected to Presence of Virtue, Rebuke adds physical damage to all weapon attacks, a global % boost to all retaliation damage, and resistance to reflected damage and life reduction for all entities affected by Presence of Virtue. It also increases the reduction of your max energy by the parent skill, but it’s worth it.
Oathkeeper Levels 32-50
Level 32 Skills
Tectonic Shift
This passive is linked to Vire’s Might, and adds bleeding damage to the effects of that skill, as well as locally increasing % internal trauma damage, maximum range, and cooldown reduction for the parent skill. The range increase only requires a single point be spent here, but you might choose to spend more if you want to reduce the cooldown further or add more damage boosts for Vire’s Might.
Summon Guardian of Empyrion
Empyrion himself might be MIA, but his Guardians sure don’t seem to mind the absence of their parent deity. This skill summons an invincible pseudo-pet that scales with player bonuses to follow you around smacking your enemies with a divine warhammer.
They deal physical, fire, and burn damage to enemies in an arc around their initial target with each blow, and you can have two Guardians active at any one time. This skill only summons 1, so be sure to cast it a second time when you start a game session. This skill is pretty great on its own, but just wait until you see its second node at level 50!
Retribution
The end of the Righteous Fervor line, Retribution adds a % of your retaliation damage to every strike with Righteous Fervor as well as adding internal trauma damage and local % fire and internal trauma damage boosts. This skill is what sets Righteous Fervor apart from other, nominally superior attack replacers. The ability to include your retaliation damage in an attack, especially an attack with no cooldown, can be really huge for some builds.
Clarity of Purpose
The only connected node for Ascension boosts the effects of the main skill by adding a big % Offensive Ability boost, total immunity (sort of, there’s a cap) to life leech and energy leech effects, and resistance to stun, freeze, petrify, and entrapment effects while under the effects of Ascension. More and better criticals plus the ability to move freely when using Ascension, which already boosted your damage output and damage absorption, makes you very hard to pin down and lets you clear groups with ease. The cooldown is the only real drawback here.
Level 40 Skills
Soulfire
Soulfire adds a whirling vortex of lightning to the effects of Eye of Reckoning. For as long as you are spinning, you generate spiraling tendrils of energy that deal lightning and physical damage to enemies they pass through while reducing that enemy’s damage output by a moderate amount. Spinners should pick it up for sure, but if you want to be tricksy and use it as a damage debuff, you can splash Eye of Reckoning and max Soulfire, then use it periodically to reduce enemy damage.
Scion of Dreeg
This Mutator changes the function of the Guardian of Empyrion and its connected node by converting all physical damage to vitality and all fire damage to acid. This is unique among all Mutators in the game, because it qualitatively changes the behavior of the connected skill node as well as the parent node. For acid/vitality users, this mutator is a must. Everybody else should obviously not use it.
Heart of Wrath
This passive applies a buff to the user of its parent skill, Judgment, that causes a burst damage effect centered on the character every second. This burst causes fire and burn damage, plus a % of your retaliation damage, to all enemies in range. Retaliation builds can get a lot of damage out of this, but non-retaliators may find the damage numbers too low to be worth your time.
Level 50 Skills
Celestial Presence
The heavy lifter of the Guardian of Empyrion line, this skill adds a radial aura centered on the Guardians that functions similarly to Aura of Censure from the Inquisitor tree. It applies a fire damage effect every second while reducing enemy resistance to physical, fire, and bleeding damage for all enemies in range of a Guardian.
This resistance reduction can stack with others of its type, so it’s very valuable.
IF you took Scion of Dreeg, the Mutator for Guardian of Empyrion, the effects of Celestial Presence will also be altered, causing the ticking damage to be acid instead of fire and the resistance reduction to be for acid, vitality, and bleeding instead of physical, fire, and bleeding.
Divine Mandate
The first Exclusive Skill for Oathkeepers is aimed at fire damage and physical damage builds. You should know the drill by now, this is mutually exclusive with any other exclusive skill and functions as a toggled buff. When active, Divine Mandate adds internal trauma damage to all weapon damage attacks, globally boosts % fire, burn, physical, and internal trauma damage, globally boosts critical damage, and grants resistance to slow effects.
The slow resistance can be life-saving, and is often hard to find in other places, so keep that in mind when considering this skill. Weapon attackers planning to deal fire or physical damage will benefit the most from this, but any fire or physical build can gain some benefit.
Path of the Three
The second Exclusive Skill for the Oathkeeper is also the last Oathkeeper skill and the final skill we will discuss in this guide. Path of the Three is aimed at acid and vitality builds, and benefits caster type builds slightly more than attackers.
While active, this toggled skill grants poison damage to all weapon damage attacks, globally boosts % acid, poison, vitality, and vitality decay damage, globally converts some physical damage into acid, globally converts a lot of fire damage into acid, and reduces the cooldown length for all skills. The cooldown reduction in particular is nice for builds that have cooldown skills like Aegis of Menhir, Judgment, or Vire’s Might maxed and want to use them a lot.
Conclusion
Well, that ended up being a lot longer than anticipated when I set out to write it! Thank you all for bearing with me through this very lengthy work, and I hope it will be of some use to those of you starting out on your journey through Grim Dawn.

a few thoughts:
Blade Arc is hot garbage unless you get it at least to lvl 5 because it starts out by heavily reducing your attack damage so will take far longer using it to kill 3 enemies than you would using normal attacks to kill them one by one. Only after you put several point into it / gear boosts it to lvl 5 or so it starts to get good.
Blitz is amazing from lvl 1 and if you put points int o it / use gear boosting it the dps is simply amazing.
For leveling you can go Blitz + Forcewave and see enemies just scatter like chaff in the wind and during lvling many enemies don’t resist cc yet so the knockdown and stun work wonders, I had elite enemies spending 10s at a time on the ground doing nothing.
Thanks for adding in how to get epic gear. Really loved that p[art
A very long read but well worth the time. This my friend is better than the official game guide or any other guide I have read for new and semi experienced players. Brilliant.
Nightbalde`s shadow strike or any other of this kind skills do not make you invincible. Any kind of lightning( lightning bolt, doombolt, aether lightning, chain lightning ect.) will deal damage + aftereffects.
Thanks for the guide, extremely informative about various class skills.
It’s people like you that add in the missing bits of information that would have helped get into this game more easily. Thank you.
if you want melee dps, do not make a reaper, go for an oathkeeper/nightblade instead you are making a mistake if you make a reaper i learned the hard way
there is practically zero weapons for that subclass, and if you’re not looking to hybrid summons it just isn’t there
Thank you very much; this is a fantastic guide and it is really helping me a lot to figure out how to pick and level my character classes.
This guide could really use some discussion of dual classes: which classes work best together and in what circumstances; which dual classes works together for certain play styles; how to best use sub-classes on dual classes, etc.
Excellent guide. For a new player, this really helps getting into the massively complex character development mechanics. Thanks a lot!
Hey dude thanks for this in depth analysis and guide to starting the game. While i’m familiar with RPGs that are of a similar style, sometimes delving into a new game with as much depth as this one can be daunting. Appreciate the insights
while a nice break down of the skills, needs to be updated as some of the info might not be accurate anymore.
As someone who is going through the game for the upteenth time, this is the one guide I always fall back on for a general description of skills, their value, and strategy ideas, even though it’s outdated. I think the length and level of detail is what makes this guide so great; I’m glad I found it when I was making my first character (warlord) so that I could get a better understanding of the terms and mechanics.
Especially as someone who doesn’t like to default to videos, this is the best game guide I’ve seen in a long while! Well done!