
Alright Recruit! This guide right here will teach you the basics of Zombies, so that you will hopefully learn not to shoot yourself and get to wave 20 or further! Let’s face it, all this information is going to go in one ear and come out the other.
What Is The Zombies Gamemode?
Before playing Zombies, Recruit, you must first understand what it is and where it came from.
A major update was released, expanding upon the offline and online content, adding two new maps, Container Yard and Siberia (Jail) and The Killhouse, where Movement, Accuracy and Skill is put to the test amongst all the players in Pavlov, and Zombies, the first gamemode in which players must truly co-operate in order to survive.
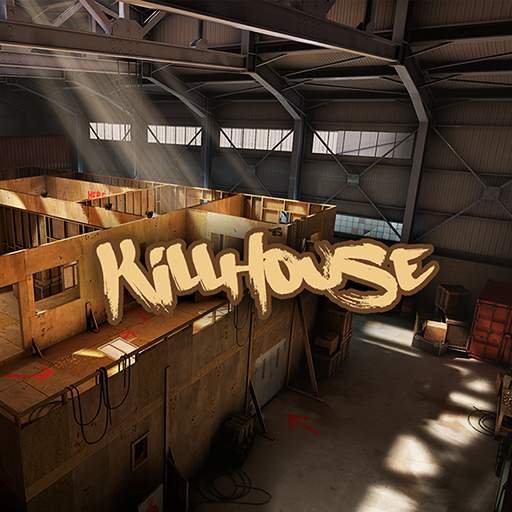
The Killhouse
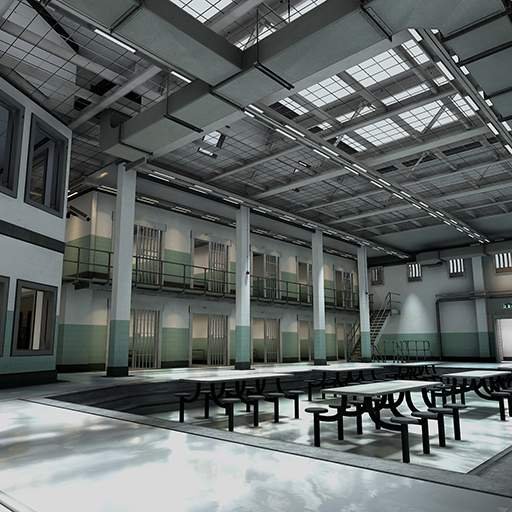
The Siberian Jail
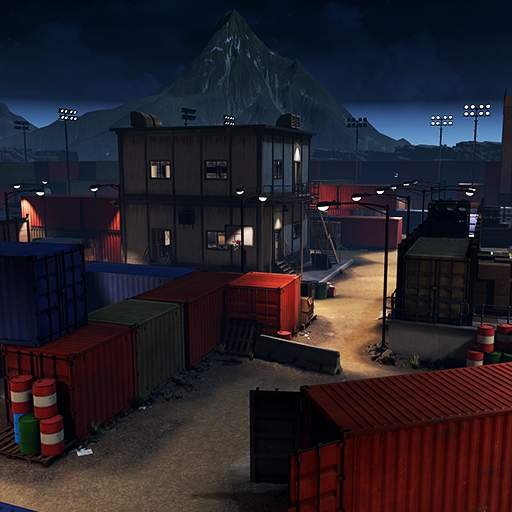
The Container Yard
What Are the Zombies?
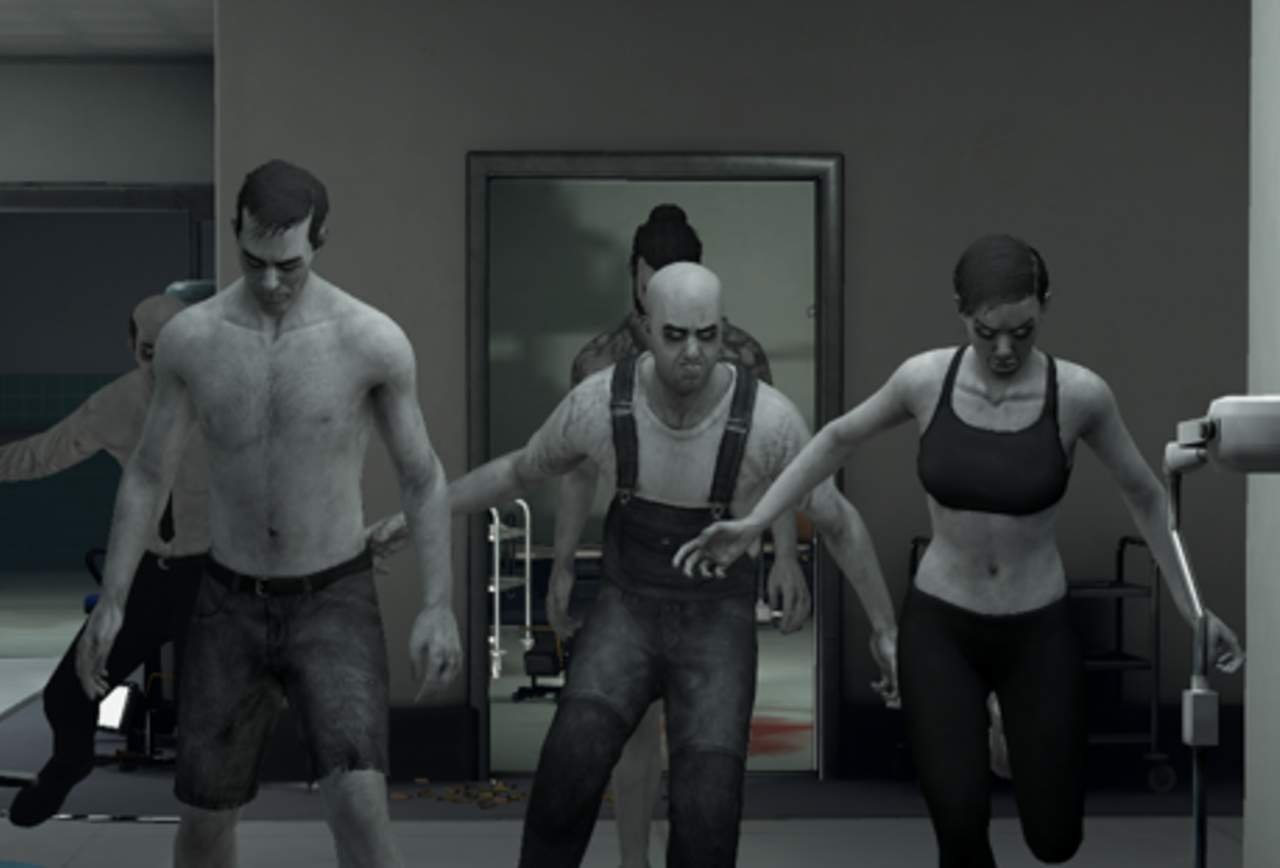
These things right here are called Zombies, the most common and only enemy in the Zombies Gamemode. They are fast, dangerous and… kind of smart? From my game experience, most of them tend to overwhelm you in groups and kill you, but some of them choose to serve as distractions, running close to the player but side stepping in order to avoid your bullets. Apart from all that, they serve as your basic enemy in the Zombies Gamemode, and are easy to kill, one shot to the head or a few shots to the body.
Basic Knowledge
Friendly Fire is a thing! Do not shoot your teammates, and do not shoot at them while they are chased by a horde or if there’s a zombie behind them, instead, move into a position where you can shoot without putting your teammates life in danger.
Do not group together, while strength in numbers certainly applies to this gamemode, being too close can lead to accidental friendly fire or being overwhelmed.
Sharing is caring if you see a teammate in need of painkillers or weapons, do not leave them as zombie food, even if your teammate is bad, every man is necessary to survival. If anything just use them as bait.
Do not use the revolver. Unless you are completely sure that you are proficient with using the revolver, don’t even lay a finger on it, unless you are throwing it in the bin.
Aim for the head, it is common sense, everyone knows that a shot to the head will kill a zombie easily.
Shoving Zombies
By using either your fists or your weapon, you are able to hit zombies to push them away, while seemingly useless, this may save your life in some situations.
There are many ways you can use this to your advantage, whether it’s pushing a zombie while running or saving a teammate, you can use this in most situations where shooting would cause more harm than it should.
Painkillers and Syringe
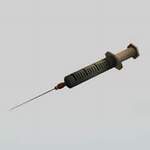

These two pieces of equipment right here are called The Syringe, and Painkillers. “What do they do?” you may ask, well I’m here to tell you.
Painkillers – Holding Trigger will open the bottle, tilt so painkillers are upside down and the pills start falling down, and aim near the head, this will heal you. You do not require to take all of them, as a few will heal you, so take some, check health, then take more if necessary. If health is dangerously low, take the entire bottle.
Syringe – The item everyone seems to get confused about, this item has 2 charges and is able to revive a dead teammate, simply hold trigger while the needle is in someone and it will revive them.
Now you know how to use the equipment, well done, you’re working your way towards being a professional zombie slayer, but don’t get too excited, this is only the beginning.
Waves and Zombies Left
Opening up the leaderboard, you will see blue team and red team, red team represents the amount of zombies left, and blue team represents your fellow teammates and the wave you are currently on. Not much else to say about this one.
Loot Crates
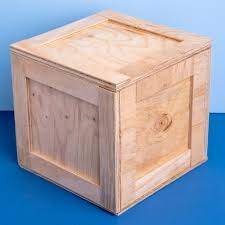
After every wave, a crate will usually spawn.
Pistol Crate
- After Wave 1, you will get a crate containing a Glock 18, Five-Seven, Revolver and a Deagle. The Glock 18 and Five-Seven are the best choices in the category, Deagle and Revolver are the worst, although the Deagle is better than the Revolver.
SMG Crate
- After Wave 2, a crate will spawn with a choice of 2 UMP-45’s, 1 Micro-UZI and a FAMAS. The UMP’s are the best choices, while the other may lack in some areas.
SMG / PainKillers / Syringe Crate
- After Wave 3, a crate will spawn with a choice of 1 MP5-N, 1 Micro-UZI, 1 Painkillers and 1 Syringe. The MP5-N is a great upgrade from any of the 3 weapons you chose last wave.
Rifle Crate
- A crate will spawn with 2 AK-47’s and 2 M4’s. The M4’s are the better option.
Rifle / Syringe / PainKillers Crate
- A crate will spawn with 1 Syringe, 1 PainKillers, 1 AK-47 and 1 M4.
Mixed Crate
- After Wave 2, a crate will spawn with a choice of 1 Kar98, 1 M590, 1 UMP-45 and 1 Micro-UZI, the UMP-45 and Micro-UZI are your best bets here due to the slow reload of the other two.
Heavy Weapon Crate
- A crate will spawn with 1 M249, 1 Saiga-12, 1 Spas-12 and 1 Currently Unknown, the Saiga-12 is the best choice here due to it’s fast firing rate and easy reload.
You’re getting there, you just got a little bit more to read.
Attachment Crate
- A crate will spawn with 2 Sights, 1 Suppressor, 1 Grip. You may not want to choose the suppressor as it lowers your damage.
Tactics
Main Area
There is a side entrance which zombies love to run in from (flank). If you have one person guarding it, and the other three nearby guarding the other entrances (holes in the upper floor, the two hallways) you may have an impenetrable defence, which heavily relies on the flank defender and hallway defenders.
Pros And Cons
- + Great defence.
- + Easy to defend, especially the flank.
- + Lots of space.
- – If done wrong, plan may fail and cause a hard time for everyone.
- – If flank defence goes down, it will be a bit harder to survive.
Main Area #2
On the opposing side of the flank, there is a side entrance which zombies are unable to enter from, having four people on that side can result in a wall of bullets which stops most of the zombies.
Pros And Cons
- + Easy to defend.
- + Lots of bullets = Zombies go down easily.
- + Only one entrance (May get cornered).
- – If done wrong, plan may fail and cause a hard time for everyone.
- – Accidental friendly fire possible.
- May get cornered.
Hospital Rooms
In the hospital rooms, having 2 groups of 2 in opposing rooms guarding one door can create a great defence.
Pros And Cons
- + Easy to defend.
- + Only one entrance in each room to defend.
- – Rooms are linked, if one defence goes down / zombies sneak through to the other room then plan may fail.
- – Heavy reliability on the opposing side to do their job.
Syringe Revival
If you are the last one left, instead of stopping while getting chased by a horde to revive someone and get eaten alive, try running around to keep them in a line then use the syringe a little bit early and poke them with it (holding trigger the entire time) to revive and keep running. This requires practice! Never use with the hand you are walking with.
Painkillers
- Like the syringe, while running, you are able to take the pills. Doesn’t require as much skill as the syringe.
Run And Gun
- This also requires practice, while running from a horde, you are able to aim behind you without looking and blind fire. This is excellent for killing them off without taking damage.
Bugs Bugs Bugs!
- Main Area #2 houses 2 rooms next to it, hospital beds, a bed in the middle and a locker. There is 2 beds with a chest in between and a bed to the right, behind it there is a small gap, get on top of the bed and go behind there. You are now stuck, but, you can’t die. You can easily get to high levels until you get bored.
M249 For Life
- Once you get to the stages of having Heavy Weapons, You can put a M249 on your back and carry one with your hand, once you run out of ammo, you can switch to the other one, reloading will take a while but the firepower is immense!
Weaponry
This big section here goes through my personal opinion of all the weapons you are able to acquire
Beretta
The starting weapon. I can’t say that it’s bad or good since you are forced to use it on Wave 1.
- +Accuracy
- =Magazine Count
- -Damage
Glock 18
Best weapon for Wave 2.
- +Toggle Mode
- =Burst Recoil
- -Burst may be a little difficult to control if used quickly
Tip: Toggle between Burst-Fire and Single-Fire to use the Glock 18 to its best potential.
Five-Seven
Mainly has a better magazine count than the Beretta, that’s about it.
- +Magazine Count
- =Accuracy
- -Damage
Deagle
Better than the Revolver, but I wouldn’t recommend using it.
- +Damage
- =Accuracy / Magazine Count
- -Recoil
Revolver
Worst pistol you can get.
- +Bullet Speed
- =Recoil
- -Magazine Count
Tip: Don’t use it.
UMP-45
2nd best SMG, best choice in the SMG Chest.
- +Reload Speed/Firing Rate
- =Accuracy
- -Damage (Nullified by Firing Rate)
Micro-UZI
Better than the FAMAS.
- +Portability
- =Accuracy
- -Recoil, Size
FAMAS
Ugly but I guess it’s okay.
- +Accuracy
- =Firing Rate
- -Weird Weapon Layout
MP5-N
Best SMG. M4 better though.
- +Firing Rate, Handling, Accuracy
- =Magazine Count
- -Size
M4
Best rifle to get.
- +Accuracy
- =Reload Speed
- -Recoil
Tip: Use a three round burst for best accuracy.
AK-47
It’s not good but it’s not bad, swap it out for the M4 when possible.
- +Damage
- =Accuracy
- -Reload Speed
Tip: There is a quick way of reloading, get a fresh mag and throw it up (not too high), take out the mag and catch the fresh one and put it in.
M249
I don’t exactly recommend, but it certainly isn’t bad.
- +Firing Rate
- =Recoil
- -Reload Speed
Tip: Don’t use in solo.
SPAS-12
Saiga-12 is better.
- +Damage
- =Firing Rate
- -Reload Speed
Saiga-12
Great shotgun for this gamemode.
- +Firing Rate, Reload Speed, Damage
- =Accuracy
- -Recoil
G3/SG1
A rifle, not the best in this gamemode.
- +Damage
- =Reload Speed
PP-19 Bizon
A rifle that penetrates armour.
- +Armour Penetration
- =Firing Rate
- -Reload Speed
AK-12
The AK-47’s brother has decided to join us.
- +Damage
- =Accuracy
- -Reload Speed
Kar98
They removed the K cause they didn’t wanna get copyrighted by Hitler. Oh yeah, it’s garbage too.
- +Damage
- =Accuracy
- -Reload Speed
AUG
Basically the FAMAS but slightly more usable.
- +Accuracy
- =Damage
- -Weird Weapon Layout
M590
Oh please, just wait till you can get the Saiga 12, pump action shotguns are overrated.
- +Damage
- =Accuracy
- -Reload Speed
The Little Things
There are two lockers in the hospital, I believe one contains painkillers and the other contains a syringe, this may not be true. Or it might be, maybe it’s random. I don’t really know.
Zombies can get stuck on walls and on the upper floor.
Glossary
This is a glossary for all you people who don’t understand some of these terms, these terms are related to my guide and not the actual meaning behind it (doesn’t apply to all).
- Magazine Count – The amount of bullets in a magazine.
- Firing Rate – The speed at which you can fire.
- Reload Speed – The speed at which you can reload.
- Burst Recoil – The recoil of a burst weapon.
- Toggle Mode – The ability to toggle between firing modes (in this case it’s efficiency).
- Accuracy – The ability to aim without a problem.
- Recoil – The backwards movement of a gun caused by momentum.
- Recoil Explanation – Basically, shoot a M249 with one hand, it goes up doesn’t it? That’s recoil.
can you win in zombies?