
The Tyranid campaign could be ridiculously hard or hilariously easy, depending on the choices you make. This guide is to help you avoid the painfully hard road and learn how to curbstomp the ‘Nid campaign on Hard difficulty.
Basics
Many things might lead you to believe that the Tyranids are meant to get close and munch on the enemy, or launch unending waves of boarding actions, but these are subpar strategies for you the player, and playing this way will make the campaign a lot more painful. Tyranids are ironically terrible at ramming as they suffer too much damage, and they are squishy and slow and therefore will suffer heavy casualties when trying to run down enemy ships, and their terrible income potential makes too many losses unsustainable. This guide will show you how to unlock the ridiculous shooting power the Tyranids secretly possess.
Ships You Will Use
Escorts:
Caustic Drone
Corrosive Vanguard – has skill that allows your ships to focus fire on 1 target rather than whatever is closest. Worth the few extra points when able to fit into battle build.
Light Cruiser:
Acid Voidprowler
Cruiser:
Razorfiend
Bio Infestation Razorfiend – has fighters to scout with
Battlecruisers:
Ignore – you will not use these, as they are meant for getting close and biting the enemy
Battleship:
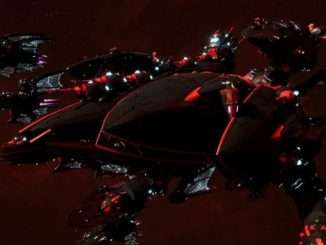
Bio Acid Hiveship
You will make sure your ships are set to fire forward the majority of the time.
Weapons
Pyro-Acid Weapons are like Macro Weapons, rounds that fly toward the target damaging shields first then hull, and can miss.
Bioplasma Weapons are like Lances EXCEPT that they ignore shields. So 4-5 Hiveships with the forward firing Heavy Bioplasma cannons, in Tracking Sense Stance and with the upgrade that gives Bioplasma weapons +4500 range and the upgrade that cuts firing time in half, can destroy a ship quickly even with its shields up the entire time.
However, I argue that Pyro-Acid is generally better, and I’ll explain why later.
Technical Skills
Always choose Spore Field first, and if the best admiral you can recruit has a different first skill, make sure you choose Spore Field for the 2nd slot. For the other skills, either the Supercharged Void Shield equivalent or the Augur Probe equivalent for Tyranids. Augur probe is good for detecting enemies so you can shoot them (especially important against Aeldari ESPECIALLY if you did not bring a ship capable of launching fighters to scout). The Teleport skill “Void Lurker” could be useful for the strategy I suggest if you park your fleet in a Nebula and then move an Admiral with Void Lurker forward until the enemy escorts see it (because the AI knows where you hidden units are) and they pop their scan skill to detect your admiral, then you immediately teleport your admiral back toward your fleet and get him in the Nebula.
Farming Fleets
In the Tyranid campaign, you can pay 100 resources to build a structure that gives 10 resources per turn. However, your main source of income will come from system with Krill Shoals (40 resources per turn) and Space Wales (80 resources per turn). You have to have a fleet stationed in that system to get those resources. That fleet only needs to have just the flagship. This is how you will have a positive income in the campaign, by stationing a fleet in a system with Space Whales and building the +10 resource structure in that same system (Krill Shoals are not worth it; Space Whales will be sufficient).
There is (1) Space Whales in Nemessis Tessera, (2) in Medusa, and (2) in Scarus. These (5) will be your breadwinners. There is also a system in Eidolon that has two Krill Shoals in that one system so it is effectively the same as a Space Whales, but by that point in the campaign you should be close to victory anyway.
You want to have a fleet in each of the 5 Space Whales systems (ideally the fleet should just be a cheap flagship to save money), and in each of those 5 systems build the +10 income structure.
Ship Building
Build Hatcheries in systems with Planetoid Nests first, then Moon Nests second. I wouldn’t even bother building hatcheries in Asteroid Nests. Scarus sector has a ridiculous number of nests, Scarus will be your major shipbuilding center once you capture it.
Structures
Occasionally you may need to build the instant repair structure to fix your ships, but generally, once you’ve built your hatcheries where they make sense, everything else should be the +income structure.
Infestation
The ability that will make a very hard campaign ridiculously easy.
Once you complete the mission in Nemesis Tessera I believe (definitely once Medusa and Belial IV become available to invade), you will unlock the ability to invest systems. Click on a system in a sector, and in the description box (where if you owned the system you would normally see what structures you can build, and what planets, etc are there), you should see a purple circle icon you can click on to spend 100 resources to infest the system. The first 2 levels once complete degrade the fighting ability of enemy forces present in the system. The 3rd Level (once complete and until your infestation is completed or eradicated by AI Invasion) allows you to teleport your fleets to that system using 1 movement point (even from Sentinel Worlds sector to Belial IV sector, a massive distance). 4th Level completion launches a free minor fleet attack on the system; normally this attack will be defeated by defending AI fleets and only serve to hopefully weaken the defenses, however, if the system is undefended or the AI fleet is weak enough, you’ll capture the system (your newly captured system will be empty, you do not get a free fleet out of this). 5th Level completion an auto-win capture of the system; all enemy defenders and defenses are defeated and the system is now yours.
This is how powerful Infestation is: As soon as a sector unlocks for you to invade, infest every system in the sector immediately (except grey/neutral/uncontrolled systems). Then check the sector every turn to see what the AI does. Wait until an AI enemy captures an uncontrolled system before infesting it – if an enemy faction captures a system after you have infested it, regardless if it was uncontrolled or held by an another enemy faction, your infestation will be eradicated. Re-Infest systems as needed. Complete your conquests in the systems your fleets are already fighting in while you wait. After something like 12-15 turns, if you are lucky and none of the AI were able to capture another system after you had infested it, you will suddenly own every system in the sector. And even if not and you forgot to re-infest a system, it should easy to finish off the survivors. So, so much easier than having to slog through scores of battles trying to conquer the larger sectors like Scarus, Chin-chare, Agripinaa, etc.
Campaign Progression
You start in Belis Corona. Nemesis Tessera is next, then Medusa and Belial IV, then Scarus and Caliban. After that, I *think* Scelus and Agripinaa, Chin-chare and Sentinal Worlds, Eidolon and finally the Cadian Sector (final mission is in Cadia system).
Key Note: Tyranids can do missions with any fleets, they don’t have an Admiral Spire or Amarkun the Gatherer leader that they must use for missions.
How to Not Waste Your Time
The Tyranid campaign can and should be one of the fastest campaigns to complete, where you can go from mission to mission quickly, only slowing down to let infestation do its work to speed your campaign up. Belis Corona, Belial IV, Caliban, and Scelus are expendable sectors (eventually Nemesis Tessera as well, and probably Sentinel Worlds once you defeat the Necrons for good); once you have completed the missions in the sectors, you can abandon them to the AI. I do not believe the AI can attack from sector to sector, only system to system. Caliban and Belial IV in particular are worthless sectors not worth holding once you have finished the missions in them. It isn’t a big deal to spend resources on a Hatchery and resource buildings in those sectors when you first capture them and while you will be doing missions in them and have fleets already there to defends against invasions, but once you move on, move on. You only need to hold a system long enough for the planets to be devoured, which only takes about 3-4 turns. Don’t defend, don’t re-infest systems, don’t waste resources on structures once you abandon a system.
It takes 10 turns just to recoup the cost of resources spent on the +income structure, and it is quite likely the AI will launch invasions before 10 turns has gone by. Caliban and Scelus have 20% Invasion Chance per Turn systems in these sectors, Chin-chare has the same in Jubal, but ♥hare might be worth holding onto since it connects to Eidolon and Agripinaa. Scelus *may* be worth holding since it connects Medusa, Scarus and Chin-chare, especially if you have already abandoned Belis Corona, Nemesis Tessera, Caliban and Belial IV and therefore have some free fleets.
By the time you reach Eidolon you should hopefully have at least 12 fleets. 5 fleets for Space Whales (when you are ready to fully abandon Nemesis Tessera, you can move that resource fleet to the double Krill Shoal system in Eidolon), 1 fleet for the 20% invasion chance system in Scelus (if you want to hold Scelus), 1 fleet for Jubal in ♥hare, 2 fleets to respond to AI invasions, and 3 fleets to take on Missions.
Walkthrough
Key Term: A fleet is 1 fleet, an Armada is 2 or 3 fleets in the same system (you can only have at most 3 fleets in a system at a time)
Step 1: Choose Cruiser clash only and Hard difficulty, start campaign.
Step 2: Your first upgrade point and beyond. With 1st Upgrade, get the far right upgrade that cuts reload time for Pyro-Acid and Bioplasma weapons by 50% while in Nebula or Asteroid Fields. This will be crucial, I will explain in the battle section. Leave Auto-Engage OFF, Auto-Engage causes ships to seek after enemies, and you want your ships to stay in the Nebula or Asteroid Field. I’d also get the Lictor Brood upgrade for lightning strike, then move down the +100 health line, then +shield. The line that concludes with +25% speed is good, as well as the line that concludes with +4500 range for Bioplasma weapons. The +9000 identification range for spore fields can be nice as well.
Step 3: For the fully leveled Admiral Trait, since income is so tight for Tyranids, the -25% upkeep Trait on all your fleets may be the best option, but it does not stack. The +10% repair rate and +3 troop regen Trait is always useful, but it also does not stack. If you decide to go +1 Movement Point, this is always good, but only if you make sure that all the admirals in your armada have the +movement trait.
If you quickly sort out which admirals you are going to permanently run together for combat, especially the armada you will use for missions, you could have the +10% repair rate/+3 troop regen Trait on one admiral and the -25% upkeep Trait on the other admiral of your main combat armada (if you run 3 fleets when attacking, the +2 exp recruit Trait would be good if you recruit all your ships with that admiral).
Turn 1
You start in Belis Corona. Do not even try to attack this first turn, you do not have enough ships or funds to recruit ships to realistically win, and even if you do, you will have crippled your start.
Move both your starting fleets SE to the system with the first Mission and take control of it. It has Krill Shoals so it will stop your negative income now that you have at least 1 fleet in that system. Build the Hatchery this turn, you need it to recruit ships in a few turns. In each of your 2 starting fleets, make the best ship your flagship then disband the others, best ship being (1) Acid Voidprowler (2) Bio Acid Voidprowler (3) Corrosive Projectile Voidprowler. Your goal is to go all Acid Voidprowlers.
So now you have Belis Corona and SE system, a hatchery built in SE system, 2 fleets with just their respective flagships, and positive income. That’s all you can do for now. End Turn.
P.S. Don’t worry about the enemy fleets attacking Belis Corona, they appear to be defensive at this stage.
P.P.S. If you can build another Hatchery in Belis Corona, do so, or do so in the next couple turns if able.
Turn 2
Nothing to do yet but acquire construction points and income. End Turn.
Turn 3
Nothing to do yet but acquire construction points and income. End Turn.
Turn 4
You should have received a massive influx of resources from worlds finally being devoured. You should also have full construction points now.
- Step 1 – recruit another fleet, try to get an Admiral with Spore Field Technical Skill and Acid Voidprowler as the flagship. You want to make sure you have 3 fleets before doing the mission, because you get another fleet as a reward for completing the mission, giving 4/3 fleets (meaning your fleet limit is 3 but you will have 4 fleets).
- Step 2 – Recruit Acid Voidprowlers into your best 2 fleets (ideally they will have spore fields for technical skill). You want to leave 1 fleet with just the flagship for now, because you will be leaving that fleet in SE system to farm the Krill Shoals after this Mission.
- Step 3 – If you don’t have enough Construction Points to get enough ships for 2 full fleets for the mission, you can end turn to get some more construction points. Otherwise, do the mission. Afterward, when you have your new fleet in Belis Corona, disband non-acid voidprowlers and only have flagship in that fleet. If you still have a Corrosive Projective Voidprowler in 1 of your fleets in SE System, you can transfer it to the fleet you will be leaving in SE System, make it the flagship, and then transfer the acid voidprowler to your combat fleets.
Turn 5
You should have 4 fleets. You will move your 2 combat fleets in SE system to Belis Corona to join your third combat fleet, leaving your farming fleet in SE System. Make sure you have enough Acid Void Prowlers, then attack NE system with 3 fleets (unless they built a minefield, then you’ll only be able to bring 2, but should be enough).
Turn 6
Now attack NW system.
Turn 7
Now attack SW system to secure Belis Corona Sector. *Bug Warning* If I centered my screen on SW system, my game crashed. I was thankfully able to load the save and move my screen to center on Belis Corona, which seemed to resolve the issue. Be careful having your screen too far to the corner of the screen.
Turn 8 and Beyond
Waiting until Turn 4 to get the huge influx of income from devoured worlds and the construction points to build your fleets up was the crucial step. After that, if it takes you until Turn 9 or 10 to be at this point, that should be fine.
Once you have taken Belis Corona, take Nemesis Tessera sector, build Hatchery in Nemesis Tessera system and +resource building in the rest, especially the system with the Space Whales. If you have a 5th fleet at this point, or if you are skilled enough to safely win battles with only 2 fleets, park a fleet in the Space Whales system, while also still having that farming fleet in the Krill Shoals system in Belis Corona. As soon as Belis Corona starts getting invaded, you are going to move that farming fleet out of Belis Corona and abandon Belis Corona.
Once you secure Nemesis Tessera sector and do the mission, you should unlock Medusa and Belial IV sectors and the ability to infest worlds. Immediately infest all of Belial IV while invading Medusa sector with your combat fleets. If you want to infest Medusa systems you can, may be a waste of resources, may be helpful in case you get bogged down, you should have plenty of resources so go ahead and infest to be safe, up to you.
If you secure Medusa quickly and your fleets are in good shape, you may be able to teleport your fleets to Belial IV before the infestations complete which will end your ability to teleport fleets to that sector (unless 1 system is still infested with Level 3 infestation completed). Otherwise you will have to move them to Belial IV the normal way.
When Scarus becomes available, infest all the systems (again, wait until uncontrolled systems get captured before infesting). Do the same for Caliban, Chin-chare, etc. Once the infestations complete and the sectors become completely or almost completely yours, move in to mop up if needed then do the missions. You should be able to move through the missions and campaign briskly (roughly 100ish turns on Hard for my first Tyranids playthrough vs around 200 turns on Normal for my Imperium playthrough).
Battles
You’ll start with all Acid Voidprowler Light Cruisers; at this stage while you are using light cruisers that don’t have hangar bays and therefore no fighters to scout for you, make sure you bring an Admiral with a Probe skill and/or Escorts for their scan ability and protect the escort… if you cannot detect the Aeldari or Chaos ships, they will sit outside your range and snipe your fleet to death.
When the points allowance makes sense to do this, which should hopefully be quickly, add at least 1 Bio Infestation Razorfiend Cruiser to a fleet and your battle queue. This razorfiend type still has the forward-firing pyro-acid cannon that fits the strategy, but has a hangar bay so it can launch fighters to scout an area in case you do not have escorts or a probe technical skill. Again, this is crucial for detecting stealthed Aeldari and Chaos so your ships can shoot them.
While keeping 1-2 Bio Infestation Razorfiends for their ability to scout with fighters, eventually you will probably want to upgrade the Acid Voidprowlers to Razorfiends for increased durability and to make your fleet easier to manage in battle (However, I would like to know how acid voidprowlers do in a 1500 point battle; you can bring 13 acid voidprowlers at 111 points each in a 1500 point battle, while only bringing 8 razorfiends at 169 points each in the same scenario).
Or, once you get to the points allowance to bring 3 Bio Acid Hiveships + Acid Voidprowlers, you can go that build. I believe the BA Hiveships have launch bays so you don’t need BI Razorfiends for their fighters, and the BA Hiveships have dual forward firing Pyro Acid Cannons (but with Bioplasma broadsides)
You might ask, if Bioplasma can bypass shields and you can mitigate the short range with Tracking Senses Stance and then completely negate the short range shortcoming with an upgrade, why not bring the regular Hiveship that has dual forward Bioplasma Cannons? Indeed, if you bring 4-5 Hiveships once you get the range upgrade and park them in a Nebula and Spore Fields and in Tracking Senses Stance, yes, they can rapid-fire shield ignoring heavy hitting 100% accurate shots to delete enemy ships, it is fantastic. And yes you can get the range upgrade before too late in the campaign. Problem is, by the time you get far enough in the campaign that the points allowance lets you bring 4-5 Hiveships into battle, the campaign will just about be over (or already over if you are really fast). The bigger problem is that, let’s say you run just 2-3 Hiveships with the rest being voidprowlers or razorfiends with their Pyro-Acid Cannons, Bioplasma IGNORES shields completely while Pyro-Acid damages shields first then the hull. So while your 2-3 Hiveships are taking out chunks of hitpoints but not just deleting ships like 5 of them would, the other ships are hitting the shields and not helping the Hiveships delete the enemy.
Whereas the BA Hiveships have HEAVY Pyro-Acid Cannons, so 2-3 of those + lots of acid voidprowlers or razorfiends will delete enemy shields and then almost as quickly delete enemy ship hitpoints too. So in summary, Pyro-Acid is better. Strength in overwhelming firepower.
You will park your ships in Nebula or Asteroid Fields where they will machine gun down enemy ships with their Pyro-Acid forward weapons, assuming you heeded my advice and chose the “half reload speed while in Nebulae/Asteroids” upgrade as your first upgrade. Going forward I’m just going to write Nebula but remember you can use Asteroid Fields. Make sure your ships are set to fire “forward” rather than broadside, although they already should be set to this. Make sure “Auto-Engage” is OFF, as you want your ships to stay put at the location you order them to put (Key Info – with Auto-Engage OFF your ships will stay where you tell them to move and not automatically move to attack enemy ships but will still fire on enemies within range, but if you order them to attack a specific ship they will move to engage and circle for broadsides, unless they are set to fire forward and are already in range). Fit all your ships in the Nebula, ideally space them out so that they can each turn 360 degrees (full circle). Once they are in position, I would also set them to the “stay put” engine status (Burn Retros for Imperium Ships); simply put click the button that causes them not to move even if you order them to attack a target. Your pyro-acid cannon range is 9000 normally, with Tracking Senses Stance it will be 13500. Bioplasma weapons start with a range of 4500 until you get an upgrade to double that; with Tracking Senses it will be 9000 (and 13500 with the upgrade) I recommend starting the engagement with Tracking Sense Stance to get hits in early; if the enemy moves within 9000 range then Reload Stance is better, especially for Shield Regeneration and skill cooldown reduction.
Now why did I tell you to choose Spore Field Technical Skill always? Because for some reason Spore Fields are counted as Nebula by the -50% reload upgrade I told you to pick, and it stacks with the Nebula your ships will be parked in and the Reload Stance. This is how your ships will turn into machine guns. Also, by parking in the Nebula, your ships will re-stealth once they stop being marked/detected (Spore Fields also re-stealth your ships). This means you need to destroy the enemy escorts pronto so they enemy cannot scan you and so you re-stealth; once you re-stealth and the enemy can no longer scan to detect you, the enemy capital ships will have to move closer to the Nebula and therefore to your ships in order to detect your ships. This includes those nasty Aeldari and Chaos ships that otherwise can snipe your ships from halfway across the map as long as your ships are detected. While the enemy moves in you can shoot them and it also allows you to switch from Tracking Senses to Reload to get more shots in faster.
You can also use the spore fields another way, you can place them in front of the incoming enemy ships to mire them down while your ships blast them (useful against Orks that intend to ram you). And if you get the upgrade that gives Spore Fields +9000 identification range, they can detect the ships that try to go around the spore fields to hit your flanks.
Some missions do not allow you to stay still waiting for the enemy but instead force you to move forward and attack, and these are typically the harder missions.
But other missions and pretty much all the normal cruiser clash battles allow you to find a Nebula and camp there and let the AI come to you, which they will, because they know where you are even when stealthed. Take advantage of this to make the AI come to your side of the map, because your Tyranid ships are squishy, and if the enemy destroys one of your ships, your reinforcements will always come from your starting side of the map, and enemy reinforcements come from their starting side. The closer the fight is to your side of the map the more of an advantage you will have, especially on Hard difficulty where the enemy often outnumber you. If you lose ships, your reinforcements will be right there to help turn the tide. If you are destroying their ships with no losses, their reinforcements must cross the whole map, often one at a time, giving you time to pick apart their fleet ship by ship.

Be the first to comment