
These are tips and strategies on how to tackle this game. There are many ways to play, but for those who are struggling or are new players, this guide may contain useful information. Containing basic tips, strategies, what to avoid, and what to do.
Contents
Tips and Strategies
All credit goes to StateofNevada!
Introduction
This is designed for Breakdown mode only, but can be applied in any of the three game modes. All information and pictures are from my personal experience. I lightly touch upon common issues or things that I have not experienced, but that you should be aware of in case it happens to you. Keep this in mind when reading the guide, as this is just what I have experienced and recommend to do based off of that.
Assessing Your Situation
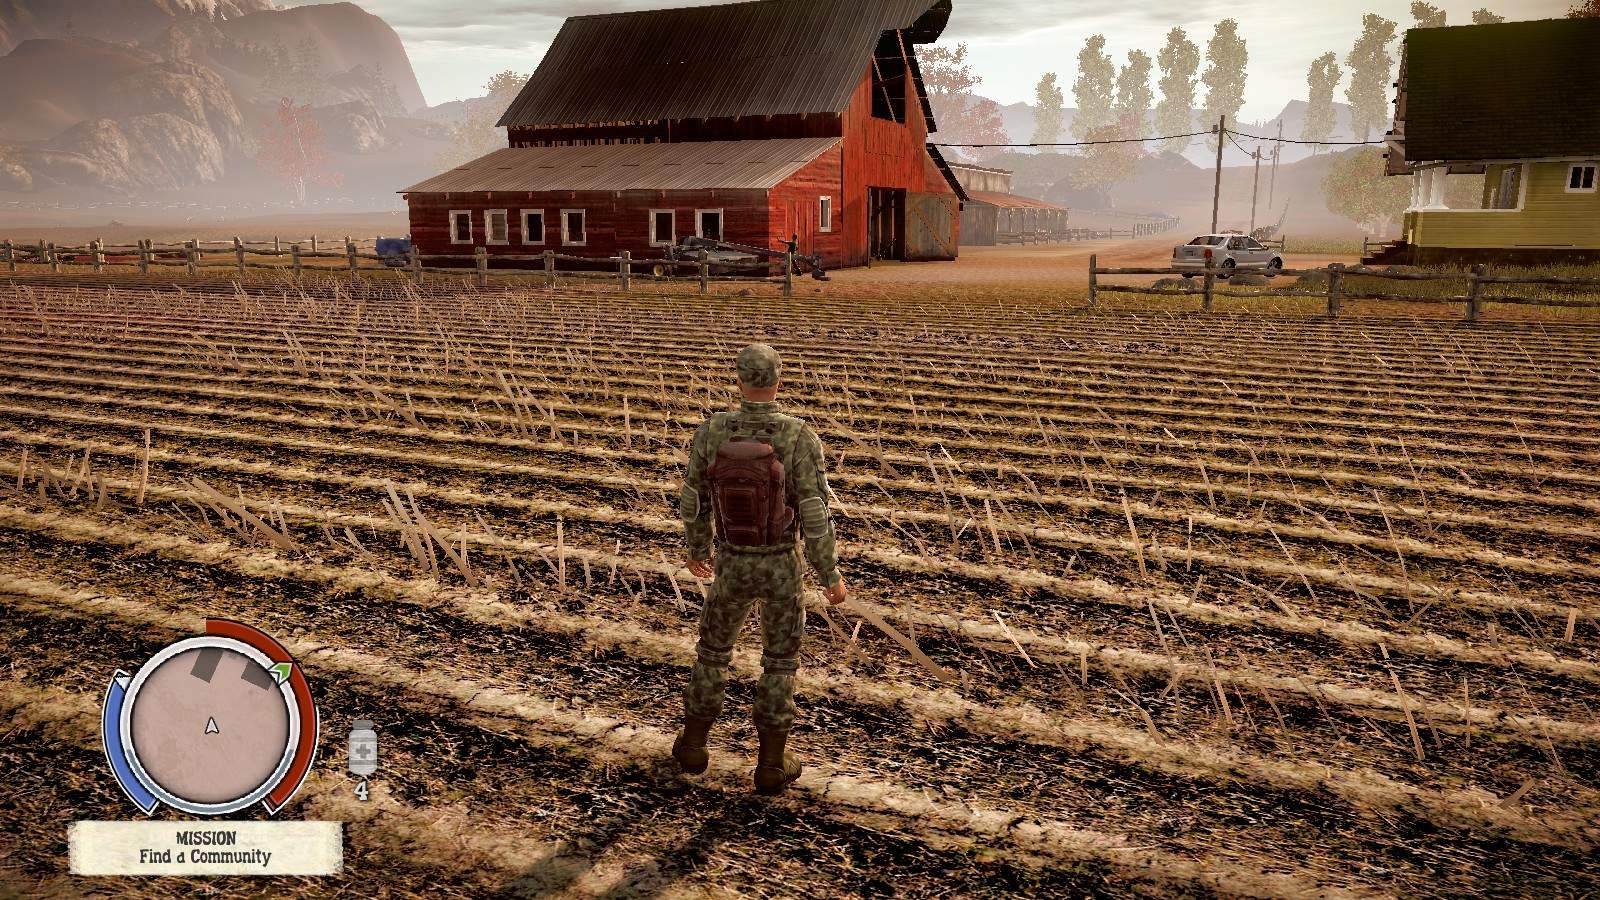
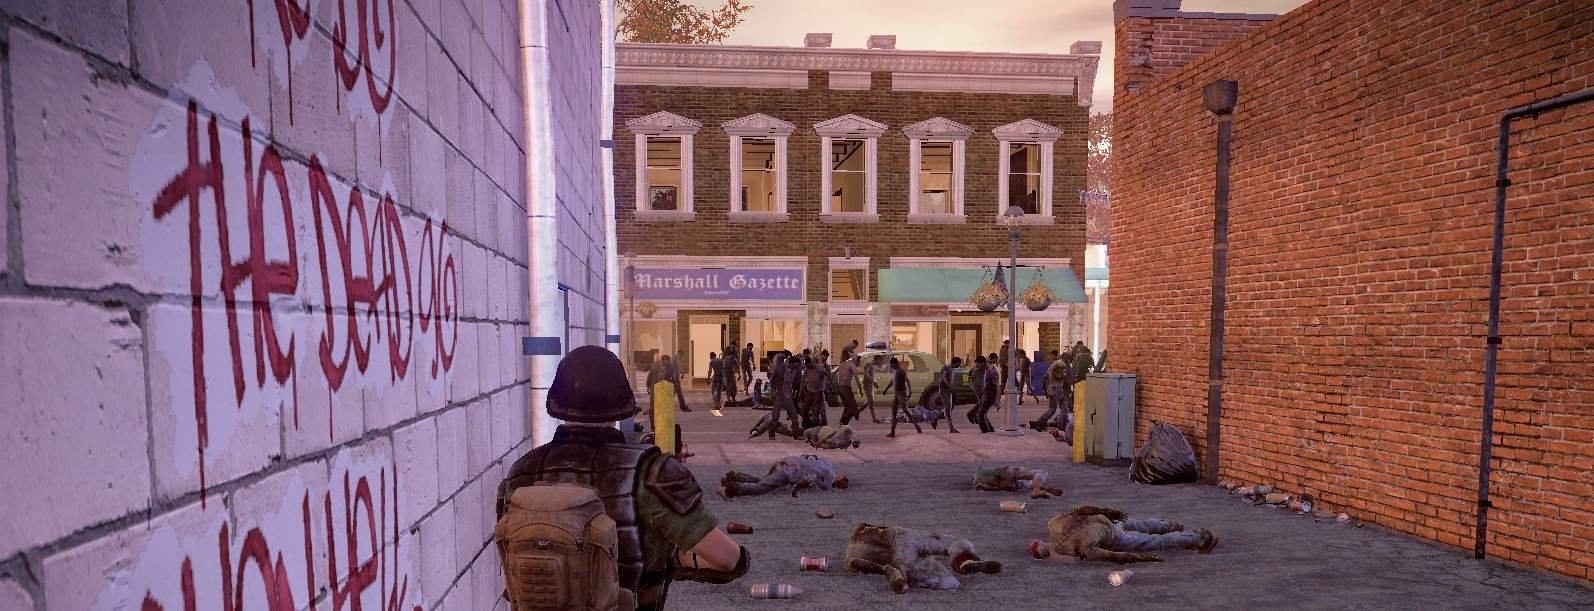
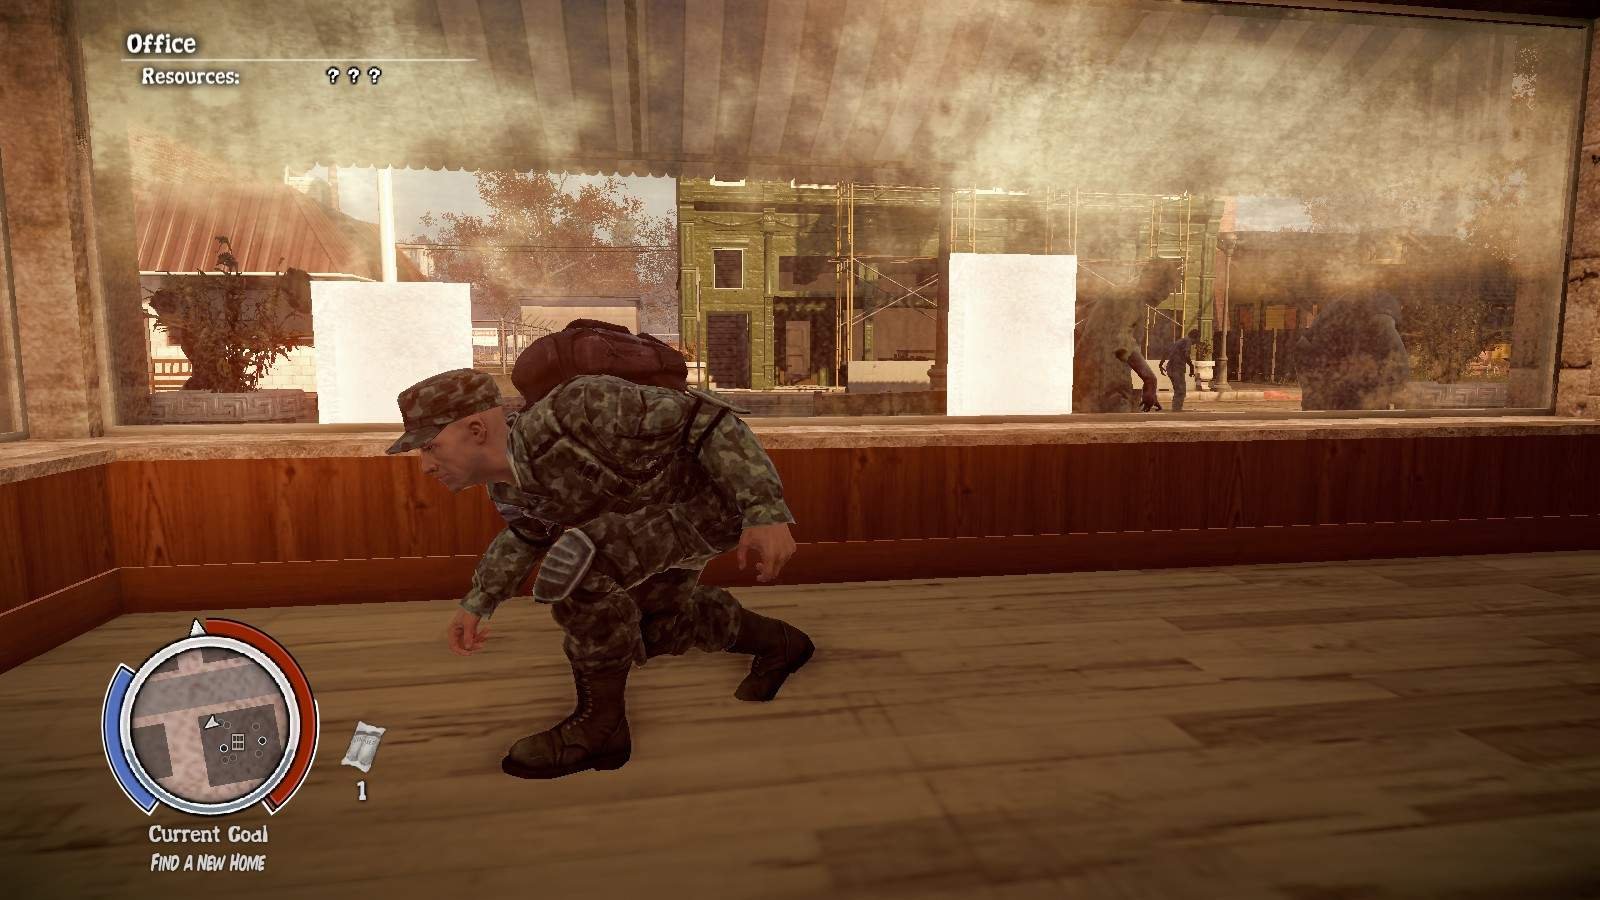
You are thrown into the world in a random spot on the map, and you have to navigate your way through the zombie infested world to find an enclave (a safe-house occupied by NPC’s in the game) to call your home.
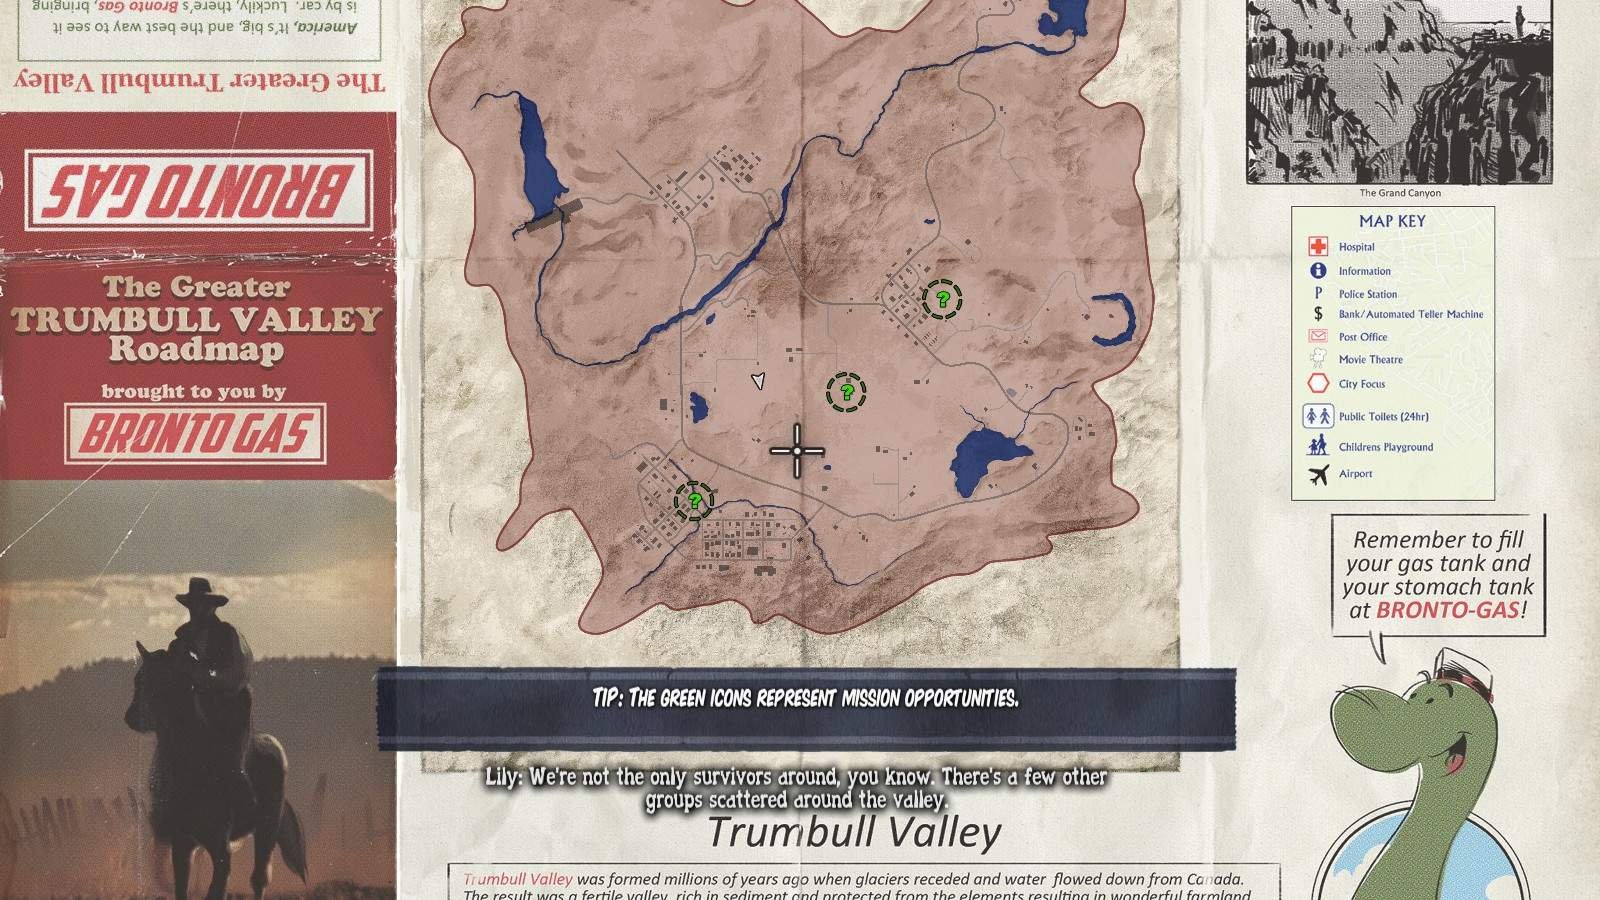
You will be given three options, usually one in the lower city (high zombie density, but plentiful and better loot), in a rural area in the middle of the map (very little is here to help defend your base, and a car is required to go anywhere, but the location is in the middle of the map), or in the upper town (not as congested as the city, but not as great or plentiful loot). The cities will be referred to this way to prevent confusion with names of cities for those unfamiliar with them.
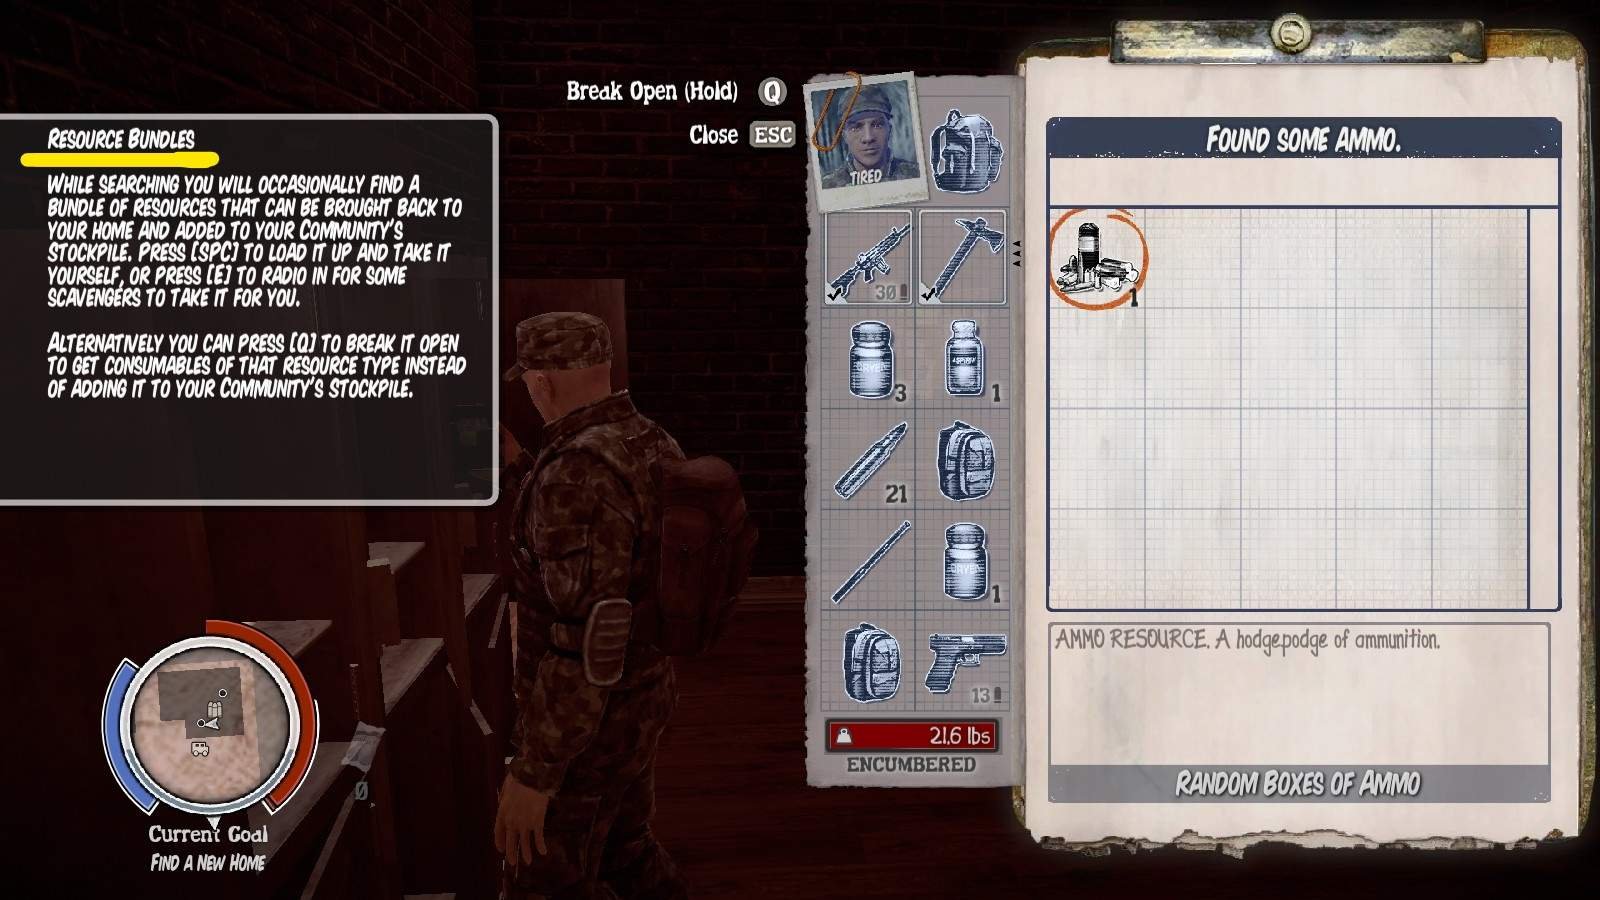
You cannot gather any resources (such as materials, medicine, food, etc.) but you can scavenge weapons, ammunition, and consumables while you navigate. It is useful to keep any resources in their containers, as once you take one it turns into a rucksack which can be dropped on the ground for later. Only so many may exist at one time, and that number is not very high. You can come back for them later (the map will helpfully notate this information automatically).

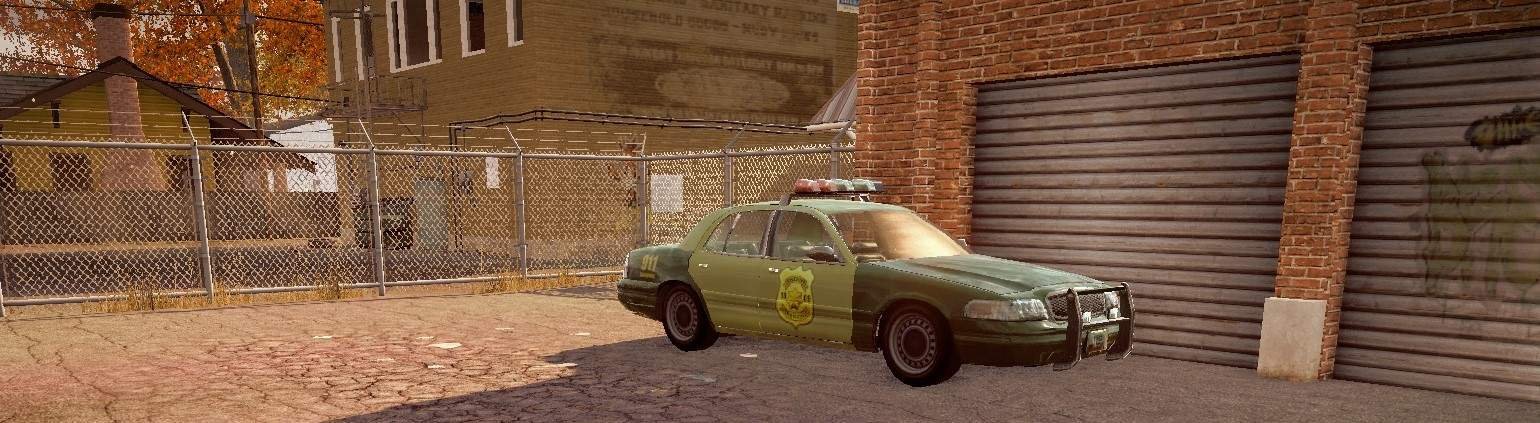
Cars are great in State of Decay, so long as you can handle the few zombies that will be attracted by the noise. It is recommended to travel by car in almost any situation, unless you are traveling very close by. I will expand on why later, but for now be aware there are special infected that require specific skill-sets and equipment to dispatch properly that you are not equipped to handle as soon as you begin the game.
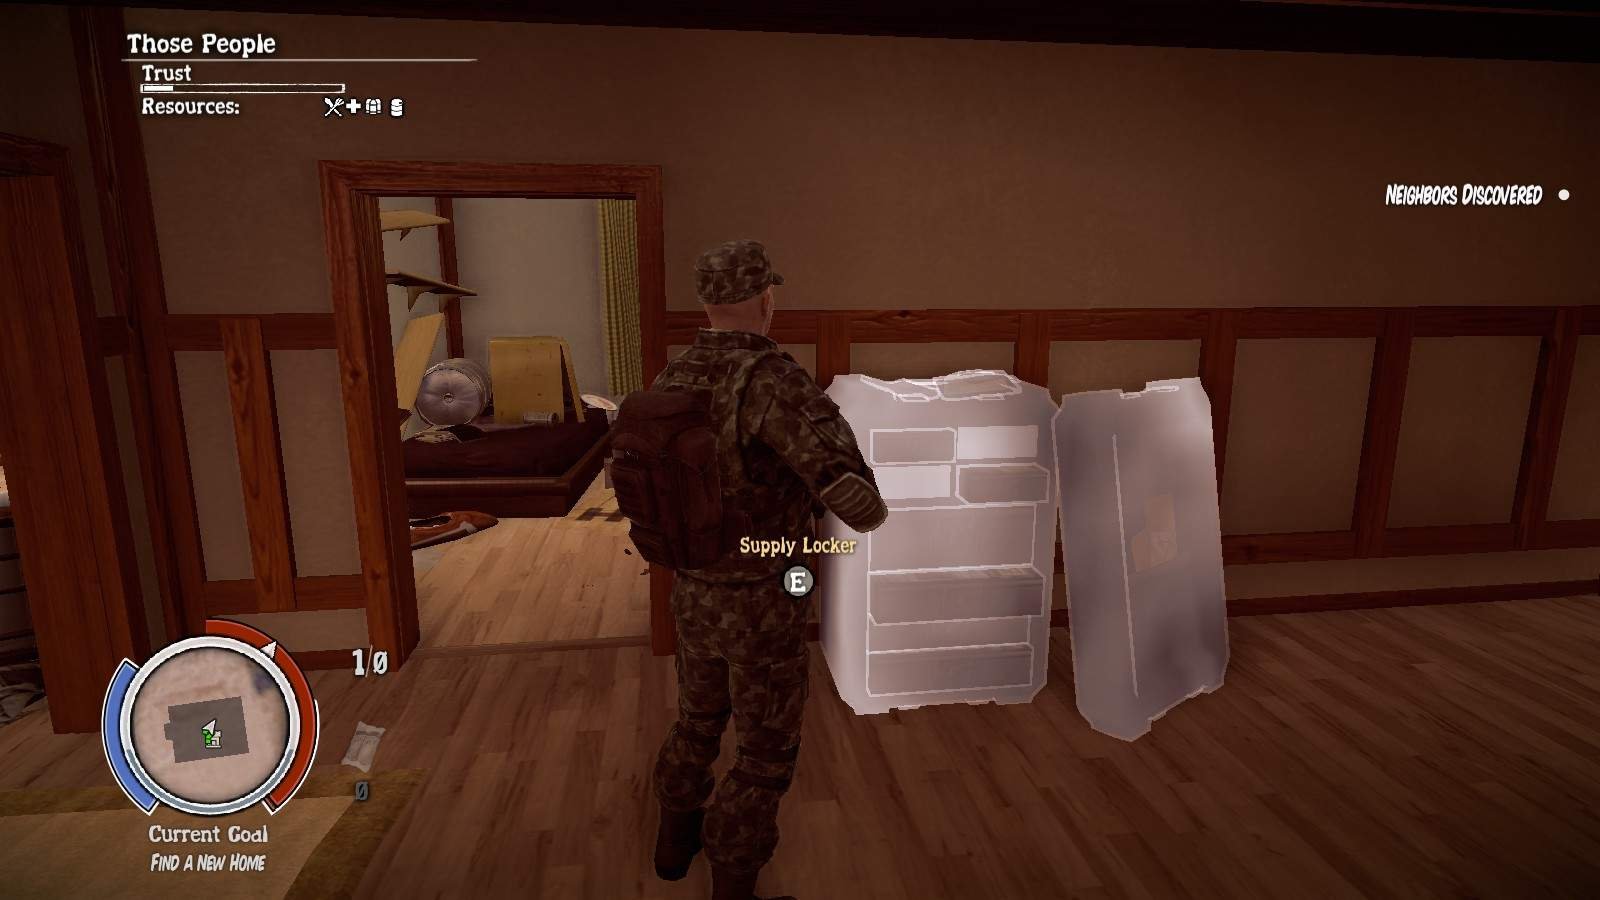
You can’t survive long on your own, as you will get tired and will need to switch to a different character once you exhaust your stamina and to heal any injuries you sustain. You should have a new home by nightfall, but likely you will get one within the first few minutes of playing if you travel by car. Weapons deteriorate and need repaired over time. Guns jam. Weapons need to be placed in storage lockers to be repaired (along with required resources if necessary). You will need a home-site for this. You can only carry so much, and items need deposited into storage lockers to be saved for later use.
Bugs to Be Aware of
State of Decay: Year One was a great game – it still is. But there are many bugs which have survived through the years. These are important to notate, so I am explaining them now before we delve too far into what to do.
Zombie Spawning – The way State of Decay handles zombie spawning is targeted to help reduce lag and processes in the game depending on the distance the zombie is from the player. The system isn’t a bug, but it is due to the design of the system that some of the bugs listed below still exist.
At it’s furthest distance from the player, the zombie will have the simplest AI movement and detection in place. They will have different animations.
Once the zombie is within a certain distance of the player, it will gain more complex AI movement and detection systems.
Finally, when the zombie is within combat range of a player, it will enter it’s most advanced form, with all mechanics and animations in place.
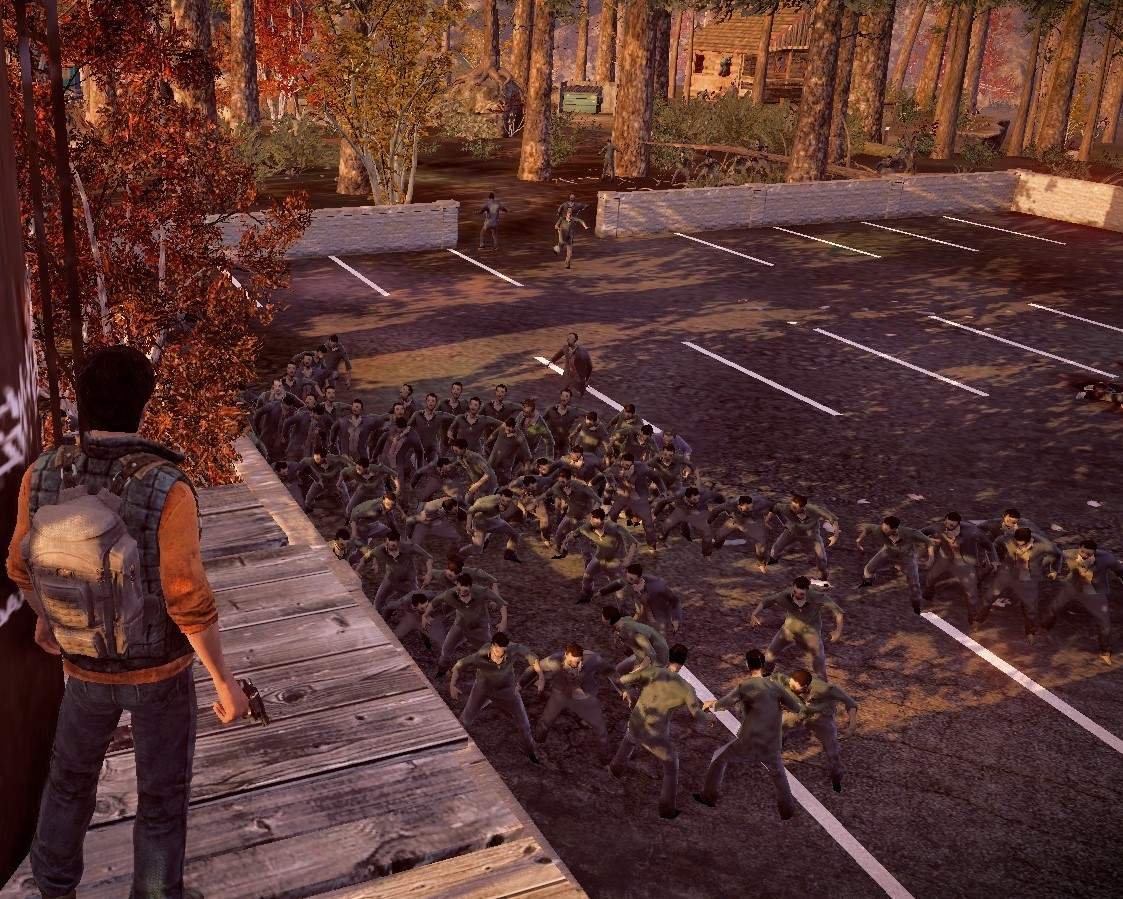
Common complaints are infinite zombie spawns (a bunch of undead constantly pouring out of extremely small shacks and such) or a more common problem (I have personally encountered) is that zombies will spawn directly behind you or as soon as you exit the vehicle. Not 10 feet away no, but rather directly behind you. Keep your dodge key handy, it will be extremely useful, and keep your head on a swivel.
I played it again recently and encountered this problem for the first time. There were so many pouring out of the cabin that I guess they were in the animation where they can’t be killed. My shots just went right through them like they were not there.
Some zombies spawn under the ground, this can make completing certain quests…difficult.
Other relevant (common) bugs are as follows:
- Zombies clipping through walls (or as I noticed, when they continually run in place to get to you as they are stuck against a wall/car/etc.) – if you notice a zombie running in place, dispatch it or give it space, as it will teleport a few feet in the direction it is facing.
- Zombies spinning while laying on the ground – this can prevent head-shots, and you must be careful not to get too close as this occurs more often the closer you get.
- Sidewalks cannot be walked on from the road, you have to jump up sometimes to go onto the sidewalk. – keep this in mind if you are being chased.
- Vehicles flipping randomly – State of Decay pushes the player to use vehicles a lot. Unfortunately, it is all too common to run into problems when using vehicles. They have a reputation for flipping or launching into the air randomly, which can cause them to explode and lose your haul and leave your stranded as the noise of the explosion draws a crowd of zombies in. – A great way to avoid this issue is to avoid going at high speeds, avoid catching air, and stick to the roads when possible. Also, do not turn too suddenly when going at top speed.
Mistakes to Avoid
State of Decay: Year One has a learning curve.
And education has a steep price.
State of Decay showcases a permadeath experience. So to avoid a mistake that can only be learned by playing the game (or by reading this or any other wonderful guides) and rage quitting, read ahead to learn of what not to do.
Special Infected
There is a special infected type that detonates into a gas cloud that is poisonous to humans. They blend well into those 1 or 2 zombies that are along the road, or that horde blocking the way through to the other side of town. You don’t see them until it is too late, and by then you have to abandon the car or your character will be seriously hurt until the gas subsides. This will leave you vulnerable and hurt.
Tip: Avoid smashing zombies with the car unless necessary. This not only prevents the above scenario, but also prolongs the amount of time you can use that vehicle until it needs repaired. Doors can fall off (leaving you susceptible to being pulled out of the car) and the car can be destroyed if left un-repaired, leaving you stranded. The zombie count does not get diminished per zombie you kill, nor does the spawn rate, so going out of your way to kill zombies does not benefit you unless necessary.
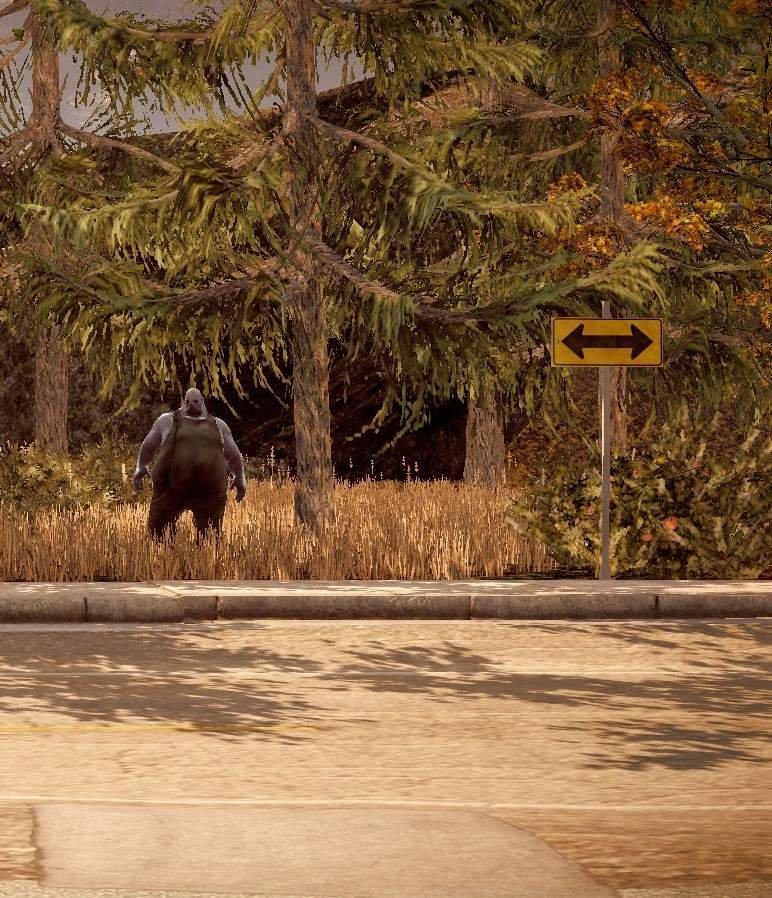
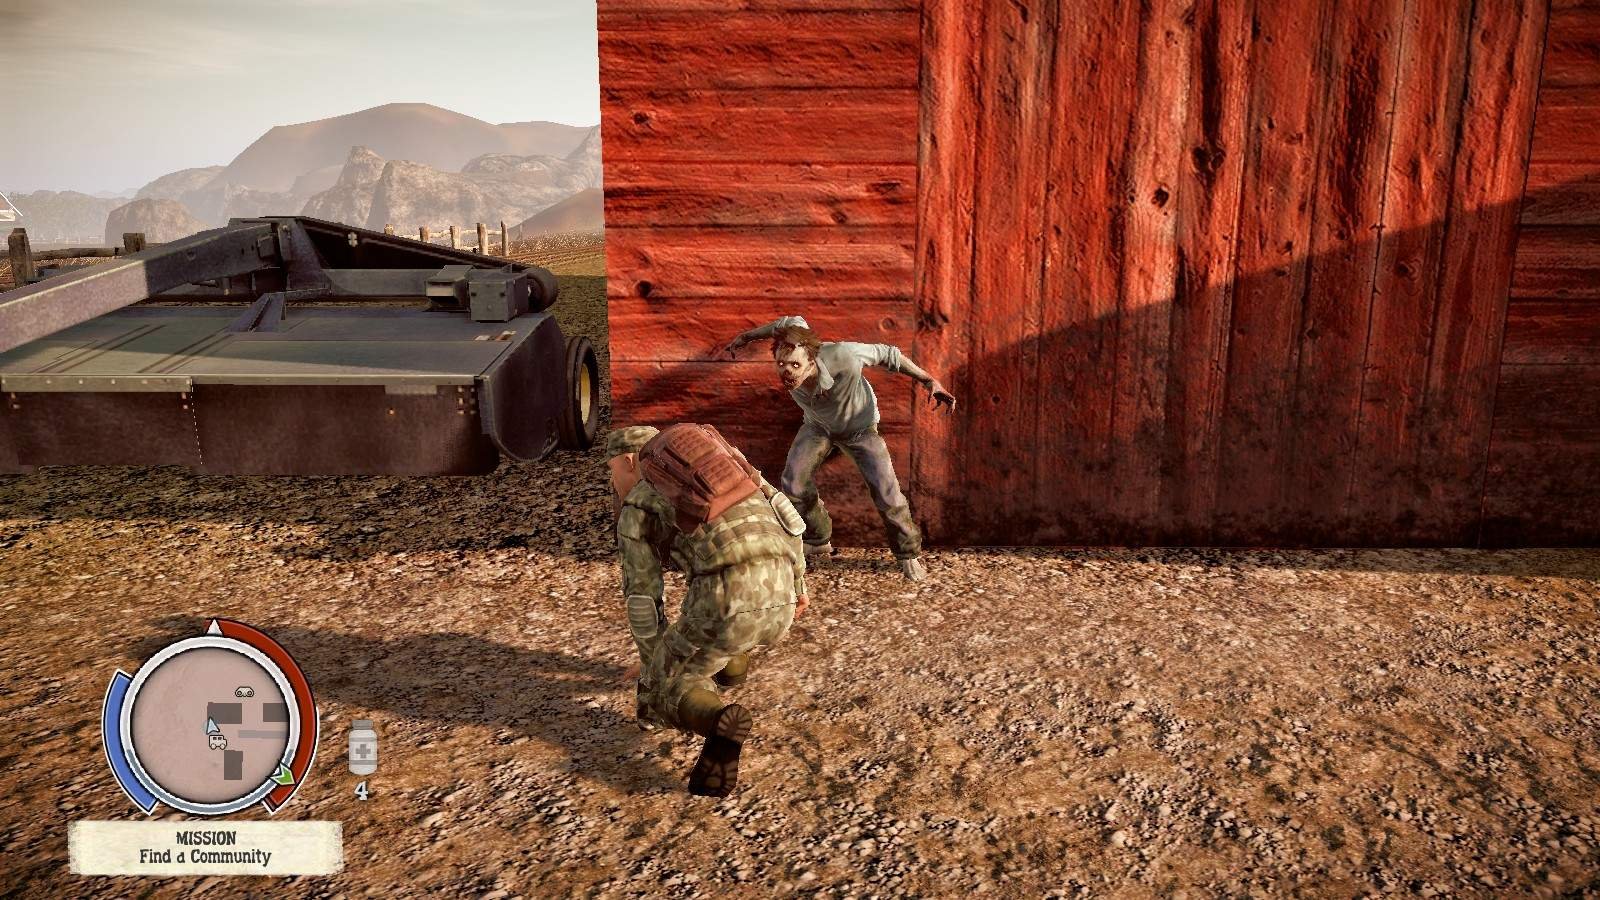
The Bigun’ is a big ol’ baddie. He is heavy and big, but certainly not slow. Don’t be fooled, he doesn’t charge at you in a straight line – he can change direction (slightly) during his charge. Unlike all other zombies, vehicles are not an insta-kill. In fact, he will damage your vehicle greatly, leaving you almost defenseless and without an escape route. You will be able to knock him over – but you won’t be able to hit him again before he gets up as you lose all momentum. He takes a lot of hits, and isn’t shy about taking them. Oh – and he can kill you – fast.
Tip: To avoid his charge, time your dodge well, as he can account for your change in location up to a point. Move far, and move far fast. Save your vehicle – use artillery bombardments, grenades, high-caliper weapons, or any other such tactics to dispatch these ones. Do not let him grab you, and only attack in close range when he is stunned. He can pick your survivor up and rip your apart – literally. It happens quick and without warning. If he grabs a survivor, be quick to put down some punishment, there is a chance you might be able to save them – but just a chance. This would be an appropriate time to ram the infected with a vehicle – you might lose the vehicle but at least your can save the survivor.

Ferals – they are quicker than you, you can’t run, and you can’t hide. They pounce, which is good for you – if you see it. Don’t let them get too close to your vehicle – they can rip your door right off their hinges, and the second time they will grab you out and rip you – well to pieces. They are the only infected capable of dodging an attack (especially when attempting to run them over with the car – though sometimes they will run into your car for you).
Tip: Dodge out of the way and they will be laying on the ground – prime to be put to rest for the last and final time. These guys, along with the bigun’s, are the primary reasons you do not go on foot over long distances. I primarily find ferals and bigun’s prowling rural areas.
Be aware of the spawning system
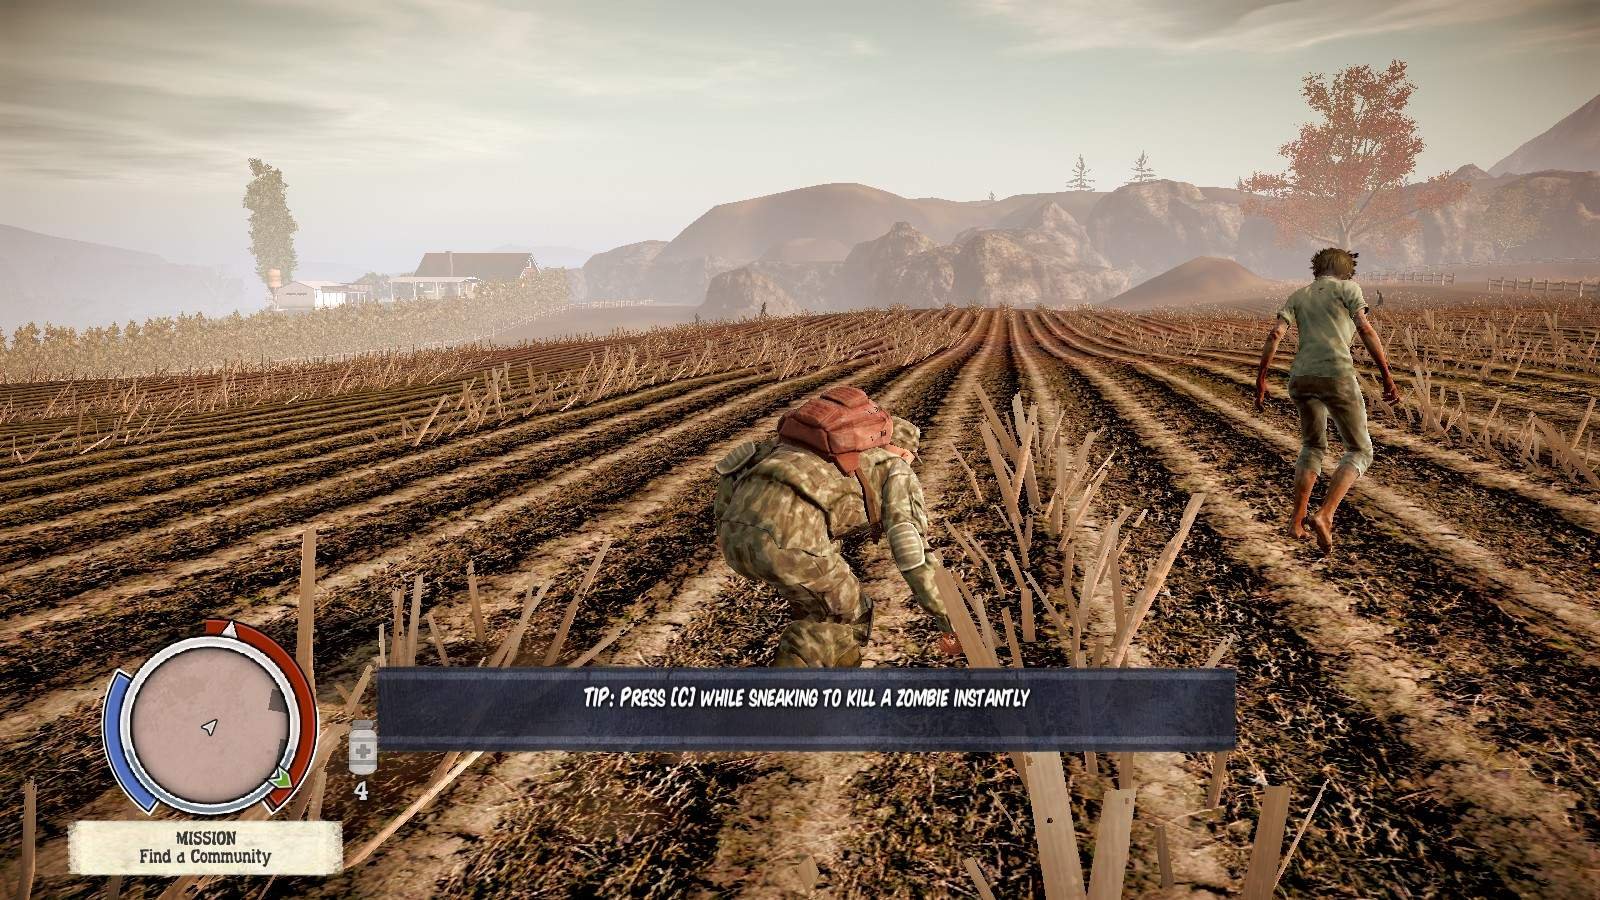
Due to how zombies are spawned, they cannot be killed like normal at long distances. They will still be knocked, but take a lot of power to kill at long distance. Note their animation before firing, getting used to which animation is playing will tell you if they are within range to be killed or not. They also may look differently (not as detailed) which can help determine this factor. This conserves ammo. See the bug section above in the guide on how to tell the distances apart (if you are paying attention, you will notice that difference in the way the zombie is rendered).
Pausing the game
Opening the map does not pause the game. Neither does pressing the tab button to see the home-site menu.
Vehicles
The vehicles can easily be turned over, and they don’t handle realistically. Get used to not going full speed, as constantly going full speed is a recipe for being launched into the air and turned over – and losing your haul.
Saving the game
The only time the game does not save is during a mission or quest. If you are about to die, you can attempt to close the game before you die to save your character, but this is considered a cheap tactic* (unless the game killed you be spawning zeds on-top of you or in some way did something similar of that nature, in which case this would be appropriate). This means that vehicle that just flipped over a moment ago will save as being flipped over even if you shut everything down as soon as it happens. So don’t expect to go around screwing around then attempt to load your save to 5 hours earlier.
Barricading Windows

A feature unfortunately lost on State of Decay 2, you can barricade windows to give you time to hear incoming threats and dispatch or escape before they break in. If you are rushing through a house to quickly loot one or two things then it is not advised, but when looting a whole house it is recommended. Ferals will break through barricades on one hit. The action it takes to barricade a window creates some noise and will draw nearby undead.
Looking before Looting
When arriving at a location, do a quick perimeter search if possible, to avoid any surprises. The spawning system may throw a surprise at you. Be mindful of where you park your exfil. Always have an exit strategy planned.
Choosing a Homesite that fits your needs
Once you assess your situation, and understand the bugs and mistakes to avoid, it is time to open your map (remember this does not pause your game) and choose a homesite. Your options will be between three locations, indicated by a green circle around a location.

Upper City
The upper city is not as dense with zombies, but they are still a common sight. There are plenty of places to duck into, and plenty of resources to find. This suits for playstyles focused on looting as much as possible as quickly as possible in a single location. 3-4 outposts will cover 1/2 the city here, if not more. This greatly reduces the risk of being in the area and keeps you from having to return home often to defend against hordes. It is recommended to start your first homesite here if you are new to the game. The main campaign will also place you here shortly after you start playing.

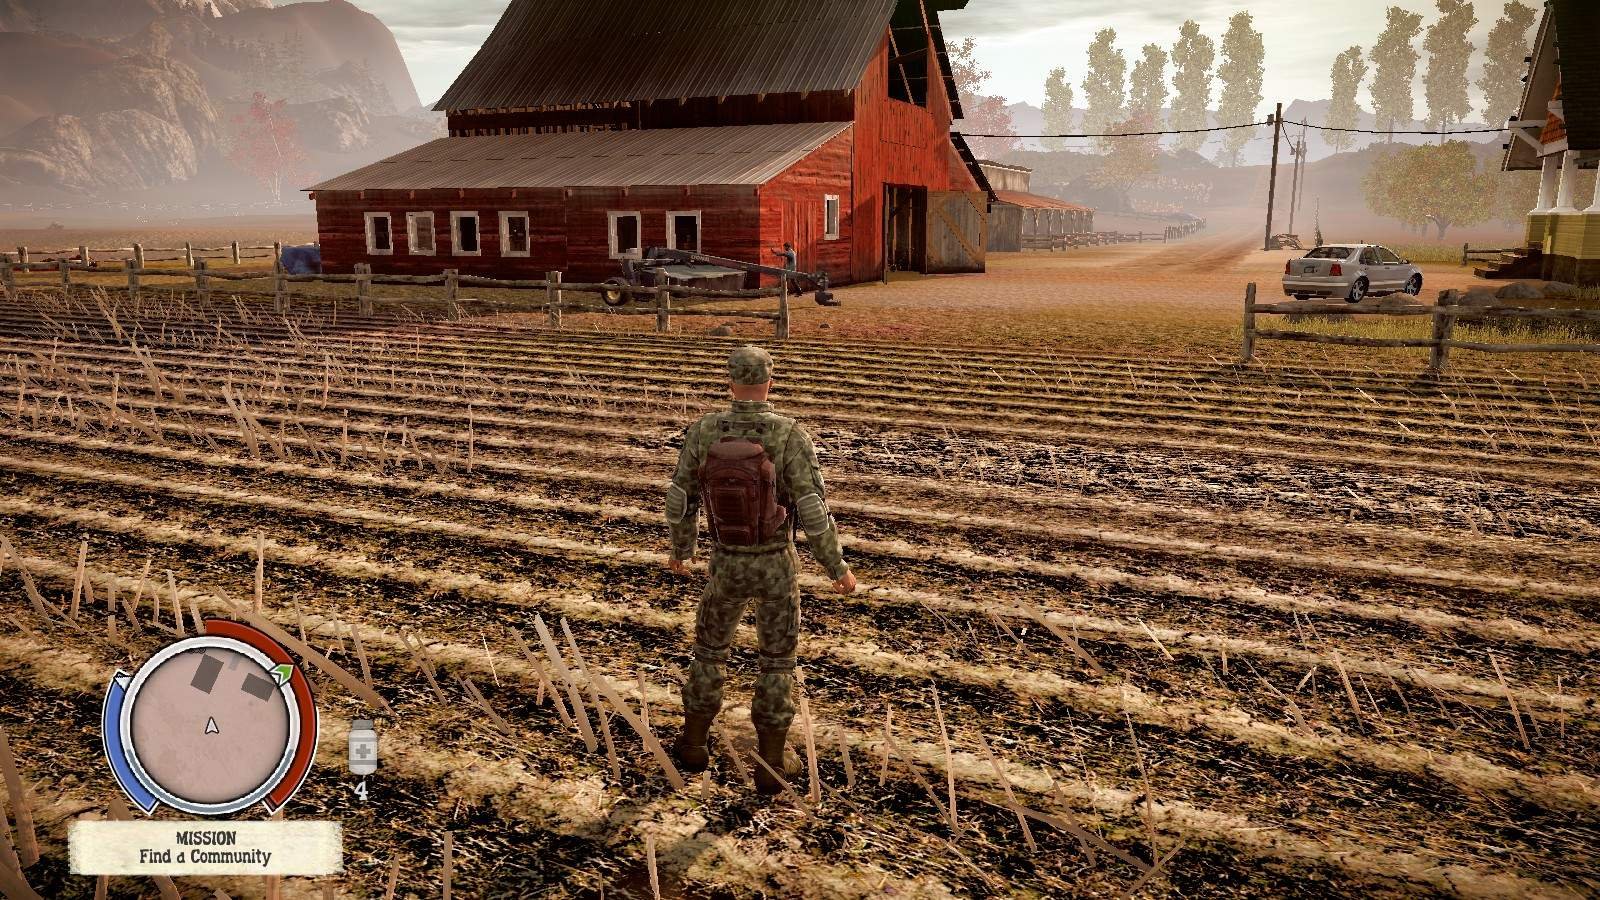
The Rural Area
The Rural Area is sparsely populated with the undead. However, don’t think that means this area is safer. There is only one outpost to defend your homestead and to eliminate zed spawning around your base. My personal experience has shown that freaks (special infected) spawn more frequently in rural areas. Primarily the worst of the lot, Ferals and Bigun’s.

The Lower City
The Lower city is densely populated with the undead, but grants access to a ton of loot. Roaming hordes are a constant problem, along with being on the very bottom of the map.
Scavenging a Building: The Three Strategies
The way to pick scavenging locations are divided into three strategies: Location, Risk, and Reward.
Location: This is important. It involves determining many things:
- How many buildings you can scavenge from nearby?
- Is it near an outpost or a place where you can set an outpost so that you don’t have to drive back to base to drop off your supplies?
- Do you pick the scavenging spot nearest to your base and work outwards, or furthest from your base and work inwards? Or do you go from spot to spot at random?
- Do you go to where you can loot the most amount of things, or go to where you can loot the most amount of valuable resources, even though it may only be a few places to loot? (Quantity vs Quality)
- Do you have the equipment to survive the trip there and back?
Risk: This determines what you are risking, and what you are risking it for.
- Do you need to loot the pharmacy for medicine or the market for food more?
- Do you go nearby where it is safe, or do you risk a longer adventure?
- Do you go to scavenge for items to prepare, or to build outposts to defend?
- Do I go where I already looted and can find one or two good things that I couldn’t grab last trip, or do I go loot that untouched mechanics shop where I might find some more good stuff?
- Do I stop my run to grab that needed material to finish upgrading my medical tent, or do I delay the medical tent so I can finish this run?
Reward: This determines the decision, is this worth it?
- If I do loot this storage warehouse, I will get he materials I need to upgrade my facility.
- If I don’t loot that army camp until I make a few silencers, I won’t have to risk losing this character that I spent hours upgrading their skill-set.
- If I loot this area and build an outpost, it will keep this area clear of zombies to reduce further risk in this area.
- If I get through these houses on my way now, I won’t have to come out of my way later to loot them.
- Do I leave this for later, or make room for this to bring back now? Which do I need more?
The way to handle clearing a building for scavenging involved three strategies: stealth, assurance, and necessity.
There are many ways to handle clearing a building, but sometimes using your usual strategy won’t work well. Here is several common strategies.
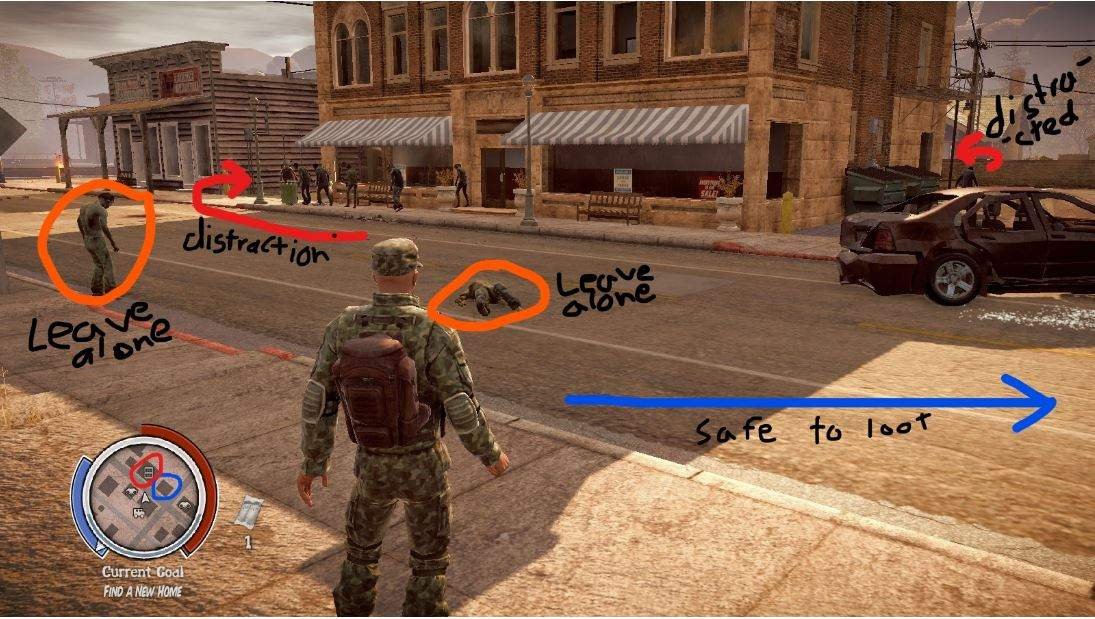
Stealth: Zombies, even just a few, can cause some trouble for you. Sometimes it is best to avoid them.
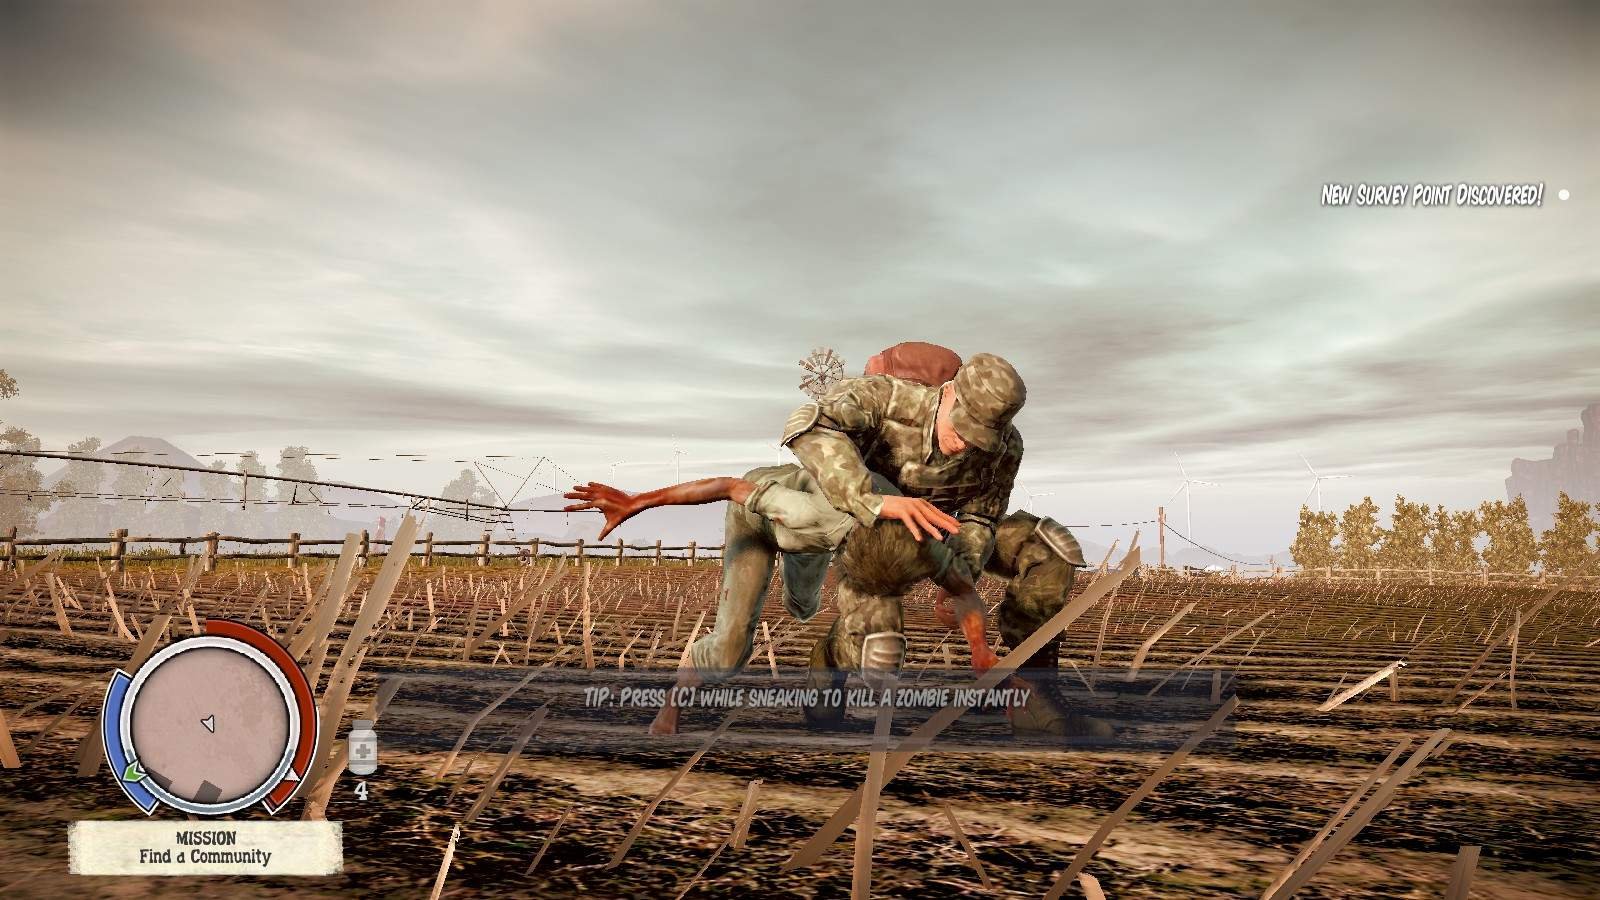
Zombies react to sound, light, vision, and player made distractions such as firecrackers. They do not sense smell. Hiding in a bush or breaking line of sight will reduce your chance of being spotted. Silently dispatching zombies one by one reduces the risk of you getting into a large fight against the un-dead. Avoiding these scenarios increase your chances of survival. This takes some time, but can be done with relative ease.
Assurance: Sometimes, it is better to double-tap than risking letting a zombie go un-tapped.

Either by shock and awe or simply taking on zombies one by one, you ensure every zombie within detection range is dispatched or otherwise removed from the area. This increases your chances of survival, but is risky to do if ill-equipped, and a simple mistake (or bad luck) can cause a very dire issue.
Necessity: The bare minimum, designed for those who need things done, and done fast. Get in, get out. Not a zombie more, not a zombie less.
Zombies in your way are taken care of, those who aren’t are left alone. Very simple. Those looking to simply get the most use of their weapons might look to redirect the undead like a glorified traffic cop might wish to attract the undead and lead them to an area out of the scavenging zone, then losing the crowd and make a long swing back to the area they wish to loot. This takes a minute to do, but quickly gets rid of the zombies without needing to use a weapon, as zombies will look for you in the last known area – great for those wishing to keep their weapons as long as possible.
Quests
Breakdown was designed with the audience in mind: Play how you want without needing to go from quest to quest. This being said, breakdown still requires you to prioritize your tasks. So what is important, and what can be left alone?
Ranked in Importance:
- Ally in Trouble – One of your members are stranded, save them or let them die.
- Stranger in Trouble – a random NPC is stranded, they may join you or lead you back to an NPC safe-house if you follow them.
- Beseiged – An NPC safehouse is beseiged. This is the quickest way to get a group of NPC’s to join your homestead. Directly after the mission (after it is completed 2-4 times) the NPC’s will likely ask to join your group.
- Infestations – A Roaming horde infested this place, you need to drag them out. Not taking care of them present a number of problems.
- Roaming horde headed to base – Depends on if you have outposts defending your base or not, but if not then move this up a few spaces. When you first gain your new homestead, it is likely this mission will activate, and you will have to defend your new home.
- Hero – Not as immediately necessary, do these asap to claim the hero and welcome them into your group.
- Scavenger? – Helps identify an NPC safehouse.
Claiming Your First Homestead
For simplicity, I will use the town most newer players should use so that they can get a grasp on things before moving on. This is the upper city, where the zombie crowds are not as dense.
Now that you know the rank of importance with quests, you can now prioritize them based upon your current needs. For example, if you can’t support more survivors, then simply lower the importance of missions dealing with those who are not yet part of your group.
I will share my experience on a run through to give you a rough idea of the first days events.
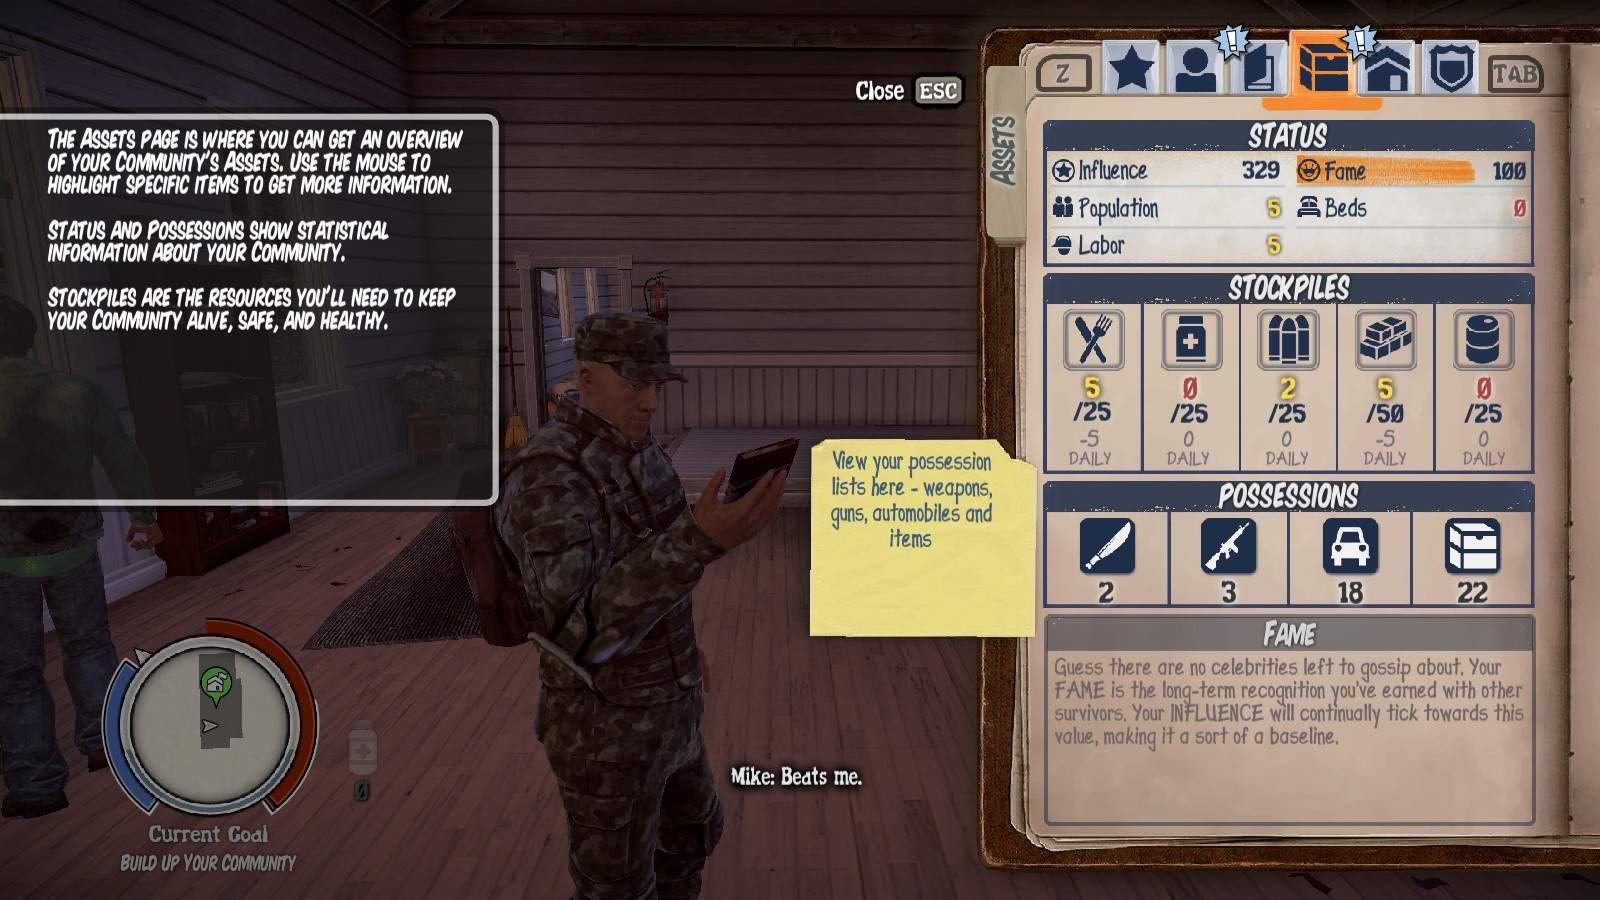
The very first thing I do is to look at the assets page by accessing the menu. This tells me how many people are in my group, weapons available, items available, and the resources we need and have as well as the daily consumption I need to compensate for by scavenging.
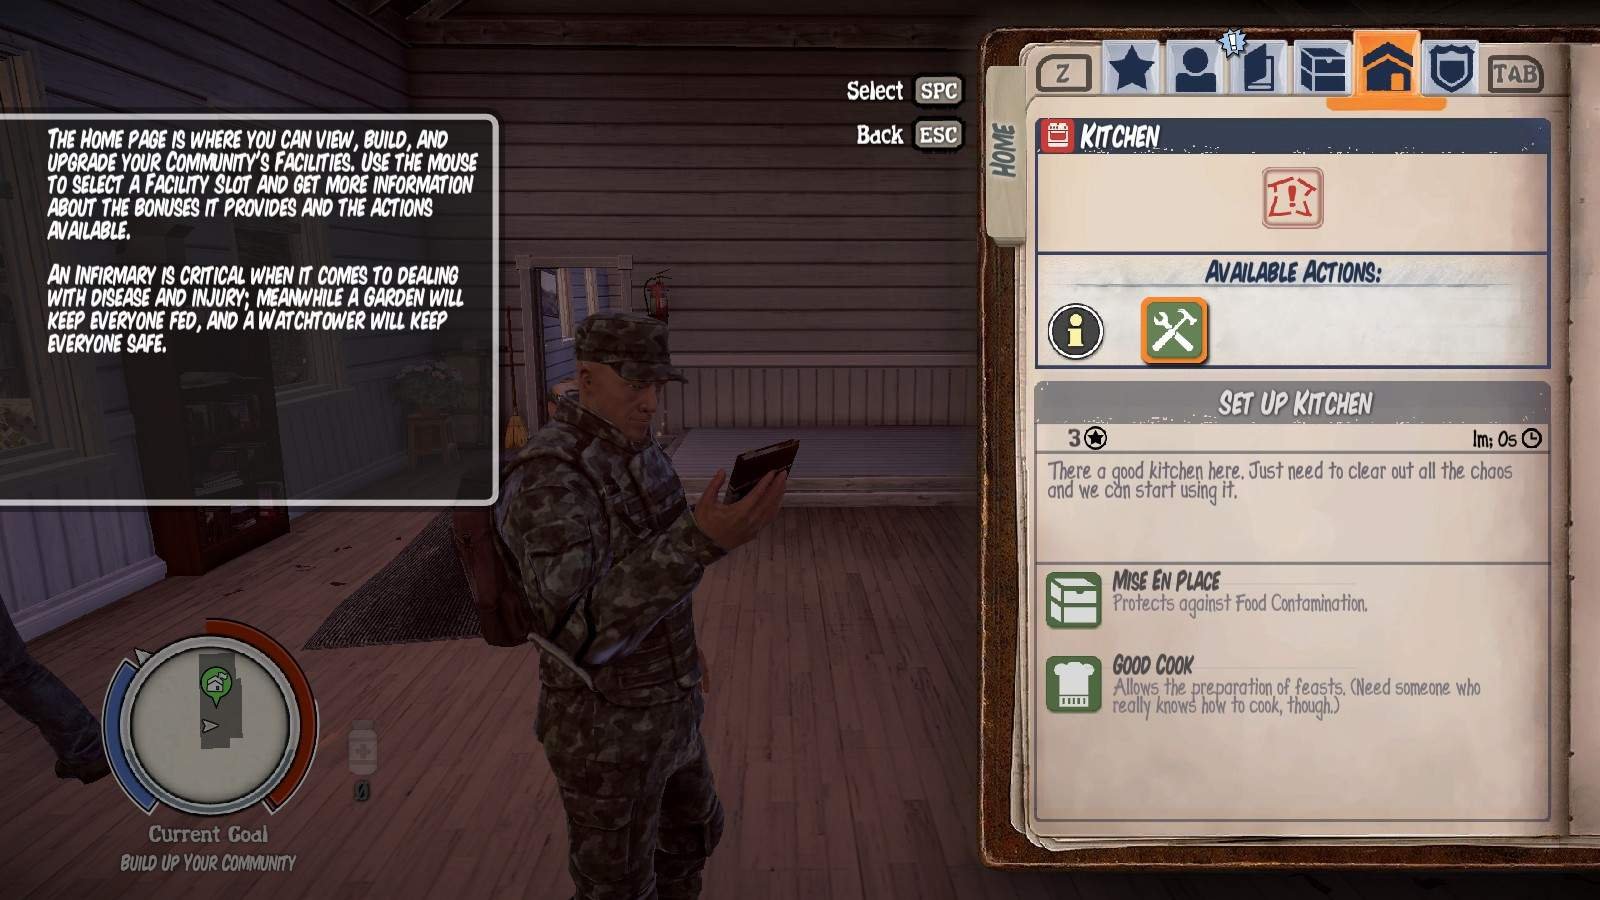
Next, I move onto the Home Page, where I can find and build new facilities, and once I gather the materials, upgrade them.
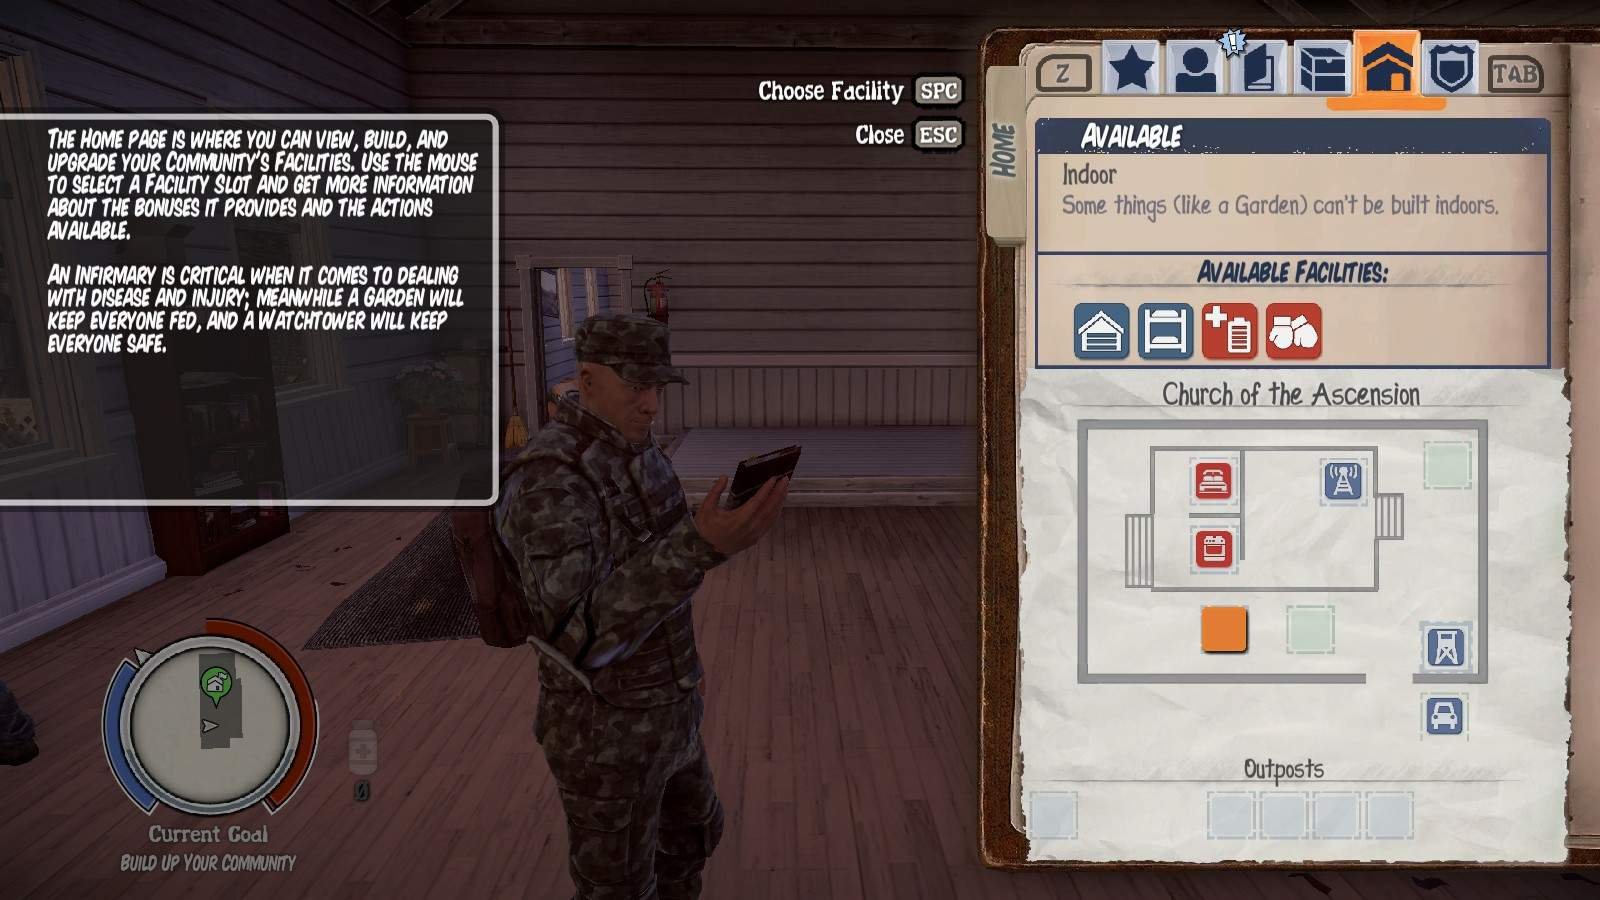
Once on this page, I like to fix up the rooms that are already installed so that they can be used immediately and I can start receiving their bonuses.

You can see I have the kitchen and bedroom pre-installed, they just need fixing up.
Once that is all done, I start looking for materials and fuel.
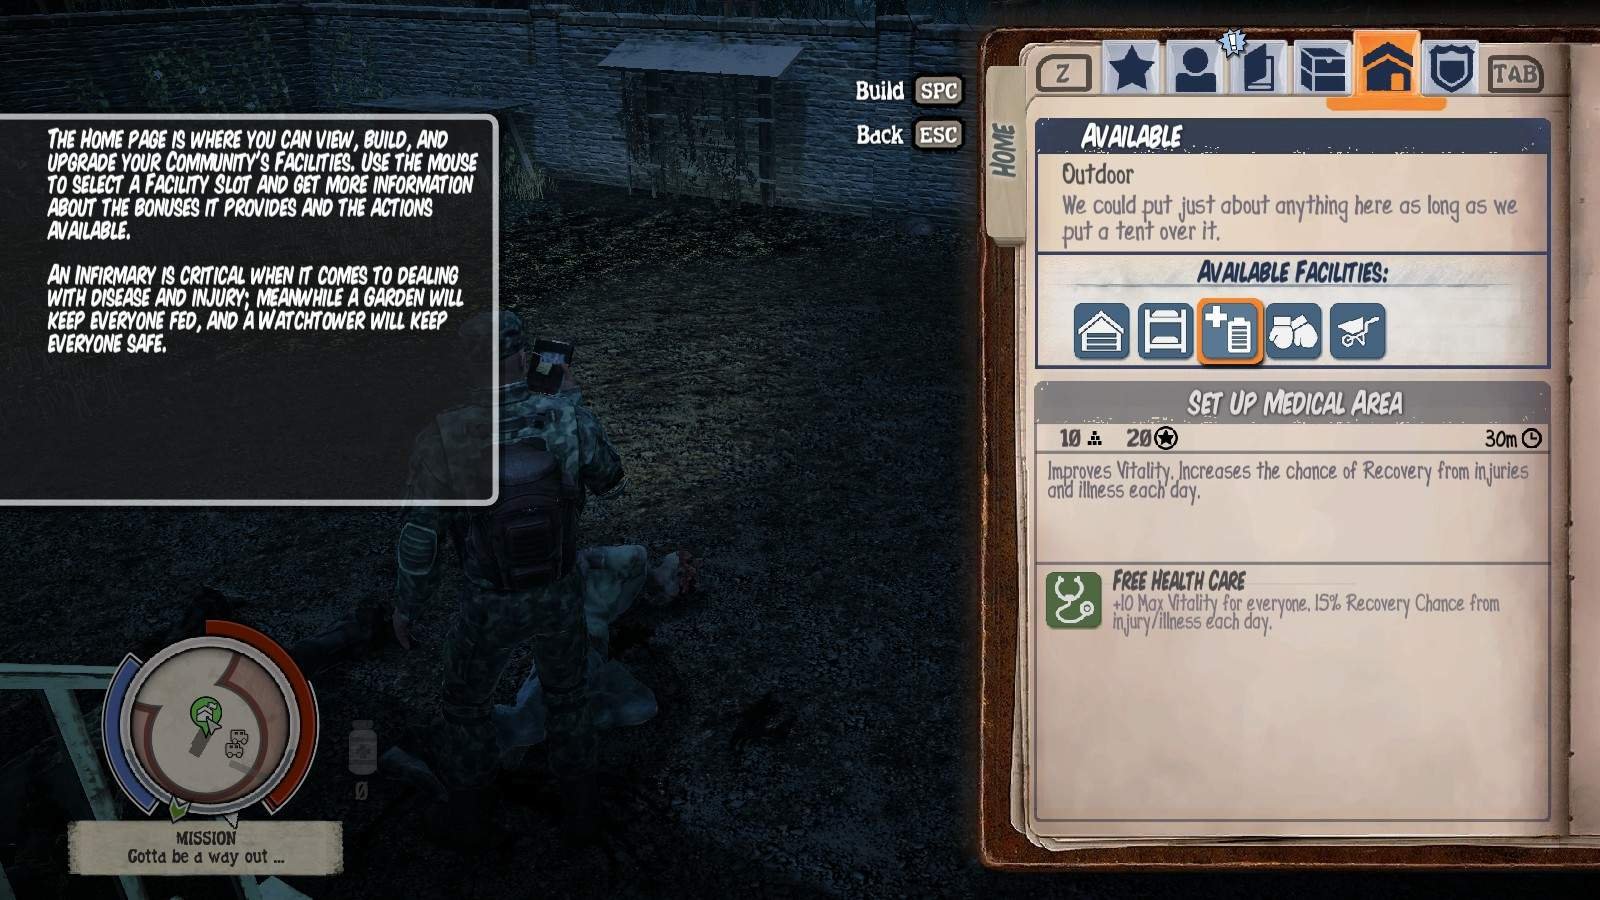
Materials come first so that I can put a bedroom and medical facility in. Fuel comes second.
Once I place the order to build these facilities, they begin to be setup by the labor available (seen in the asset page explained earlier.) If no labor is available, I cannot build anything.
Once that is taken care of I move onto fuel – This is extremely important to keep my base safe. Outposts need fuel to keep their defenses armed.
Once I deposit some fuel into the stockpile, I find an appropriate place, and establish it as an outpost via the radio commands.
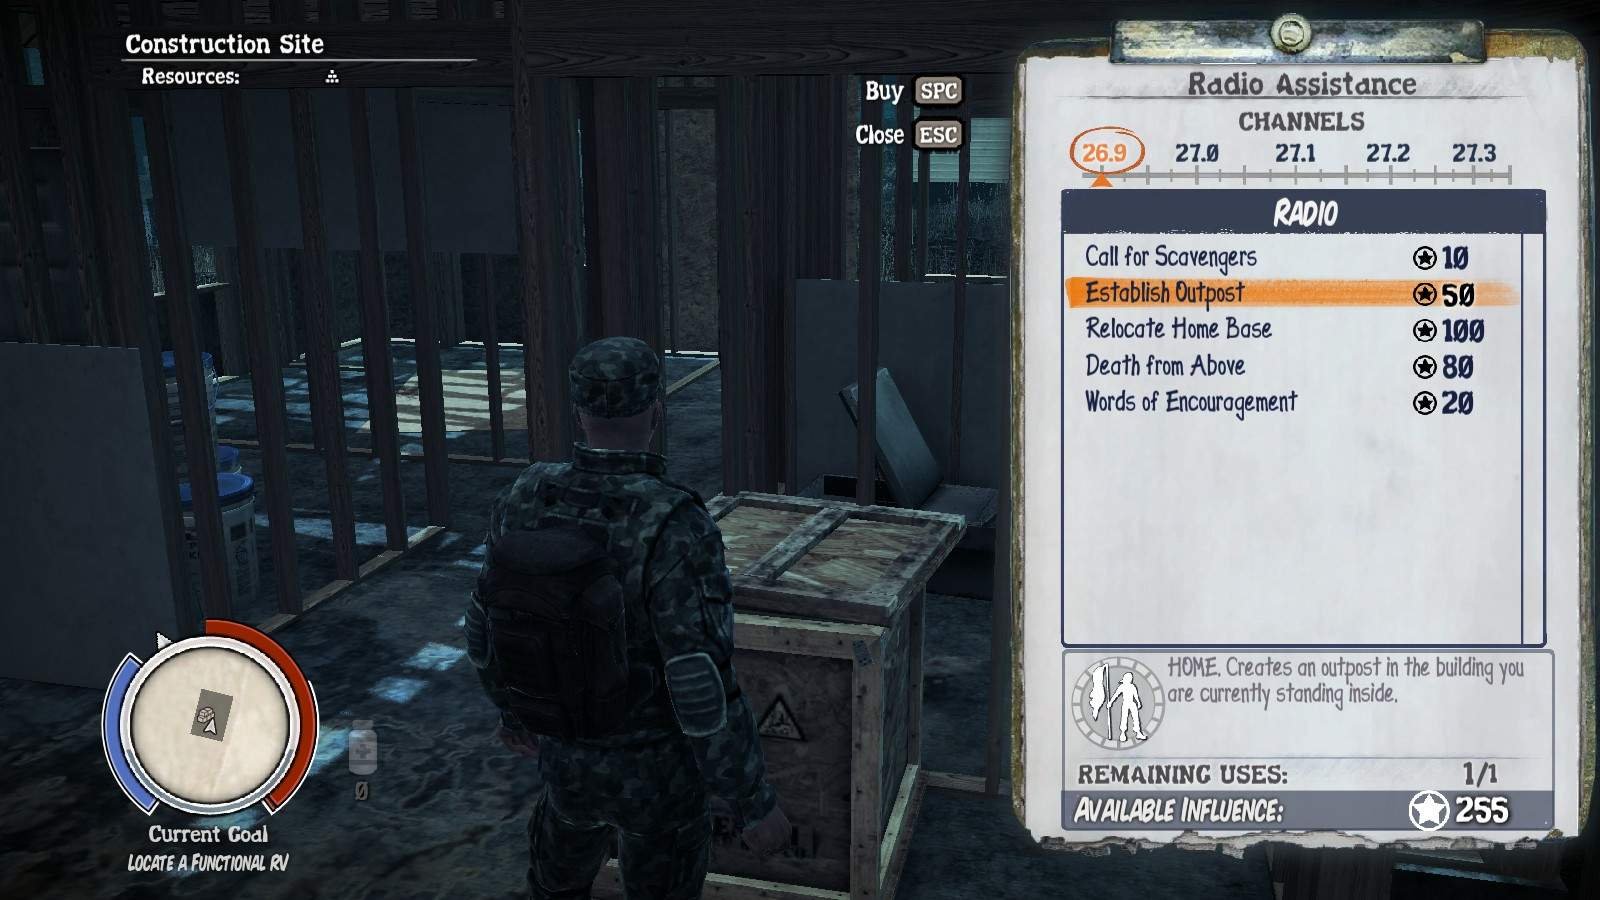
Outposts generate a safe area zeds can’t spawn in, as well as (when armed) they will take out a single wandering horde.
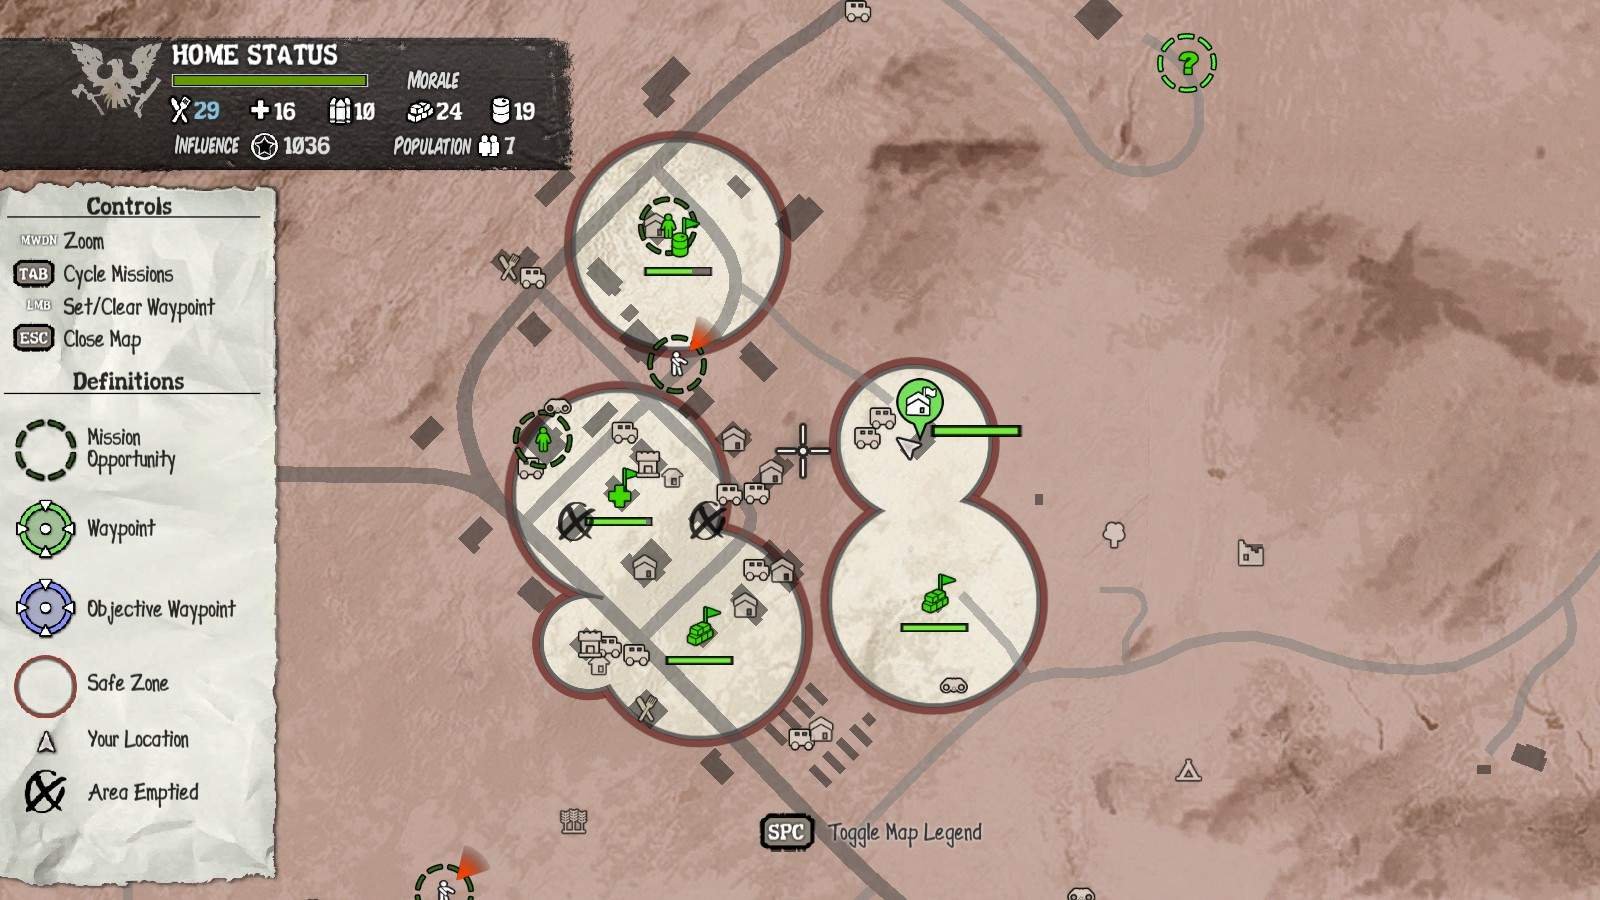
Placing these outposts tactically can maximize their output, which is very useful early game.
They need a small amount of time to re-arm, but the safe area is permanent. If it is not fueled up the safe area is reduced until you arm the outpost.
Before Leaving your Homestead to go on an adventure, go through this checklist:
Have in Inventory
- Gun (Ferals, Juggernauts, Bloaters, Screamers).
- Melee Weapon (Common Z’s).
Consider bringing
- One extra mag worth of ammo.
- Pills (for Stamina/Health).
- Snacks (for Stamina).
- Extra Silencer.
- Looked at Map for all available Quest Types.
- Armed Outposts with Fuel
- Look at Resource Levels.
- Check Journal Tab for any important information.
Creating a Strategy and Plan
Now that you have a base of operations, it is time to strategize. Do you first tend to your medical needs? Perhaps Food? Do you scavenge for Resources or Items? How do you hit houses – by proximity or worth? Do you set up Outposts to make scavenging easier, or scavenge for guns to make setting up Outposts easier?
Is your goal to save the most survivors? Horde items and resources? Follow all quests, or isolate yourselves from other survivor enclaves?
Fortunately, this game lets you choose and change your choices at any time and in any way.
You now have the tools to handle what the apocalypse will throw at you. But for how long?


Be the first to comment