Starting Locations
The game can begin in various locations, accessible through the settings menu. Each location provides unique starting bonuses. The “Sanctuary” location appears to offer the most advantageous rewards at the start.
The Shrine / Briarpatch Woods:
- Owl Statue –> Leading to Secret Area in Shrine of the Raptor
- 9 Lore Entries
- ID Owl Statue
- Shrine that heals Disease and other negative Status Effects
Sanctuary:
- Xenomorph Keycard for Endgame weapon
- 1000 Free XP (Bringing some characters to Lvl2)
- Terminal that lets you train Skills “Iron Fist”, “Accuracy”, “Firearms” on all characters to +12
- Terminal that reveals the maps for Village of Crowl, Briarwood Forest, Gardens of Midknight
- Statue to Identify items
- Ranged Star Gauntlet Weapon with 99 Charges that is helpful in early tough fights
Imprisoned / Crowl Prison:
- Moravia Key
- 1 Hard Chest with 12 Items (Armor, Helmet, Random Weapons, Bow, Arrows)
- 5 Early Easy Chests with 7 Items in the Crowl Armory (Arrows, Scrolls, Sword, Axe, Maces, War Axe, Lance…)
Wilderness / Gardens of Midknight:
- Key of the Ancients
Eerie Wastes:
- Skull of Hathor Sogg
The Sanctuary, Village of Crowl
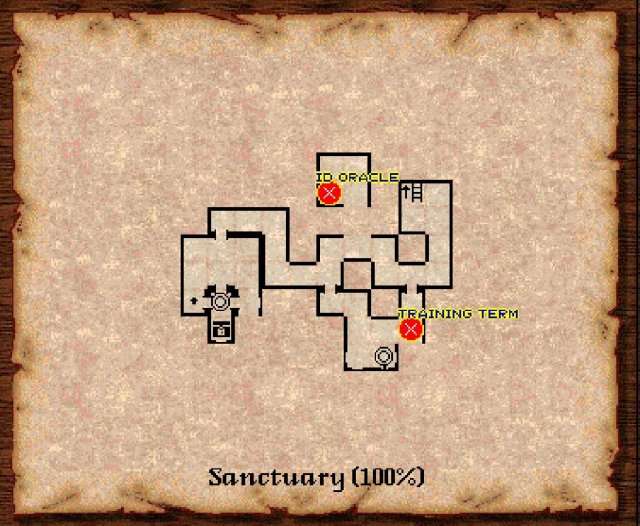
Choosing the “Sanctuary” start places you in the Sanctuary. A chest directly ahead contains the Xenomorph Keycard and the Star Gauntlet, a strong early-game ranged weapon. A nearby terminal provides lore details. A statue in the distance can identify the Star Gauntlet.
A training terminal allows characters to learn the skills “Iron Hands,” “Firearms,” and “Accuracy” up to level 12. A wheel grants 1000XP and character level-ups. After these actions and resting, you should be prepared to explore the outside area.
Village of Crowl
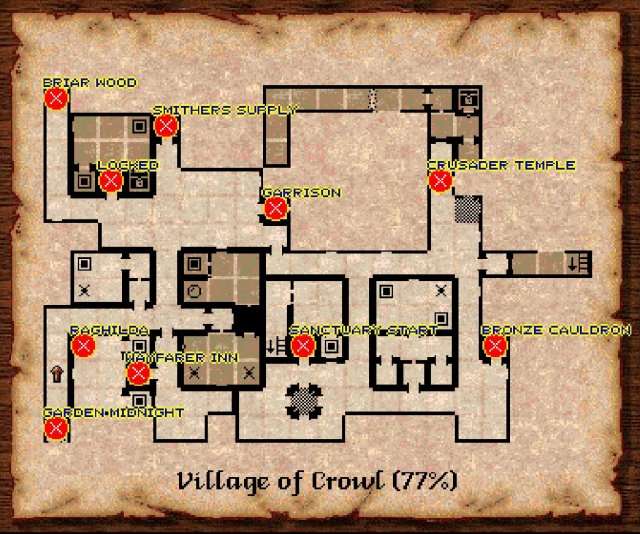
You won’t want to run into many tough encounters early on and might improve the chances of that not happening by setting “Wandering Monsters” to “Never” in the Configuration until getting your bearings. The goal for now is to go North and then West, there will likely be 3 Random encounters on the way that might be easier or harder depending, your “Star Gauntlet” should be of help.
After you’ve reached the big town plaza you should be relatively safe, you can recruit your first helpful NPC companion “Raghilda” by heading South to the “Wayfarer Inn”, talking to her first and the choosing Recruit. After that head North to the Briarpatch Woods.
Crowl Prison
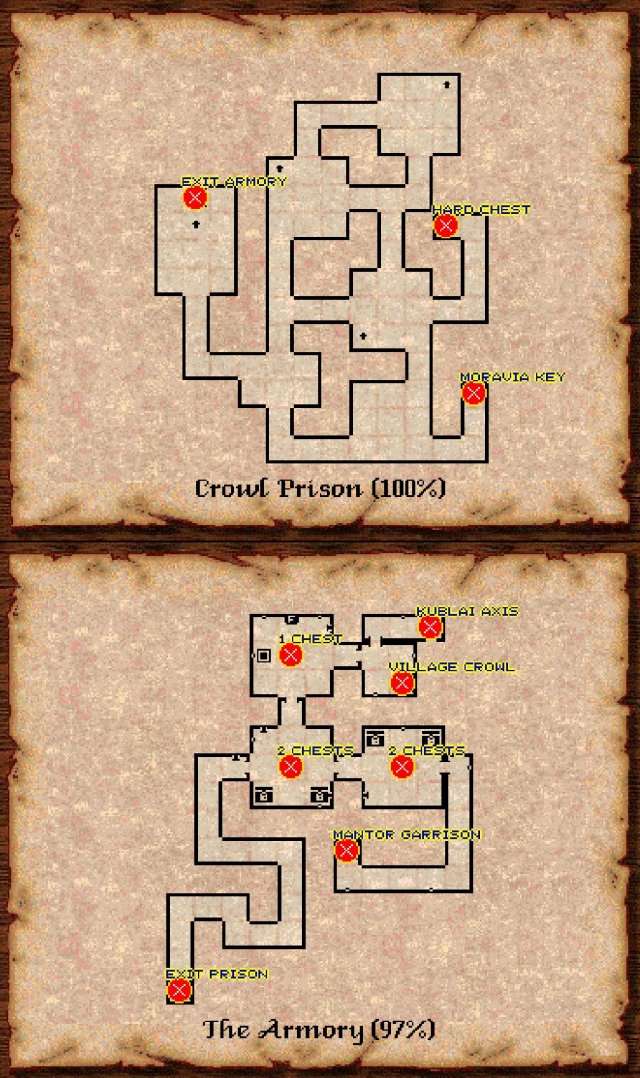
If you start here, you have to get out while making sure that your party doesn’t die from Disease, you’ll find the Moravia Key on a skeleton on your way out, as well as a really tough to crack chest and various chests in The Armory on your way out full of weapons of various kinds:
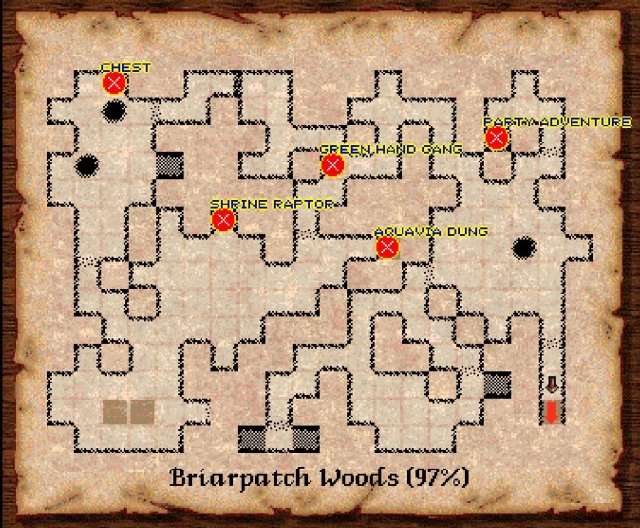
Briarpatch Woods, Aquavia
After stepping out into the road, you should meet “Little Rosy” for the first time, have a conversation with her and then you can recruit her to your party as a second NPC party member. The encounters here shouldn’t be much of a problem after that, go right ahead and dispatch “The Green Hand Gang”, which would have been an issue for a Lvl1 party starting off in “The Shrine” area:
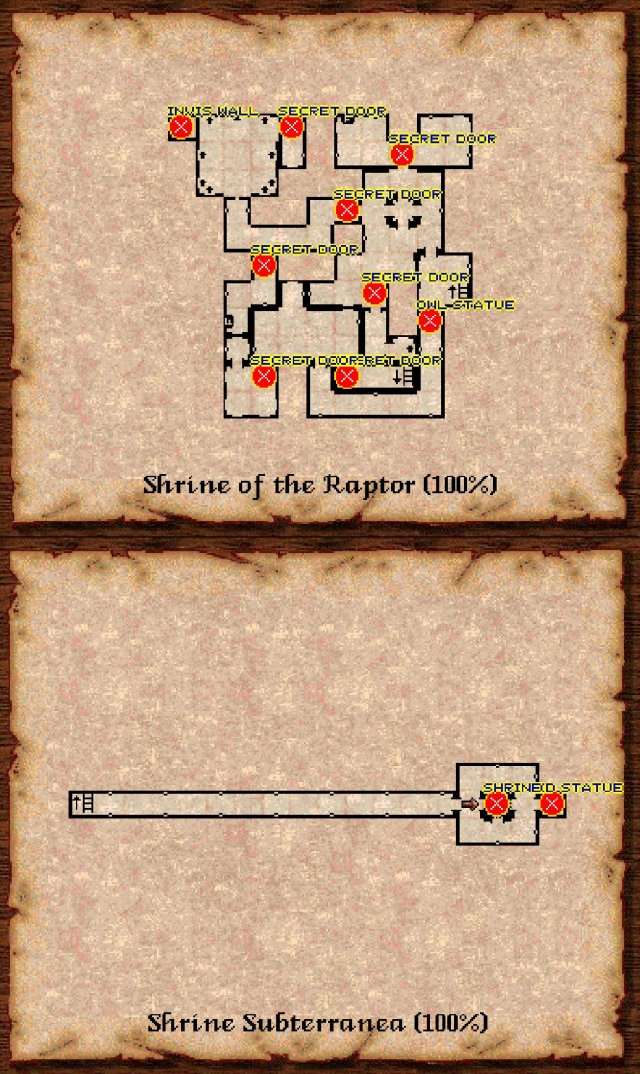
Shrine of the Raptor
has a lot of Secret Doors and an Invisible Wall granting +5 Devotion to a single character, so make sure to have “Detect Secret” on at any time, for parties that started off in “The Shrine” area, they can use the Owl Statue by putting it in an alcove near the Entrance, opening up the lower part of the dungeon, with additional Lore added to the Journal and a Subterranean Level with a Statue able to Identify items and a Shrine that is able to remove Bad Status effects from characters like Disease:
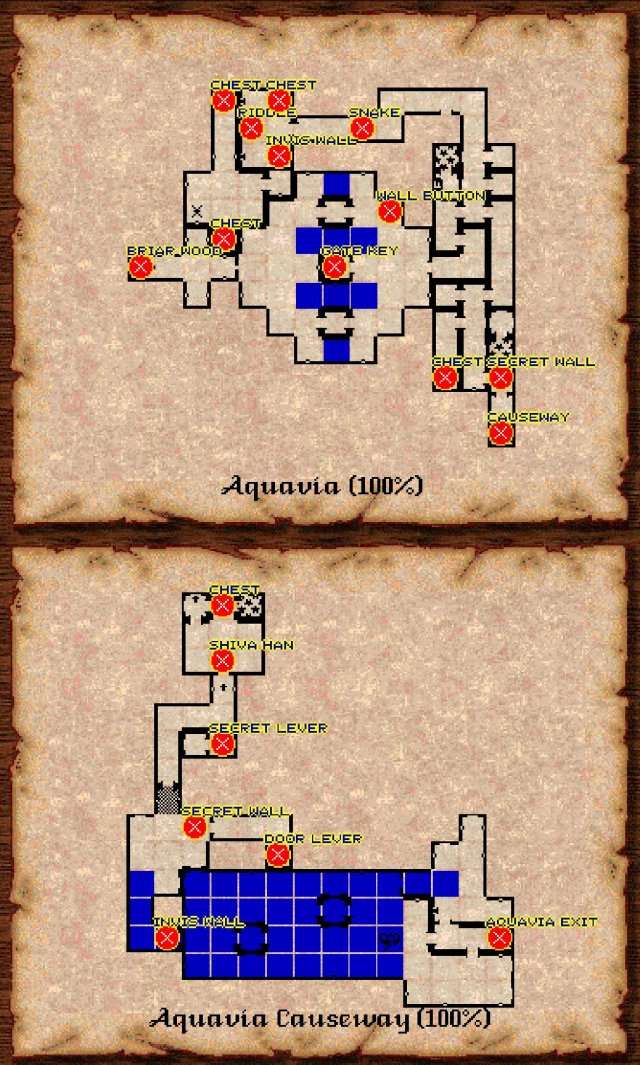
Aquavia
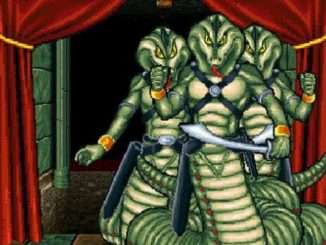
is the first larger Dungeon you will encounter in the game. After entering the large room filled with water you need to find the Secret Wall Button at the back left, which lowers a Drawbridge for a chest containing the Key for the locked skull gate. Explore beyond, beat the Snake Miniboss in the North, Loot everything and solve the Puzzle (Sun, Moon, Star – The answer is hidden in an Inscription on the Level below)
After descending to the second Level, Aquavia Causeway look around, embark on the boat and fight your way through schools of hungry Piranhas until you reach the Invisible Wall at the other end of the hall, then find the Secret wall to the right, use the Lever to open the door to the boss. If you solved the puzzle on the Level above you can also use the Secret Lever for an item to make the fight ahead easier. After defeating Shiva Han you can look around and loot the rest, through the Teleporter to the right you will find the King’s Crest in a Chest.
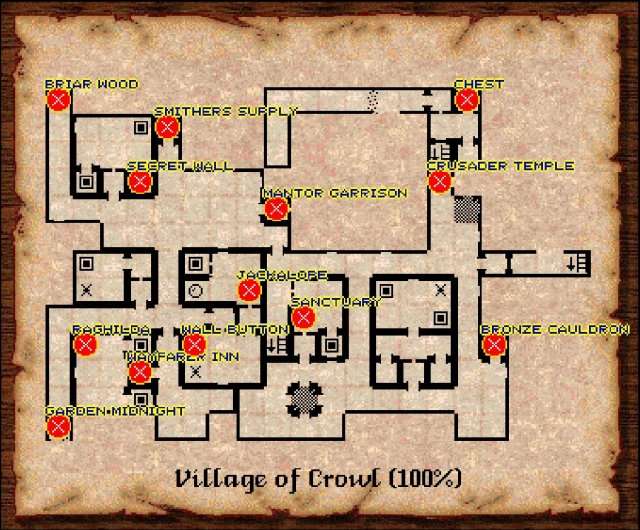
Village of Crowl, Catacombs
With a somewhat stronger party that has hopefully Leveled up a few times, it is time to head back to Crowl, Sell all the unneeded items for some inventory space, pick the city clean as far as possible and take care of the ?UGLY DOG?, talk to the NPCs there extensively about their concerns and push the story forward. Smithers can be quizzed by asking “Can We Help You” or talking about his “Father” or “King Loogmar”, you can also show him King Loogmar’s Crest and he will have something to say about it. Gorlo will give a lot of hints by himself regarding the “Book”, “Scandal” and “Crusader Temple”.
Just follow the conversation and with the right incentives he even hands over the key to the Catacombs. Trimestes is also an important person in town, for Details see the Section below about Talking to NPCs.
Catacombs
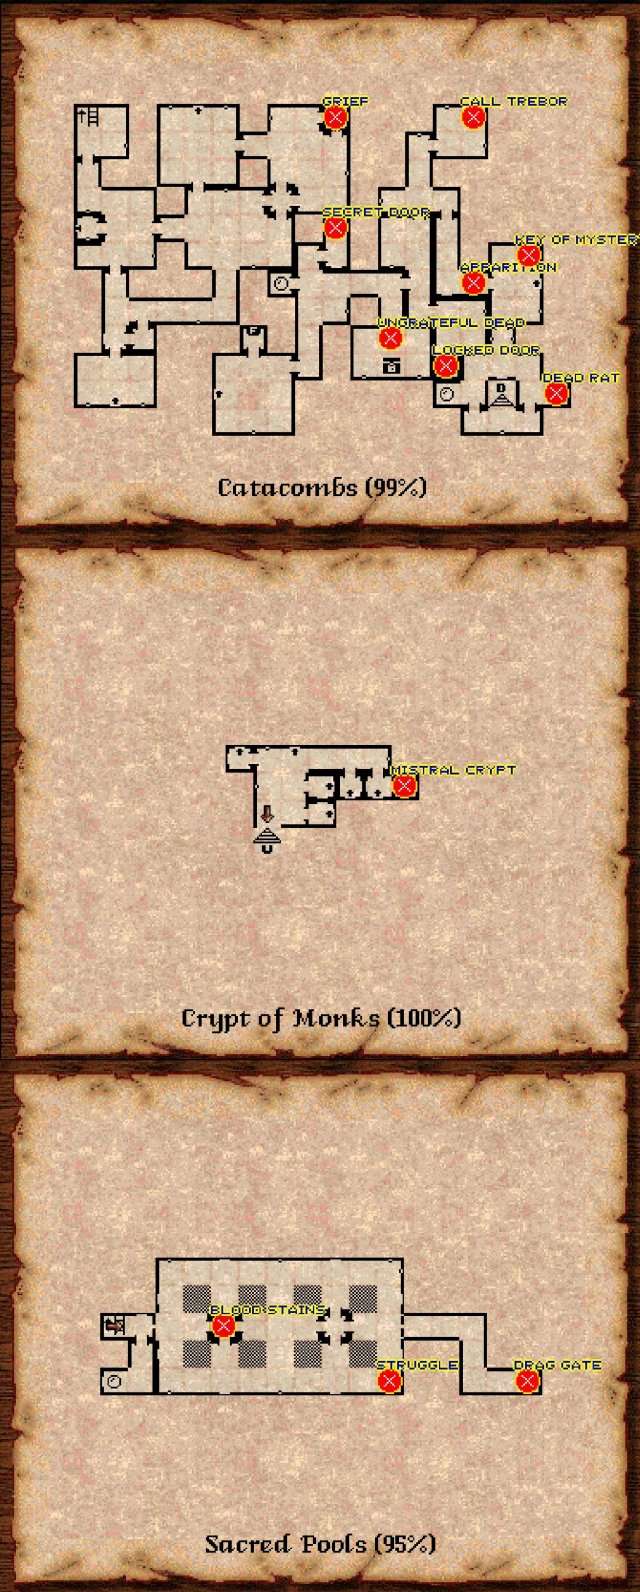
The Catacombs can be reached through the Crusader Temple. The solution for the Apparitions puzzle is Grief and can be found on an Inscription in a pool of water. You get the Key of Mystery from behind the door and can open a Locked Door nearby with it to detect two Inscriptions (On the wall and by using “Look”). Major enemies on this Level are “The Ungrateful Dead” and a “Crypt Cleaner”. Before heading down don’t forget to pick up the Dead Rat from an urn.
Crypt of Monks
There is a Golden Hand with various charges to loot here you will need to enter the Cenotaph, as well as some Hints on Several Inscriptions on the walls, and you can find the Crypt of Mistral behind a Secret Wall in the back.
Sacred Pools
The third area accessible from the Crusader Temple, you can find a few hints of what might have happened to Raghilda’s sister throughout, but the path is closed off for now.


Be the first to comment