
A rundown of the basics like controls, the HUD, traveling the game world and a few tips and tricks at the end.
Guide to Basics
Controls
Starpoint Gemini 3 features simple FPS-like controls. Learning them is as straightforward as it can get.
Movement
- Forward – Throttle forward. Default is W
- Reverse – Throttle reverse. Default is S
- Strafe left / right – Default is A / D
- Strafe up / down – Default is Space, C
- Roll left / right – Default is Q / E
- Boost – Default is Left Shift
- Cut engines – Deactivate engines and let inertia carry you. Default is Y
- Cruise mode – Draw all power into the engines to travel fast. Weapons are deactivate during cruise. Default is (Hold) Left Control
Camera
Cycle through camera modes – Default is Tab
Turning
If you’re playing with the keyboard + mouse, use the mouse to look around and turn in the same direction. On the gamepad, check out the sticks. Using the joystick should already feel natural.
Combat
- Fire weapons – Fire the main weapons that use Energy. Default is LMB
- Launch missile – Only guided missiles track their target! Default is RMB.
- Lock on target – Keep the reticle over the target and press MMB (default)
- Switch weapon – Cycle between the two equipped weapons. Default is F
- Switch missile – Cycle between the two equipped missiles. Default is G
Interact
Each available interaction with the targeted object is numbered. Press the number to interact with the object in the desired way. Default are 1, 2
Equipment
Each equipment slot is numbered. Use the slot’s corresponding number to activate a piece of equipment. Default are 5, 6, 7, 8
Photo mode
If you’re in the mood to make some great creenshots, press F8.
Quick interface
When using the keyboard, you have some other shortcuts at your disposal:
- Starchart – M
- Skills – K
- Journal – J
- Inventory – I
- Crafting – Scroll Down
The HUD
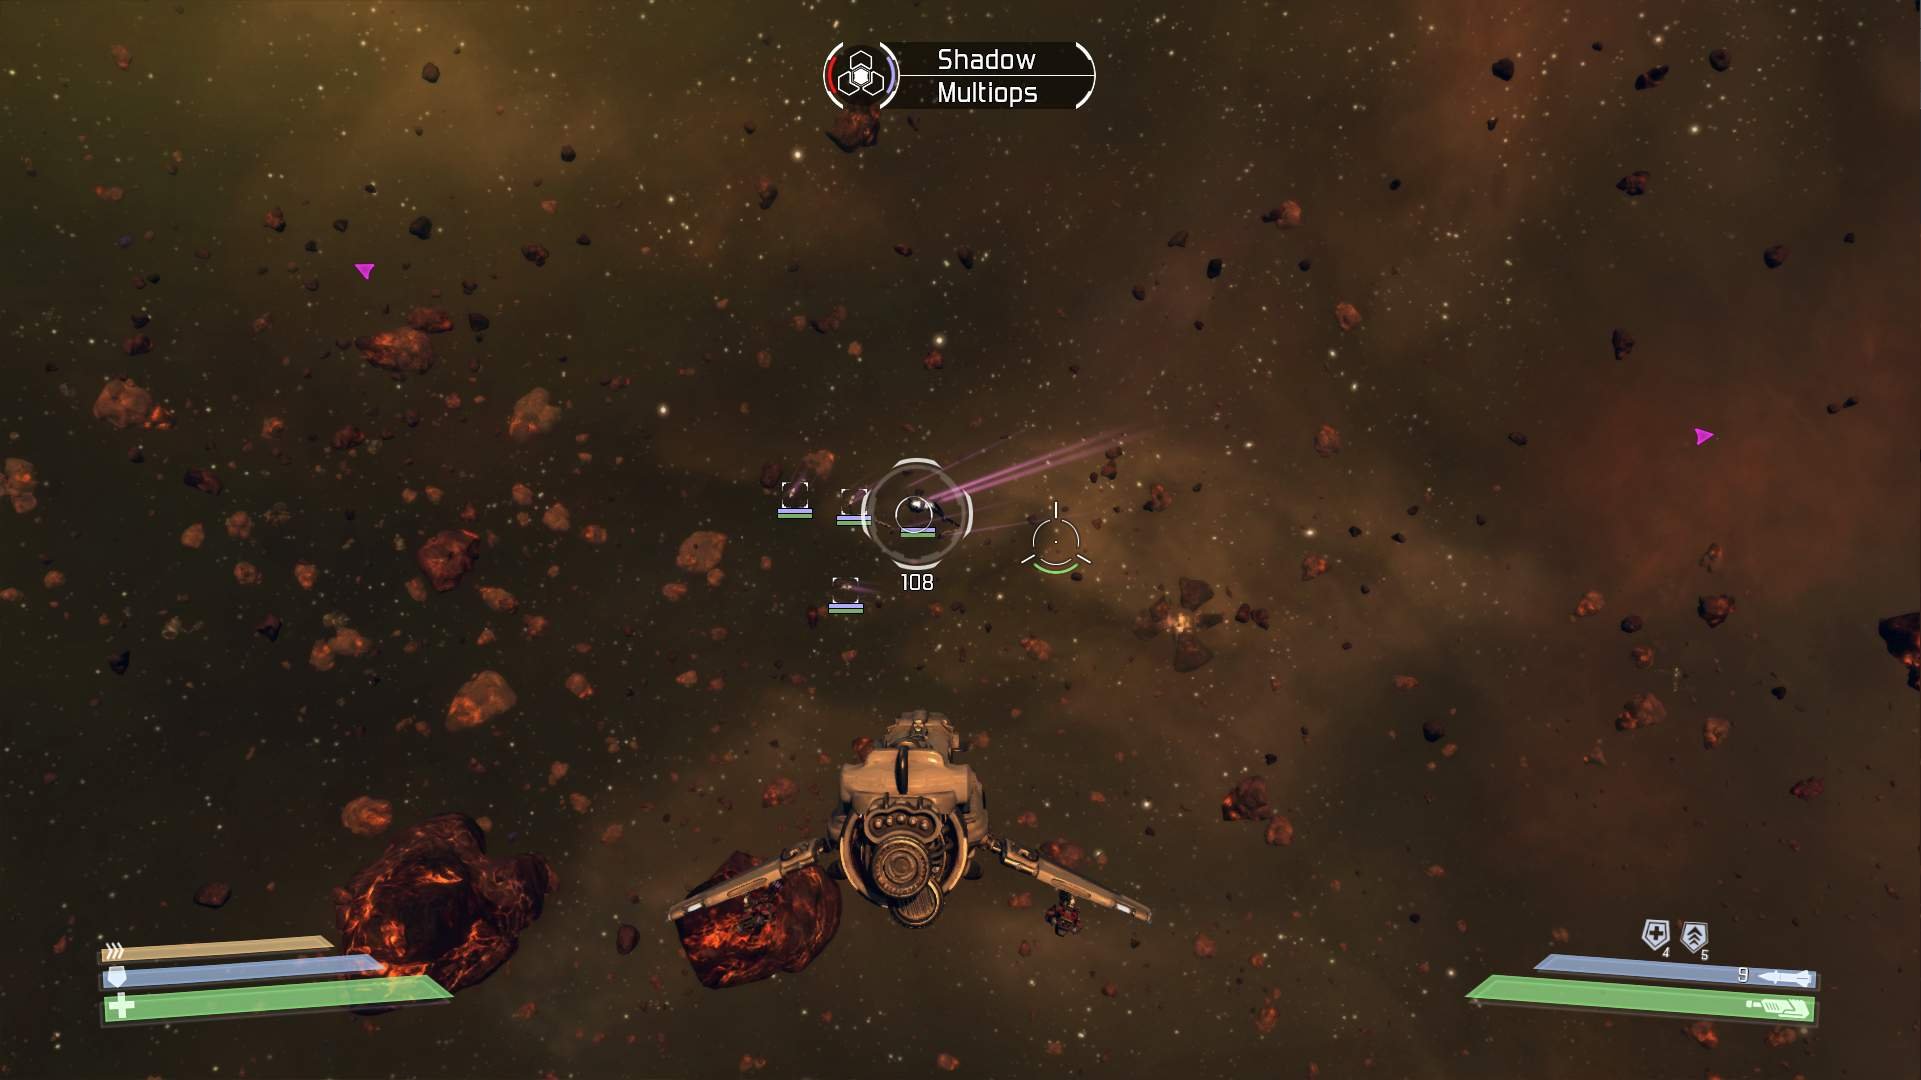
Left console
The left console shows you the state of your ship’s hull, shield and booster. To damage your hull, the enemy has to first deplete your shield. Shield is automatically recharged over time, while you can only repair your hull by docking to a station / landing on a planet, or by using specialized equipment (Repair nanobots). Shield can be quickly recharged by using specialized equipment (Shield charger). Booster also refills automatically, but much like the other two stats, you can use specialized equipment to quickly refill your booster.
Right console
On the bottom right of the screen you can see the state of your weapons and equipment. The lower bar shows you how much weapon energy you have. Energy is spent with each shot of your weapons, but it recharges automatically. Your weapons’ energy level is one of the most important info you could have, so this is additionally displayed on the targeting reticle with a small bar. Just above the energy bar is the missiles bar. This shows you how many missiles (of that particular type) you have left and how long it takes before the missile reloads and is ready to fire again. And finally, the equipment slots. All installed equipment is displayed here, along with their corresponding amounts (that you have in your inventory). Depending on the color and state of the icons, you can easily see if the item is ready to be used again or if it is in cooldown.
Top console
At the top of the screen lies the target information panel. This gives you some general information on your currently selected target (hull, shield, name and faction). Seeing as the hull and the shield stat are the most important, this info is additionally displayed on the target lock as well.
Target lock and object marker
When you have an object targeted, it is specifically marked with the target lock indicator. The color of the indicator automatically tells you if the object is friendly, neutral or hostile towards you. The color scheme works as usual: red is bad, green is good.
Any other object, meaning not target-locked, is also marked on-screen with its object marker. This is a simple rectangle, accompanied by two small bars: the object’s hull and shield indicators.
Traveling Around

The fastest way to travel around a single sector is using the nav buoy network. Nav buoys can be found all around the game world. Using them is as simple as docking on the structure. Each buoy is linked to its pair buoy. Docking on one will almost instantly teleport you to its pair. The action itself, displayed as the available numbered action is called Jump.
Visiting other sectors

To explore other sectors (of the same planetary system), you have to reach them first. This is done by using T-Gates. Interact with a T-Gate (Jump) to open up the T-Gate interface. Then choose what sector you want to go to and watch the magic happen.
Visiting other planetary systems
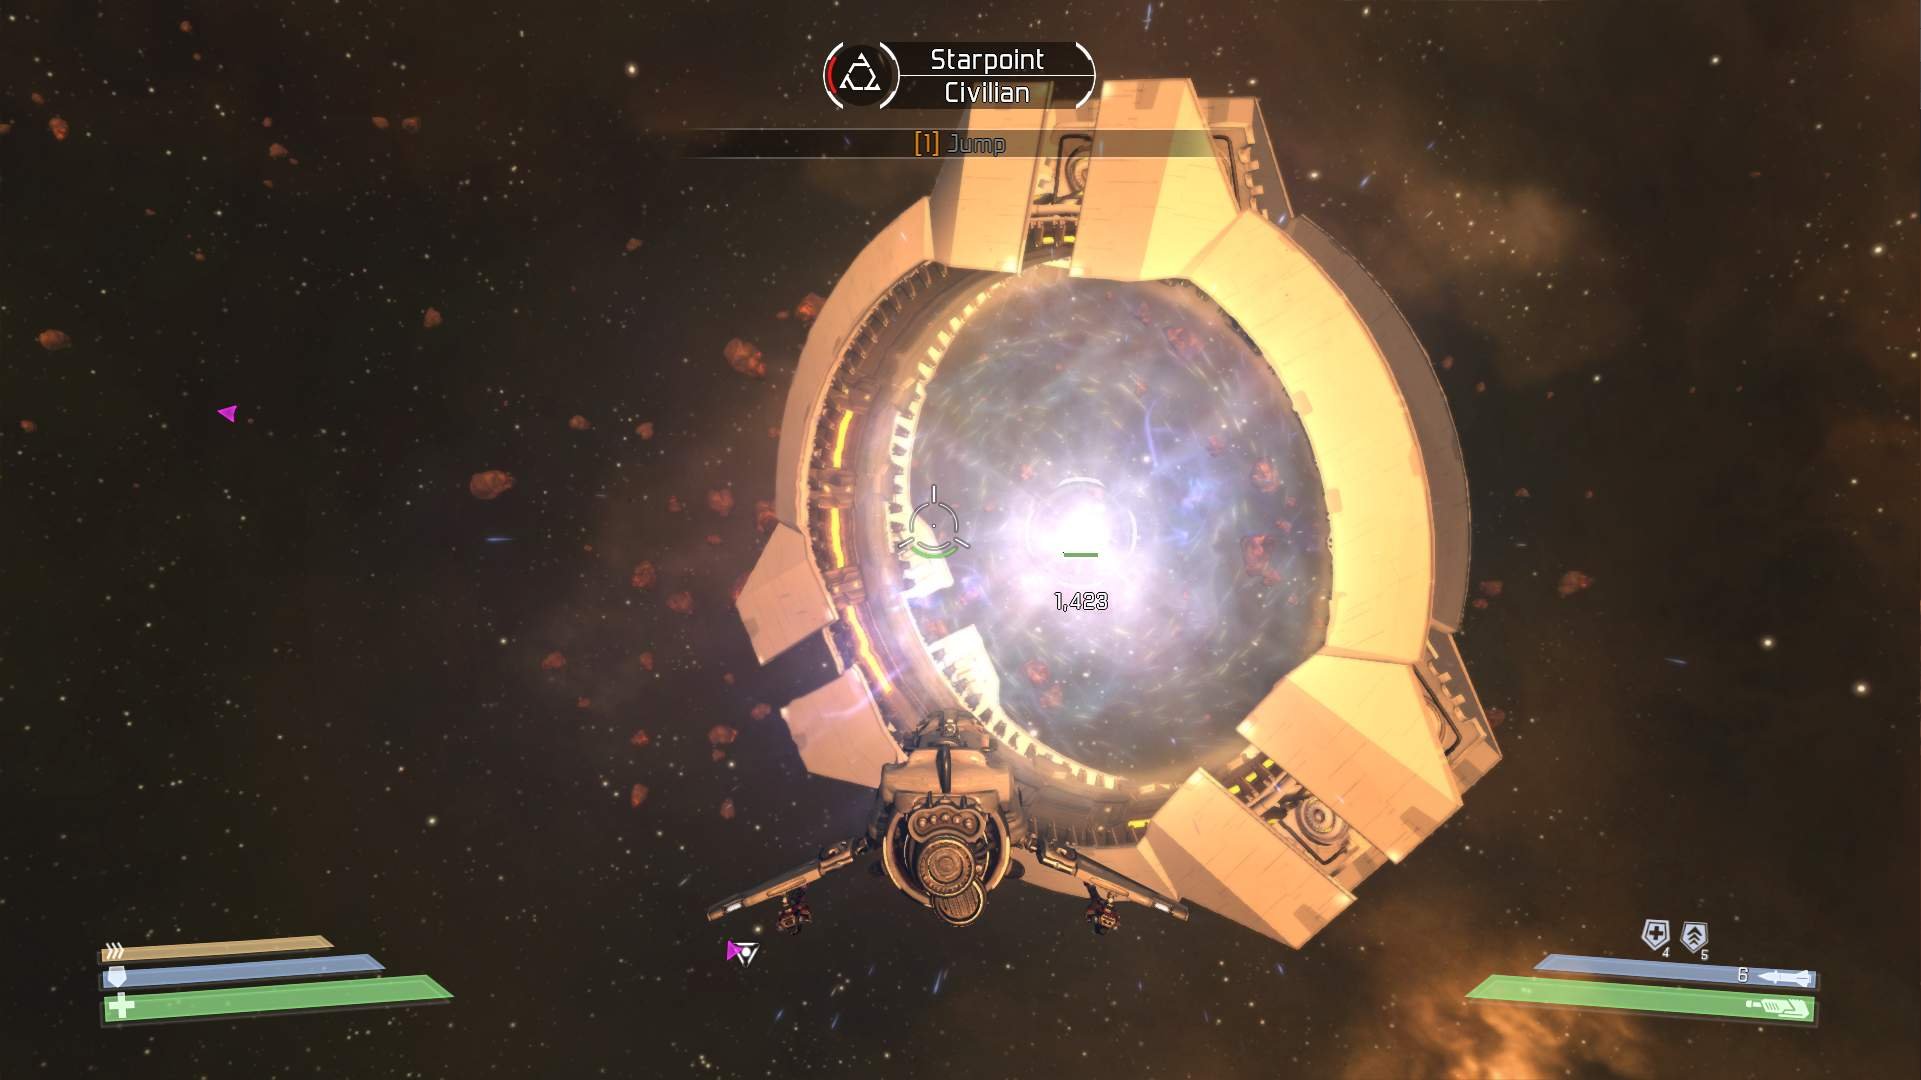
Galavanting around Gemini is nice and all, but why not visit Sol or Sirius? To do that, reach the Starpoint (there’s one in each planetary system) and interact with the Starpoint (Jump). Much like with T-Gates, this will open up the Starpoint interface. Then choose what system you want to go to and, yep, watch the magic happen.
Quick Tips and Tricks
Toggle max throttle
While in combat, fast and direct controls are pivotal, but when you’re not in a fight, holding forward throttle is tedious. Here’s a little trick: double-tap the forward key to toggle maximum forward throttle. Changing speed (reverse) deactivates this mode.
Cut engines and booster combo
Shutting down engines, but keeping inertia is one of the best defensive maneuvers you can use. Combine that with fast movement direction changes by using the booster and you get a killer combo.
Cruise mode, weapons and getting away
While cruise mode is charging and during cruise mode, weapons do NOT work! If you’re trying to get away from a combat situation using cruise, which is completely valid, try to get some distance first, using cut engines and boost. Your weapons will still work, and you might get some pesky enemies off your back, before turning around and going for cruise.
Strafing runs
Going head-to-head with enemies can be a lot of fun, but usually isn’t the best of ideas. Sure, your shots will be more accurate since you’re going directly at him, but it goes both ways. Your enemy will be able to hit you more easily as well. How about this: gain some speed first, aim to go past the enemy, along one of his sides, then cut your engines and let inertia guide you away as you rip holes in the weakling’s side armor. You can also use this li’l maneuver to quickly get on your enemy’s tail.
Weapon damage type and weapon switching
You have two slots available for equipping weapons and during flight you can quickly switch between them. Using this technique is pivotal. Some weapons deal more damage to shields, while others rip through the enemy’s hull. Using the anti-shield first and then switching to the hull-ripper later is highly advised. Weapon damage type also comes into play here, since shields can be more or less resistant to specific types of damage (physical, energy, plasma). If an object is drastically more resistant to a certain damage type, this is indicated on its target lock indicator. Keep in mind that when this is the case, you can be certain that the targeted object is more dangerous in general (perhaps a veteran of sorts, or an ace pilot). More info on weapons, weapon types and damage types can be found in a different guide.
Missiles and how to avoid them
Missiles, even guided, don’t have to directly hit their target to cause damage. Missiles detonate in the proximity of their targets and cause blast damage in their effective radius (blast radius for each missile is different). One of the easiest ways to avoid damage from missiles is to wait for them to get close (various visual on-HUD and audio indicators will alert you to this) and then boost away. Even if you do get caught in the blast, the damage can be reduced to a minimum. Of course, there also a dedicated equipment for this purpose: Decoy. Details on missiles are explained in a different guide.
Be the first to comment