
Introduction
I assume you are here after playing a bit of the game, having fun, and then suddenly, the stress of museum struck you like a hundred tonne weight on your shoulders!! But put that weight aside for a moment, take a bit of time to know the game first! Earn some money! Don’t worry, museum item gathering is not as tough as you might think. The only thing you might want to have a head start on are Fishes – since fishes are seasonal. Then again, you’ll have plenty of time to catch up. Each 25% of completion pushes Jounce back by a season. It’s been reported to go away at 90%, but that is subject to change at the whims of the developers in future patches.
There is an in-game museum checklist. You might still find it useful though. As of the current patch, the names of the items you donate are not included in the in-game list, so I will include images in this guide that has all the names in.
This guide is divided into 4 main sections, for the 4 main categories of items. In future, there will be more items and more categories like bugs, etc. But for now, it’s just Flowers, Herbs, Ores and Fishes!
Disclaimer: Since this is an Early Access game, a lot of things are subject to change. If you do find something to be inaccurate and wrong, just let me know and move on. Please do not waste too much time trying to find something and then realising later that it is has been bugged, changed, or just plain wrong – I will not take responsibility for excessive time wasted. There is currently no need to donate every single thing, a few fishes out of every season will not cost you your town! You have been warned!
Flowers
There are 64 flowers currently accepted by the museum, 2 of which are herbs. Some can be found in Pumpkinvale itself, but most of them has to be found in the outside world. I recommend using lots of pies to speed up the process of looking for flowers, but if you can’t afford them, normal walking works. Horses sometimes make your map marker veer off-track so I wouldn’t recommend it, but you can try it for yourself. It may have been fixed in later patches.
Herbs
Currently, only 2 herbs are available for donation: Camelia and Lavender. They are everywhere. You will definitely find some while out and about looking for flowers, so I’m not going to include a location map for now. Maybe next time, when more herbs are added, I will, but for now, here is what they look like in the wild.
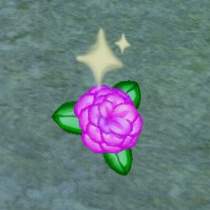
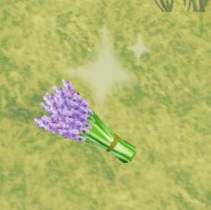
And here are some locations they can be found in.
- Camelia: Lovely Point Groves, Peacewood Groves, Pumpkinvale, Rosebark Circle, Wahoo Beach
- Lavender: Maple Leaf Woods, Whisky Woods
None! Yay!
Pumpkinvale Flowers
There are a few flowers, the Cosmos, Daffodil, Daisy, Poppy, Star Scabiosa and Trillium, that can be found easily just by wandering around PV.
Clementine Mines Flowers
The Black Dahlia and Black Iris can only be found in the Goddess room of the mines. To get there, follow the mushroom trail. It has to be a line of mushrooms, not patches! Those patches aren’t as helpful. When you reach a crossroad, the mushroom trails usually clue you in as to which path to take. For more information, see Clementine Mines under the Ores section.
Pumpkin World Flowers
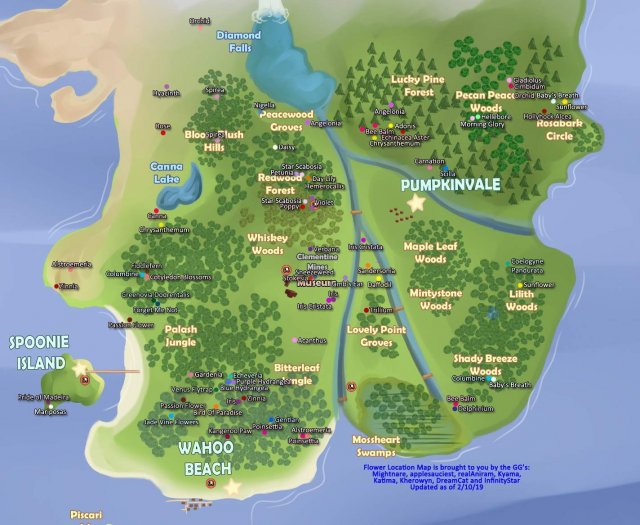
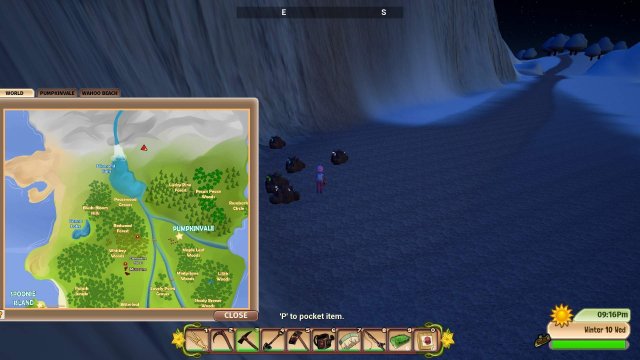
I suggest using the image below (this chunk of text) to find them. You can start searching area by area and tick them off as you go, so you don’t have to backtrack to find flowers you missed later. This is not a comprehensive list, there may be flowers found in places not listed in this map. In certain parts of the map, like the little point southwest of PV where 2 rivers meet, you won’t be able to see yourself on the map, so you have to rely on traditional map reading skills. Or as traditional as you can get on a video game, anyway.
Ores
To donate Metals, Minerals and Gems, you require a Gem Polishing Station and Smelter. The Gem Polishing Table requires shipping 30 uncut gems before it is available at the Home Improvements Shop and costs 800g. The Smelter costs 250g and is available from the start.
There are 2 mines currently available in the game, and 1 area with a few mining nodes in the North, but that’s not really a good place to mine since there’s so little nodes. They do drop rare ores sometimes, so if you are desperate, you can try that. Mining nodes take about 2-3 days to respawn.
There is a total of 79 ores on the list, 4 of which isn’t in the game yet and only available via NPC quests. They are: Glass, Alabaster, Bismuth and Pink Salt. About 10 can be found in the secret mines and the rest are in the Clementine Mines.
Clementine Mines
This is the biggest mine in game at the moment, found to the southwest of PV. It requires a bit more saving up of money and stocking up of food for stamina. There’s a bunch of giant boulders that block your way in the mines, so you have to break them before you proceed. I highly recommend saving up some coin for a few Gold Pickaxes, which is the highest grade of tools offered by the blacksmith. Later on, you can craft better tools that help reduce stamina required to use the tool. Tools that are better than Gold, in order of efficiency: Steel, Titanium, Uranium, Diamond and Meteor.
In the center of the mines, there is a room with a huge glowing pool and a Goddess statue in it. You can get there by following the mushroom trails, but if you don’t follow the mushrooms carefully, you might get turned around. When you get tired of being lost, just click the top right compass icon to leave the mines.
Secret Mines
This is a relatively small mine, but can be quite far to get to especially if you’re from PV. There are 2 ways to get to the secret mines, but only 1 way out. The easiest way is by land, but you will have to leave by sea, or by fainting back to Spoonie Island. Start from the coast where the bridge to Spoonie Island is located. Head up north until you reach a cliff. From here, you can either swim or walk up to the secret mines.
To walk to the mines, you will have to head up the cliff, then walk into a cliff valley where the 4 trees are. Keep walking through the bushes and rocks, until you see a boulder stacked on top of another boulder in the west / left. Head into that valley path on the left and keep going. The hole to the secret mines is hidden behind a group of bushes to the southwest. There’s actually 2 holes here – the smaller, lower hole drops you at the secret mines entrance. If you land in the middle area, just hop down again. Currently, the middle area is a small system of caves that doesn’t contain anything yet.
To leave the mines, you will have to head out to sea. Swim towards the shore by heading East, ideally eat a speed buff first in case you drown, or have lots of stamina before swimming. You can also enter the secret mines this way.
Some Nodes in the North
Just go North? Not really worth the effort in my opinion, but you do you boo!
Fishes
There are 125 fishes that the museum will accept. That’s a lot! Don’t worry, we will do it by seasons. There’s a few fishes that might be bugged from showing up currently, they are the Grayling, Knifejaw and Sandfish.
I highly recommend crafting a Meteorite Fishing Rod for this – it really cuts own the time taken to fish. It also removes the fishing minigame though, so if this bothers you, you might want to consider a Diamond Fishing Rod.
Here are the 4 fishing locations:
- River – There is a jetty on the West of Pumpkinvale where you can get River fishes.
- Lake – There is a Lake in Pumpkinvale in the East, near the River Farm plot. You can also fish in Canna Lake and Diamond Falls.
- Ocean – There are multiple jetties on Wahoo Beach where you can catch Ocean Fishes from.
- Deep Ocean – From Wahoo Beach, there is a little boat on the East of the coast that takes you to Piscari Isle for 50g. You can catch Deep Ocean fishes from the jetty at Piscari Isle.


Be the first to comment