
Nexus PvP Beginner Guide
Nexus PvP is an objective-based game mode. You can win by eliminating the entire enemy team, but otherwise the team with the most points wins. Kills alone are not enough if the enemy remains alive and controls the objectives.
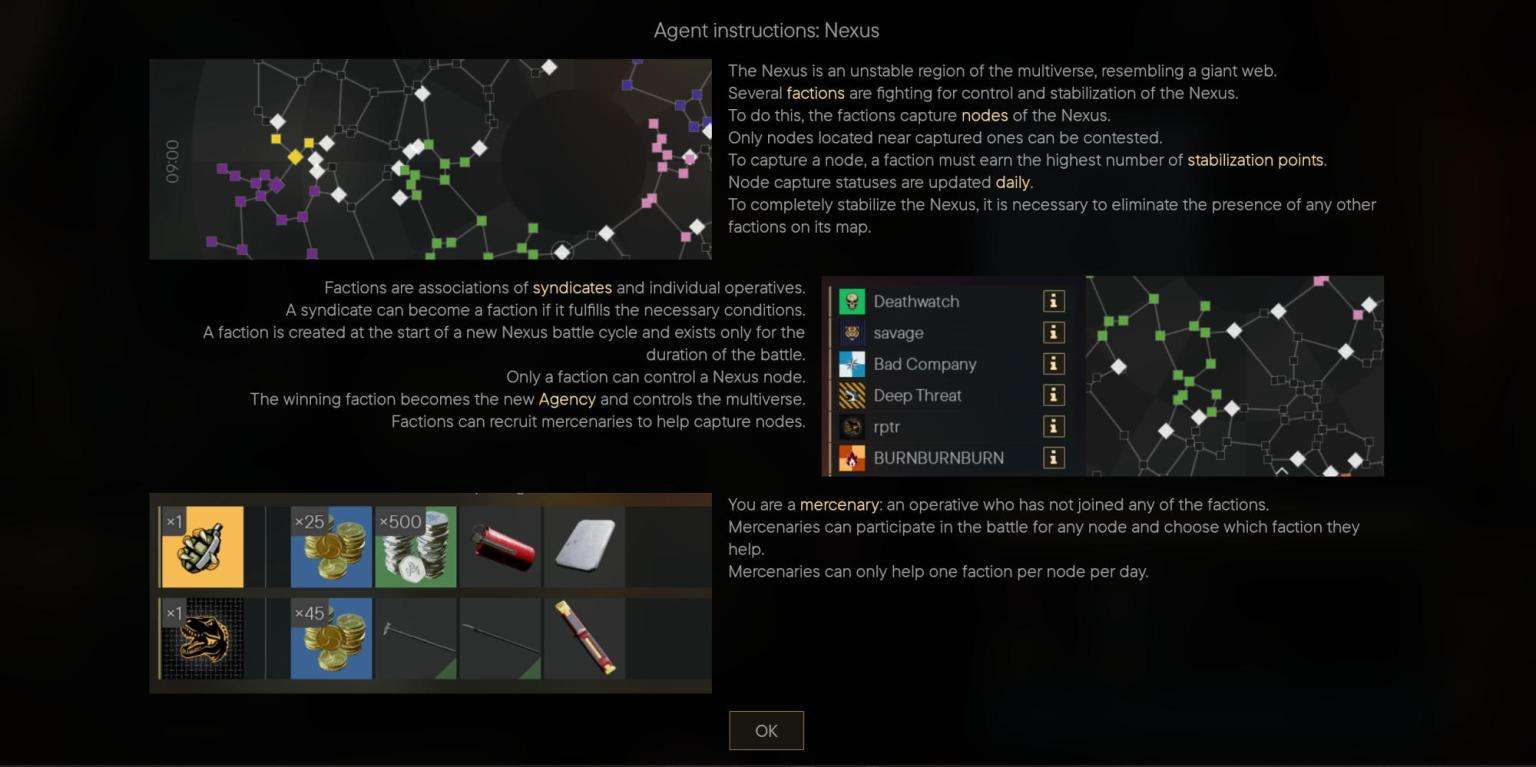
Both teams start with 100 points. A team loses 5 points whenever one of its players is killed. On A/C maps, teams also lose points over time if they do not control a beacon.
The only way for your team to gain points is to capture a beacon and hold it.
Prepare Before the Round
Use Painkiller and Regeneration Injector before the round starts so their buffs are already active.
Start using them during the 10-second countdown, as close to the beginning of the round as possible so you do not waste their duration during the countdown. Use the Regeneration Injector first because it has a longer cooldown.
Keep the following in mind:
- Sprinting now cancels the use of these items, so stop sprinting while using them.
- The injector can sometimes bug out and leave you with empty hands. If this happens, simply use it again.
- Very rarely, one buff can overwrite the other. This appears to be a bug.
Watch the Score and Time
Keep an eye on the remaining time and the overall health bars of both teams.
If the enemy team’s red bar has more health when the timer runs out, you will die if they control the objective.
There is no reason to simply hide and try to “save AWP.” If you are going to lose the round, the only way to stay alive is to make sure the enemy does not have a beacon captured or to stay close to your own beacon.
Capture and Neutralize Beacons
You do not always need to immediately capture an enemy position. Running past it and pressing F will make it neutral.
Once the area is clear, you can return and capture it.
While capturing, you can move around as long as you remain close to the beacon. Moving makes it more difficult for an enemy to kill you while you capture it.
Quickly double tapping F can allow you to capture the beacon while still holding your gun, allowing you to aim and shoot freely or use medkits while capturing.
Use the Environment
Many parts of the environment can be useful during combat.
Shoot Out Lights
You can shoot lights to create darker corners and areas to hide in.
Camping can be useful, but keep the objective in mind. There is no point in camping at your spawn while the enemy has a 20 to 80 advantage. You need to capture the objective or eliminate the entire enemy team.
There is also little point in attempting to capture an enemy beacon during the final 20 seconds if the score is already 20 to 80. It takes too long for your team’s points to recover, so you could still lose with a score of 40 to 60.
Destroy Objects
Many objects on the map can be destroyed, including crates.
Use Gravity Flip Areas
Some locations can flip you upside down using gravity.
Players can have difficulty aiming while flipped, so camping near one of these locations or maintaining a good view of one can provide opportunities for kills.
Use Wall Movement
Some locations allow you to wallrun or walljump, which can provide additional movement speed.
Listen for Enemies
Pay attention to the compass when you hear footsteps. The sound may simply be coming from a teammate.
If you hear excessive jumping sounds, it may be a bot stuck on stairs or running against a container. This can indicate an easy kill.
However, players can also use this as a trap. They may camp around a stuck bot, or there may be no bot at all and an enemy player may be jumping repeatedly while waiting for you to investigate.
Use the Map
You can still help your team after you die.
Open the map with M, then press Left Alt to make the mouse cursor appear. Mark the location where you believe the enemy who killed you was positioned.
Map marks remain between rounds, so remove marks when they are no longer valid. For example, after around 20 seconds, the player who killed you has probably moved.
Check the map periodically during the round, especially when camping. You can assess the situation by looking at your teammates’ movements and their death marks.
Defend Portals
Defend portals when possible.
On some maps, an enemy can attack your spawn within approximately 10 seconds of the round starting if they use a portal and no enemy is camping the portal.
Communicate With Your Team
Nexus PvP has quick chat and gestures for fast communication. Use them when appropriate.
Text chat is also available, although opening it can be somewhat buggy. Usually, interacting with the map first allows text chat to be opened with Enter.
Learn the Maps
Map knowledge is important because objectives can rotate between different locations.
The objective may be on the ground in one match and on the roof in another. Some locations can also cause players to become stuck, allow players to look through walls, or cause FPS drops.
Knowing these areas allows you to avoid them or use them to your advantage.
Most maps have four variations:
- A
- C
- Two different B cycles
A/C Variants
In an A/C match, one team has A and the other has C.
Capture the enemy’s point and defend your own.
B Variants
In a B match, both teams fight for a single control point.
The beacon can be either on the ground or on the roof. You cannot reliably know which version you will get beforehand.
Do not trust the altitude displayed when hovering over the objective on the map. It shows the same altitude for both variants, so it does not tell you whether the beacon is on the ground or roof.
You can share gear with teammates.
For example, if you have a 4k build body sleeve with an extra weapon and ammunition, you can drop the weapon so a teammate who does not have 1k points and is using a preset build can pick it up.
This is probably most useful when playing with a team using voice chat.
Prioritize Speed and Movement
Speed is a major factor in Nexus PvP.
If you reach the objective first, you will usually have a better defensive position. Movement and Jump chronogenes are particularly useful for PvP.
Finemotor Skills can also be useful in some situations, such as when a preset requires frequent switching between a primary weapon, secondary weapon, and side weapon.
The MP5 can sometimes bug during reloading. It may do nothing for approximately 5 seconds when you try to reload, particularly when reloading several times quickly during a firefight.
Having a second MP5 allows you to switch to it and continue fighting. Sometimes switching weapons can be faster than reloading.
You cannot use two MP5s simultaneously.
Stay on the Move
Camping can sometimes make sense, but most of the time you should keep moving.
This is especially important while capturing a beacon. Move from left to right while staying close enough to the beacon to make yourself harder to hit.
Manage Body Sleeve Points
Spend body sleeve points carefully.
Armor becomes more expensive in terms of gear score the more armor you use. Sometimes it can be worthwhile to trade some armor for a better weapon.
If you make this trade, the guide recommends trying to keep armor on the right side of the body.
The weapon is held on the right side, and players commonly peek around corners with the right side of their body so that the gun appears around the corner first. When peeking from the other side, more of the body can be exposed before the gun reaches the corner.
The best choice depends on your playstyle.
Carry Magazines Instead of Loose Ammunition
Carry magazines rather than loose ammunition.
You generally do not have enough time to load individual bullets into a new magazine, and you will not normally spend much time looting during a round.
The guide recommends carrying around 10 magazines for a round.
Avoid Backpacks When Possible
You generally do not need a backpack in Nexus PvP, and it makes you more visible to enemies.
Do Not Waste Time Looting or Hacking Mindvaults
Mindvaults
The guide recommends not hacking Mindvaults during Nexus PvP because it is considered a waste of time.
You cannot bring loot out of Nexus PvP. The guide also states that, as far as it is aware, teammates cannot be revived in Nexus battles.
Hacking a Mindvault also tells enemies that you are there, making it easier for them to locate you. The only reason to do it would be to intentionally use it as a trap.
The game may tell you that you obtained enemy dog tags, but the guide states that you do not actually get them because dog tags count as loot.
Looting Bodies
It is fine to take equipment if you run out of ammunition or medical supplies, but do not spend a long time looting a body.
Rounds are short, and you are vulnerable while looting.
A safer approach is:
- Grab the enemy’s backpack and weapons.
- Move to a safe location.
- Search the backpack there.
- Drop anything you do not need.
- Return to the fight.
Do not remain over a dead body for an extended period while looting.
Use the Shooting Range While Matchmaking
Finding a Nexus PvP match can sometimes take up to 3 minutes.
You cannot start searching for a match while you are already in the shooting range. However, you can start searching before entering the shooting range.
This allows you to warm up or practice your aim while waiting for matchmaking.
Avoid Teamkills
Do not teamkill.
Accidents happen, especially when you cannot clearly see the ribbon color of another player. If you accidentally kill a teammate, a simple apology in text chat can help. If it happens repeatedly, check before shooting.
Use the compass or map to determine whether a player is a teammate.
Do not deliberately kill teammates just because the round is ending. Each teamkill gives you -500 negative points.
This reduces your body sleeve budget for the next round. The teammate who was killed may also lose the option to use “free gear” if they had selected the same loadout and instead have to spend their gear score on a new loadout.
This can affect later rounds. For example, a player may be saving points to use a 2k to 3k build in the final round.
Be careful when using grenades and Molotovs. If a teammate runs into your grenade, you receive the negative points even if the teammate was responsible for entering the grenade’s area.
Do Not Damage Friendly NPCs
Do not heavily damage your team’s NPCs.
If you deal too much damage to a friendly NPC, it will start attacking you, at least the NPC that you damaged.
Create 1k Starter Body Sleeve Presets
At the beginning of each match, you have 1,000 points to choose either one of your preconfigured builds or one of the randomly offered builds.
Creating several 1k presets can be useful.
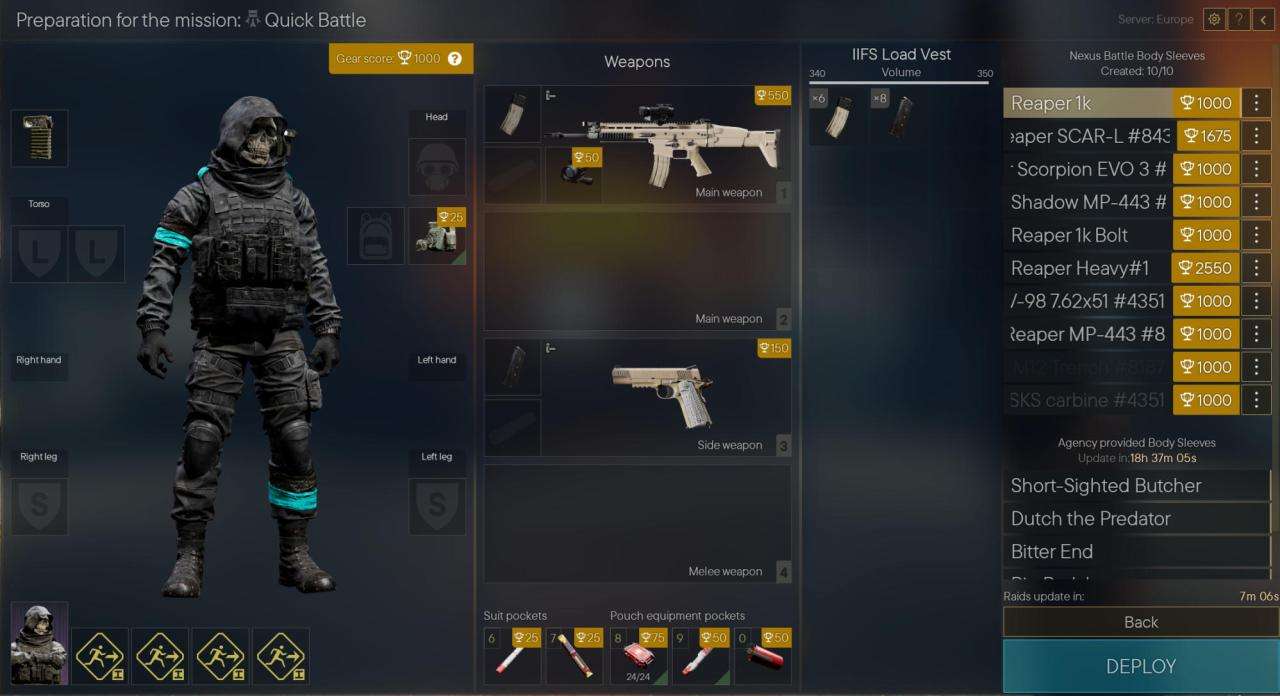
The equipment in these presets is not your personal equipment, so you can freely choose from the available weapons and armor.
Using 1k builds can also help preserve points for later rounds. For example, you could use a 2k build with the same loadout and additional armor in the second round, but if you die without getting kills or capturing objectives, you may not have enough points to select one of your 1k builds in the next round.
In that situation, you are forced to use one of the game’s preset builds.
Starter Build Tips
If you do not have the recommended chronogenes, use whatever you have. They cost no points.
All pouches cost the same, so choosing the largest pouch gives you more quick slots.
Flashlights do not cost anything. You can take one or leave it behind. You will not need one on most maps, but it can be useful for blinding enemies or signaling to teammates that you are friendly when they cannot see your ribbon color from a distance.
If a teammate is accidentally trying to shoot you, flashing the light a couple of times can help them realize their mistake.
Your total gear score is displayed in the top-left corner above your character.
1k Build Examples
Assault Build: SCAR-L
This build prioritizes speed over armor.
The basic approach is to reach the objective first and capture it while firing at approaching enemies.
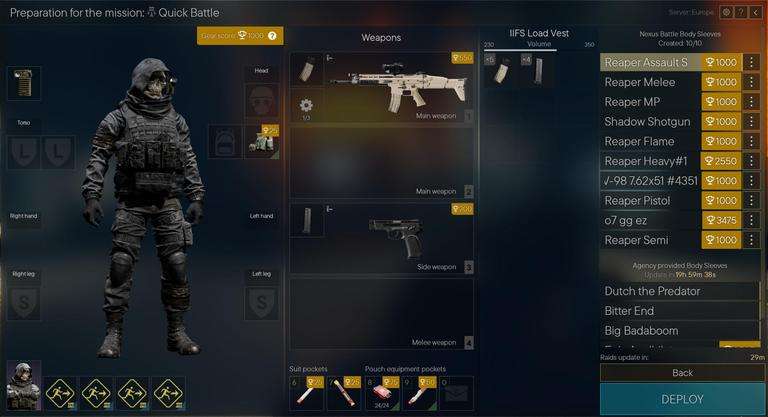
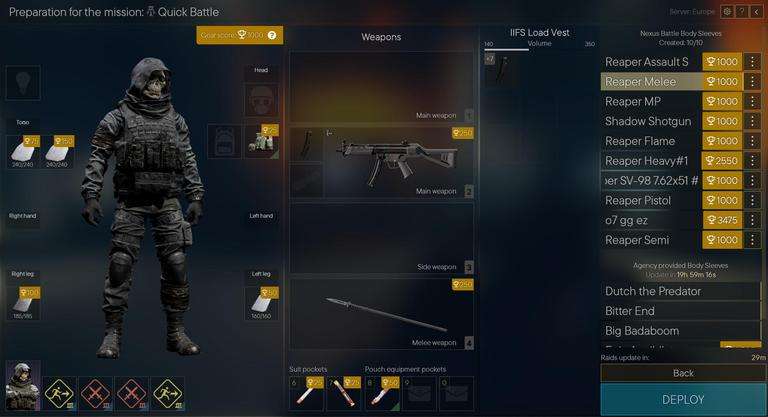
Melee Build: Tactical Spear
Use the Tactical Spear for close-range kills, but have a backup option for long and mid-range engagements.
Completing a melee kill and fulfilling the secondary objective does not end the round. You still need to continue fighting.
SMG Build: MP5
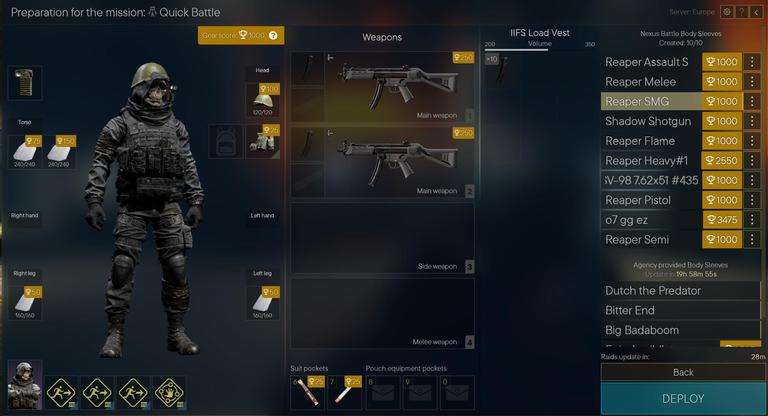
This build was created partly because the MP5 can bug while reloading.
The problem is especially noticeable when reloading several times quickly during a firefight. The weapon can fail to reload for approximately 5 seconds.
A second MP5 can be used as a backup, although two MP5s cannot be used simultaneously.
Shotgun Build: MB590
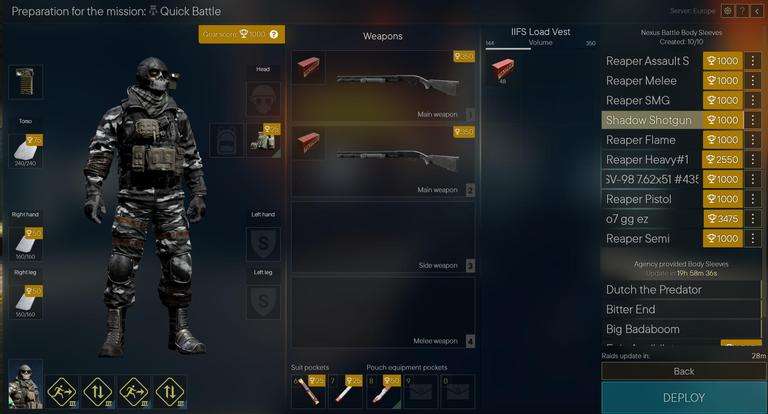
This build trades some armor for a second shotgun while staying within the 1k gear score limit.
Bolt-Action Build: SV-98
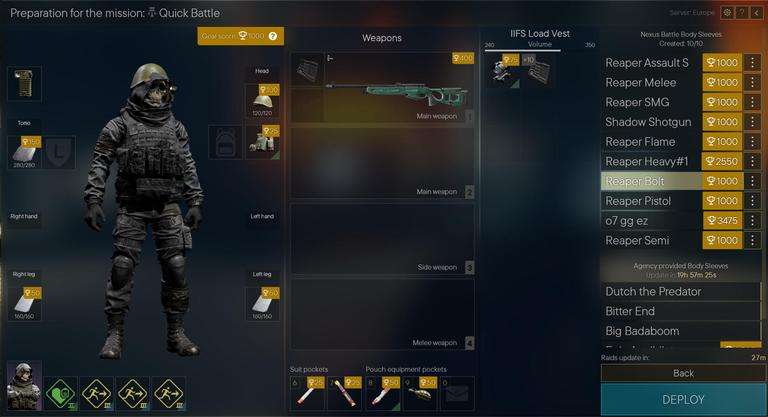
Carry an extra scope if you want the option to camp at long range. The guide notes that it personally performs better without a scope.
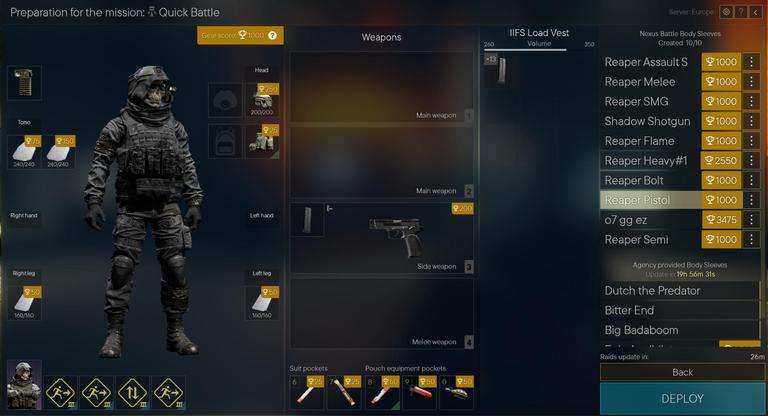
Pistol Build: MP443
Depending on the enemy’s body sleeve and armor, you may need to fire the entire magazine to kill them.
The MP443’s fire rate and magazine size make it the preferred pistol in the guide. You can only have one side weapon.
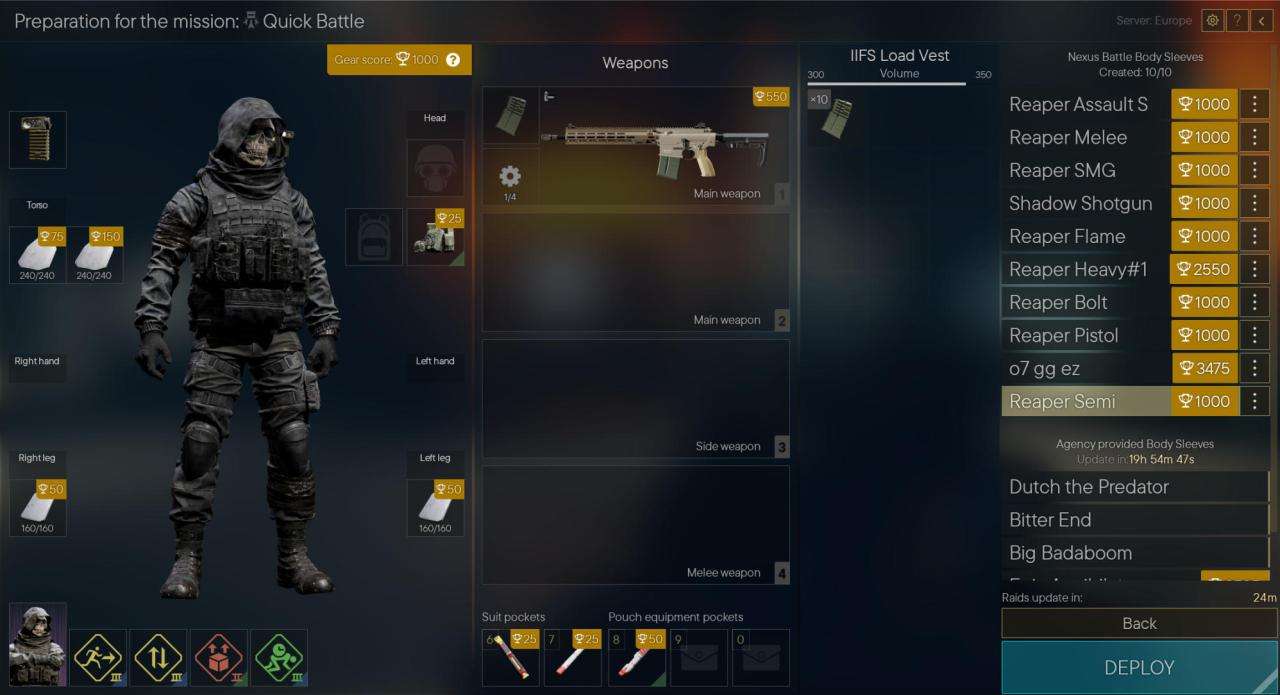
Semi-Automatic Build: M110
The M110 is used for this semi-automatic build.
Factions and Node Capturing
After completing the secondary objectives, you can usually choose between two factions.
If you are targeting a specific faction, check which factions are available for that mission’s reward.
In some cases, only one faction is available, usually on the inner or central nodes.
Instead of selecting missions by clicking nodes on the map, click the faction on the left and select the missions from there.
After completing the secondary objective:
- Return to the mission screen.
- Make sure the reward you want is highlighted.
- Click Report.
Maps and Variants
There are three base maps:
- Trains (Underground Depot)
- Aztec (Itzal Kutan)
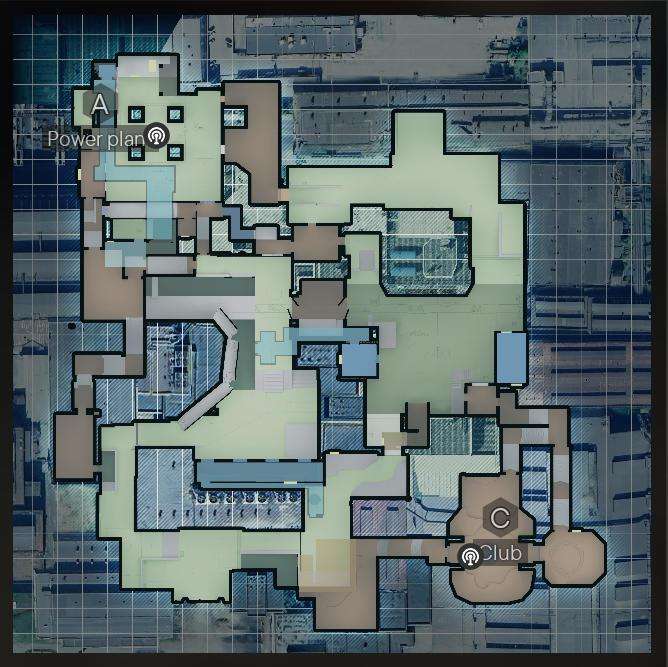
- Club (Mir Factory)
Each map has an Assault and Clash variant.
Assault maps use the A/C variant, while Clash maps use the B variant.
Clash versions have alternative beacon spawns. The beacon may be on the ground or on the roof, and you cannot reliably determine its position beforehand.
The exception is Aztec (Itzal Kutan): Clash, which has only one variant.
The map screenshots used in the original guide were taken from the mission selector, so they do not show portals.
Underground Depot
Clash, B Variant
The beacon may be on the ground or on the roof.
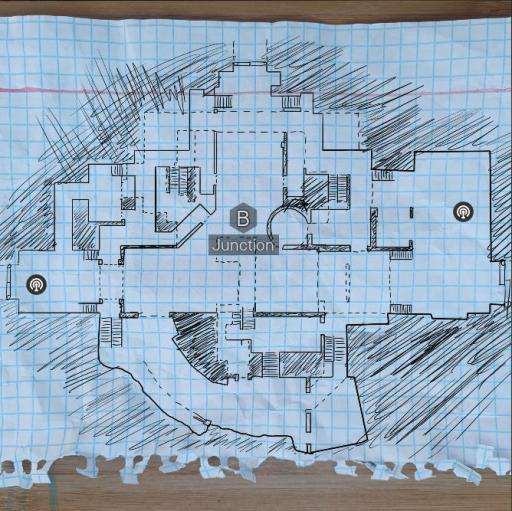
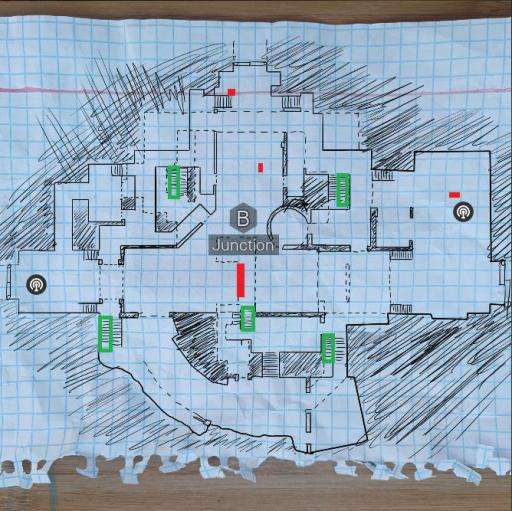
Do not trust the altitude shown when hovering over the objective. The map displays the same altitude for both variants.
- Green Zones are stairs that flip you upside down, allowing you to reach the beacon on the roof.
- Red Zones are locations where NPCs can become stuck.
Assault, A/C Variant
Underground Depot also has an Assault variant using the A/C objective layout.
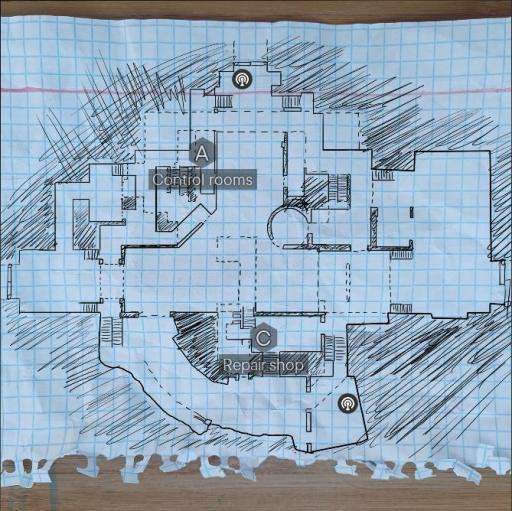
Itzal Kutan
Clash, B Variant
Itzal Kutan has a Clash B variant.
Unlike the other Clash maps described in the guide, Itzal Kutan: Clash has only one variant.
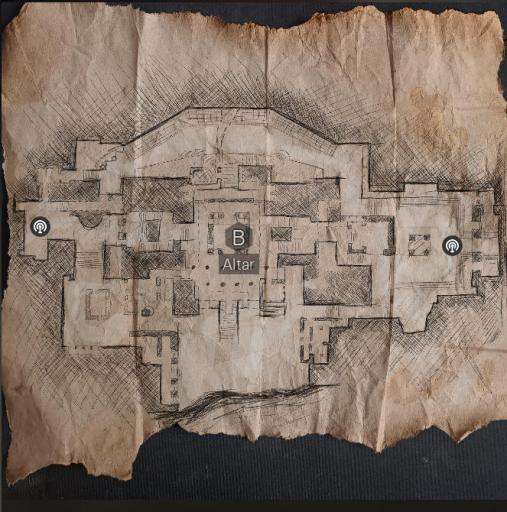
Assault, A/C Variant
Itzal Kutan also has an Assault variant using the A/C objective layout.
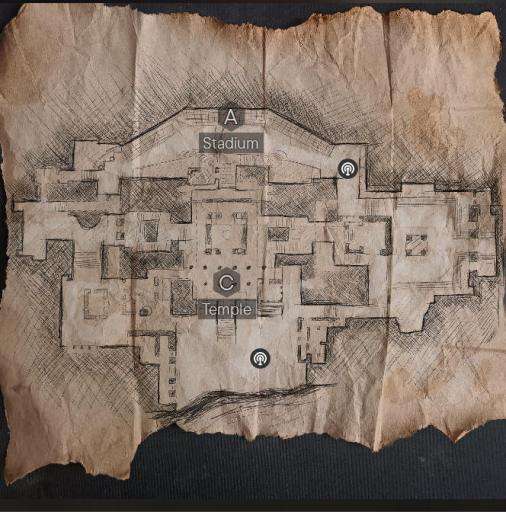
Mir Factory
Clash, B Variant
Mir Factory has a Clash B variant with alternative beacon spawns.
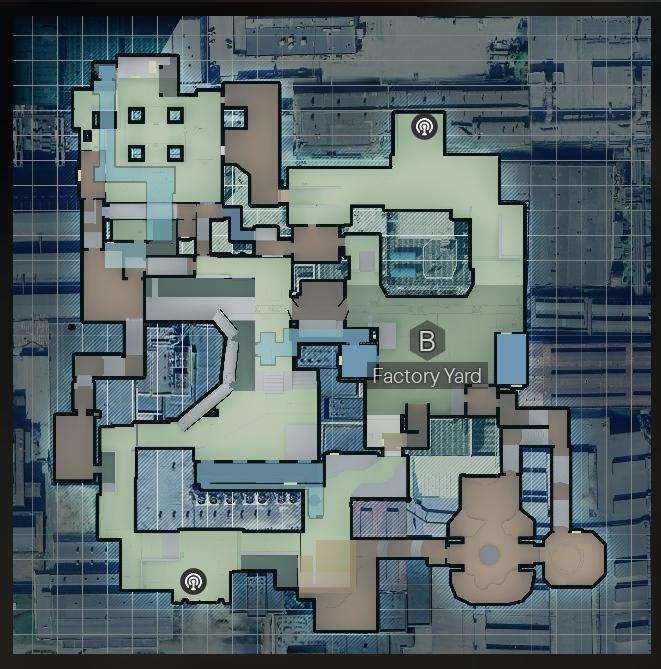
Assault, A/C Variant
Mir Factory also has an Assault variant using the A/C objective layout.
Be the first to comment