
Warning! This guide contains spoilers so read on your own risk.
Guide to All Puzzle Solutions and Passwords
Chapter 1
Edward and Emily
The room of Jeremy Hartwood’s missing uncle.
In the room we find a book and together with a piece of lore we get a “Painted Tile”. Take it to the box and simply rearrange the fragments to create a drawing.
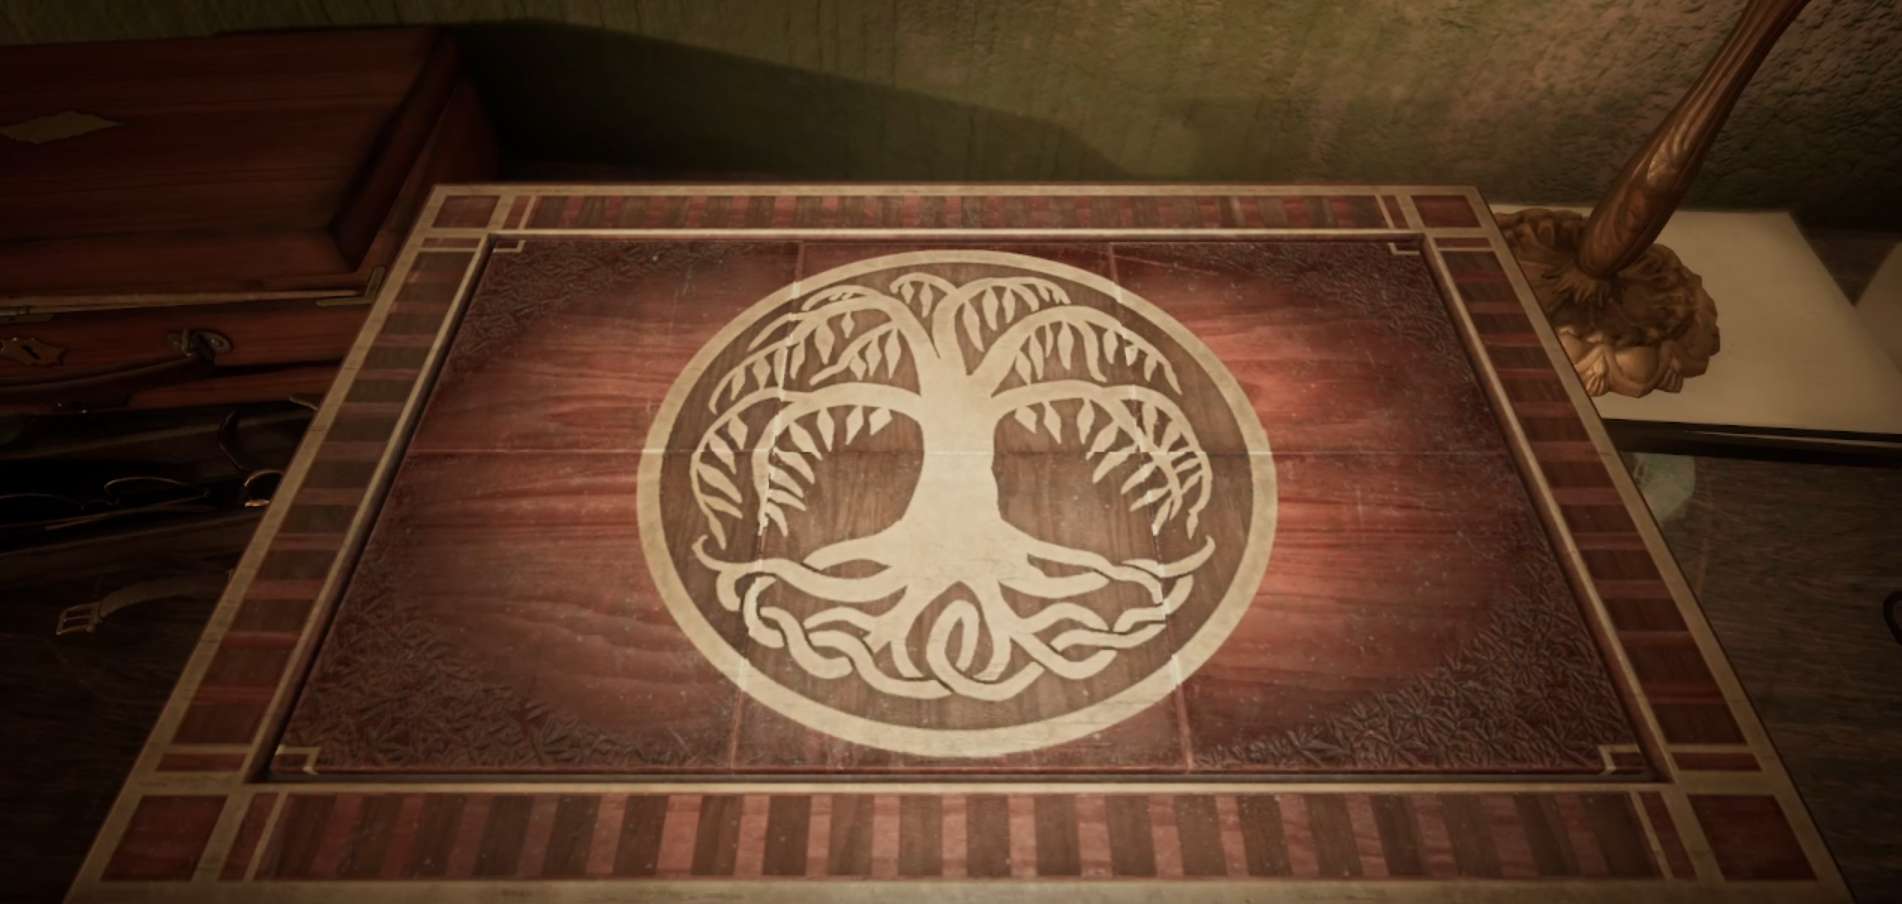
Take the talisman from the voodooist’s shop and enter the code 3-5-8 to open the portal back.
Chapter 2
Edward and Emily
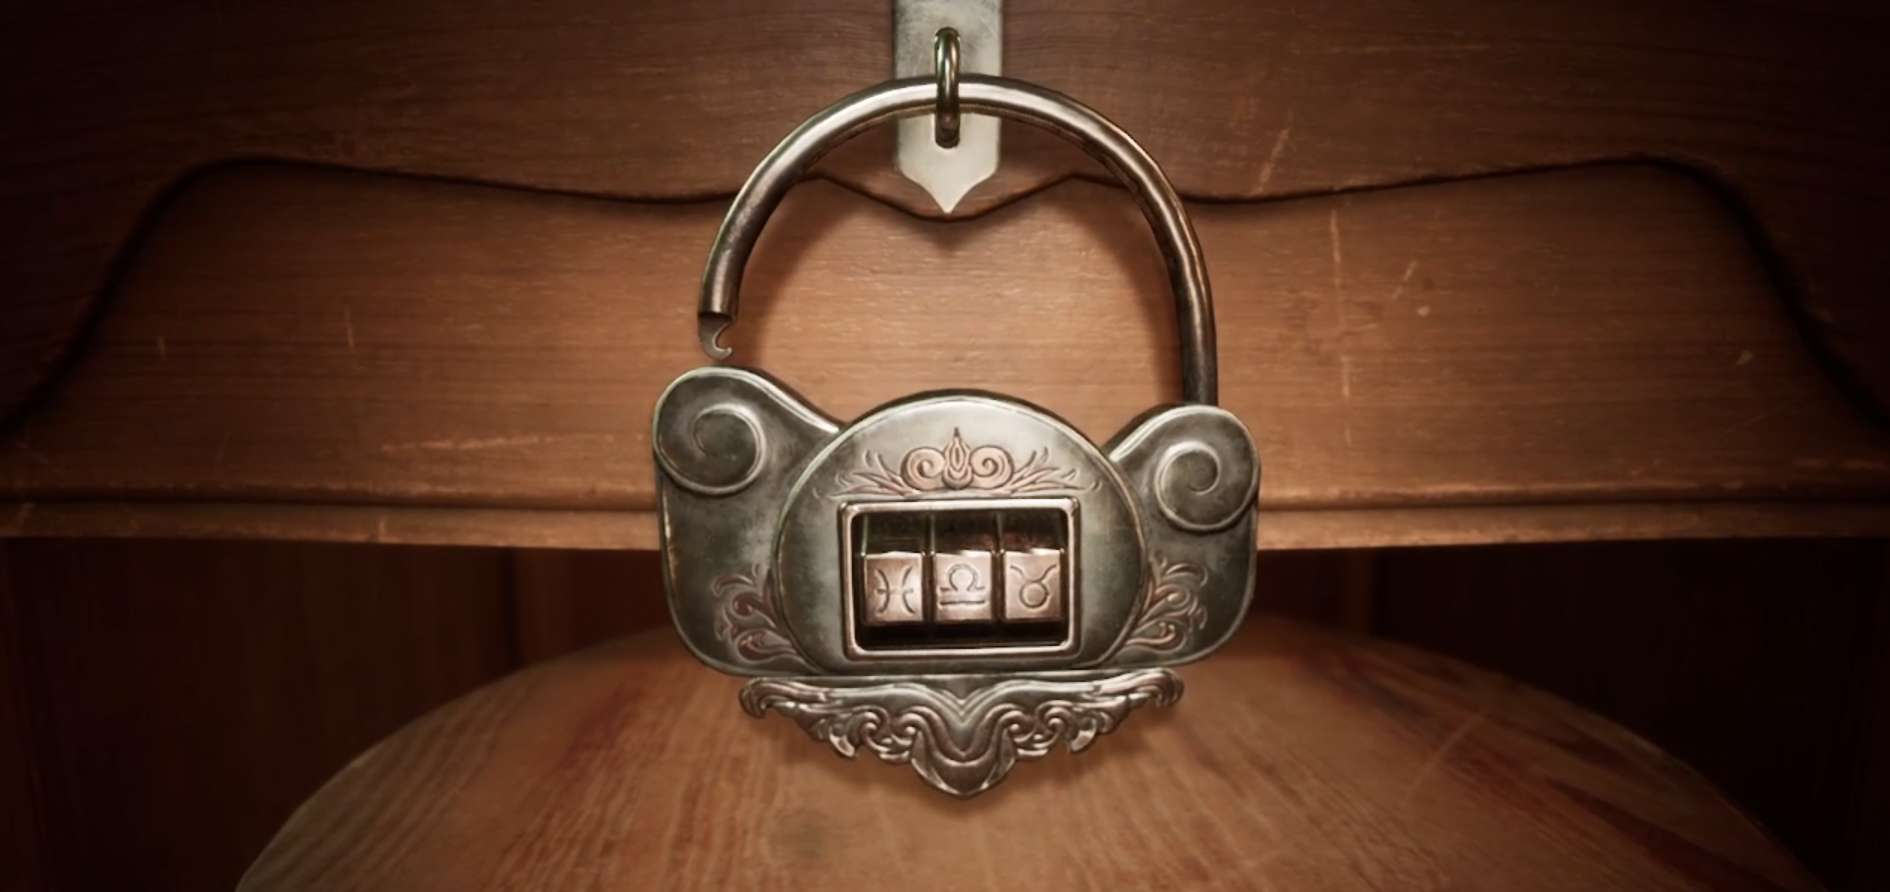
Solve the riddle in the room with the big bed and portraits (Perozi’s room).
We expose a mold drawing like this on the wall:
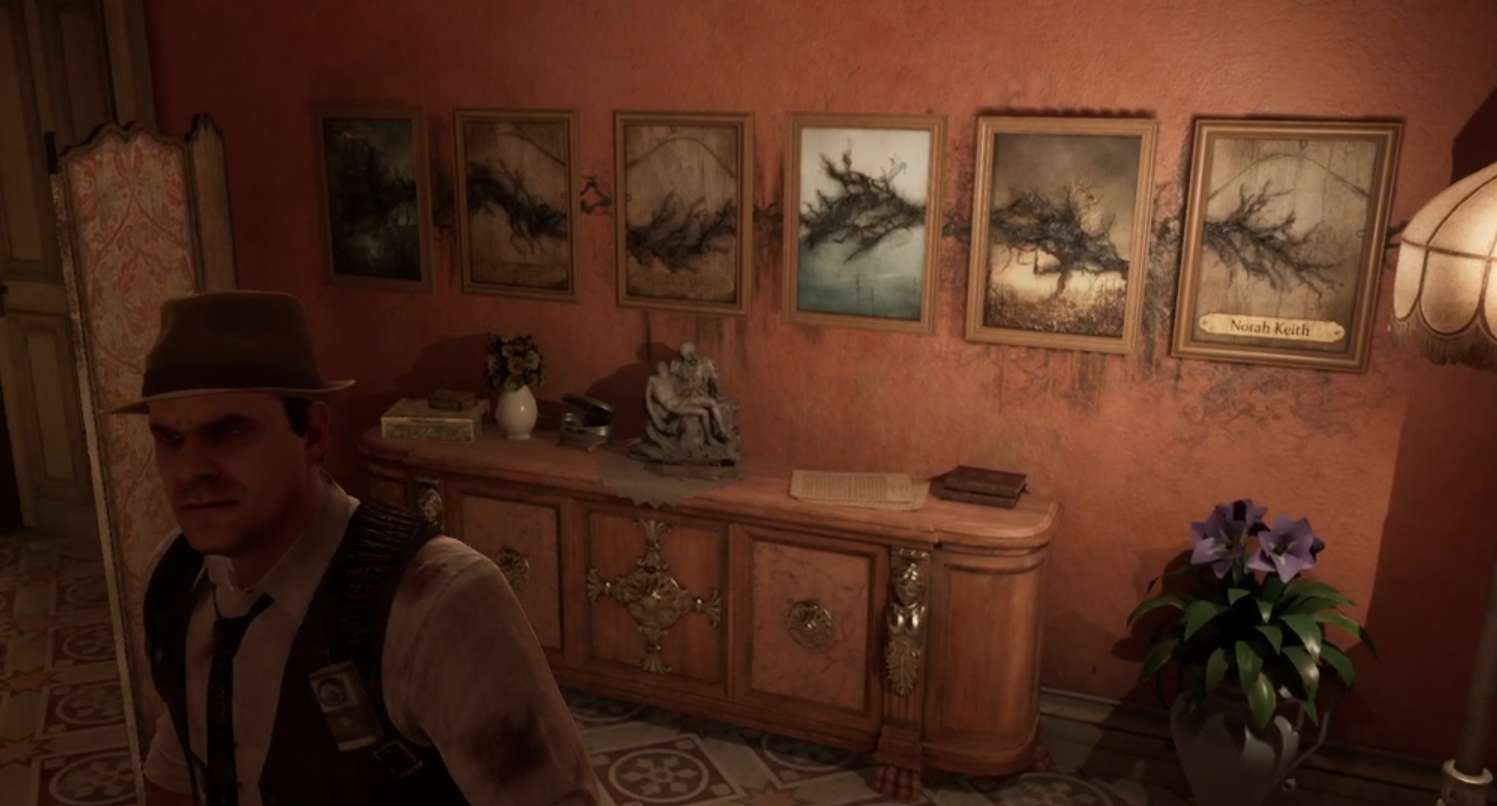
Look at the last names of those left on the portraits: Arges, Mosig, Keith. Next to them on the wall, find them and look at the numbers: 2, 9, 4.
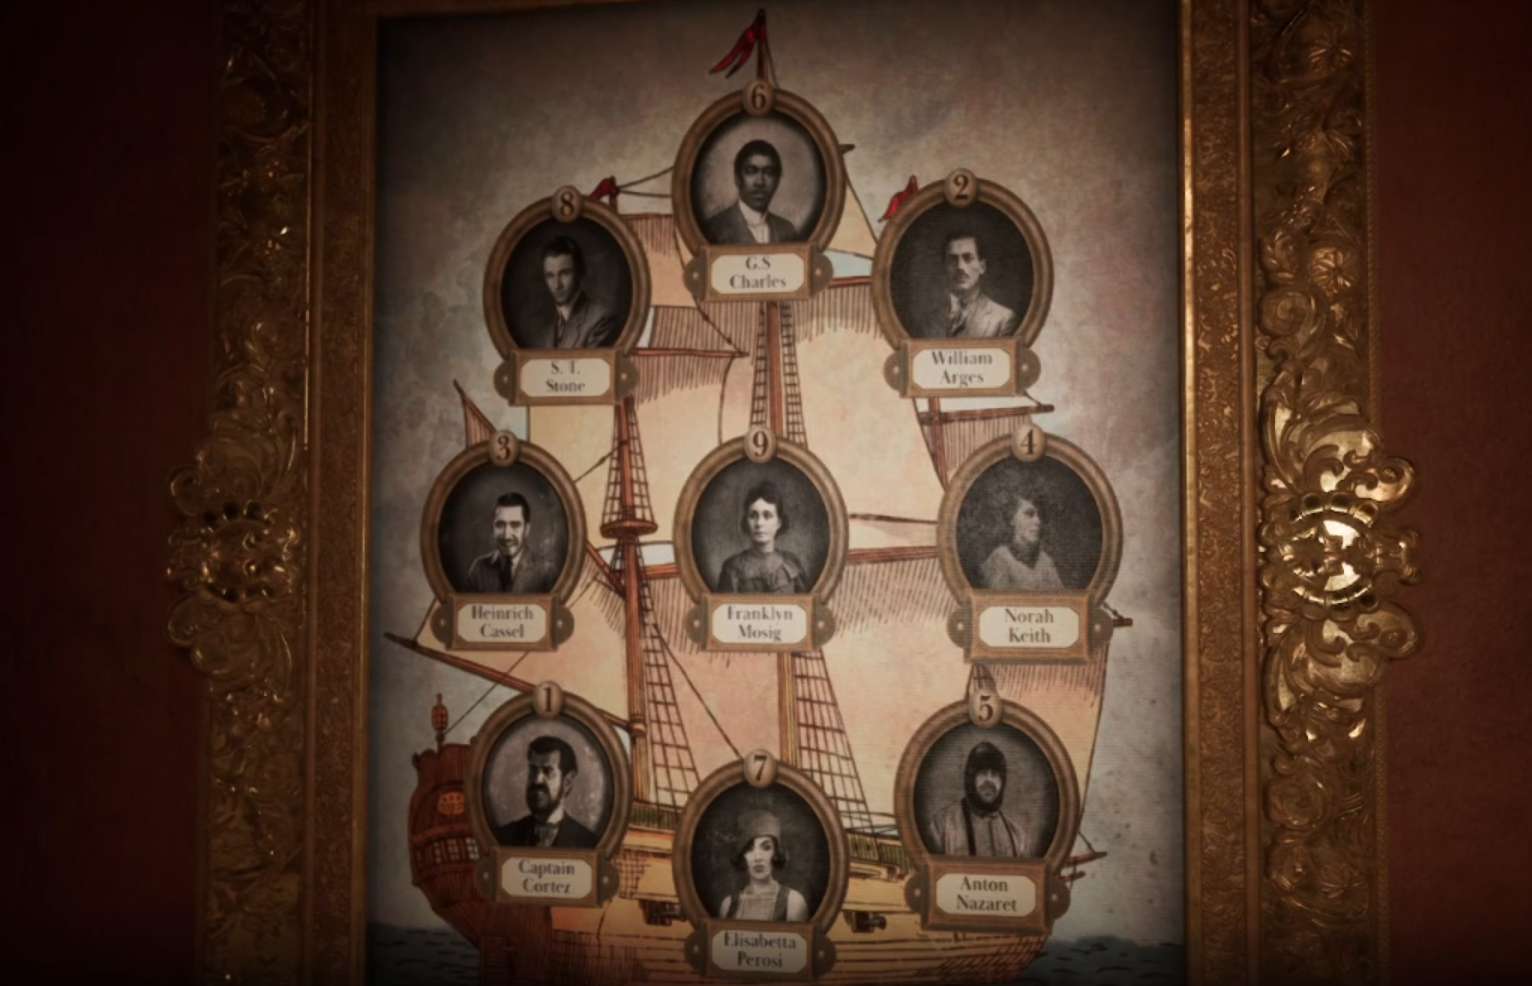
Match them with the entries in Perozi’s Journal, where the circle of the zodiac corresponds to the 12 numbers. Aquarius is 1, Pisces is 2, etc. We should have Pisces, Libra, Taurus.
Enter the combination. The correct answer:
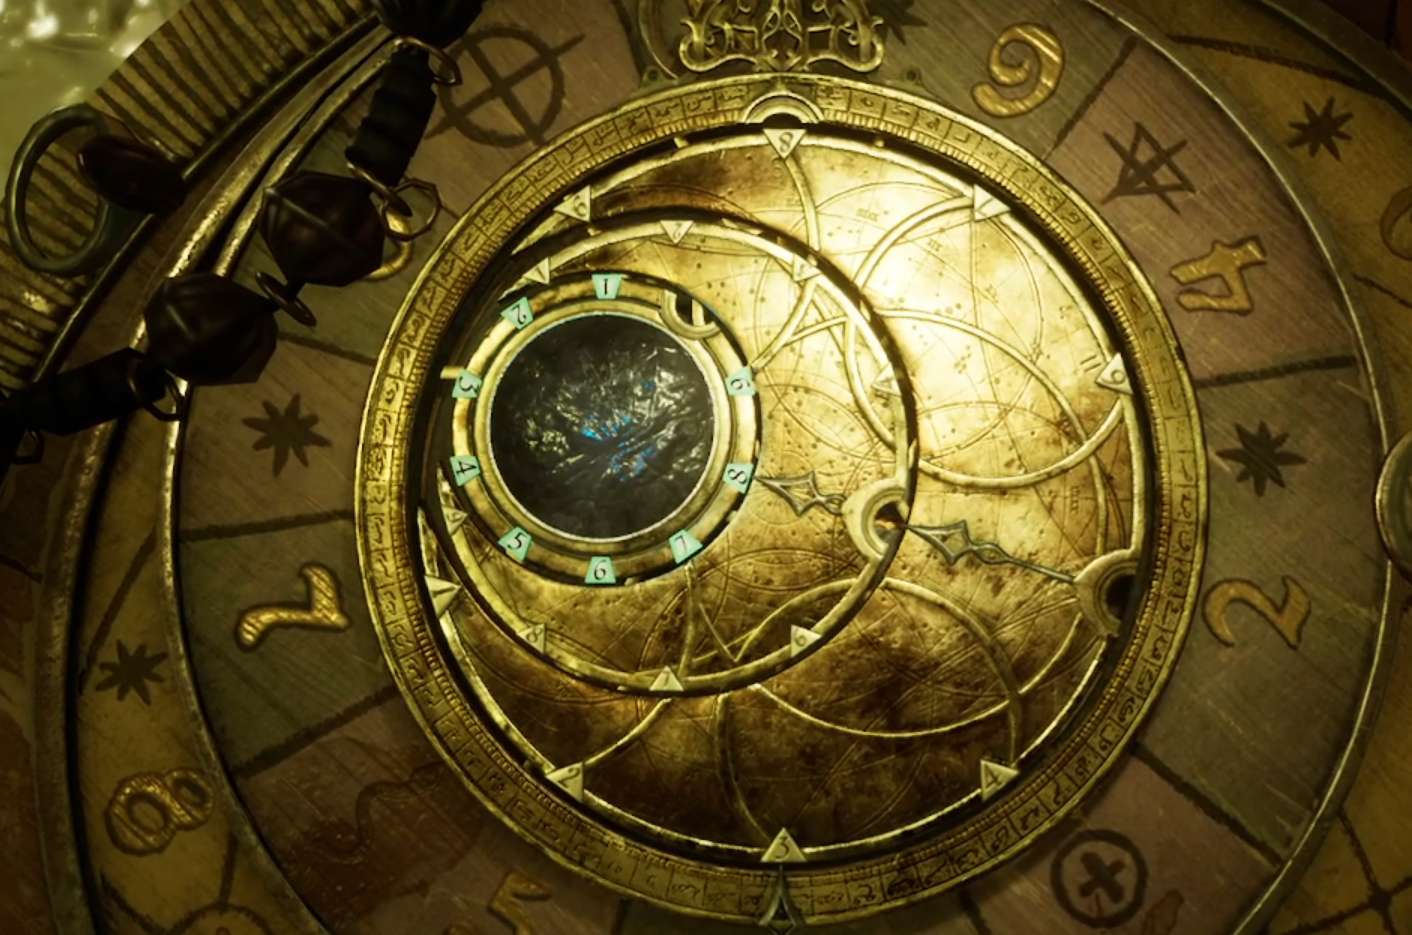
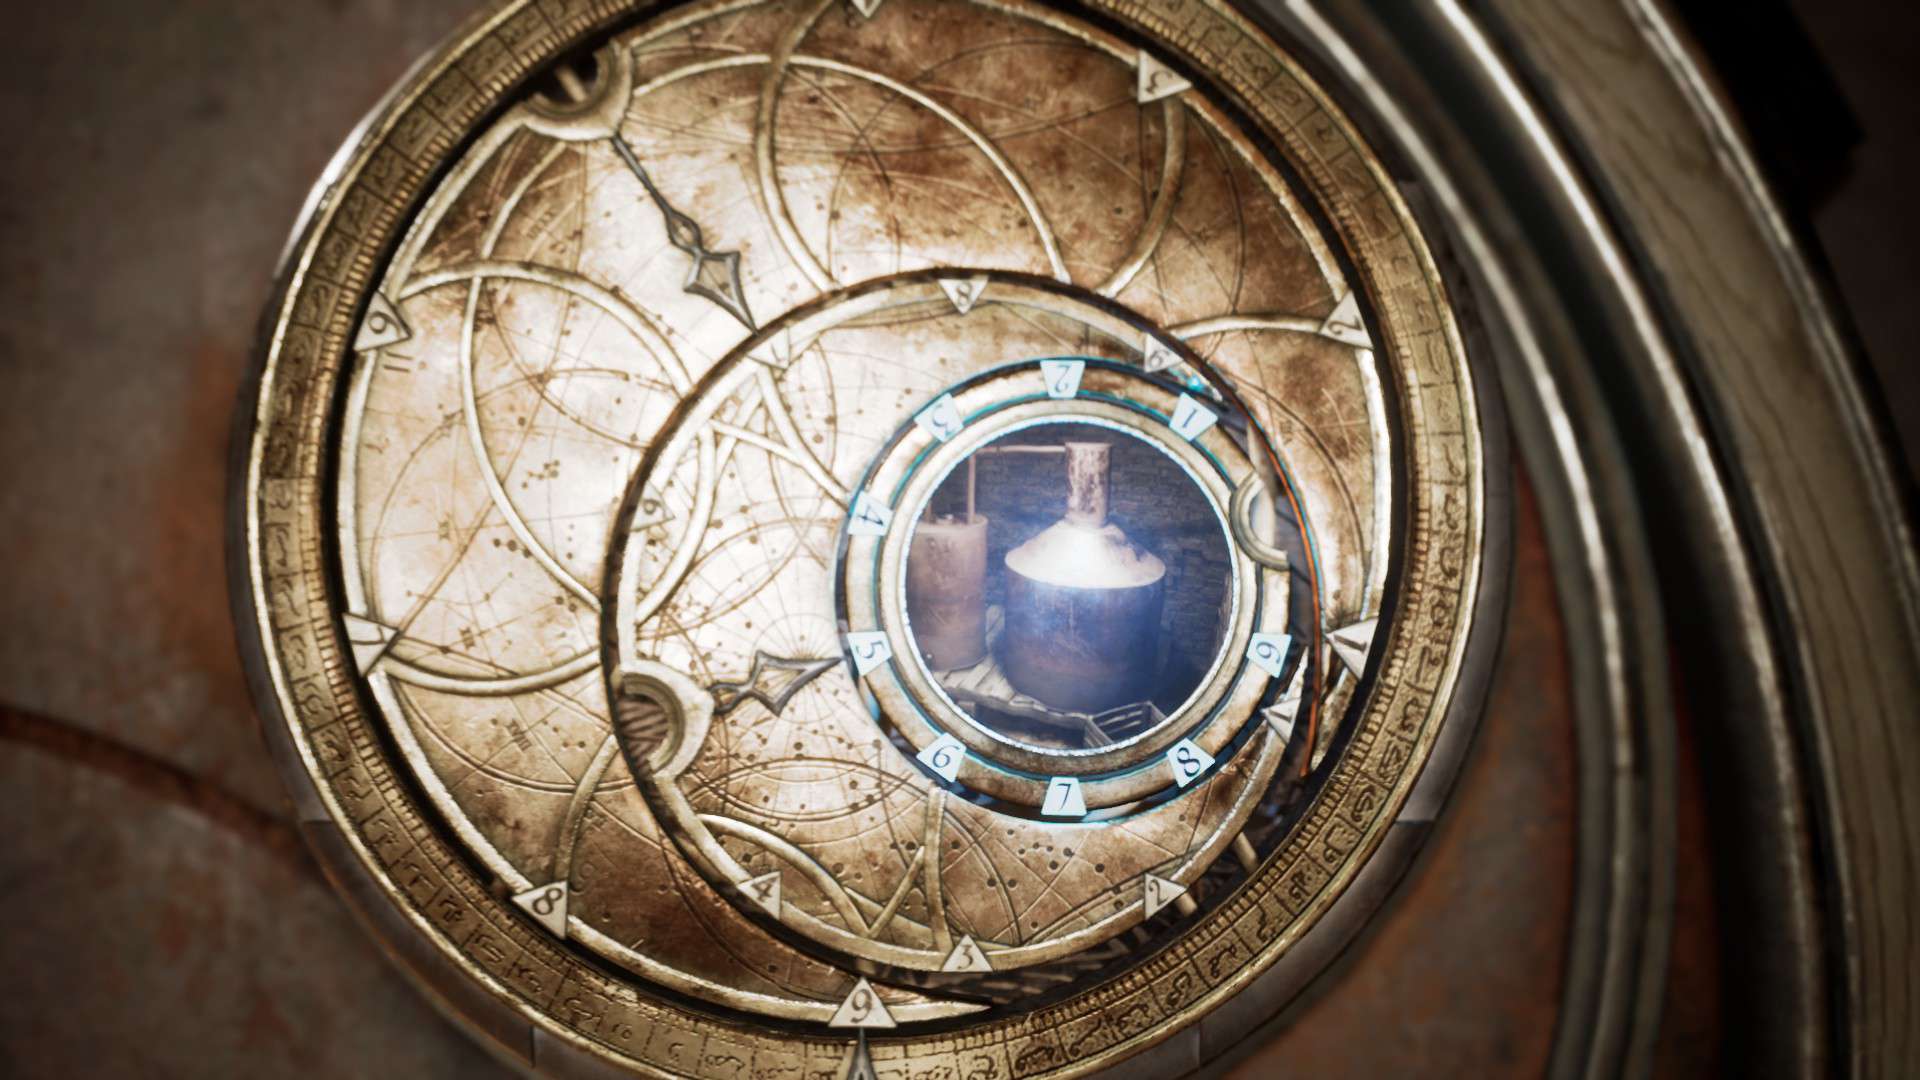
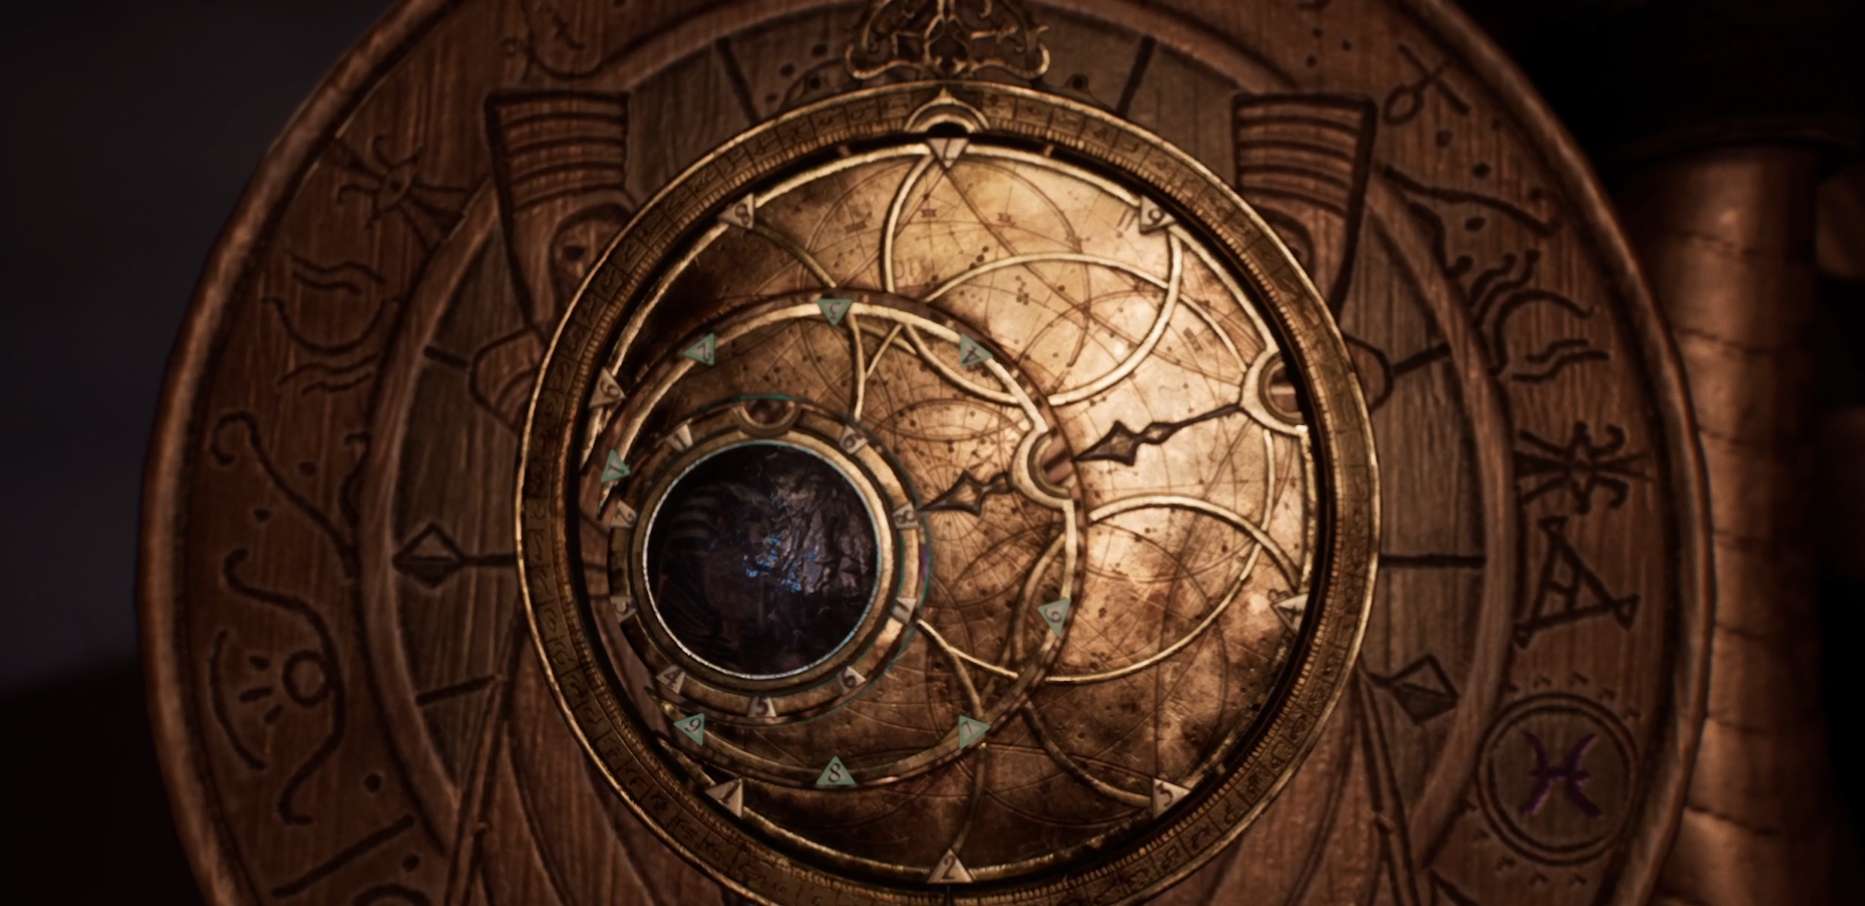
Astronomical clock
Two fragments (broken plates) can be found in the vegetable garden (in the pit, in the bucket, you need to find a hose, let water in and connect the hose near the pit), the second in the box with the zodiac code lock (see above). We rearrange the fragments until we get this pattern:
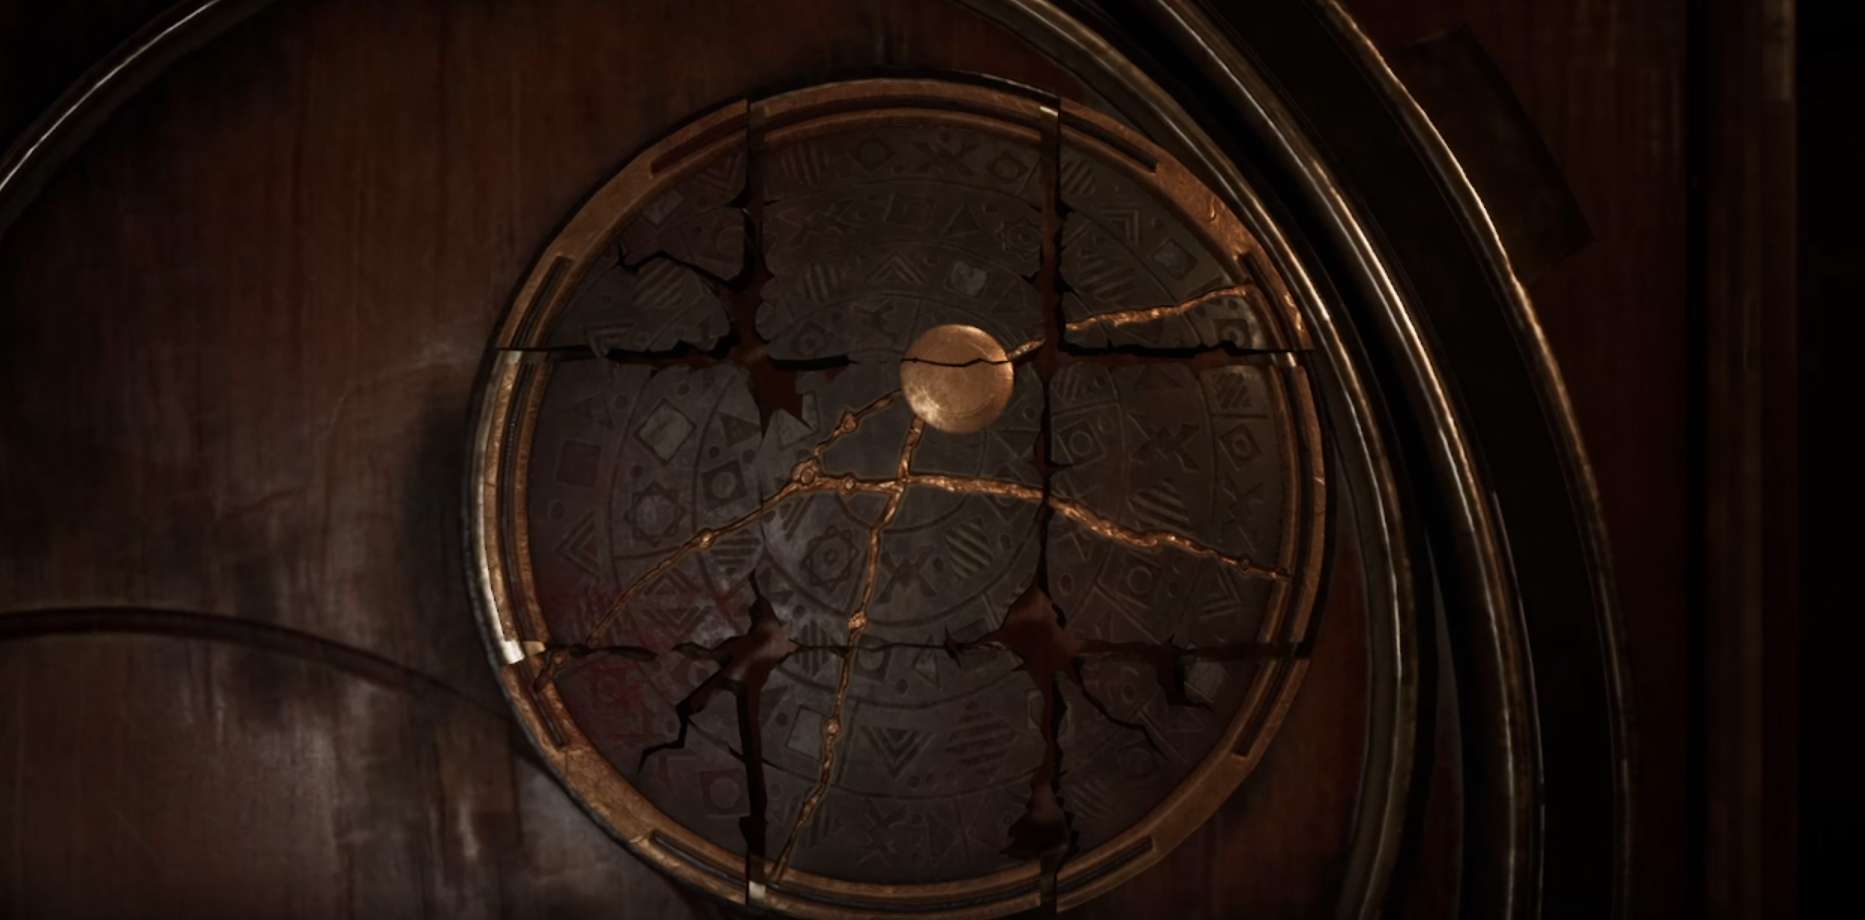
Astronomical Clock Talisman code: 6-4-3.

Cassandra’s room
To solve the problem you will need two bottles. One of them can be found in Sanitar/Lottie’s room and the other on the table in Cassandra’s room. Place the four bottles by the window as follows:
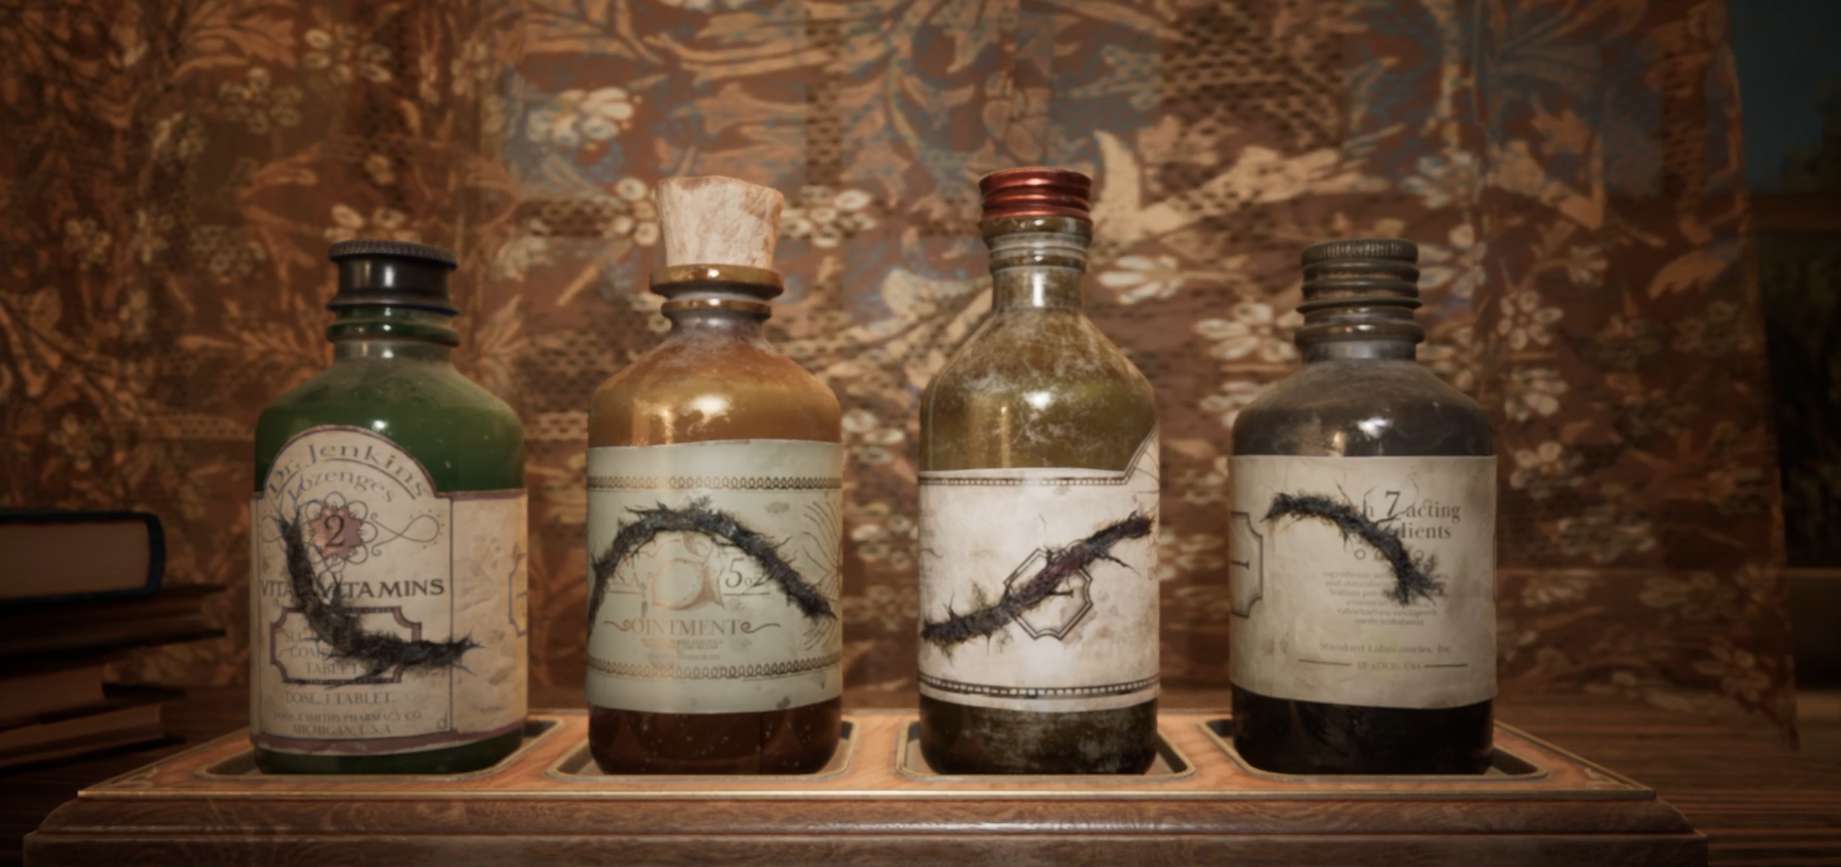
Look at the numbers and compare them to Perosi’s Notes. It should be Pisces, Gemini, Leo. Let’s go to the castle.

Basement-boiler room
To solve the puzzle on the boiler you need to find two broken plates.
One is taken behind the boiler at the disappearing turp, the second in Cassanda’s room (see the riddle above).
Create the following picture:
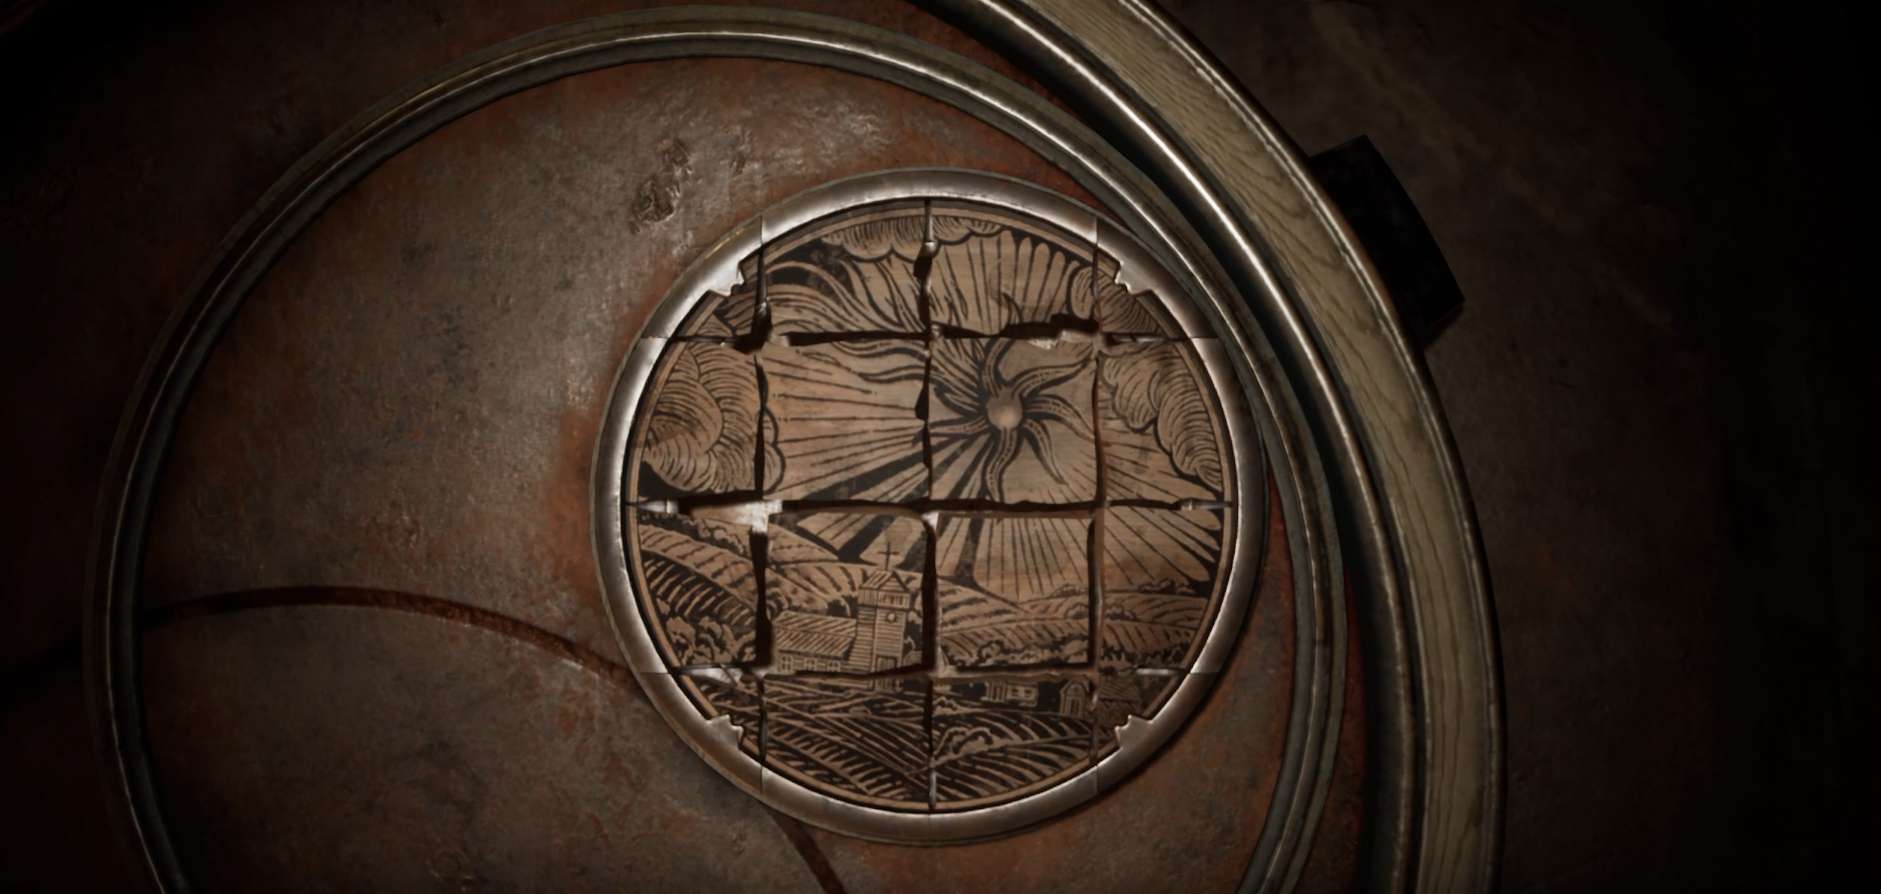
And enter the code into the talisman: 5-7-9
Cemetery
The correct position of all three enamels in the cemetery:
Library, telescope puzzle
We focus the lens in the telescope so that the constellation becomes clear
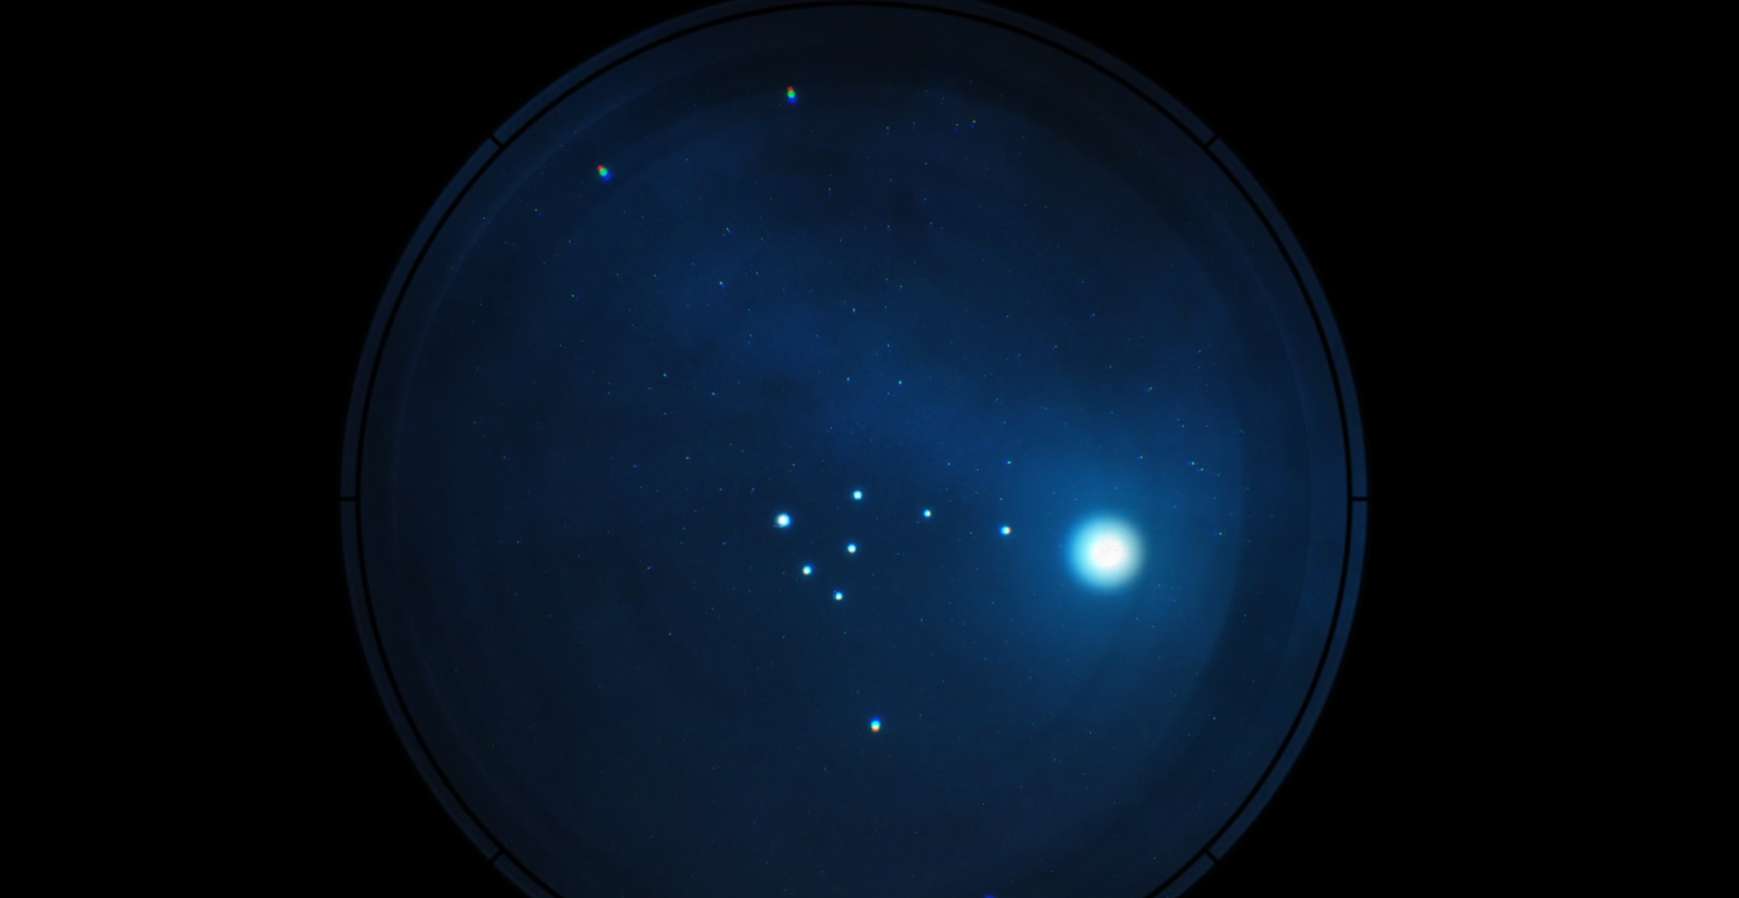
And display this pattern on the wall:
Chapter 3
Edward and Emily
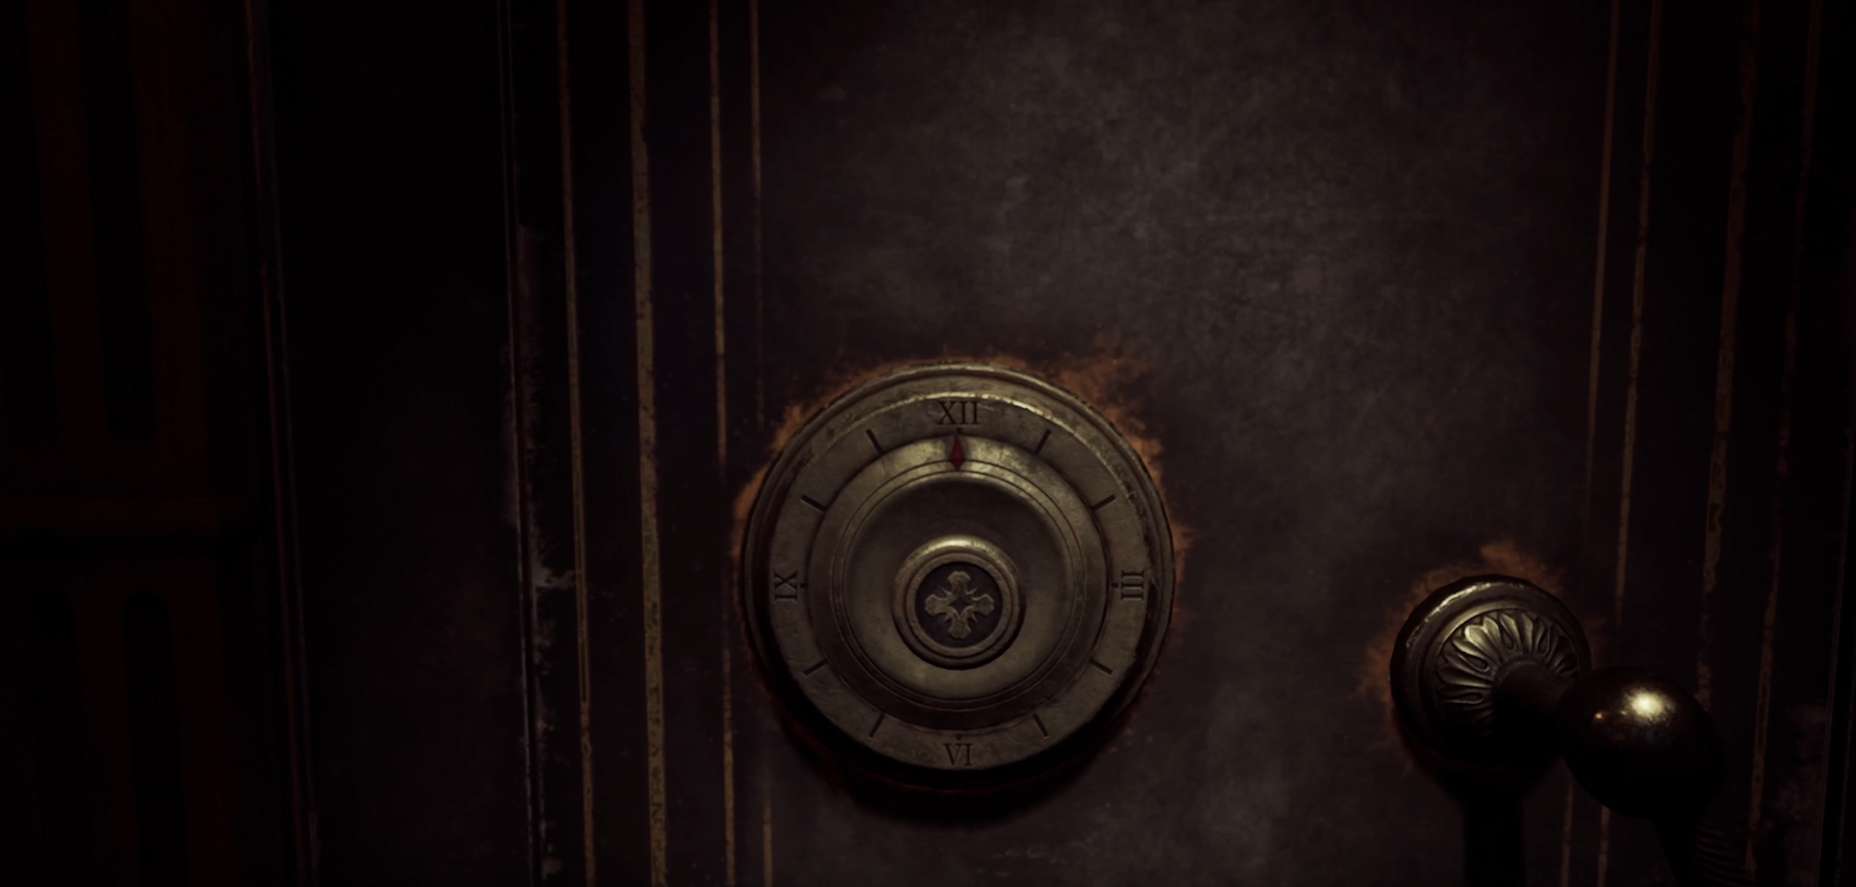
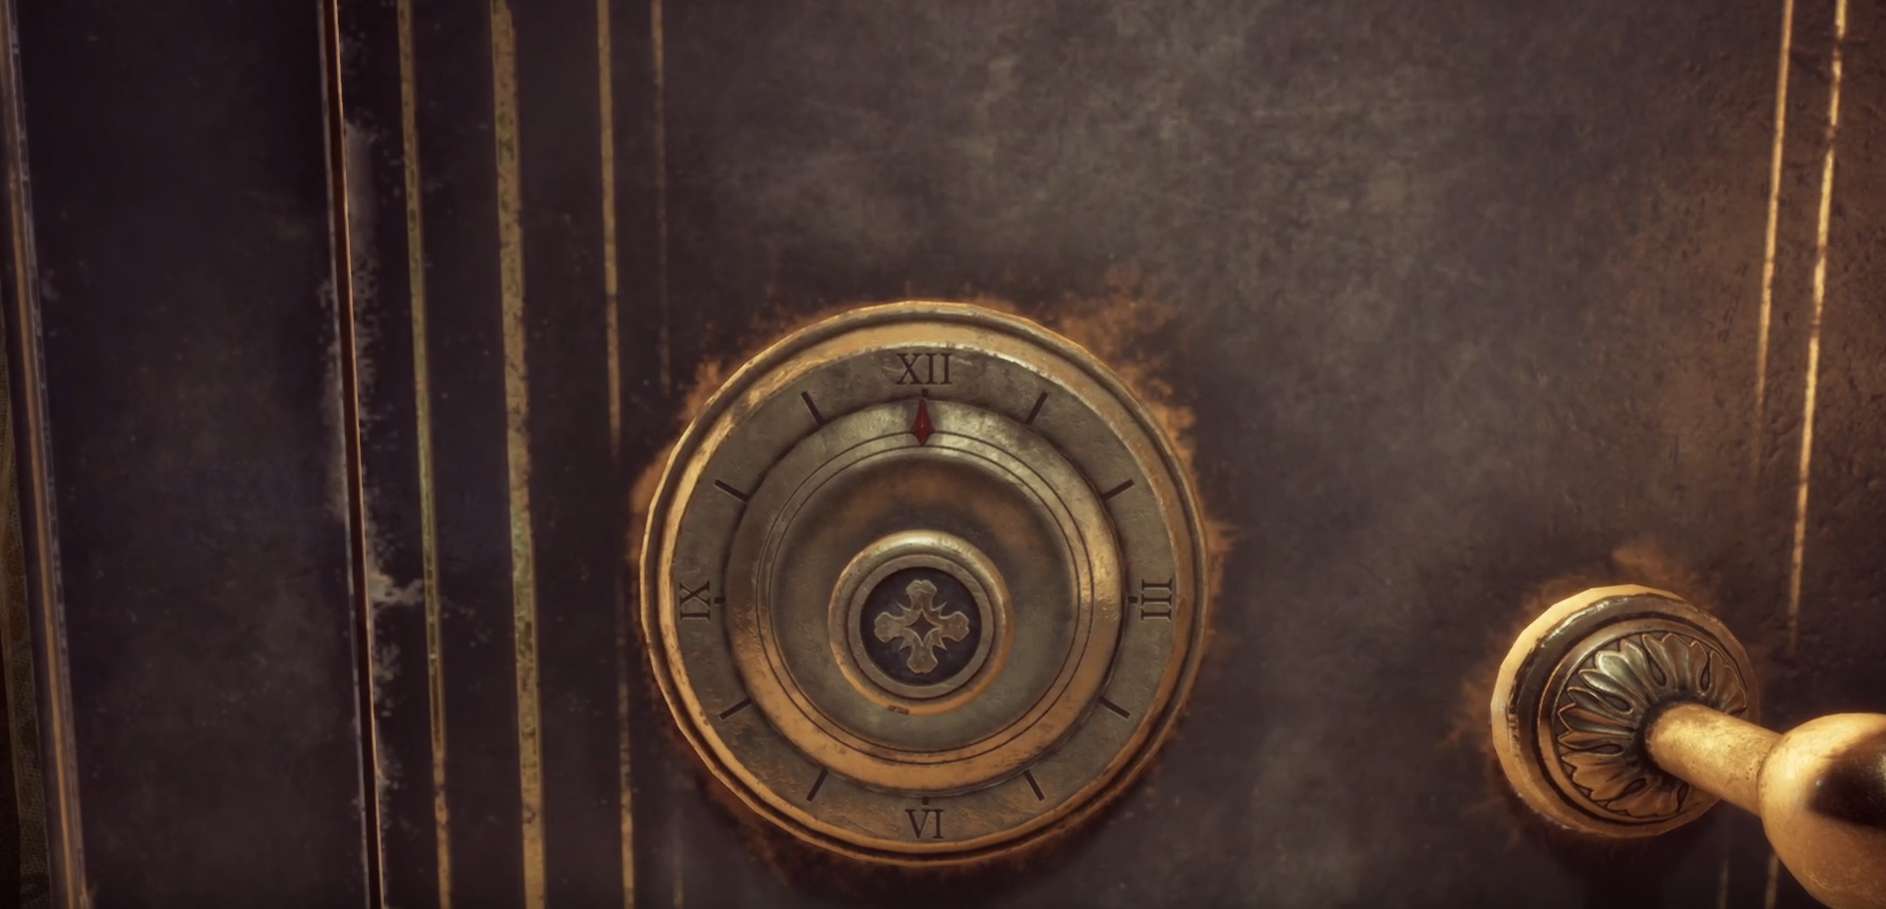
The safe in the harbor warehouse.
The note has a clue related to the number of letters in the words What – 4, Later – 5, Hell – 4. We turn the safe’s dial to 4 o’clock counterclockwise, then 5 o’clock counterclockwise, then 4 clockwise again.
The riddle of the sarcophagus
On the floor, look at the clue.
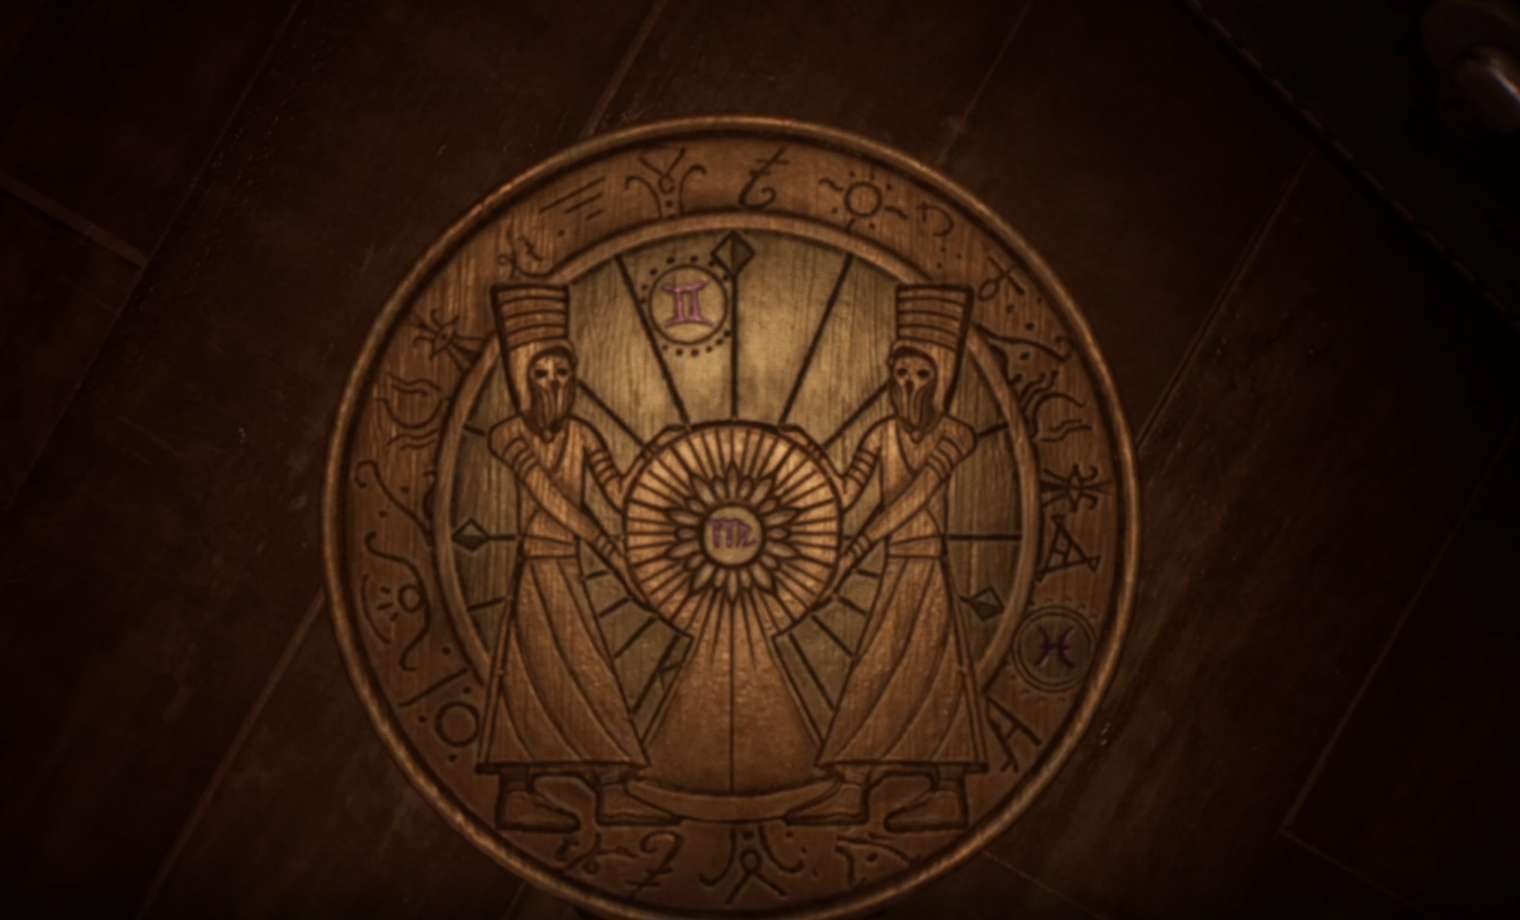
Also a riddle with zodiac signs, but now reversed. In Perozi’s notes find what numbers correspond to the signs on the clue. The code for the Talisman is 2-5-8.
Chapter 4
Edward and Emily
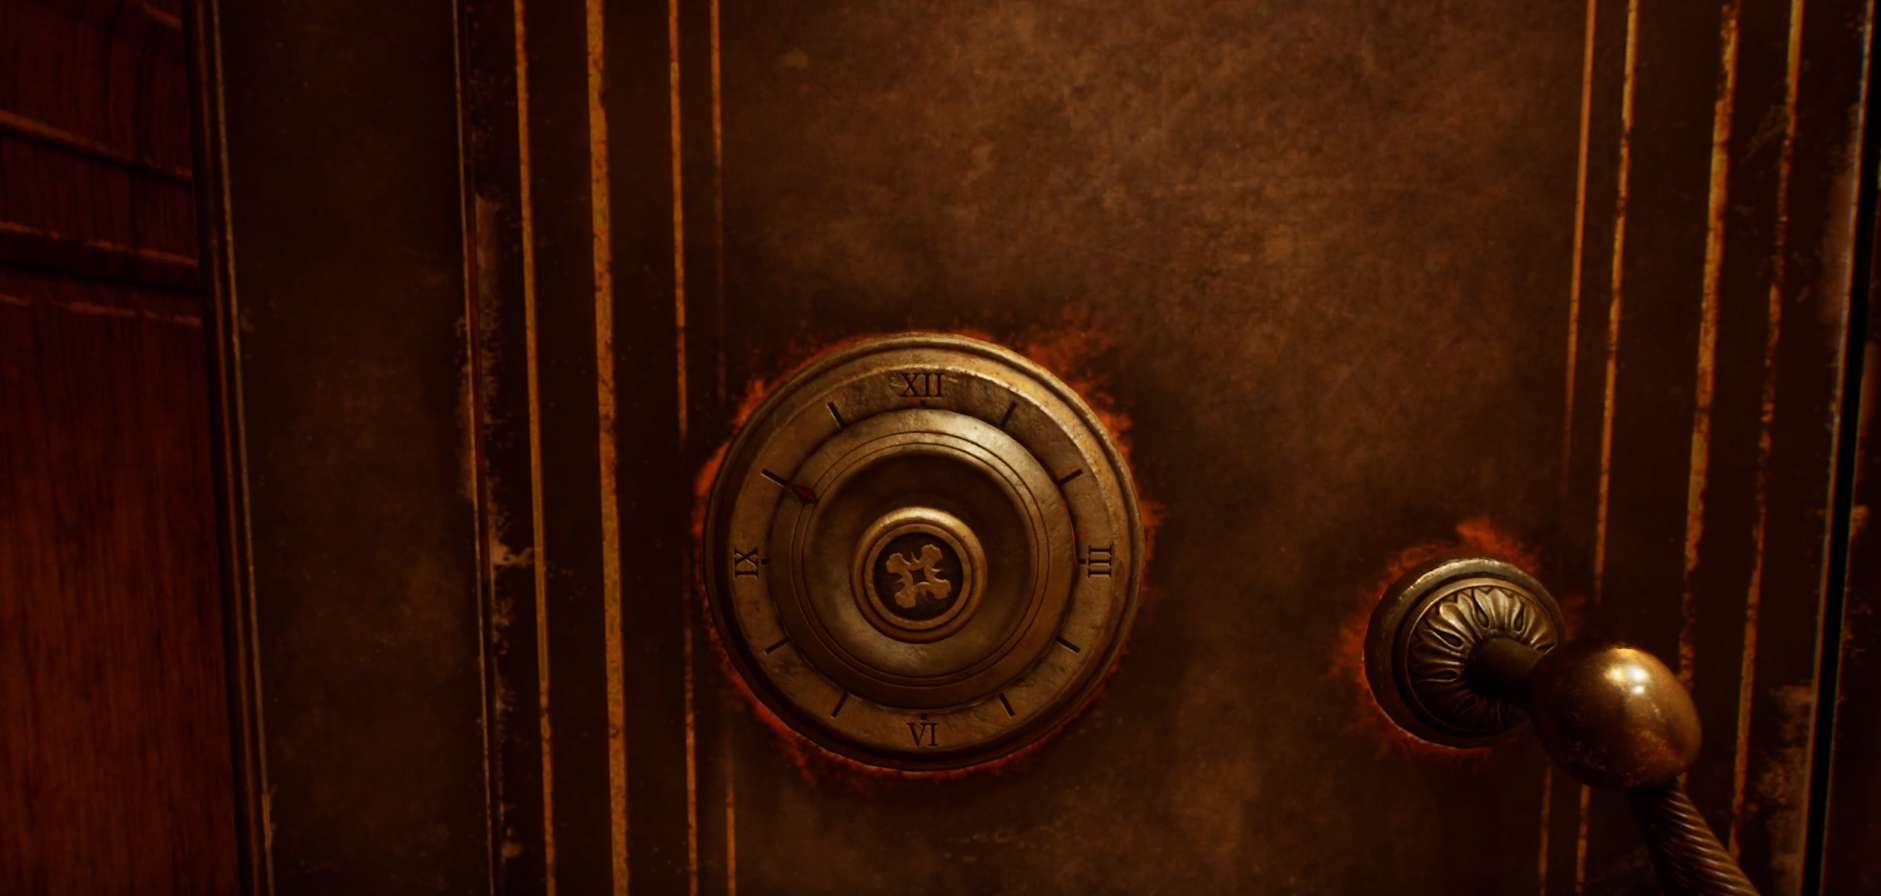
The safe in the receptionist’s office
We leaf on the dial to nine counterclockwise, then to one o’clock clock clockwise, then to three o’clock counterclockwise.
Edward
If you are playing as the detective, his personal quest begins in the empty room.
Empty room
Tear the wallpaper on the wall and get a clue.
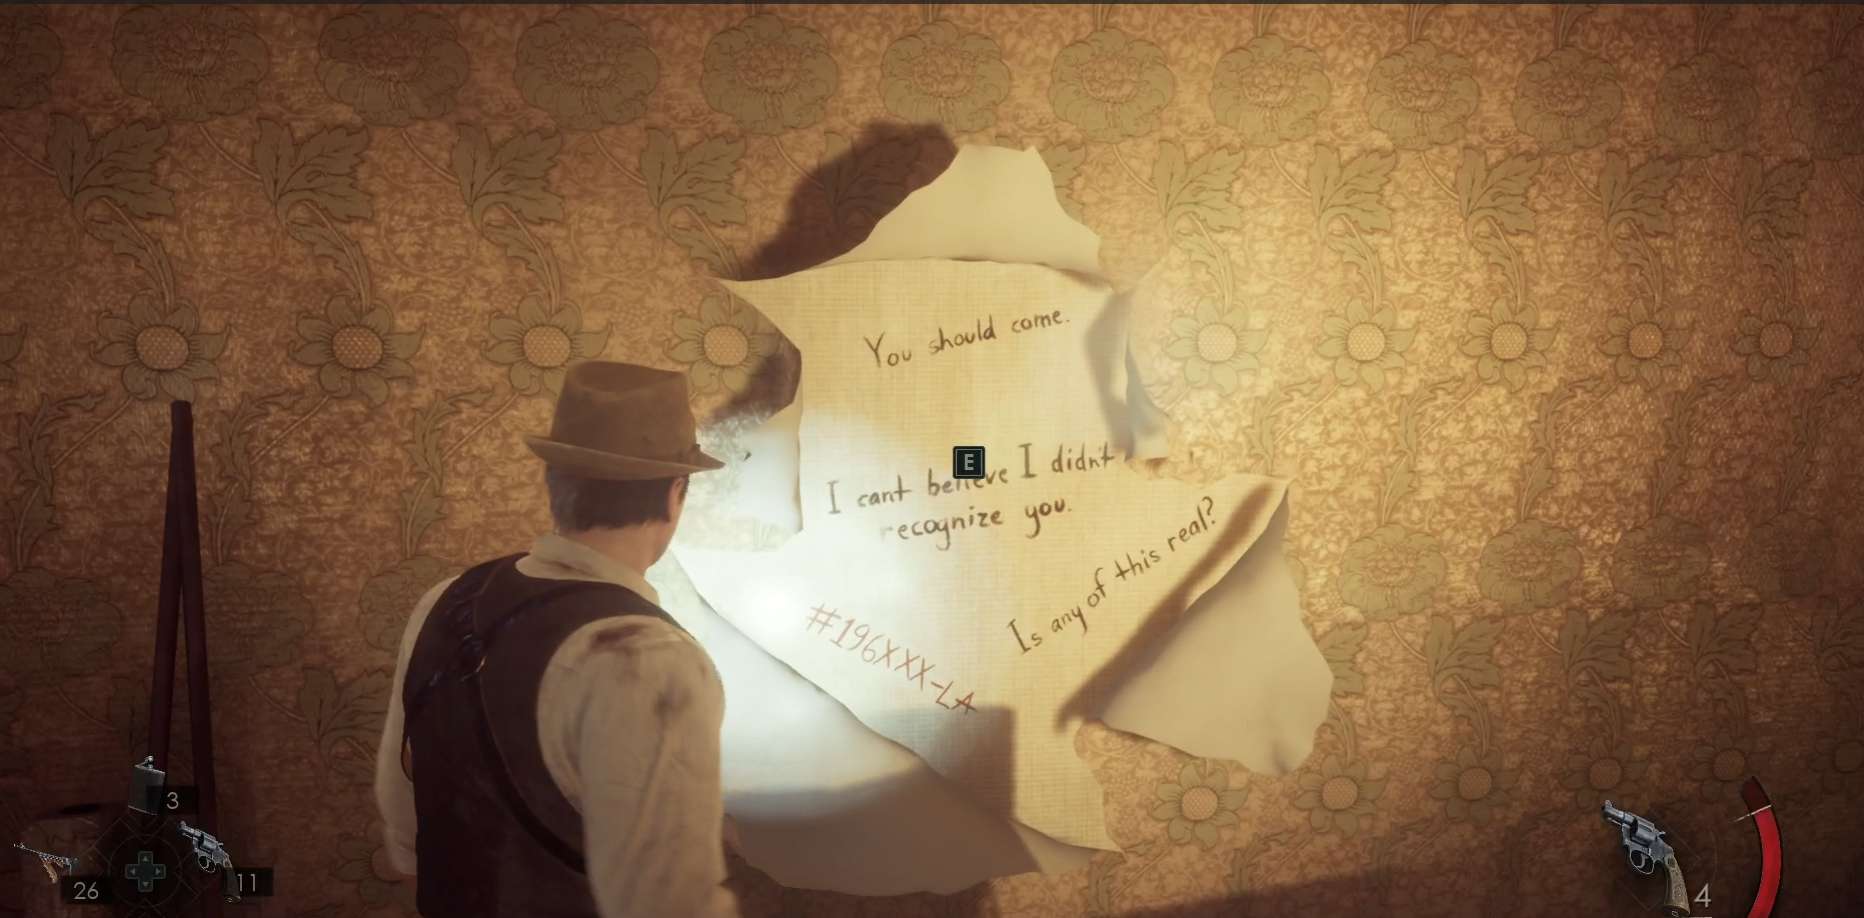
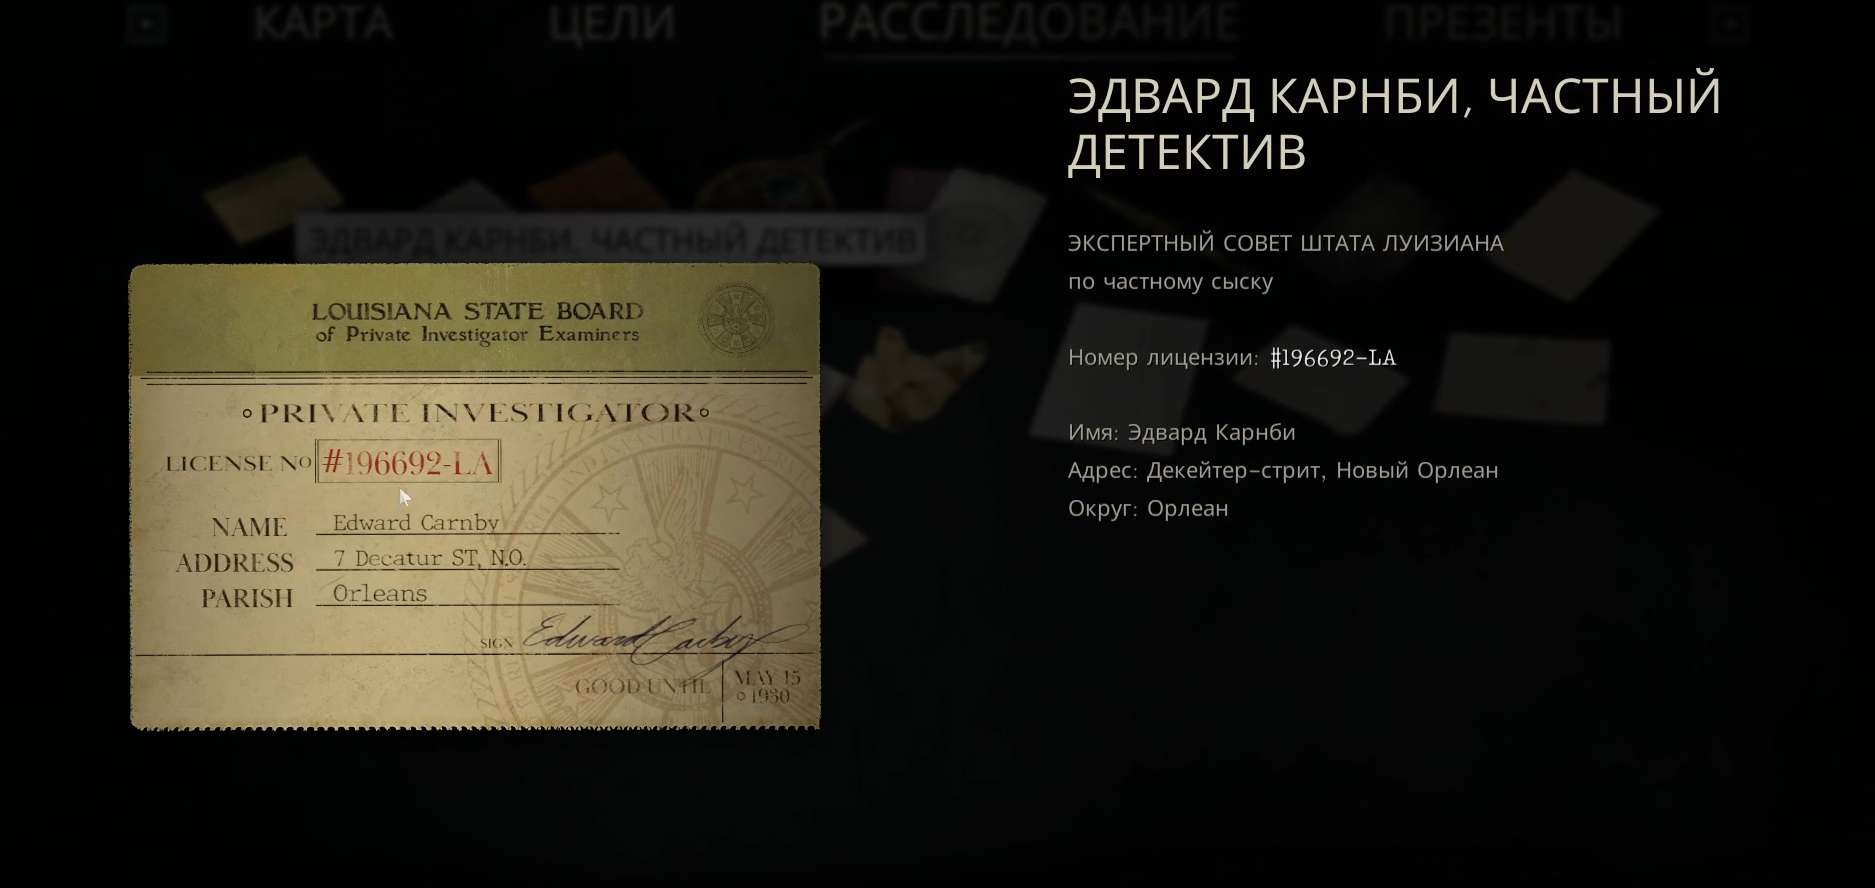
Open the inventory and find the detective’s ID: 196692-LA. We look at the last three digits.
Flip on the safe’s dial to six counterclockwise, then nine clockwise, then two counterclockwise.
Grace’s room
To solve the puzzle with drawings you need to find an additional drawing. It is taken in the vent in McCaffrey’s room (you need a coin from the safe in the empty room). Create such a drawing:
In the world of the detective spin the pictures this way:
Emily
If you play as Emily, her personal quest starts in the empty room.
Empty room
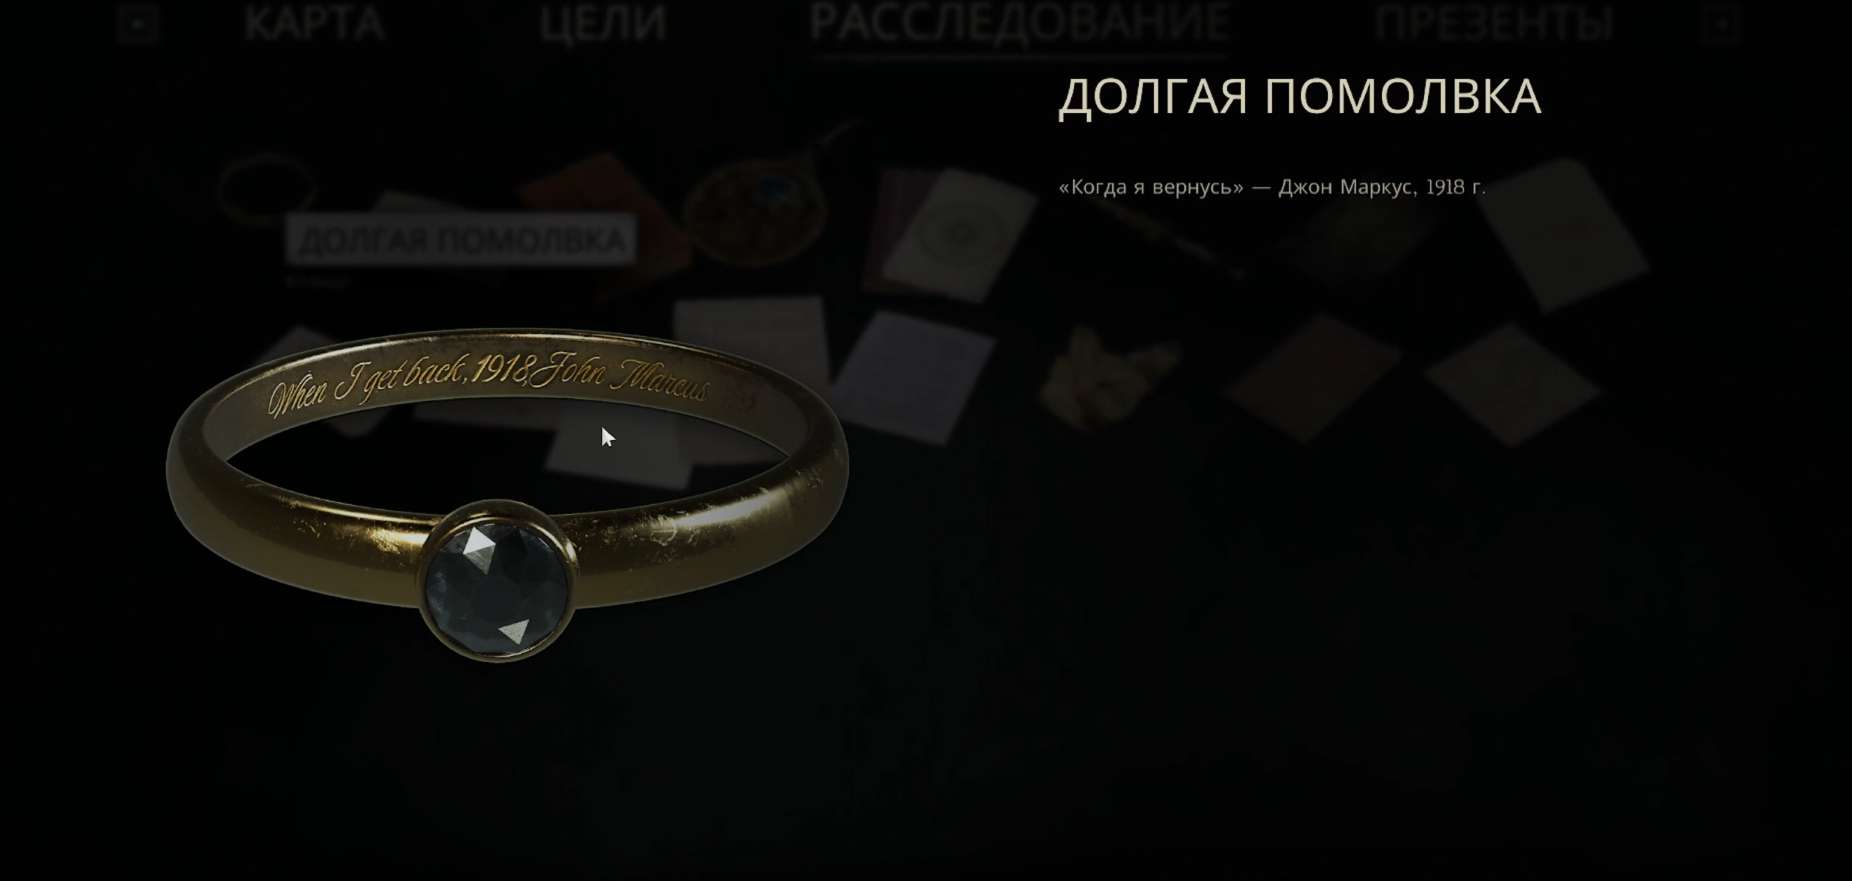
Tearing the wallpaper on the wall and getting a clue. “When I get out of here, 1XXX.”
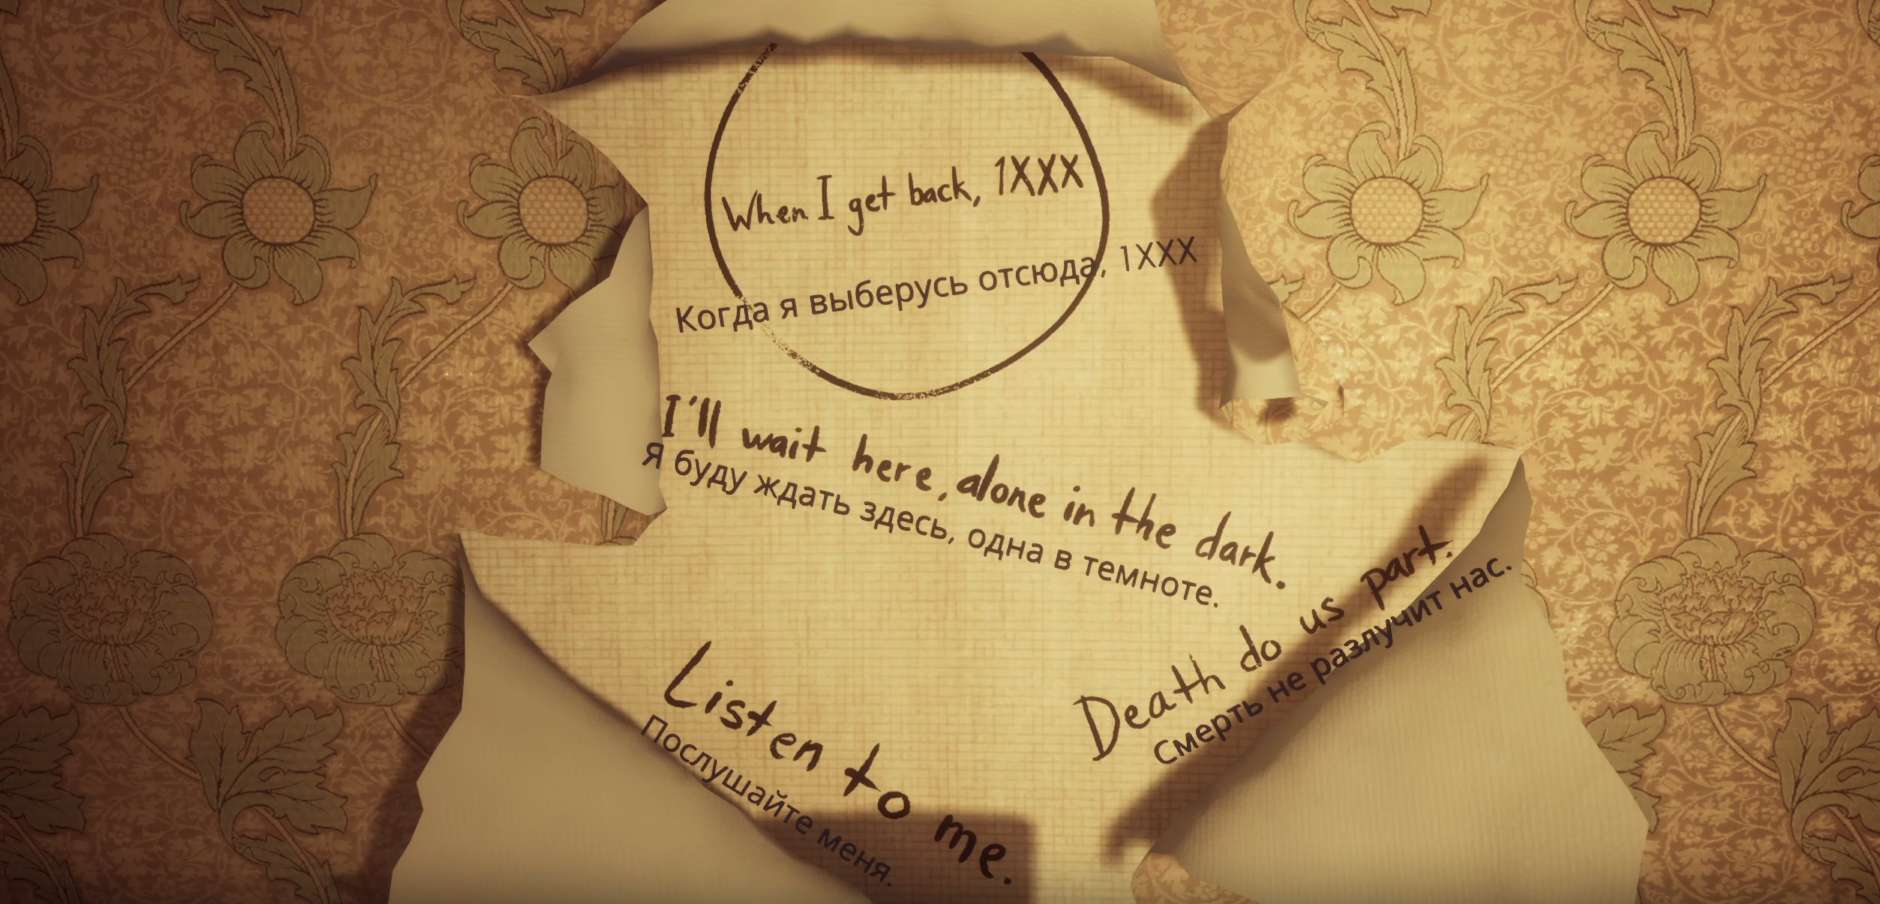
Open the inventory and examine the ring: 1918. That means the code we need is 918
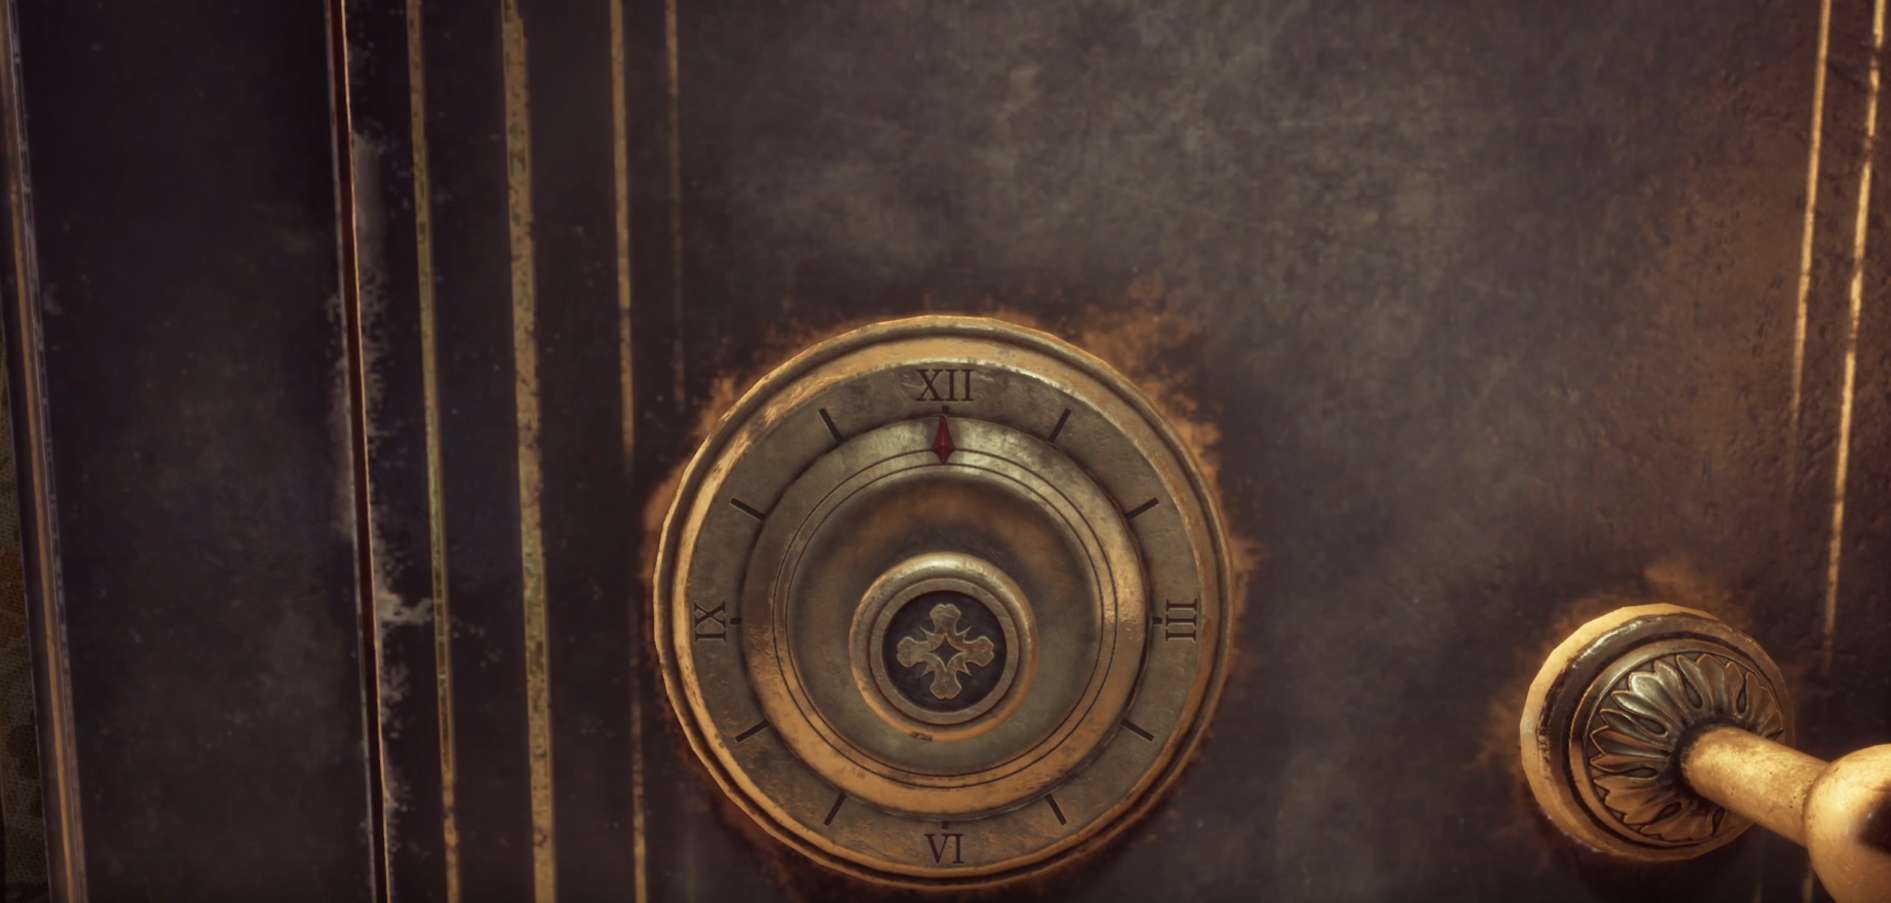
Twist on the safe’s dial to nine counterclockwise, then to one o’clock clockwise, then to eight counterclockwise.
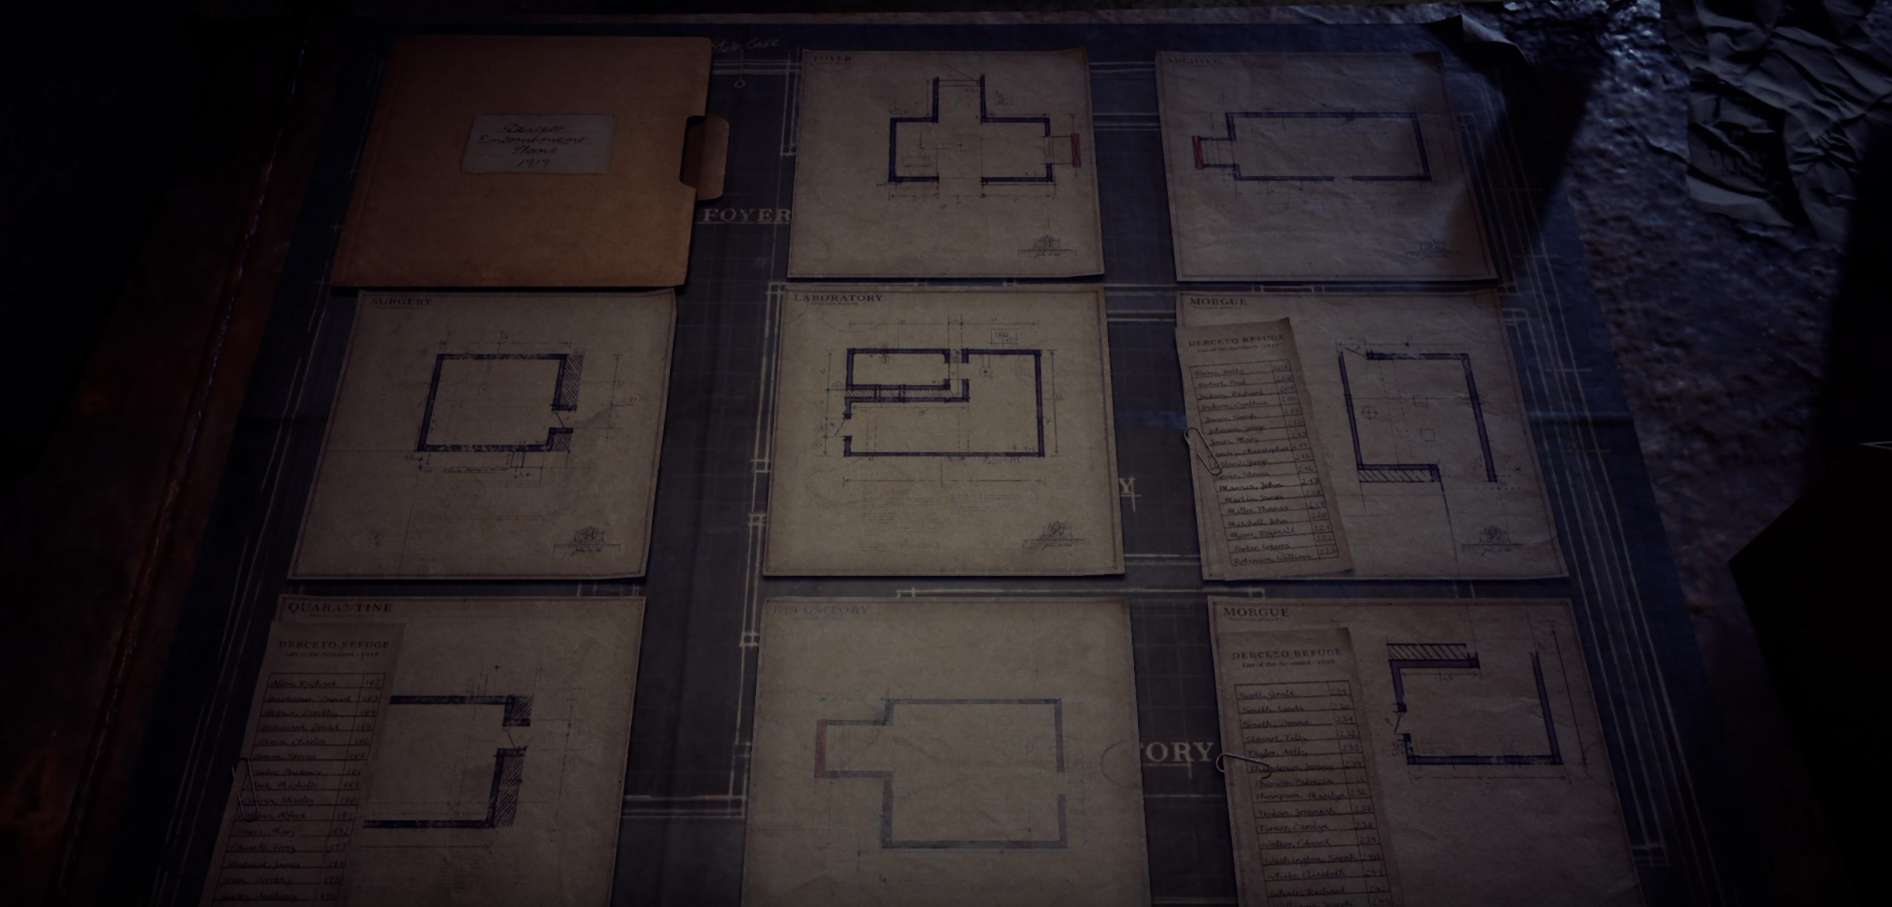
The riddle with the hospital plan.
Edward and Emily
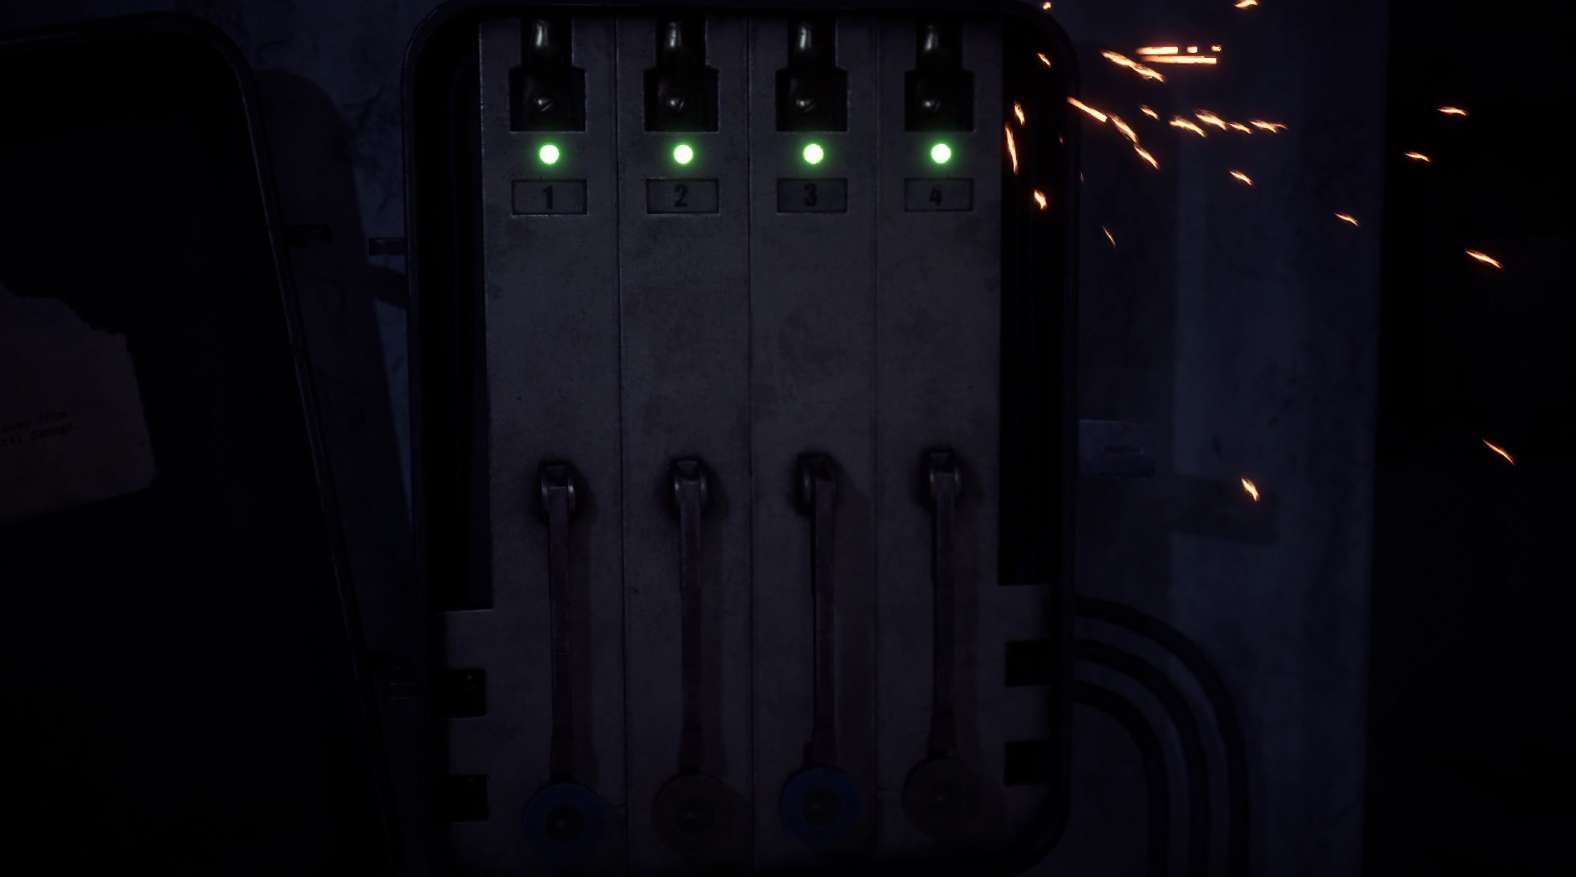
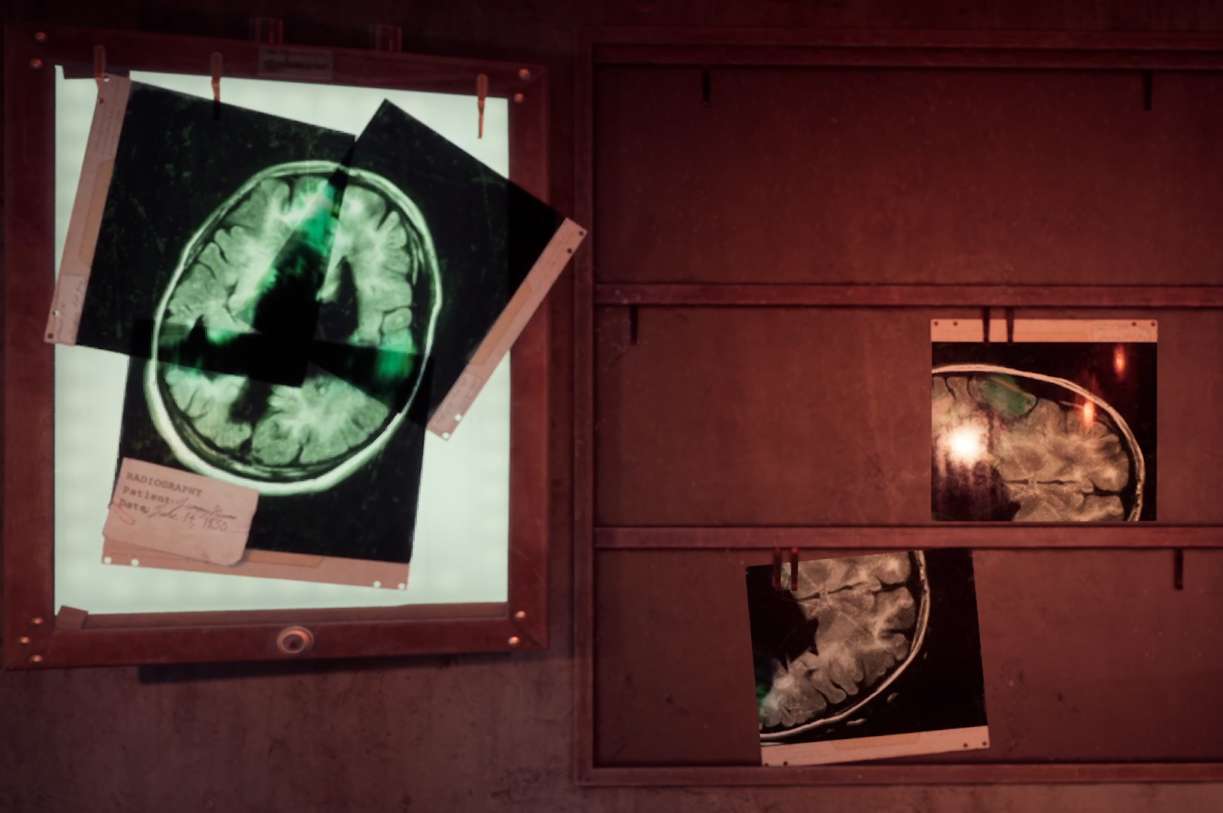
Laboratory
Collect two x-rays and two fuses nearby in the rooms. Turn on the electricity: Pull the first lever, the third and the second.
Rotate the x-rays until you get this:
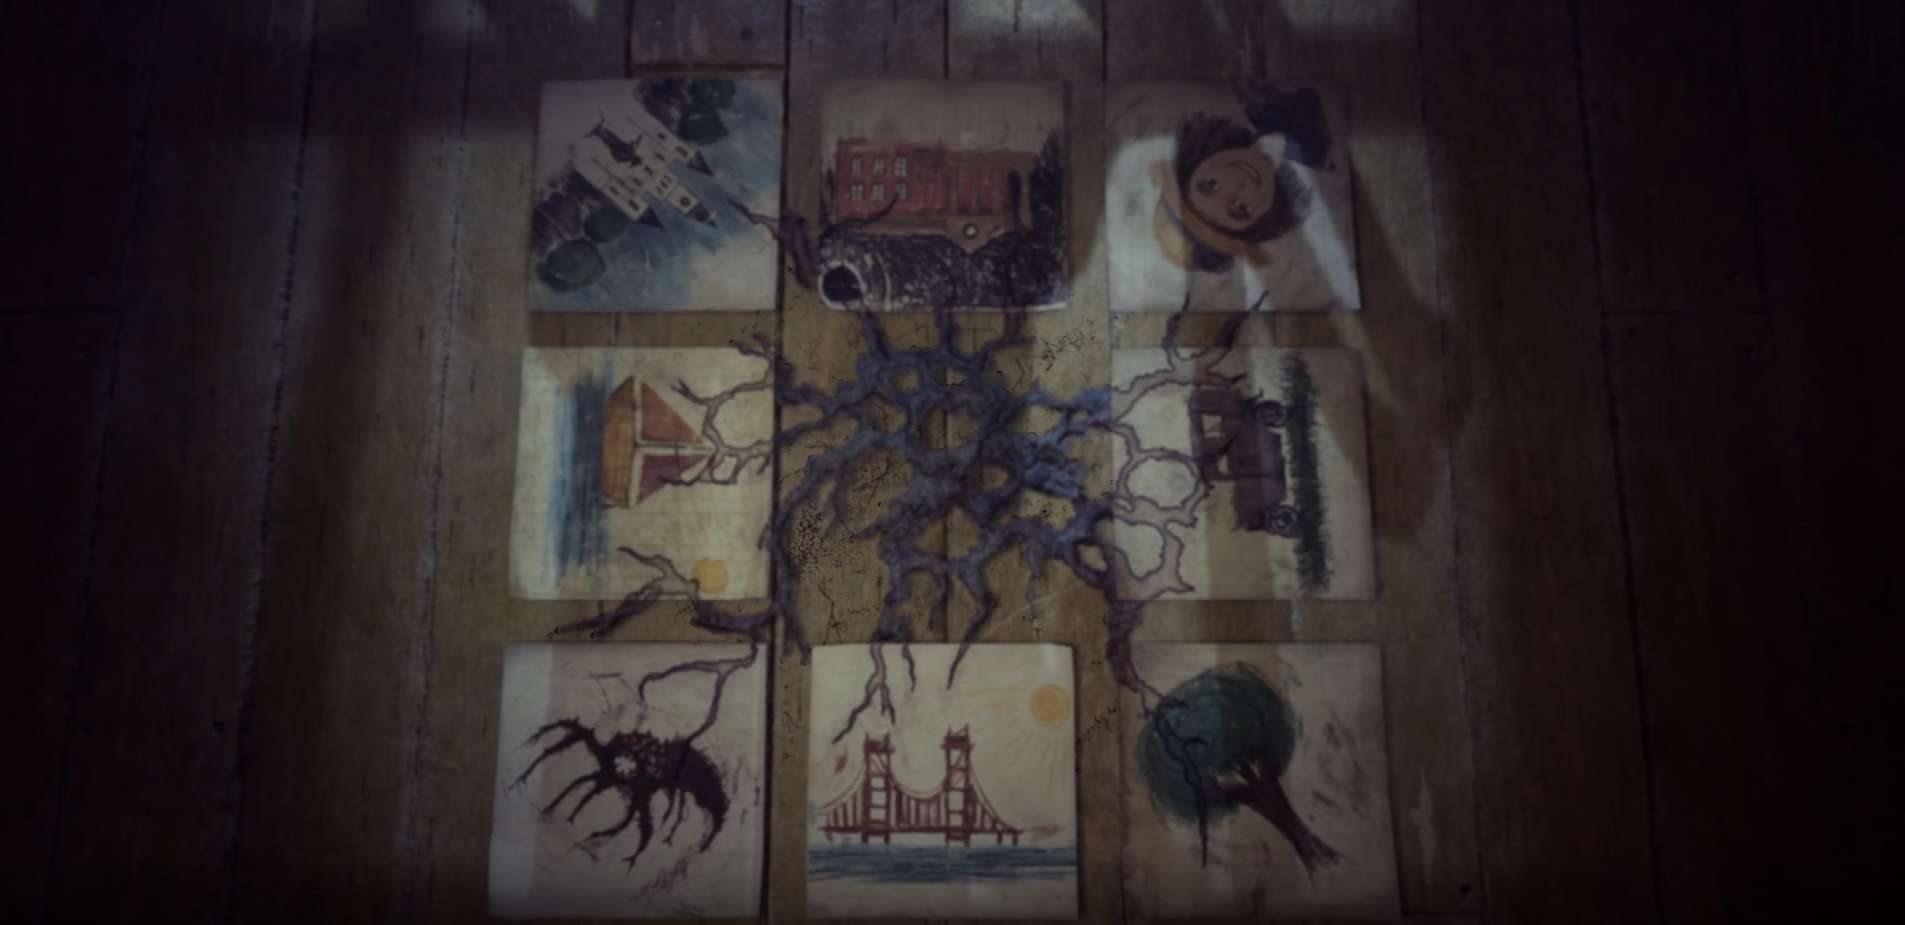
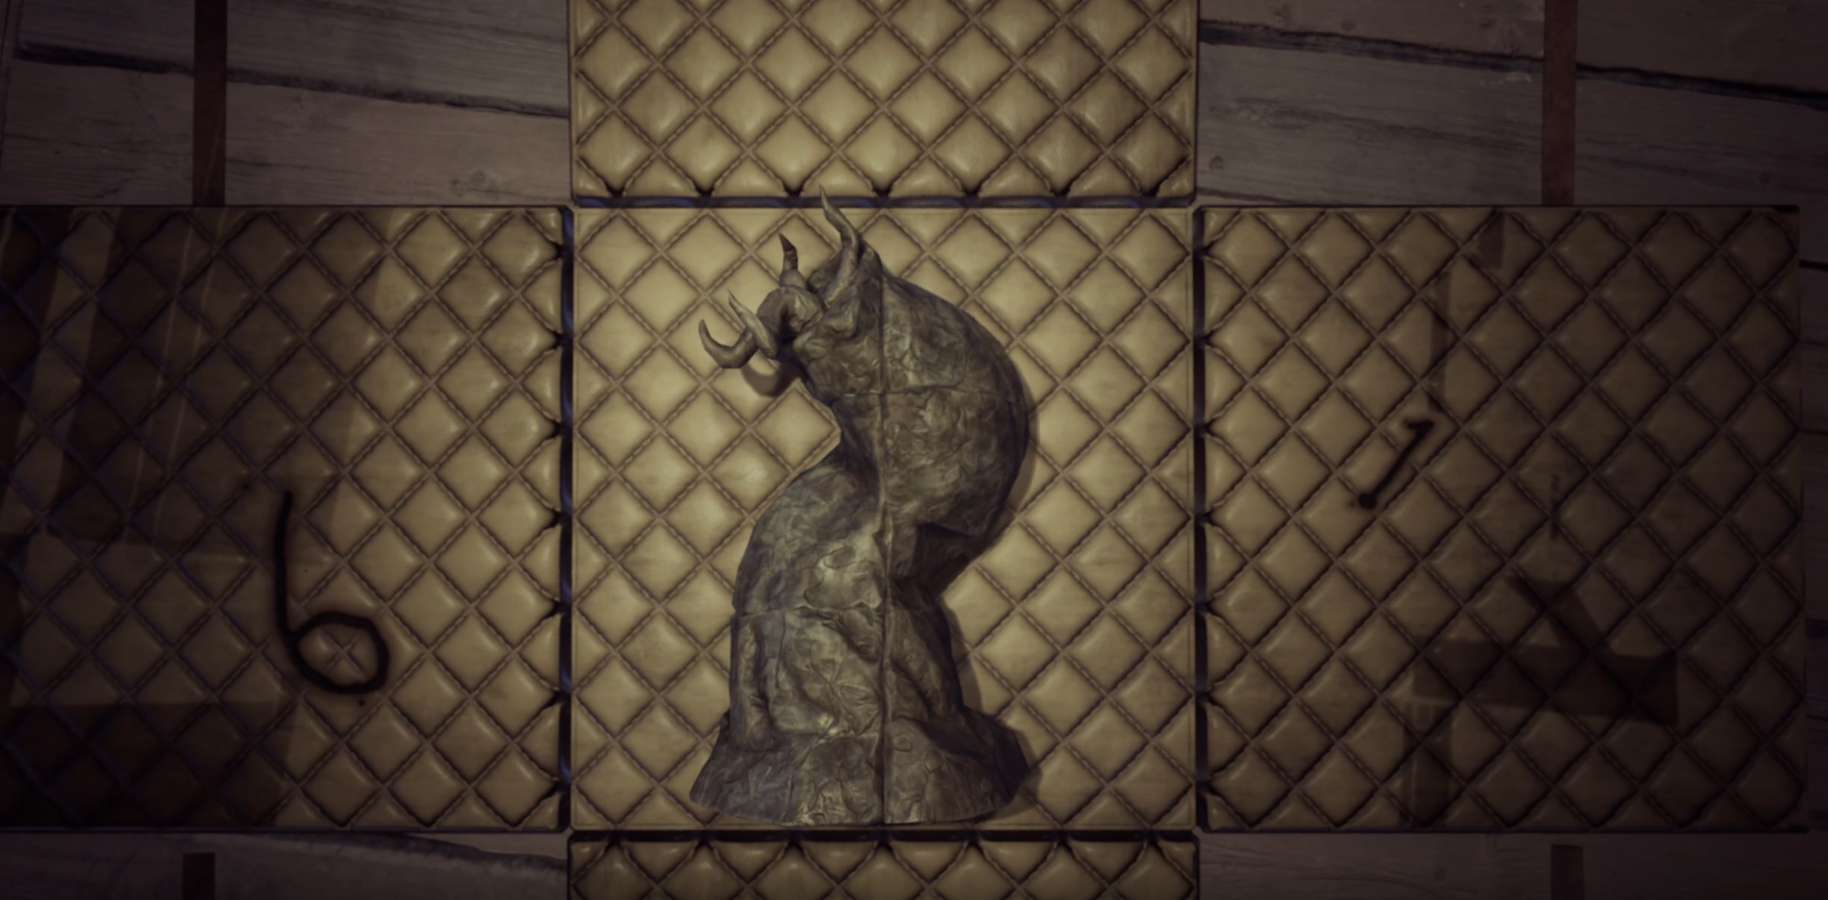
Attic
After getting a part of the statuette in the lab, move to the attic and collect the whole statuette. You don’t even need to twirl anything here, just make the correct shape out of the six fragments.
There are numbers in the suitcase, enter them into the Talisman 6-4-1.
Dr. Grey’s private quarters
In the broken clock, you need to insert the Talisman, and rotate it to exactly the same position as on the floor. In numbers, this is code 0-0-5
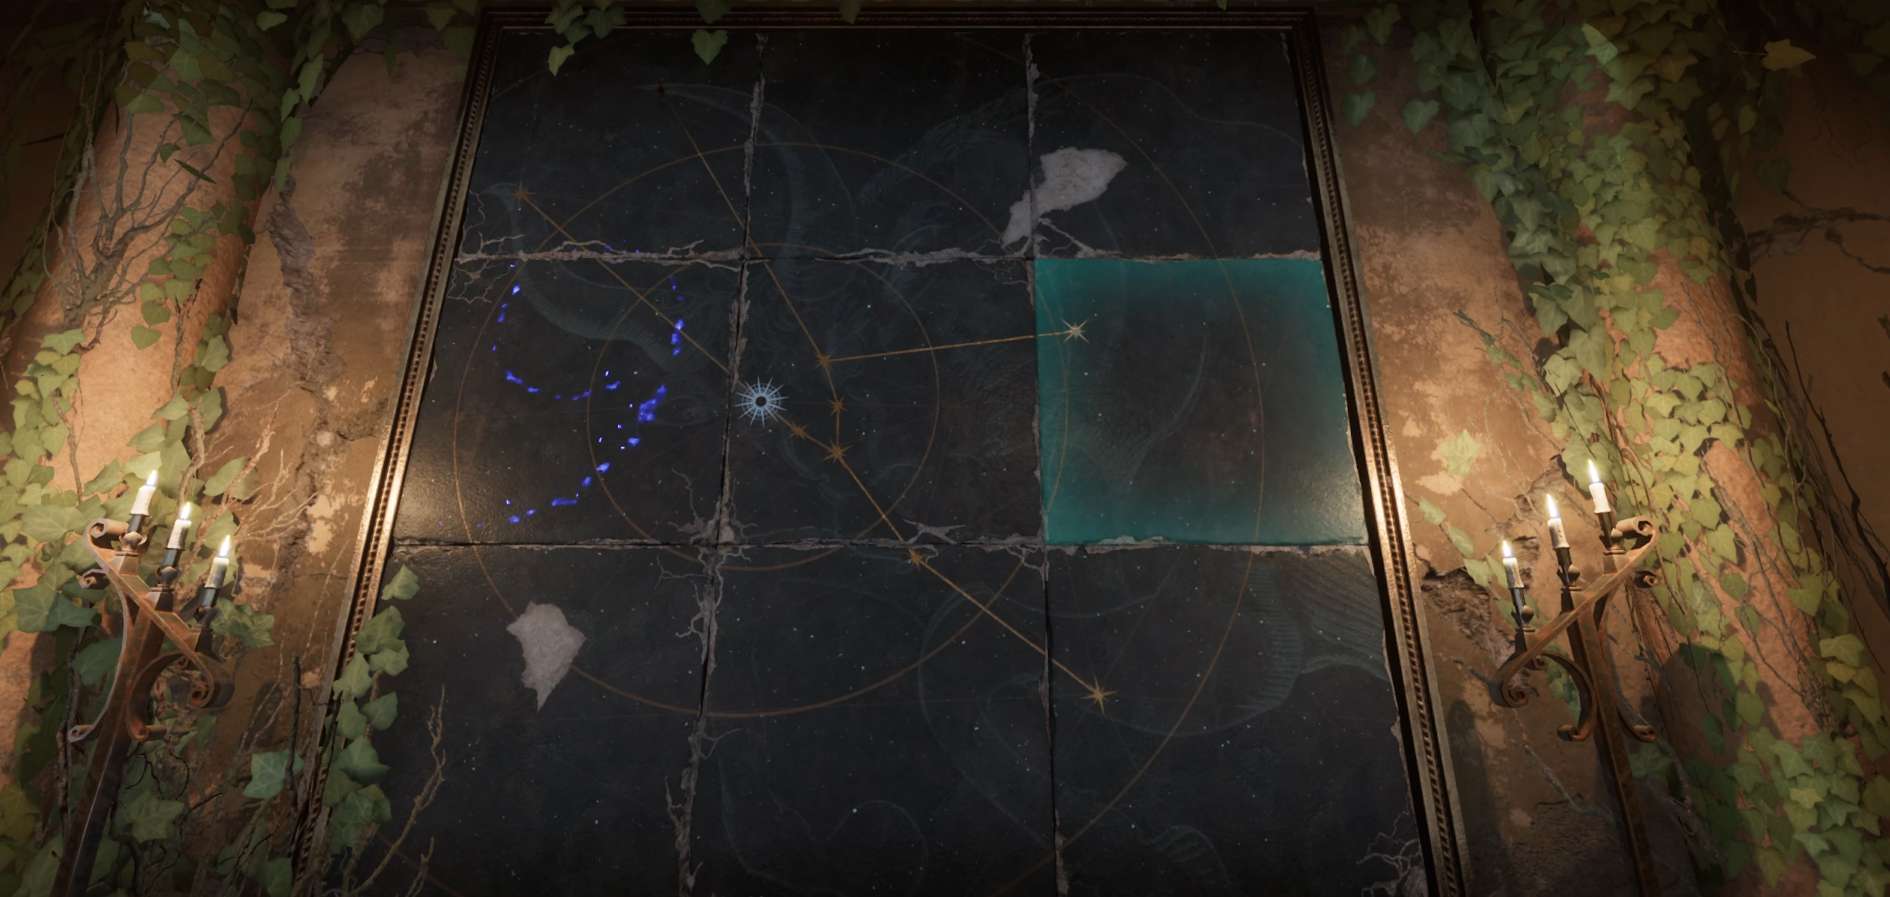
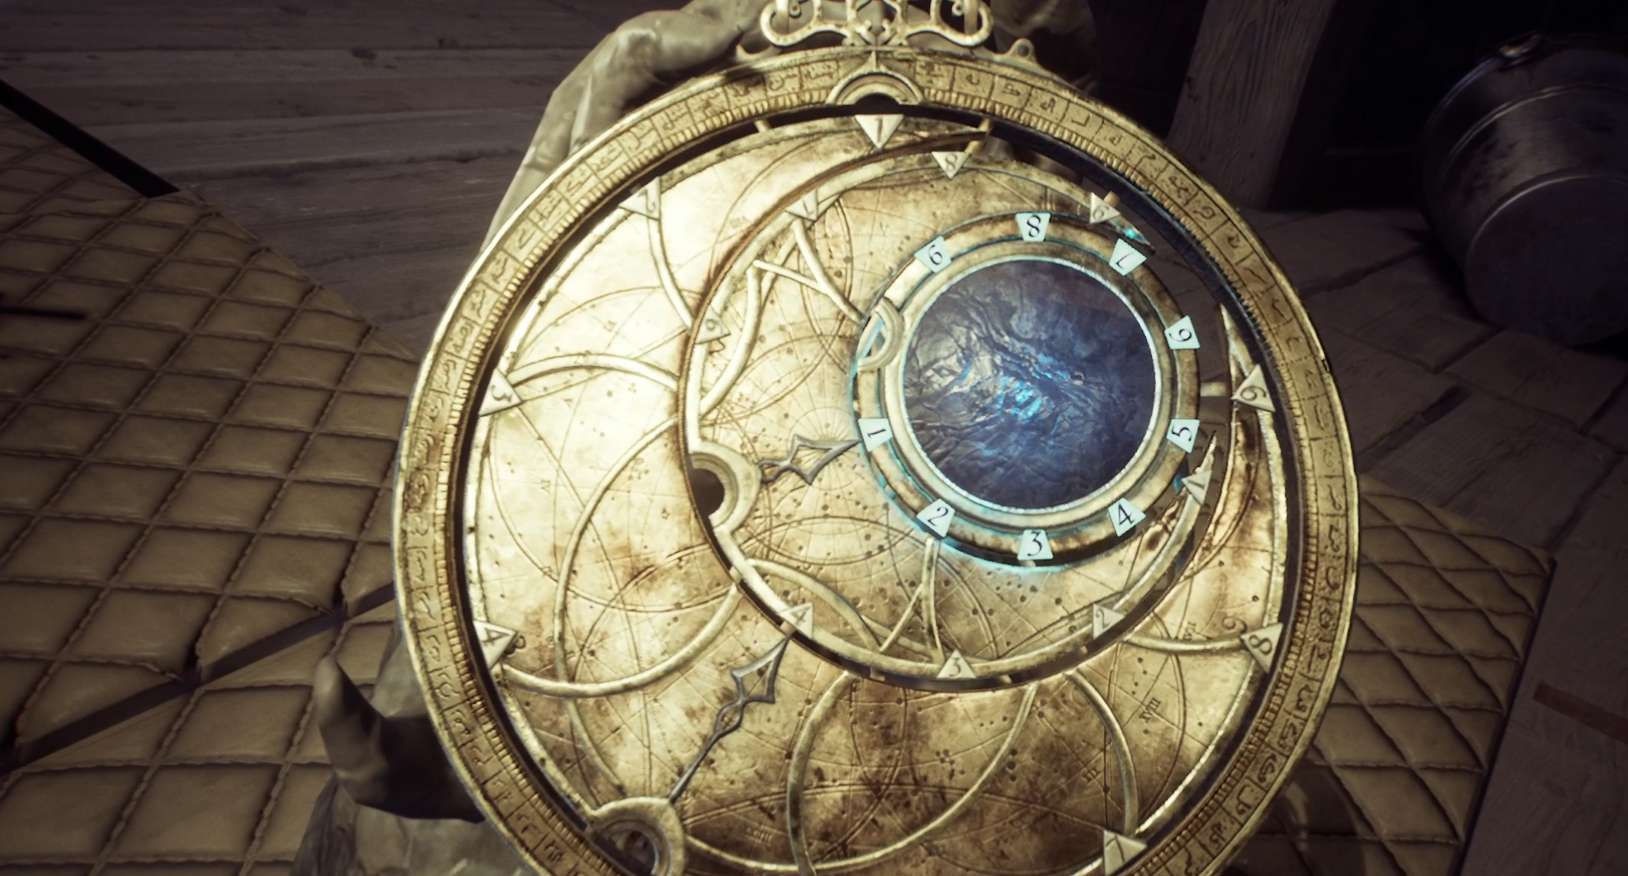
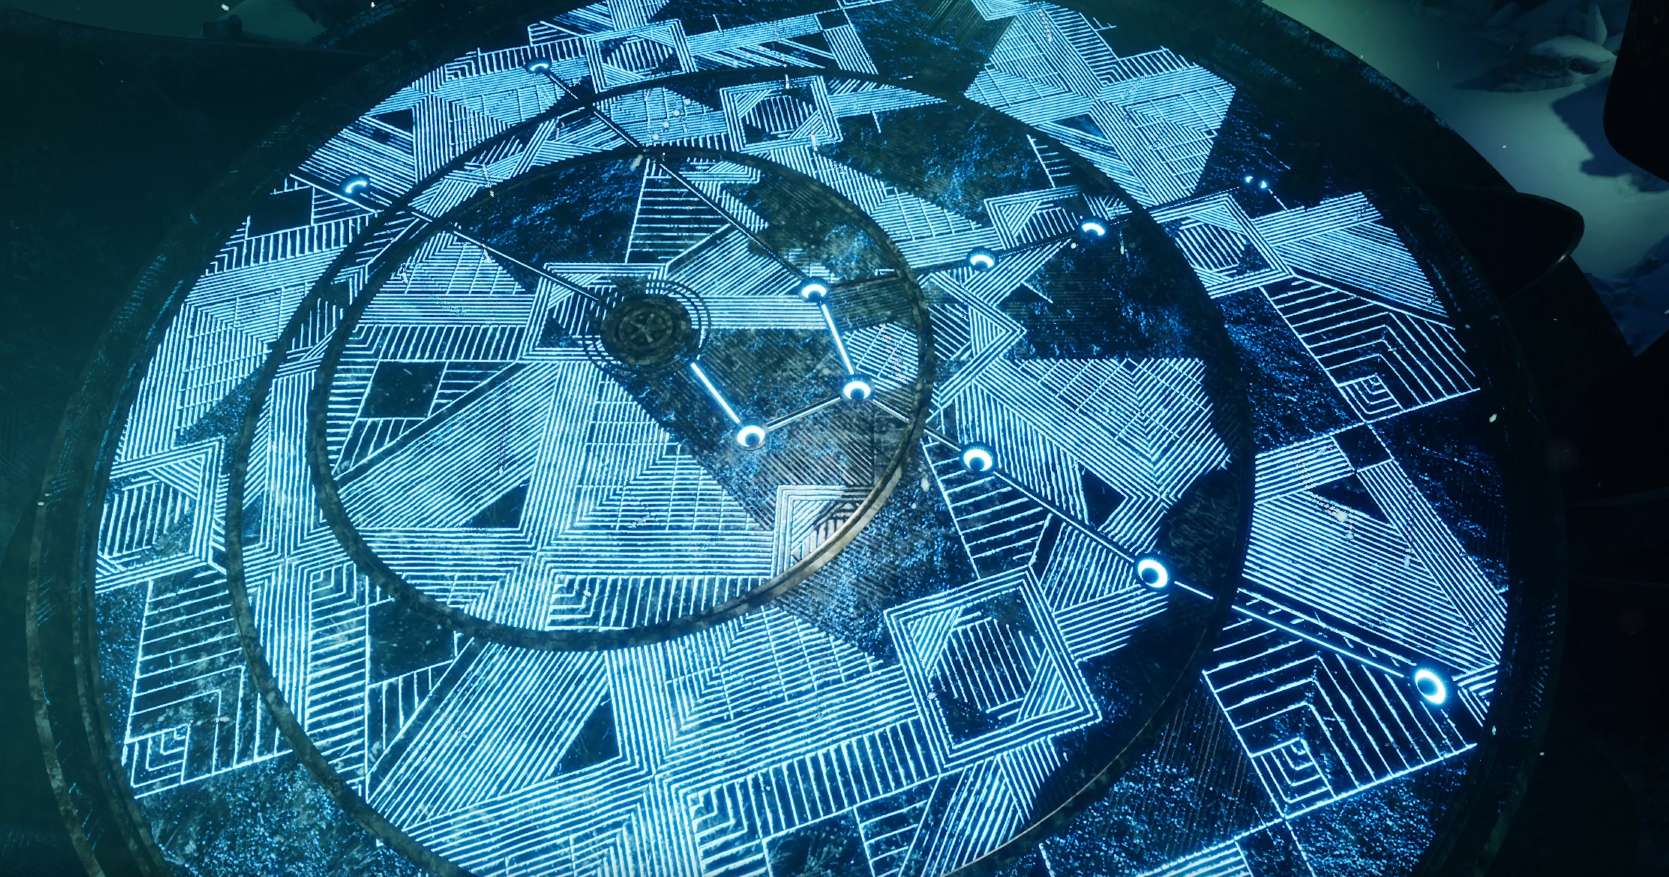
Stellarium
You need to make the constellation of Taurus on the floor. Spin the circles until you get a pattern like this:
Chapter 5
There are no puzzles, just beat the boss!
Be the first to comment