
This guide will teach you the basics of Astrea, how to play it properly, and hopefully make you win more games!
Contents
Guide to Basics
Сrеdit gоеs to ZirzoR!
Astrea, Dice Deck Building Game
Astrea is a dice deck building game, the goal of the game is to build a deck of dice that has synergy with eachother & with the character you’re currently playing & then use these dice to beat the bosses of the game on increasingly harder difficulties.
But we’re not here to talk about the higher difficulties, that’s for later, we’re here to talk about the fundamentals of the game and the choices you can make in said game.
This guide will not cover the very basics of the game, I will assume that you’ve done the tutorial and atleast reached level 1 on a character.
The Starting Choice
So let’s start with the first choice: (Once you reach level 1, with a character, this is unlocked)
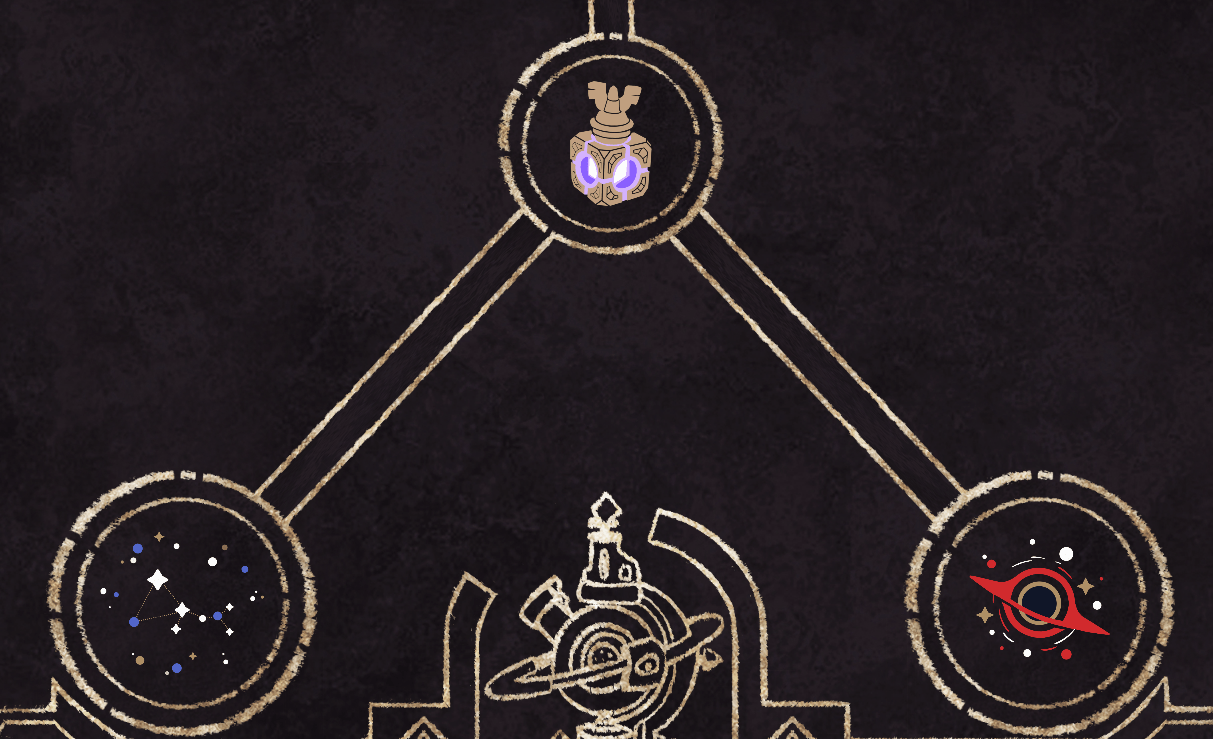
The first choice of the game, whenever you start a new game is to pick a Star blessing (Left) or a Blackhole Blessing (Right).
Star Blessings mostly only have upsides and nothing bad or unwanted can happen if you pick them, the Blackhole Blessings have a major upside but also a downside (Risk vs Rewards).
I’m a firm believer in that choosing a blessing with a downside for the first act of the game, is almost always a bad choice, here are some of the reasons behind that:
- Your current deck has no goal, nor any synergy, picking something that can give you a major downside when you cant finish battles quickly is a sureway of making sure that you sometimes wont leave act 1.
- Star blessings forge synergies in your deck, or are build enabling, Blackhole Blessings are not.
For example: Cellarius (The Shark) Has a Blessing called Tamed Remoras, which makes waves jump to other targets when the target dies, which makes waves a LOT more useful against multitarget fights and is a great starter blessing if you want to make a Wave based deck.
There are tons of blessings similar to this one, and they’re all Star Blessings.
This is why I highly advocate, especially on higher difficulties to not go for the Blackhole Blessings, all 3 of the Blackhole blessings might also be completely unusable or a detriment for your current character or build idéas when you start a new run, the Star Blessings dont have a chance of this ever happening, almost all of them are useful to you in some way.
So if your goal is to Git Gud at this game and start winstreaking, then please, dont pick the Blackhole Blessings on a new run (RNG Management is one of the key skills to develop in this game).
Fundamentals of Combat, Part 1
In this section of the guide we will talk about the Fundamentals of Combat, what I mean by this is the key basic notions and Idéas behind how combat works and how to optimize it properly.
This comes in parts, so please bear with me.
Basic Resources
Corruption & Purity, The Dual Blades
Corruption and Purity is the Dual Blades in this game, each one has a side that hurts and one side that mends and they’re also the main resources that you can use in the game to get ahead but to also be punished when not controlled properly (Remember RNG Management from the last section? This applies here to).

Purity: The first of the Dual Blades, Purity mends you, but hurts the enemy, it is the main way of dealing damage and healing back HP loss, it can also heal your companion sentinels.

Corruption: The second Dual blade, Corruption hurts you, but mends the enemy and causes Overcorruption on them, it is also the main way of hurting yourself to make use of Virtues outside of the enemies turn.
You always have to play an action that has Corruption in it before ending your turn (Unless you use a specific keyword, it gives you purity based on remaining dice in your hand and forcefully ends your turn, even if you have a Corruption source.).
Did Someone Say Block?

Light Shield: The first Defense of the game, The “block” If you will, Light shields stops corruption where ever it comes from, it stops you from hurting yourself and also stops the enemy from hurting you.
But did you know you can also put the Light Shield on the enemy? Yes, its true.
Putting Light Shield on the enemy means that they cannot heal themselves from dealing corruption to themselves, they can also not cause themselves to Overcorrupt, it also blocks you from mending them or dealing any corruption to them.
Fundamentals of Combat, Part 2
In the second part of this section, we’re going to be talking about the RNG management.
What is RNG
Now, first what is RNG? RNG Stands for: Random Number Generator.
A Random Number Generator, also known as RNG, is the term used when something has a random outcome, such as a die having 6 sides, 1 through 6, each side of the die has an equal chance of appearing, but each side of the die also has different values to the player. (Such as 1 being worst and 6 being the best or the reverse in other cases)
It is therefore random and therefore its called RNG, each generation of the die is a random number between 1 and 6.
Now back to the guide.
RNG Management
RNG management in this game is the term used when you want to manage or change the outcomes of a particular die into the side that you want it to land on or to change the outcome of something bad to something better.
A Risk Die in this game almost always has 4 sides that are bad for you, and 2 that are really good, the “RNG” in this sense is leaning towards bad, hence the “risk”, so how to remove the risk from risky dice?
To make sure that the good outcomes almost always end up where we want them we have RNG management tools in the game or choices that we can make to change the outcomes.
Here are some of the choices we can make and some of the tools for RNG Management:

- Reroll: Rerolling the die, tries the RNG again to try and get the outcome to be something different, the chance of it landing on the same side again is quite small, but still possible, if you only have a single source of reroll it might not be enough in the case that it does land on the same die again.

- Cleromancy: Also known as discard and draw equal to the amount discarded, this is a more sureway method to make sure that the outcome that you have before you is gone instead of being rerolled, discarding dice from your hand should probably not be a prio, but if you have to, then it’s a good tool to have when push comes to shove.

- Convert: Conversion in this game simply means that you turn a die with a corruption source into a purity source of equal value and type (Area Corrupt becomes Area Purity, etc).
Moonie, the first character in the game, teaches you some about conversion, if a die is on a side that is corrupted, Moonie can simply make sure that any bad outcome turns into a good one instead, Moonie has a single use of this every single turn for free with the main virtue, so its a good tool when you start out to get used to managing your dice.
Choices on the Board
Now when it comes to choices that manage RNG, its about Blessings, Shards and Battles.
The first choice in the game can also be classed as RNG management, if you picked a Blackhole Blessing to start with and it caused a bad outcome, that is something you could’ve done differently to influence the run so that it might’ve been a win instead (Which requires a lot of insight and meta knowledge, to be able to determine where it went wrong and why).
You can also try and make sure to draw more dice and cycle through or use your virtues to make sure that the outcomes change the way you want them to.
You can also forge the Risk Dice into something better to circumvent the bad sides on the die, over the course of a game, and then later on duping the “perfect” version of said die for the ultimate payout.
The Other Choices
Shards aka Gold: When you pick more shards and when to use them, is also a big part of the RNG management in this game, do you save the shards for later in the run when things get more expensive, do you push it all in early to get a snowball start or do you cash it all in at the end to get max value (Lower cost level 5 sentinels in the last acts or spending it all before the first boss to forge/dupe dice to have for the entire rest of the run).
Monster Fights: Normal vs Elite fights, if you have previous knowledge of all the elites in a given act, this is also a thing that can be circumvented when needed, if you have a multi-hit build that is vulnerable to thorns then not picking elite fights in the last act might be a good choice.
Or you have a slow-roll deck that slows things down to slowly get more and more power as time passes, then perhaps skipping the elite fights in the ruins might be a good idéa (The cauldron and the apothecary is gonna ruin your day if you’re slow, they will fill your deck with so much junk that its not even funny).
Knowing when to skip elite fights is also a key element into knowing what elites there are and what builds work against which elites.
RNG management is a key element into raising your skill ceiling and feeling like you can GIT GUD at this game, it really shows when you get really good at it.
Fundamentals of Combat, Part 3
The third and final section of this part of the guide, this is the part where we talk about virtues and how to manage them properly, this is probably the most complicated but rewarding part of combat.
Virtue Management
Now is the part where we talk about the Purity Bar and Virtues and how to manage them properly.
What is the Purity bar you might ask? Well here it is:

Purity Bar: The Purity bar, also known as your HP Bar is the single most important aspect of this game, and the ONLY way of not dying is to manage it properly.
On top of the purity bar is the Virtues that this section is going to talk about, I’m going to use Moonie as the character in this section, to make things abit more simple and so that everyone understands, since its the first character in the game.
The first virtue, all the way to the right is the ONLY virtue that cannot be used more then once per turn outside of using a keyword called “Refresh” (Refresh also works even if you’re Silenced, Same with the Blessing that Refreshes your Virtues at the start of battle).
You can never reuse the first virtue from taking or healing damage.
Each virtue after the first one is attached to the Bar in different locations, in Moonies case its the bars of 1, 3 and 5 (So if we take 1, 3 or 5 dmg from a full bar it will activate said Virtue).
Such as Here:

This is the bar completely depleted, if we take any more dmg, we will lose a heart, which is bad.
Now here comes the complicated part, and a part which some people dont seem to know (I’ve watched some people play on streams or on youtube and they clearly dont know about this).
Each Virtue can be activated more then once per turn, how do we do this you may ask?
For example, in the last picture, Moonie is 2 steps away from “Draw a die” virtue, If I use “Draw a Die” then heal myself for 2, so that I’m aligned with the virtue, then dmg myself again for 1 or 2, then I can use the Virtue again to draw another die, repeatable any number of times. (Especially if you have 2 sentinels with low purity/corruption dice that can ping pong you on the Purity Bar)
Because each time you take dmg or corruption, the bar moves down or up, and each time the corruption reaches a Virtue on the way down, the virtue will activate and be usuable, every, single, time, so you could do this:
Take 5 dmg from enemy, Virtue: Draw a die, Virtue: deal 4 dmg, Virtue: reroll 2 dice, use die to heal 1 draw 1, deal 1 dmg to self, Virtue: draw a die again. (Hence why small amount of Purity/Corruption is good alongside dice draw, I think most people skip the die that has dual draw sides on them that can cycle through your deck, its one of the best dice in the game for this reason.)
So all in all, you rerolled 2 dice (RNG management), you drew 3 die, you dealt uptowards of 4+ dmg to the enemy, while only using a single dice from your starting hand (While also refilling your hand).
Each Virtue is also activated again at the start of your turn if your corruption is still under the Virtue (When you’re only taking small amounts of dmg from the enemies or none).
Using the enemies dmg against themselves is a fast way of risk management aswell, so that they deal exactly enough dmg to active all your virtues at the start of your turn.
Then this is repeatable multiple times per turn for multiple turns (You can also convert enemies dice and make sure they heal you to full afterwards aswell).

Did you also know you can Convert enemies Area 1 Corrupt dice and then Enhance them? So they deal Area 6 Purify to all characters? Its devastating for them and a huge boon for you.
This is this section done for now, maybe more in the future if I feel motivated or feel the need to make it bigger, just a small start for now.

Nice first guide here. I pretty much figured out on my own about the reuseable virtues in the demo, though. Also, thanks for showing me Wild Frost and Slice & Dice. The Slice game looks to have similiar gameplay.