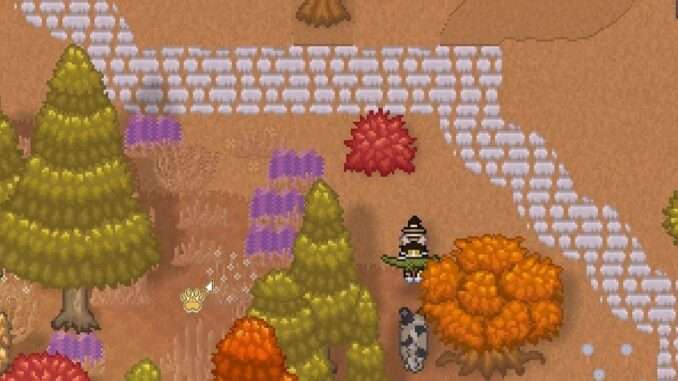
A guide to the Main Story ruins! Includes puzzles and what you should expect going into each room.
Unlocking Ruins
The ruins unlock progressively as you recruit cats. The first ruin unlocks after you have an eerie dream, where you go to see the Forest Guardian who you will then talk to in East Forest.
He gives you some of the rundown. Ruins available for exploring will be marked on the map with a leaf icon.
- E>S>W>N
I recommend bringing offense skills and lots of healing herbs to the ruins! And I mean a lot. Trust me, you’ll thank me later.
There’s levels where you have to fight multiple of enemies, and even in the entry hallways there will be bats – which makes dodging pretty hard in the tight space!
Remember that you can hold the attack button to charge it, going from purple to blue, making your attack more devastating. You can also dodge with CTRL (PC)!
Time doesn’t pass in the ruins, so take your time!
East Ruin
East Forest
Immediately upon entering, you’ll have to fight some bats before getting to this puzzle portion:
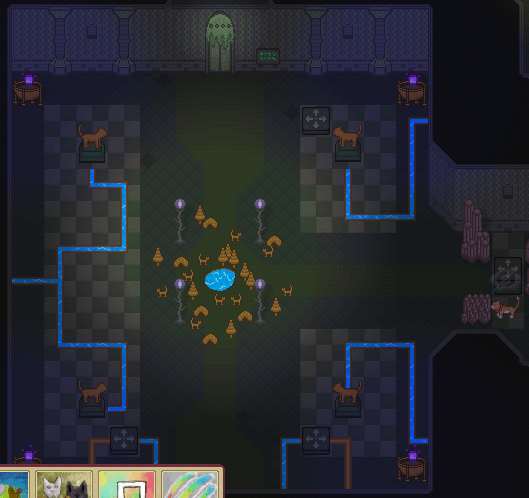
Attack the block to get to the puzzle, where you will see a small cutscene. Your goal for this puzzle is to block all the water with the blocks:

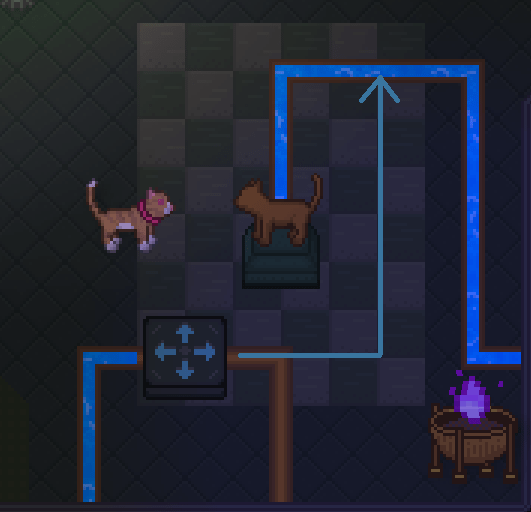
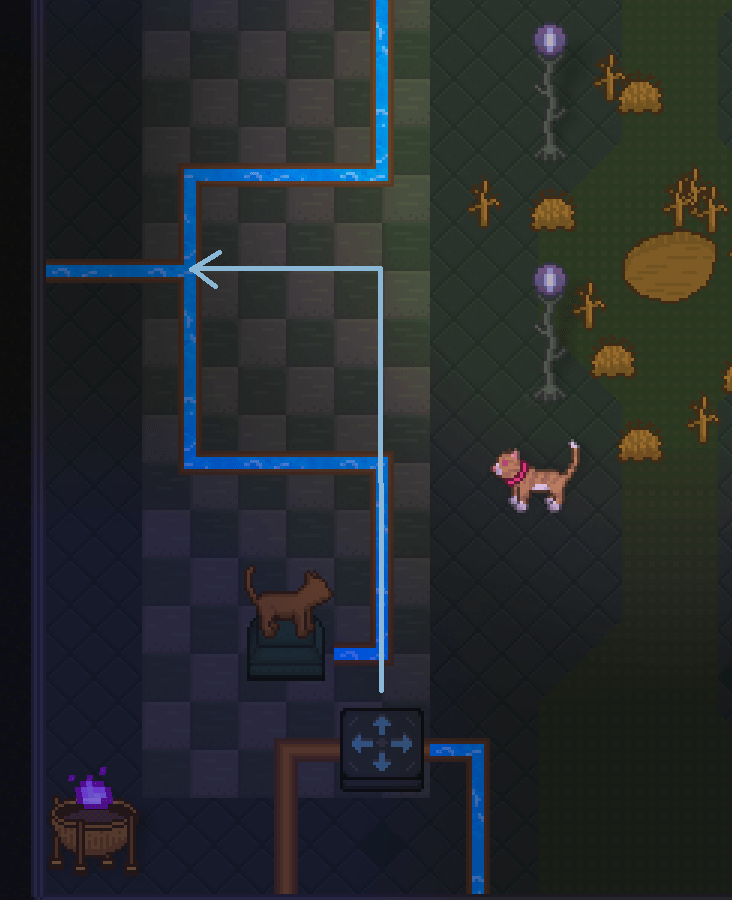
Then you will come to a room where you will need to fight slimes. There are three rounds, with the slimes increasing until the end.
They multiply upon being killed, though they aren’t too hard to defeat. You can stand in place and spam attack, in my experience, till they get little – then you want to be more mindful with your attacks and defense.

After defeating all the slimes, the door will open and you’ll get to a room that will show blue O’s and red X’s. Simply walk along the blue tiles and avoid the red.
Go back to the green exclamation marked block and interact with it for the next puzzle. Interact with it again if you mess up:
1.
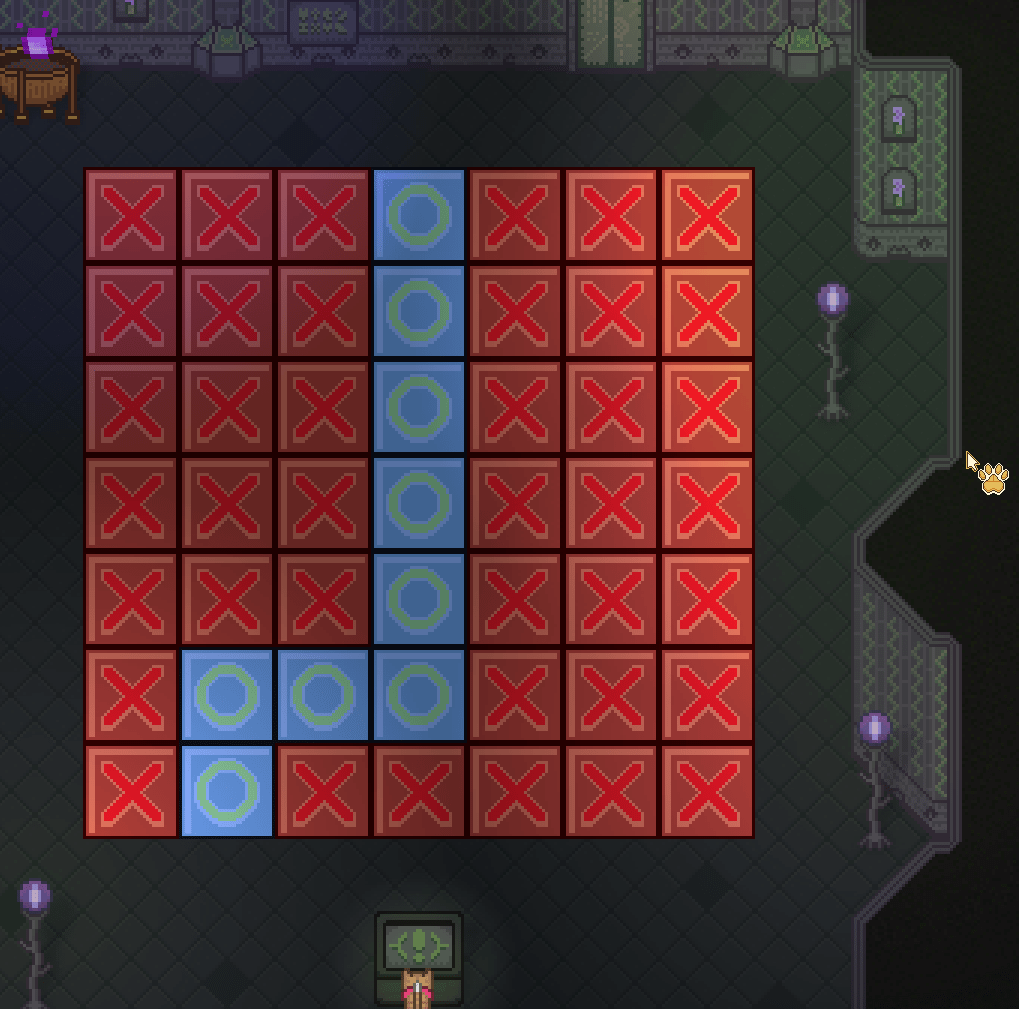
2.
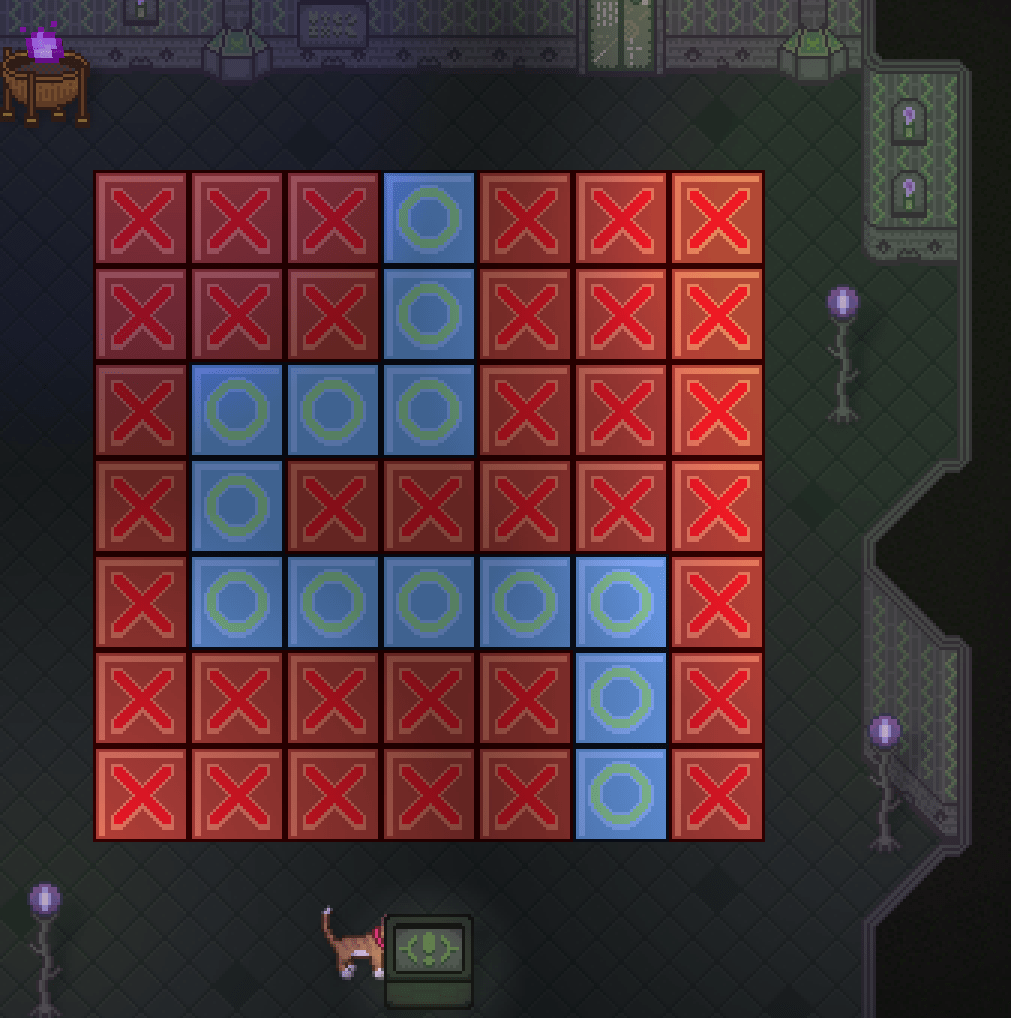
3.
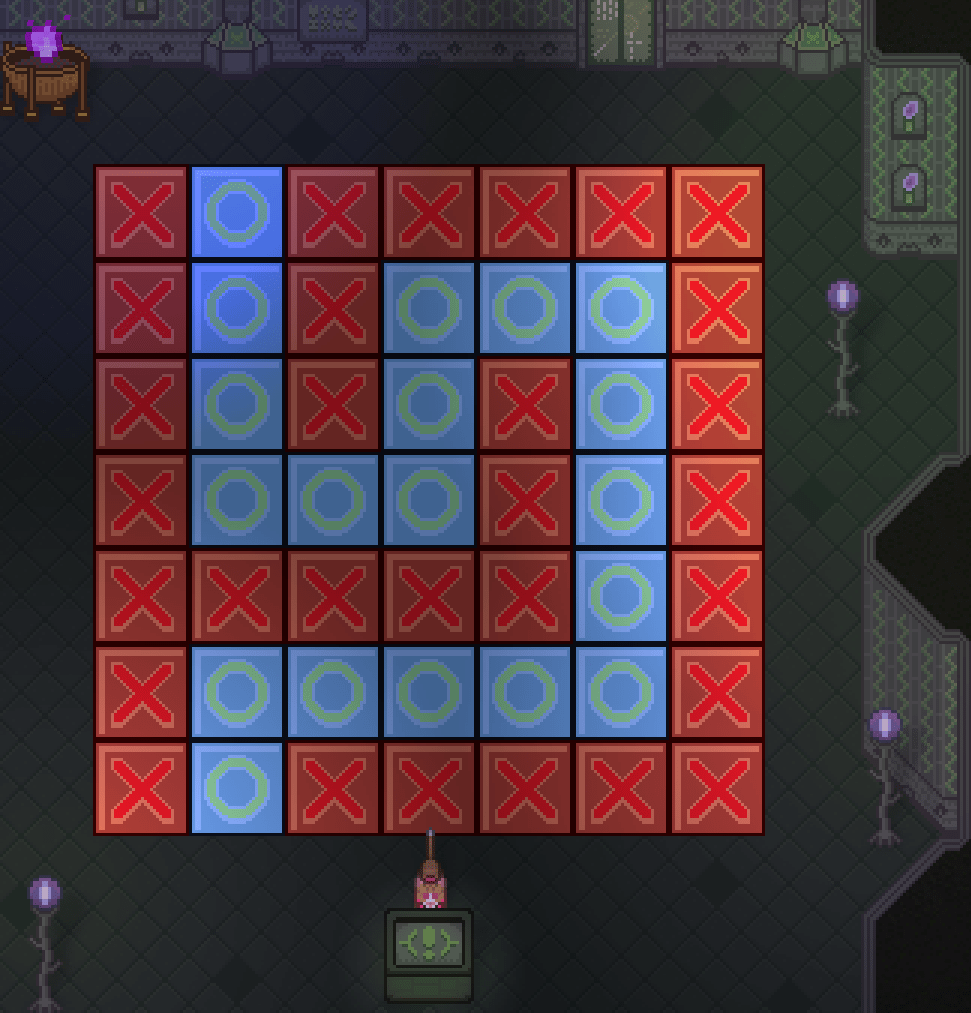
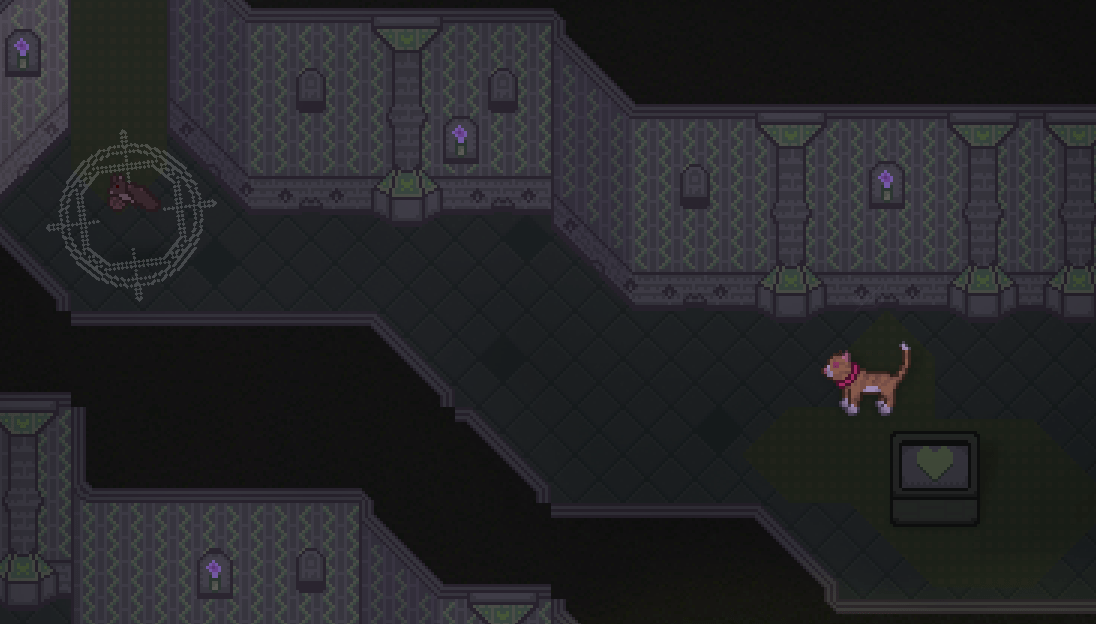
There will be another bat in the hallway, before coming to a block with a heart on it. Interact with it to heal. Be mindful though, there’s another bat just beyond the block – so if you’re good on health, defeat it first then heal up in case you get hurt fighting it! You can only use it once.
Finally, you will come to a boss room (I personally have arachnids on, so this might be different for those of you with it off). Make sure to avoid the cobwebs thrown at you, and attack those on the floor connecting to the boss.
Then you can attack it, until it veils itself in cobwebs again and you have to repeat the process. Cobwebs flying at you will also increase, so be careful!
Once you’ve drained the boss’ health bar, you’ll have completed the ruin! Congrats! Make sure to go to the temple after doing so to update everyone.

South Ruin
South Glade
Next up, as you enter this ruin, there will be another bat and a puzzle room:
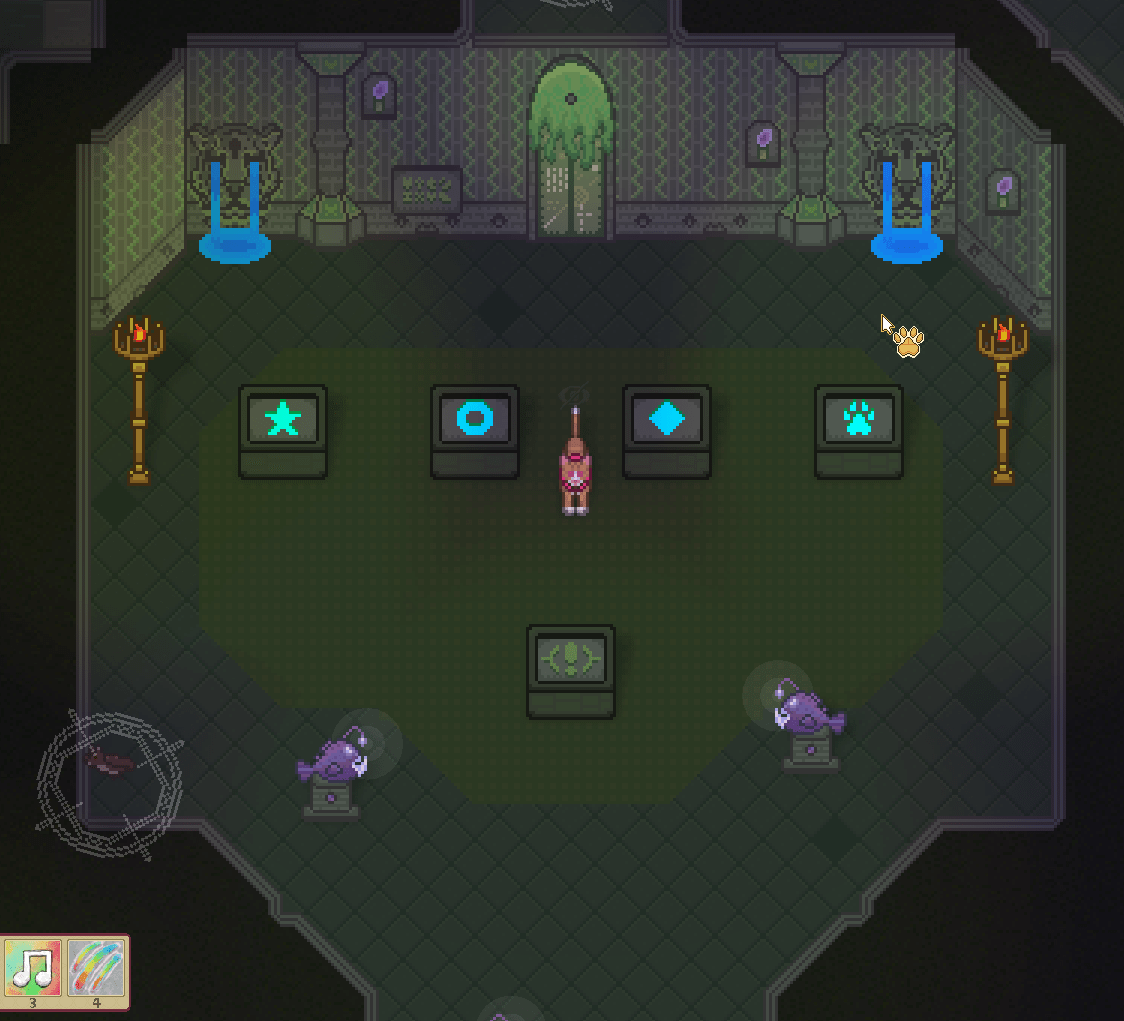
If you interact with the exclamation mark block, it says this:
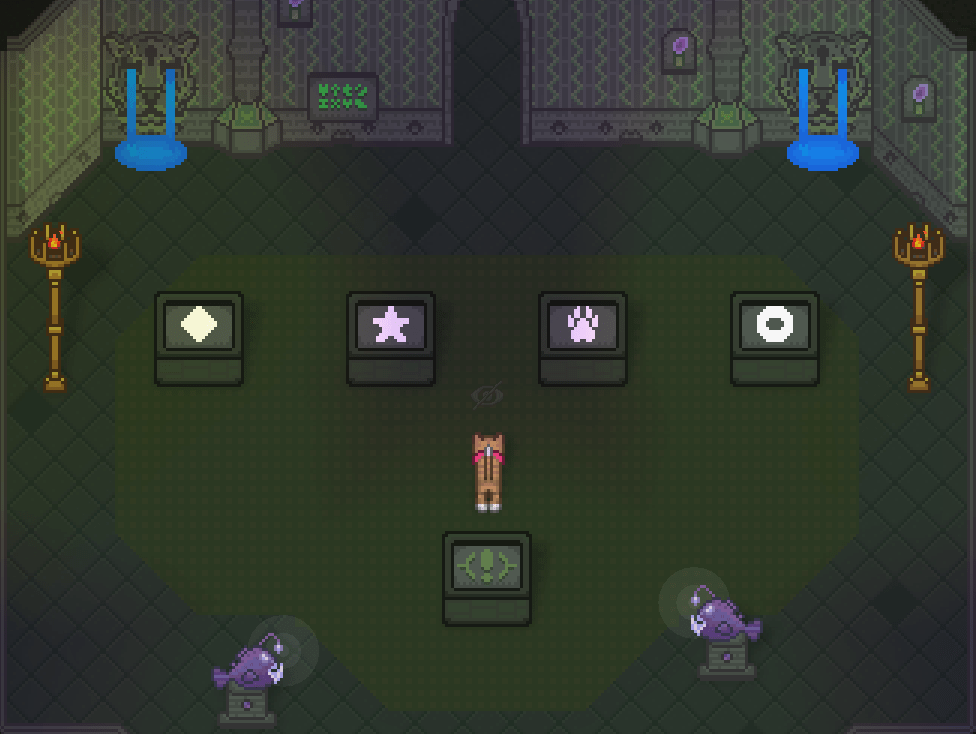
- The Circle cannot border the Diamond
- The Paw reaches for the Diamond, but it is too far away to grab.
- The Star appears before the Circle
- Neither the beginning nor the end hold the Paw
Here is the solution:
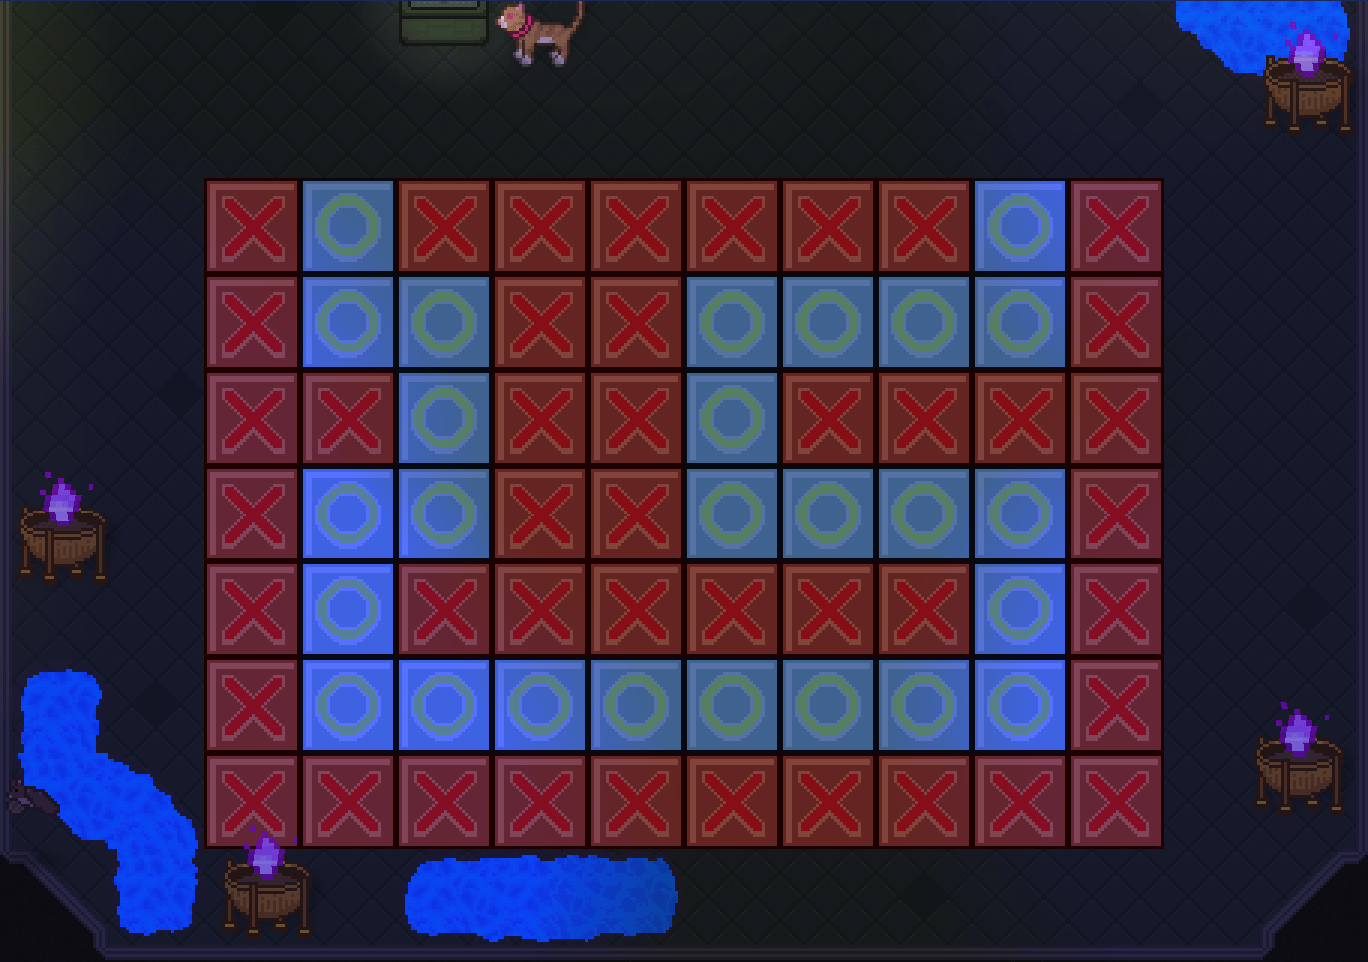
In the hallway is another bat, and then another puzzle where you have to walk on select tiles, here’s the pathways:
1.

2.
3.

Another hallway, more bats. And another puzzle! You want the suns to not be getting any water, but the rain drops to get water by moving the blocks a certain way.
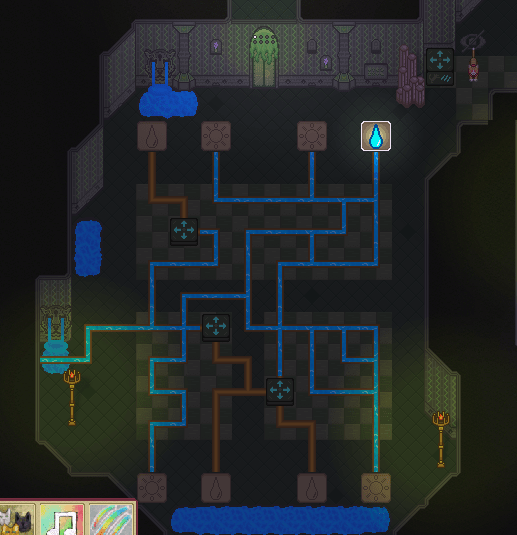
Here’s the solution:
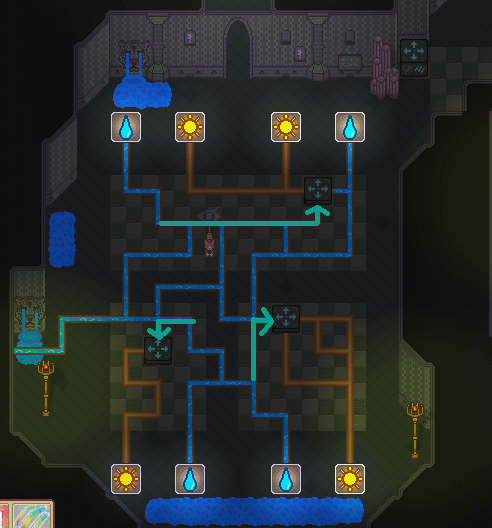
And now its time for another boss fight! Make sure you interact with the heart block to heal. You’ll want to avoid its tentacles and the flying rain drops; and attack it once it retracts its tentacles and moves to a floating platform.
And once you’ve drained it’s HP, you’re out! Good job! Don’t forget to go to the temple again.
West Ruin
West Woodland
As you enter, there will be no bats to greet you! However, the next room is a step up in difficulty from the other ruins. There are bugs that after a hit, put up a shield for a few moments before you can hit them again.
And to add on to that, if you get hit, you get poisoned! So I recommend bringing some marigold on this trip. There are three rounds, the bugs increasing for each. Remember to charge up your attacks if possible! Make sure to avoid the poisonous gas littered around this ruin.

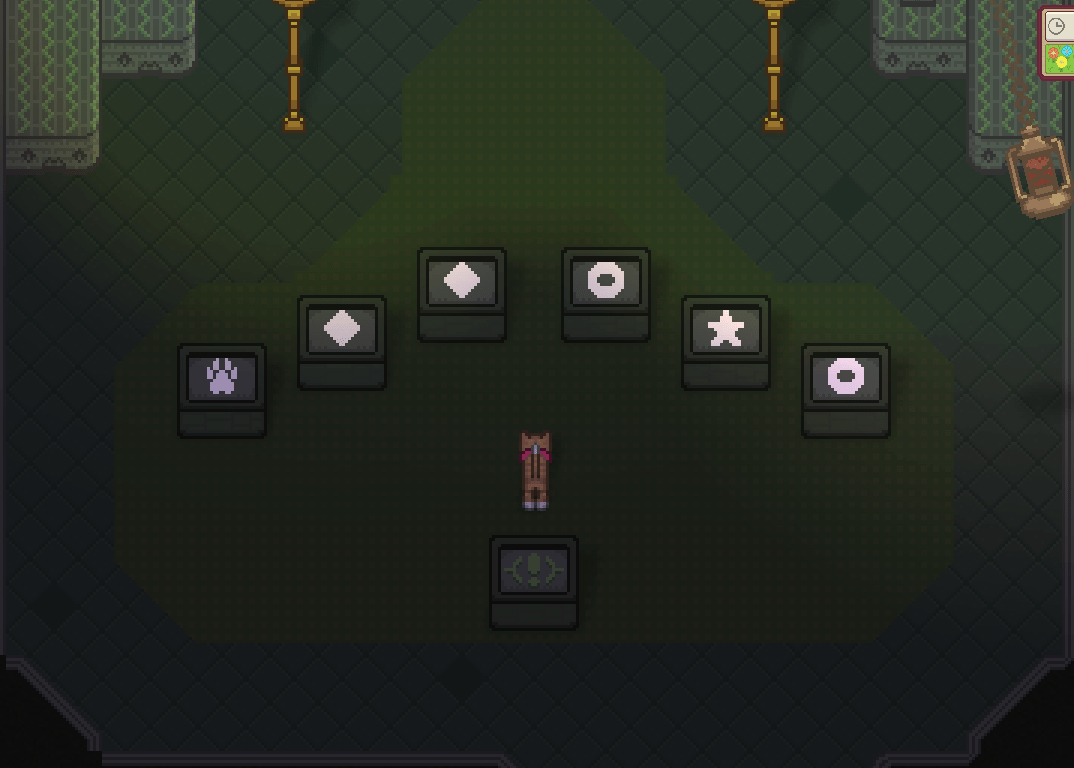
Next room is another puzzle where you have to figure out where each symbol goes:

If you interact with the exclamation mark block, it says this:
- Every Circle must neighbor a Star.
- No Diamond may appear to the right of any Circle.
- There are twice as many Diamonds as there are Stars.
- A Paw is in the leftmost place.
- There is only one Star and only one Paw
And here is the solution:
Now after the hallway is another fighting room, where you have to defeat ghosts! They shoot projectiles and disappear after a few hits to a nearby location – though their projectiles will be reset on disappearing. There are four rounds, the ghosts increasing with each. The purple torches can block projectiles!

And finally, the boss! Make sure you heal up!
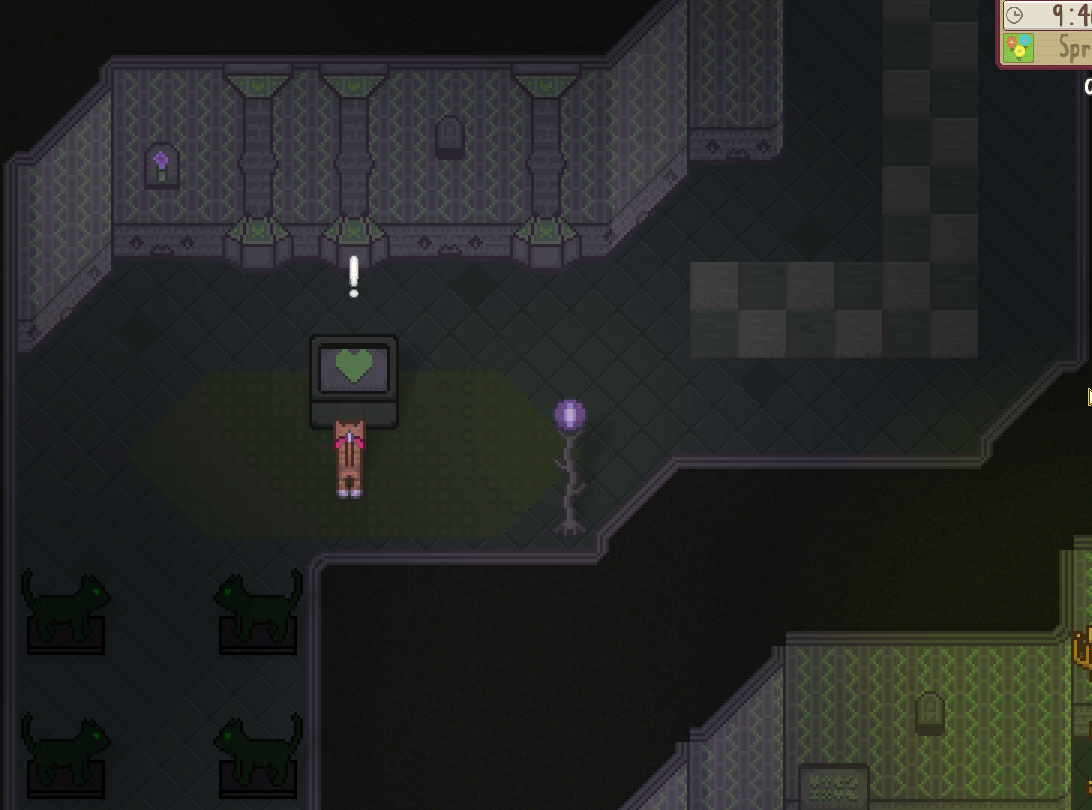
Hit the three bats to summon the boss to the center, where you can start attacking it. Projectiles will be flying about, so take care to avoid them!
The bats can shoot out their own projectiles as well, and create a circle field around them which will harm you. They will glow before this to let you know when to back off.
Once the boss’ HP has been drained, you’re out! Great work! Now to update everyone at the temple once again.

North Ruin
Get Champ for this, because of the lava. Lots of goldenseal.
- Stay at the large island near the entrance, and Champ will kill the ghosts quickly. Make sure you have the attack already charged and wait for them to come.
- The beetles can’t go past the corridor you came through at the bend, back up to the wall after getting them on you.
- The blobs you guide next to the exit from the beetle room.
- Make sure you have the attacking specials for the boss. Wait until you hear the click for the boss, then run up and attack. Stay at the wall until the click.


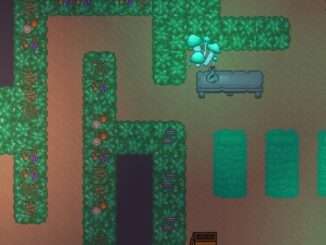


Lol the north ruin is AWFUL. I walked in, got past the first part, and decided I was not messing with it til I got more goldenseal. Good luck with it!