
Basic Information
All credit goes to sterlingscott434 !
Maps & Dungeons
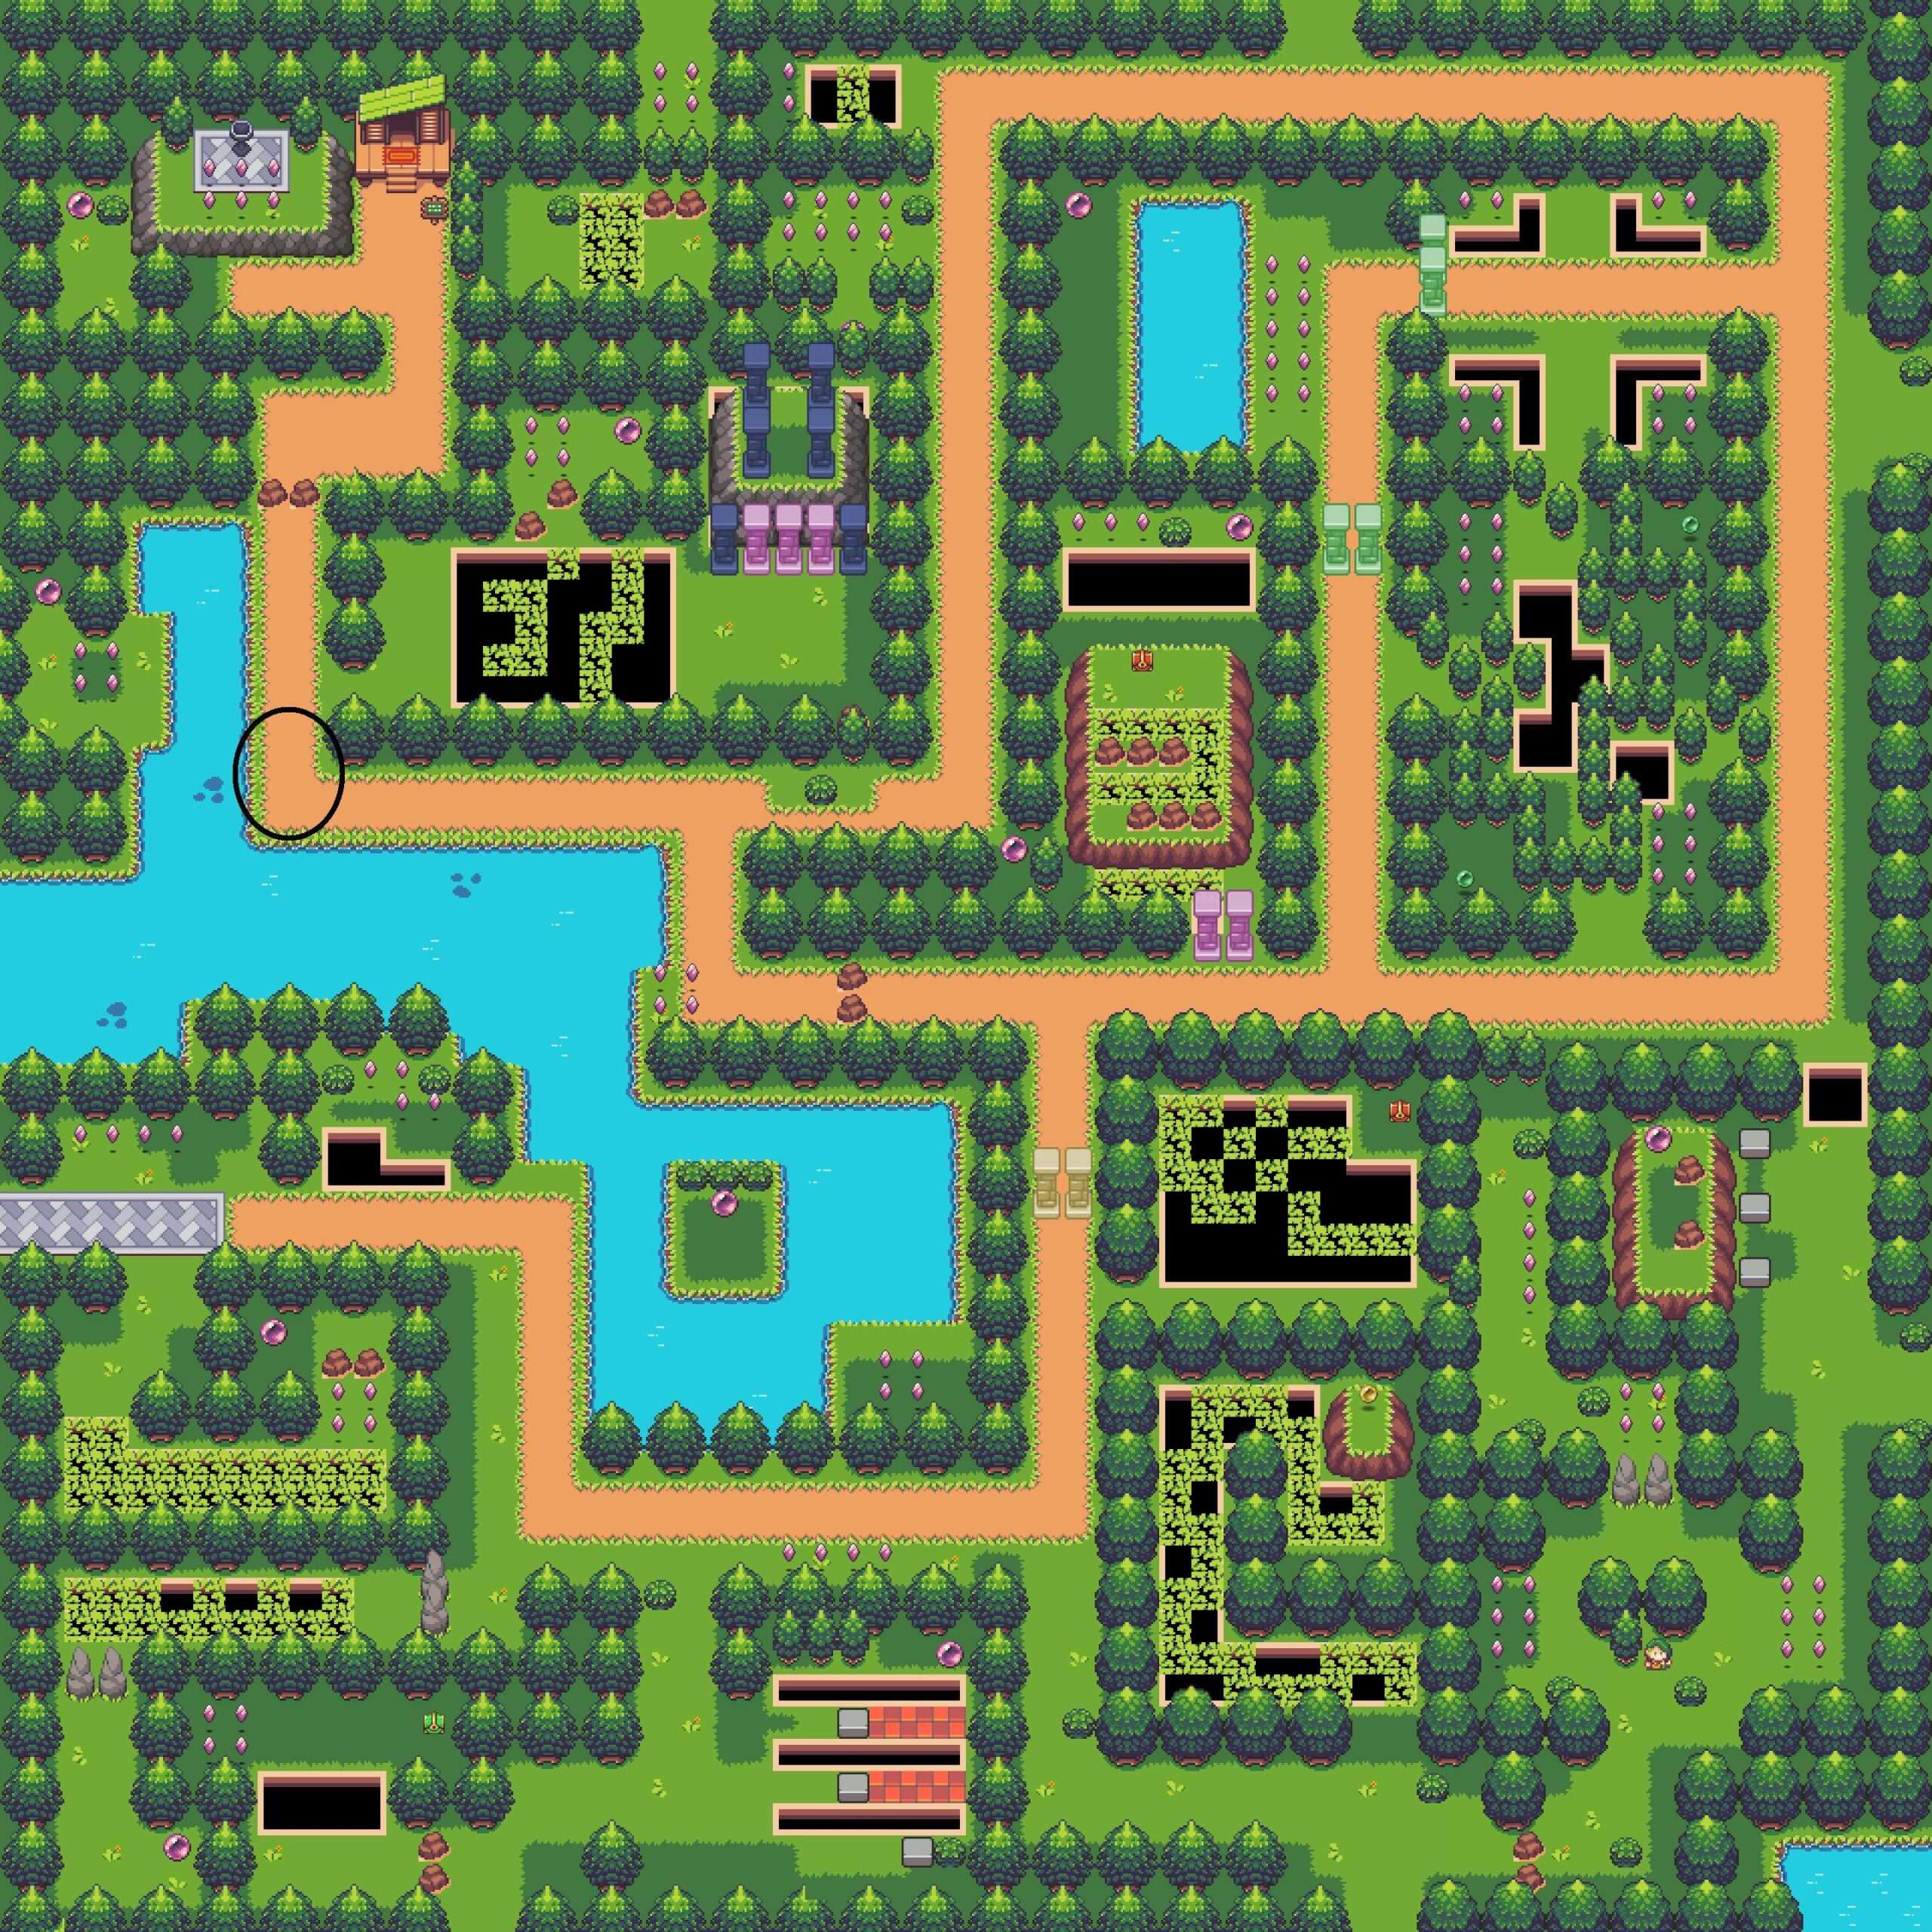
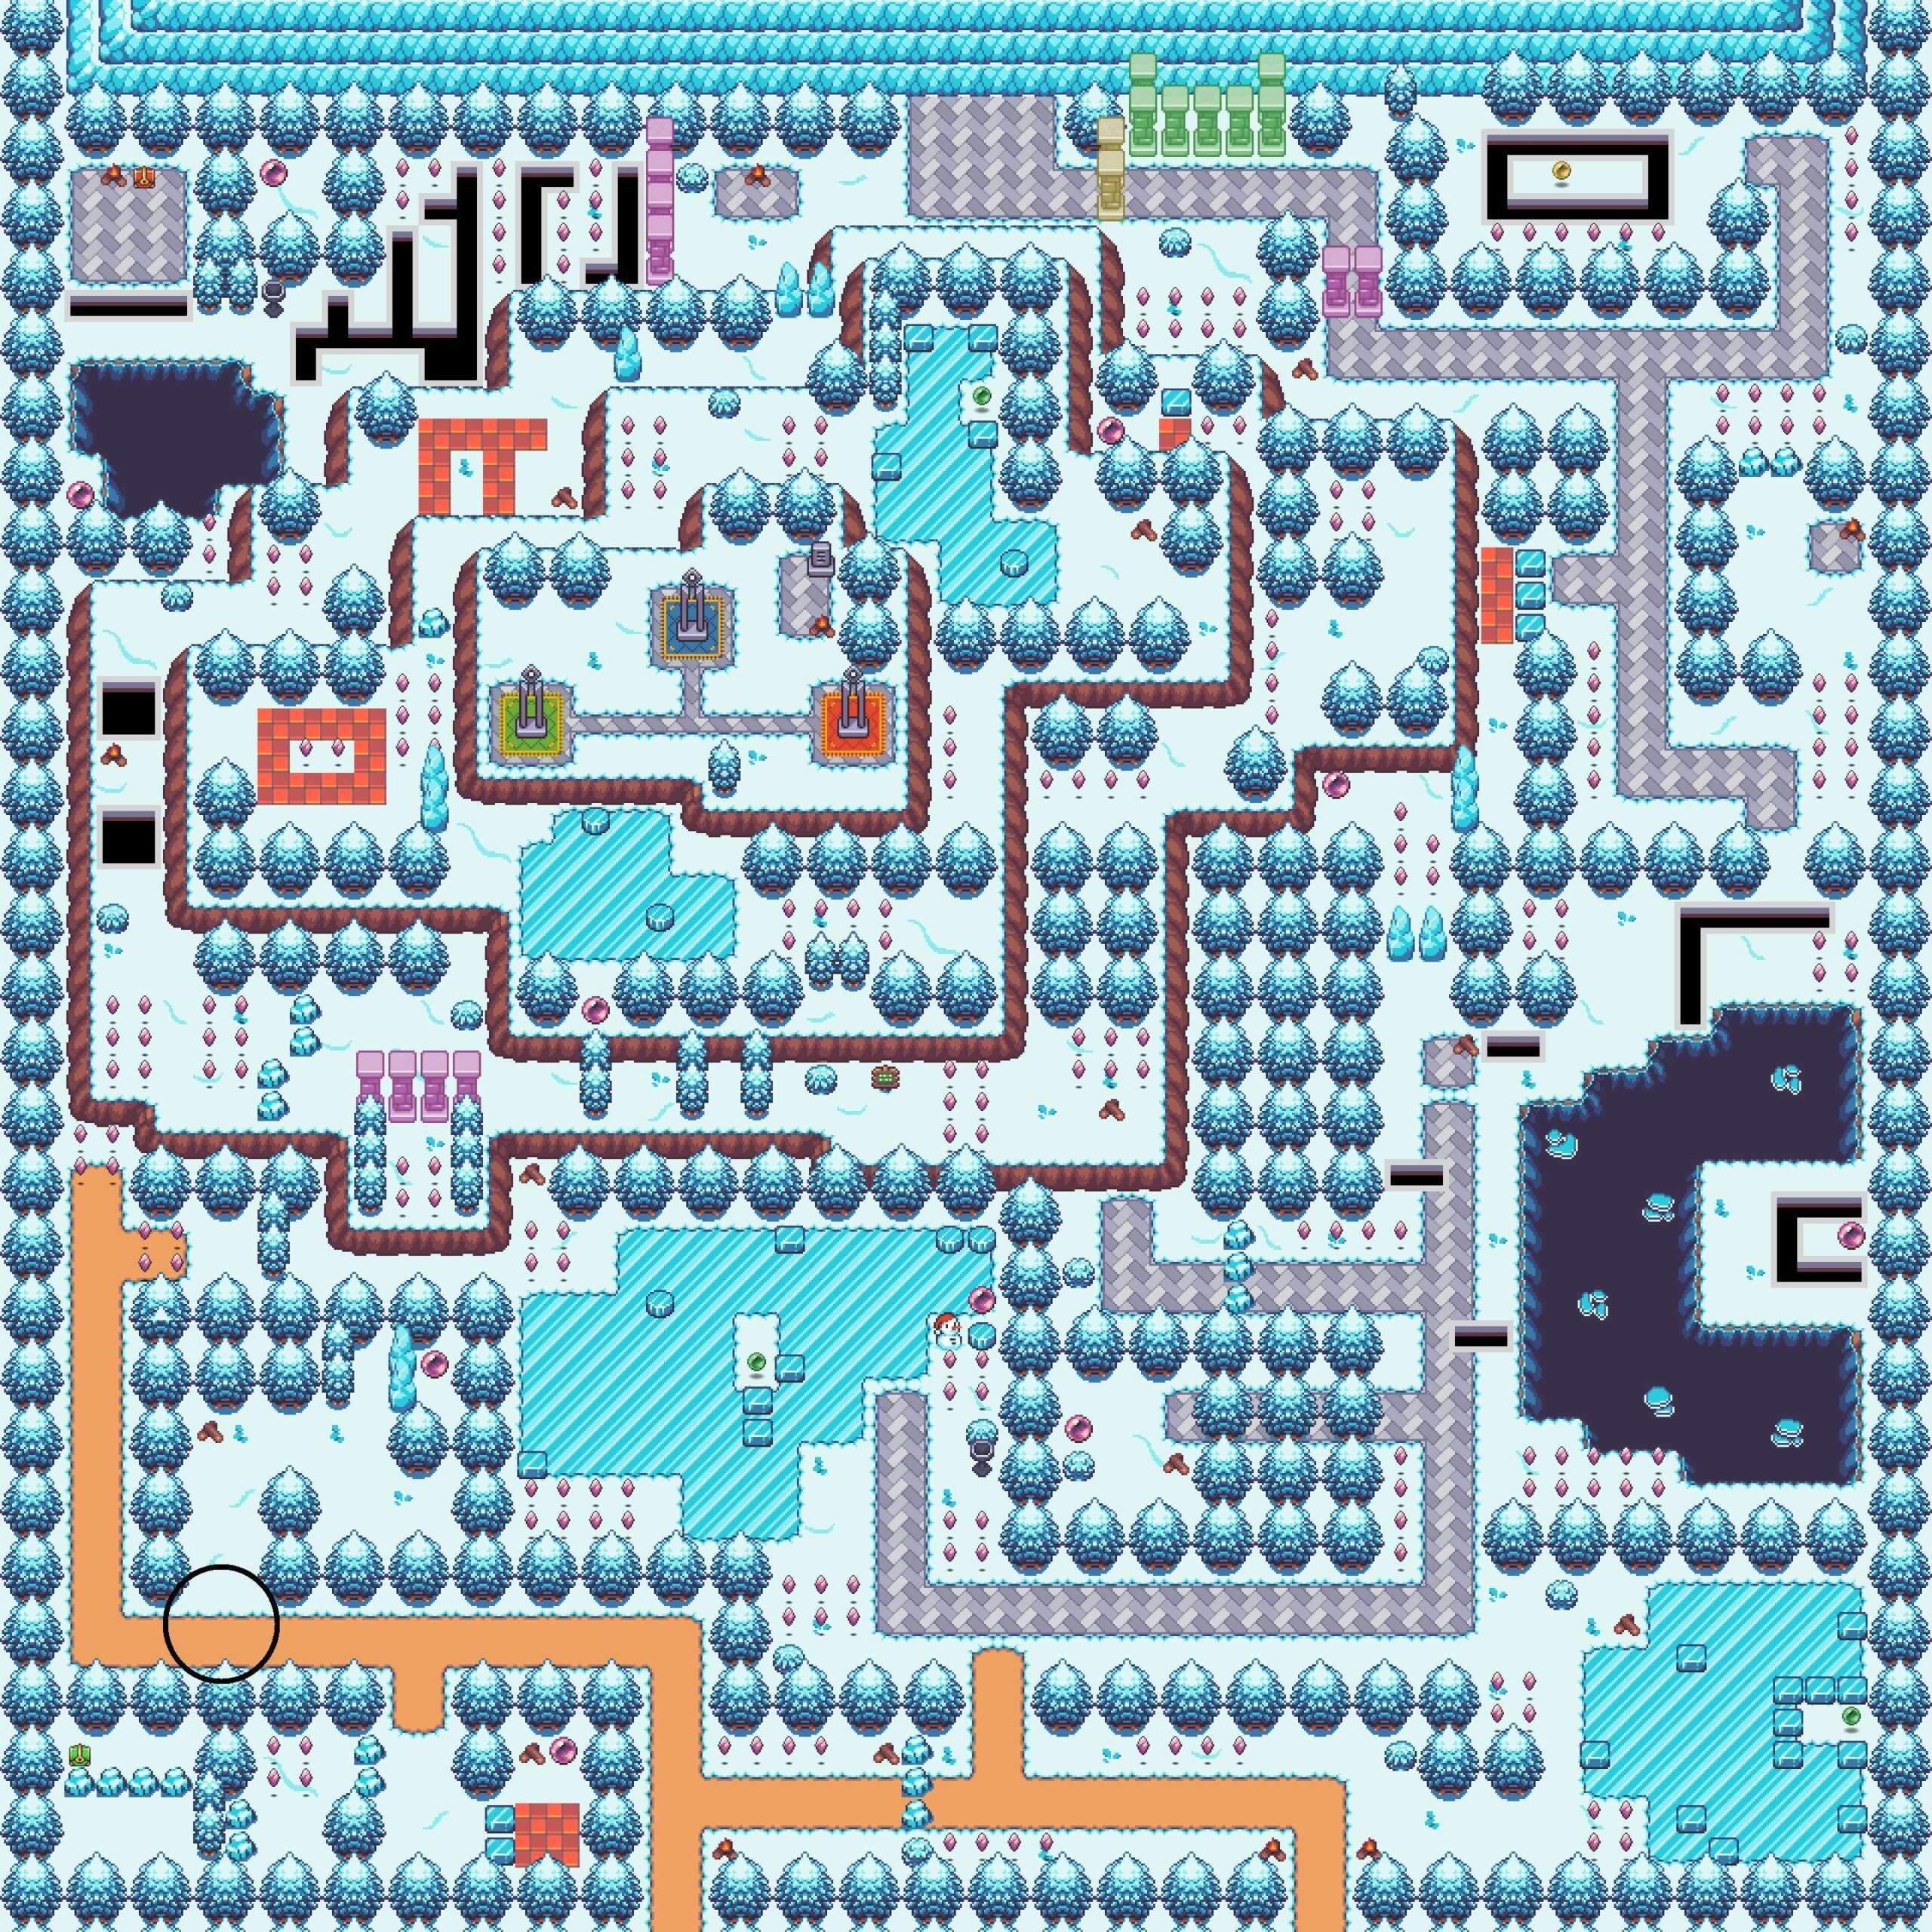
- There are four maps in the game: Forest, Beach, Mountain, & Taiga.
- Each area contains a dungeon.
- The Forest is where you’ll start and the Taiga is the most difficult map as it contains the final dungeon.
- The Taiga Dungeon is where the Keys from dungeons can be inserted in order to unlock the final dungeon.
Items
There are collectible items such as Dream Crystals (used to unlock areas) and Dream Shards (used to get both endings with the girls). You need ~200 Dream Crystals to unlock every area that requires them and you need 50/60 Dream Shards to get any of the girl endings.
There are items that act as power-ups. With the exception of the Forest (which has two), every map and dungeon has one power-up for a total of eight power-ups (the final dungeon does not contain any power-ups or collectibles). Every power-up is required to beat the game. A red chest indicates that there is a power-up.
- Rope – Found in Forest. Used to return to the start of any dungeon or map.
- Hammer – Found in Forest. Used to smash small rocks.
- Flippers – Found in Beach. Used to swim.
- Belt – Found in Mountain. Used to move iron plates.
- Torch – Found in Taiga. Used to light fires.
- Axe – Found in Forest Dungeon. Used to cut small trees.
- Staff – Found in Beach Dungeon. Used to blow up large rocks.
- Boots – Found in Mountain Dungeon. Used to jump over two tiles.
There are additional items that act as boosts, rings & fragments. There are three fragments, with one in every dungeon except the final one. Collecting all three fragments halve any damage taken. There are four energy rings, with one in every map. Each ring adds twenty-five total energy for a maximum of two hundred. A blue chest indicates one of these items.
Dungeons
Dungeons can be completed in any order with the exception of the final dungeon. A dungeon is completed when you get a small cutscene and then red mist comes in.
Forest Dungeon
The Forest Dungeon is the simplest dungeon, requiring only the Hammer and Axe to beat. However, more power-ups are required to collect everything.
- Tip: You can jump over the black orbs by timing your jump.
Beach Dungeon
The Beach Dungeon is the second dungeon and requires the Flippers and Staff to beat. It’s much easier to beat if you have the Torch and Belt. Again, more power-ups are required to collect everything.
- Tip: The black orbs in the water will follow you as long as you’re in the same body of water and near them.
Mountain Dungeon
The Mountain Dungeon is the most complex out of the three starting dungeons. It requires most of the power-ups in the game.
- Tip: The blue/black switch only needs to be activated to gain access to a Dream Shard. The rest of the dungeon can be beaten with only the red switch activated.
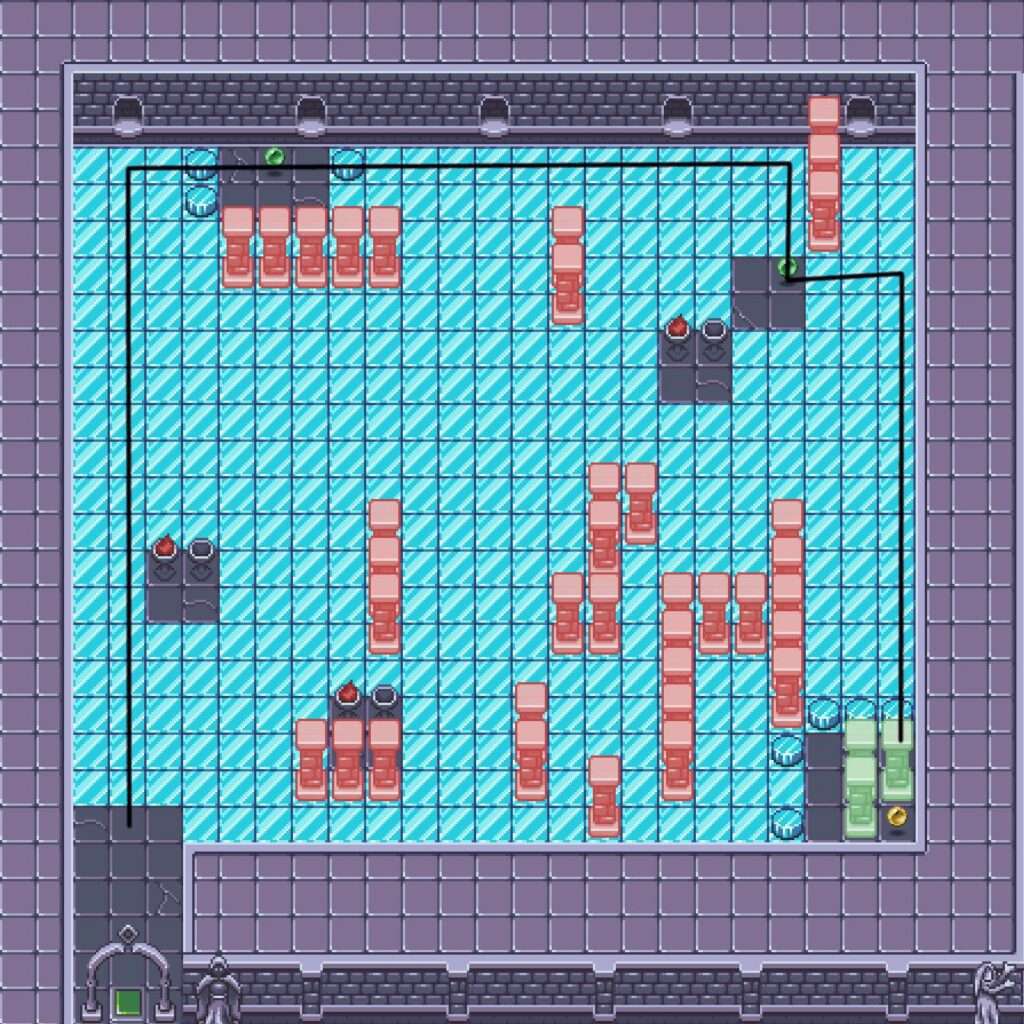
Final Dungeon
The Final Dungeon is located in the Taiga Map which unlocks after using the Keys acquired from the other three dungeons. It is the most complex dungeon with four seperate puzzles and a boss at the end.
- Tip: There is a way to complete the ice puzzle much quicker.
Final Boss
The final boss requires you to hit him with the bombs from your Staff. It takes six hits to beat him. He has three phases:
- He shoots out one bomb at a time and you can walk up to him normally.
- He shoots out two bombs and you’ll need to light a Torch and activate both switches on either the left or right. This spawns in an iron plate which can be used to safely cross the red tiles.
- He shoots out three bombs and you’ll need to hit the remaining switches. This spawns in another iron plate which can be used to safely cross the red tiles. After hitting him once, a group of trees spawn in which need to be cut.
If you die four times during the fight (all time; the game recognizes any death across any save file as counting towards this), it will allow you to choose an easier boss fight. In the easier version, he doesn’t spawn in a bomb during the first two phases and will only spawn in one bomb in the final phase.
Cheese: If you want to beat the boss properly, do not follow this. This strategy involves the fact that you can complete an action quicker than you take damage on a red tile. During phases two and three, you can spam jump across the red tiles instead of hitting the switches. This significantly speeds up the fight and makes it a joke. I actually made use of this fact to complete one of the Beach puzzles involving iron plates where I used the Belt to move it before taking damage.
Endings
There are three different endings in this game.
Ending 1
To get ending 1, simply beat the game without finishing any of the girls’ quest lines. It’s best done by not collecting 50 Dream Shards. This is the worst ending you can get.
Ending 2
Ending 2 is when you get a relationship with Emma. The steps to get this ending are as follows:
- Meet her in the Forest.

- Complete any dungeon.
- Go to her house in the Forest.

- Complete any dungeon.
- Meet her in the Forest.
- Collect 50 Dream Shards.
- Complete any dungeon.
- Go to her house in the Forest.
- Beat the final boss.
Make sure you collect 50 Dream Shards before completing the third dungeon. It is also recommended to save before each meeting with Emma. There are choices for every cutscene, with a CG meaning you have chosen the best option. It’s especially important to save before the final meeting as you can fail the relationship.
If you have the free NSFW DLC, you will have an additional scene during the ending along with a nude CG after the first house event (with the right choice).
Ending 3
Ending 3 is when you get a relationship with Nessi. The steps to get this ending are as follows:
- Meet her in the Forest.

- Complete any dungeon.
- Meet her at the Beach.

- Complete any dungeon.
- Meet her in the Taiga.
- Collect 50 Dream Shards
- Complete any dungeon
- Enter the Mountain Map
- Beat the final boss
Make sure you collect 50 Dream Shards before completing the third dungeon. It is also recommended to save before each meeting with Nessi. There are choices for every cutscene, with a CG meaning you have chosen the best option. It’s especially important to save before the final meeting as you can fail the relationship.
If you have the free NSFW DLC, you will have an additional scene during the ending along with a nude CG after the Taiga event (with the right choice).
Be the first to comment