
A guide detailing how I achieved the Members Only achievement solo.
How to Obtain Members Only Achievement
Intro
I love this game, but I’ve not yet made any guides for it! I just achieved the Members Only achievement, so I figured I’d show how I did it in case anyone’s having trouble with it. I’ll assume you’ve already played a bit and know the basics. I completed this achievement on the “Too Easy” difficulty, since the achievement doesn’t care which difficulty you choose, but this strategy should also work on the “Easy” difficulty.
For anyone who’s not aware, the “Members Only” achievement is where you, “Win a game with the Escape Pod without recruiting additional heroes”. So essentially, you get your starting 2 heroes and that’s it. This is atypical because typically you work up to 4 heroes, starting with 2 and hiring heroes you find along the way. It also means that if one of your starting heroes dies, you can’t hire another hero to replace them.
I don’t think this achievement was that hard to get solo, but its worth noting that an alternative way to get this achievement is by playing multiplayer with 4 players. This way you start with a full 4 heroes and as long as you don’t recruit anyone you can get the achievement. This guide assumes you’re going solo (or 2-player).
Here’s a screenshot from my final floor so you can tell the strategy was pretty damn effective.
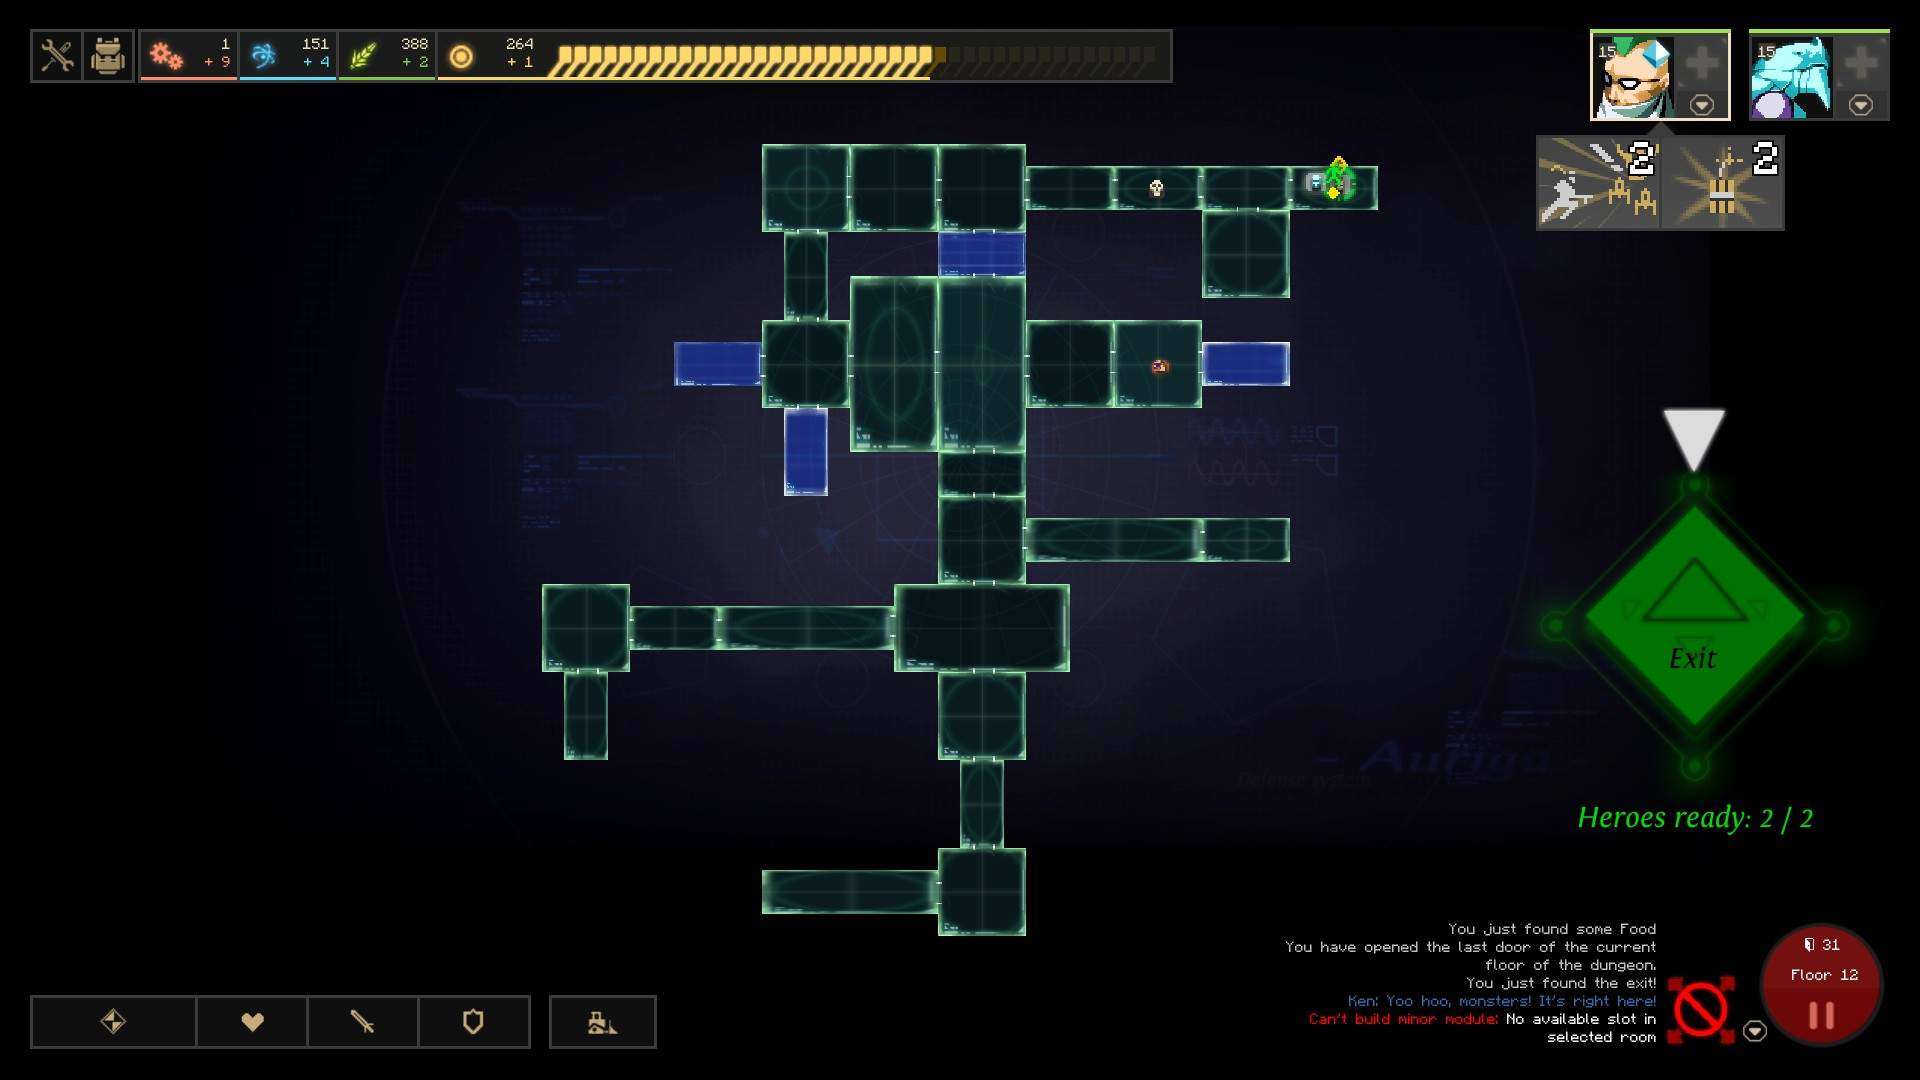
Notice there’s 264 dust, every room is powered with dust to spare, both heroes are max level, with plenty of leftover food and science. Don’t mind the low Industry remaining, I was bored so I built a ton of minor mods at the end before I exited.
Hero Selection
For heroes, we’re going with Ken Massoqui and Kreyang.
Ken
Ken has a lot of strengths. First and foremost is his DPS. He has decent baseline DPS, which becomes one of the highest DPS in the game with the use of his active abilities: Sado-Selfish and Sacrifice. Sado unlocks at level 2 and has a 2-door cooldown. It gives him +50 attack power divided by the heroes in the room. This ability is great because you get it early, it has a short cooldown, and its perfect for this achievement since we’re only going to have 2 heroes total (1 other hero that isn’t Ken) so the minimum benefit it will provide is +25 attack power. Since your two heroes will probably be spread out on the map, you’ll usually get the full benefit.
Ken’s second active ability, Sacrifice, unlocks at level 7, also has a 2-door cooldown, and gives Ken +130% attack power but deals 20 damage per second to himself. While the downside might sound painful, in practice it is hardly noticeable, and can be easily mitigated with mods, items, or by healing with food. Sado and Sacrifice pair well together, for massive damage when needed, but more often you’ll just want to use one or the other for each wave. If you alternate them, then you’ll always have 1 off of cooldown since they each only have a 2-door cooldown.
DPS isn’t Ken’s only strength, he also has a good base speed of 37 which lets him get around the map quickly, and which is why he’ll be our crystal carrier. He also, importantly, learns the Repair passive at level 5, which means after a wave he can run around and fix modules without requiring us to find an item with the repair passive.
Ken’s other passive- Danger Junkie – is great for this achievement, but not critically noteworthy. Starting from level 4, it gives him some extra speed and attack power when alone, which helps with fighting solo and crystal running.
Ken does have some downsides: mainly his low health and that he’s part of the Crew faction. The crew faction has the highest level-up food costs, which is pricey, but we will compensate through that by having our second hero be a part of the Native faction which has the cheapest level-up costs. Also, Ken only needs to get to level 7 to have repair and both of his actives, so he can sit at level 7 for a while and still be effective and useful, though squishy. Since he has lower health, Ken will require the most attention during fights to keep him from dying, but he’s far from the squishiest heroes in the game and we can use modules and items keep him healthy.
Kreyang
Kreyang will be our second hero and, like Ken, will bring a lot to the table as a fairly tanky hero with great utility. Firstly, like mentioned above, Kreyang is part of the Native faction, which means she needs less food to level-up. This will help our early economy. Secondly, Kreyang learns operate at level 4, and has above average wit, meaning we can quickly get her operating and boosting our eco early.
Kreyang may be only an above average operator, but her active ability Winter Just Came is a fantastic ability that really makes our team comp work. WJC is learned at level 3 and slows all enemies on the whole floor by 40% and has a cooldown of 3 doors. This essentially applies a Neurostun effect to every room, but also stacks with existing Neurostuns. Slowing down the entire wave is incredibly useful when its time to move the crystal, and you can use science to get it off of cooldown to keep everything slowed to a crawl. It helps a lot with risky escapes, but it can also be useful while clearing the floor to give your 2 heroes time to reposition to deal with mobs coming from different lanes.
Kreyang’s other active is useful, though should be used sparingly, and is hopefully not often needed. Hold the Line doesn’t unlock until level 8, but is a great panic button if needed. It increases the defense of all heroes in the room by +100 but lowers the Dust loot probability by -40%. I used this ability only once on my playthrough, whereas I used WJC many times each floor, and I used Ken’s abilities constantly. Obviously you want to use it as rarely as possible because you don’t want to lower the Dust drop rate.
Kreyang also gets Endless Expert starting at level 6, which gives bonus Science. While by no means a necessary passive, it definitely helps with getting some earlier research in the mid game, and ensuring you have enough science to refresh abilities in the late game.
As far as downsides, Kreyang’s only issue is that she suffers from low DPS. In my playthrough, with the proper modules, she rarely had trouble staying alive, but would have a hard time dealing with lots of enemies, especially mobs that attack modules which could kill her modules before she killed them. Since you’ll probably have a high wit item in her device slot, you’ll want to get her a nice spear for more DPS.
Leveling Up Heroes
Here’s the level-up path I chose and my reasoning:
- Ken to level 2 to get his first active ability to give him some DPS.
- Kreyang to level 4 to get Operate.
- Ken to level 5 to get Repair. (could swap this with the following if you want)
- Kreyang to level 7 to get Endless Expert (lvl 6) and 10 wit (lvl 7).
- Ken to level 7 to get Sacrifice (further increasing his DPS, he doesn’t require more levels after this).
- Kreyang to level 10 to get 11 wit.
- At this point I focused Kreyang, keeping her about 3 levels ahead of Ken, only leveling up Ken when I felt he was getting too squishy or needed a little more DPS. Kreyang is a native, so even though she’s ahead of Ken in levels, it’ll still be cheaper to level her up.
The nice thing about doing this achievement is that since you only have 2 heroes, they’ll be over-leveled for the mobs they’re facing and you’re guaranteed to have both of them max-level before the final floors. Remember: its better to lean on fed heroes rather than minor modules, because the modules get left behind each floor, but your heroes come with. Leveling-up you heroes quickly is one of your primary goals.
Technology
Here are the some of the technologies I went with, grouped roughly by tier. There are many different viable strategies that work, so below is not the only way to do it, just the way I went:
S Tier
- Food Replicator – Food is so important, for leveling and healing. Get level 4 ASAP.
- Industry Generator – Industry is what will carry you in the late game, also get level 4 ASAP.
- Neurostun – There are many ways to ‘skin a mob’- so to speak- but this is the only good way to slow them down. You need at least level 1 Neurostun. If you don’t have lvl 1 Neurostun, then prioritize researching this over the above mods. Maxing out this mod is not necessary, but still good.
A Tier
- Shop – This is not a high priority in the early game, but you must pick this up before the late game. This is essential for farming dust on later floors.
- Emergency Generator – This major mod, while expensive, can totally save you on later floors when dust is sparse. Not needed early, but an absolute must have for late-game.
- Tear Gas – These are your main offensive modules. They drastically weaken enemies and deal AoE damage to all monsters in the room.
- Dust Field Generator – These allow your heroes to be super tanky, especially useful when facing lots of anti-hero mobs.
- Autodoc Shards – These are good on the frontline as well as at fallback points for extra healing. Its important to unlock this mod in case you have to deal with a Chimera Keeper.
- Mechanical Pal – This is important to get in conjunction with the Shop. Low priority, but you’ll want at least level 1 before the late game.
B Tier
- Prisoner Prod – You will build a ton of these. For that reason alone its worth it to level them up when you don’t have any better options.
- LAN Module – I do recommend picking this up, though it is low priority. Wait to see the first few waves of enemies and only build this if you see they have module-targeting mobs (like silic dozers and zoners).
- Pepper Spray – This is essentially like a Tesla, single-target Neuro and Prisoner Prod all in one. In unsupported rooms I usually build one of these and a Prisoner Prod.
C Tier
- Suppressive Firebot – On normal runs, with turrets like Misha or Gork, these are high priority. But since Kreyang is low DPS and Ken will be running all over, I think this is a bad mod for this team.
- KIP Cannon – I didn’t build any of these, and I usually don’t think they’re worth it, BUT since you only need to level up 2 heroes, you don’t need as much food, which means your economy will be able to start stockpiling science in the mid-late game. I could see these being useful while hunting this achievement. I had between 150-300 science during my last few floors, so these could’ve been valuable.
F Tier
- Tactical HUD – Since we only have 2 heroes, this mod’s value is diminished. It is a late-game major mod that consumes a valuable major mod slot. Do not recommend analyzing.
- Field Medic – Similar to Tac HUD, we only have 2 heroes, so this mod’s value is diminished. In the late game we will have max-level heroes already, so all of our food will be saved just for healing, so we don’t really need to reduce the heal cost since we’ll be floating food.
The following minor modules are totally unnecessary, but feel free to use them if you want (I didn’t build a single one on my run): Viral Injector, Bio-organic Transference, Holohero, Smoking Gun, Seblaster, Claymoar, Biomass Cannery, Biomass Factory.
Items
For items, you’ve got a couple things you’re looking for. I won’t list all the items, just the traits you want for each hero.
Ken
- Weapon – Highest DPS possible. It’s okay to sacrifice a little bit of speed to get higher DPS. Ken’s role is to run around and kill waves, he needs to kill them fast.
- Armor – Ideally you want an armor that will give speed as well as protection. Ken needs speed for running the crystal. Don’t take any of the armor that drastically reduces speed.
- Device (room clearing) – There are two different devices you want for Ken. While you’re kicking doors, you want an item with Pilfer like Third Eye. This gives you more dust when opening dust rooms, which is hugely important. If you can’t find that, then you want something that increases your DPS or speed.
- Device (crystal running) – Ideally you’ll use an item with Scamper like Photon Decelerator. Scamper makes it so monsters don’t slow you down, which could be useful depending on your crystal running route. If you can’t get Scamper, then any high-speed device will do. Defense is not worth it on Ken, no amount of defense that can be provided by a device item will be enough to save him.
Kreyang
- Weapon – Any old spear will do, just pick the one that yields the highest DPS.
- Armor – Ideally, Kreyang will be staying stationary and operating. I recommend really tanky armor, even if it has big speed debuffs. Her speed is not important, however her DPS and wit is important, so don’t pick any armor that lowers DPS or wit. Space Suit is nice because it provides nice defensive stats and wit.
- Device – You mainly want whatever item gives her the most wit possible, to help your economy. In the late game you may find she has to fill dark rooms and isn’t operating much, in which case you might swap it out for a combat item.
A noteworthy item that is always useful is Dust Box which gives whoever you equip it to the Secret Compartment[dungeon-of-the-endless.fandom.com] passive ability. If you find this item, you should pick it up, and equip it to Kreyang before you pick up the crystal as it will really help, especially on the later floors.
Early, Mid & Late Game
Early Game (F1-F4)
Honestly, my first 2 floors were really bad on this run and I thought I would lose because I did not have enough major mod slots or dust. Luckily with good strategy I turned it around.
For the first few floors I normally start with food, then industry, then science. Until Kreyang is able to operate, use her to fill dark rooms as necessary. Remember that Ken does more damage solo (when not in a room with Kreyang). As soon as Kreyang has Operate, I get her on a food mod to farm extra food so we can get some early levels. Make sure not to over-build major mods on early levels when the max door count is low because the majors won’t pay for themselves. On floor one the door count is about 11-12, increasing by 1-3 doors per floor.
Throughout the early and mid game you’re playing a guessing game, where you’re trying to guess where the exit is and open every door except the door to the exit room. Remember, once you have opened the door to the exit room and discovered the exit, the mobs will be much more difficult: more will spawn and they will spawn more often. So in the early floors you’re usually trying to open the exit last in order to farm resources safely. That said, if you’ve got some terrible room setups, don’t be afraid to hunt for the exit and ditch the floor early; farmed resources are no good if you’re dead.
Prioritize leveling-up and researching upgrades for your food and industry modules, as well as picking up the various high-priority minor mods. However, if an artifact is in your way and you haven’t gotten your FIDS-producing major mods down yet, don’t be afraid to destroy an artifact to make room for a major mod.
Mid Game (F5-F8)
You need to balance farming resources with going for the exit if the floor is looking rough due to RNG. You should try to save as many expensive items as possible to save them for when you find a dust merchant. Getting dust for items is much more valuable than some food or industry. Going into late game you want to have spare items to sell to dust merchants if possible.
In the mid game is when you should start getting the late-game techs that you’ll need such as Emergency Generator, Mechanical Pal, Shop, LAN Module, etc. By the end of mid game or start of late game, your heroes should be max level, but don’t get a level-up if it will leave you with no food for healing.
Late Game (F9-F12)
You still want to get your resource production major mods down early, but once your heroes are both maxed, you will only build 1 food, and all the rest will be industry. Never underestimate how much industry you may need in the later floors: Emergency Generators are expensive, destroying old major mods to build a Shop or LAN Module, building tons of minor-modules, rebuilding sacrificed prisoner prods, etc. You want to be floating in the triple digits for industry at all times. You shouldn’t need to build any science, but if you’re having to spend it to refresh your abilities you might need to build 1 science.
Your highest priority now is to generate as much industry and dust as possible while hunting for the exit. You are no longer trying to farm resources- and thus find the exit last- like you were in the early game. Dust and major mod slots are rare on these floors, so you’ll want to get out and go to the next floor ASAP.
If you find a merchant, you must build a shop, get the merchant to safety, and build 1 mechanical pal by the shop before continuing. A shop can be operated (by mech pals or heroes) to generate dust at a rate of 1 dust per 10 wit, rounding up. The rounding up part is important because a shop with 1 level 1 mech pal will yield 1 dust per door, which is absolutely massive. It is not worth it to build multiple mech pals unless you are also operating with Kreyang or if you have 5 minor mod slots and can build 5 level 4 mech pals to get to a wit of over 10.
You should be saving items to sell at dust merchants. You can buy items you don’t need from non-dust merchants to sell them at dust merchants if you have spare inventory space.
In the late game you should also stop researching, unless you are still missing some critical modules. Make sure you always have at least 50 science banked so you can refresh your abilities if necessary. Likewise, your food situation should be great because your characters should be max level, so your only food expense is for healing and food merchants.
If you’re struggling for dust, always remember you can bulldoze major mods or the research artifacts to replace them with Emergency Generators. While expensive, an EG light up dark rooms that used to contain artifacts, power rooms to turn on useful minor mods, and allows you to reallocate dust to other dark rooms. WARNING: don’t be a moron like me and accidentally build an EG in a self-powered room… always make sure to un-power the room first (to make sure its not self-powered), then build the EG. Also, another trick with EGs, EG cost scales with the production major mods, so if you can’t afford an EG, you can destroy an industry generator or food processor to reduce the cost of the EG, then build the production mod back if you really need it.
Depending on how well you’re handling the waves, you may need to take Kreyang off of operating to fill dark rooms. On my run, on the last 2 floors, Kreyang operated twice, the rest of the time she was filling dark rooms and running around fighting.
General Tips
Here’s a few more random tips to help you out that didn’t really fit anywhere else:
- The Rule of Three: avoid creating groups of 3 adjacent dark rooms. This rule of thumb keeps mob waves manageable. It is worth it to reallocate dust, build an Emergency Gen, or take Kreyang off of operating to break up a block of 3 dark rooms. Otherwise you’ll need some major defensive investments.
- Destroy Artifacts: Okay, you don’t and shouldn’t destroy all of them, but Kreyang’s passive that buffs her when an artifact is actively researching something is far less important than getting a major mod down. If you don’t need to research anymore, destroy it and build. Likewise, if you have discovered 2-3 artifacts, and you don’t have enough science to keep them all going, don’t be afraid to destroy the extras. Silic dozers won’t target inactive artifacts, but will target active ones. You can use this in an emergency mid-wave to distract dozers by buying a cheap research you don’t need. This has the added benefit of buffing Kreyang through her passive.
- Don’t Illuminate All Rooms: Mobs have a chance to drop dust when you kill them, therefore, you want mobs to spawn. On early floors if I have enough dust to power all rooms, I will often intentionally leave small, manageable 1 or 2 room clusters of dark rooms unlit, so that mobs have somewhere to spawn, so I can farm dust off of them. Obviously there is a balance to be struck between farming mobs and being overwhelmed by mobs. Typically, Kreyang operating with a couple defensive minors and 1 dark room adjacent is the perfect setup. If Kreyang doesn’t have enough DPS to kill the dozers before they kill her major, build a LAN Module somewhere.
- Hotkeys: Its definitely worth it to look the the controls and learn the hotkeys for heal, refresh, character swapping, etc.
- Map View: When you scroll out to the map view, you can see where heroes and mobs are, as well as which rooms are powered and lit. This is often my main view when microing both of my heroes while fighting. I just zoom in to see specific interactions.
- Cheeky Doors: If you accidentally find the exit early, and you want to leave because you have a lot of dark rooms, but you just build your majors and you want to get some more resources before leaving, you can open some cheeky doors. Basically, just set things up as best you can, and have 1 or both of your heroes open some nearby doors in quick succession, before popping the crystal and running away. You don’t need to clear all the waves before you open the next door. You can do some pretty risky stuff this way, including opening some doors then quickly redirecting the power before lifting the crystal. Just remember once the crystal is on the move you cannot power any rooms.
- Safe Doors: Any door between two rooms you’ve already discovered is a safe door. It can be opened and no mobs will spawn, no matter how many dark rooms you have, though you will still get resources and cooldown and research progress.
Be the first to comment