
Creating the dungeon map is a key feature of Etrian Odyssey, but what do all these buttons do? And how does path automation work? Here’s a quick overview to get you started!
Guide to Use the Map Editor
Welcome cartographers!
Being able to draw out the map as you explore is one of the big features of Etrian Odyssey. But there are are a lot of buttons in the editor, and not a clear indication of what they do.
There’s at least a few changes from the original DS version, so whether you’re new to the series or need a quick brush up, here’s a guide to the Etrian Odyssey map features on PC!
Starting Tip: Zoom Out!
Before I get into the details of what everything does, I’m just going to lead off with this helpful tip to get started: Zoom out on the editing section of the map!
In the map toolset, there’s two sets of four diagonal arrows.
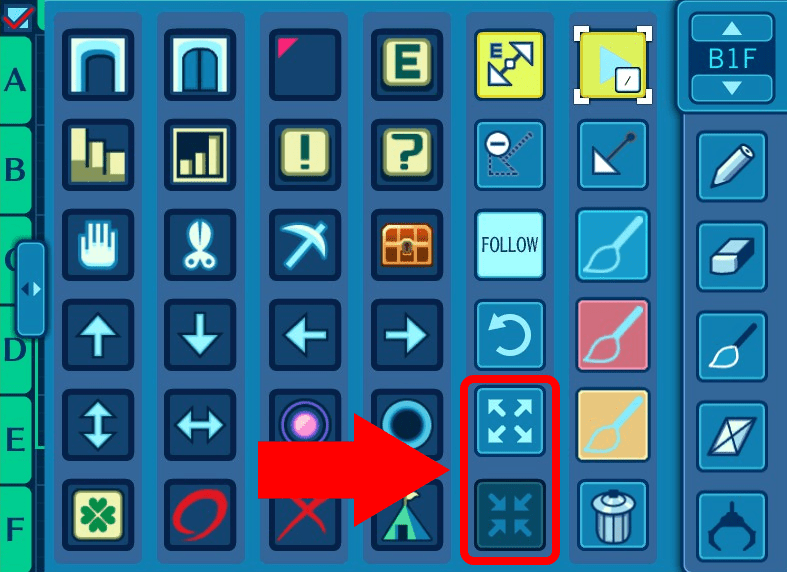
The upper one with the arrows pointing outward zooms the editing section of the map in. The lower one with the arrows pointing out zooms the map out. Feels like it should be reversed, but I guess it’s meant to correspond to the motion of using multi-touch on a phone/tablet to drag two fingers out or together.
I assume the default zoom level corresponded to the original Nintendo DS resolutions, but we’re on PC! Spam that lower zoom out button to give yourself more viewable area on the editable portion of the map.
Here’s a comparison of the default zoom to fully zoomed out:
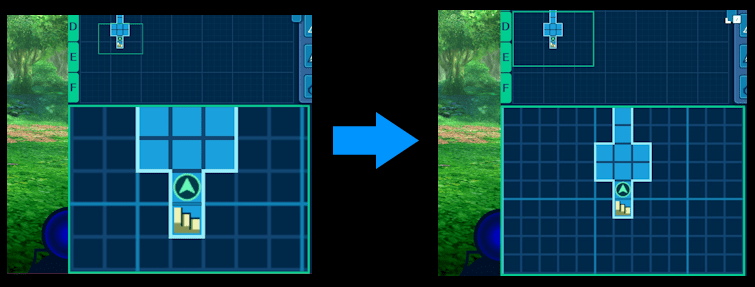
So here’s a quick overview of the interface while exploring the dungeon:
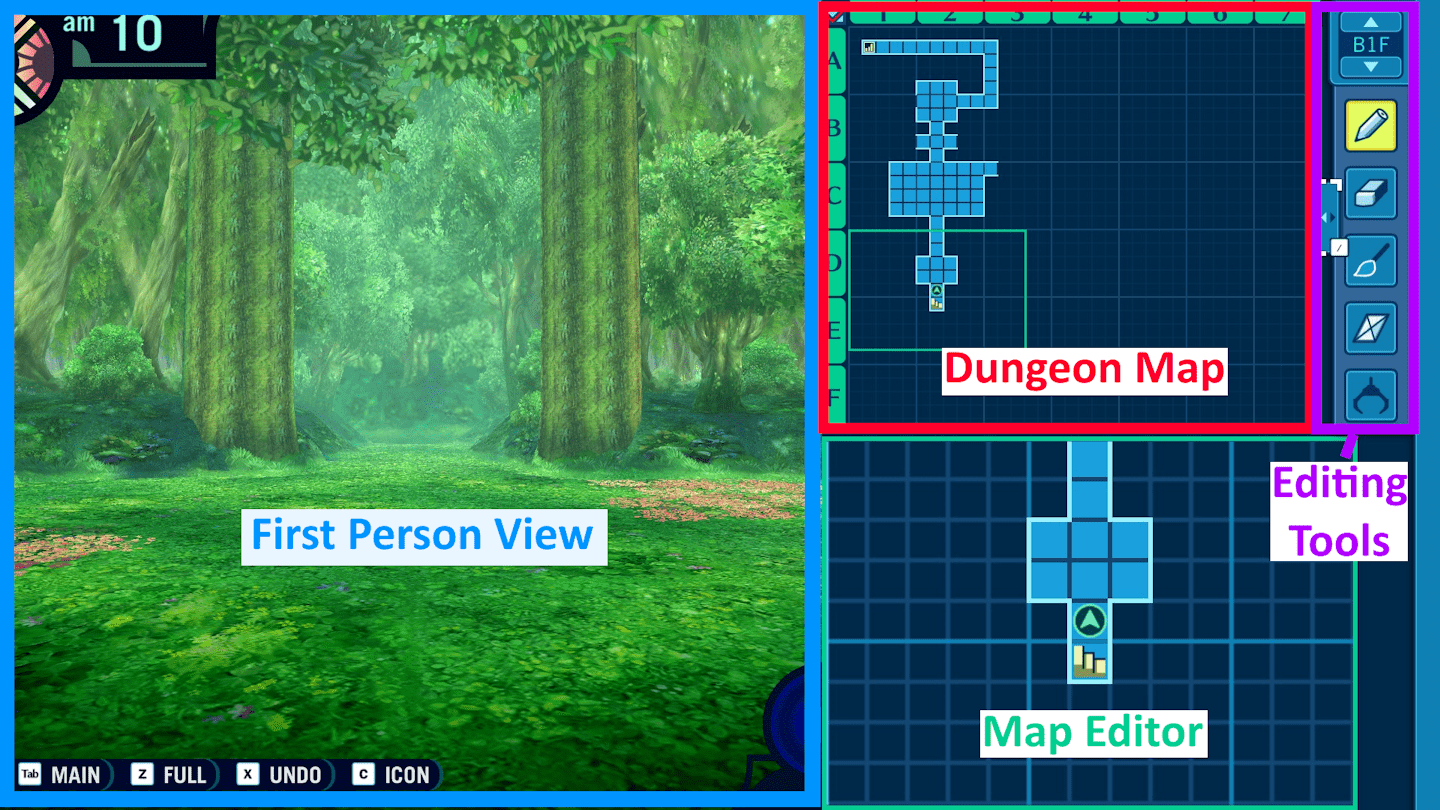
You have the first person view of the game on left side. To the right is the full dungeon map at the top, with the map editor below it. And then the map toolbox in the upper right.
In the original DS version, the first person view would be the top screen, while a single map you zoom in and out of was on the bottom screen. Now that there’s more screen real estate, this is how they have the game laid out.
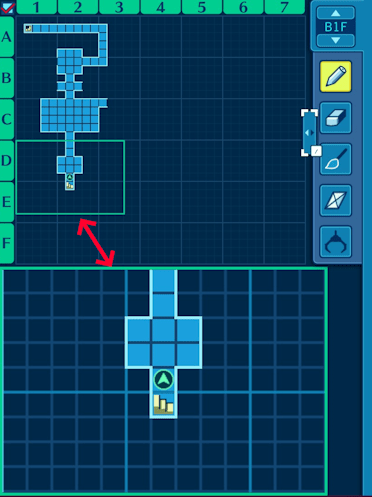
If you look at the full map, you’ll notice an area highlighted by a green rectangle. This corresponds to where the map editor below is currently displaying.
To move the map editor to different positions, you can left-click anywhere in the upper full map to jump the editor to that area. You can also right-click and drag within the map editor to scroll it.
Editing Tools
These are mostly self explanatory, but for completeness I’m adding them here.

Click the floor button to switch the floor displayed by the full map and the map editor.

Select the pencil tool then draw lines in the map editor to indicate where the walls in the dungeon are.

Select the eraser and then click on lines in the map editor to delete them.

Select the paintbrush and then click on squares in the map editor to color them in, indicating walkable areas of the dungeon. There’s 3 colors you can pick from in the toolbox.
If you have Automap turned on (enabled by default), the game will automatically fill in tiles in any square you traverse, though you can fill them in manually this way as well. You could do it in a different color if you wanted to differentiate tiles that you’ve actually walked on.

The clear title button clears any tile coloring, restoring to the dark blue color that represent unexplored/inaccessible parts of the dungeon.

The crane icon can be used to pick up markers in the map editor and drag them to other locations. If you want to delete a marker there’s a trash can icon in the extended toolbox.
Miscellaneous: What’s that checkbox?
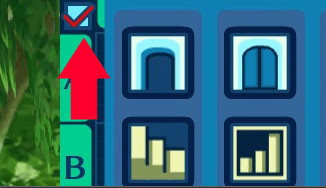
There’s a checkbox in the top left of the full map. If the box is unchecked you can move around the dungeon and if your map is set to display different floor it will stay showing that floor. Toggling this off and back on or moving while the box is checked will jump the map display to your current floor.
The Toolbox – So Many Buttons!

Clicking the little tab attached to the main map brings up a page full of icons and buttons
The first 4 columns are all icons that can be dragged onto the map as markers. Here’s the list with my typical uses for them:
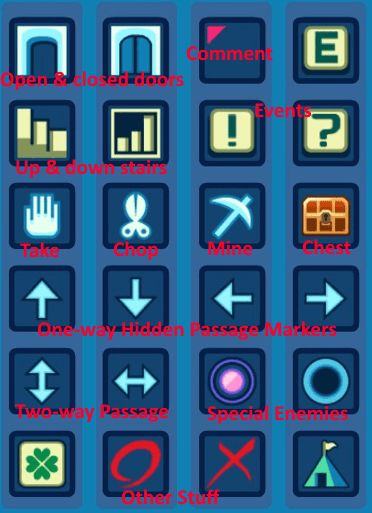
Note that the game itself doesn’t care which icons you use, so don’t get too caught up with selecting the “correct” icon. You could mark a doorway with a pickaxe on the map and the game won’t care. Use what makes the most sense to you!

With that said, I will call out the Comment marker, which is unique in that it can be placed on top in combination with other markers.
After placing, the game will prompt you to type a short note/label that will be applied to the square on the map.

The Chest icon is also unique in that you can use it to mark lootable boxes found in the dungeon, and the icon on the map will automatically change to an opened/empty chest icon once the box has been looted.
The rest of the tool buttons have different functions

These four are the path editing functions. This is a bit more advanced, so I’ll come back to it at the end of this guide.

The Follow button can be togged on and off. When it’s lit, the map editing section will automatically move whenever you move in the dungeon, keeping the editor centered on your current location. Click the Follow button to dim it and turn it off if you don’t want the map editor to move when the party moves.

The circle arrow is the Undo button. Pretty self explanatory for most computer apps, it undoes whatever the last change you made was. I think you can keep pressing to rewind more actions. Just be aware there’s no “redo” button.

Next are the Zoom In/Out buttons for the map editor. I covered these as a tip at the start of this guide, but basically I definitely recommend playing with the editor zoomed out for most functionality. If you have bad eyesight or are playing on a small display (like a Steam Deck) maybe playing zoomed in can be useful, but otherwise being able to see more of the map at once is nice when drawing out long hallways.

In the next column are the different tile colors. Light blue is the default for flooring, and with the default settings the game automatically marks tiles this way when you step on them.
Use of the other colors is pretty optional, and up to you. One use I’ve found for them is to mark the path of powerful FOEs that show up on the map.
Here’s an example of using yellow floor tiles to mark an enemy FOE’s movements:
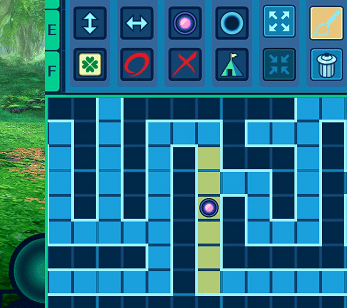

Last is the trash can. Click the trash can, then click on markers on the map editor to delete them.
Advanced – Paths for Automation
So back to these guys:
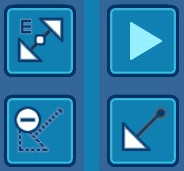
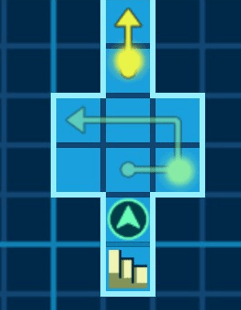
Paths are lines you can draw on the dungeon map, as seen here. They could probably be used as a form of marker, but a powerful feature of paths is their use for auto-walking through the dungeon.
Unless you’re some kind of dungeon exploring god, most likely you’re going to go through dungeon floors multiple times. Even after you’ve explored every inch of a floor, you’ll still probably repeat floors many times as you progress through the lower floors, returning to the town periodically to recharge.
As an alternative to manually navigating through the same floors over and over, you can draw a path through it. When you step on any part of the path, your party will automatically walk through the dungeon on the course you drew.
Important: Paths automate the navigation, but the party will still be traveling through it, and random enemies will still attack you periodically at the same frequency as if you walked through it manually. The automation isn’t a free pass to avoid fighting, just to save a bit on repetition.
It’s also difficult to bring up menus (say to heal after a battle) so long as you’re auto-walking a path. As such it’s best to only auto-walk paths on floors that have become trivial to you. Or be ready to quickly cancel the auto-walk when needed post combat (toggle the Path Play button off).
Drawing Paths

The Draw Path button. Click this, then trace out the path you want in the map editor.
Note that if you need to draw a path beyond the edges of the map editor, you’ll need to move the editor around, then use the Edit Path button (see below) to extend the path line. Trying to use the Draw Path button will draw another path rather than extending an existing one.

The Delete Path button. Click this, then click and release on a path in the map editor to remove it. If you click and hold on the front or end of a path, you can then drag the mouse to shorten the path.

The Edit Path button. Click on a path to select it. You can drag either end of the path to make it longer. Note that you can’t shorten a path this way; going backwards tells the game you want the path to go back and forth in that spot.
If you click and release on the path anywhere besides the start and end points it will reverse the direction of the path.
If you have multiple paths drawn on a map, you can also use the Edit Path button to select on prior to pressing the Play Path button, which is what enables automation. Speaking of…

The Play Path button. A path by itself doesn’t trigger auto-walking. Pressing the Play Path button will toggle the last path that you drew/edited to a bright pink line. This shows that it’s enabled for auto-walking. If you don’t have any paths drawn, you can click the Play Path button first, and whatever path you draw next will start with auto-walking enabled.
Once a path is enabled, stepping on any included tile will cause your party to automatically begin following the line as drawn.
To stop following the path, you can click the Play Path button to turn it off. You can also use the directional controls to walk off the path, but just keep in mind it can be a little tricky to do so since you’ll be fighting with the automation. Using the sidestep buttons (Q and E by default) is one way to do this, assuming you’re not in a hallway where you’d just slam into a wall.
Spoiler
Here is an example of an automated path I drew to navigate through the first floor of the dungeon. After entering the dungeon, I can step forward a couple squares to engage the auto-walk and it will take me to the end. Mouse-over the black spoiler text if you want to see the example. Just be aware it includes a complete version of the first floor map.
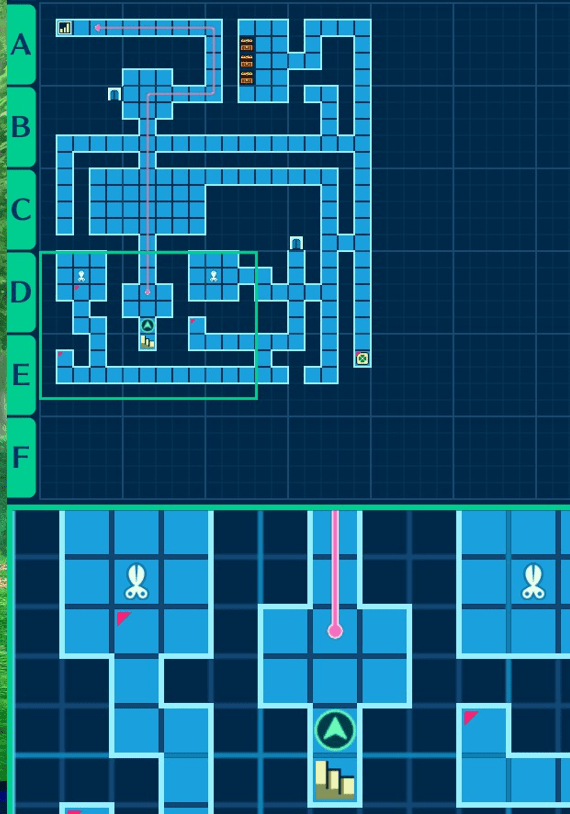


It seems there’s some kind of maximum value for path length; I tried to use it to automate traversing larger floors, and it wouldn’t allow the full length of the path.
Also, in one of the later stratums where we have certain unavoidable equivalents of paths, I attempted to use the pathing tool just for marking those, and found out that we’ve got a very limited number (maybe it was 4 or 5) that we can put on a single floor. (I’d figured that I’d just use them for marking and not activate them.)
Only real use I’ve found so far for the pathing tool was to loop my movement in an enemy-free area for a certain quest that we have to spend 5 days in a certain floor for; I looped the path in that area and went to do chores, coming back every now and then to confirm the “a day has passed” notification. I could probably do something similar to make grinding easier later on, if and when I need it, I suppose.
Great guide! I appreciate it since I wasn’t sure of a few things – also never clicking on the overhead map so didn’t know you COULD move the map around without it following you.