
In Field of Glory: Kingdoms there are two ways to resolve battles. One is to resolve the combat using the routine embedded in this game. The alternative is to export the battle to Field of Glory: Medieval and resolve it that way.
Guide to Combat System
Field Battles
Combat happens automatically when 2 or more enemy factions are in the same region, except if the enemy units are inside the city. In this case a battle will only happen if the besiegers order an assault.
Only one battle can occur per region in a given impulse. If there are more than 2 enemy factions (and their allies), only 2 sides will fight in this impulse with these picked at random. The largest faction tends to be picked first, but this is subject to a random roll.
Each faction can be assisted by one ally, so it is a possible that 4 factions will take part in a 2 vs 2 battle. The ally will be the most numerous in the region (in case there is more than one).
Battles are treated as a form of movement and thus are resolved in the inter-turn phase when all movement orders are carried out. Each field battle has to end with the destruction or retreat of one side but may be spread over multiple rounds if the first encounter is a draw.
Viewing the Battle
If a battle happens the player has three choices. You can opt to watch the battle play out in detail, see the end of battle summary screen or simply proceed with the turn resolution. The outcome of a battle can be viewed at any time in the next turn by going to the region, using the ledger or the turn-log. The result, but not the actual process, can be viewed from the turn log for the next two game turns if desired by setting the game-log filters.

A battle is a series of duels between enemy units, over a single impulse.
Each side is either defending or attacking. The defender in a battle is the side with the biggest number of units not having moved this impulse (the only exception to this is if the defenders have sortied from a besieged city).
Deployment
When a battle happens, the engine determines how units are deployed, aiming to match units against each other as far as possible. The deployment process uses the concept of ‘distance from center’ to determine the layout of units. Some tiles are reserved for cavalry and will not be filled if either sufficient cavalry are not present or the overall army is too small.
This score varies by unit type and, for example, Heavy Infantry have a score of 0 (so if present will be deployed in the center) whereas cavalry can have a score of up to 20 (so will tend to deploy on the flanks). The engine first deploys units with a low ‘distance from center’ value and then proceeds toward the flanks, until there is no room left (or units).
These values will vary according to the terrain and if the battle is actually an assault on a fortified city. In the latter case, cavalry will very rarely be selected.
Healthy units will tend to be picked before units that have been damaged.
The frontage (battle line width) is a function of the terrain in the region but this maybe reduced if the battle is actually an attempt to storm a fortress.
Once the front line is full, units will be added to a second and possibly third line. Those with the ‘support’ trait will be placed in the front line if there are available slots but otherwise will be in the second line. Here they will be able to support a unit actually in combat but no more than one support can help a frontline unit under normal circumstances.
Visually, at the start, skirmishers will be deployed in front of the main battle line and the battle will commence with a ranged combat phase.
Unit Attributes
Some units have the specific traits.
Charge and Charge-breaker
Many cavalry and a few footmen units have the ability to charge the enemy. This is not automatic and is dependent on several restrictions.
- The terrain must be suitable for a charge (as specified in the actual ability).
- The unit must not be exhausted.
The chance to charge, vs a D10 is:
- Effectiveness + Experience level (same as Guaranteed min roll)
- +3 per charge level beyond the first (i.e. Devastating Charge gives +3 in this case)
- -3 per charge-breaker level of the opposed unit
If the roll is failed for the attacker, then the defender gets to roll for it too.
The charging unit gets a +1 per charge level to its attack rating.
The unit losing its duel (including the charging unit!) get 1 + charger level extra margin when determining losses. Practically charge level 1 gives +2 margin, so one extra effectiveness and hit lost, while a Devastating charge will give +3 margin (-2E / -1H).
Steady and Armoured
Steady units can ignore the first effectiveness point lost in melee combat (not in ranged combat) if they succeed in a dice roll (usually 50%) and if they have not already lost more effectiveness than their ability level (i.e. they are not already shaken).
Armoured works the same principles but in this case it potentially protects against hit lossed.
Temperamental Weapon
Some weapons, mostly gunpowder ones, will get a penalty in terrain prone to humid conditions or difficult conditions: Forest, Swamp, Mountain.
Ranged combat phase
All units with some ranged capacity will fire against the enemy in this phase. Some units can only hit the enemy frontline, some can reach the enemy support line or even the reserve units.
In term of gameplay, the mechanics used are the same as the duel process.
A ranged attack can never kill a unit, only inflict fatigue and tired or exhausted units then will have an extra penalty in the duel phase.
It is resolved by matching pairs of units. An already fatigued target is less likely to be selected if non-fatigued targets are available. Frontline units will be matched against frontline units as far as possible (remember that in this phase some of your skirmishers are deployed at the front) and a given unit may be attacked more than once.

Duel combat phase
Once the ranged combat phase is over, skirmishers will retreat to the support line.
As far as possible, each front line unit will fight a single opponent but if one side has more units (and there is spare frontage) then they can gain the advantage of being able to flank their opponent. Defenders use the defence rating of their troops, attackers their attack.
Flanking attacks happen when a frontline unit has no opposition. In this case, the flanker will attack the enemy frontline unit closest to its deployment unless this unit has already been flanked. If there is no such unit, it will attack an unflanked support unit (checking from periphery to the center of deployment). If there is no such unit, it will attack an unflanked reserve unit. If there is no such unit, the flanking unit will be used in the pursuit phase (if any) and inflict additional damage.
Support units provide one third of their ranged attack strength if they belong to the support category or +1 if it is a melee type unit, to the strength of the relevant combat units.
In combination, this sets up a triangle rule for combat resolution. The key factors are unit strength, army leadership and unit effectiveness. A weakness in one of these might be compensated by strengths in another factor.
Each combat is then resolved using three steps.
- Step One
Add up the defence or attack rating of the units, modify according to terrain and the presence of any support units. The support value is provided by the units behind those committed. Some units are poor in melee in their own right (e.g. archers) but provide a good support value. The values will also reflect unit experience and fatigue level.
- Step Two
The unit will roll one or more D10 and add the best score to their combat value determined above. The number of D10 available is determined by the relevant rating (attack or defence) of your general +1.
- Step Three
Each D10 has a guaranteed minimum value determined as 1 plus unit experience (from 0-3 depending on if it is a recent recruit or an elite unit) and its current effectiveness (from 0 to 2 for a fresh, properly supplied, unit). Any dice with a value below this level will be rerolled until it, at least, matches the minimum value (and it can, as a result of this process, exceed the minimum).
Combat results
Once all these modifiers have been generated they are compared:
- If the difference is 0 between the 2 opponents, both sides will lose one effectiveness point and take one hit.
- If the difference is 1, the weakest side will lose 1 effectiveness point.
- If the difference is 2, the weakest side will lose 1 hit point
- If the difference is 3, the weakest side will lose 1 hit and 1 effectiveness point.
- Each difference over 3 will see the losses increase by 1 hit and 1 effectiveness point until it is destroyed
- If a unit is already at 0 for effectiveness, any further effectiveness losses are converted into hits.
- Some units have the skirmisher trait. Even if they lose a duel, if the enemy margin is not big enough, the winner will lose one effectiveness point.
Determining the Overall Outcome
At the end of the battle either one side will be forced to retreat or a new combat round will commence. Note that if a fresh round starts, it is possible that extra units may arrive for one or both sides depending on how far they have had to march.
To determine the outcome, each side sums up their losses in terms of both hits and lost effectiveness.
If the difference between these scores is 3 or more, then the side with the smallest value is the winner, otherwise the battle is a draw and will restart in the next impulse.
If neither side retreats another round of combat will occur with units chosen again according to 16.1.2. Thus a larger army may be able to ensure it keeps on fighting with fresh units even as its opponent has to use units that are tired and have already taken losses.
The winner will then inflict extra losses to the defeated, with these first taken as efficiency losses then as outright losses. Thus an army with all its units exhausted at the end of a battle will be very vulnerable in the pursuit phase. The damage inflicted in the pursuit phase is related to the flanking rating of each unit. Thus cavalry and skirmishers will be very effective.
Units with the trait ‘evade’ can reduce some of their potential losses.
The winner takes the region, unless the combat was an open field battle and there is still a city to capture.
The end of battle report will show a combination of in-battle and pursuit losses.

Ground Units Caught at Sea
If ground units are caught in a naval battle the process is similar to above. However, the ground units lose all the advantages of their unit type and depend purely on the dice roll for their strength as they are treated as poorly armed transport ships. This will be partly mitigated if you can produce the highest level of transport ships as these have some combat ability.
On the other hand, combat ships will fight using the full range of modifiers.
Naval battles are otherwise conducted in the same way as land battles.
Raiding and Pirates
Some states or leaders have the trait that allows them to raid their neighbours. If this option is selected then a raid will take place in one of the neighbouring regions. The chance of success is related to the size of the raiding force and strength of any defences and/ or enemy armies.
If a region is successfully raided, then it will not be attacked again for the next six turns. However, during this period productivity will be badly affected as a result of the raid, You can only raid (or be raided by) if diplomatic relations with the target are negative or are already at war with them. You can always raid (or be raided by) a region that is owned by one of the world nations – in effect not owned by an organised state.
The AI will not carry out raids if their relationship with you is 0 or higher.
Note the success or otherwise of a raid will lead to losses or gains of authority.
Sieges
Sieges are a particular form of combat.
In this case, battle does not occur automatically but can occur if either the besieger orders an assault or the defender tries to sally out (most likely if they are starving).
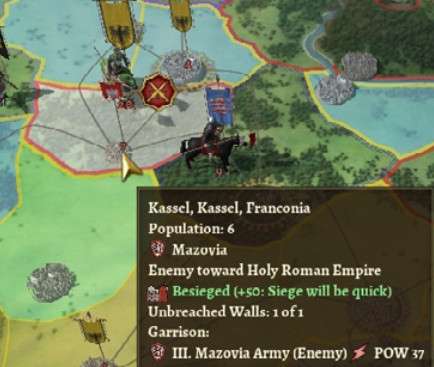
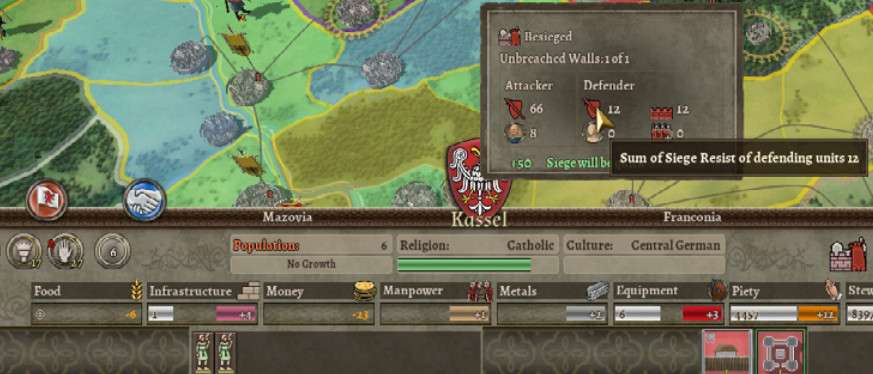
If a region is besieged then the chances of a positive outcome that turn is indicated by a pop-up message.
The scale for siege resolution is from 0-100 so it is possible to have a lucky (or very unlucky) outcome.
Assaults
You can opt to order an assault, either as part of the movement order or once the siege has started, and that will be resolved as a version of the usual combat resolution (note these battles cannot be exported to Field of Glory: Medieval).
If you launch an assault and you are defeated, the battle will not be repeated this turn. Equally the attacker will not retreat from the region so the siege will be maintained. If the battle ended in a draw, a fresh assault will happen in the next round until one side wins.
Besieging a City
If the region is well defended, or has strong walls, then it maybe better to besiege it for a number of turns. Depending on the relative strengths of the two sides, over time the defenders will weaken as they starve and the walls will be damaged making either an assault more likely to succeed or that the region will surrender.
If the besieged city is a port, it might be necessary to deploy a fleet off-shore in order to cut supply to the defenders. Note that some regions have ports that open into more than one sea area and both will need to be blocked to ensure that no food comes into the city.
Over time a besieged army will weaken as it runs out of food but this can be slow if the city has buildings that allowed a large food stock-pile to be amassed. As long as there is a food stockpile (in this case a unit pays an extra unit of food for each point of effectiveness that is regained) the defender can regain effectiveness. If it has a hospital then there is a possibility it can also regain lost hit points.
If the defenders start to run out of food but feel they have some chance in a field battle, they may sally out in an attempt to drive off the besieging forces.
Calculating relative Siege Capacity
To determine what will happen once a siege has started it is necessary to compare the relative siege values or capacity of each side.
For the attacker, add up the siege bonus provided by medium infantry and other units that have the besieger trait.
To this is added a maximum of +4 if a leader is present (+2 for having a leader, even a 0-0, and then their attack value). In addition some leaders have the siege trait and can further improve this value. The leader score cannot exceed that of the combined value of all relevant infantry. So if only 2 units with the besieger trait are present, the leader value is capped at +2.
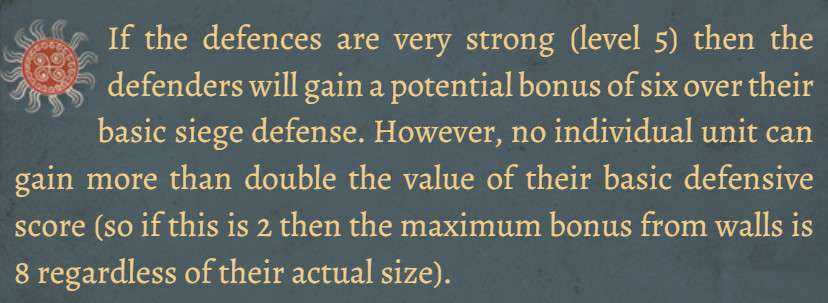
For the defender, the siege value is calculated in the same way and then the siege resist value of any buildings is added.
The two values are compared and are capped between a minimum of -6 and a maximum of +6.
Outcome of the Siege Process
Each turn a random Die (100) is generated and added to the difference between the attacker and defender siege capacity. If the net score is 4 or less then nothing happens unless the die roll was a 10.
In that case, or if the score was between 5 and 9, a low amount of attrition will be inflicted on the defender.
If the score was between 10 and 15 a high amount of attrition will be inflicted on the defender.
If the score was 16 (the highest value possible), then the defenders will surrender.
If the defenders did not surrender, another Die(10) is rolled and if the modified value is 9 or more, a breach will be made in the walls (this will reduce the defender’s siege value next turn or make it easier for an assault to succeed). In this case, if the unmodified roll was a 10 then a breach will occur regardless of the modified score.
Recovering from a Battle
A unit that has fought may have lost effectiveness and/or outright losses.
It will regain effectiveness at a rate of 1 point per turn. It will only recover losses if it is at full effectiveness and based in a region with positive food production and at least 50 loyalty. If these conditions are met then it will recover at 1 per turn assuming you have sufficient resources of men, metal and equipment.
Be the first to comment