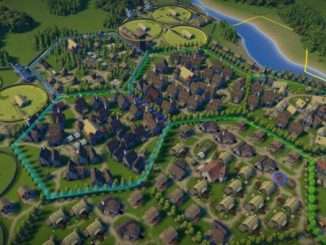
A simple step by step guide on how to set up Trading Routes in Foundation.
Quick Guide to Trading Routes
Prerequisites to Trading
- Enough resources to unlock a trading route.
- Sufficient production of the product(s) you want to sell OR sufficient gold to buy the product(s) you want.
- A Warehouse with a villager working as a Transporter assigned to it.
- Patience for the neighbouring village trader to come by and trade with your village.
Unlocking a Trade Route
Unlocking a Trade Route is quite simple. Once you have the required resources, for example 20 Planks for the first Trading Route and 20 Bread Loaves for the second click on the respective “Unlock trade route for X” button and your new Trading Route is ready to use!

Setting Up the Trading Window
In the trading window you can select which resources to buy, sell, or not trade at all (default) and in what amounts.

It is extremely important not to buy or sell too much. From my experience so far the trader comes once every week so your weekly profit to buy goods and your weekly production of the goods you want to sell should be considered when assigning product amounts in the Trading Window.
- Buying too much, i.e. items costing more than the money you have or make in a week will cause you to run into debt and your villagers will start abandoning your village.
- Similarly selling too much can cause you to fail to meet your villagers’ needs and again they will start abandoning your village.
The second very important thing you should note is what the neighbouring village, that you have unlocked a trading route to, actually wants to buy and sell. This information is outlined in the first tab of the Trading Window where you unlocked the Trading Route.
As shown in the screenshot below this village has unlocked two Trading Routes with the neighbouring villages of Davenport and Northbury.
- Davenport is buying Berries, Stone, and Planks and selling Tools, Bread, and Marble.
- Northbury is buying Wool and Clothes and selling Coal and Iron Bars.

Setting up the Warehouse
Setting up the Warehouse to accept the goods to be traded (both bought and sold) is the most important step in the trading process. This is the step most people forget and then asking why their Trading Route is not working.
Outlining this vital detail was the number one reason I decided to write this short guide, so let’s get to it.
After building a Warehouse, you need to:
- Get a villager to work as a Transporter
- Open the Warehouse menu
- Select which items you want to store there
In the picture, they only allowed Tools, Stone, Clothes, and Planks in their Warehouse. They did this for two reasons:
- To sell Clothes, Stone, and Planks to traders
- To let traders sell Tools to them
Everything else is blocked from being stored there. That’s how you control what gets traded.

Market Tips
It is much more efficient to build only one or two Food Stalls per Market. Build more than one Market in an area.
1st Market:
- 2x Food: Berry, Fish
- 3x Goods: Common Clothes, Candle, Common Wares
- 2x Luxury: Herbs, Honey
2nd Market:
- 2x Food: Cheese, Bread
- 3x Goods: Common Clothes, Candle, Common Wares
- 2x Luxury: Honey, Herbs
3rd Market:
- 2x Food: Fish, Berry
- 3x Goods: Common Clothes, Candle, Common Wares
- 1x Luxury: Jewelry


Be the first to comment