
If you are struggling with the gameplay mechanics of Kingdom of Wreck Business, you are probably not alone. But if you keep playing it anyway (like me), then I hope this guide might help with some of the frustration around extracting raw material resources from shipwrecks.
Extracting Raw Materials from Shipwrecks
Сrеdit gоеs to Radar14!
Getting Started, and What I Know for Sure…
There were a few items of consensus in the discussions. For one, the only vessel that seems for certain to be suited to resource extraction is the NOAA vessel. It must be equipped with an upgrade to the back for an extraction tool (a crane), which will display in the statistics panel with a checkmark.

Also, it is necessary to purchase the GPS tracking gun from the Auction House panel, and it seems to me that you need to purchase BOTH scanner and GPS darts. I don’t know why, and it is not intuitive, but that was my experience.
Lastly, this mission component seems to crop up randomly, and sometimes includes a note in the contract message indicating “extraction tools required”. You would think the cargo extraction would be primarily aboard cargo ships, but that does not seems to be the case. Sometimes I would arrive on site without the proper tools, but as money seems abundant and there does not appear to be a penalty for wasting too much time, you can return to port and retrieve the proper equipment.
Note: Maybe it’s stupid, but don’t forget to select the correct ship for your expedition (in this case, the NOAA ship).

Extracting Resources
When I arrive on site, I like to ping the sonar and see what the wreck is like if it’s close to the surface. This is easily accomplished on the bridge by selecting the ship’s wheel [F], then toggling the alternate view [V], and lastly activating the sonar [K].
As you can see, this time the ship is intact and relatively close to the surface.

You can now either return to the ship’s bridge and dive by selecting your tanks, or there is a “Dive” button at the top right corner from the third-person ship screen.
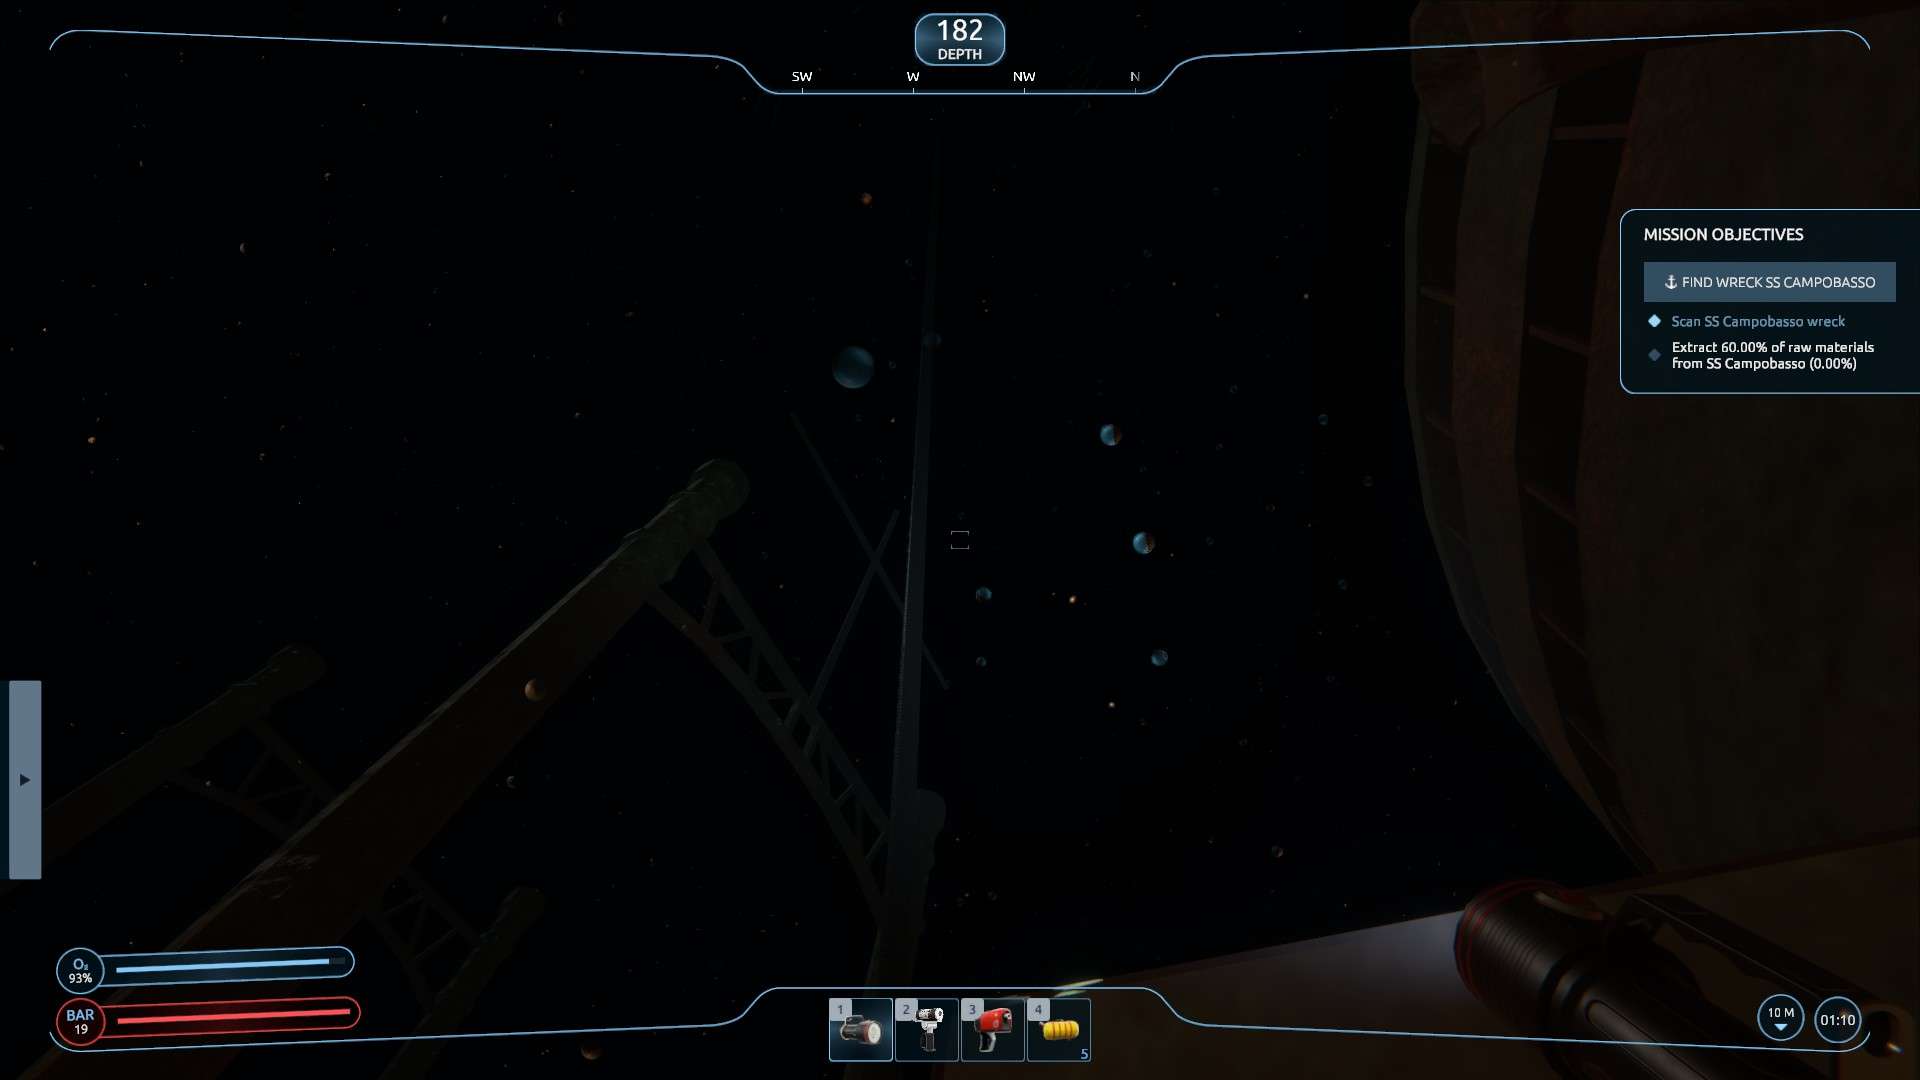
Dive down to the wreck and determine what the mission conditions are.

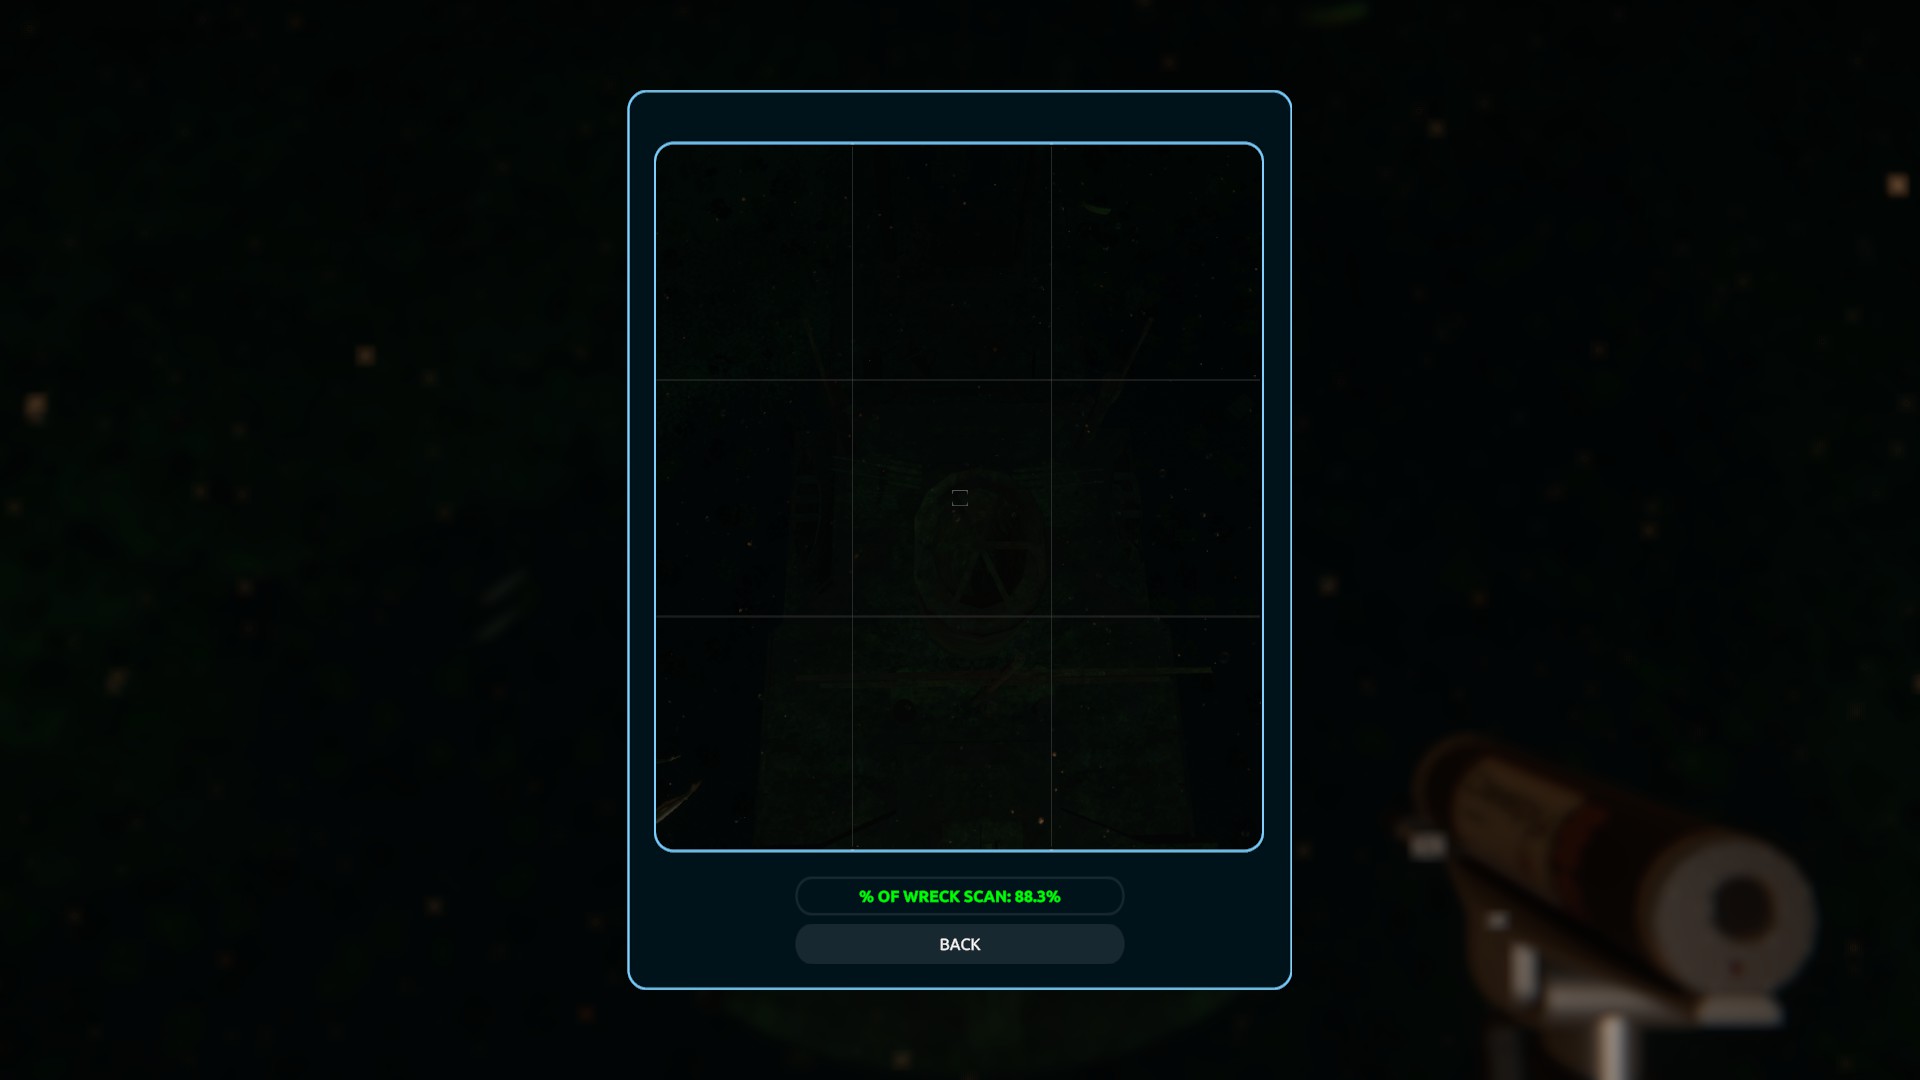
In this case, the contract calls for a wreck scan and 60% raw material resource extraction.
The scan is quite straightforward, equipping and selecting the Laser Tool and activating it from a depth that captures an adequate amount of the vessel.
Down to business. Extraction of the raw material resources.
First, you’ll want to search the top deck area of the wreck for a cargo hatch. These seem to be a slightly different color and texture than the rest of the ship (in this case, brown with an anti-aircraft gun on top of it– a strange arrangement for a cargo hatch).

If you approach it more closely, you will see a notice appear indicating it is a raw material container with instructions for marking the hatch for extraction.

Now, this is the tricky and irritating part. It does not say anywhere in the game (as far as I could see, anyway) and it is not intuitive, but: you must mark the container where highlighted with BOTH a GPS dart AND a scanner dart. I tested this theory by trying and eliminating things one at a time, and this was the only thing that worked across two separate wrecks. The GPS gun has an indicator light; the yellow is the GPS dart, and the green is the Scan dart.

Another sneaky thing is that there are sometimes multiple cargo holds; this ship had four of them, in fact. You have to check the whole deck. I zoomed out to show the four distinct cargo hatches, each with two darts (one yellow, one green).

With your cargo holds tagged, you can now return to your expedition ship on the surface and take the helm again (press [F] in front of the steering wheel) and then toggle the third-person view with [V].
From this screen, something will now be different if you select the “Extraction Mode” button on the right side of the screen. When you select it, there should now be a series of blue circles on the surface of the water and some new information on the info panel. The blue circles indicate the position on the seafloor of your marked cargo holds. Also, a rectangle beneath your ship’s crane will have turned from orange to green if you are above these circles which tell you that you are in position to extract.


When your ship’s green rectangle is lined up inside the blue ring of circles, exit the bridge and dive again. Note: Remember to make sure your anchor is deployed and the crane is extended before you leave, or you’ll have to come back to the ship. Return to the wreck and the cargo hatch and a slightly different information pop-up should appear that tells you to connect the container [to the extraction hose]. When you press [F], the hose to the ship will appear.


Follow the hose to the surface, and you’ll see you are all connected and ready to extract.

Return to the bridge, take the helm, and select the third-person ship view again. Selecting the extraction tool button, you will now be able to select an extraction container from the list. Make sure your anchor is deployed and the lift expanded. Choosing the one to which your hose is attached will prompt a “Start” button on the left side of your screen. Click it, and wait for the resources to be depleted. If there are multiple cargo holds, lather, rinse, and repeat until finished. Note: you do have to return to the wreck and detach the extraction hose…


Congratulations! With any luck, you have completed your objectives. Mission completed.

Be the first to comment