
This is an in-depth guide for Kingdom Rush 1 that I originally wrote as a reference for myself, but that I decided to share after I discovered the great deal of strategic and mechanical depth present in Kingdom Rush 1, which many people may not be aware of.
Strategy and Tips
General Game Strategy: Level Opening
The start of a level is often the most important and strategic point in Kingdom Rush. How you’ll want to start and place/upgrade towers will often depend on the level itself, where the natural chokepoints are, what enemies you have to deal with in the first wave and level as a whole, etc. As a general rule it’s often a good idea to go for a number of nonupgraded Melee Towers covering a strategic chokepoint to start, and then sell most of them later for room/money. Be sure to upgrade the Melee Towers that you actually intend to keep as soon as the soldiers start dying and the enemies start to push through, as this immediately respawns the soldiers. Artillery Towers often go great with Melee Towers, as the latter will bunch of enemies so the former can get max Area of Effect damage on all of them. The nonupgraded Melee Towers combined with Artillery will be capable of holding off the enemies on most levels until you’re able to afford a Tesla Coil with Overcharge or a Big Bertha.
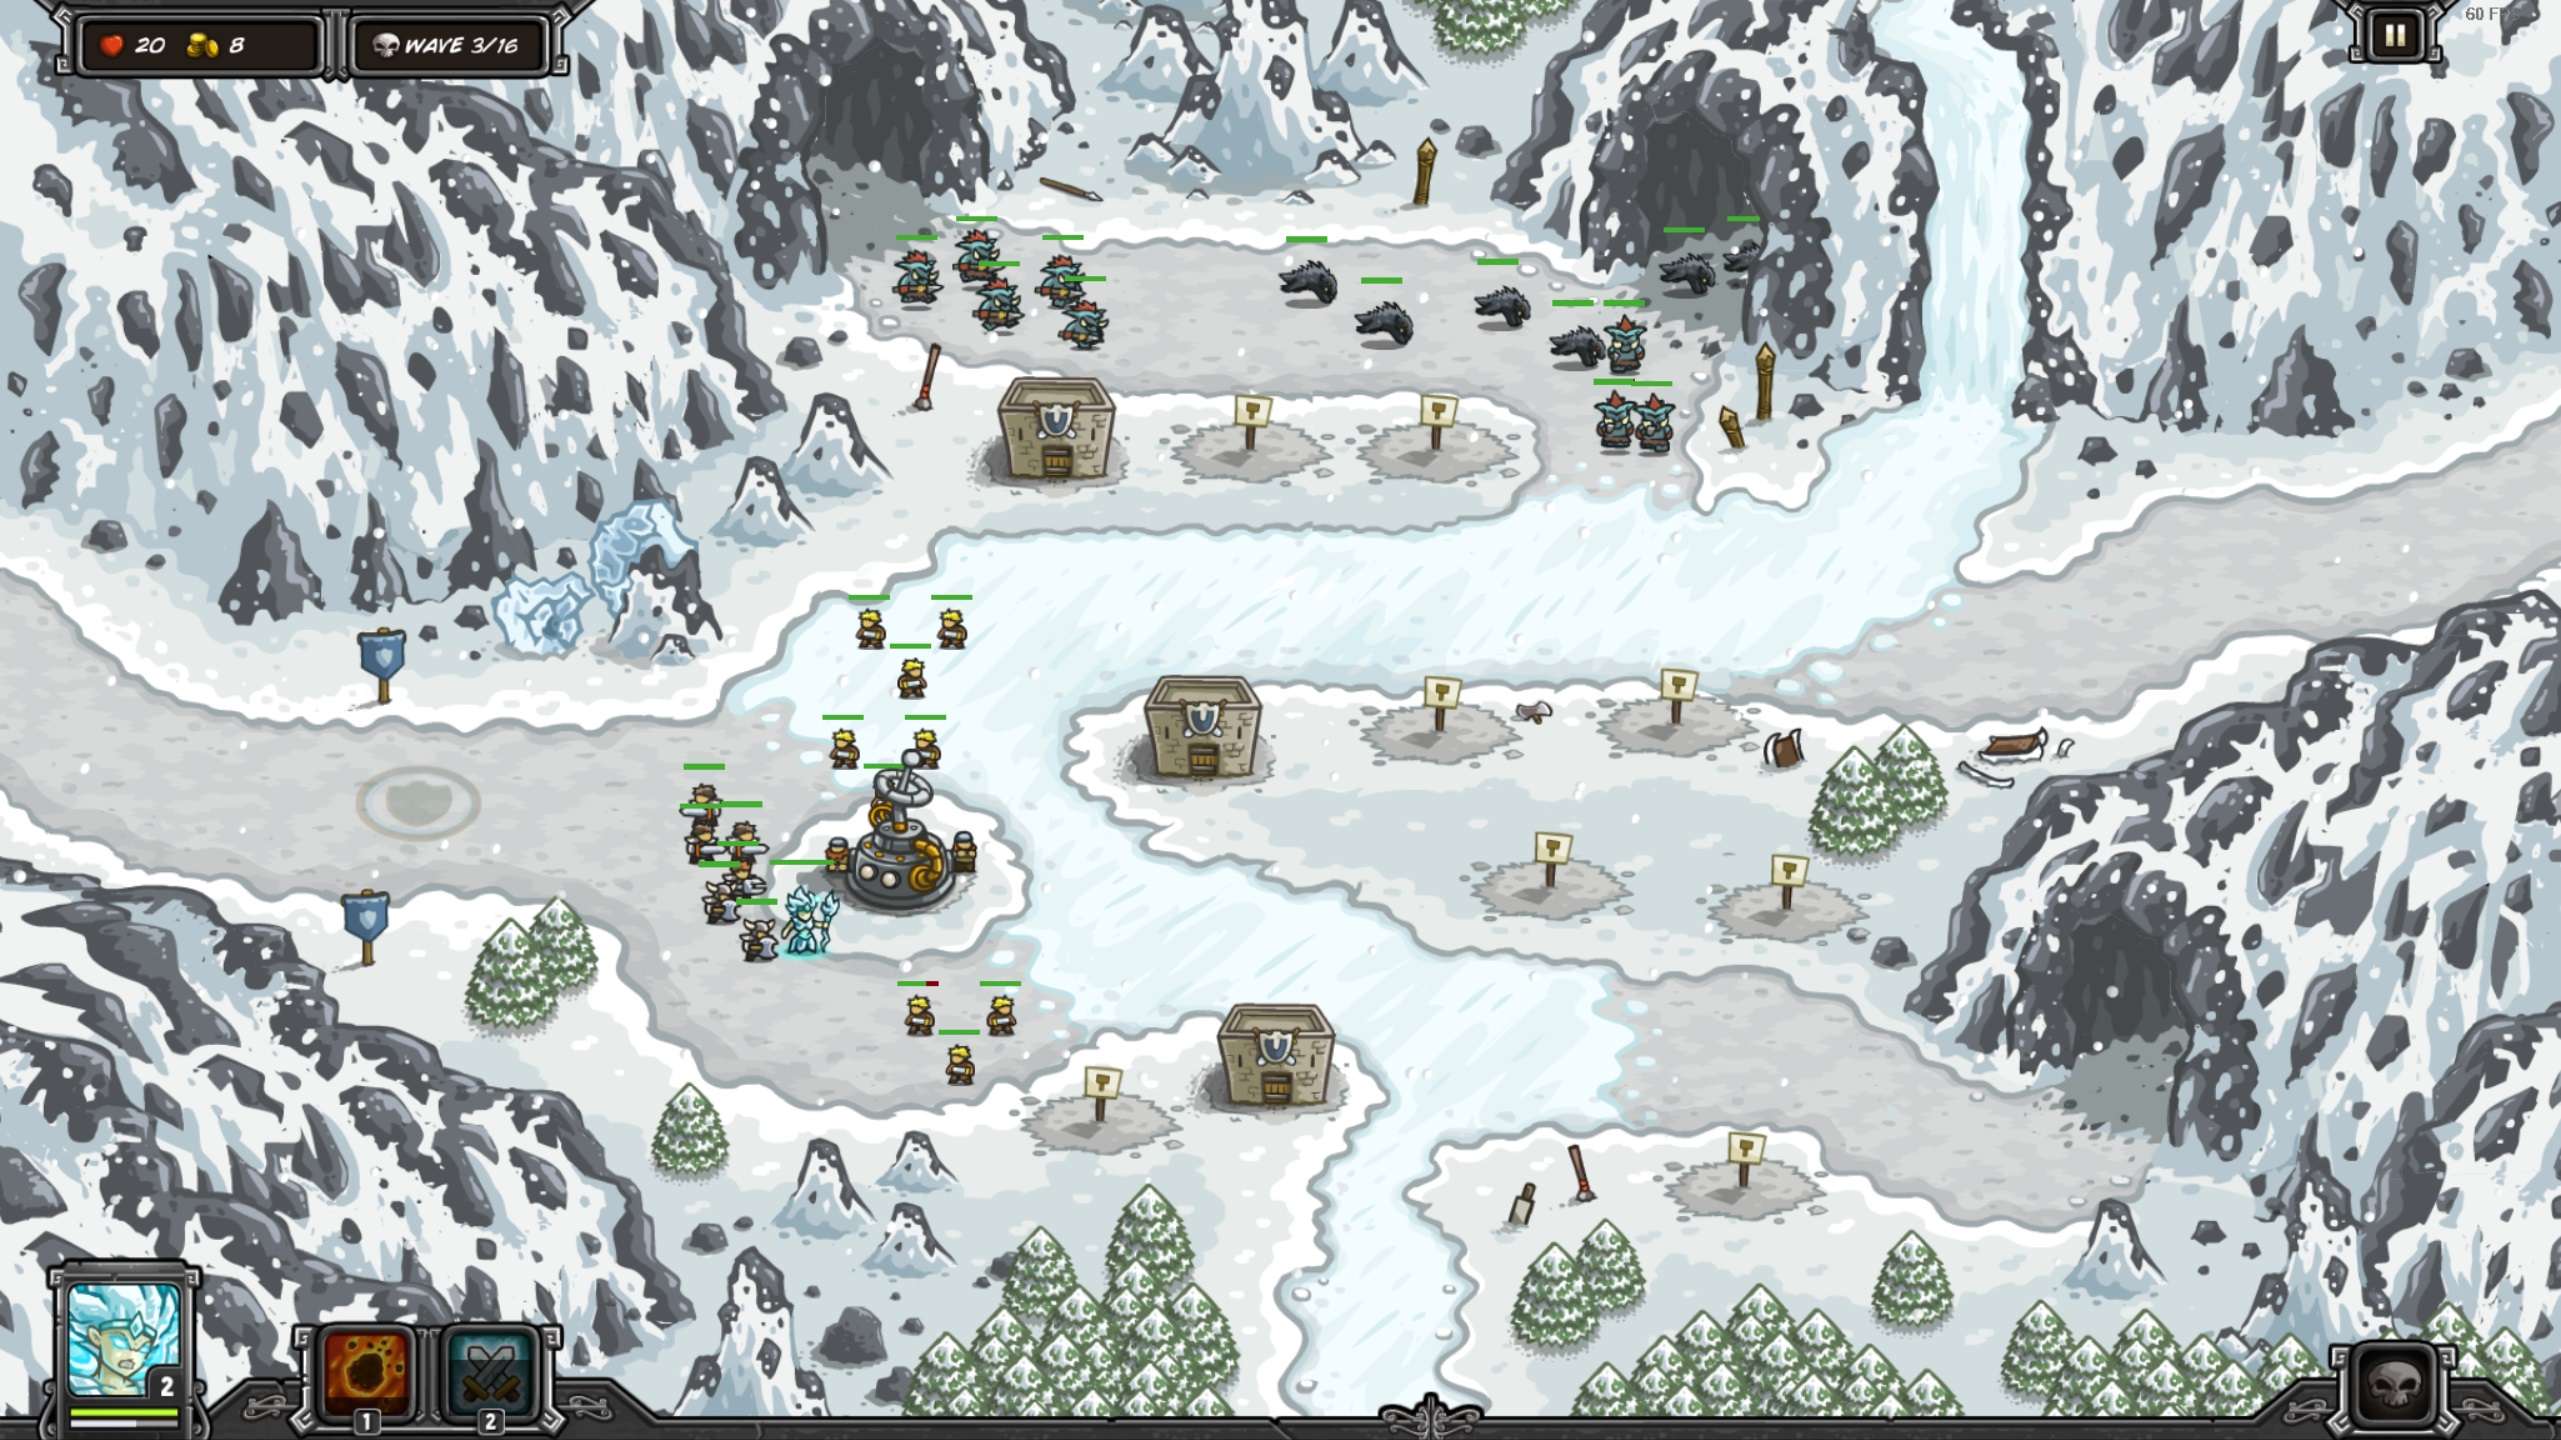
An example of a solid early game tower setup on the ‘Glacial Heights’ Elite Stage on Veteran.
General Game Strategy: Upgrading and Combining Towers
Tesla Coils with Overcharge and the Smart Targeting Star Upgrade plus Paladins with Holy Light and Shield of Valour positioned at a chokepoint are often the best first upgraded towers to get in KR1. Then you can either get some more Tesla Coils and Paladins at other strategic chokepoint(s) in the level, or start spamming Sorcerer Mages with a single point in their Earth Elemental summon ability; waiting to upgrade this more until the Earth Elemental is near death, since they get full health every time you upgrade this ability. Putting one point in the Polymorph ability is also useful if you have to deal with a lot of extremely tough enemies, though keep in mind you will have to spam-click the sheep to death quickly, as they cannot be blocked by ground units and are relatively fast. Placing a single Rangers Hideout with Wrath of the Forest vines fully upgraded near your stalling and offensive towers is also very powerful for crowd control, and Poison Arrows is a strong damaging ability for the cost, especially since poison Damage Over Time ignores armour and can be spread to lots of small enemies at once for huge Damage Per Second potential. Both of these abilities also disable the health regeneration of all trolls, werewolves, Lycans, and Swamp Thing. Note, however, that any given enemy can only be vine ensnared up to 3 times, and poison does not stack with itself, and thus you generally don’t want more than one upgraded Rangers Hideout at a time.
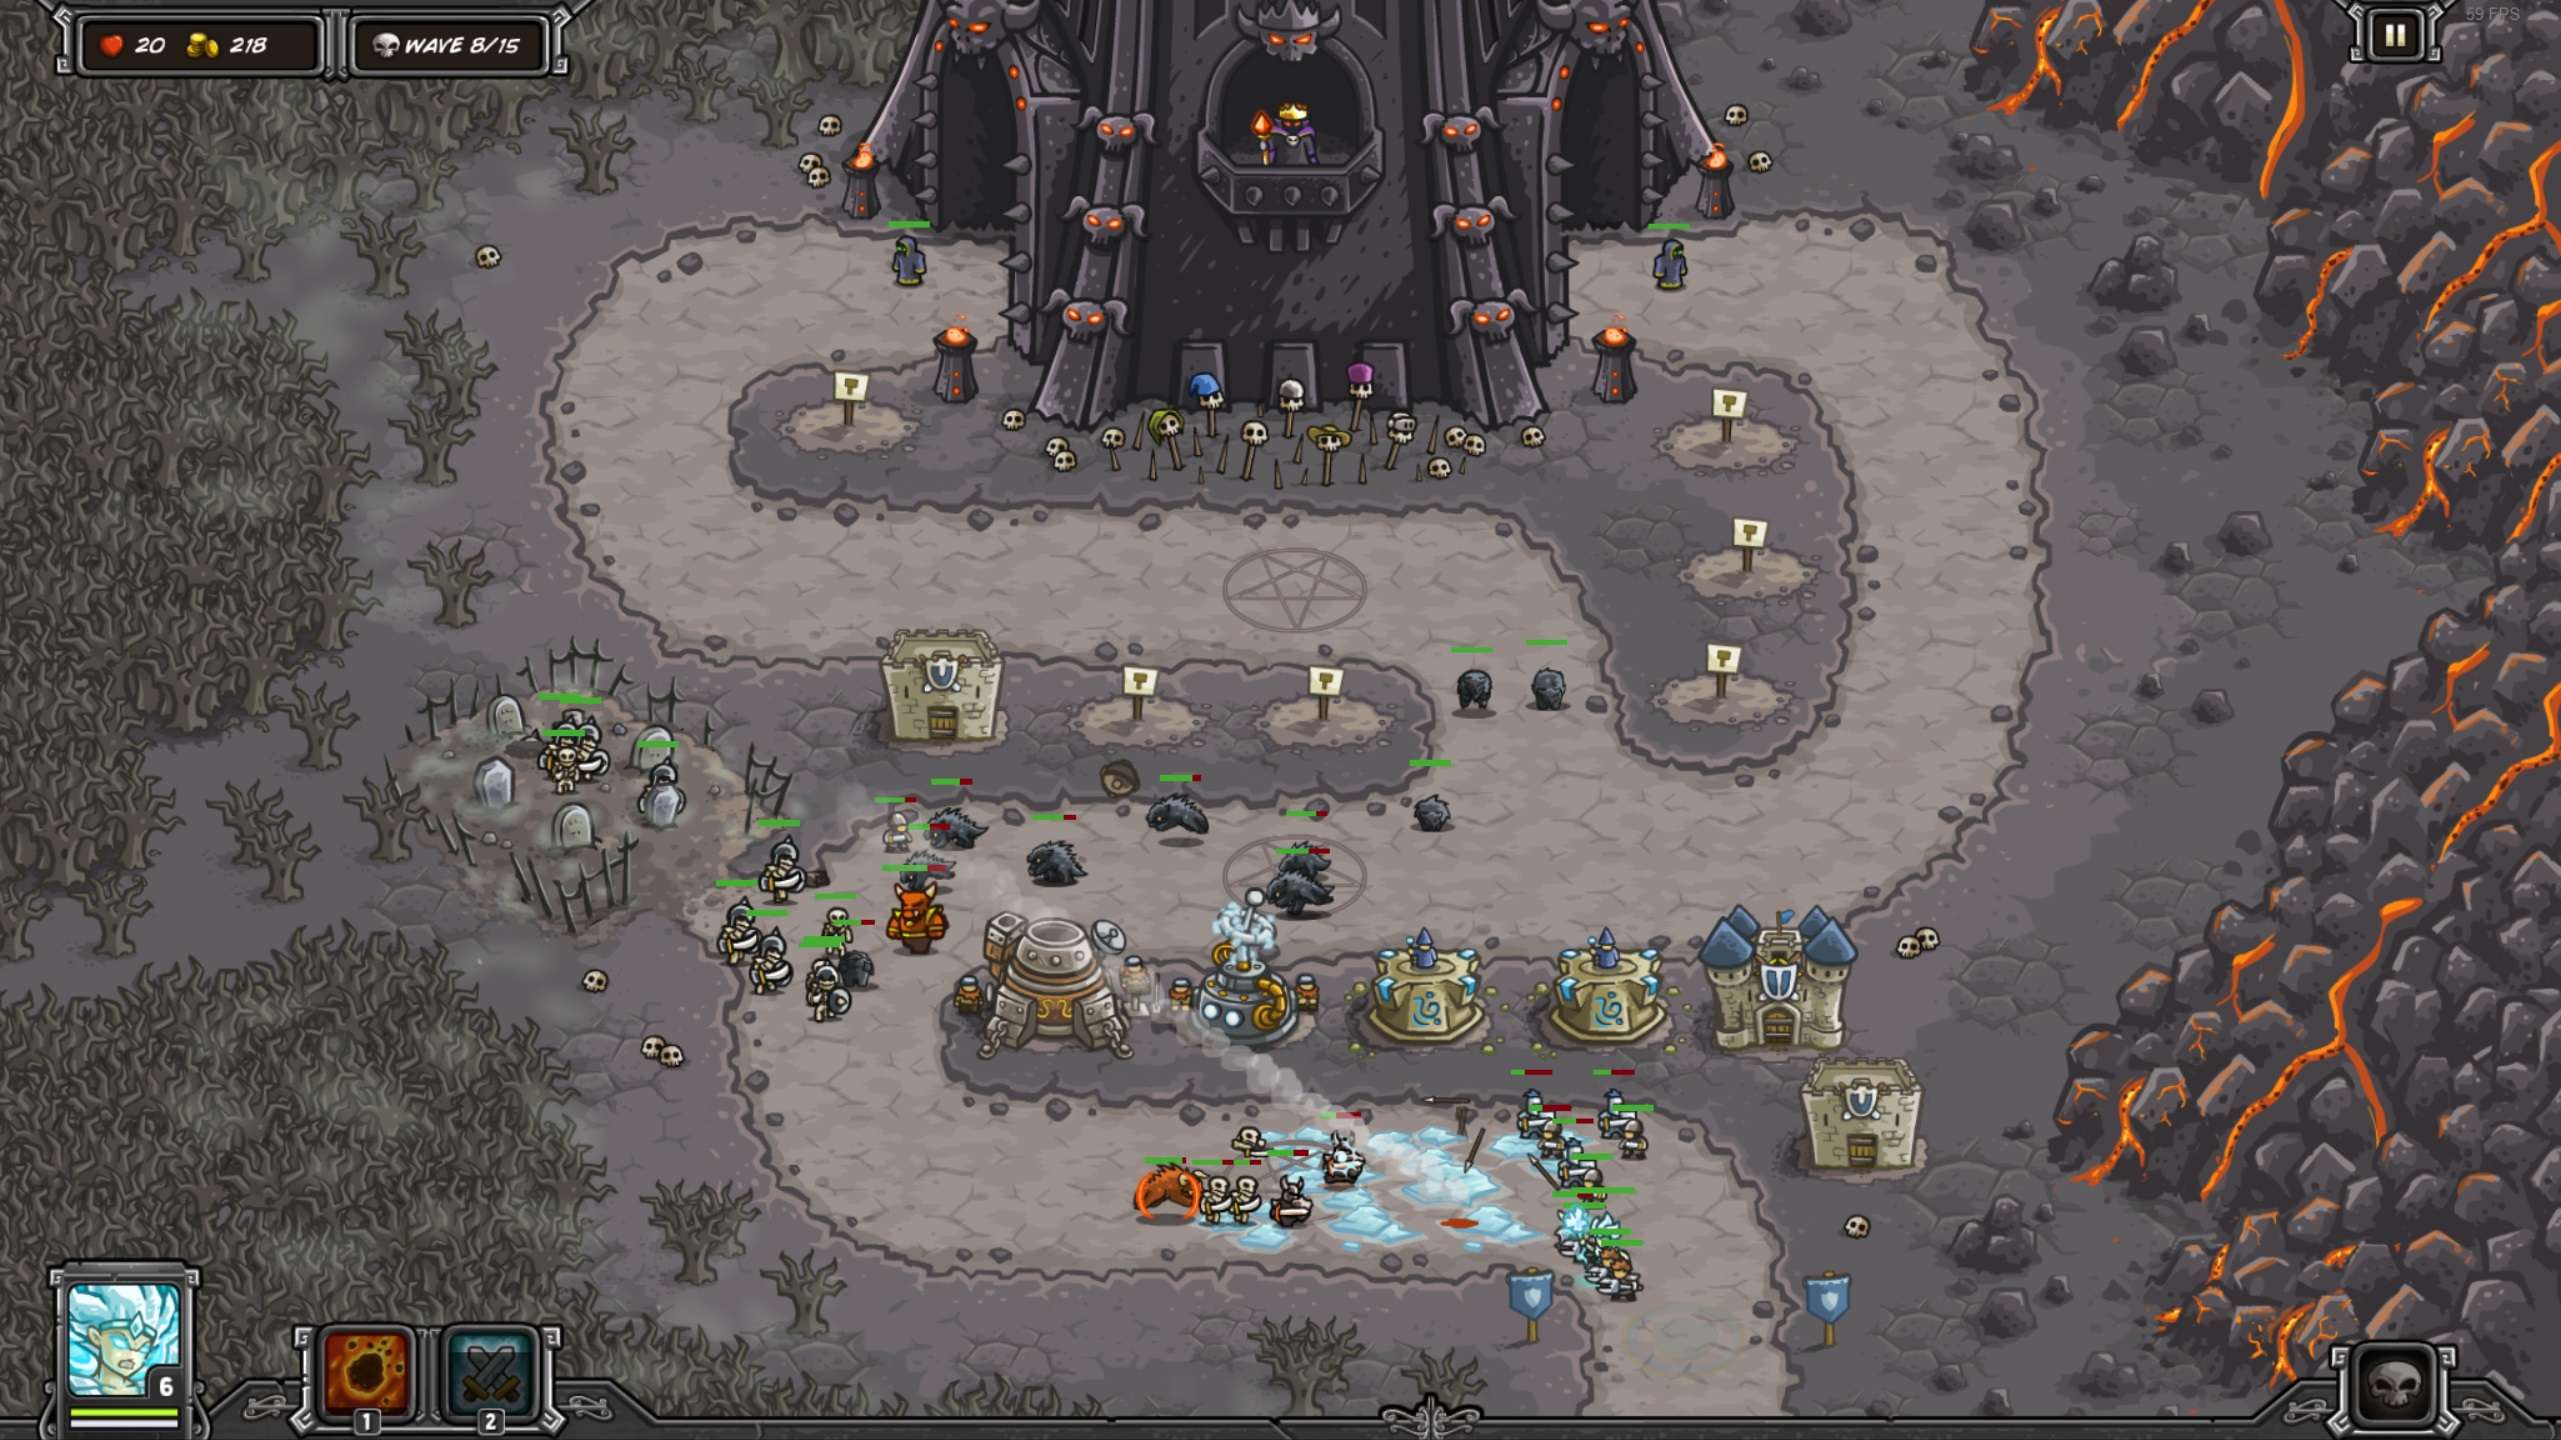
My mid-game setup on ‘The Dark Tower’ Veteran.
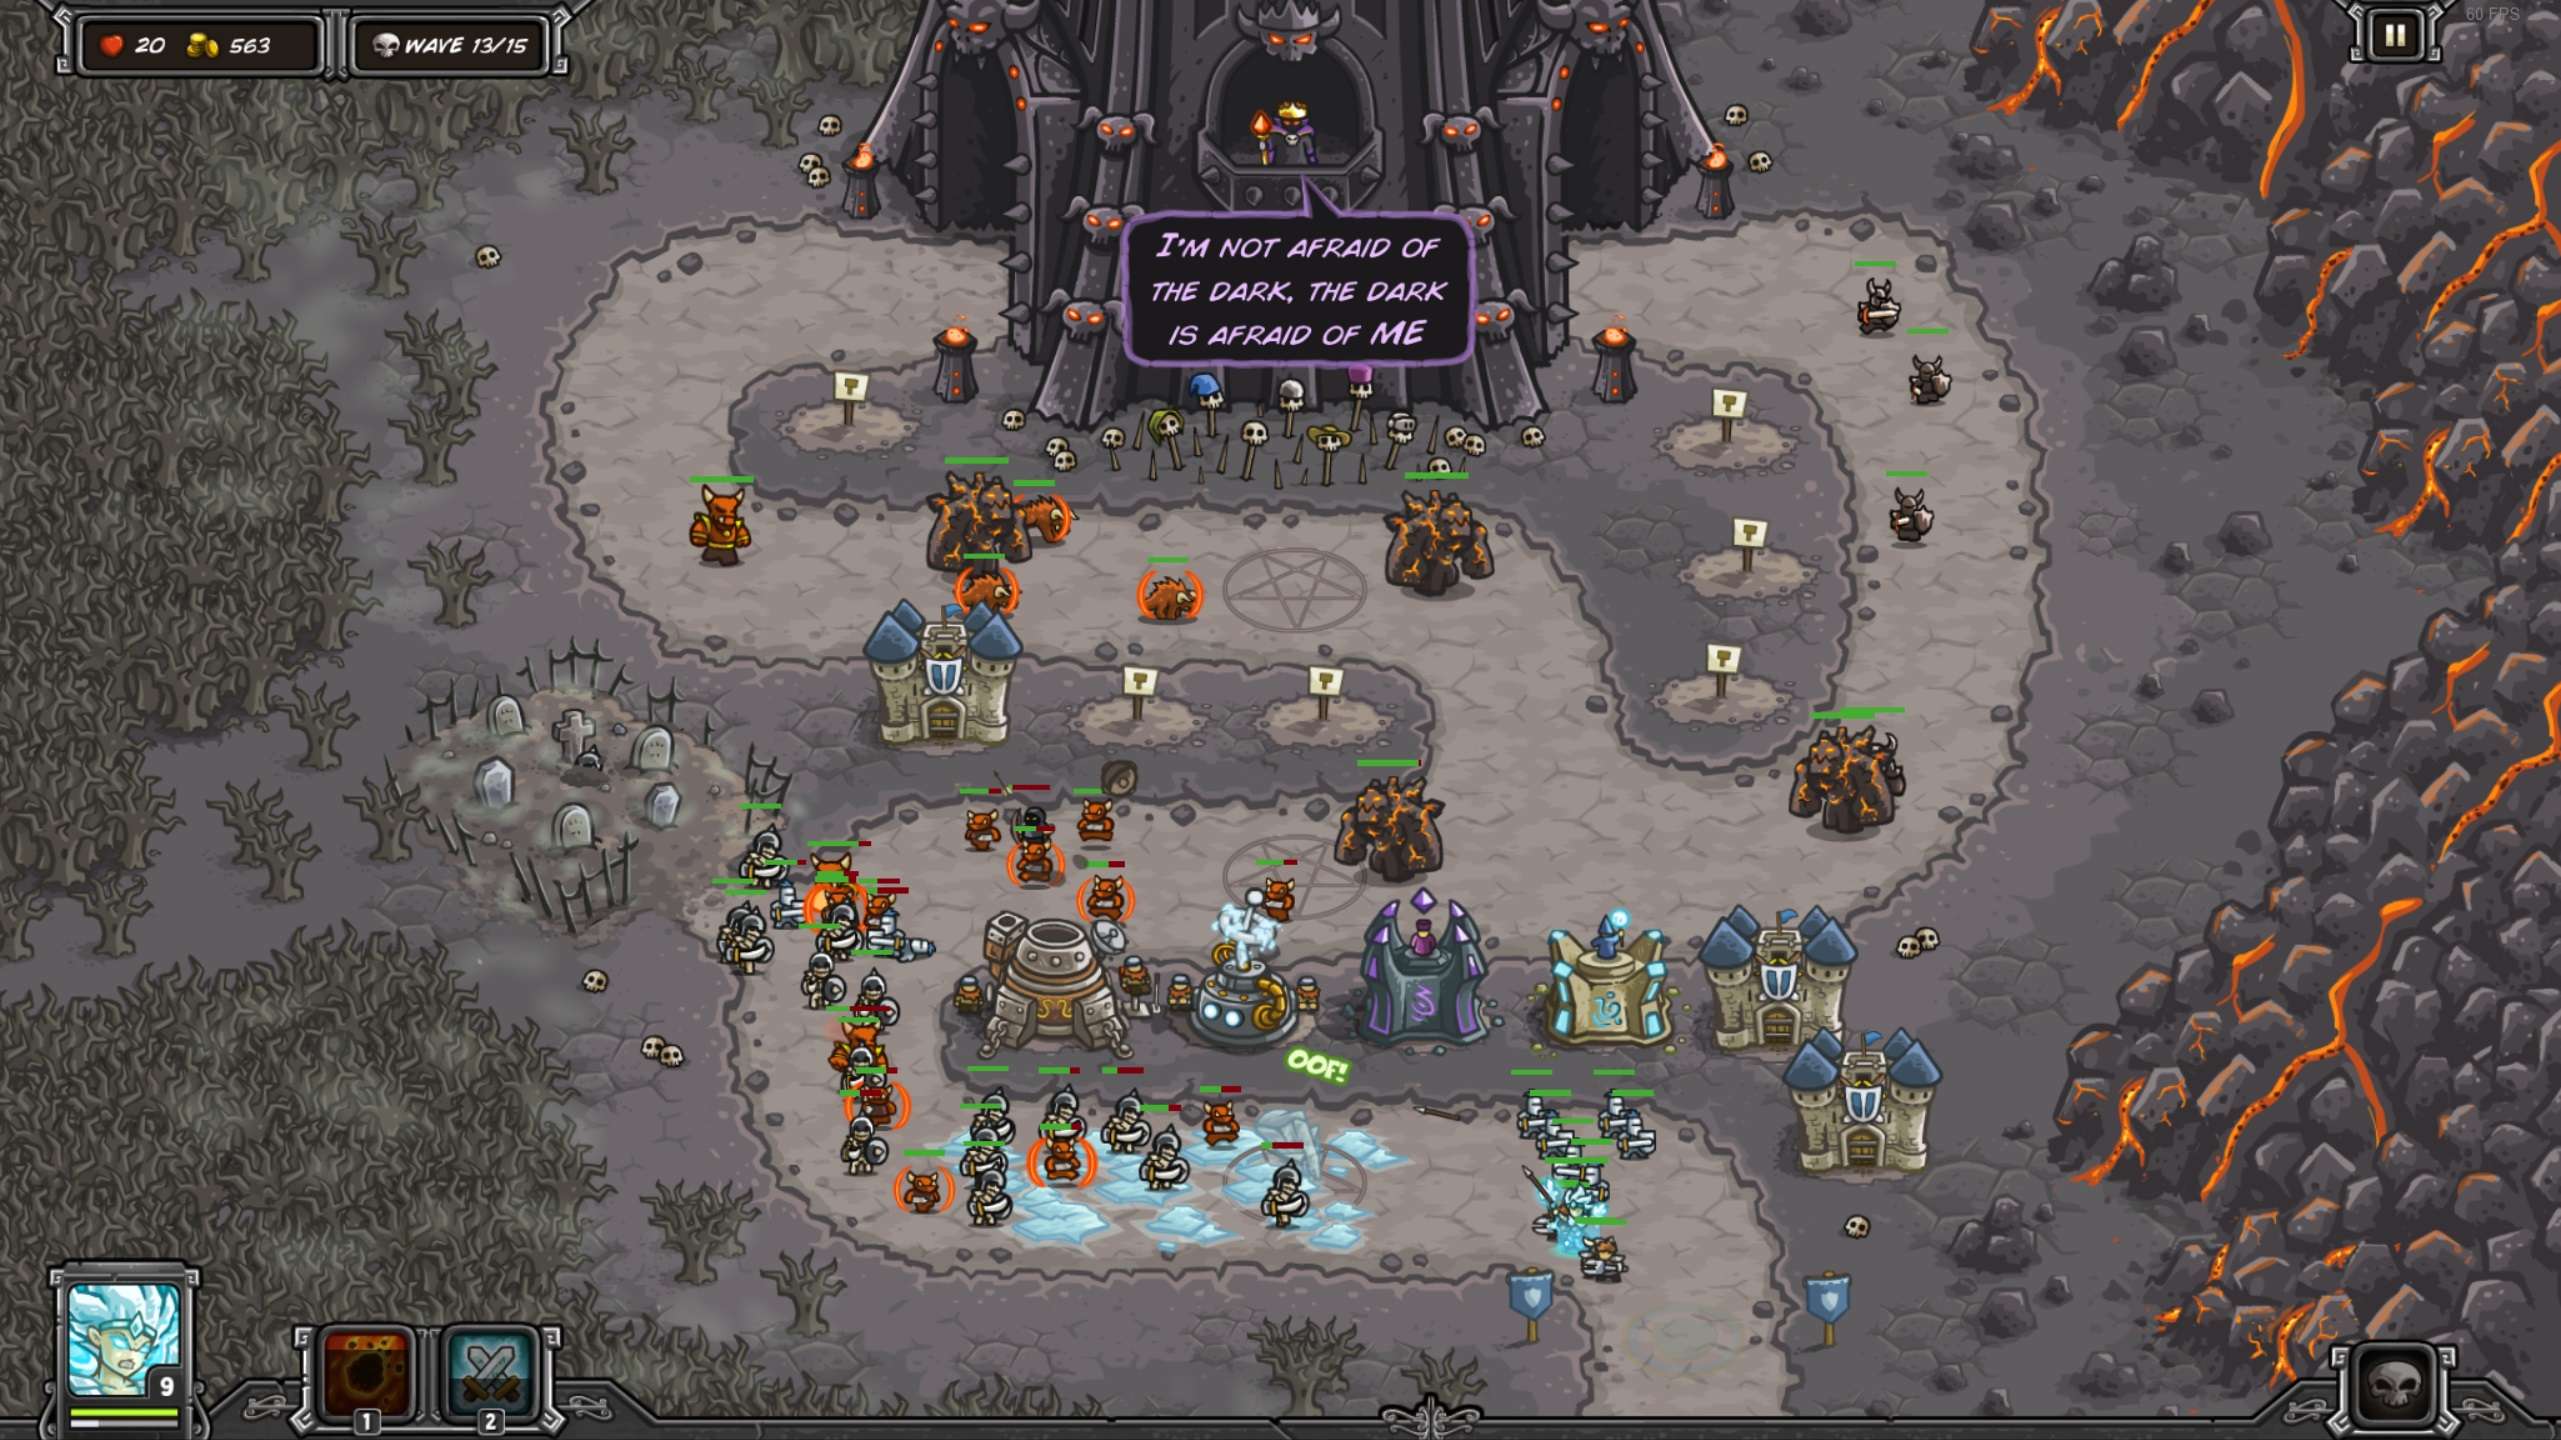
My late-game setup on ‘The Dark Tower’ Veteran.
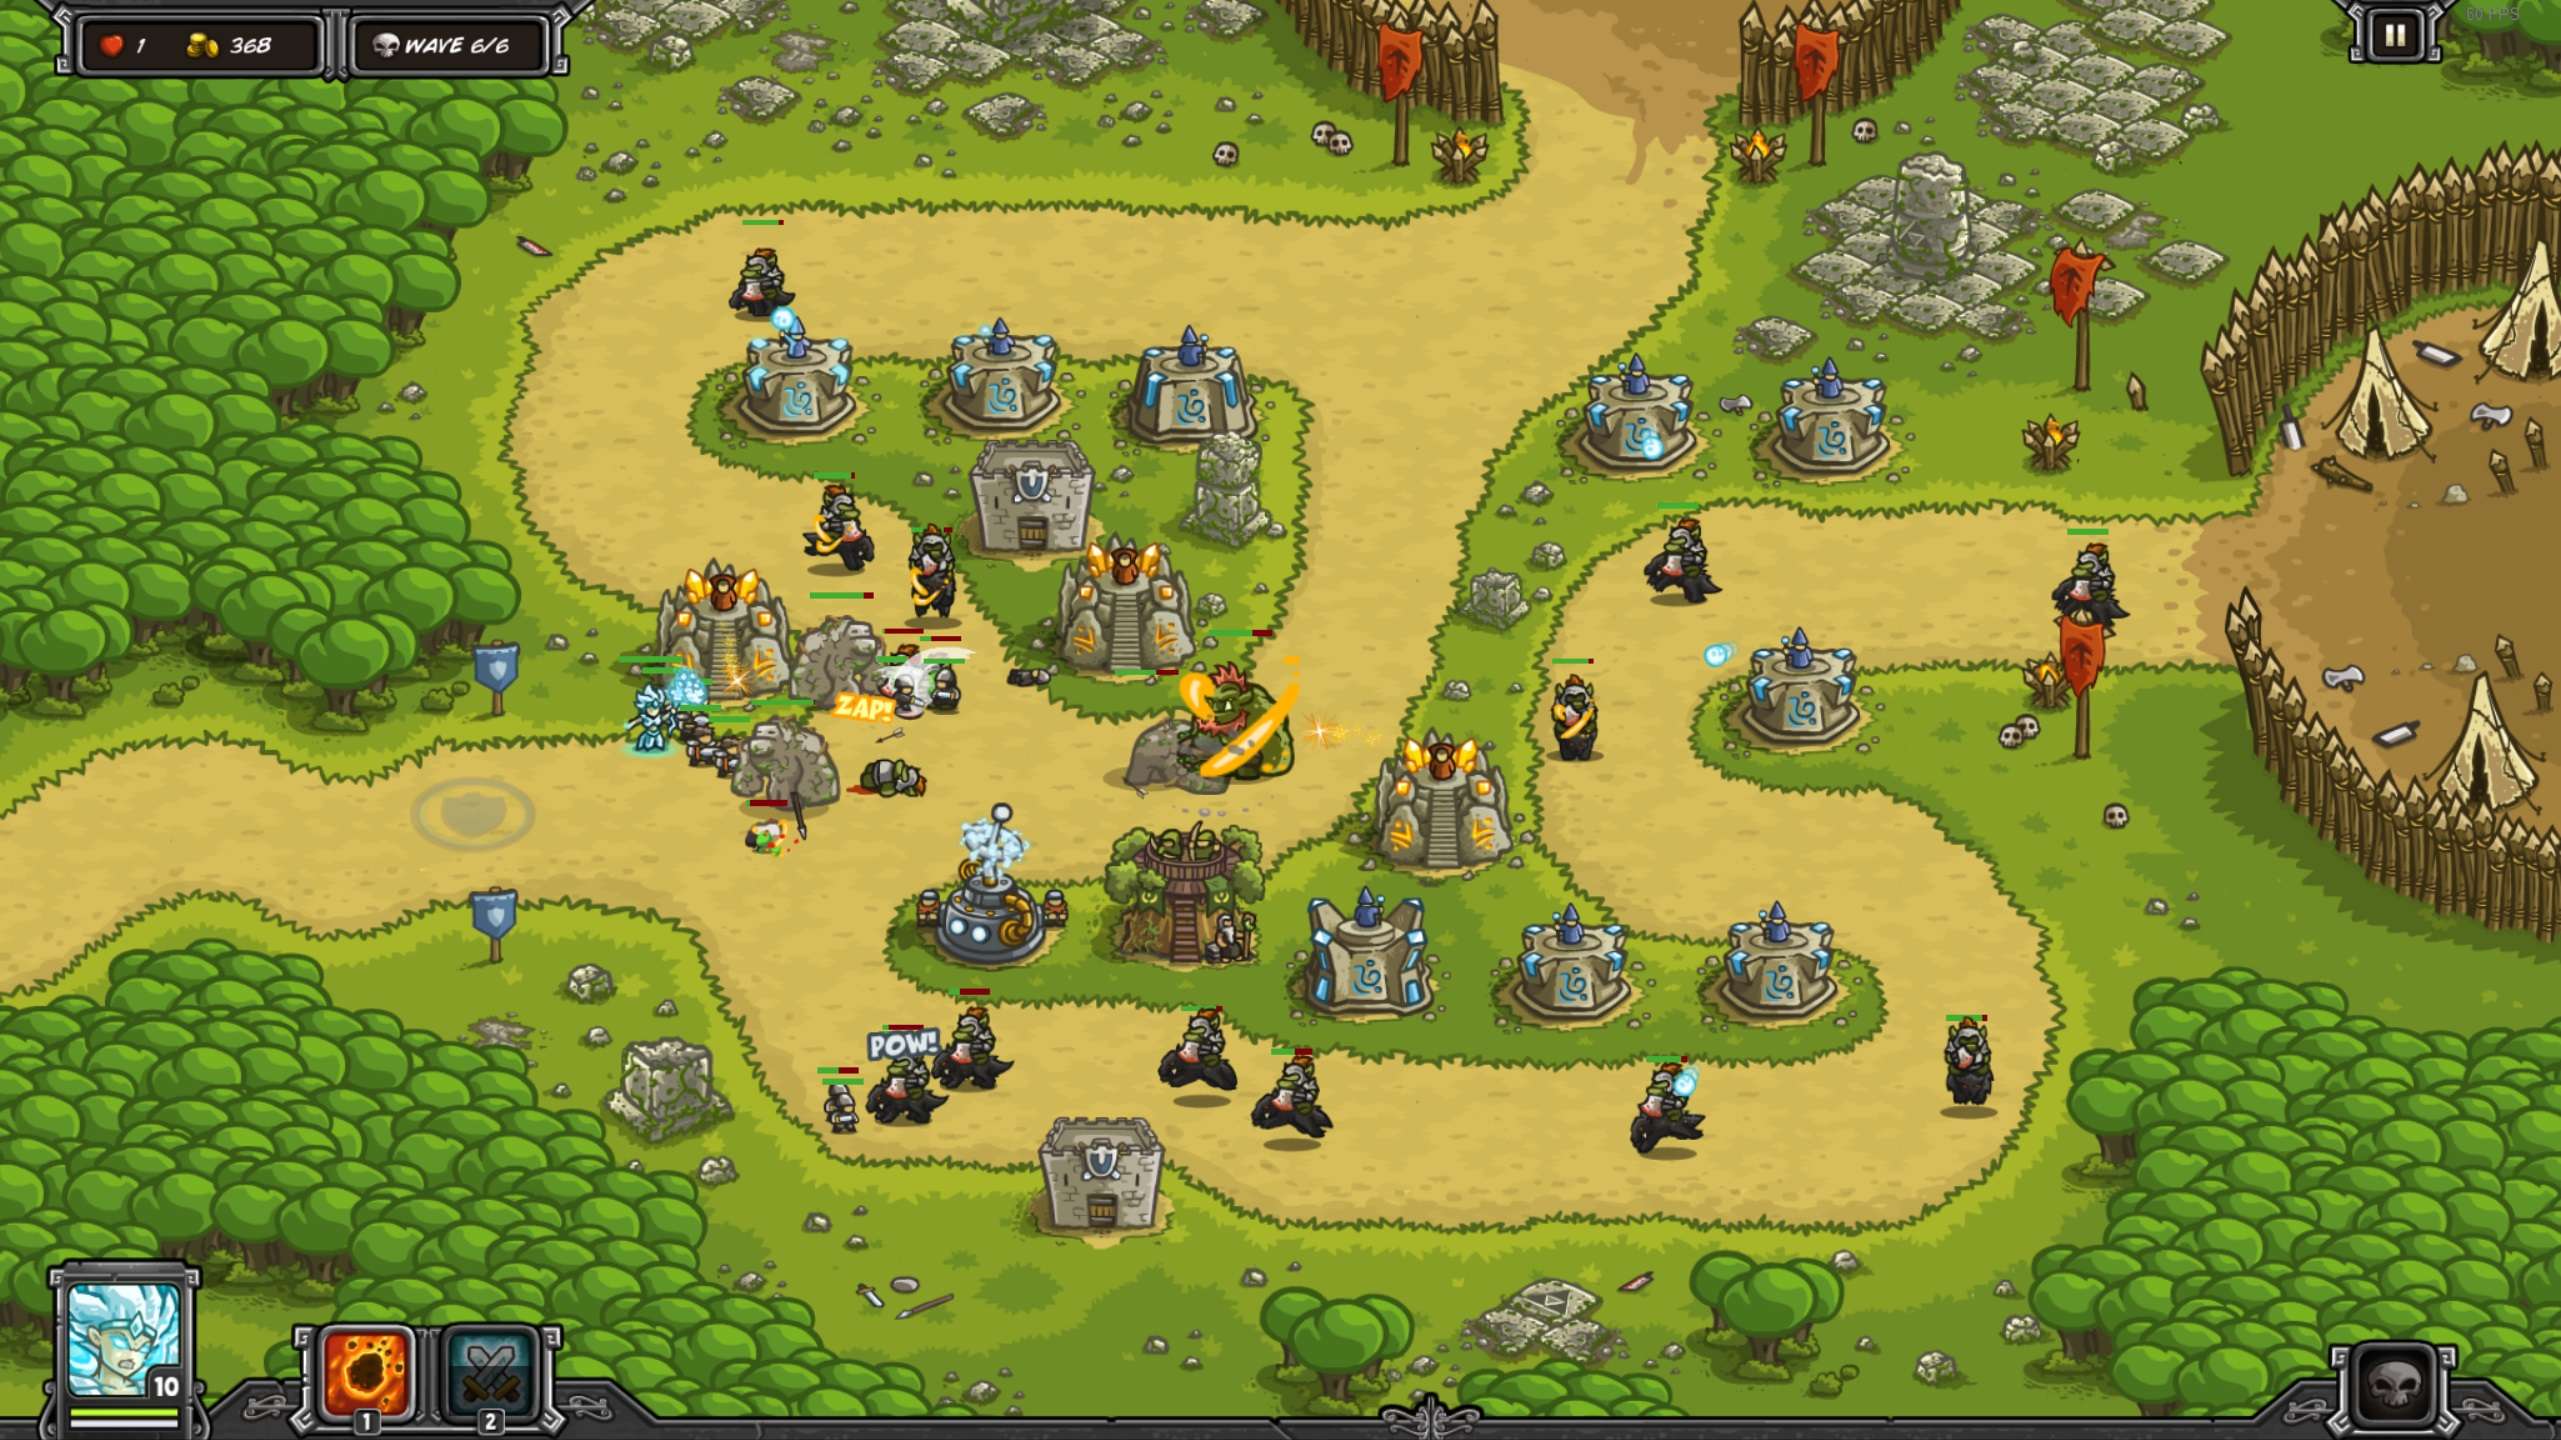
My late-game strategy on the ‘Ruins of Acaroth’ Elite Stage’s Heroic Challenge on Veteran.
My late-game strategy on the ‘Rotwick’ Elite Stage on Veteran.
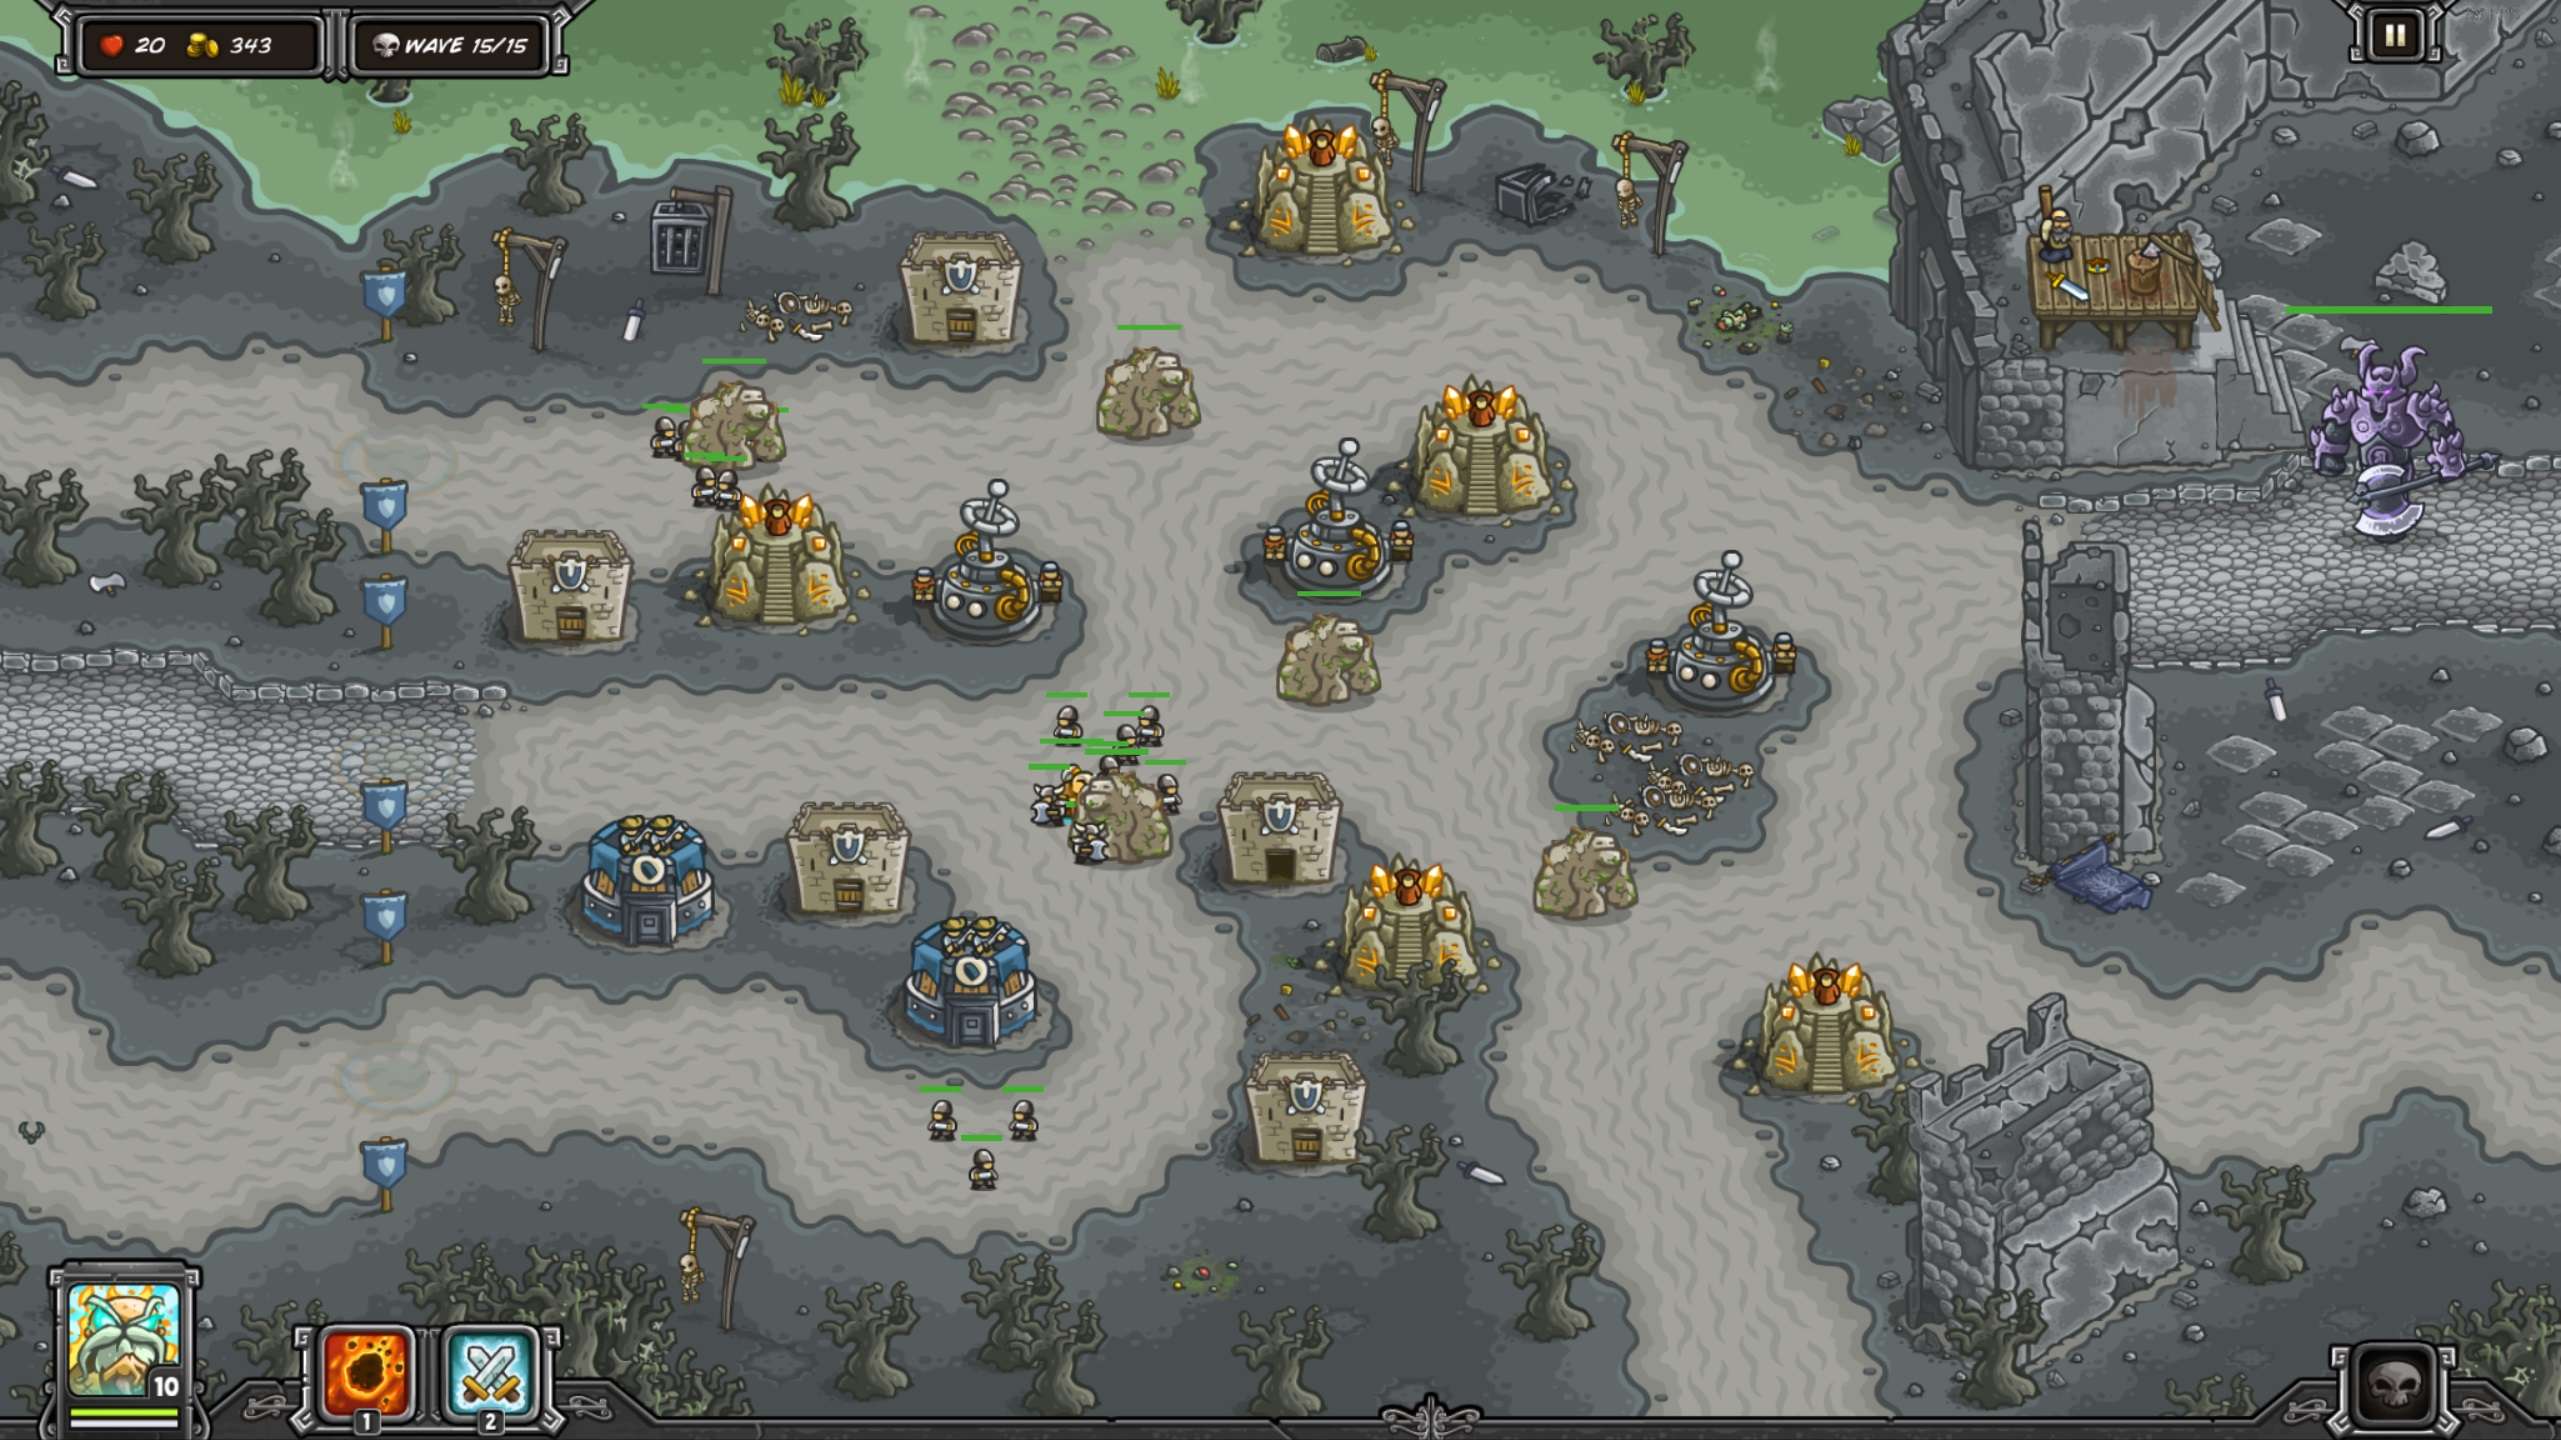
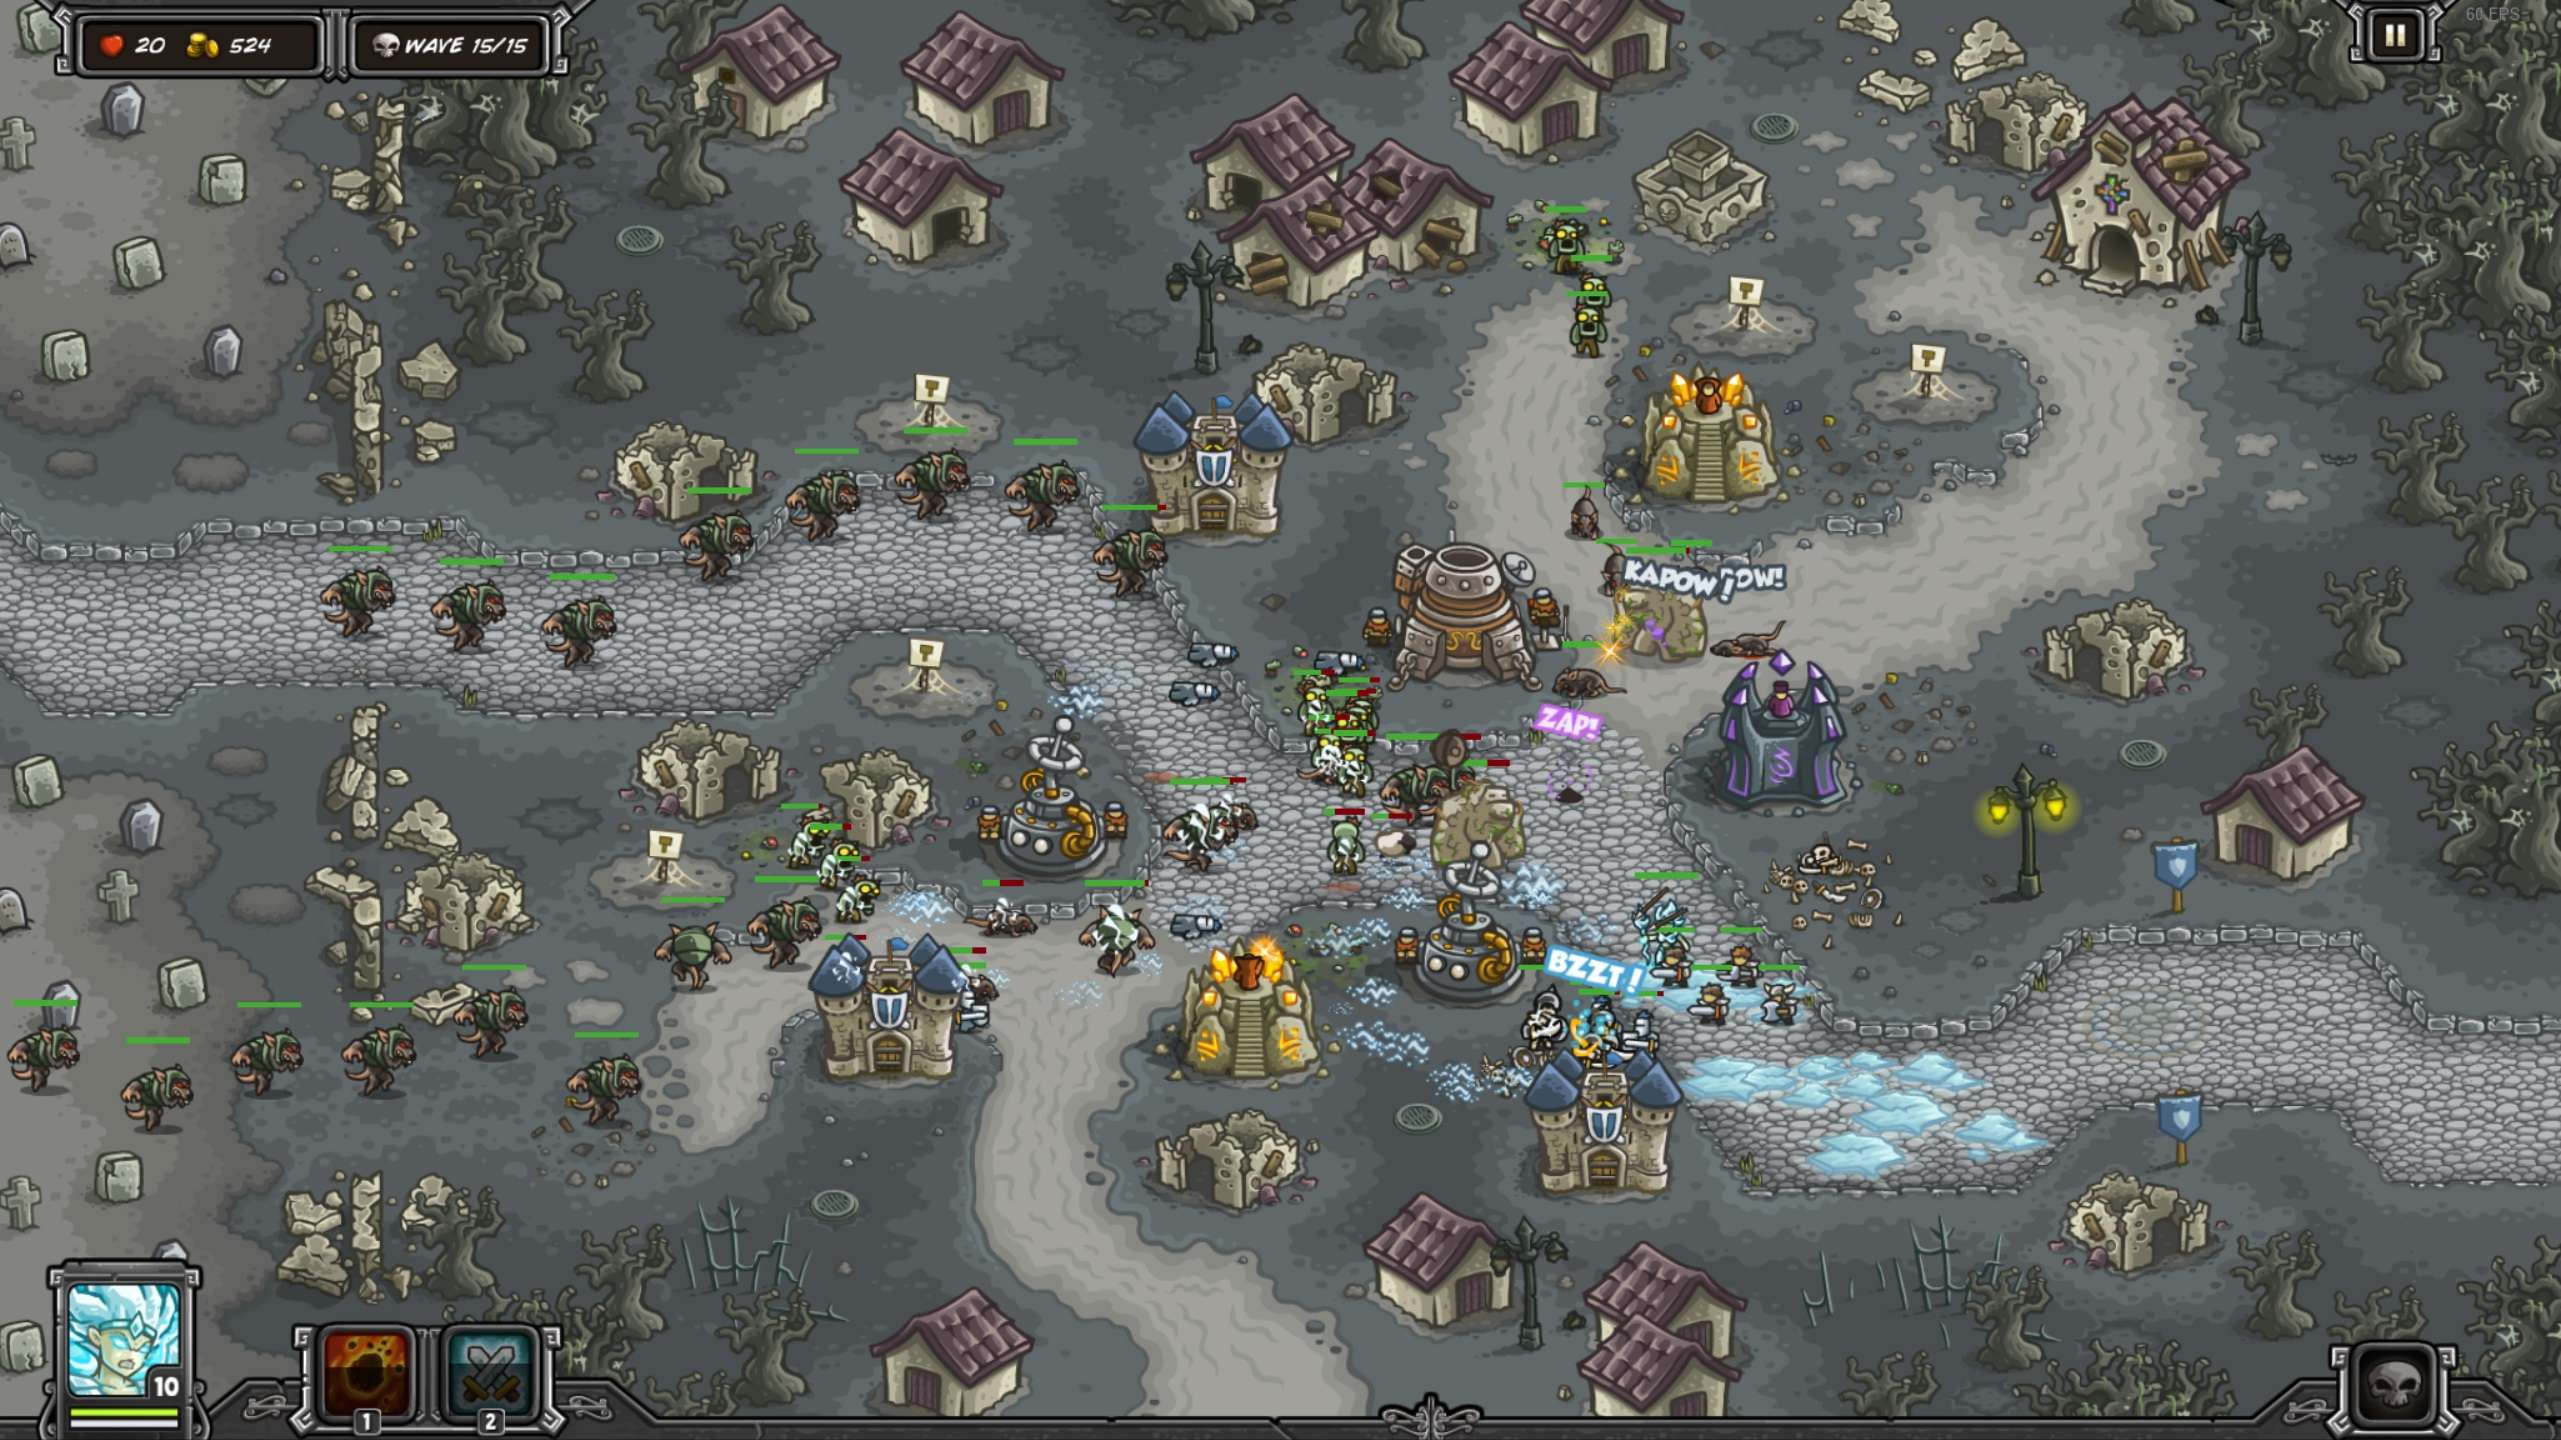
My late-game pre-boss strategy on the ‘Blackburn Castle’ Elite Stage on Veteran.
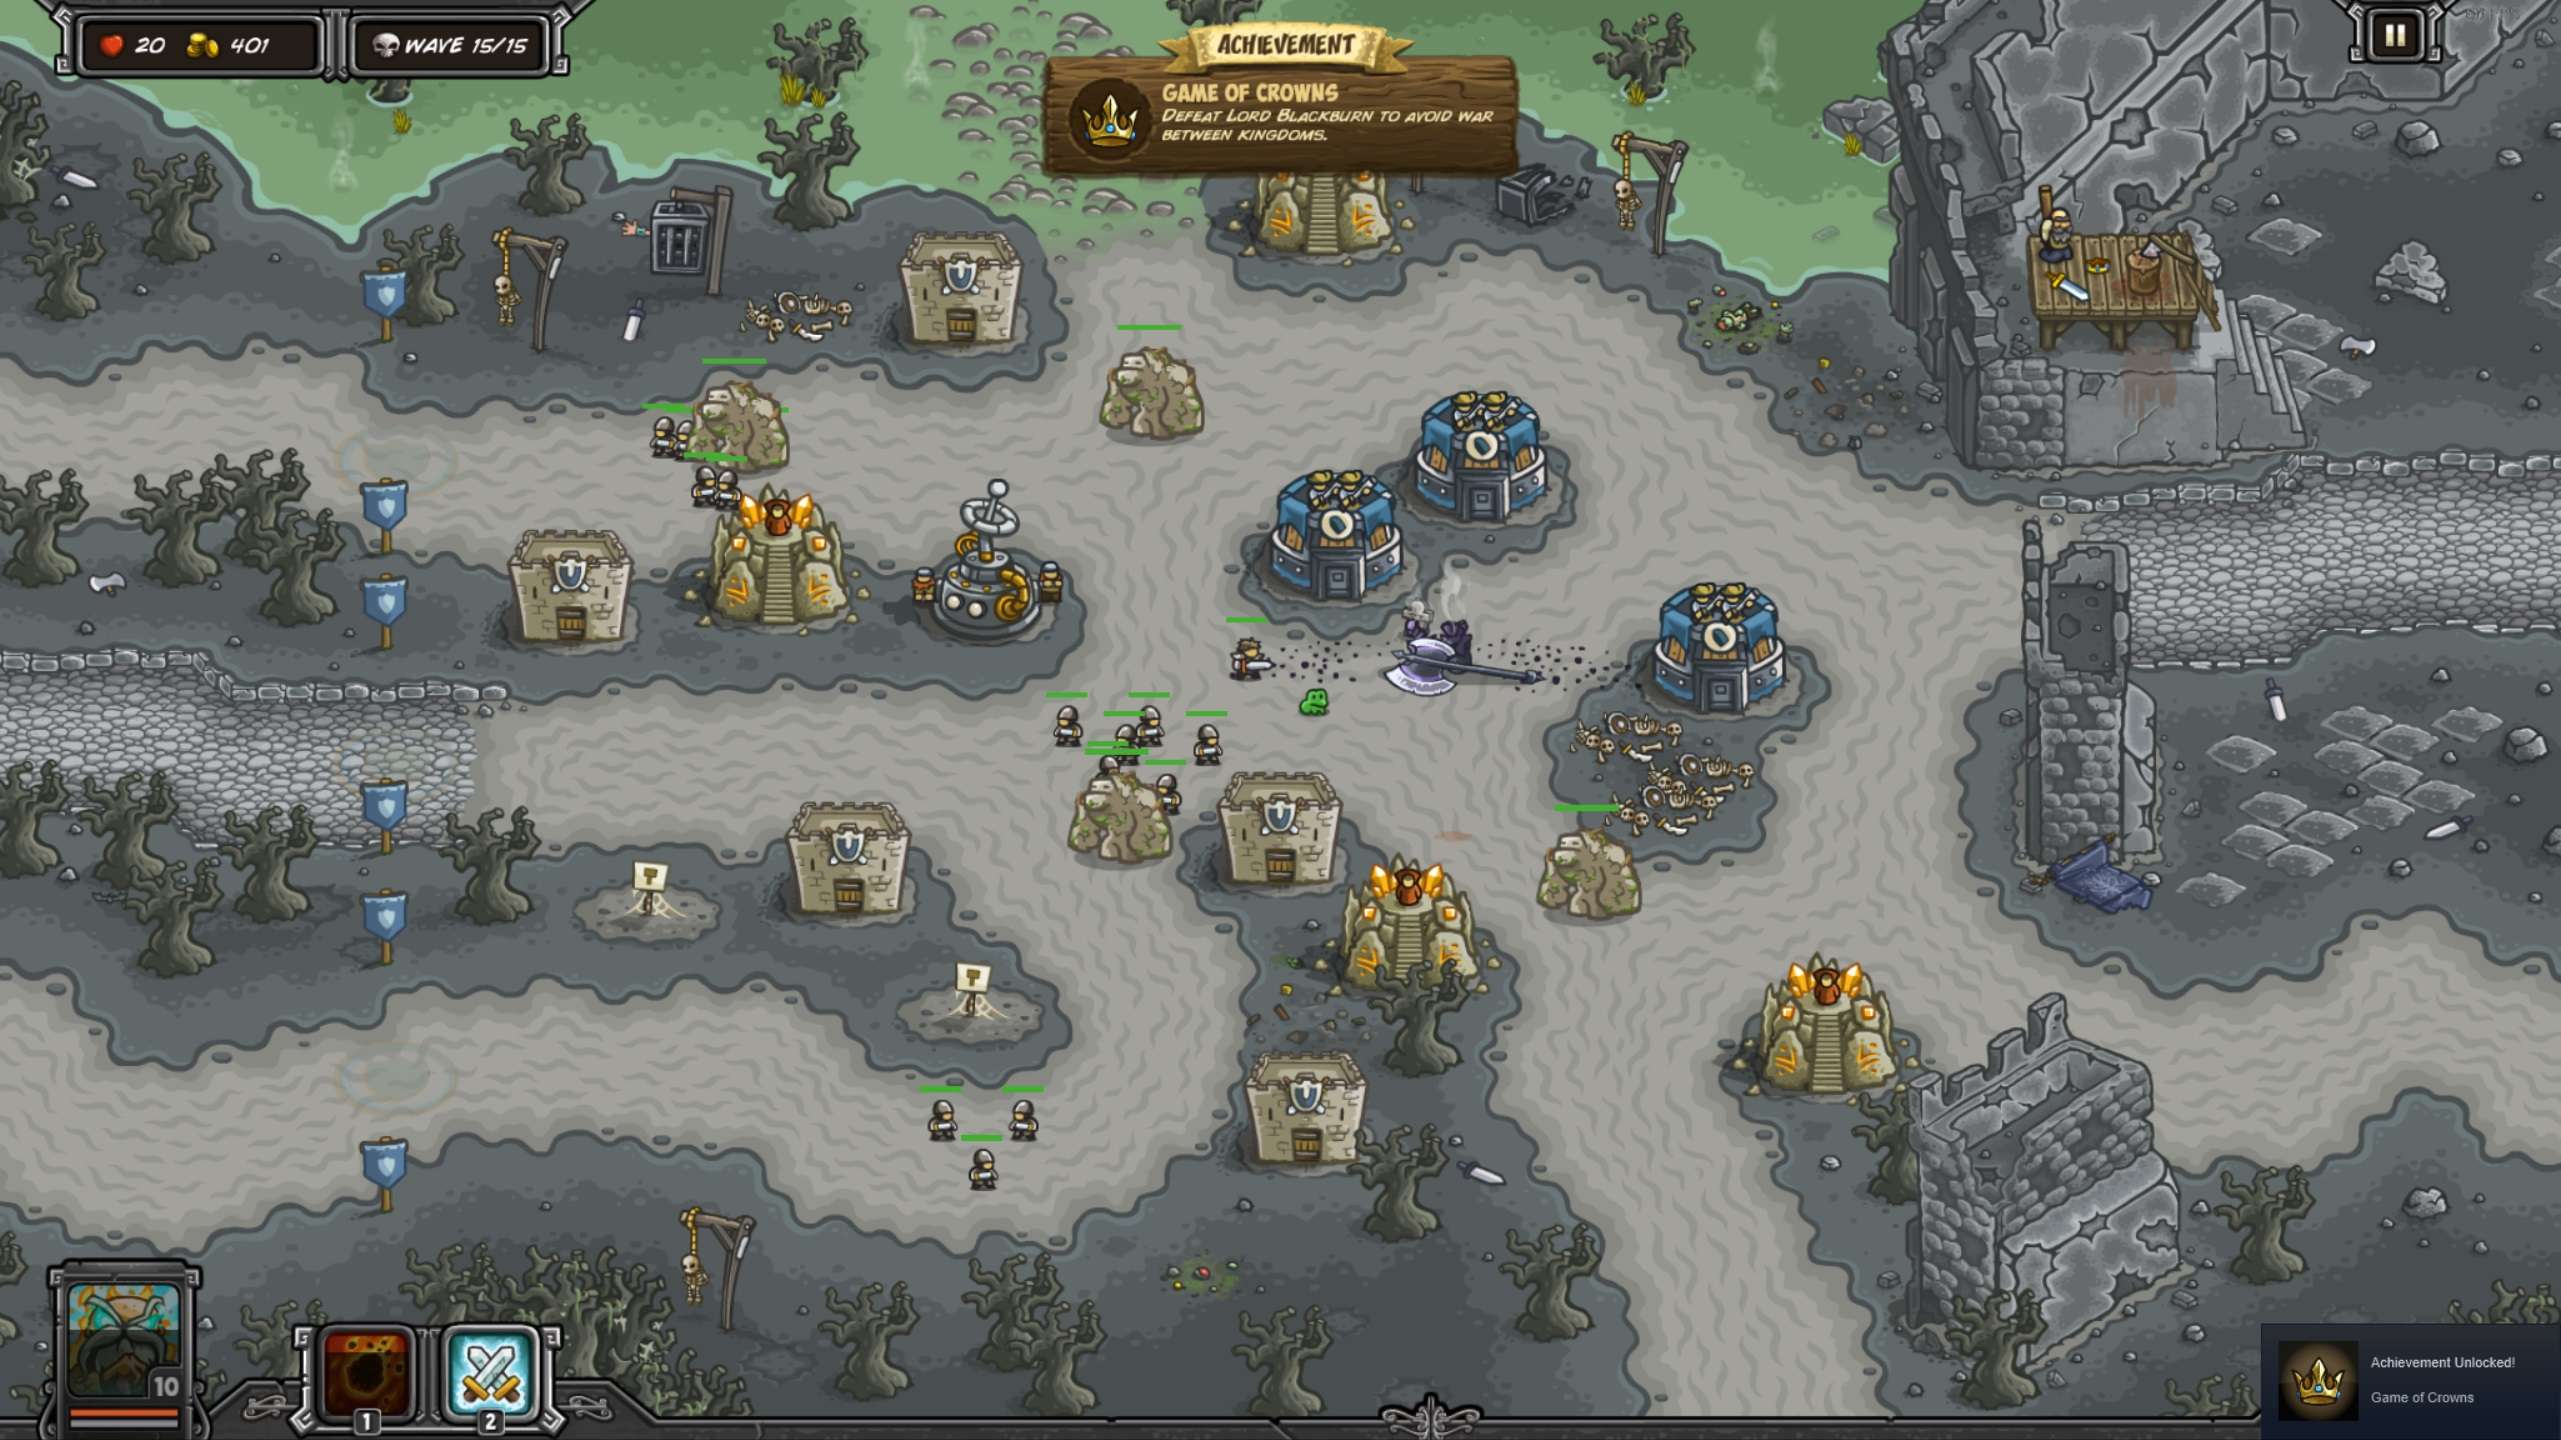
My late-game post-boss strategy on the ‘Blackburn Castle’ Elite Stage on Veteran.
Towers Strategy and Info
- Level 2 Melee Towers are a lot better than level 1, for just a little higher price. Level 3 is a pretty good upgrade from 2, but not as cost effective as Level 1-2 overall. Level 4 Paladins with Holy Light and Shield of Valor are the best for the price in most scenarios, as they’re practically unkillable by most things. Once you get your Melee Towers up to Paladins, you’ll want to invest in 2-3 Holy Light upgrades before you bother with Shield of Valor, as they need the former for sustainment in combat. Holy Strike is generally seen as a waste of money, unless you have an excess of cash or limited tower space at a strategic chokepoint. When your Melee units start taking fire from ranged enemies, be sure to move them somewhere out of range (if possible), and then back on top of the ranged enemies when they come within range of the Melee Tower. Most ranged enemies are weaker in melee combat. Never let ranged enemies stack up and shred your Melee units’ health. Also note that Paladins are the only Level 4 tower that is completely useless against flying enemies.
- The Barbarian Hall is pretty mediocre in KR1 (IMO), and a waste of money compared to other towers. I seldom ever use it, outside of the Icewind Pass Iron Challenge where you need them to target flying enemies with throwing axes.
- Tesla Coils are best for their Overcharge ability, which provides true Area of Effect explosive damage (which ignores half of an enemy’s physical armour) and makes them one of the best towers in the game. Definitely focus on maxing this upgrade first before bothering with Supercharged Bolt (especially if you don’t have Smart Targeting), which is a good upgrade overall, but isn’t true AoE. Oftentimes you may want to forego Supercharged Bolt in favour of making more Teslas with Overcharge, and then later on go for Supercharged Bolt when you have a good defense built up.
- The Big Bertha is generally not as good as the Tesla Coil overall, but it is the best tower for dealing with massive amounts of trash enemy spam, and it’s also good for bosses when other towers would be out of range and you have extra money to spend, as their Dragonbreath missile has very long range (appears to be about double that of the tower itself) and will always aim for the enemy closest to the exit.
- The Sorcerer Mage is one of the best and most spammable towers in KR1, overall. Its main attack deals magic damage and Curses any enemy it hits. The Curse deals True Damage as Damage Over Time (which isn’t reflected in the damage listing for the tower), and halves the enemy’s physical armour rating for its duration; thus greatly increasing the damage all physical/explosive attacks deal to armoured enemies. Its Polymorph ability permanently turns an enemy into a sheep, which can’t be blocked by friendly ground units, but can be rapidly clicked to death for an Instant Kill. This also comes at a cheaper price than the Arcane Wizard’s Death Ray, for a very similar overall effect as long as you’re attentive. Like Death Ray, don’t bother upgrading Polymorph above level 1 in most scenarios, as it’s cost ineffective. The Sorcerer Mage’s Earth Elemental summon is great to spam at Level 1, as when an Elemental is near death, you can just upgrade the ability in order to fully restore the Elemental’s health. Earth Elementals have significant health and armour, and deal good amounts of physical damage to up to 4 enemies at once. With max Star Upgrades, each of the Sorcerer’s primary attacks will also slow enemies and permanently destroy 3% of their physical armour rating. In short, this tower is almost universally good and is quite cost effective; with good single target damage, temporary physical armour halving from Curse, some True Damage from Curse, slowing and permanent physical armour breaking per shot, an Instant Kill ability, and stalling and physical area damage from its Earth Elemental.
- Arcane Wizard: Having one near the back of the track with the Teleport and Death Ray to counter tough big/armoured enemies can be useful, depending on the level and enemies. Be sure not to rely on Arcane Wizards alone, however, as they’re terrible against groups of enemies relative to their cost.
- The Rangers Hideout is a very strong all around tower, although its special abilities’ effects on enemies are mutually exclusive with itself and thus redundant if you have more than one Rangers Hideout. Vines and poison both disable health regeneration for all trolls, werewolves, Lycans, and Swamp Thing; making this tower a hard counter to those enemies. The poison Damage Over Time also ignores armour, and can outright kill some lesser enemies with one poison arrow at Level 3.
- The Musketeer Garrison: For bosses and large enemy spam, Shrapnel Shot 3 is amazing if you have Smart Targeting unlocked, as it has the best DPS and some AoE. Note that Shrapnel Shot has 0.5x range compared to the tower itself, however, making its range misleading. Also note that Sniper Shot (1.5x range) does not target or affect bosses in any way.
- Nonupgraded Mage and Archer Towers have the highest gold-to-DPS ratio, and with upgrades, the nonupgraded Mage Towers can also slow enemies and permanently destroy 3% of an enemy’s armour with every shot. Note, however, that lots of spread-out weak towers are not useful against enemies with health regeneration.
The Best Heroes (IMO) Ranked
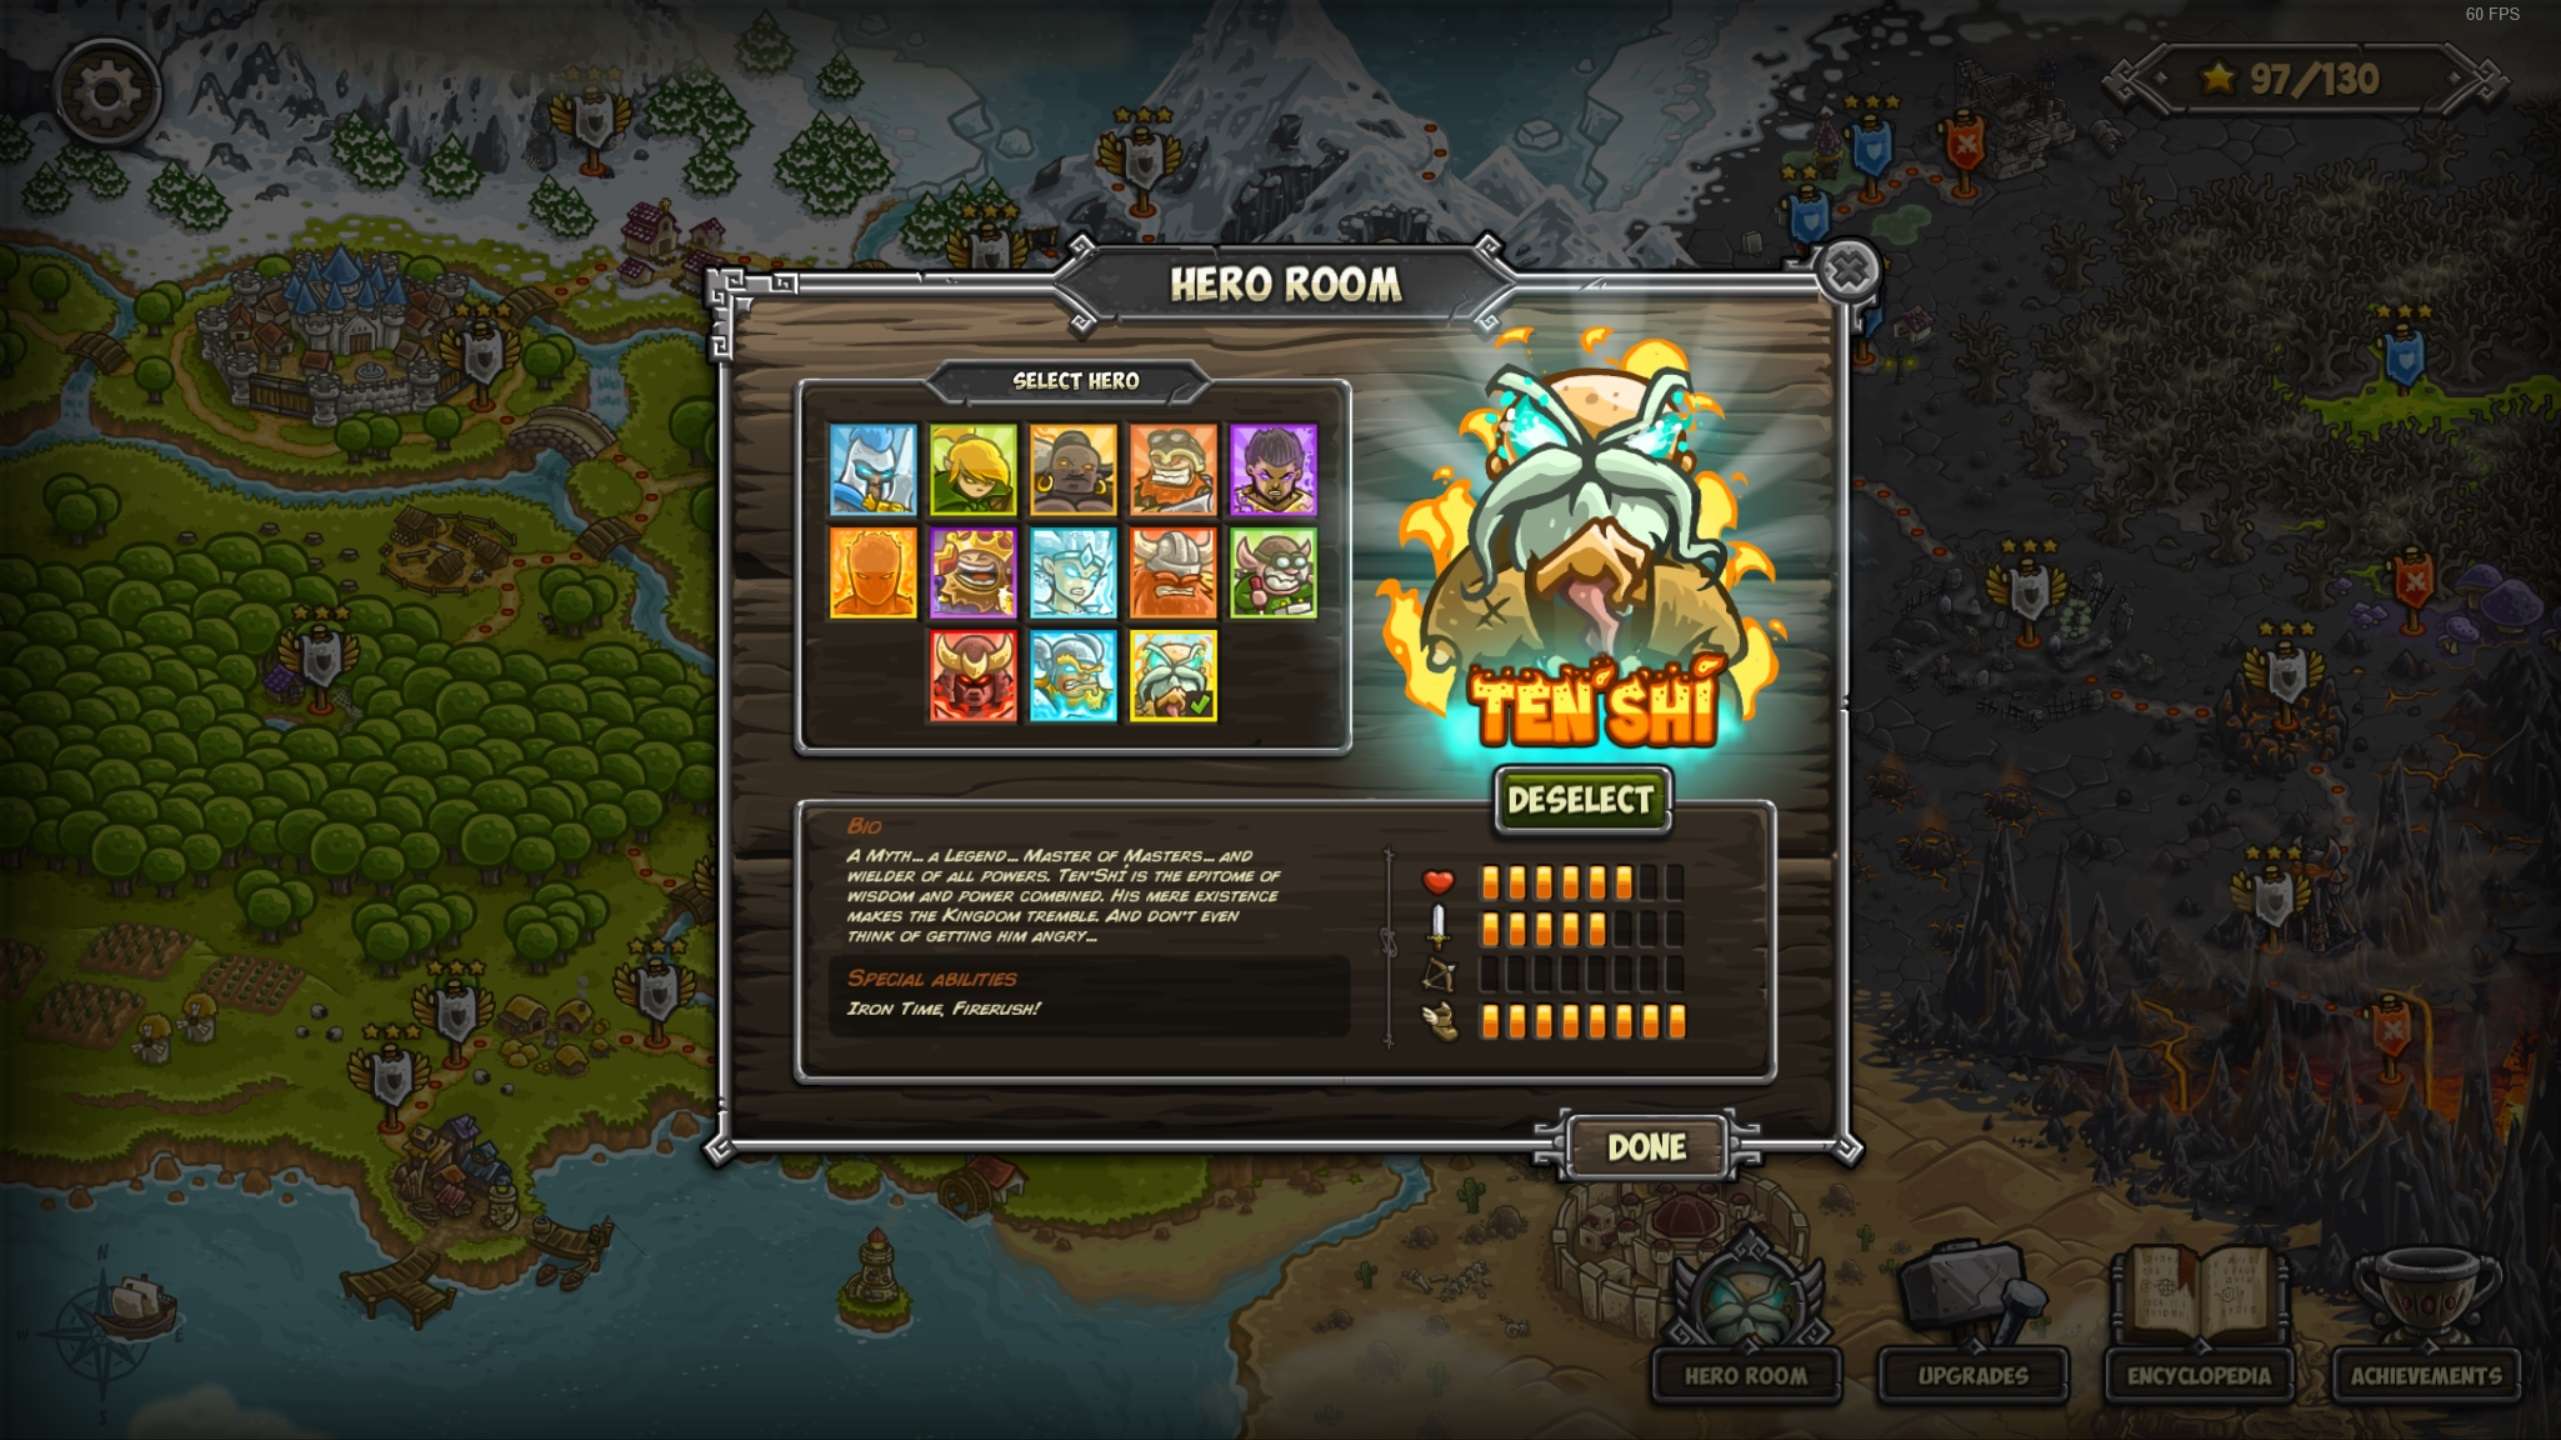
- Ten’shi
Ten’shi is a very strong melee Hero, and the best support Hero; tied with Elora Wintersong. Ten’shi is a great all-around melee Hero with True Damage primary attacks, meteors, and earthquakes, invincibility to all damage and effects during Iron Time, the ability to stun non-boss enemies with his earthquake attack during Iron Time, and the ability to teleport around the map instantly when not in Iron Time. This all combined gives him high support utility, maneuverability, healing ability, sustainment, and precision targeted enemy stalling/killing capability. His ability to teleport effectively allows him to be everywhere on the level at once and micromanage many tasks. He can also teleport to and bully some dangerous melee-vulnerable enemies such as Shamans, Spider Matriarchs, Shadow Archers, Demon Lords, Necromancers, Goblin Sappers, Raiders, and Abominations. You can also strategically teleport him to an enemy/group of enemies right before he casts his Firerush! meteor ability (which will make a bell dinging sound just before he casts it), to great effect. Ten’shi can level up exceptionally fast if you micromanage him, focusing on always teleporting him to the least-armoured/lowest damaging enemy onscreen, and keeping an eye on his health total to prevent him from dying to them over time.
- Elora Wintersong
Elora is the best ranged Hero, and the best support Hero; tied with Ten’shi. Elora has good range, speed, health and armour (for a ranged Hero), DPS, AoE, crowd control, can target flying enemies, and gets benefit from the Mage Tower’s Arcane Shatter Star Upgrade for her attacks. She’s the only thing in KR1 that can slow bosses via debuffs, making her excellent against bosses; especially ones with Instant Kill abilities that would render melee Heroes almost moot. Elora can level up exceptionally fast if you micromanage her, keeping her within range to attack magic damage-vulnerable enemies, without them being able to damage her. Note that micromanagement is necessary to do with Elora, as her melee damage is weak compared to her ranged damage, and thus you want to keep her out of enemy range when possible. Although she can still block and tank effectively when needed.
- Ignus
Ignus/Chonk is the best melee Hero for DPS, to the point that some people considered him to be overpowered before his (doubled) damage per tick glitch was fixed on the Steam version. His DPS and AoE damage are great, all of his attacks deal True Damage (unaffected by any enemy resistances), he’s fast, he’s fairly tanky, he heals in combat, and he respawns faster than most Heroes. However, he also is very unreliable for stalling enemies (the primary job of most melee Heroes), as he tends to erratically jump from enemy to enemy with his Surge of Flames dash. This will force you to do a lot of micromanagement to keep him where you want him. Ignus can level up exceptionally fast by sheer virtue of the fact that he deals a lot of True Damage, although keeping him attacking an enemy(ies) may be an issue.
- Oni
Oni is a great all-around melee Hero. He deals great damage and AoE, is fast, and is immune to Demon explosions; generally making him the best Hero on levels with lots of Demons.
- Sir Gerald Lightseeker
Sir Gerald is the best tank melee Hero in the game, period. He’s highly damage resistant, reflects (non-AoE) melee damage back at enemies as True Damage (100% to 200% depending on level), and has good support capability by buffing other ground units when 2 or more are nearby and are engaging in melee combat; granting them increased damage, healing 15% of their max health, and granting them additional armour (+5-15% depending on level).
Early Game Star Upgrades And Considerations
Early on you should focus on maxing the Star Upgrade trees of Magic/Bomb Towers (switching them out depending on the level and what tower upgrades you have unlocked) and Reinforcements (free extra blocking and ranged damage = OP). Level 2-4 Meteors are also extremely powerful relative to their Star cost. Smart Targeting is one of the most powerful Star Upgrades in the game and should be prioritized as soon as you have Big Bertha/Tesla available, as it makes all Bomb Towers and the Musketeer Garrison amazingly powerful (even without any Archer Tower Star Upgrades). Generally I prioritize fully upgrading the Star paths in the following order: Bombs, Reinforcements, Meteors/Mage, Melee, and then Archery. It’s also worth mentioning that when you have finished the main Campaign, you should go back and begin 3-starring the older levels and doing the Heroic and Iron Challenges on them before wasting your time attempting the extra challenging Elite Stages. Ignore the Elite Stages until you have all of the Star Upgrades unlocked. This will save you a lot of unnecessary headache, especially on certain insane Elite Stages on Veteran difficulty.
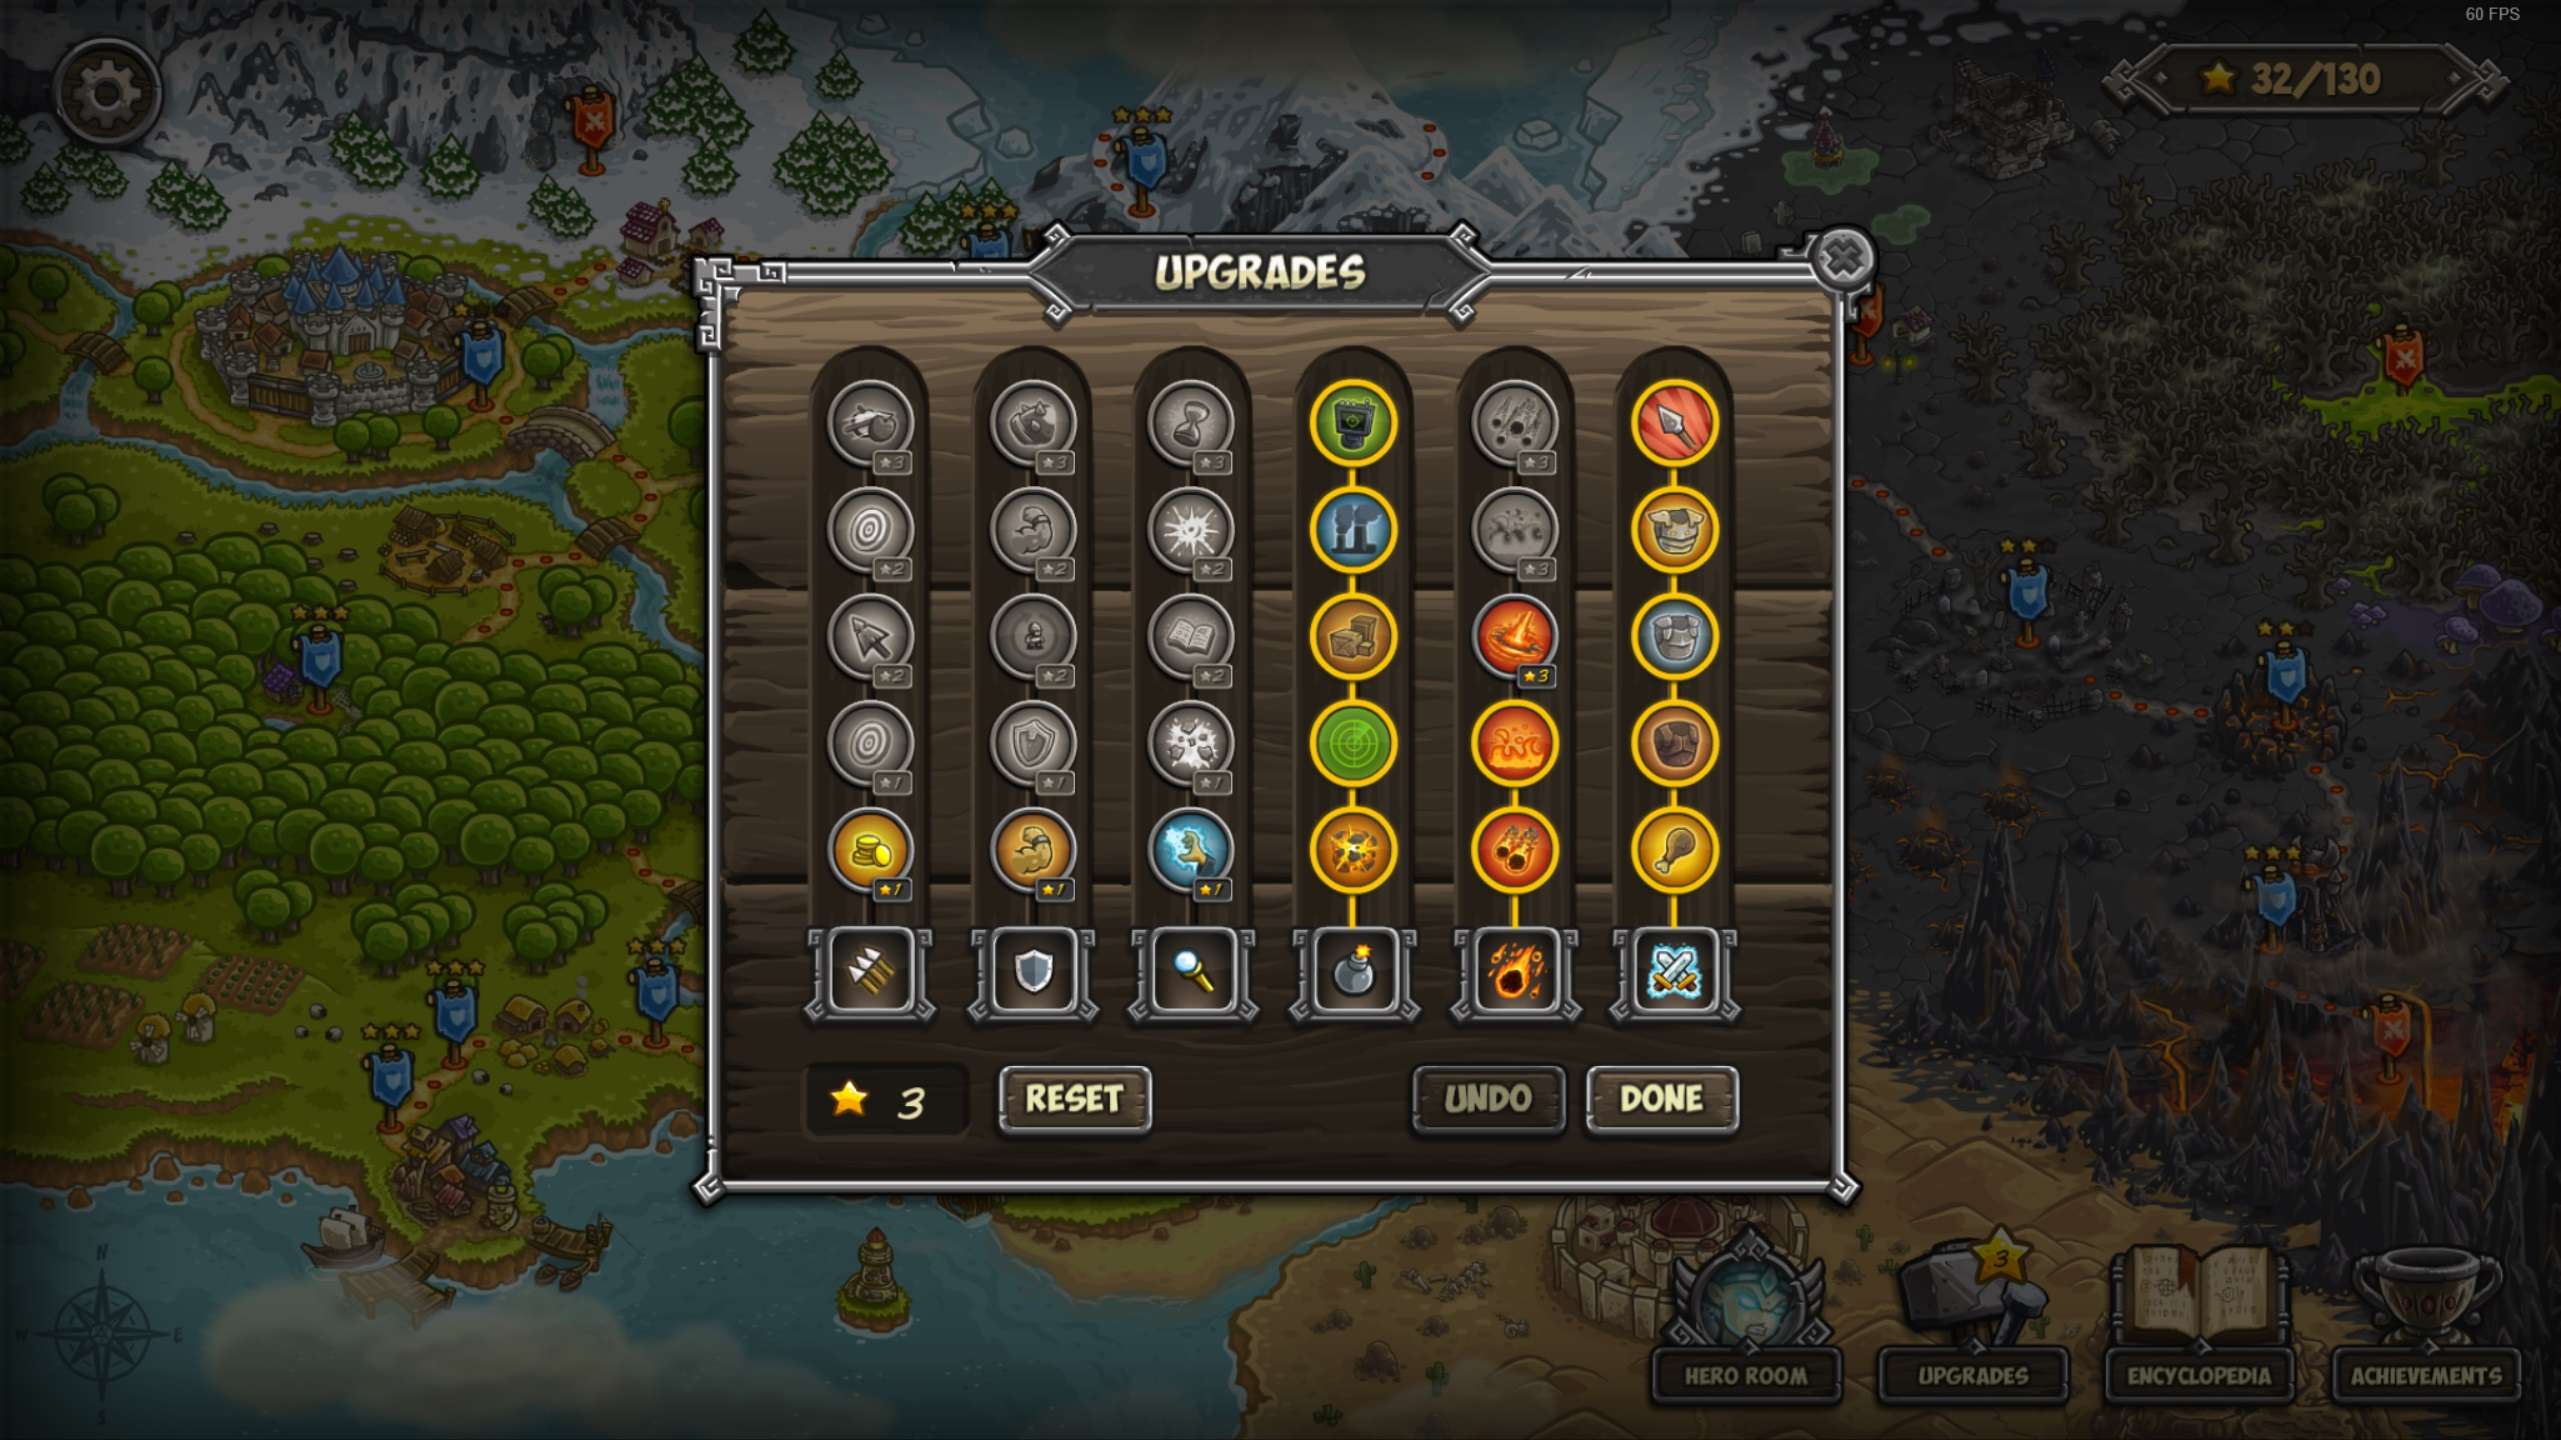
An example of a strong mid-game Star Upgrade build.
More info on why Smart Targeting is the best Star Upgrade in the game.
Be the first to comment