
Tutorial, tips and full solutions for X’BPGH: The Forbidden Path. Warning! This guide contains spoilers.
Guide to X’BPGH: The Forbidden Path
Introduction
Want to figure out the solution yourself but can’t stop brainfarting? Can’t figure out how the game works or just want to copy my solution to each level? Well come on in, you’ve come to the right place!
If you just came for the solutions then scroll down to the bottom where I’ve included solutions in the form of screenshots. The rest of you curious flesh manipulators can stay up here for a lesson in walking the Forbidden Path.
Specimen A (Column I)
I strongly suggest you try this one by trial and error just to see which button does what. Don’t be afraid to mess up, you can start over at any time.
The solution to this puzzle won’t tell you anything that you couldn’t easily figure out for yourself.
UI Explanation:
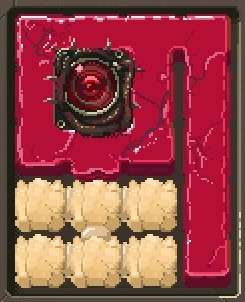
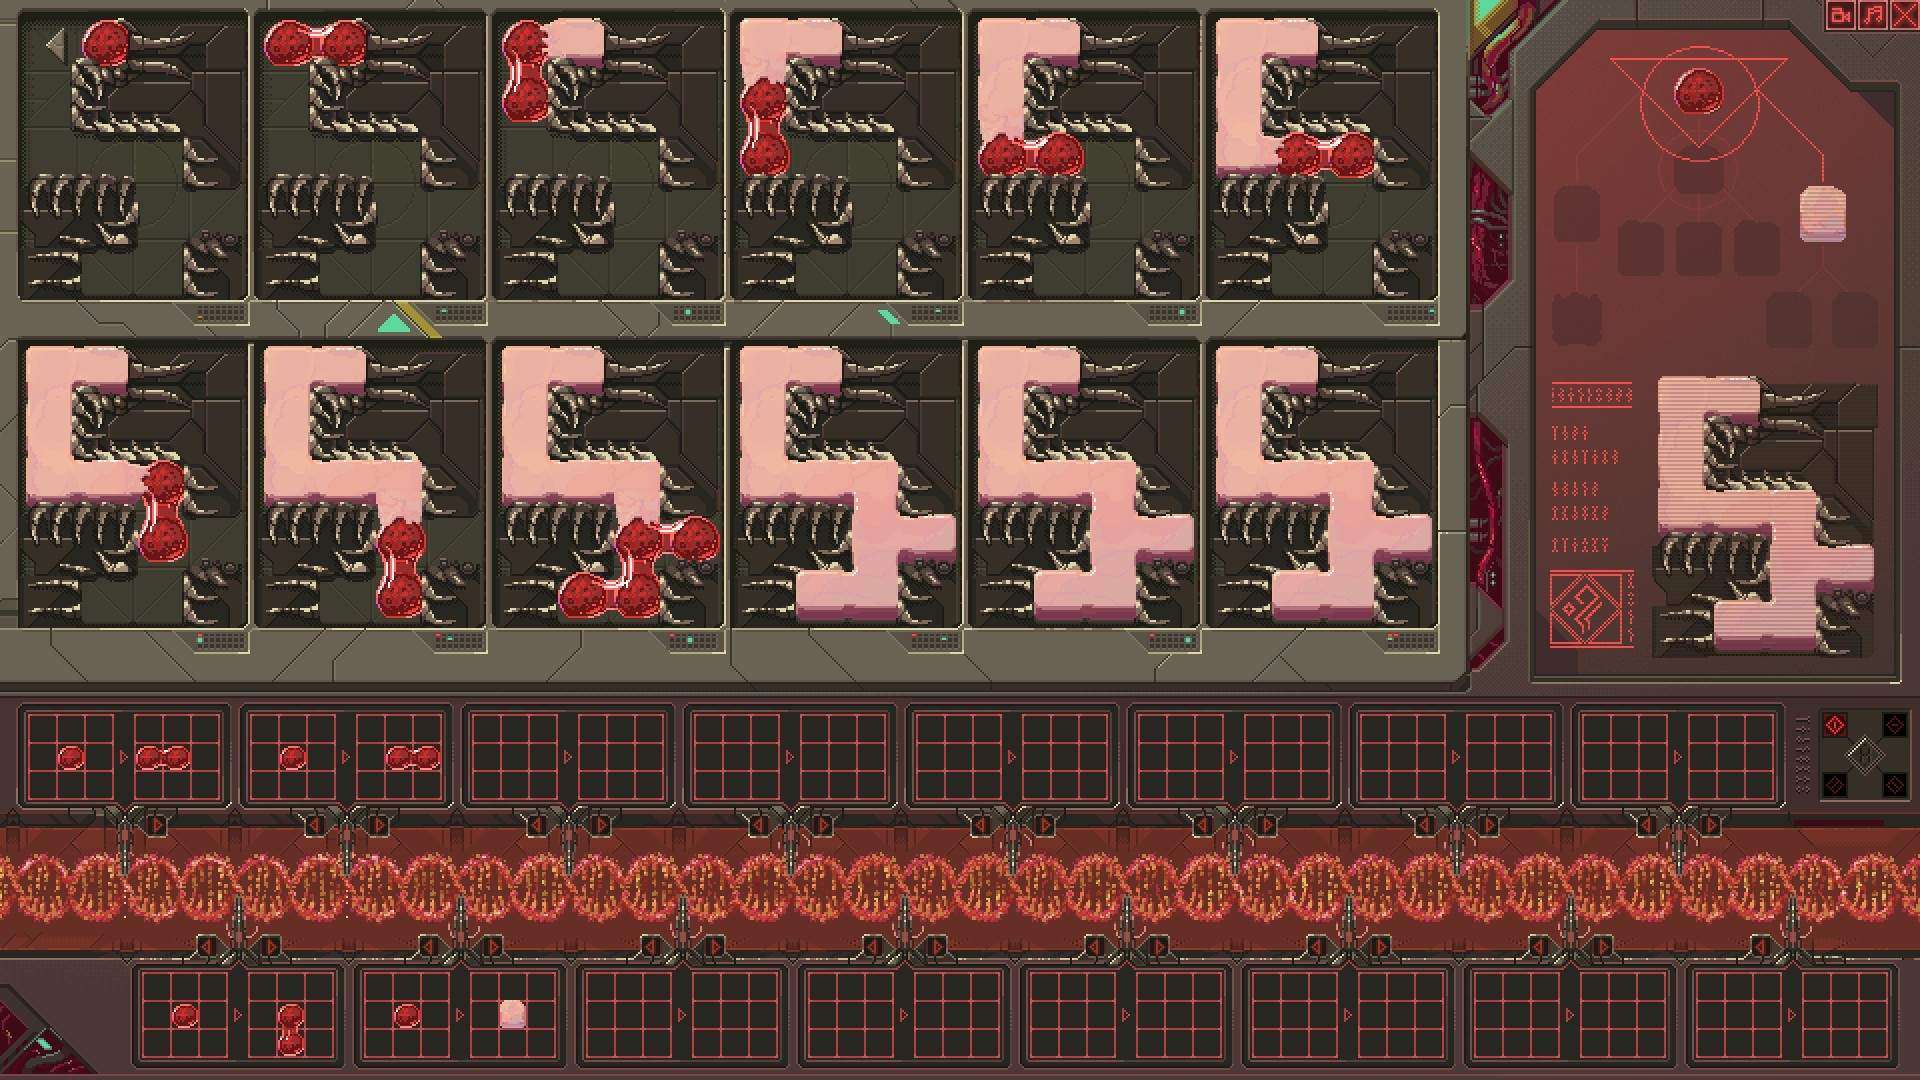
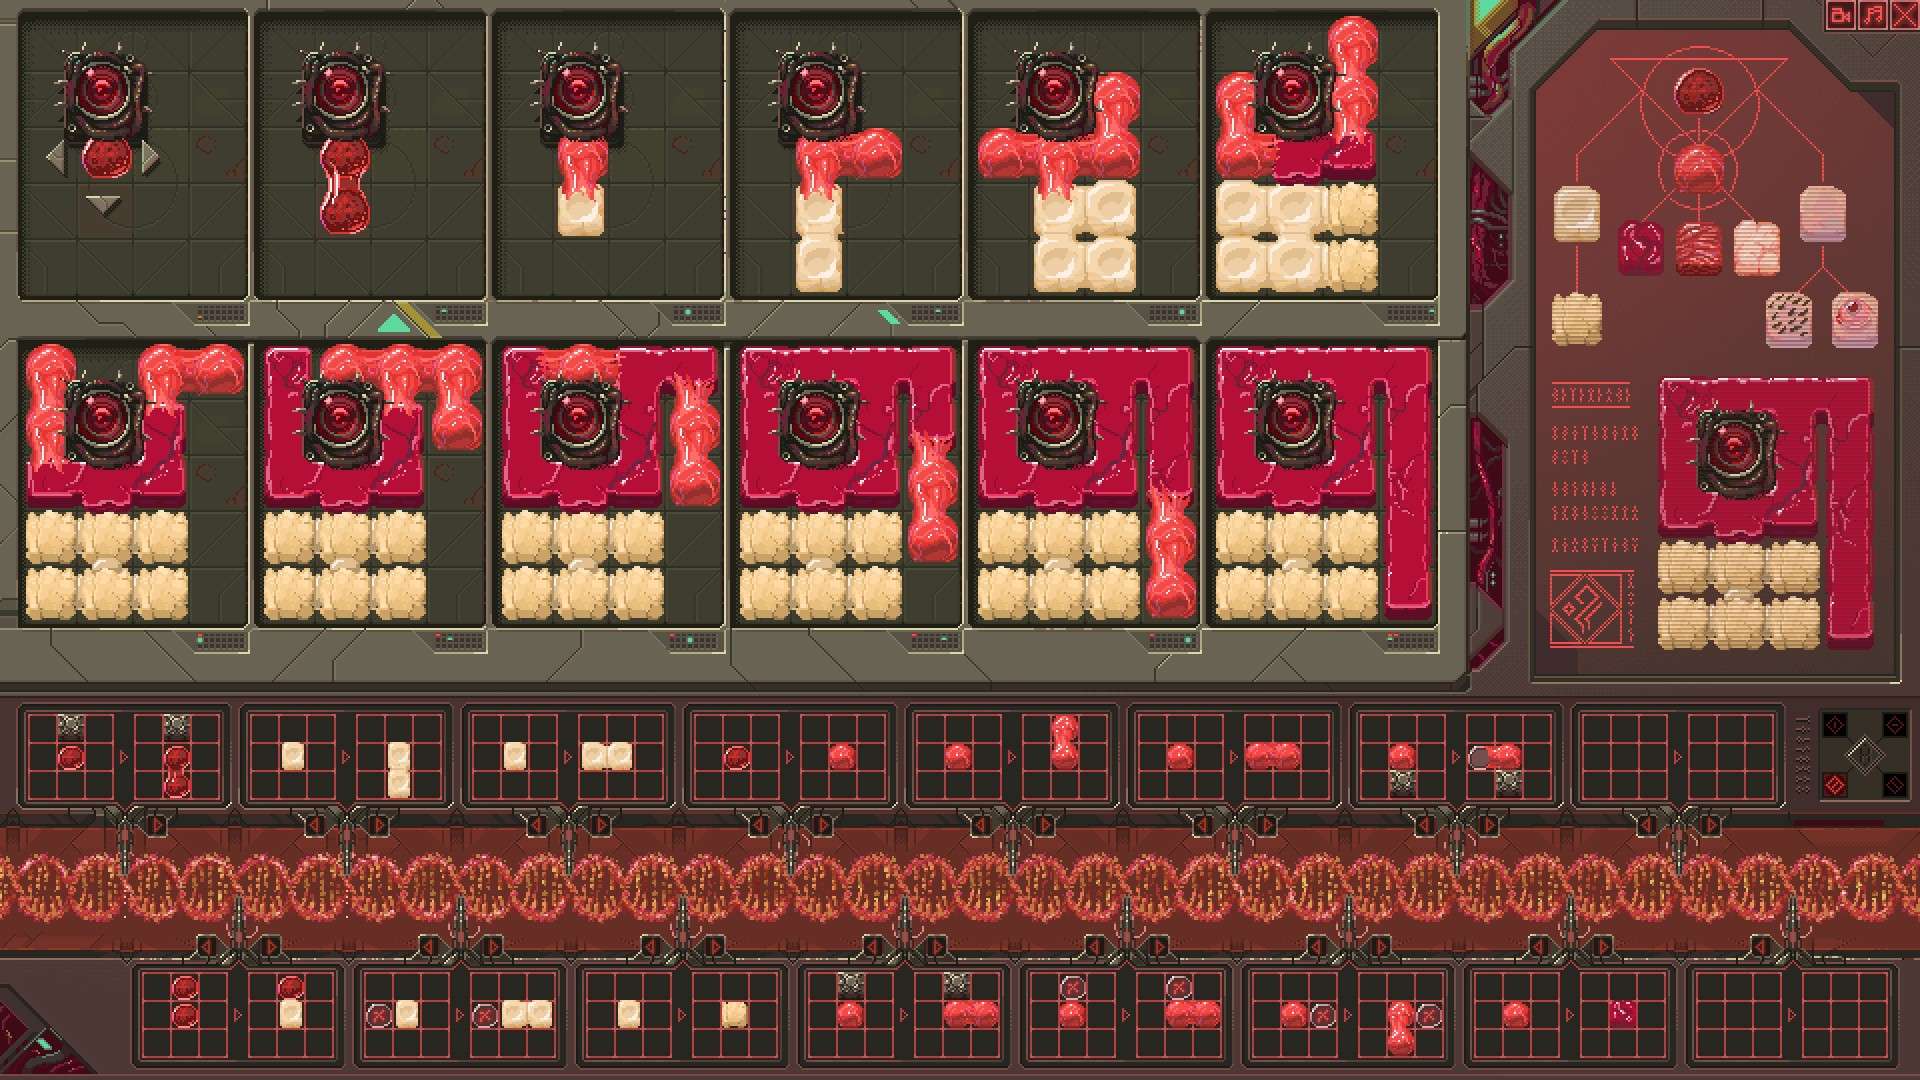
The 12 grids in the top half of the screen show the path your flesh is going to take. Change the outcome by writing rules left to right in the alien double helix near the bottom of the screen. The large screen on the right displays what your final product should look like. The Minecraftesque crafting interface lets you duplicate and specialize cells.
If you mess up and want to reset, use the tiny H button under the intended result screen.
Written Solution (Spoilers):
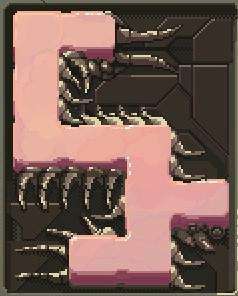
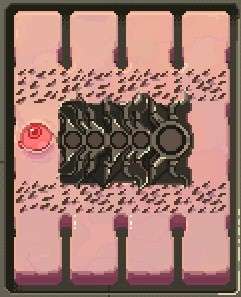
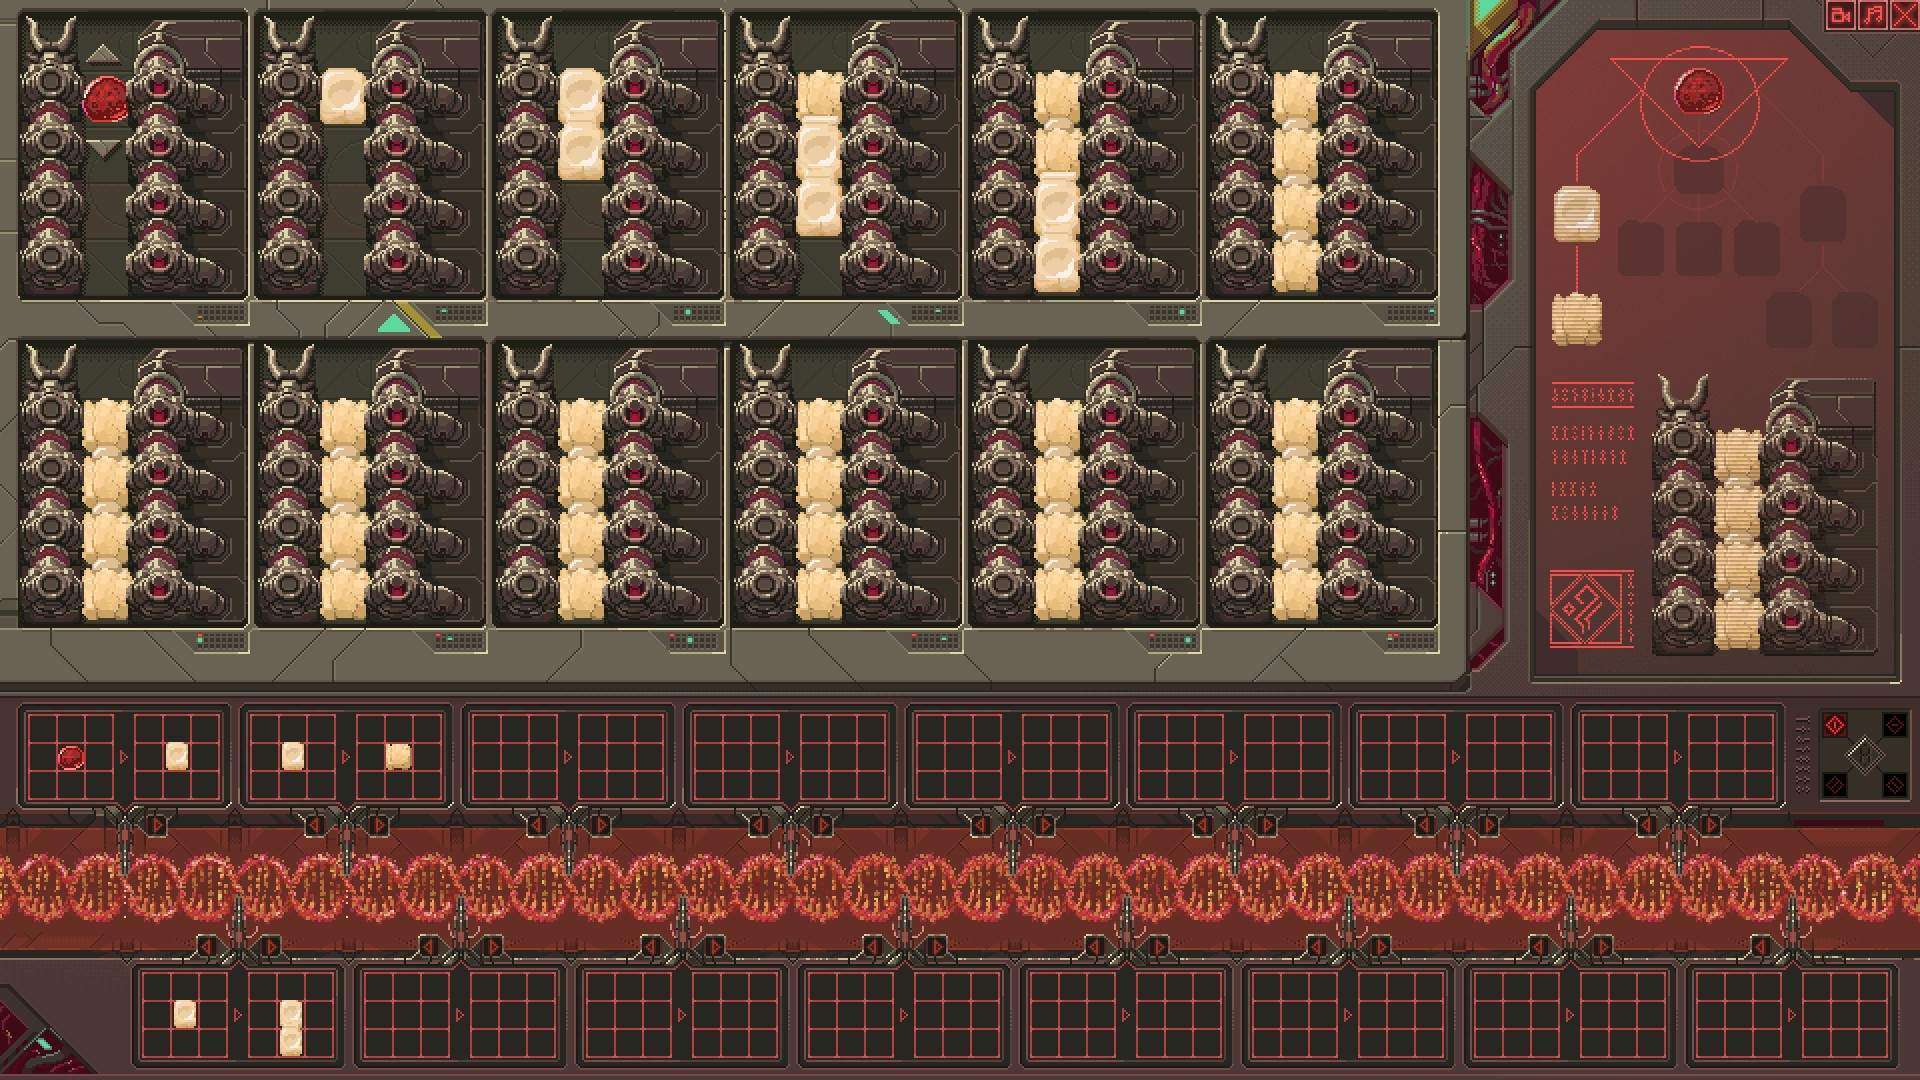
Fill in all the gaps with seed by dividing them in all needed directions. Specialize seed into skin. Alternatively, specialize first and then divide.
Specimen B (Column I)
Hint #1:
The order of your reactions matters a lot.
Hint #2:
Try changing around the order in which things happen.
Hint 3:
If you mess up and want to reset, use the tiny H button under the intended result screen.
Written Solution (Spoilers):
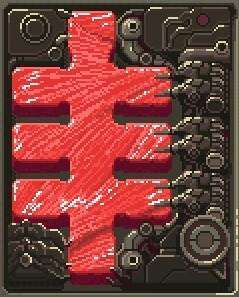
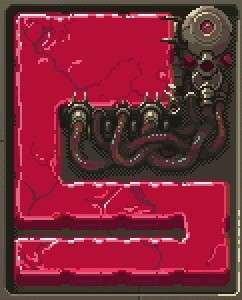
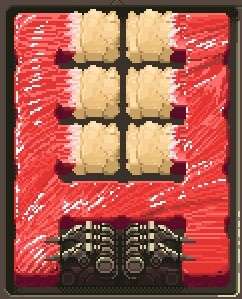
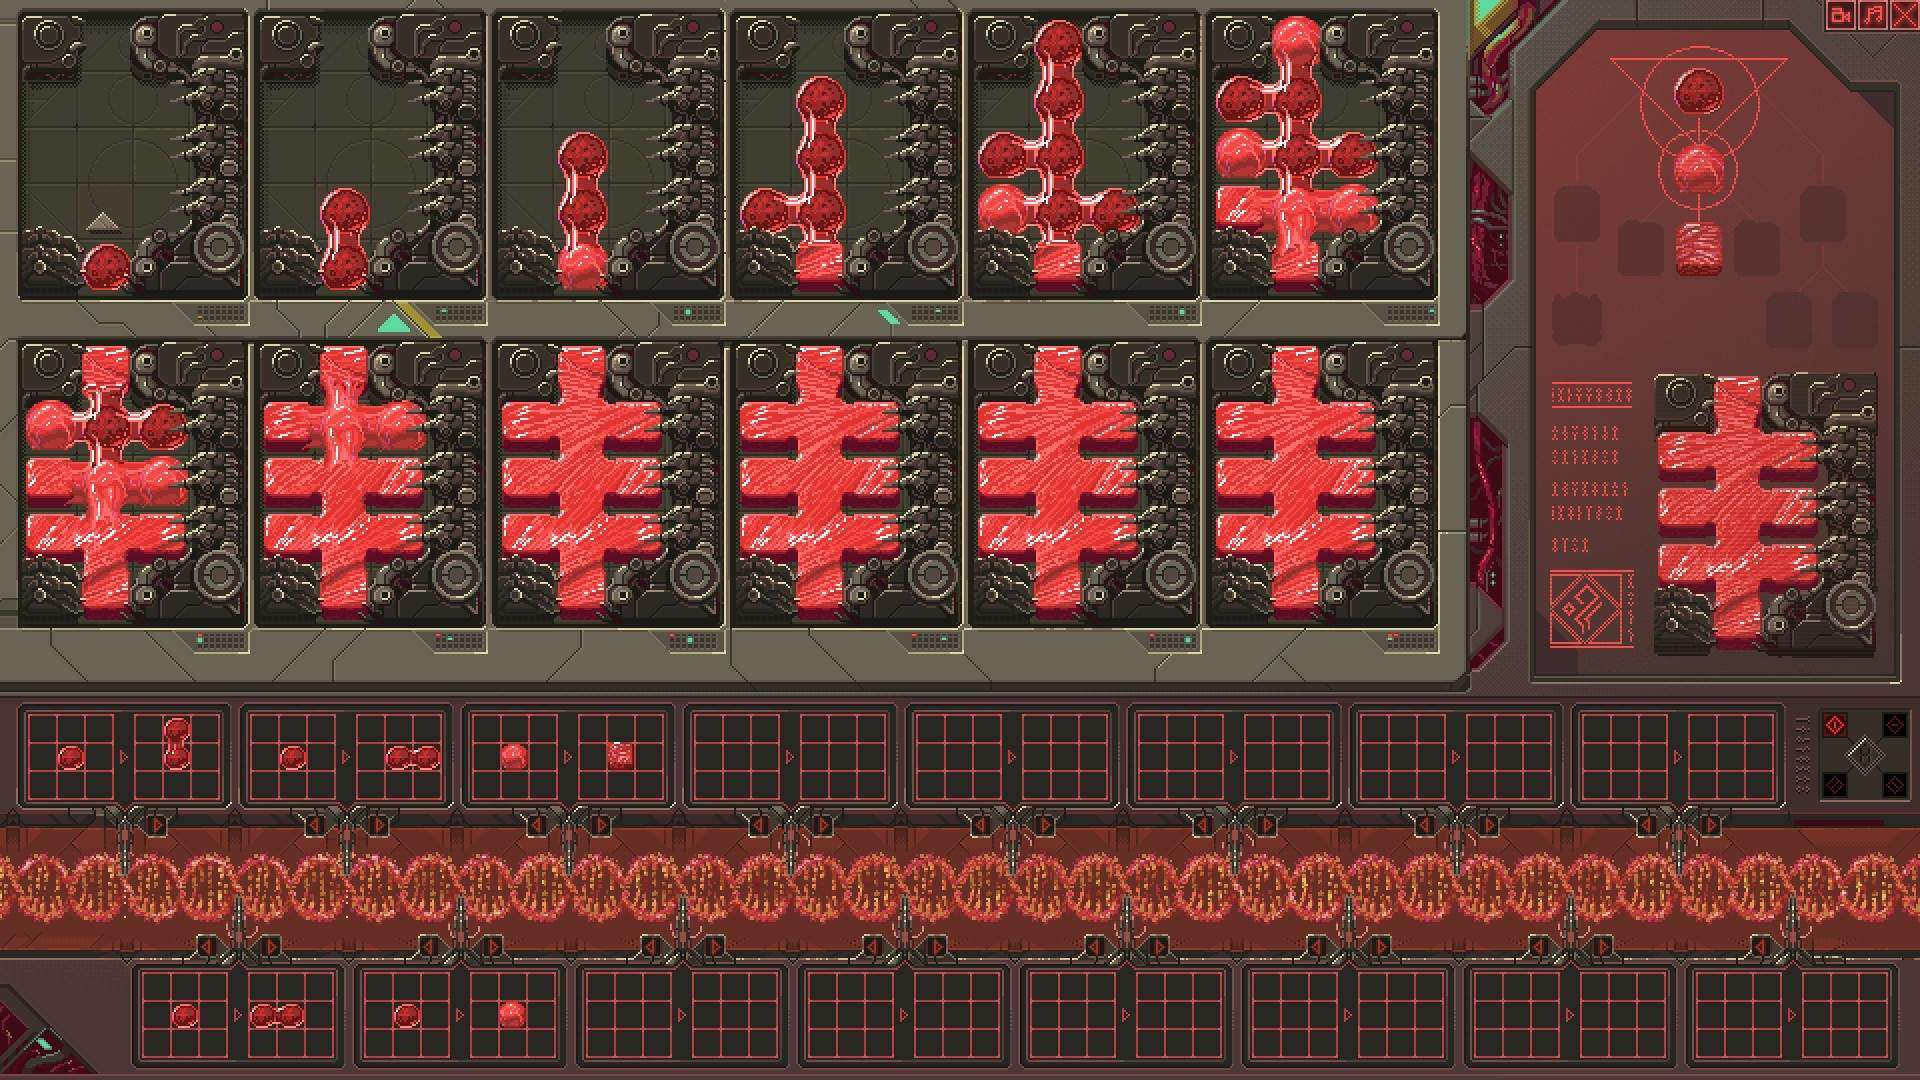
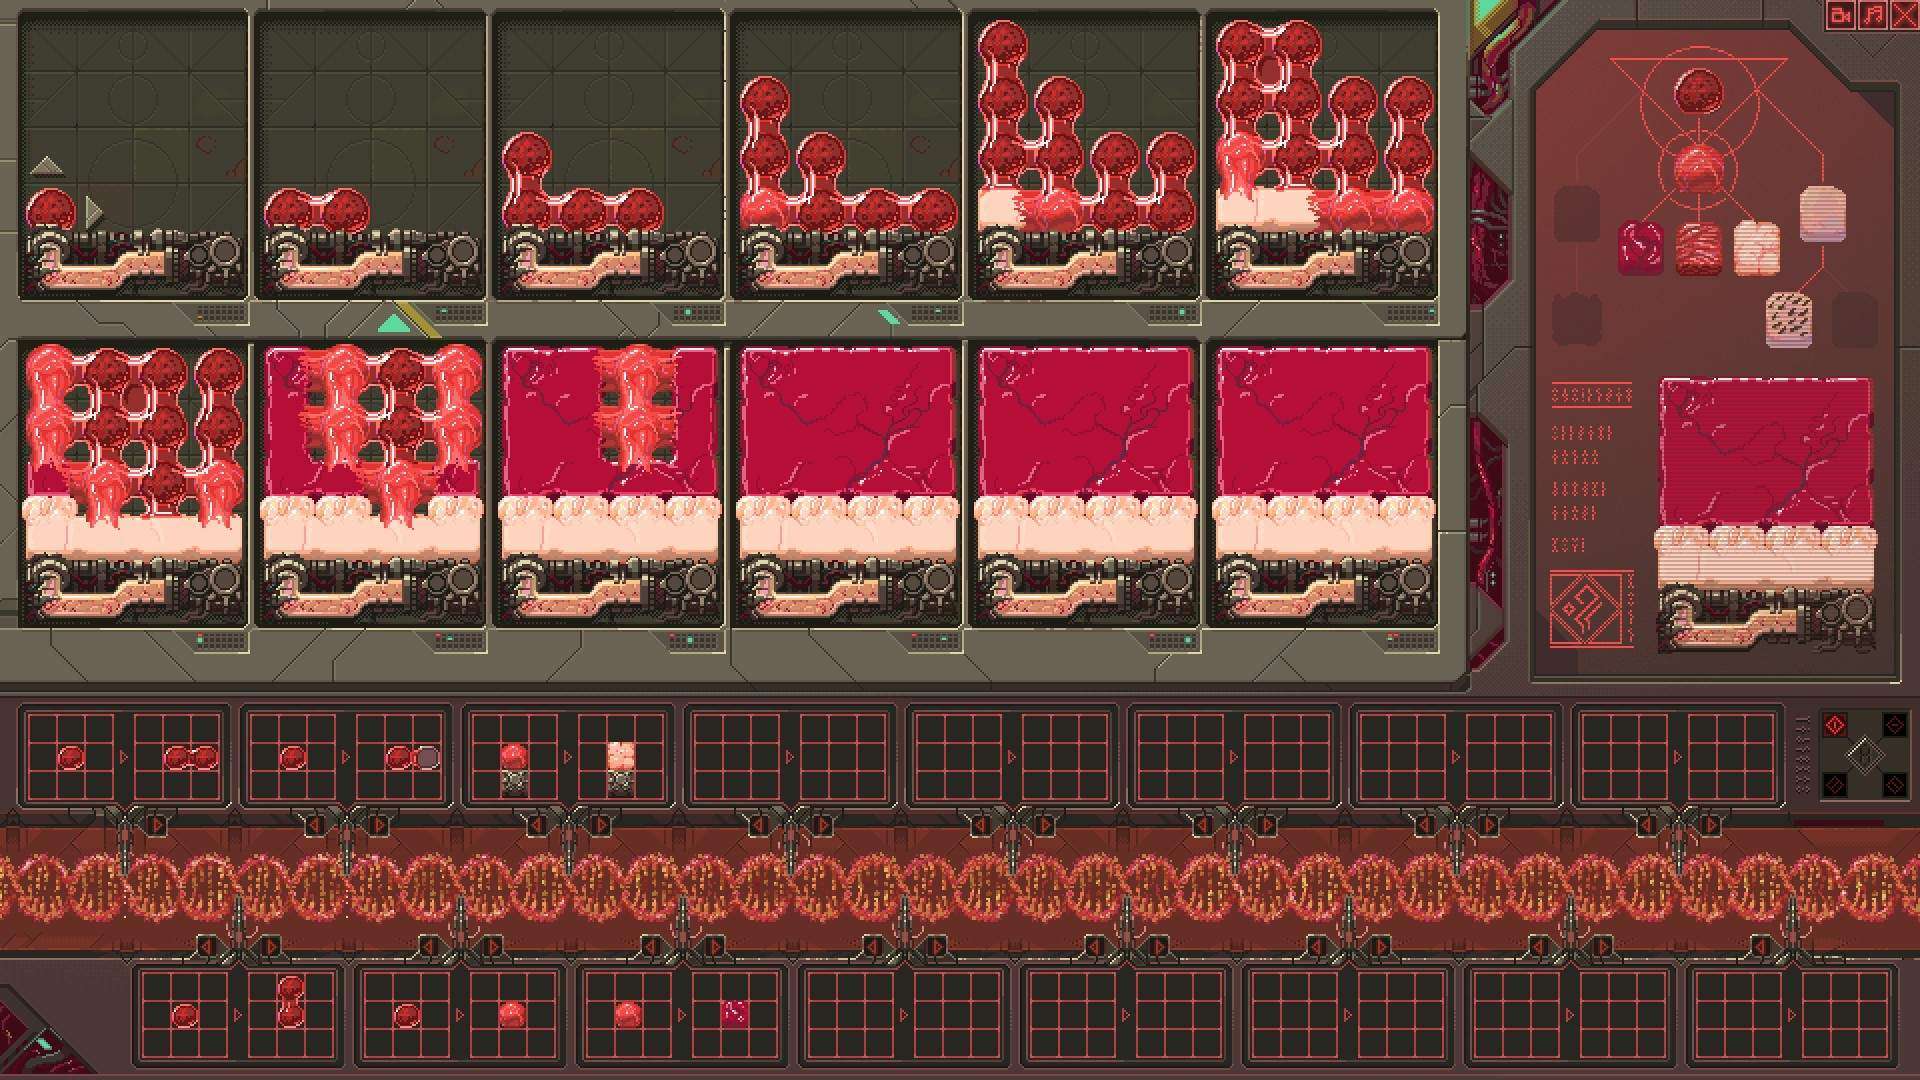
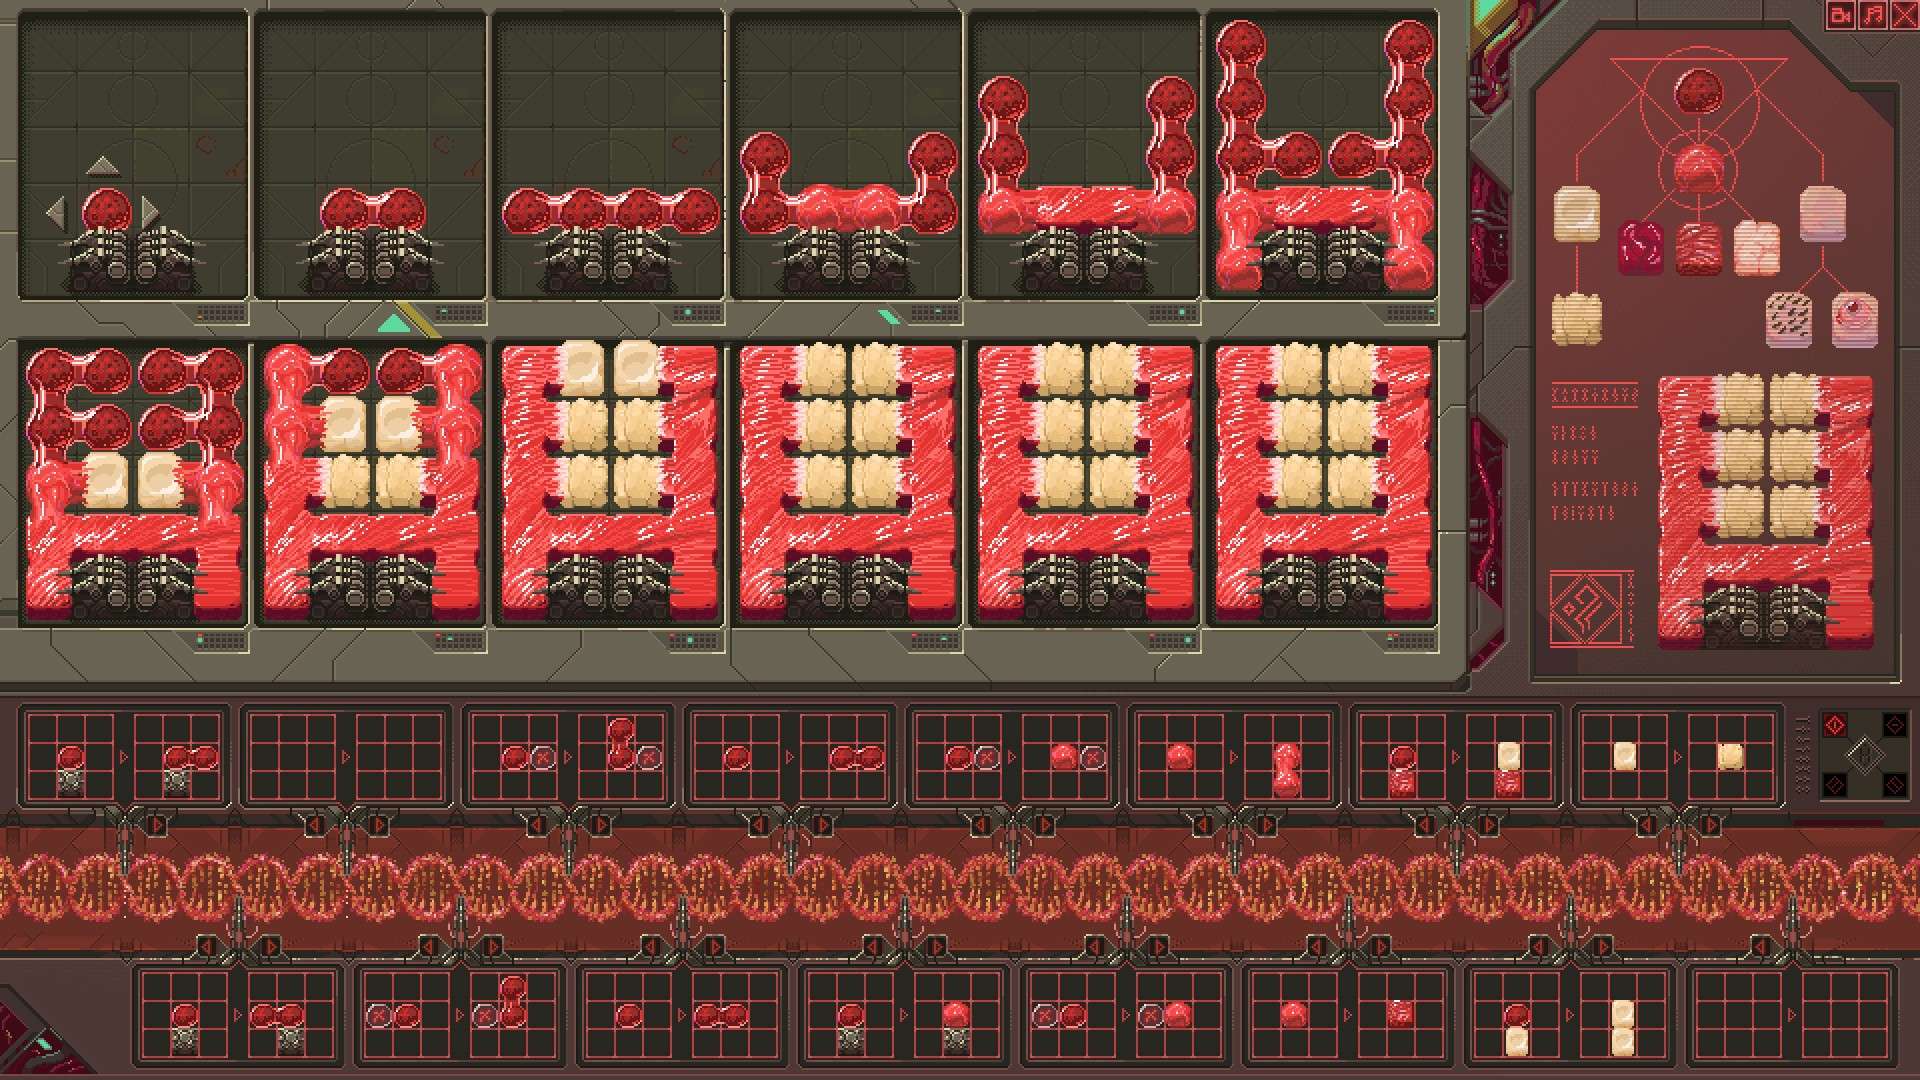
Start from anywhere in the 2nd column and create a vertical line of seed there. Divide outwards to both sides and specialize into soft tissue, then from tissue into muscle.
Specimen Γ (Column I)
Hint #1:
Try clicking around for new buttons to press. You might’ve missed something pressable.
Hint #2:
You can’t win this level by filling every single space with seed.
Written Solution (Spoilers):
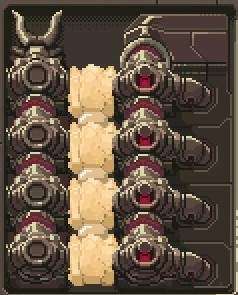
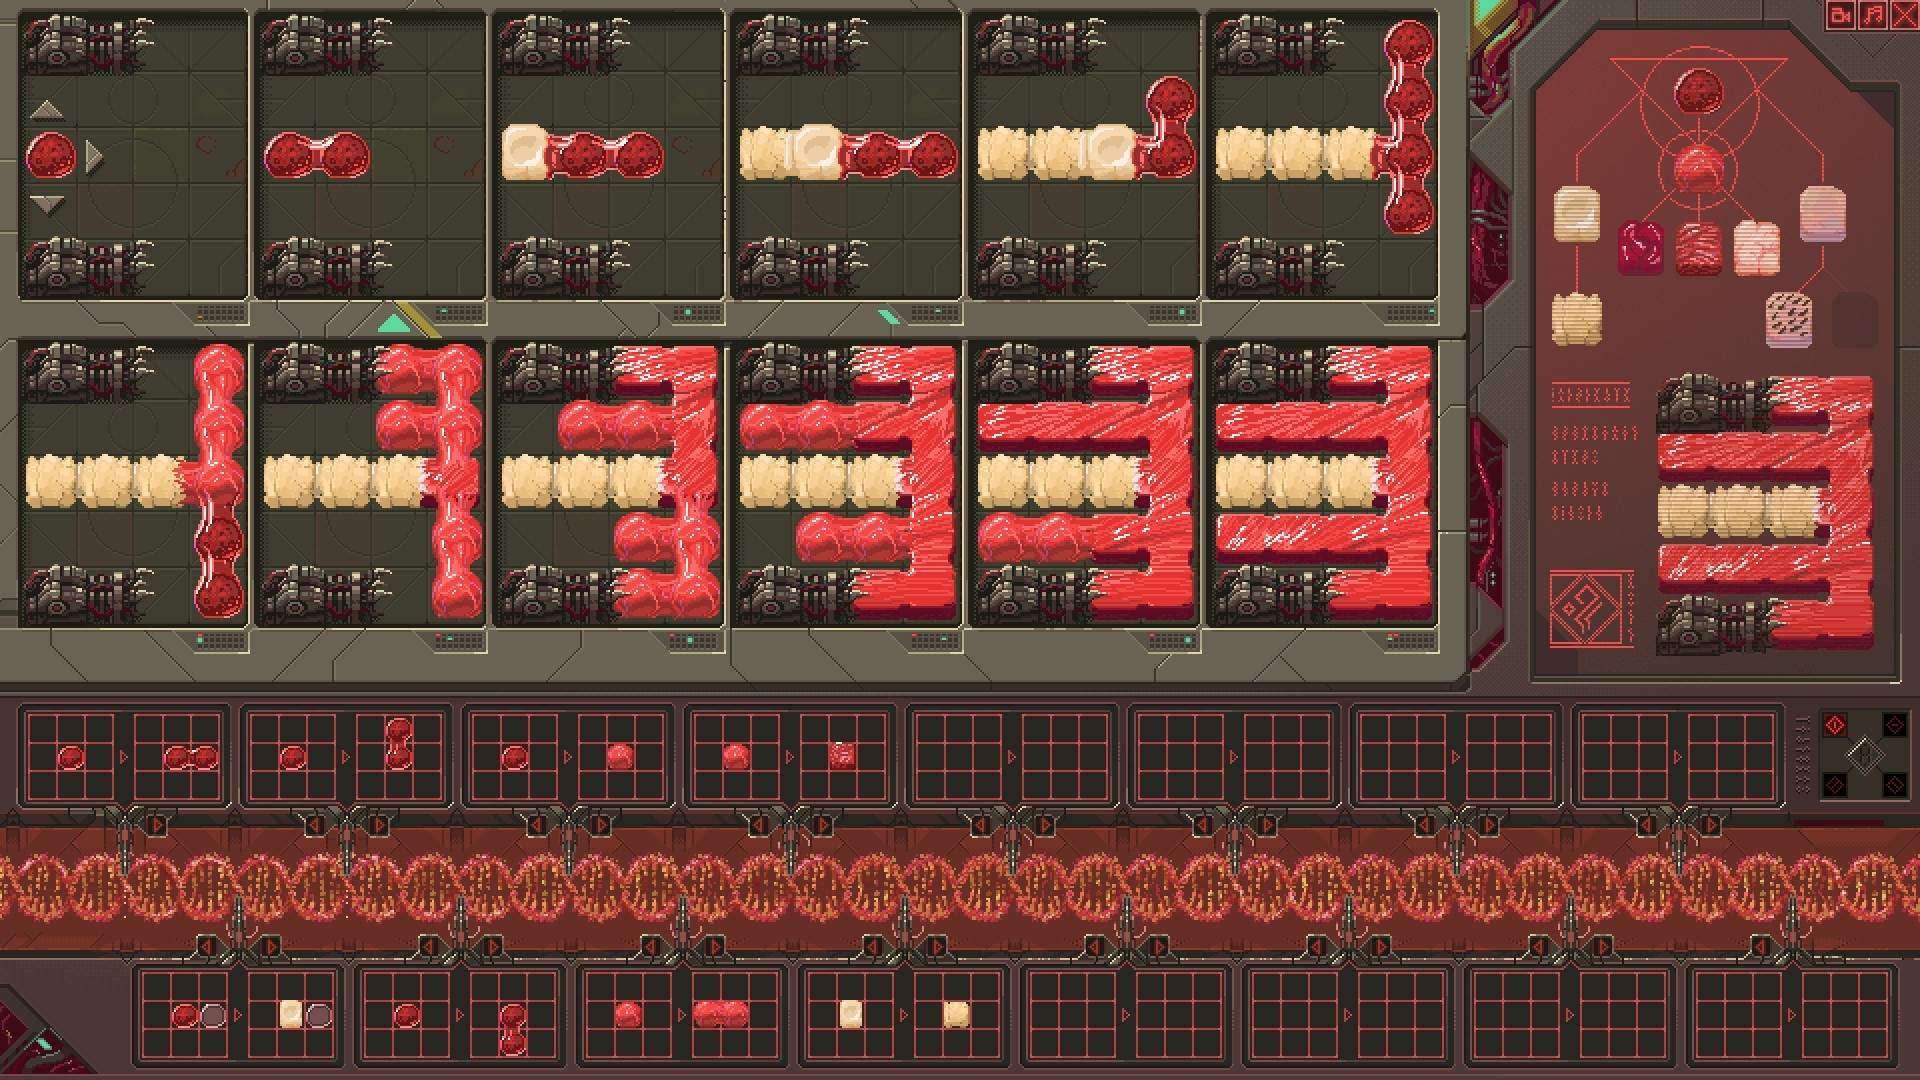
Start on the 2nd space from the top and divide downwards. Specialize seed into cartilage and cartilage into bone. (Bone into superior bone)
Specimen Δ (Column II)

Hint #1:
Make sure your final product matches the intended result exactly.
Hint #2:
Specialize early so every skin cell is covered with hair.
Hint #3:
A new mechanic besides division has been made available.
Written Solution (Spoilers):
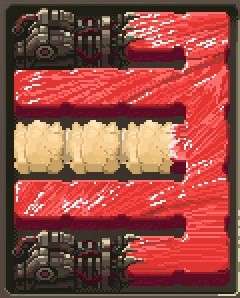
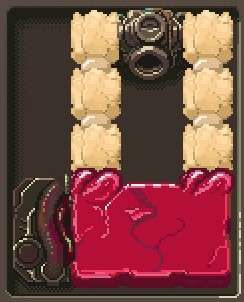
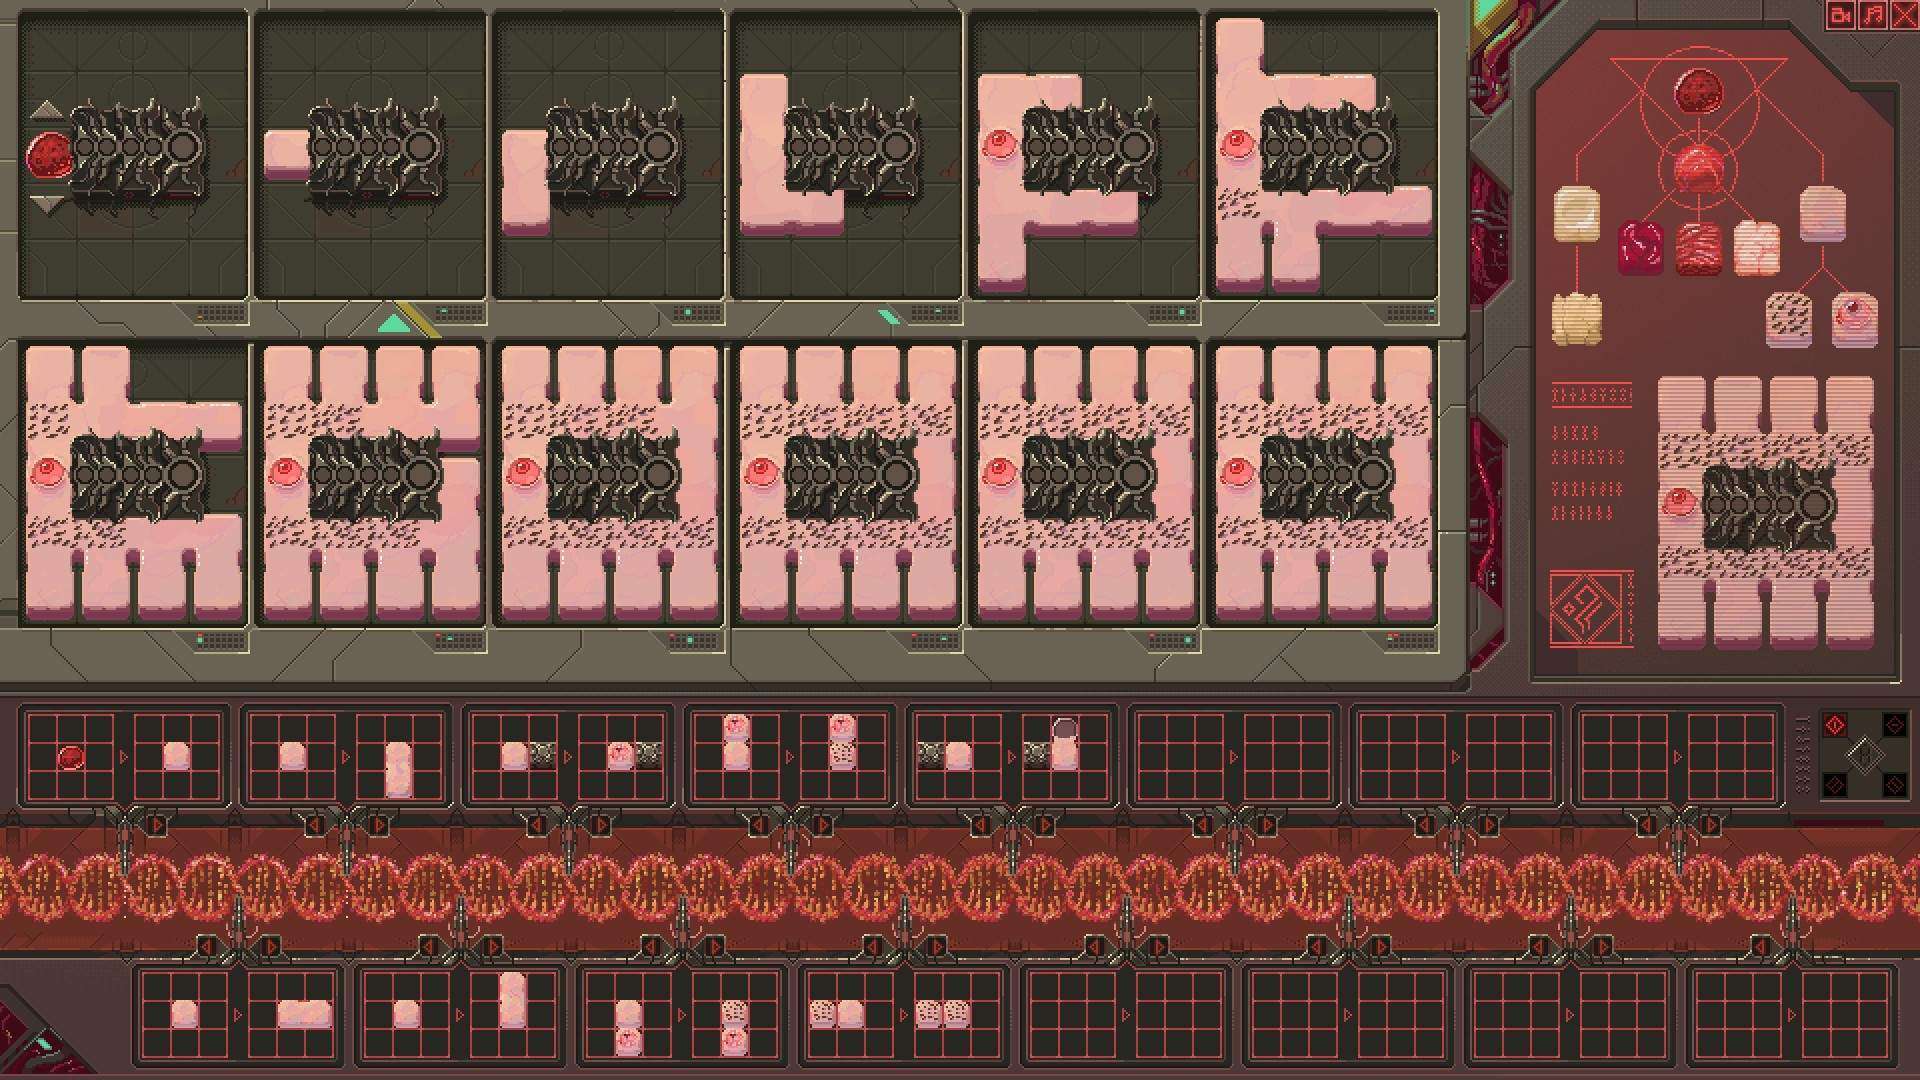
Start at the bottom and extend the seed among all cells above. Specialize into skin and use the fuse function to match the picture. Specialize all skin into hair.
Specimen E (Column II)

Hint #1:
Again, the order of events is very important.
Hint #2:
Try using any new mechanics. Trial and error, baby.
Neighbor explanation:
The neighbor mechanic works as an IF function. Basically, if the specified cell’s neighbor (either left, right, up or down) is what you specify, then the chosen action will take place. The IF function and the outcome occupy a single DNA slot.
Hint #3:
Metal is your neighbor and fat is your name.
Specimen Z (Column II)
Hint #1:
There’s a mechanic you probably haven’t used before.
Hint #2:
The IF statement is not the only conditional statement.
Specimen H (Column III)
Hint #1:
Metal is your friend.
Hint #2:
Change the order of things.
Hint #3:
Once you have one cell of a certain kind, it’s easy to spread it.
Specimen Θ (Column III)
Hint #1:
Do everything in a logical order.
Hint #2:
Try using some underutilized mechanics.
Hint #3:
The lower and upper parts each require a different approach.
Hint #4:
Start from the event horizon.
Specimen I (Column III)
Hint #0:
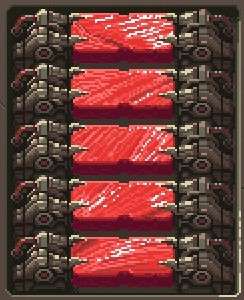
This one looks like crab sticks.
Hint #1:
Make sure you know how to use all available mechanics in this game.
Hint #2:
Try a new mechanic you might not have used before.
Hint #3:
Write a solution to Specimen Z from start to finish then come back and try again.
Specimen Κ (Column IV)

Hint #1:
It’s easier than it looks.
Hint #2:
If it looks impossible to you then you’re doing it wrong. I was stuck on this one for a while but it is actually straightforward.
Hint #3:
Use the neighbor function to look at cells that might’ve changed state.
Hint #4:
Write a solution to Specimen Θ from start to finish. Then come back and try again.
Specimen Λ (Column IV)

Hint #1:
This one is pretty straightforward. Just do everything step by step and rule things out in the order of easiest to hardest.
Hint #2:
There are more neighbor statements than regular divisions. Try changing up the order in which things happen.
Specimen M (Column IV)
Hint #1:
It’s obvious which part of the level you have to start in.
Hint #2:
If you’re the type to think over possible courses of action without even trying them then just try completing the level. Once you’re close the solution will be obvious.
Specimen Ν (Column V)

Hint #1:
Play Specimen Z and then come back.
Hint #2:
The solution is made to perfectly end on the last screen.
Big Hint #3:
This is a big hint so don’t look if you feel like you’re close. Basically, you should know that ‘while loops’ can trigger off of other loops after they’ve ended.
Specimen Ξ (Column V)
Hint #1:
Time is very important in this level. I cannot stress that enough.
Hint #2:
There are 2 parts to this puzzle. Whether or not you want them to be independent of each other is your choice.
Hint #3:
Find the sweet spot for your starting seed. This might take a bit of trial and error.
Hint #4:
There’s no shame in ending a while loop right after starting it.
Specimen Ο (Column V)
Hint #1:
This level is pretty easy.
Hint #2:
That’s the hint. I wounded your ego cause this level literally is easy. Go back and try again.
Hint #3:
Just because it’s the final level doesn’t mean there’s some crazy strategy to it.
Hint #4:
I’d say do Specimen Z and Specimen I again if you really can’t figure it out. Reset your solution and start anew.
Solution Screenshots (Spoilers)
Here are all the levels in screenshot form. It’s okay to give up or just grind out the achievement. We’re all friends here.
My solutions aren’t the most efficient but they worked for me. Just copy my moves from the pictures and go on with your day.
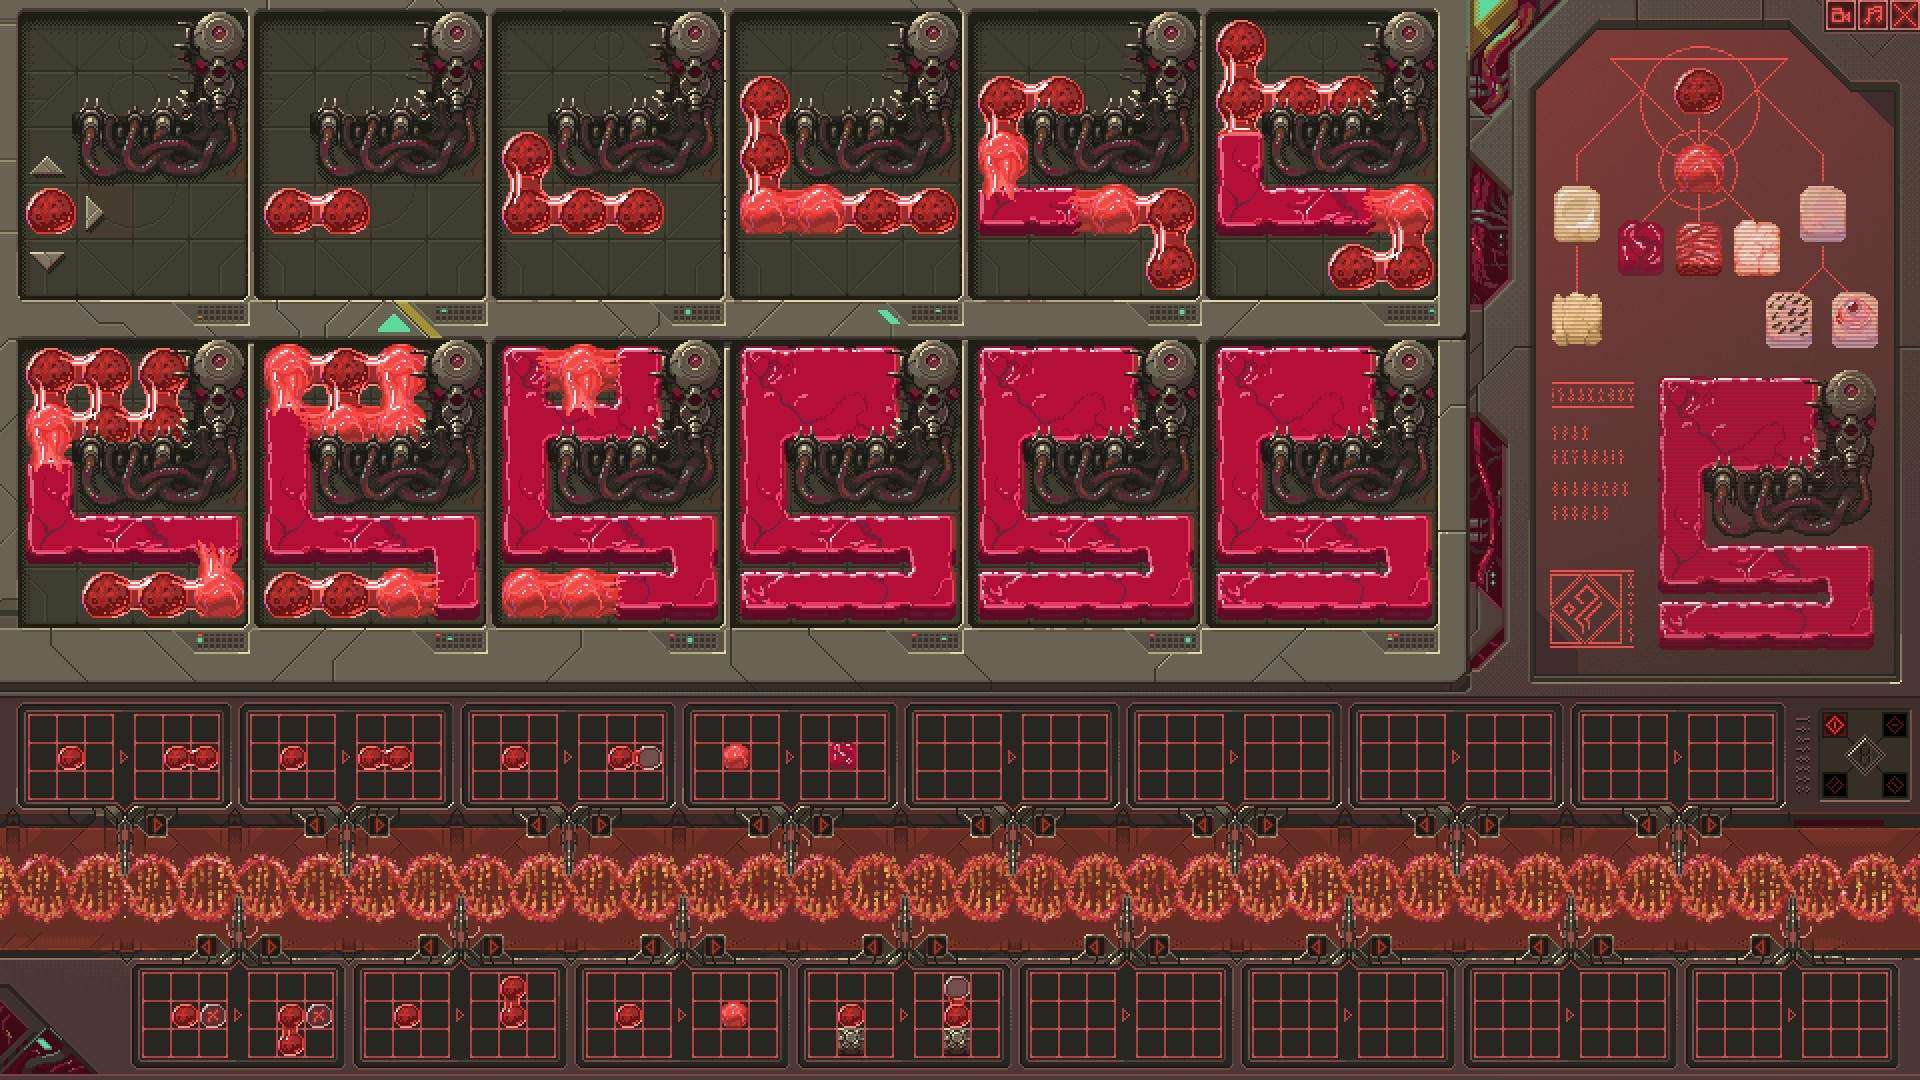
Specimen A (Column I)
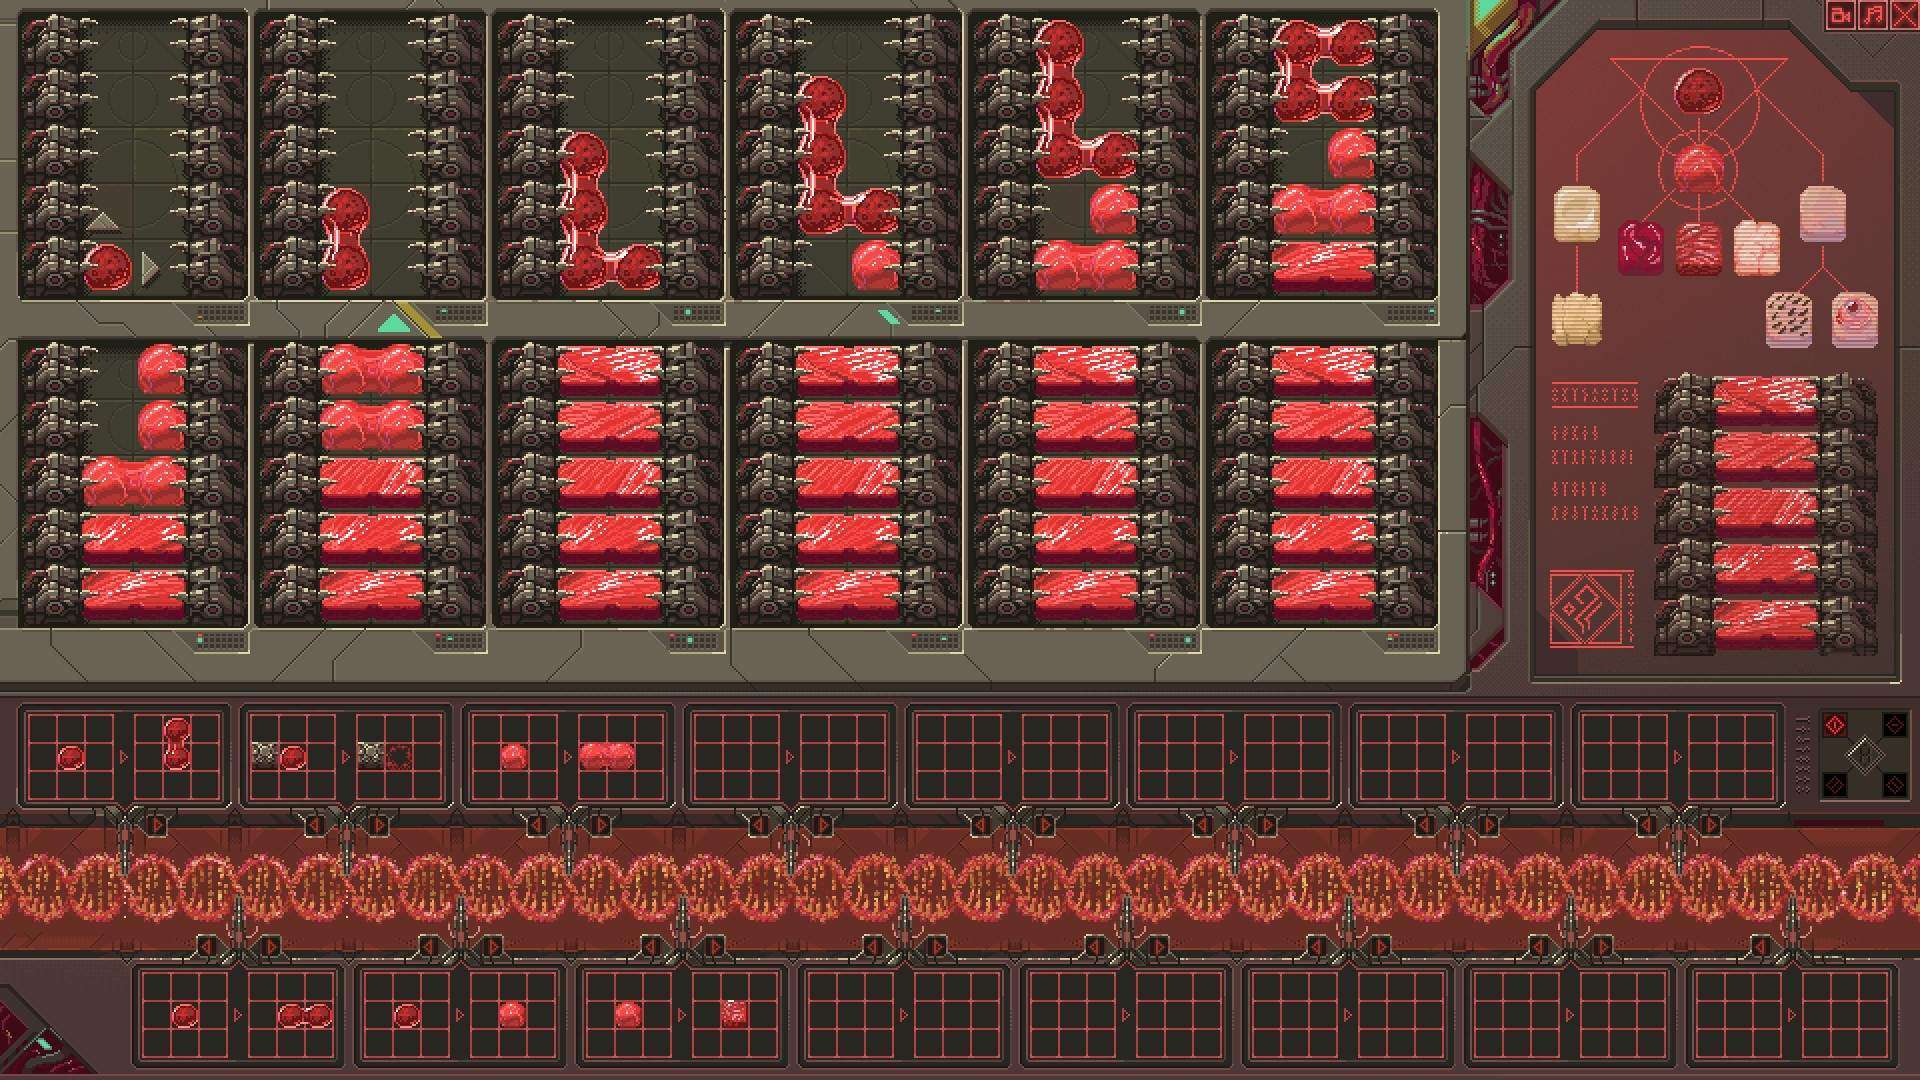
Specimen B (Column I)
Specimen Γ (Column I)
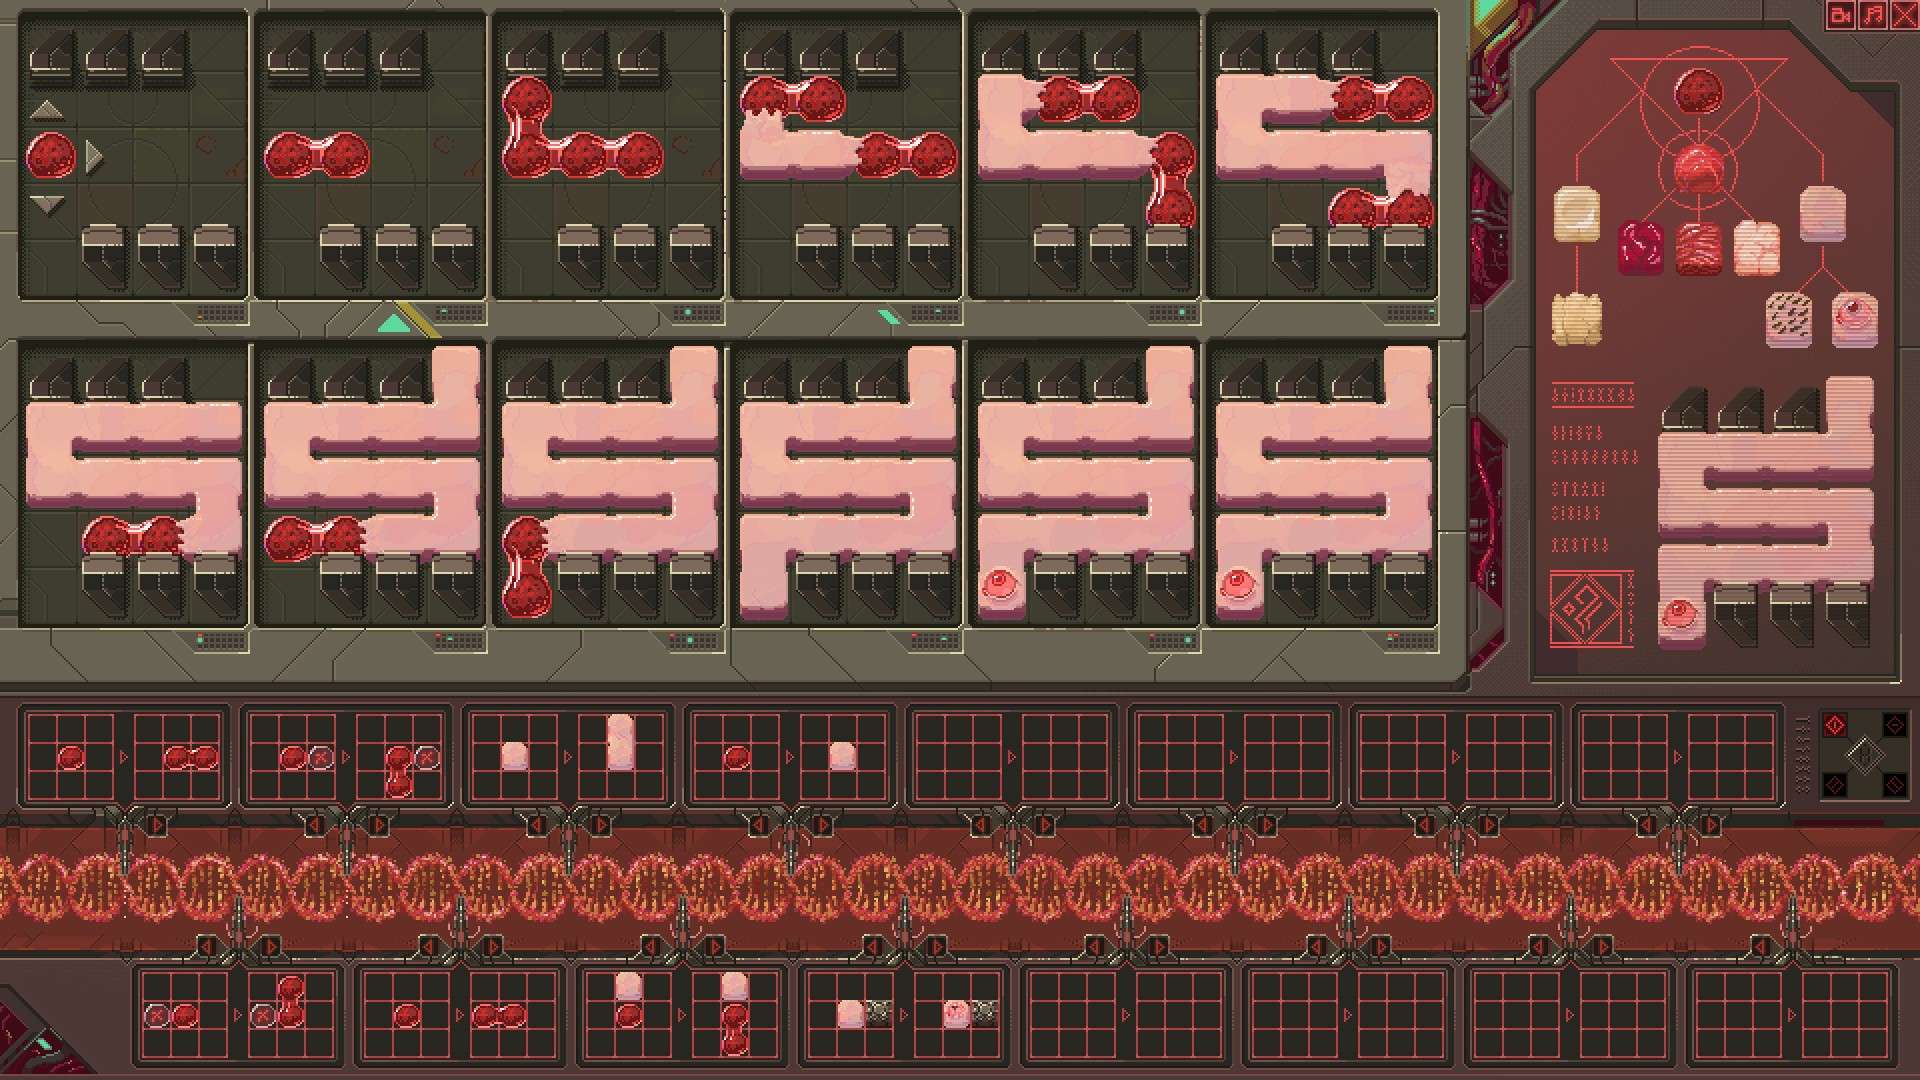
Specimen Δ (Column II)

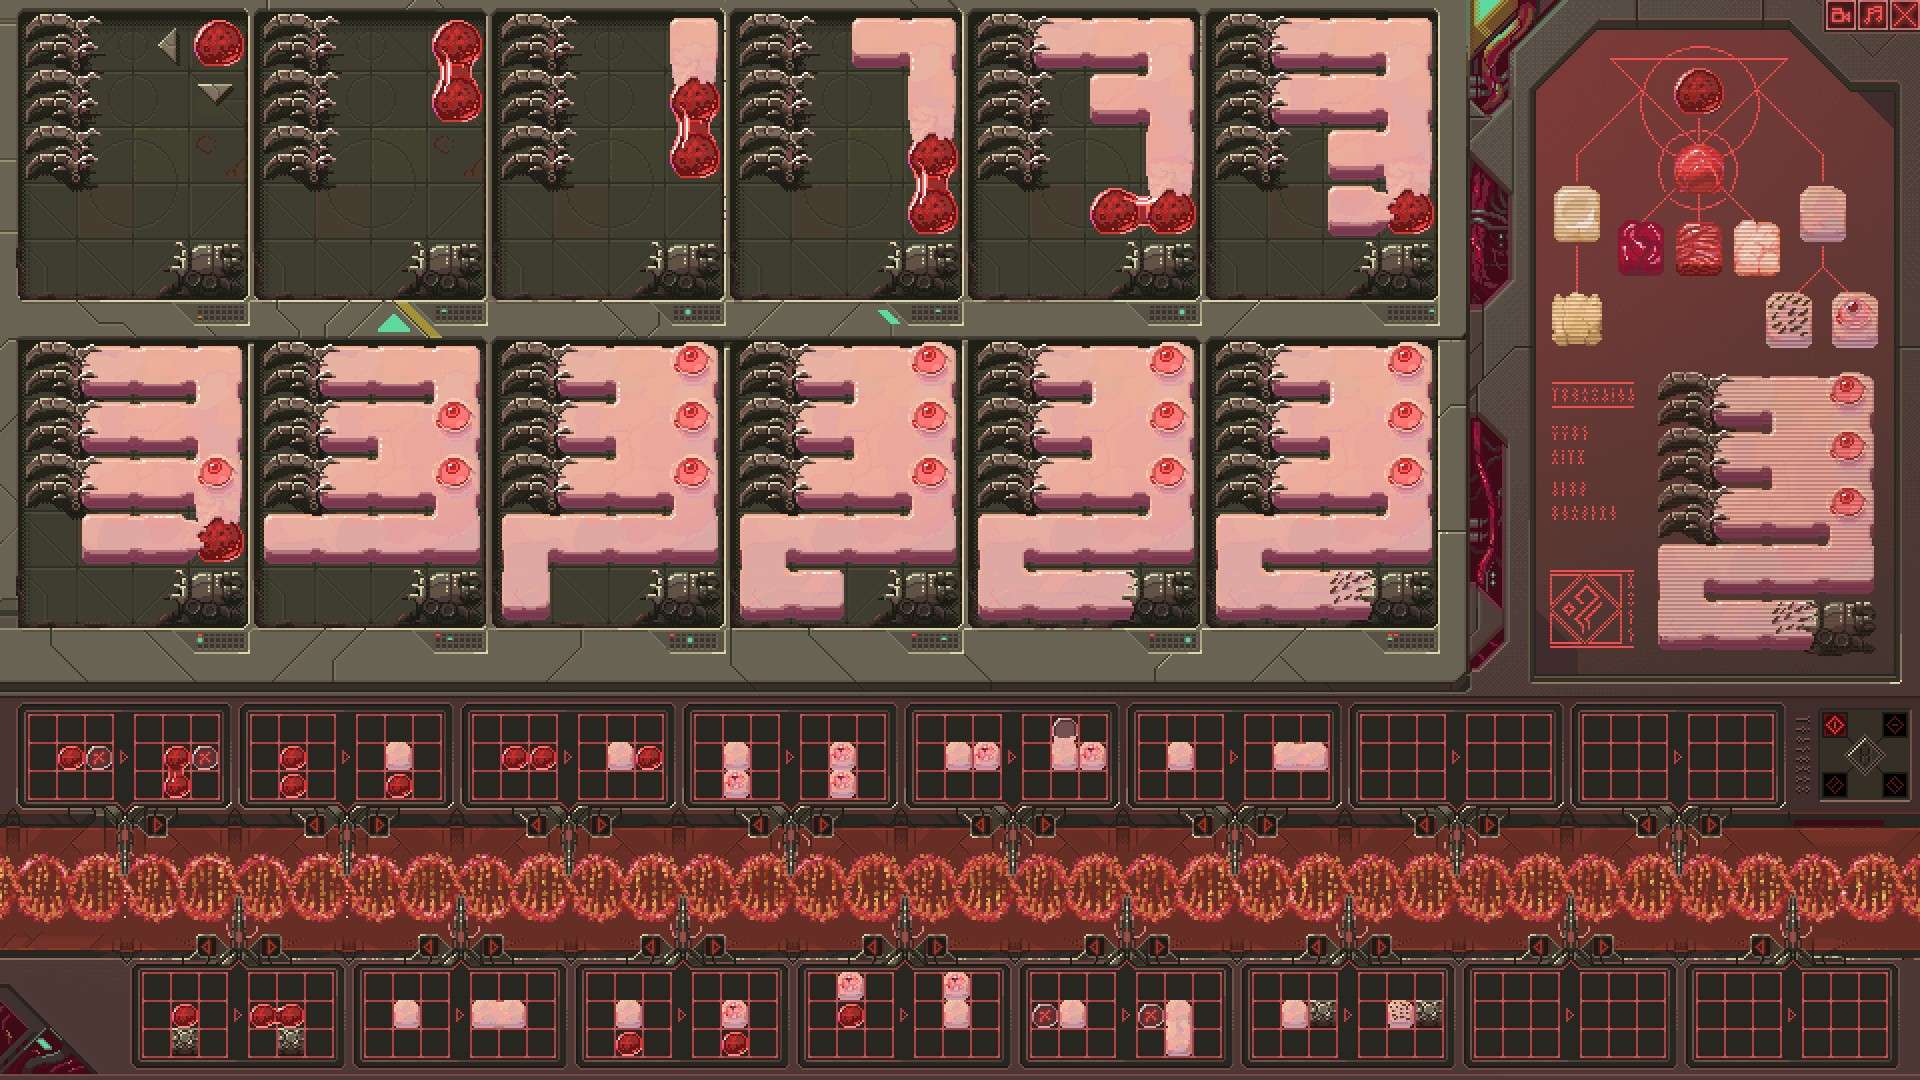
Specimen E (Column II)
Specimen Z (Column II)
Specimen H (Column III)
Specimen Θ (Column III)
Specimen I (Column III)
Specimen Κ (Column IV)
Specimen Λ (Column IV)

Specimen M (Column IV)

Specimen Ν (Column V)
Specimen Ξ (Column V)
Specimen Ο (Column V)


Be the first to comment