
This is a guide on how to get every achievement in the game. Since there hasn’t been a proper guide uploaded yet, hopefully this one can help out a bit.
How to Obtain All Achievements
Basic Achievements
First up are the basic achievements. These are exactly what they sound like, basic tasks that can easily be done.
Handsome Style
- Customize your profile badge for the first time
The easiest one to do if you’ve already unlocked some banners and icons. Simply unlock some banners and icons for your Online profile. (Through Arcade Mode or Campaign). Then go to Options, Online and then My Profile. Then just customize your badge and you’ll have it.
No Nonsense Avatar
- Clear Arcade with 1 brawler
Bushido Tactics
- Clear Arcade with 5 brawlers
World Domination is at Hand!
- Clear Arcade with 15 brawlers
Leave Everything to Me!
- Clear Arcade with all (standard) Brawlers
I grouped these four together because… it’s pretty much self explanatory. Thankfully Arcade displays who you’ve already played as. You can do these on any difficulty you want, and you’ll eventually get all four of these achievements.
I Want an Award!
- Compete in your first local or online battle
Way of the Ninja
- Compete in 10 local or online battles
Monstrous Power!
- Compete in 50 local or online battles
Defender of the Earth
- Compete in 100 local or online battles
Once again, grouped these four as these are self-explanatory. You’ll earn these achievements as you keep playing local and online matches.
To speed up the process, you can enter a local match with a CPU, set it to one stock, kill yourself and keep repeating the process until you get the achievements.
That was Nuts!
- Complete a Pop the Slime Balloons minigame level
Brain Blast!
- Complete the Pop the Slime Balloons minigame with all (standard) brawlers
NASB did what Smash Bros Ultimate couldn’t and gave us a “Break The Targets” mode for this game! And these two achievements are very easy to get. Simply go into Single Player, then Minigames, and there you can select Pop The Slime Balloons. Just like Arcade Mode, it tracks who you’ve played as in case you need reminding of who’s left. Play it with all the characters and you’ll get both achievements easily.
Small Disclaimer: Pop the Balloons can also be done in Campaign Mode as one of the many routes that can show up in your run. However, completing one in Campaign mode DOES NOT count towards the achievement. Only doing the minigame in Single Player mode counts.
“Slightly” Difficult Achievements
If I’m being honest, these achievements aren’t that difficult. Mostly because you can make them easy to complete in some way… kinda but I’ll get to that.
Don’t you take that tone with me, young man!
- Complete an Arcade run without losing a single stock
This one can be made difficult if you decide to do Arcade on the highest difficulty (and spoilers, you will have to do it at some point), but at the same time, you can make it easier on yourself if you just want to get it out of the way. Just set it to the Easiest setting, choose your character and simply go through the Arcade mode without losing a stock. The Bosses may give you some slight trouble but if you know how to handle them, you should be fine.
Smashing!
- Defeat an opponent without losing a single stock in a local or online battle
Second verse, same as the first. Since you can set a local CPU opponent to Level 0 of all things, getting this achievement will be a cake walk. Despite the description, unless you purposefully set the bot to Level 9, I don’t see how this is difficult.
Say My Name!
- Play at least once with all standard brawlers in a local or online battle
Ironic that the character whose schtick is that she wants everyone to remember her is the icon pic. Because this achievement requires you to have good memory of who you played as. It’s not hard, but it is annoying if you lose track of who you’ve already played as and who you haven’t played as. And unlike Arcade and Pop the Balloons, the game doesn’t visibly show who you’ve already done a match with.
So here’s an easy way to go about it. Simply start from the top row, and go from left to right. Once you’ve played a match with each character from the top row, move on to the bottom and repeat the process. Once you’ve done that, you should have the achievement.
“Hard” Achievements
These next three achievements are the ones I feel are genuinely difficult and can put up a challenge. So it will take some skill to complete them…. well one of them at least. If you’re someone who’s inexperienced with platform fighters or just have basic skills, then there are ways you can cheese at least two of these achievements. With that said:
Blimey!
- Complete an Arcade run on the highest difficulty
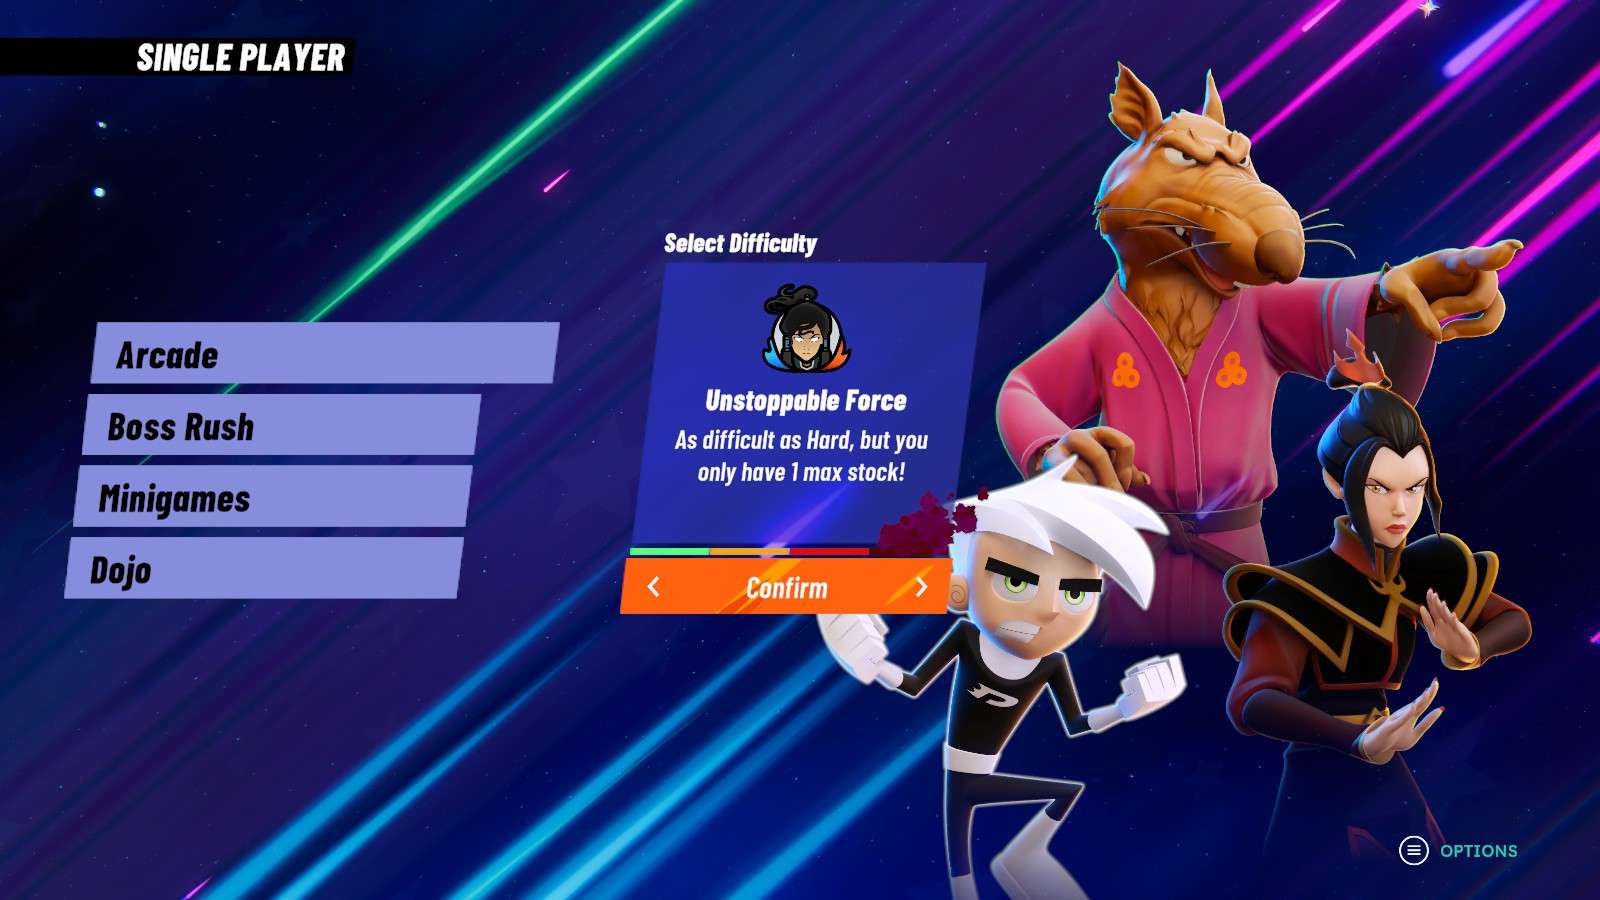
To beat this one you need to beat Arcade on the Unstoppable Force difficulty. Easier said than done depending on who you play as, especially since you’re also only given one stock.
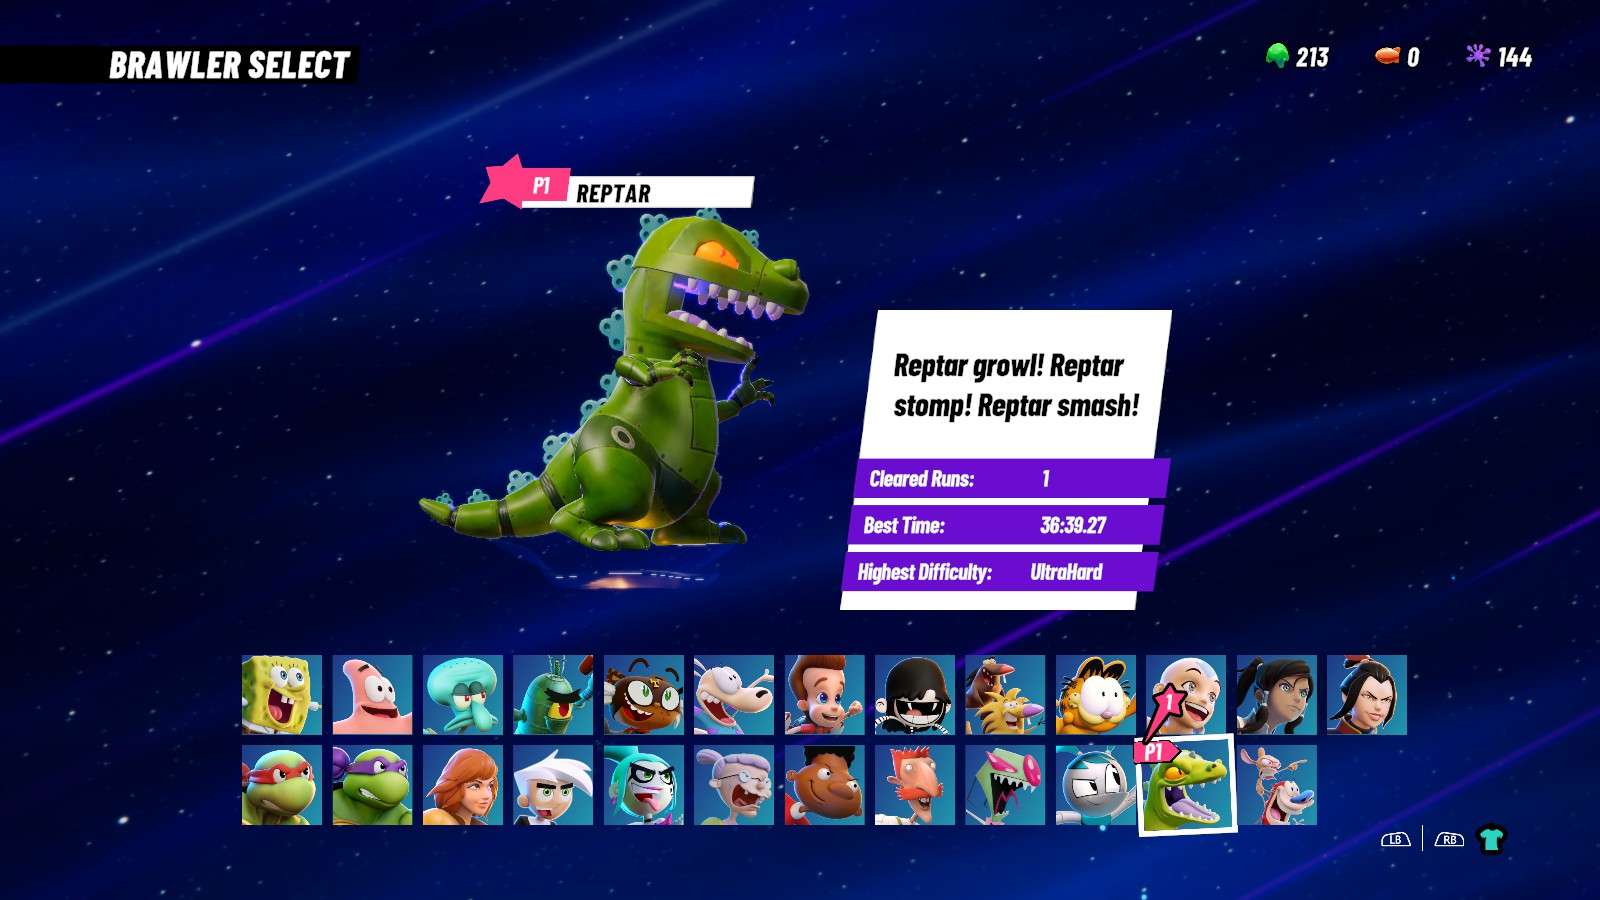
The way I beat this was by using Reptar as my character. As of me writing this guide, Reptar is currently one of the strongest characters in the game. He has strong attacks that can come out quick and can make easy work of opponents and bosses. If you’re struggling to get this done, try doing this with the green dino as your character and do what you can to win and survive.

On a side note: If you want to kill two birds with one stone, you can also also attempt the “Don’t you take that tone with me, young man!” achievement while going for this one, Since that one requires you not to lose a stock, and you’re only given one stock on Unstoppable Force difficulty.
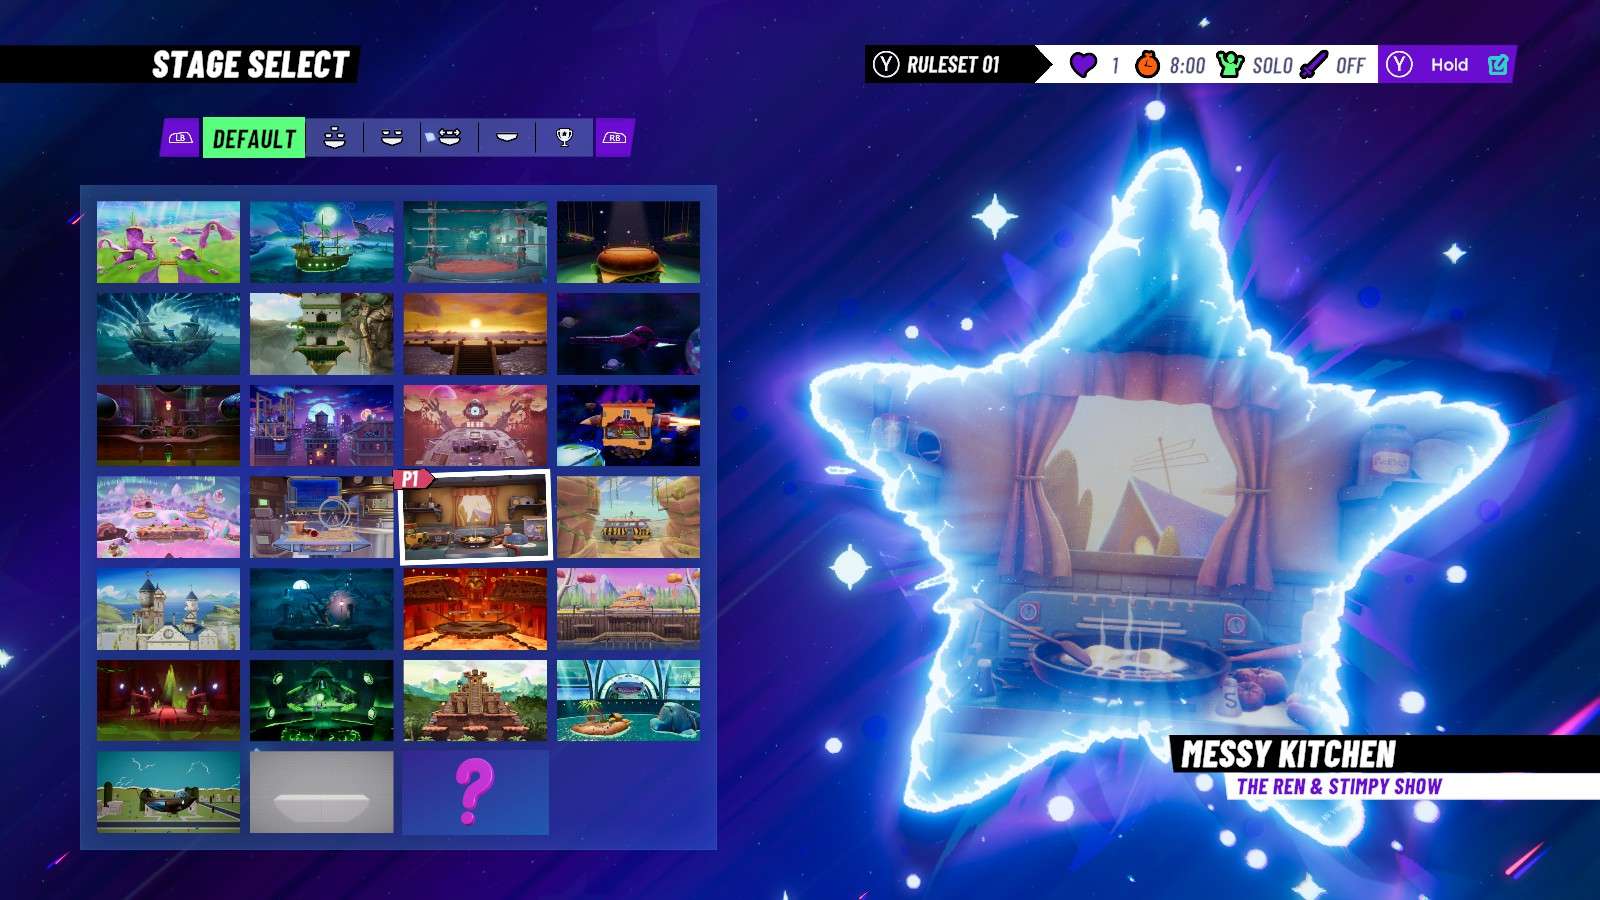
Wicked
- Defeat a level 9 NPC in a 1v1 battle
Exactly what the description says. A Difficult achievement for sure, but one that can be easily cheesed if you know what to do.
Go to battle, set the rules to 1 Stock, select your character, pick your opponent and set them to Level 9. Now, the way I did this was by picking a stage with a walk-off area, damaging the CPU and then bait them near the edge for an easy KO.
The stage I did this on was the Messy Kitchen, since the top left and top right shelves are easy walk offs. And since the pan in the center can harm CPU’s as well, having them fall into it will help in raising that damage.
Not Even a Contest
- Defeat three level 9 NPCs in a team-battle
Same story as the previous one, except now you have to deal with three 9-Leveled CPUs. Like before, the same walk-off strategy can work, but it’s a lot more annoying to do since you’ll have three opponents going against you. Luckily, a friend of mine has provided a second strategy for this achievement that can also work.
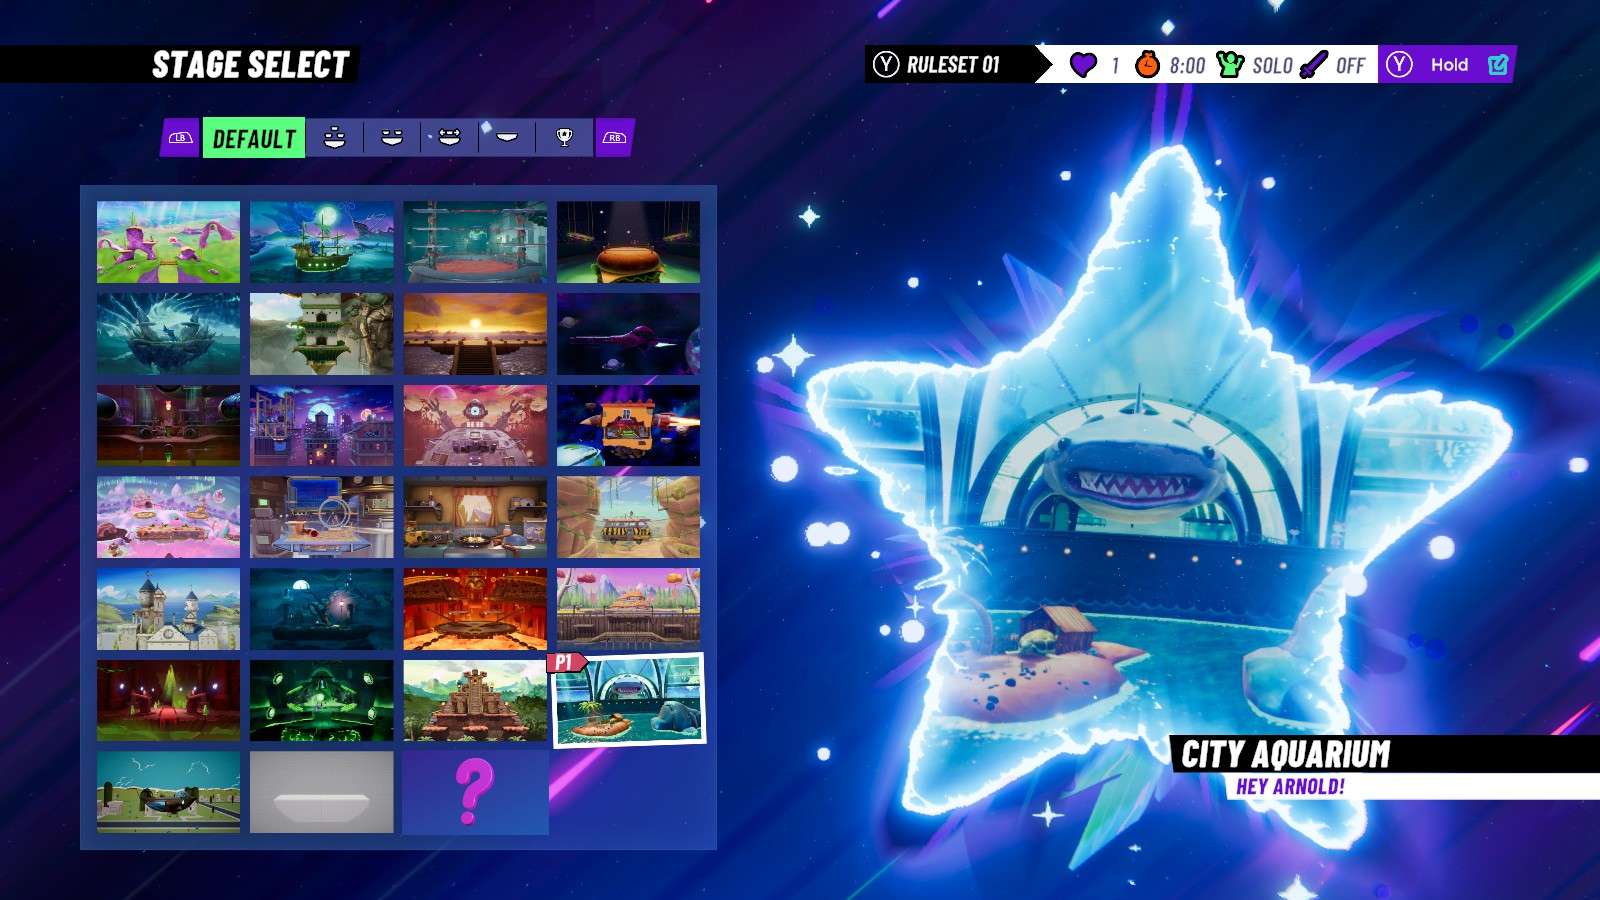
- First, pick the City Aquarium stage. It should have two main platforms with water in the center.
- Then change the rules to allow Teams and change stocks to 1.
- Create 3 CPU fighters on Level 9 and have them all be on the same team. Doesn’t matter who the opposing characters are.
- Once you start the match, stay close to the center without falling into the water. The CPUs should end up falling into the water trying to reach you.
If all goes well, you can get this achievement in less than a minute. I gave this strategy a test and while a bit iffy to work with, it did actually work.
Campaign Achievement Intro
One of the big selling points of NASB 2 was the new Campaign Mode that has you going through a simple story with roguelike gameplay elements combined with the platform fighter gameplay that this game provides. So of course there would also be achievements linked to it.
Before I continue, I personally recommend that you
Finish the story from start to finish.
Not only because this next portion will contain spoilers for the mode, but also because:
- You’ll actually acquire some of these achievements during your playthrough.
- You’ll unlock some helpful tools to getting these achievements as you progress further into the story.
So if you want to experience this fresh as well as knock some easy achievements out of the park, then stop reading.
If you already finished it or just don’t care for spoilers, then keep on going!
Defeat The Boss Achievements
Alright, I decided to put these in a separate section, just so they wouldn’t clog up the next section. Cause honestly, there isn’t much to say about these, so saying it six times in a row would be repetitive and redundant.
All you need to know is this:
You get these achievements by beating all the bosses at least once during your Campaign run.
In order of the achievements the bosses are:
- King Jellyfish
- The Flying Dutchman
- Shredder
- Sartana De Los Muertos
- Vlad Plasmius
- Clockwork
Easy to understand these. I leave you now with the names of the achievements themselves.
- Jellyfishing
- Leedle leedle leedle lee
- Shredded
- This I Swear!
- Going Ghost!
- Timed Out
Campaign Achievements
Now with the intro AND the bosses out of the way, here are the other Campaign Mode Achievements.
Activate the plot device!
- Complete your first Campaign run
Easy to grasp here. Simply complete a Campaign Run for the first time. If you’re just starting the story for the first time and are skilled enough, you can get this as early as the introduction run. The catch is that you’ll start with Spongebob, with no perks and one stock. If you fail at any point, don’t worry. You HAVE to complete the runs in order to progress through the story anyways, so you’ll obviously get this achievement in no time.
Savior of the World
- Complete the Campaign’s story
Another easy to understand one. Simply play through the story, defeat Clockwork and then reach the end credits. Not much else to say here.
Research Complete!
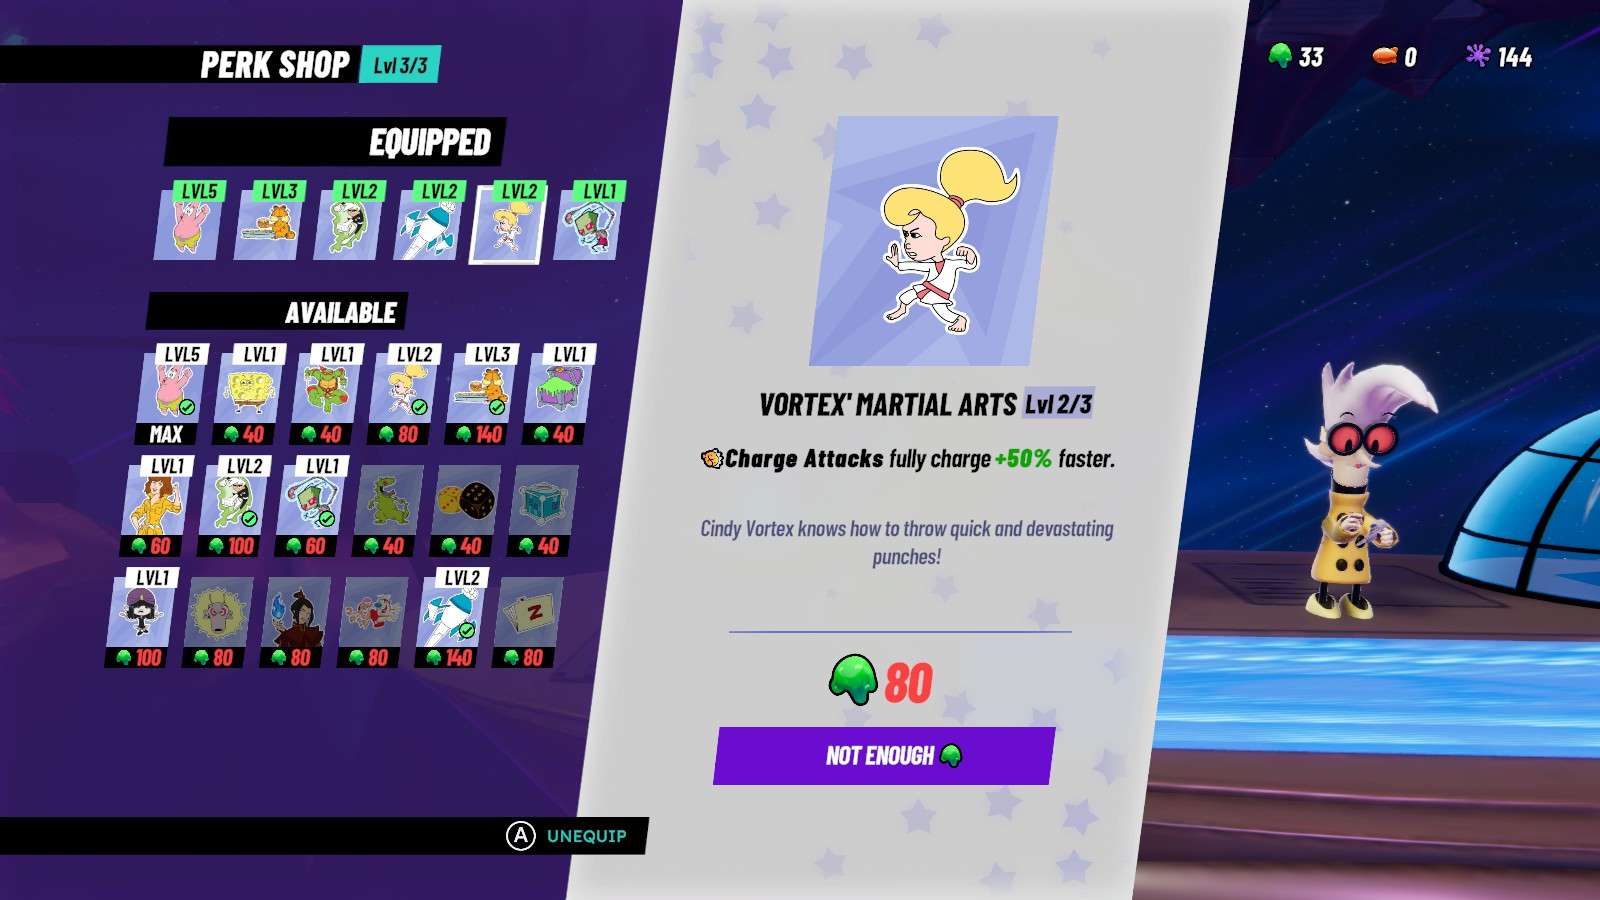
- Level up a Campaign Perk to its max level
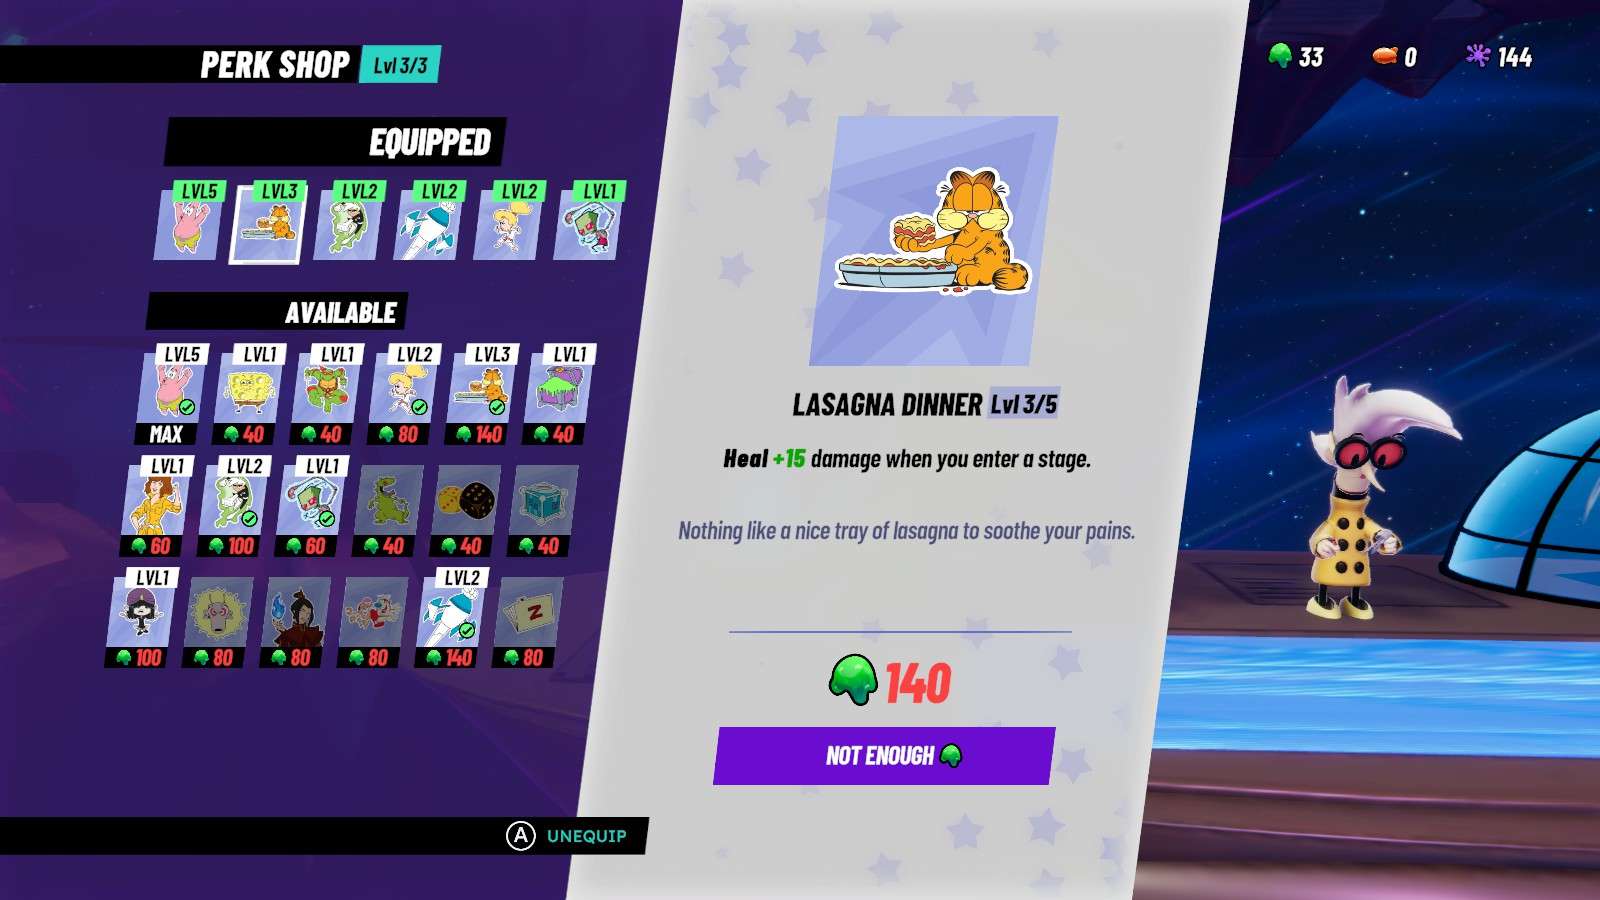
In the Hub world you can purchase permanent perks from Nora Wakeman to equip and use during your campaign run. However, you can make these perks stronger by upgrading them with the green slimies you collect during your adventure.
Each of these perks start at Level 1 and can be leveled up several more times, with the MAX level being different for each perk. Some Max out at Level 5. While others Max out at Level 3. You can do this with any perk you purchase and you’ll get the achievement, but there is a catch:

The more you upgrade a perk, the more Slimies it will cost to upgrade them. So if you want to get this achievement quick, try to focus on getting more of the Green Slimies so you can level up one of your perks. And since there are various easy ways to get them, from end of round rewards, to power ups that instantly grant them to you, it should not take long to unlock the perks and level them up…
…speaking of unlocking perks…
The Journey is the Destination, Man
- Unlock all Campaign Perks
Now this achievement actually isn’t what you think it is. Let me explain:
Nora’s shop has a LOT of perks for you to purchase and use. But purchasing them all is NOT how you unlock this achievement.
Alongside the Green Slimies, there are also Purple Splats you can collect as well. These are used to upgrade the shops in the hub world, which in turn gives you more stuff to purchase. In the case of Nora’s Shop, you can use the Purple Splats to upgrade her shop up to two times. When upgraded to Level 2, she gives you a second set of perks to purchase. But when you upgrade to Level 3, she gives you the third and final set of perks you can acquire.
Simply put: Level up Nora’s shop to its Max Level, and you’ll receive/unlock all the campaign mode perks, thus unlocking the achievement in the process.
Now we’ve pretty much covered every achievement in the game’s campaign mode as well as the game itself… all of them…except for one more.
Unleash the DOOM!
- Complete a Campaign run in the highest difficulty
I decided to give the final achievement its own section, as I have a lot to share about it, tips, strategies and etc.
- SO. To complete this achievement you have to do a full Campaign Run on the hardest difficulty.
- Each Run is Three Phases long, and each phase ends with a Boss Fight. Once you beat the third phase and the third boss, you’ll beat the run.
- Before I can talk about this more in-depth, I’ll need to provide some extra information that can help out with the process.
Hard Mode… ISN’T Hard?
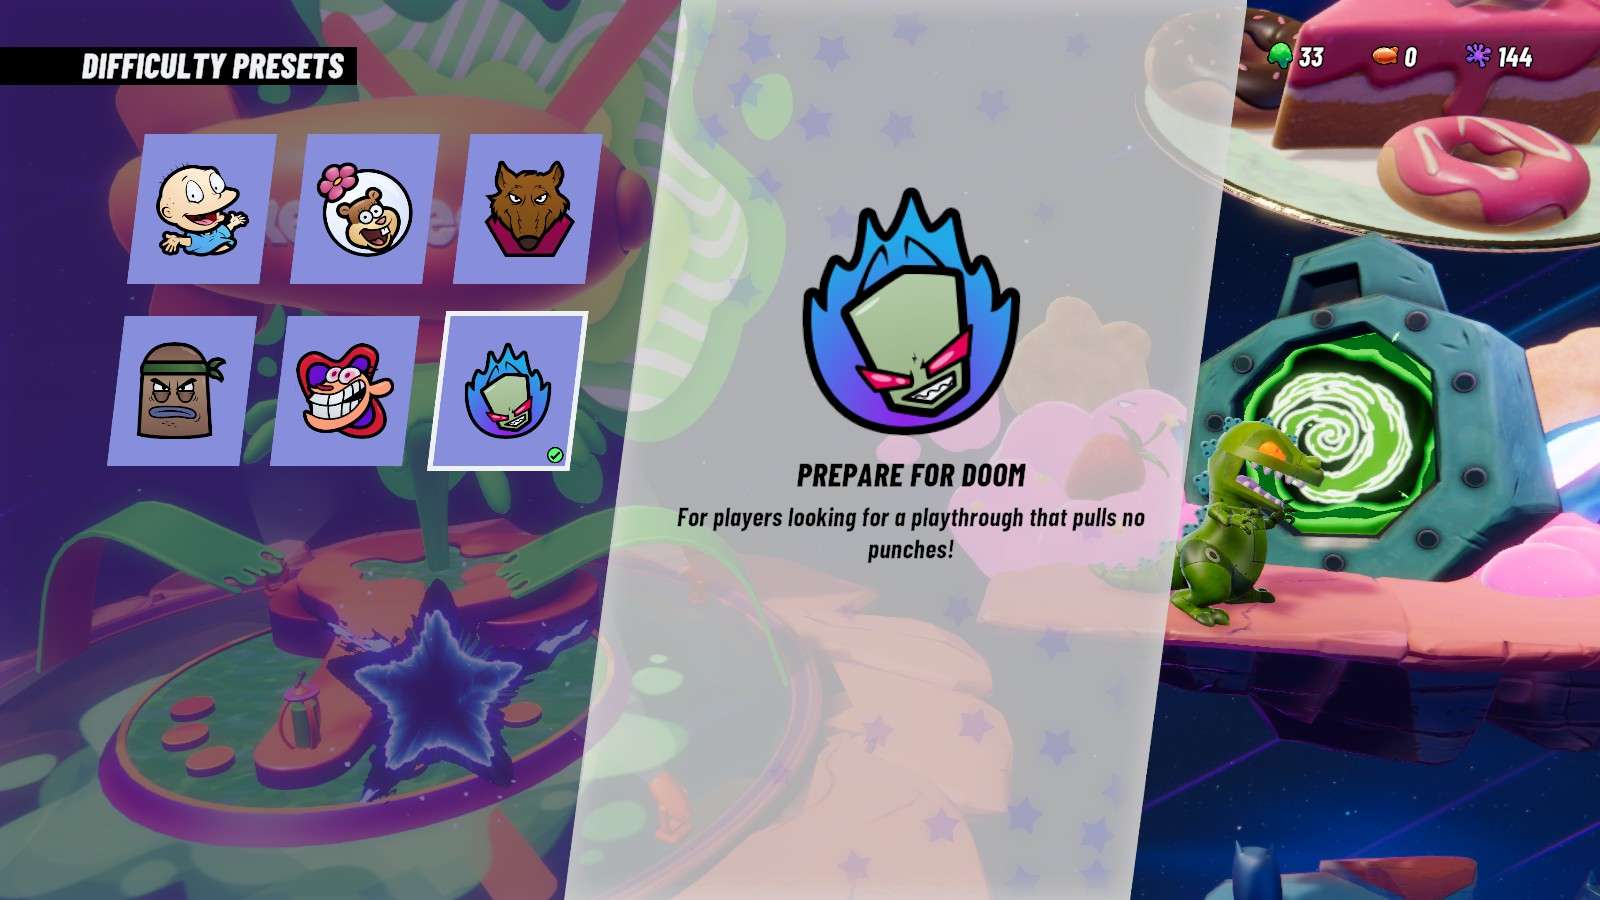
First and foremost: When you first start a file, you’re only given three different difficulty options, with Hard (or Master I think it’s called) being the highest option. However, this IS NOT the hardest difficulty. Once you enter the Hub World, head to the Ghost Portal near the top left of the fountain. This is how you can change your difficulty settings for Campaign mode.
Not only can you switch it to an easier difficulty, BUT it also comes with three EVEN HARDER difficulties to toggle on.
The setting you’ll need to set this to is “Prepare For Doom”, which basically equates as “Ultra Hard” in the character select booth. Set this as the difficulty, and then proceed to/complete a run.
Post Game Tools
Remember how I said you should complete the main story all the way BEFORE doing these Campaign Achievements? Well here’s the two reasons why I recommend this:
- Repeat Runs
After you complete the main story, and watch/skip the credits, a portal will remain open in the fountain. Entering this portal will start a Campaign run for you to play through, so you can do this as many times as you wish. I should also note that the bosses (including the final one you face in Phase 3) are randomized for each run. For example, I did a run with Ember and the last boss I faced was Clockwork. But when I did the “Doom Run” with Reptar, it gave me Vlad as the last boss of my run. So keep that in mind.
- The Purple Splat Shop
For a majority of the story mode, Zim’s house remains completely empty. However, upon reaching the final run to face Clockwork, a familiar face from Invader Zim finally shows herself, and actually unlocks one of the best shops for Campaign Mode.

When you reach this point, Gaz shows up and opens a shop that allows you to trade Green Slimies for Purple Splats… in BULK, with the highest amount granting you 160 Splats for every 110 Green Slimies you give her. I highly recommend using this as much as you can as it can not only help you upgrade Nora’s shop, but it will also help in opening up the remaining 5 equipment slots, which yes, requires Purple Splats to unlock.
Now I should stress, you DON’T have to wait. You can attempt this achievement at any point during the story. But I just feel that attempting it after it’s done is much better, since these two additions make the process a tad more easier to work with.
Proceeding with “The Doom Run”
Now with all that out of the way, time for me to share how to go about the “Doom Run”. There are many ways to go about it, but what I’ll be sharing is the method I went about it.
To start off, let’s talk perks.
First off I highly recommend fully upgrading Nora’s shop and getting the remaining 5 Equipment slots. Since each slot requires more Splats to unlock, getting them through Gaz will definitely help.
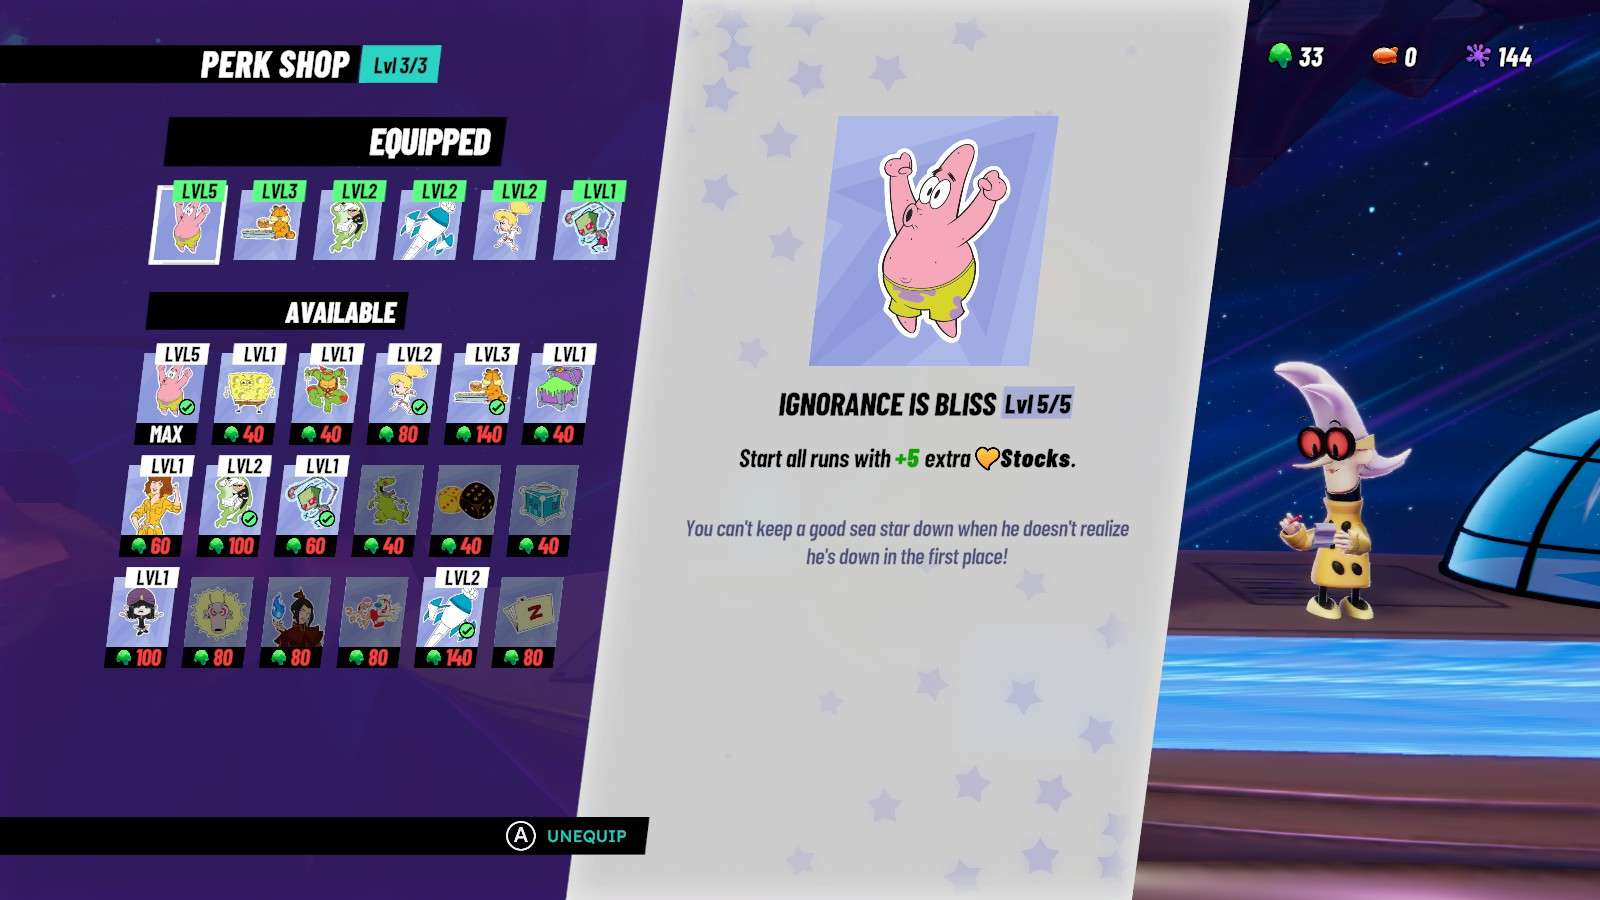
As for which perks to bring, you can use three slots for whichever three perks you think will help, but for the other three slots, I highly recommend you bring the following three with you:
- Ignorance is Bliss
- Lasagna Dinner
- Rocket Science
- Lasagna Dinner will heal you whenever you enter a stage, which can come in handy if you really need the healing.
- Rocket Science can not only help with dealing damage, but it can home in on a target to do so. (I’m unsure if it already comes with a Homing Attack or if you need a power up to make it home in, but it still helps)
- Finally, Ignorance is Bliss is a MUST, because it allows you to start the Run with 5 extra stocks when fully upgraded. So MAX out its level and equip it immediately.
And if you’re curious, the extra three perks I brought along include:
- Irken Shield Generator, which starts me off with a shield that absorbs damage.
- Vortex Martial Arts, which helps charge my charged attacks faster
- And Ectoplasmic Energy, which charges my Slime Meter faster.
As for which character to bring, I suggest bringing a character who can deal a lot of damage, but also isn’t extremely slow.
For my run, I used Reptar, as again: he could deal a lot of damage, can move surprisingly quick, and can attack just as fast. Combined with the power ups and perks you can acquire, he can make the Doom Run an easy ride if you know how to use him.
I think the last thing to discuss is the Run Routes.
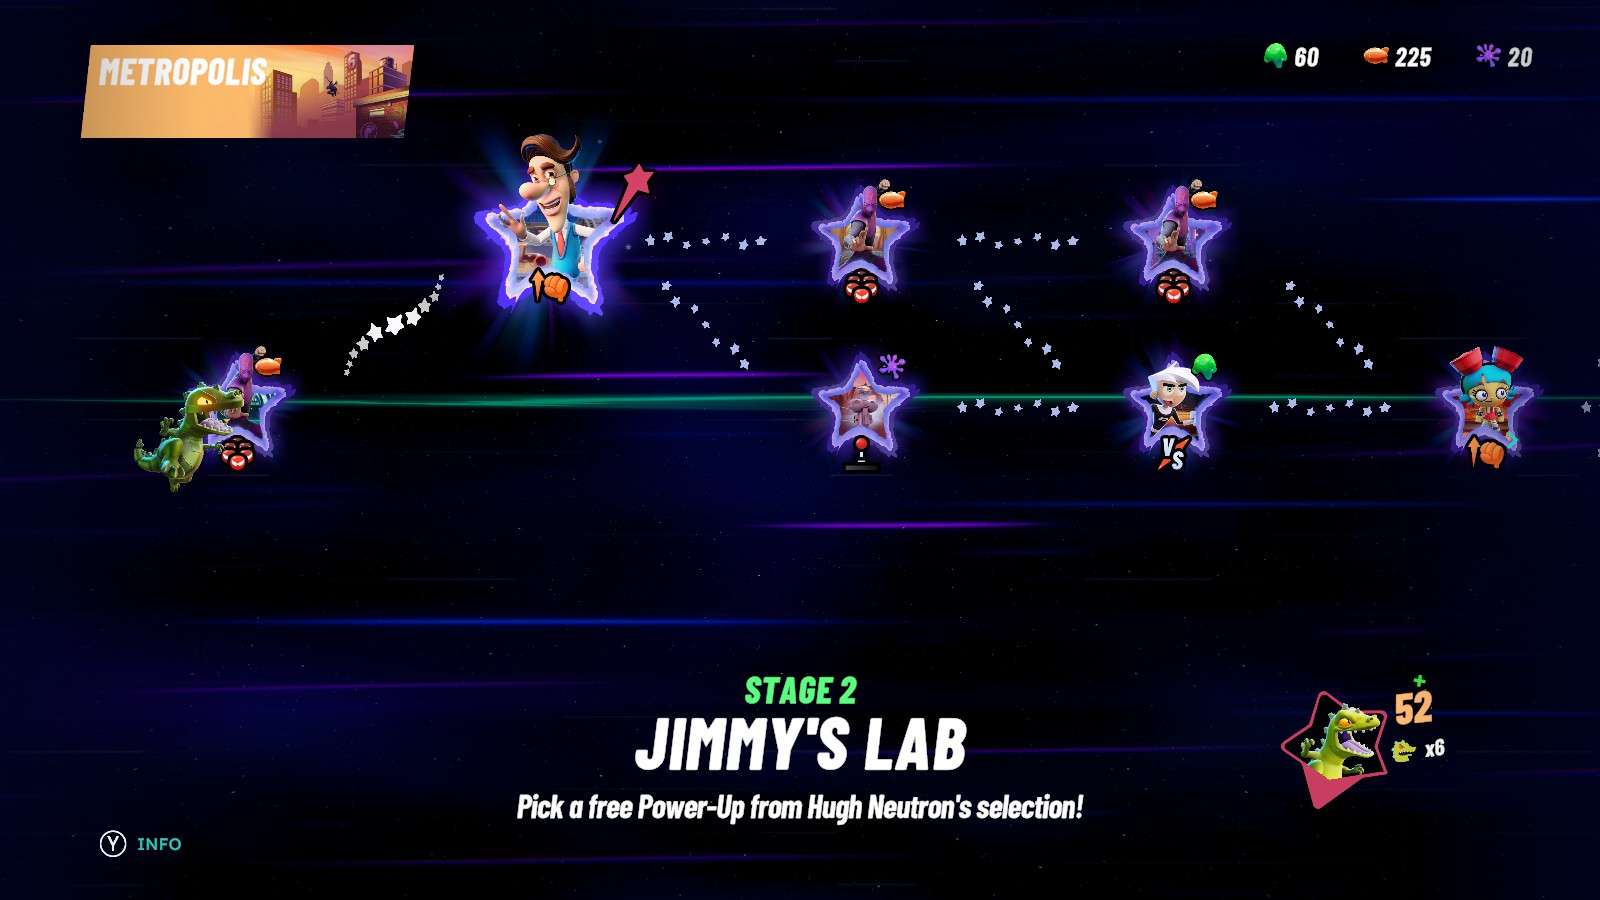
My personal strategy for The Doom Run was to ensure that I kept as many stocks as possible before reaching the third phase. The optimal way I went about this was to try and avoid as many “Versus” spots as possible and instead go for the easier and safer spots to head into. Those being the Power Up Spaces, the Pop The Balloon Spaces. the Rest Stages and the Blimp Store Stages. If presented with none of those, I mostly prefer to do the arena stages, as the enemies can be easily K’O’d with the perks and power ups you’ve acquired. The only time I entered a Versus stage was if it was the only option available.
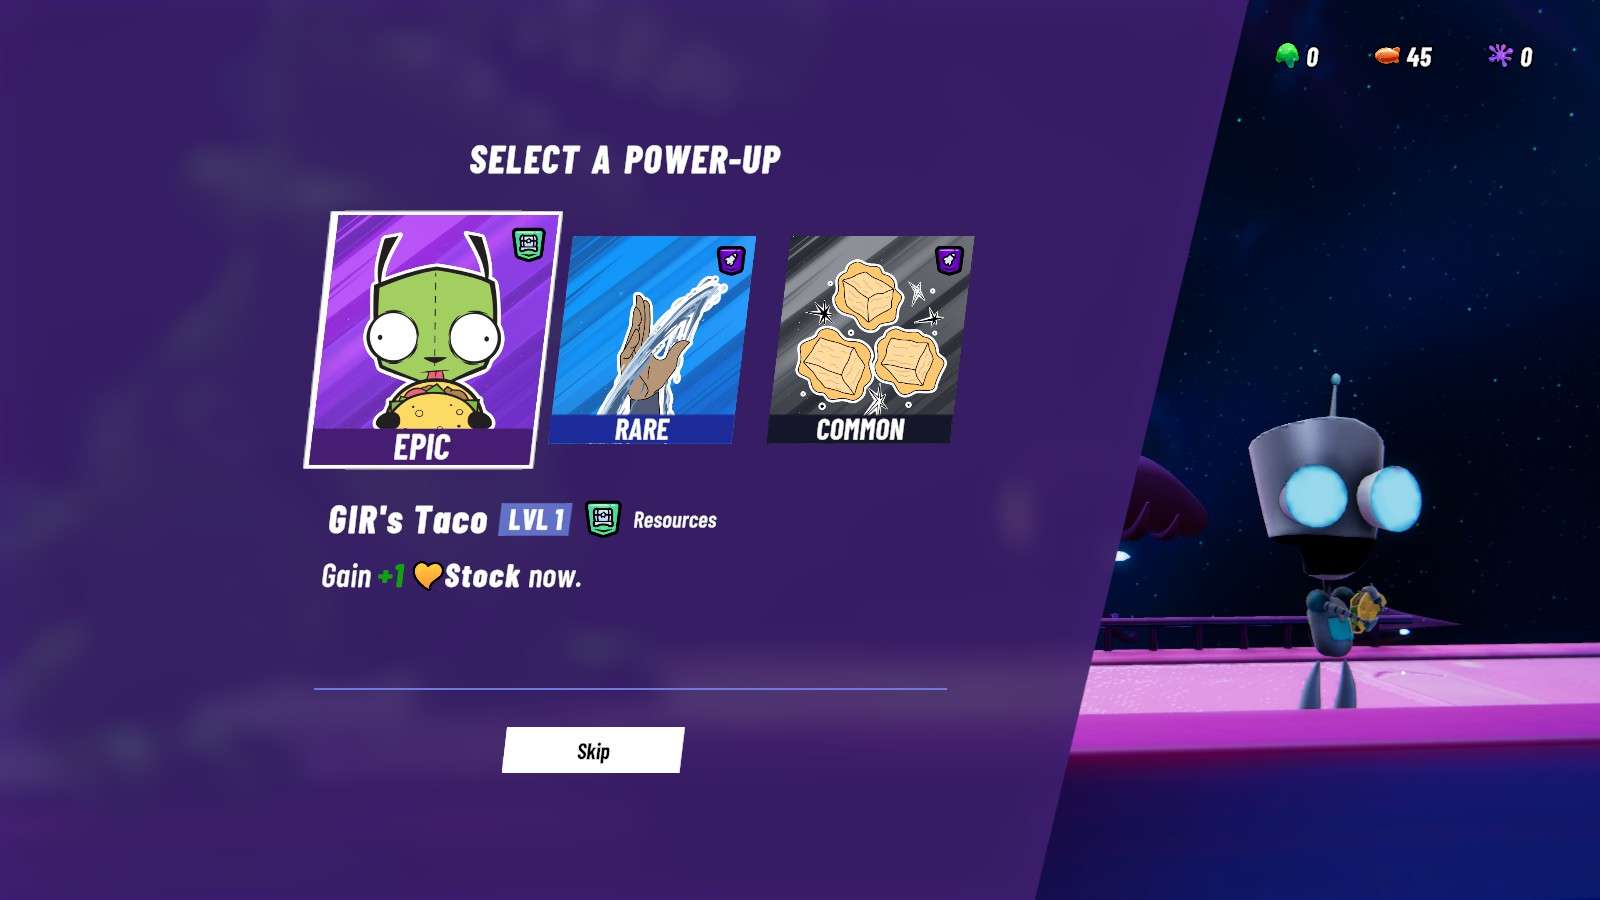
On the topic of Power Ups, the main ones I recommend getting (if you need them) are Power Ups that heal you or give you a Stock back. These come in handy if you happen to keep losing stocks, so nab them if you come across them in the Blimp Shops or the Freebie Stages.
With all that said and done, keep trudging on until you beat the third and final boss of the run.
It doesn’t matter what your rank at the end is. As long as you beat the last boss, on “Prepare For Doom”, you will complete “The Doom Run” and earn the final achievement.

Be the first to comment