
A compository of where to find area logs and what is needed to get them. Straight to the point, and directions on how to get there. Do note that since maps can be mirrored 180°, horizontal positions can be opposite of the guide.
Desolate Forest
1: Walk-through wall reached by a ladder at the middle of the map.
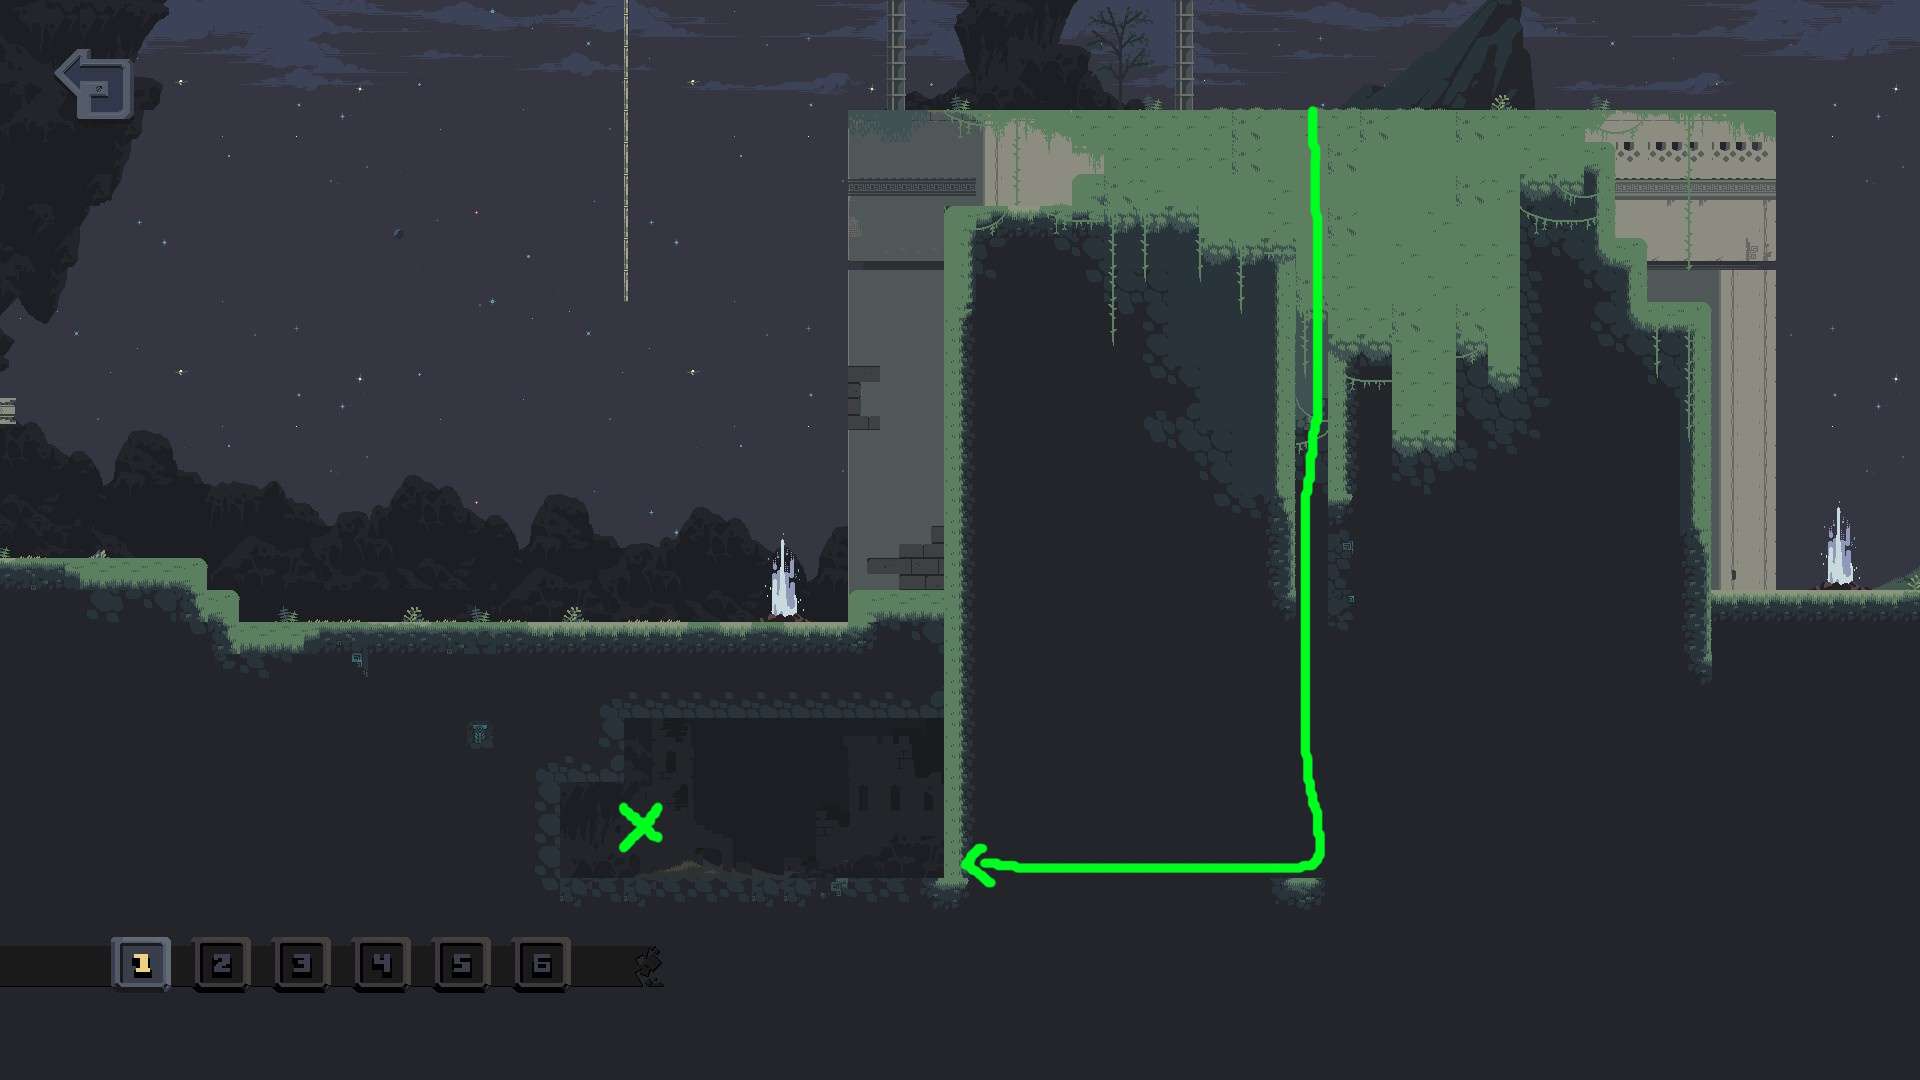
2: At the center of the map, there is a walk-through wall next to a geyser. A simple jump will reach it.
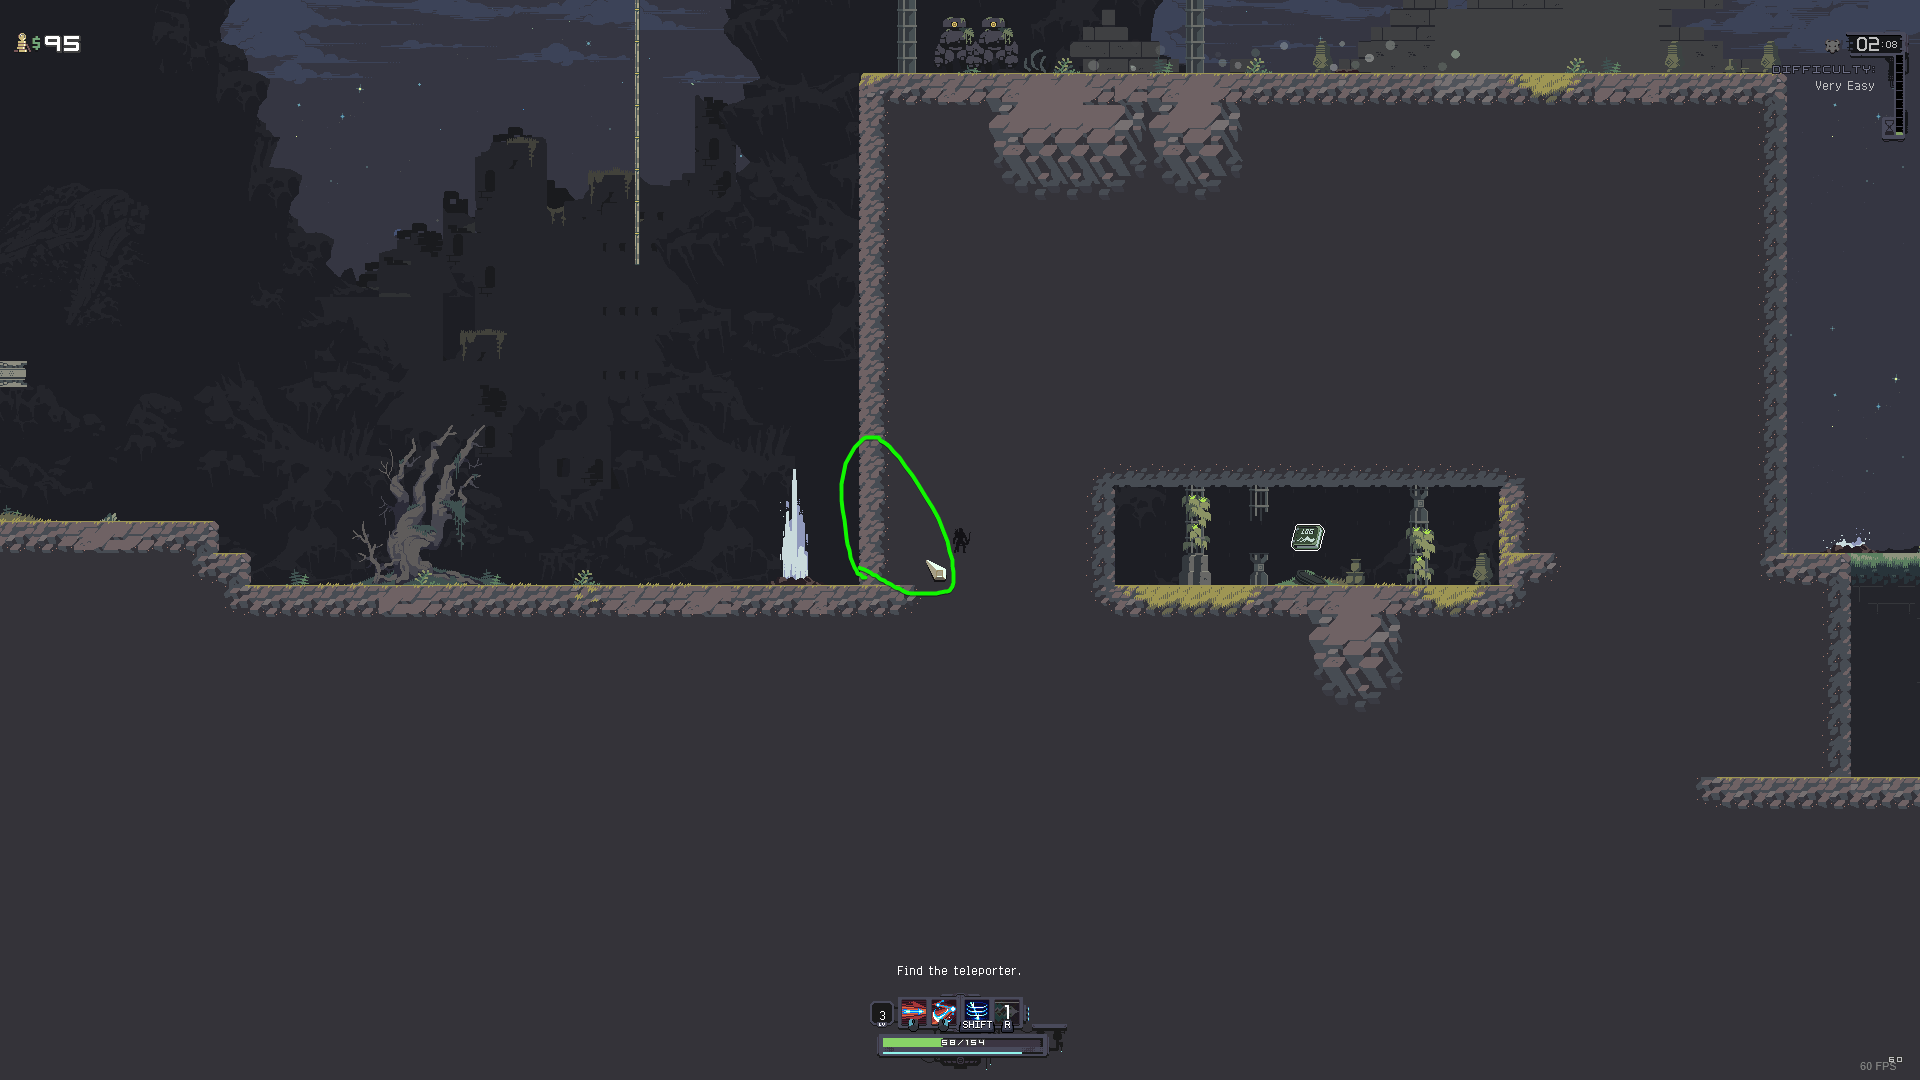
3: At the bottom right of the map, next to a ladder and geyser, is a walk through wall that leads to the log seen at the bottom far right of the map.
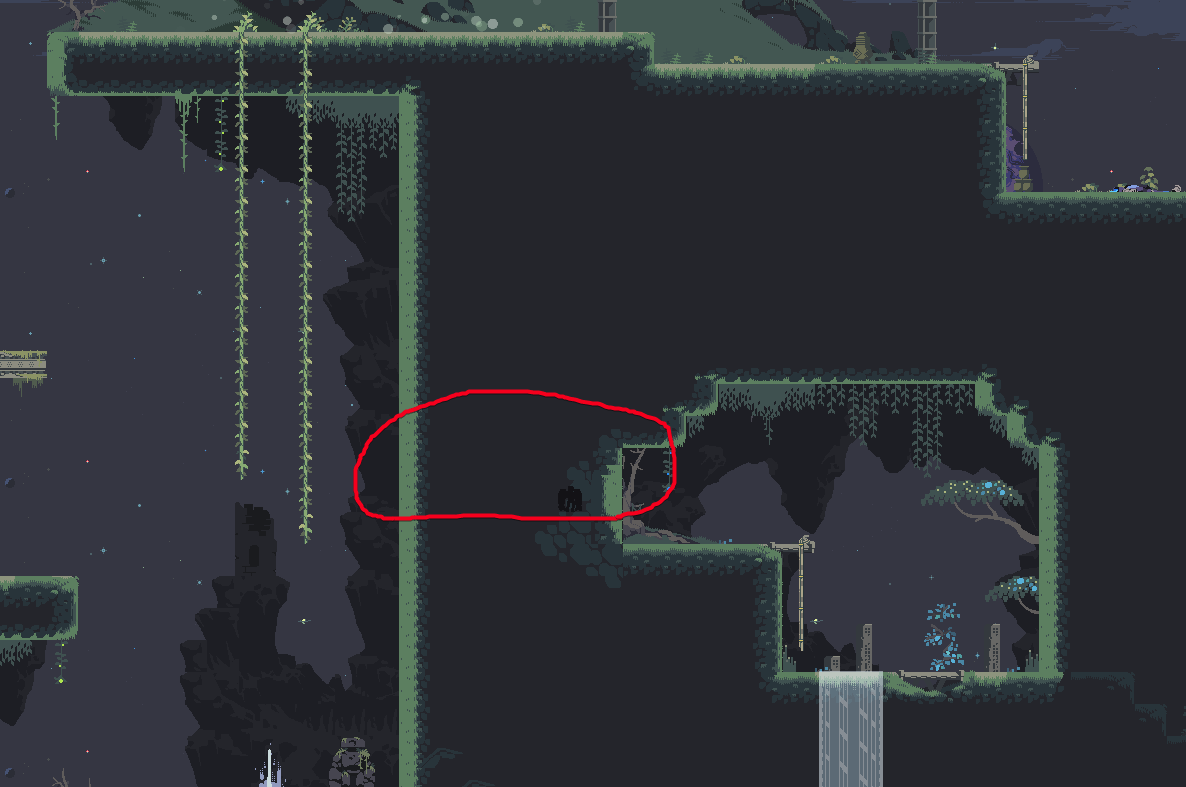

4: At the bottom far left of the map. A ladder that leads to a walk through wall.
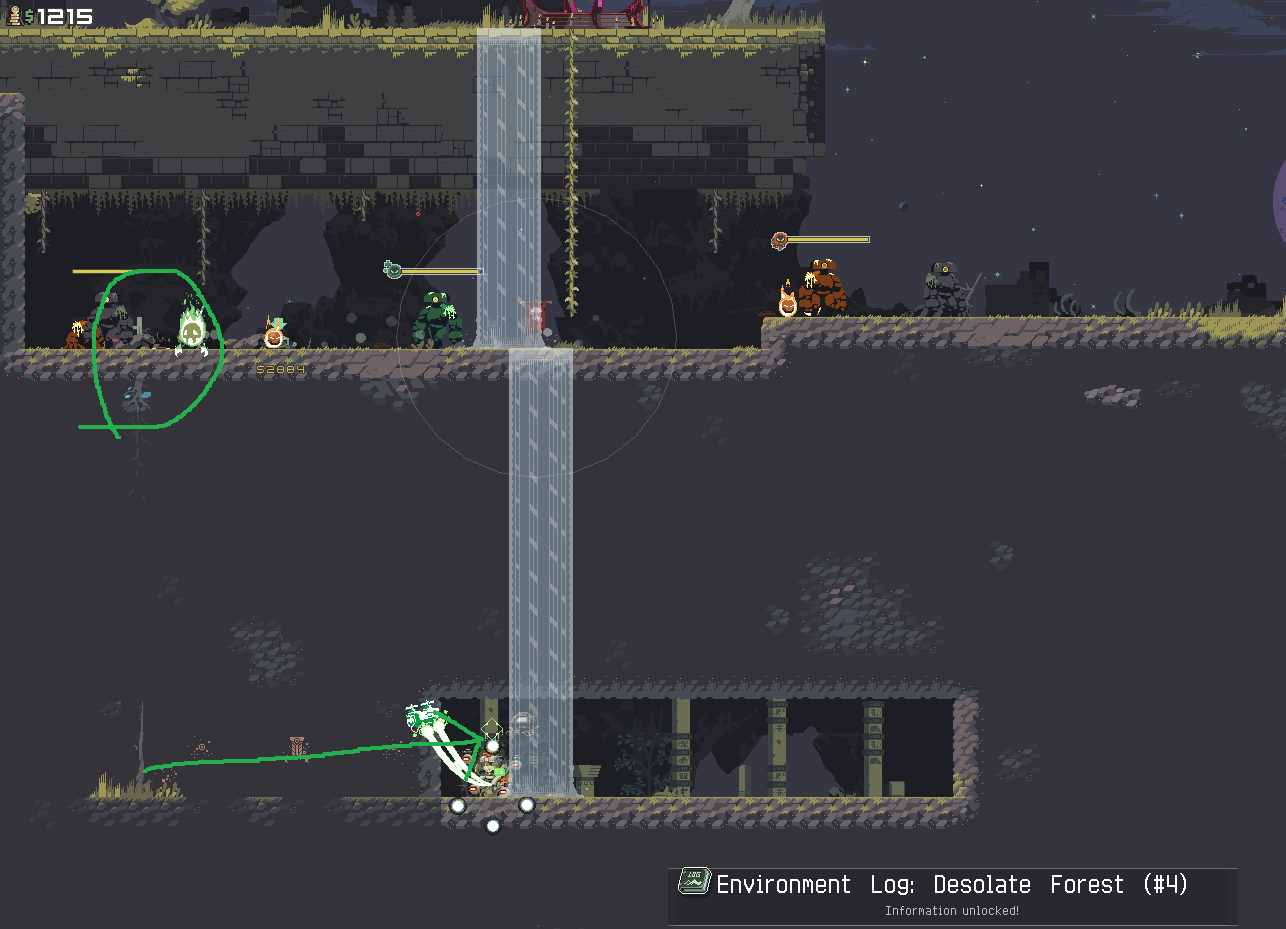
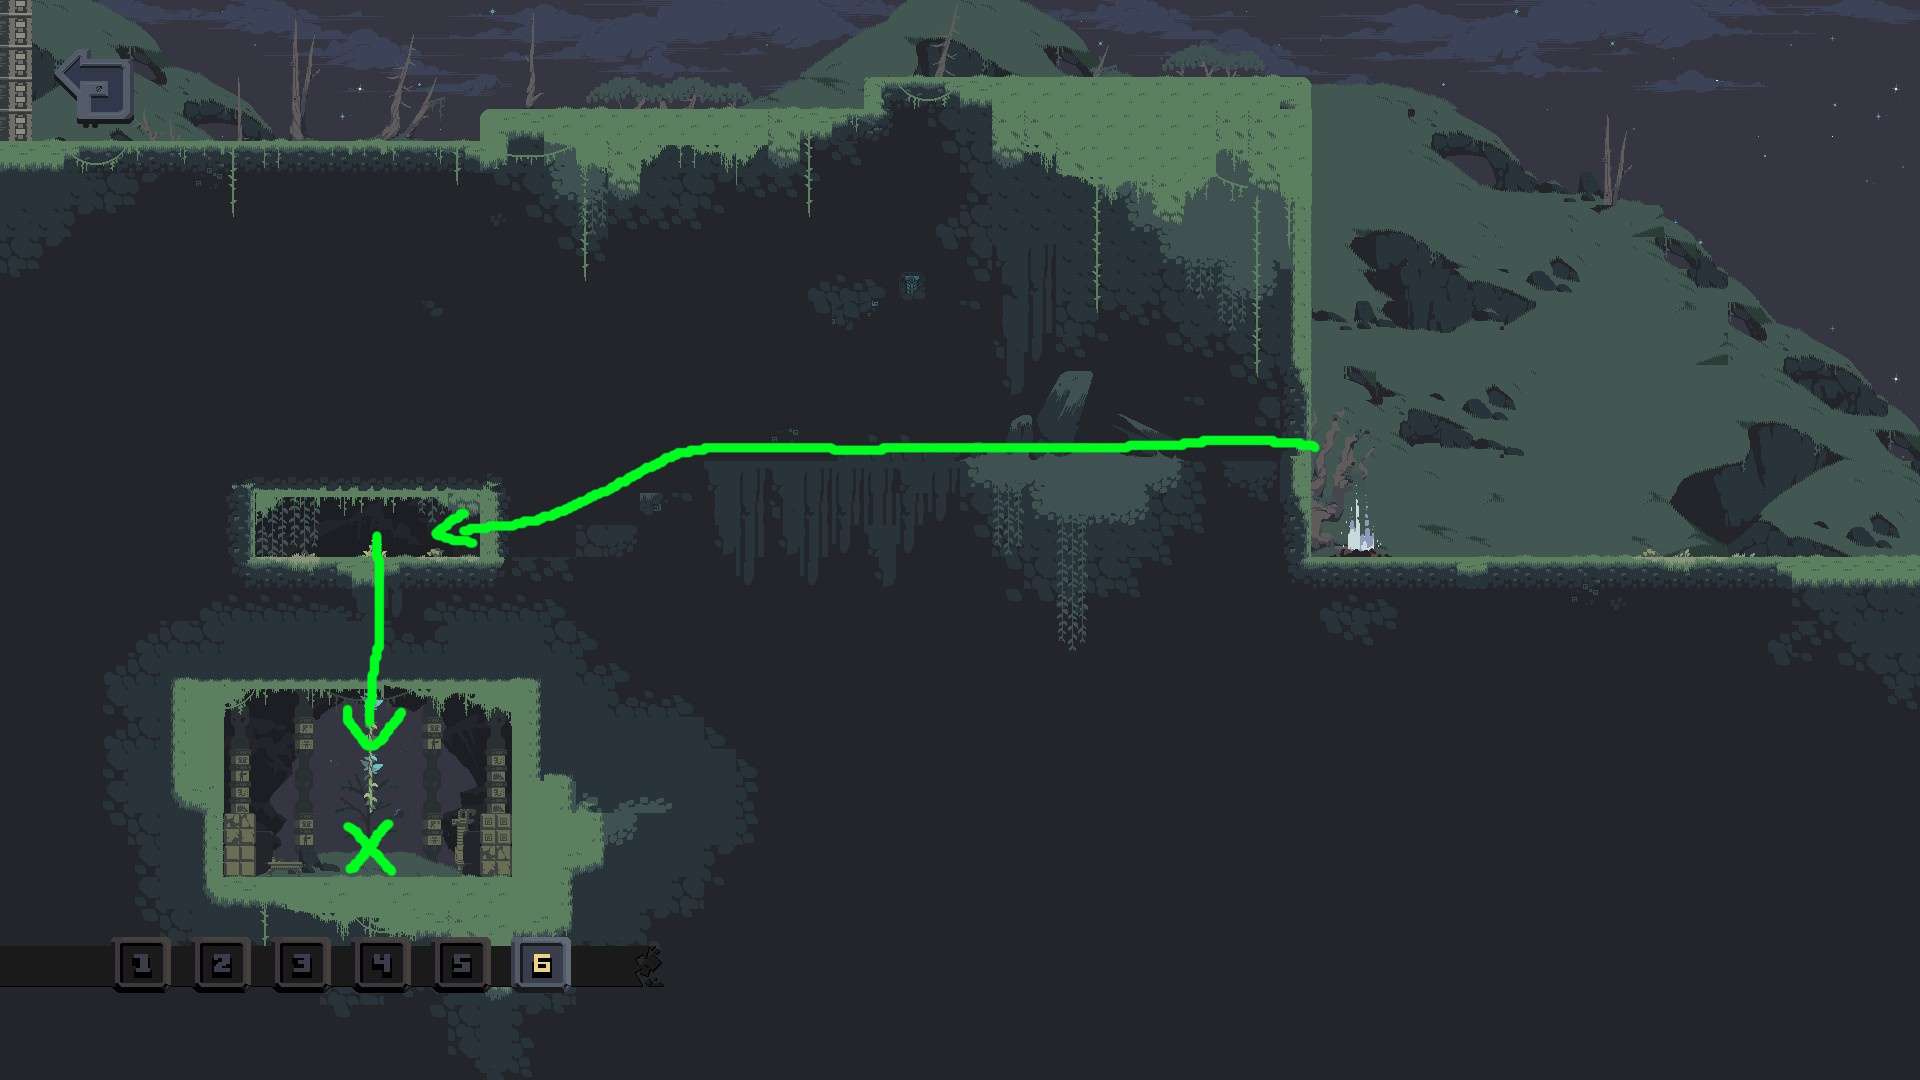
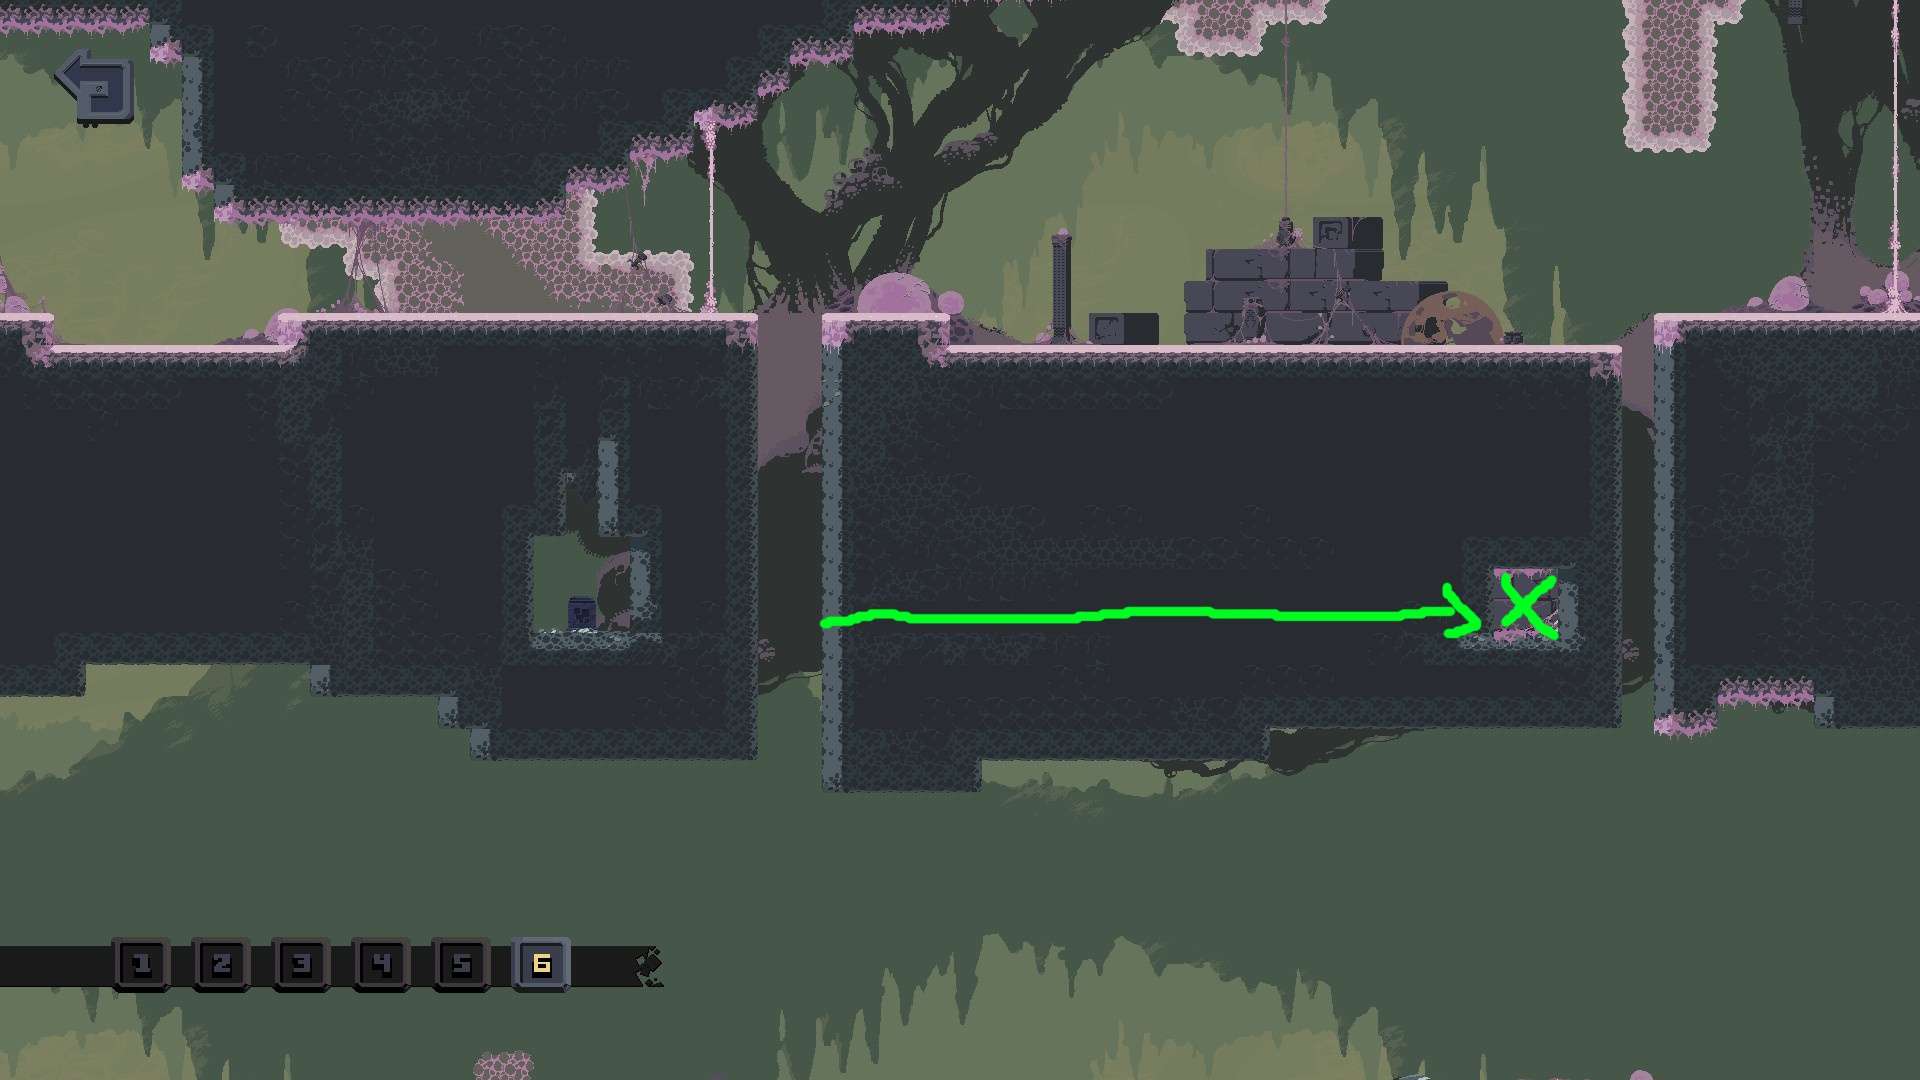
5: At the center of the map, reachable by hugging wall into a walk-through wall.
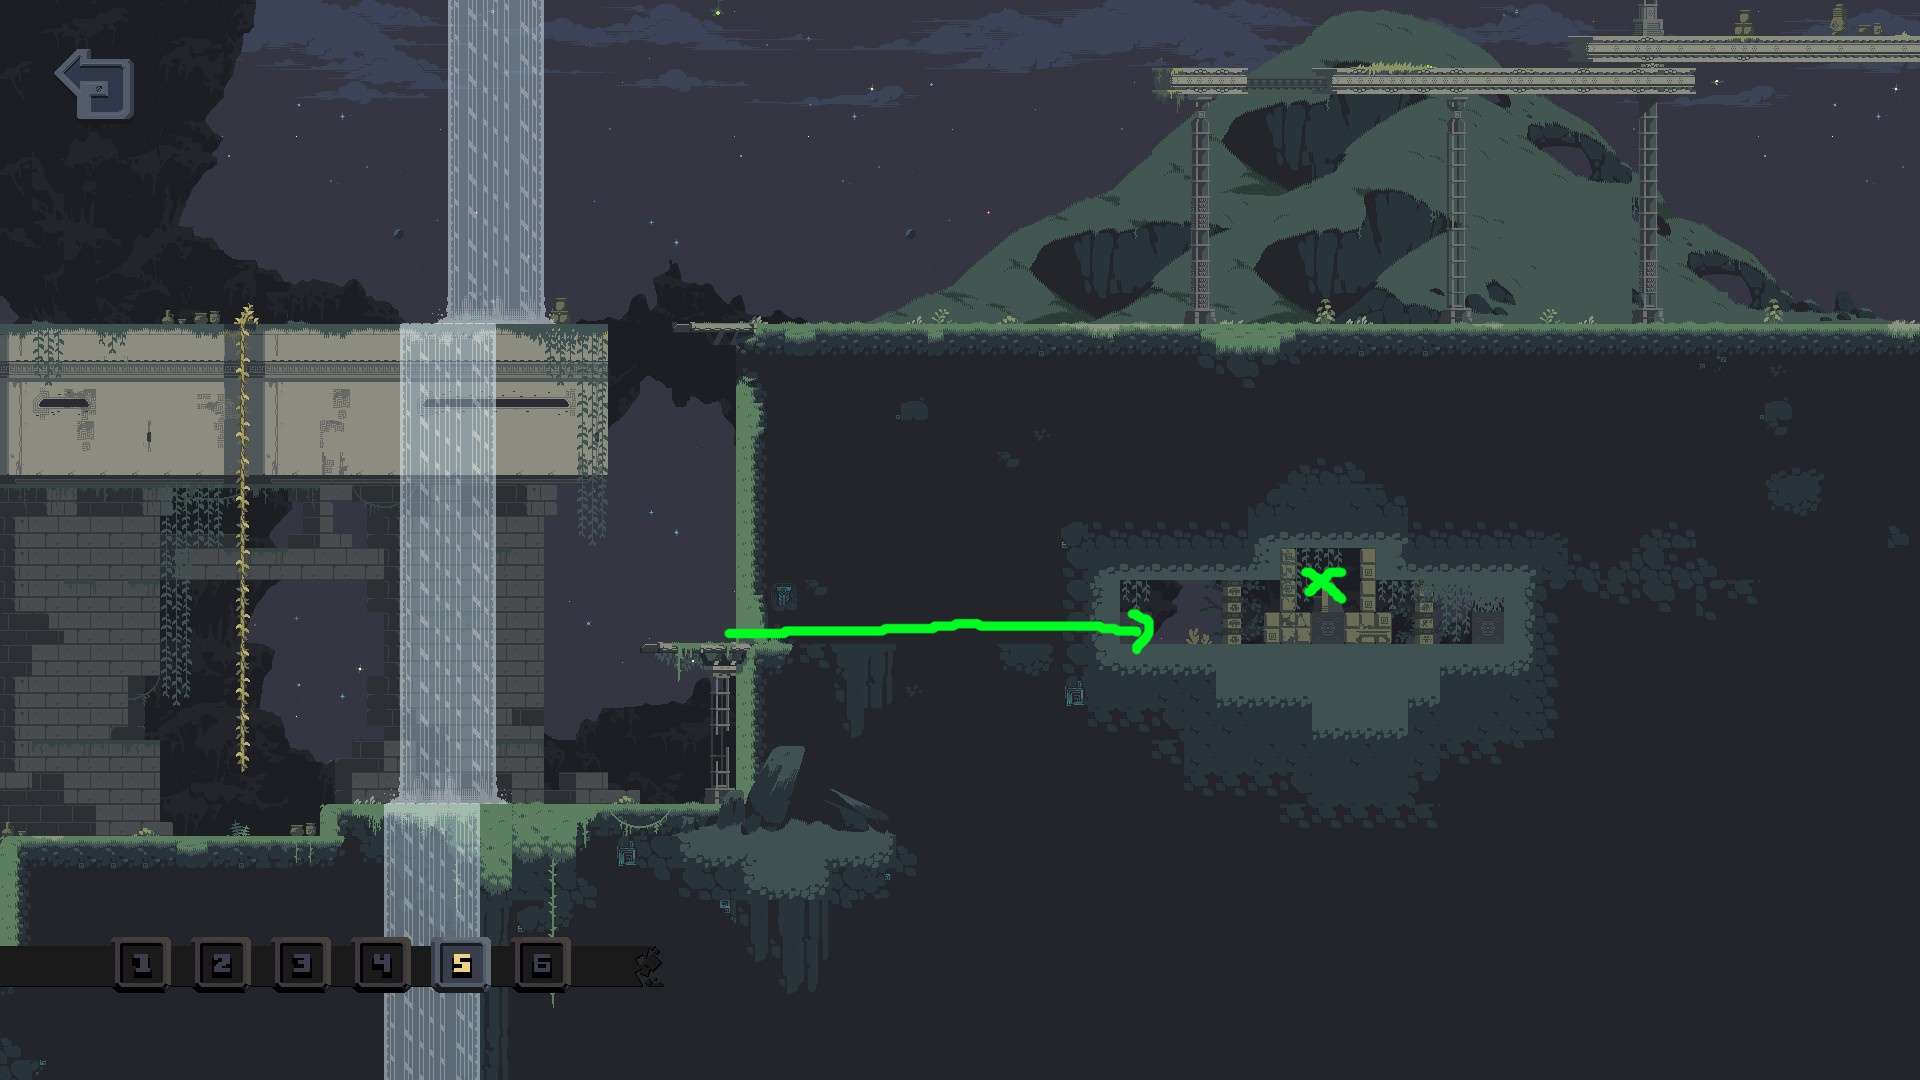
6: Far left of the map, reachable by hugging the wall to get into a walk-through wall.
Dried Lake
1: At the far right of the map, there is a walk-through wall that requires some mobility to get to.
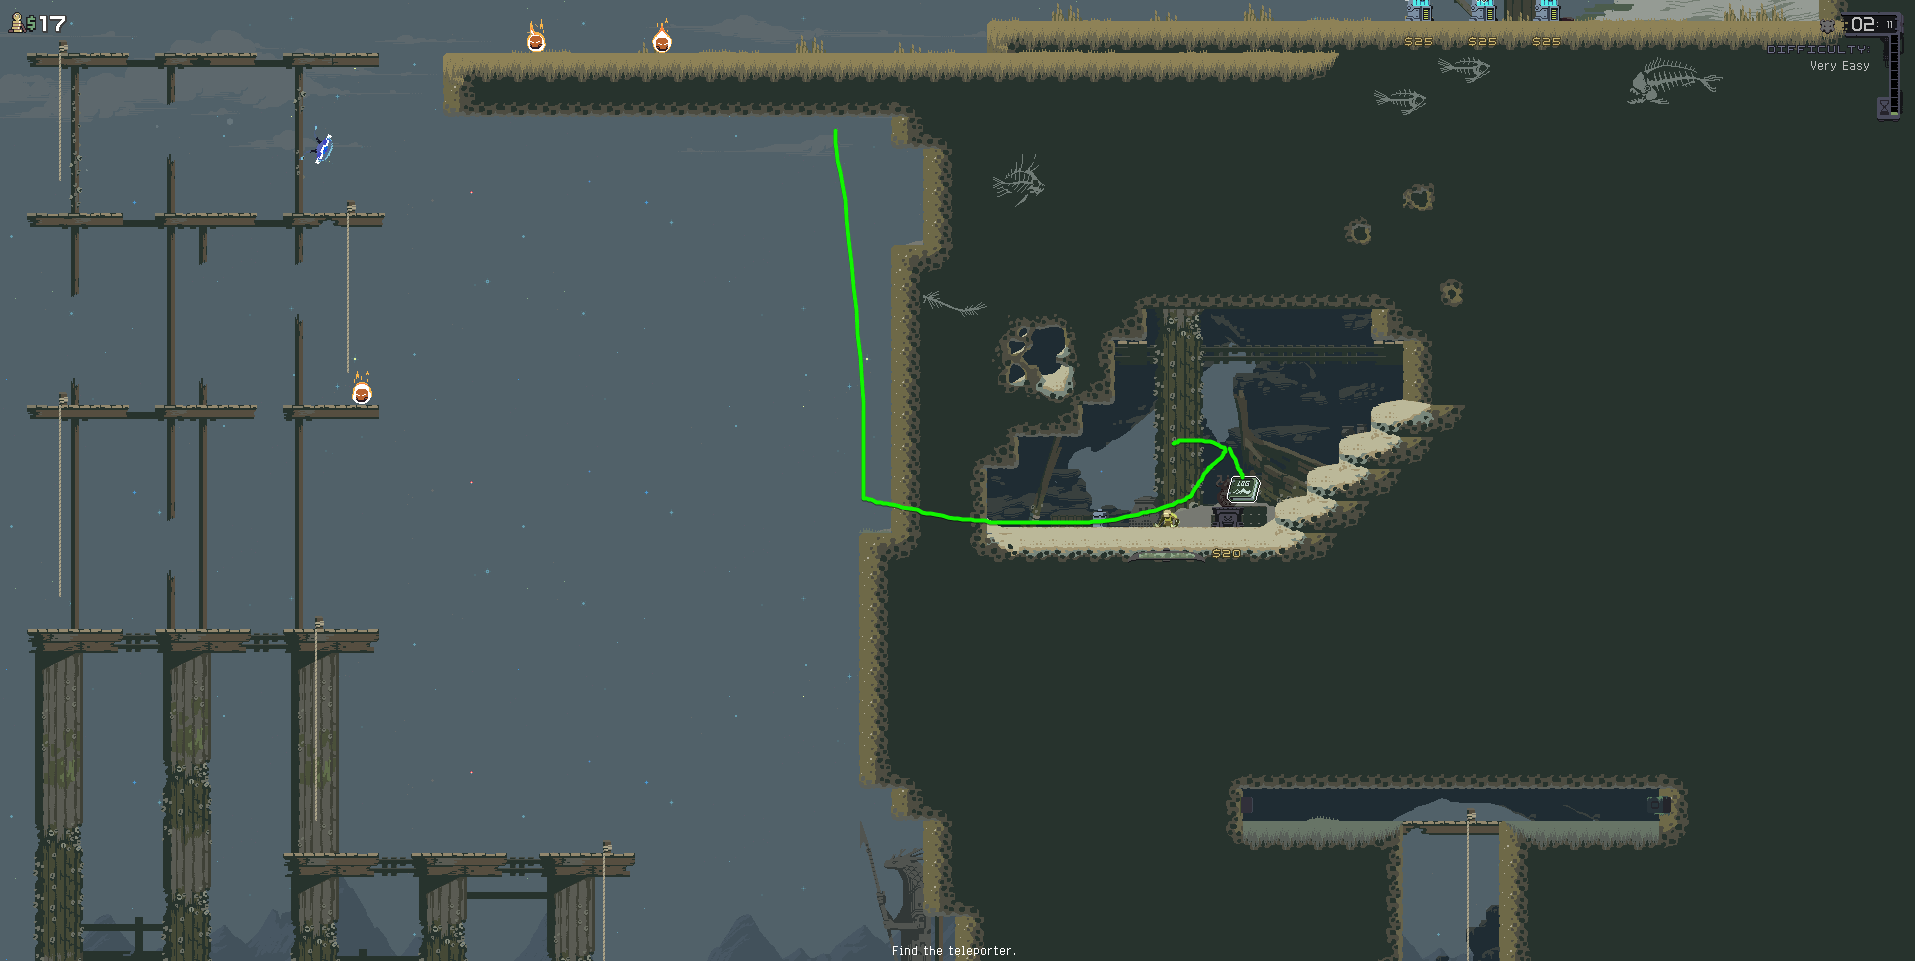
2: At the left of the map, next to a bridge. Mobility is needed to reach the ledge.

3: At the right of the map. Mobility skills/items are mandatory.
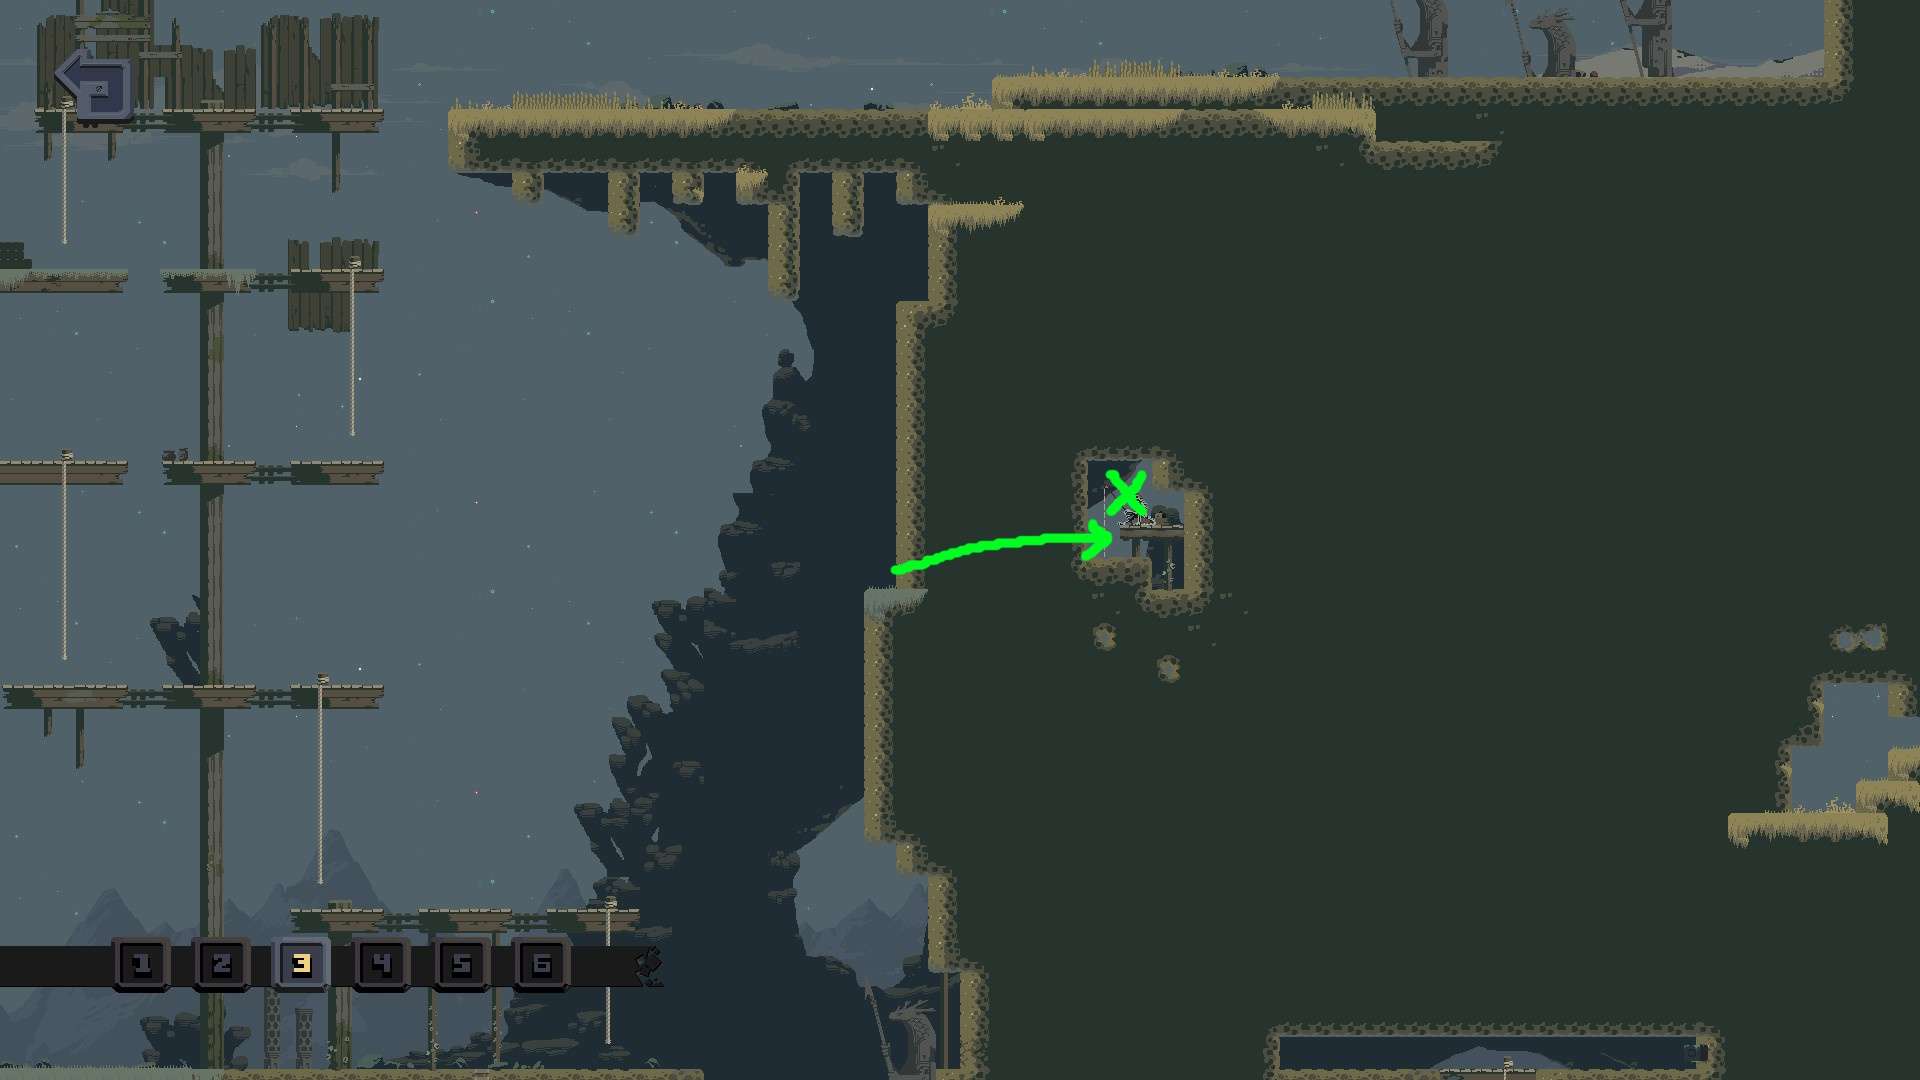
4: At the bottom center, behind a walk-through wall that can be accessed by hugging the wall by falling.
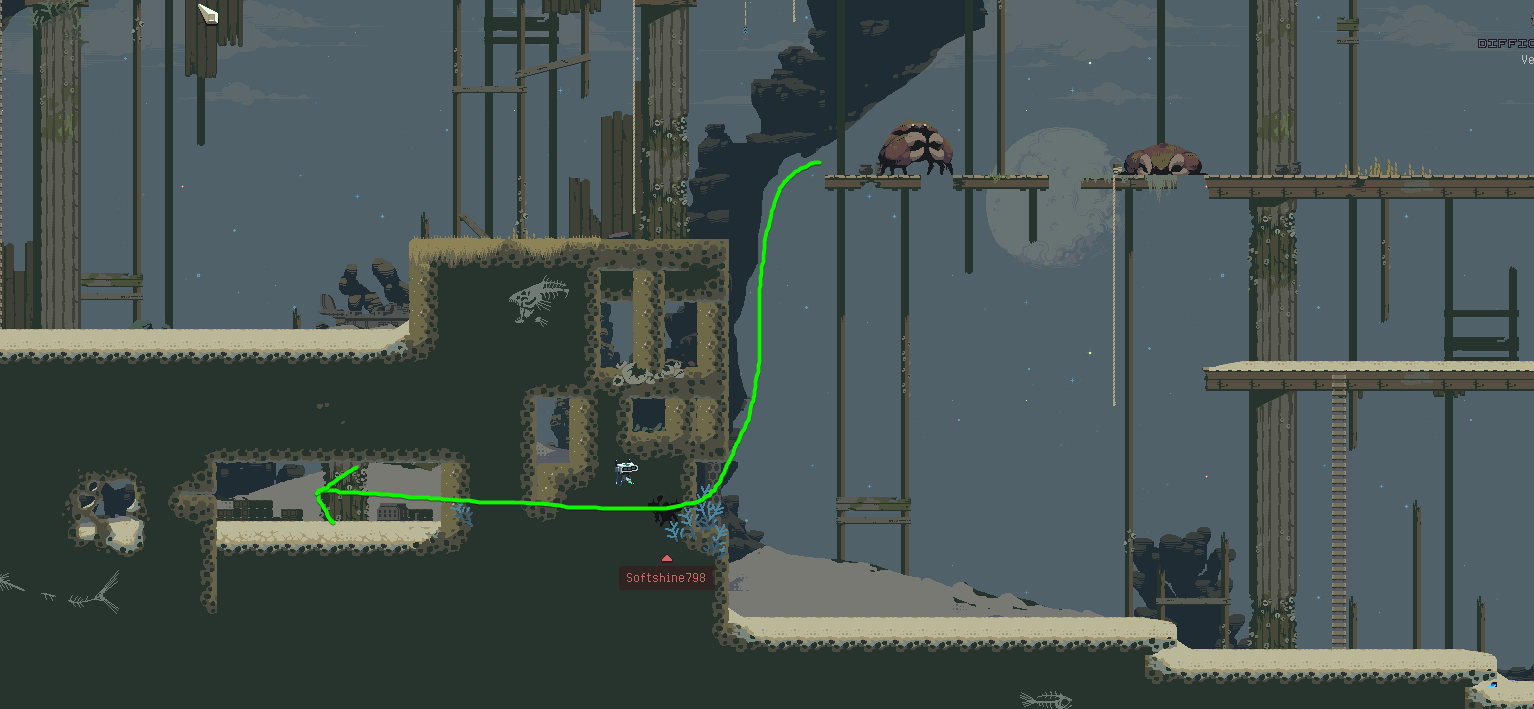
5: At the center of the map, there is a ladder that leads to a walk-through wall. Go there and the log is in the area.
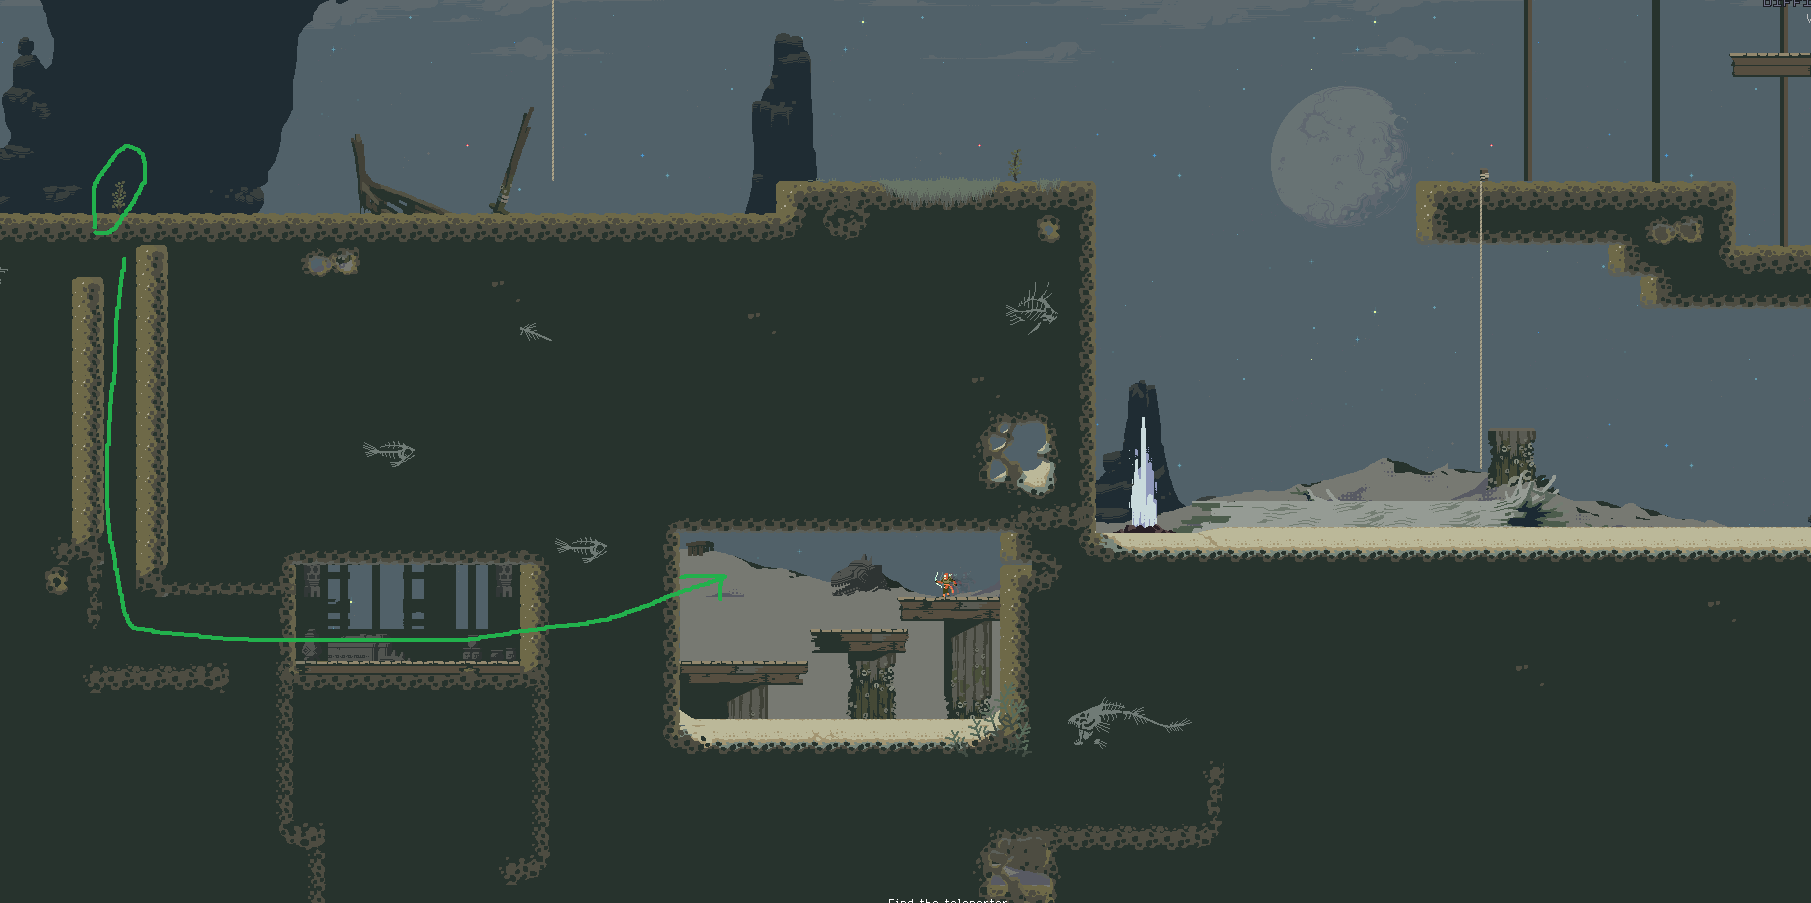
6: At the bottom far right of the map, there are two ladders that lead to walk-through walls.
Damp Caverns
1: In the center of the map. Requires mobility to get to.
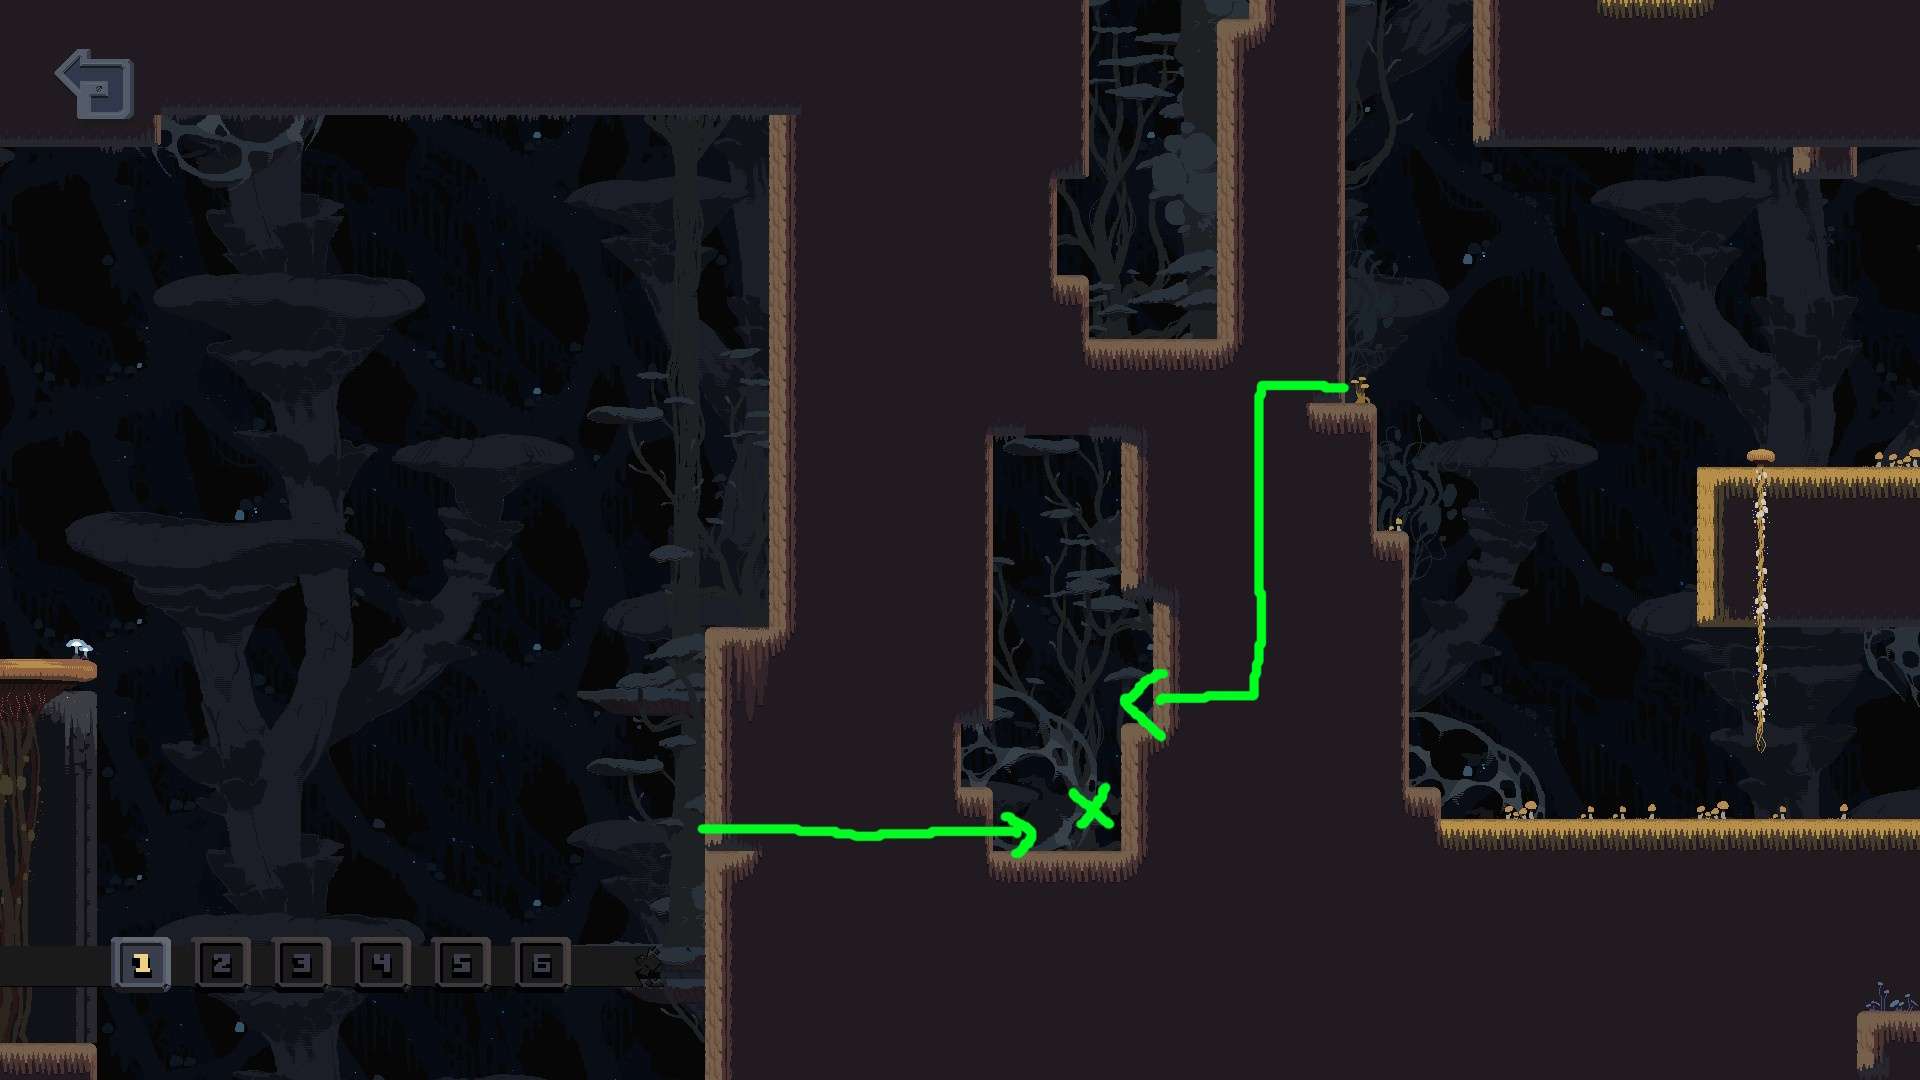
2: At the top right of the map. Can hug the wall as falling to get into a walk-through wall.
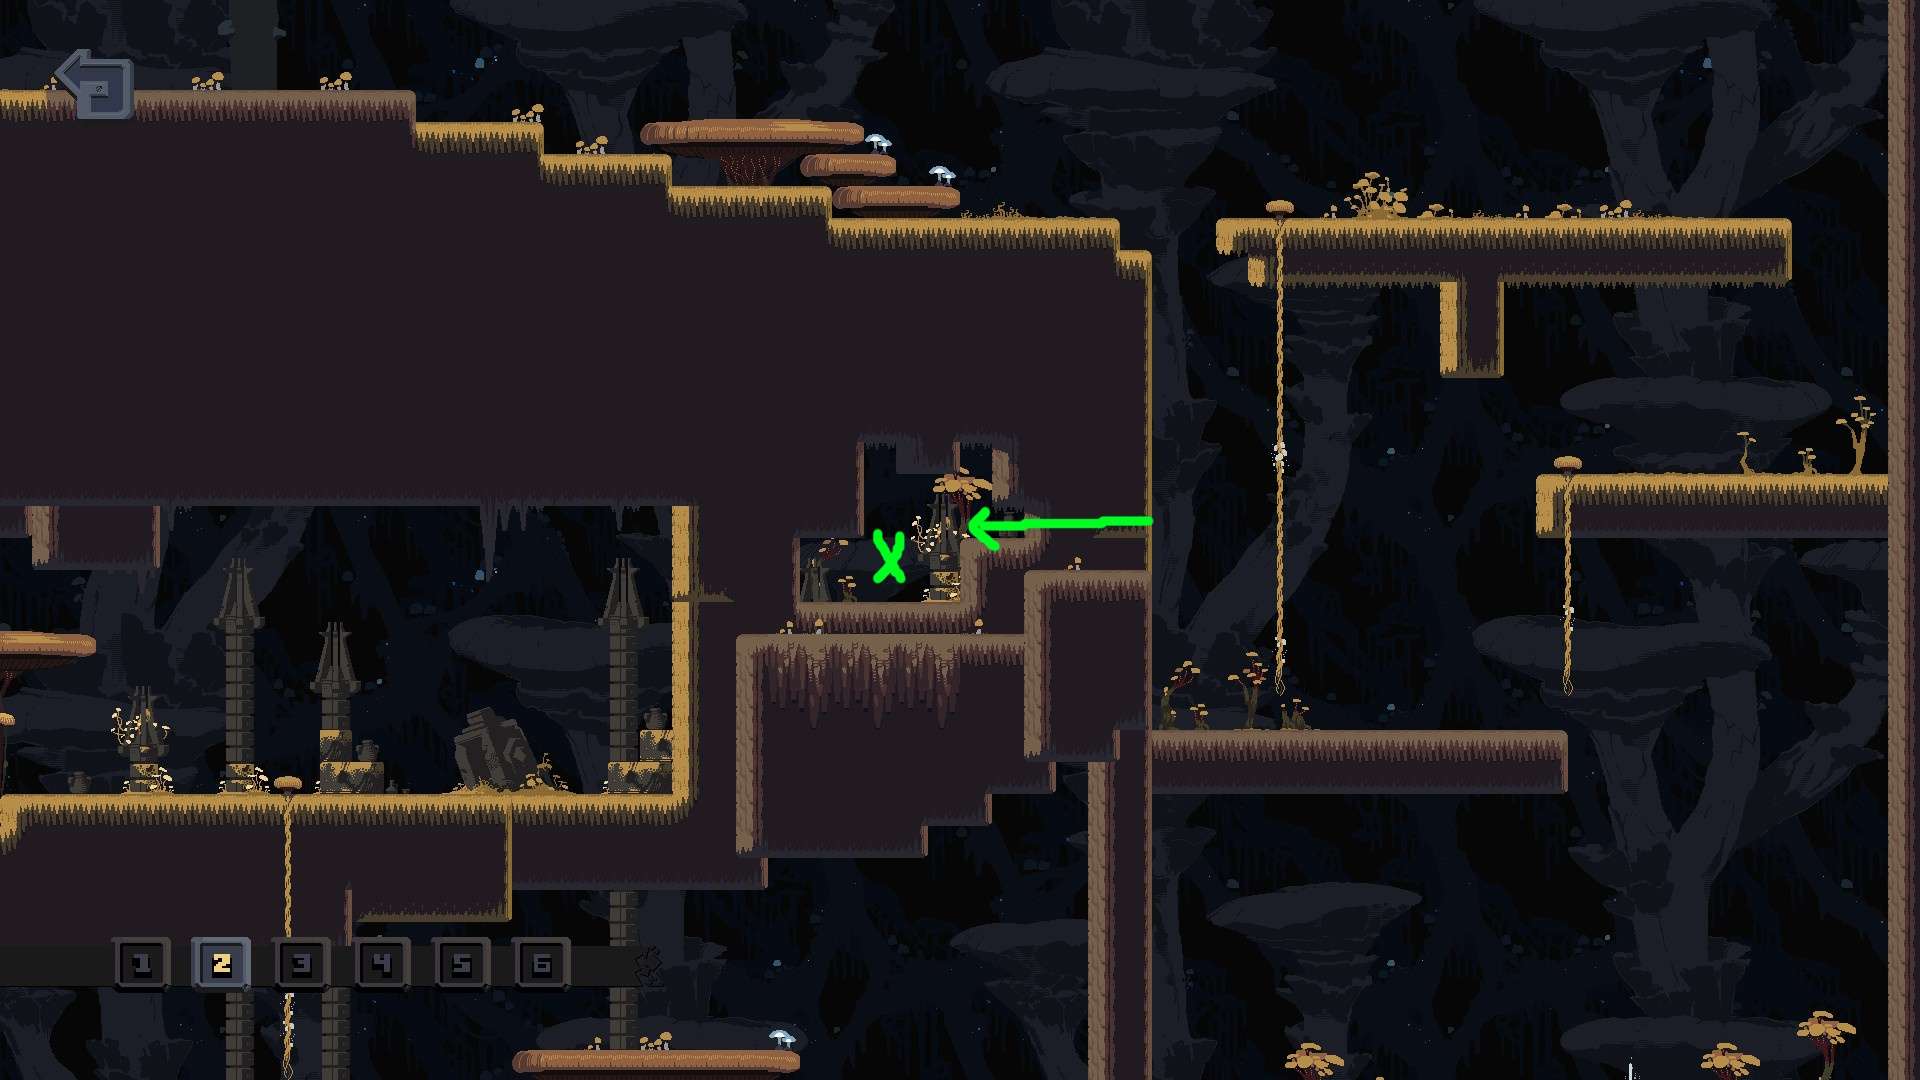
3: At the top right of the map, reachable by a ladder into a walk-through wall.
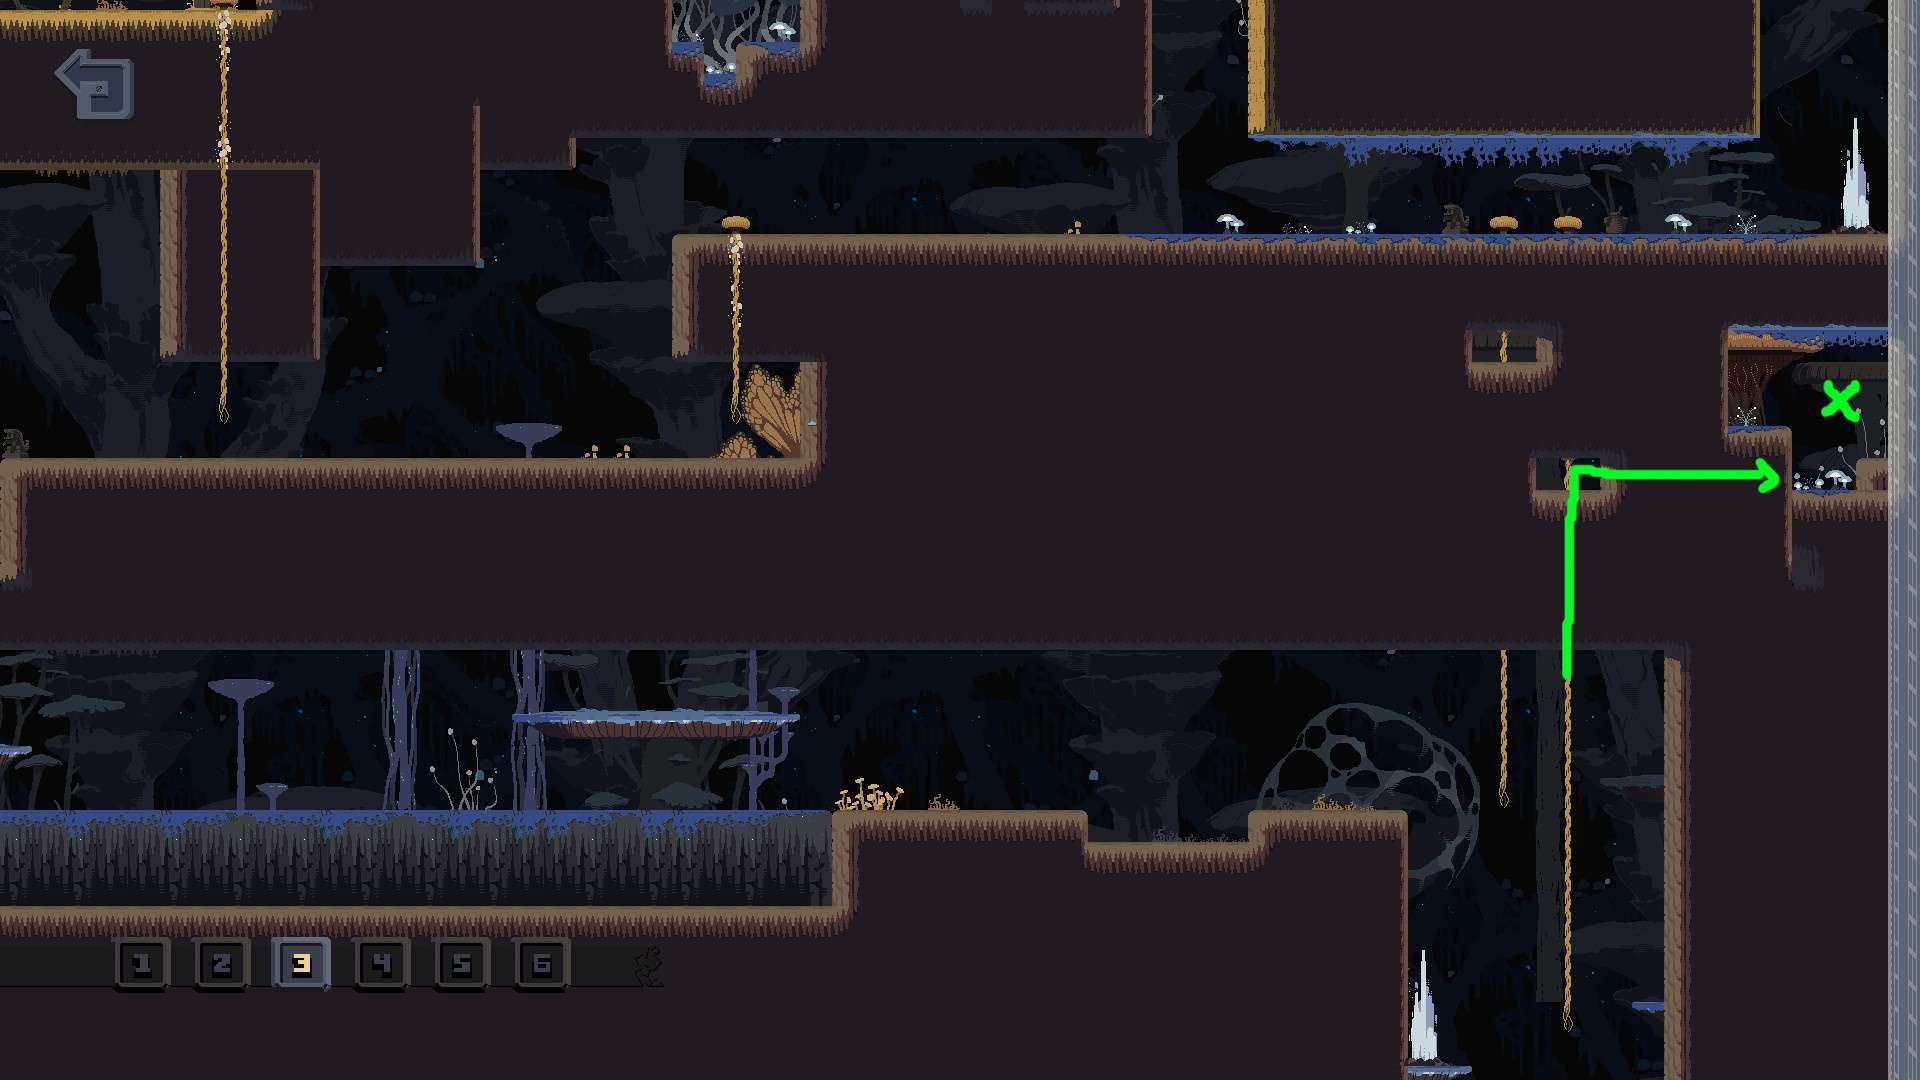
4: Bottom left of map, reachable with mobility combined with geyser.
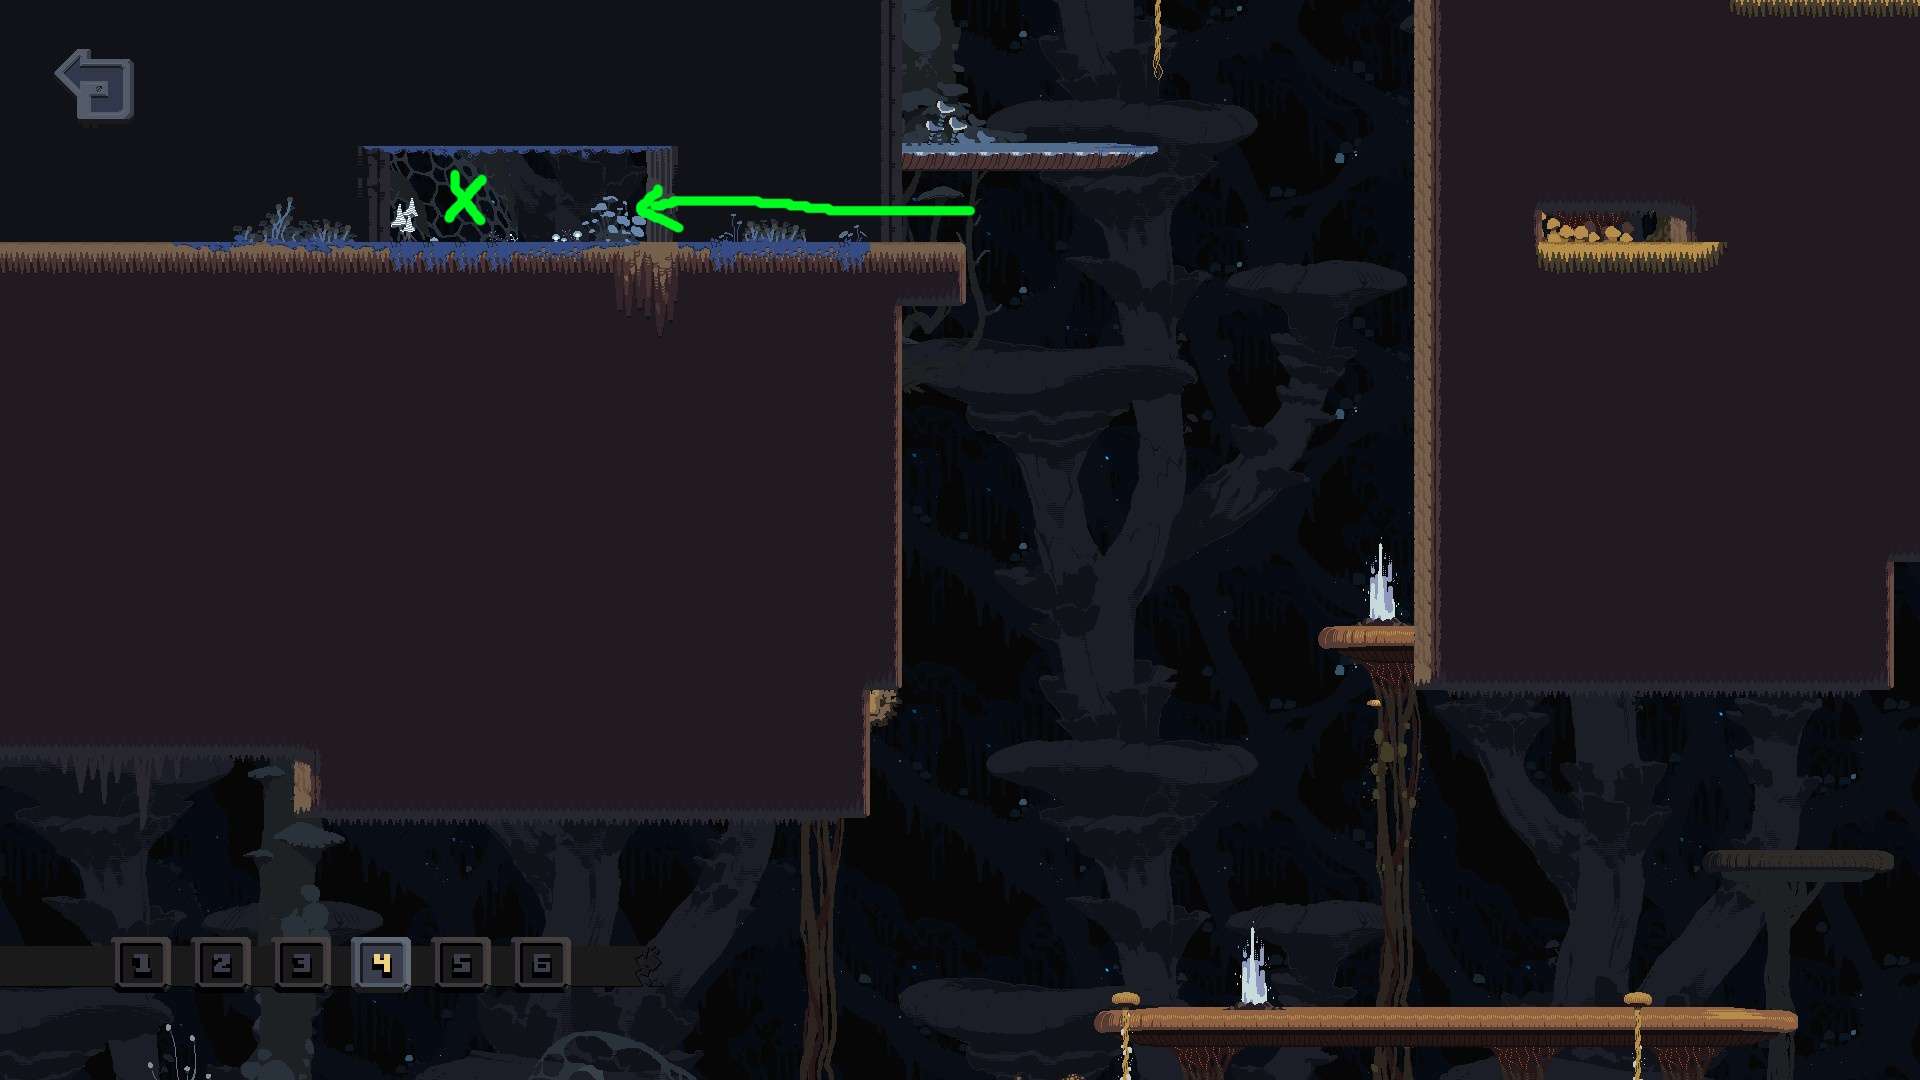
5: At the top right of the map. Can either be reached through a walk-through wall that can be reached with a mobility item/skill or a high jump that requires more mobility.
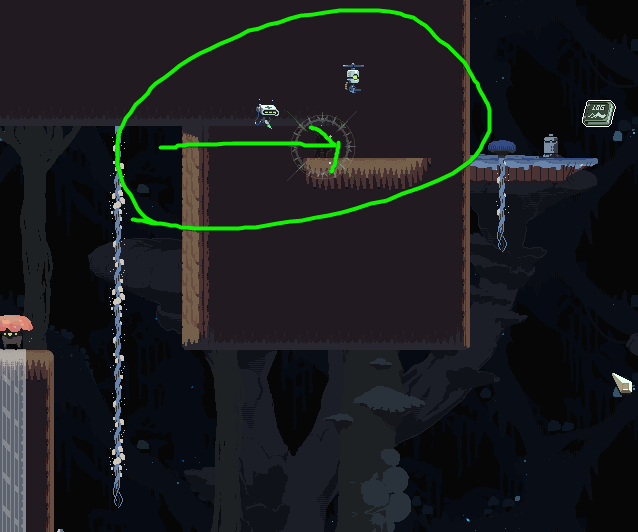
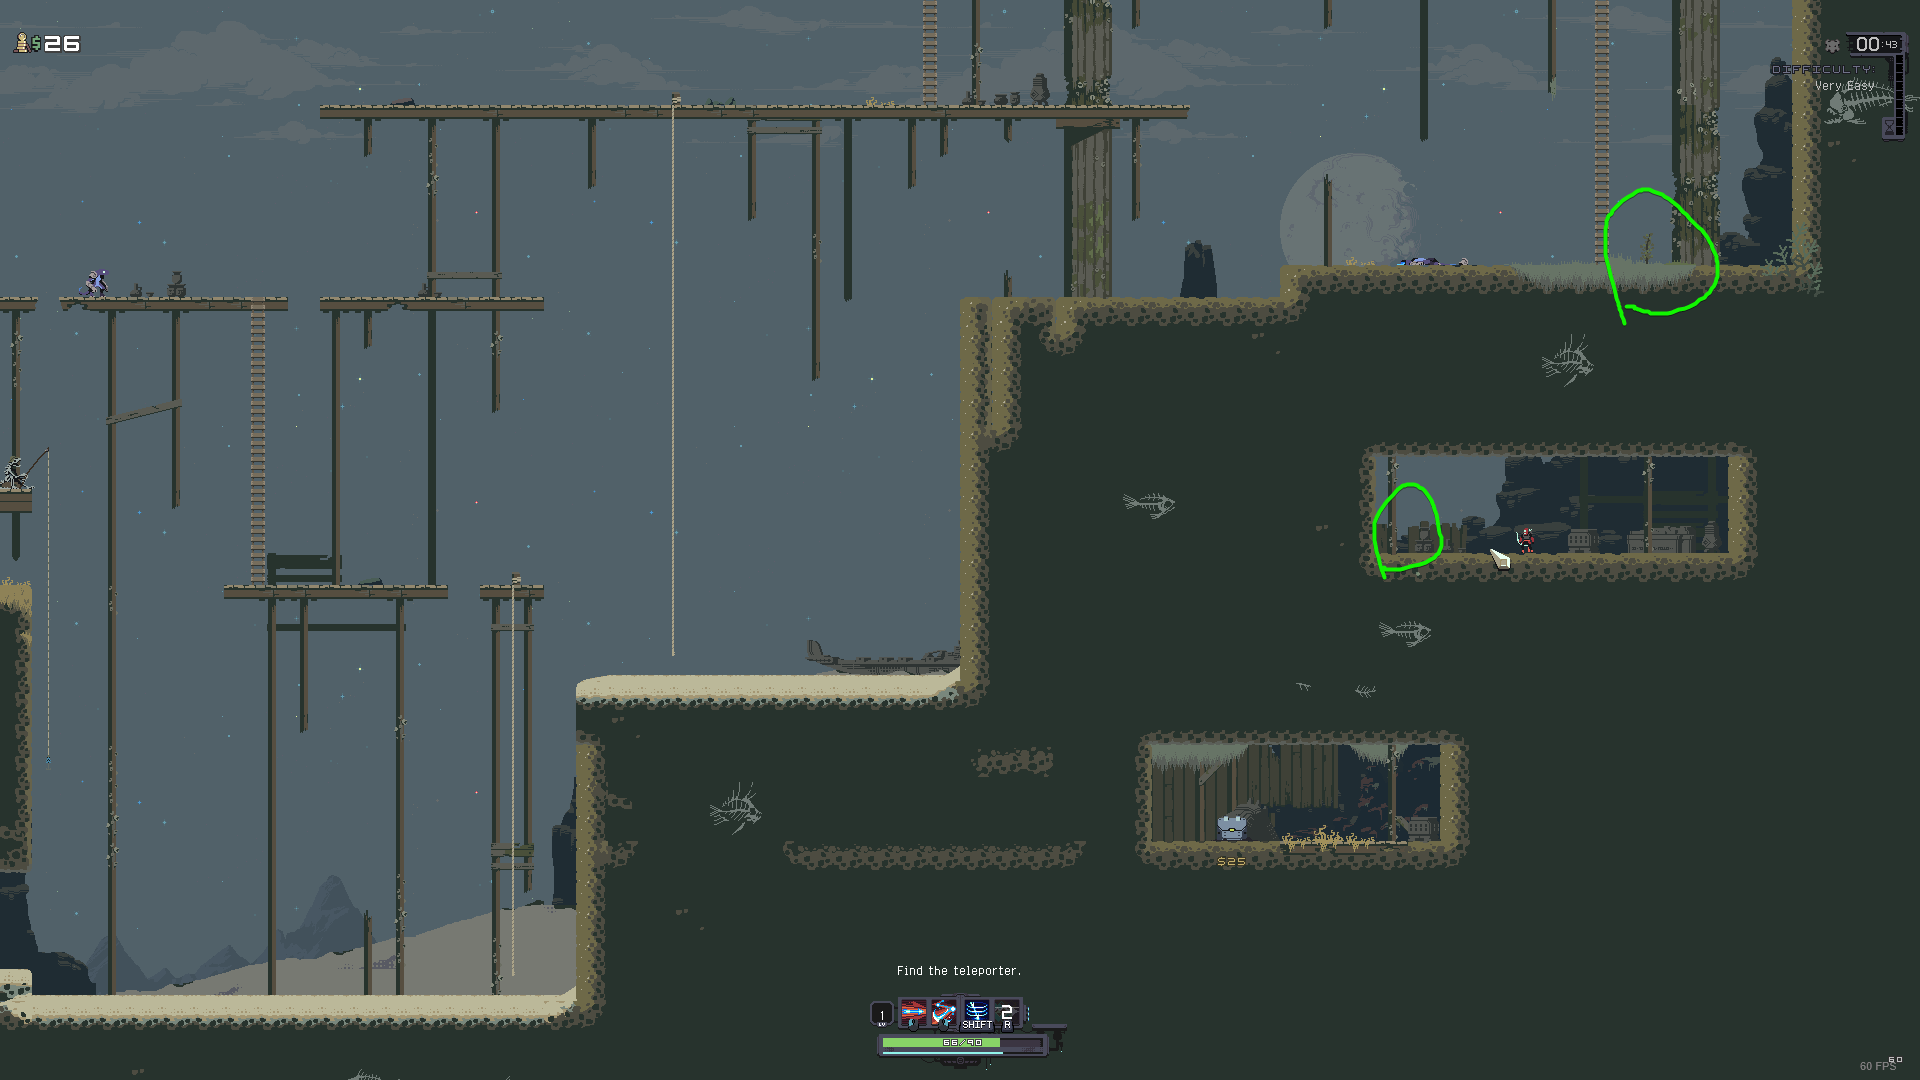
6: At the far left of the map, there is a ladder that can be reached, but some mobility is required. A way without items is to use Loader’s Hydraulic Gauntlet skill at the green circle to reach the ladder.
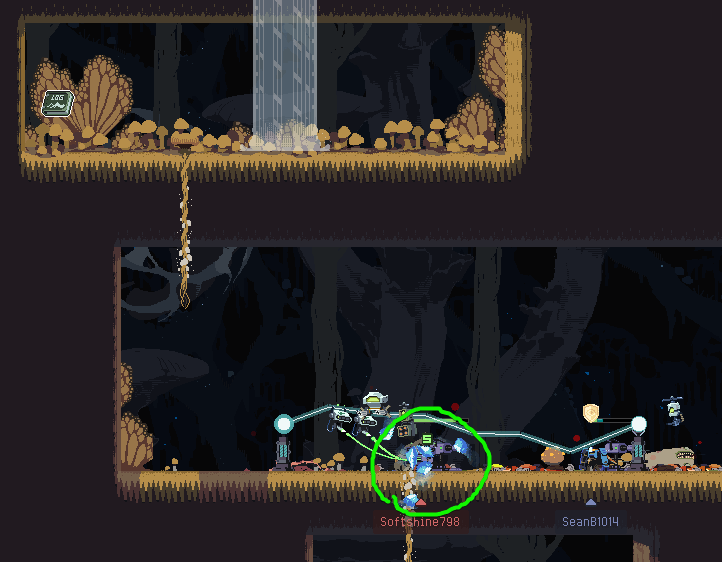
Sky Meadow
1: At the right side of the map, reachable from the bottom opening. Requires a few extra jumps to reach.
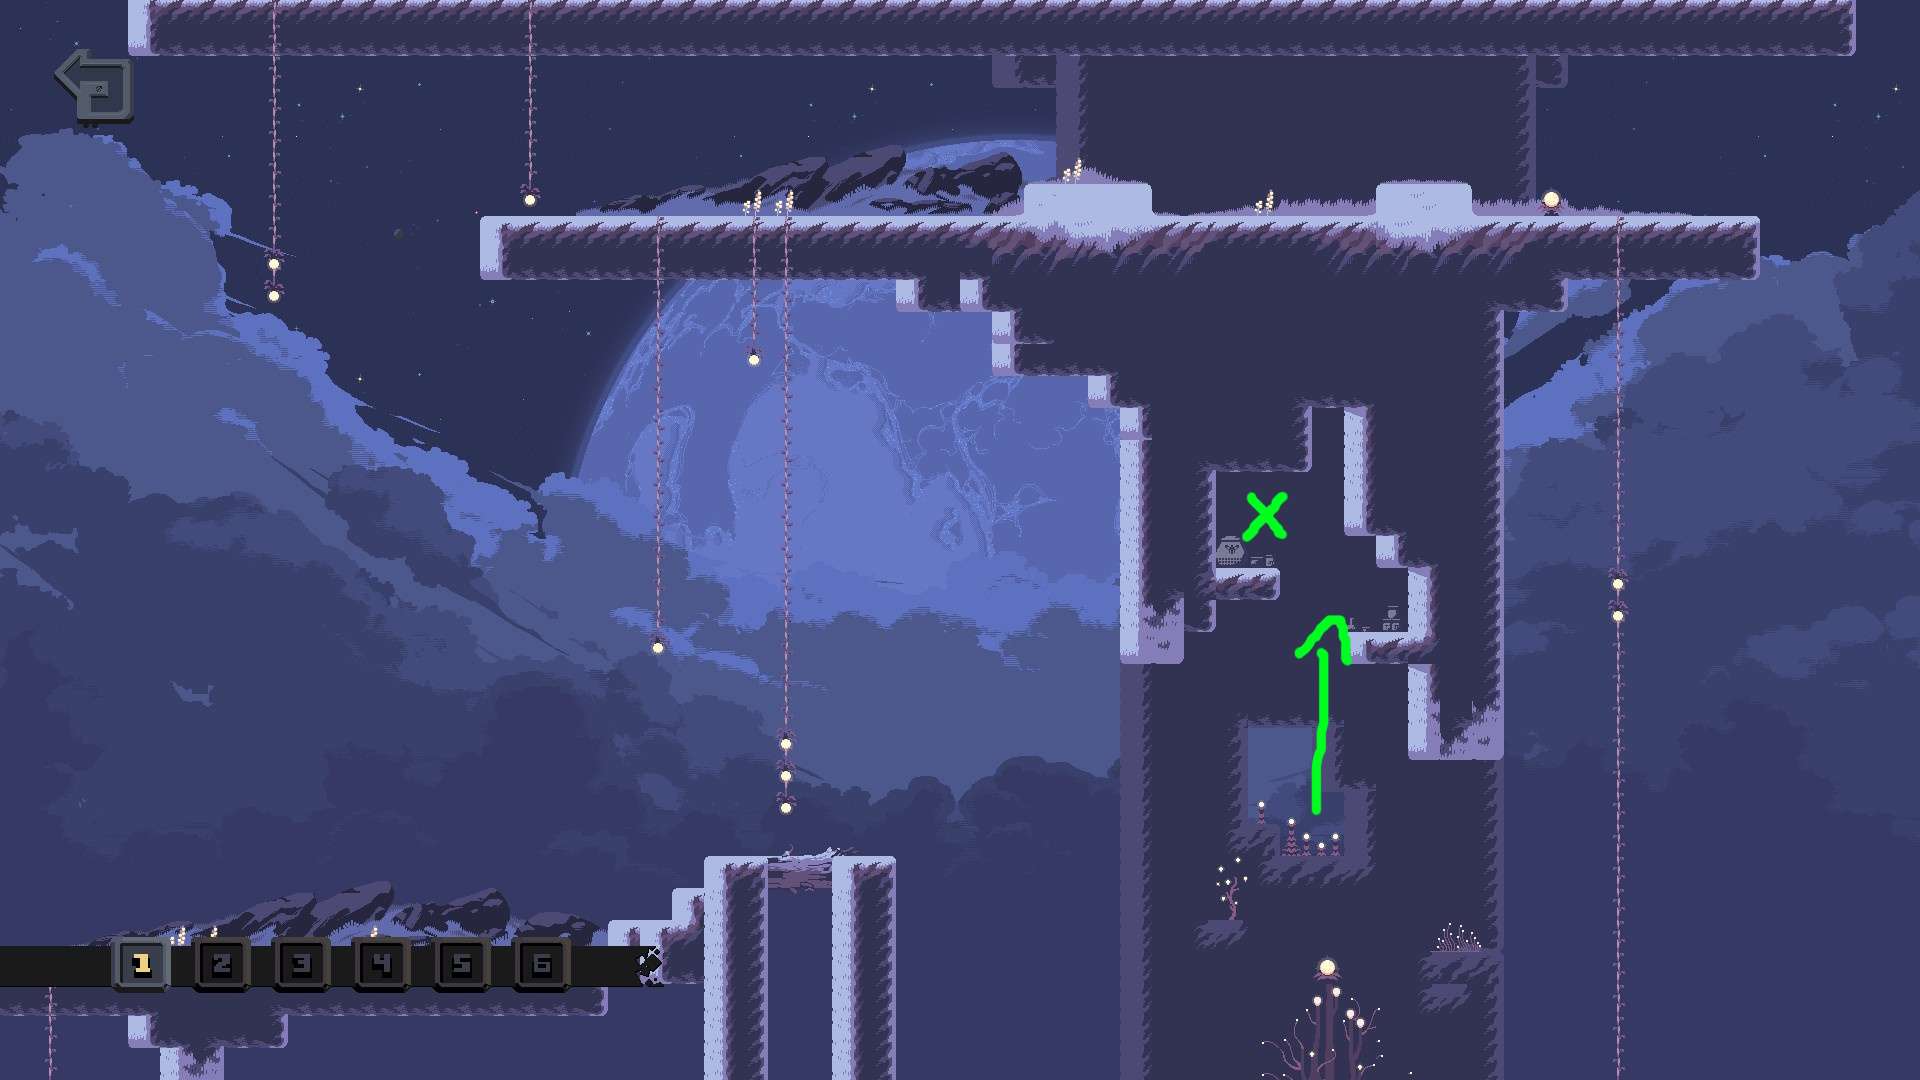
2: At the top center of the map, in plain sight. Mobility is required to reach it.

3: At the center of the map, reachable by a ladder and a walk-through wall.
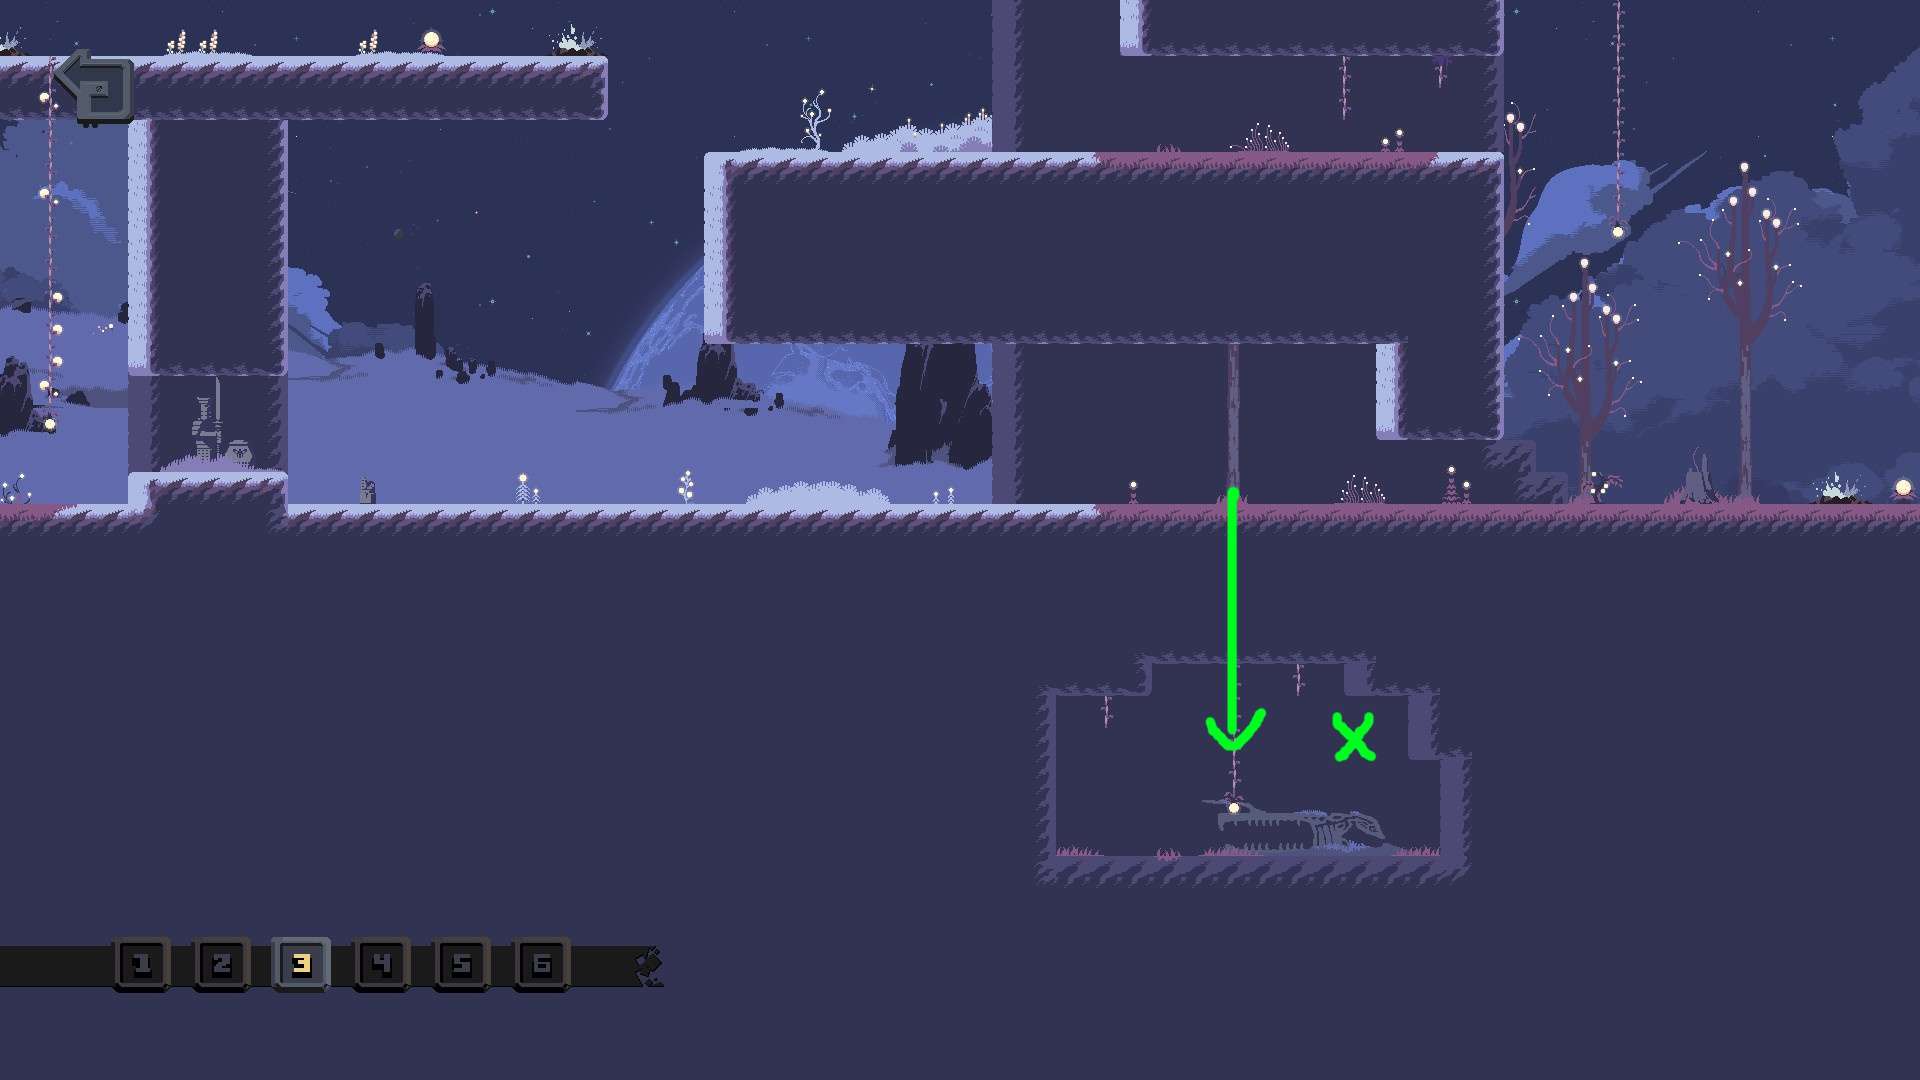
4: At the top left corner of the map, reachable by a ladder.
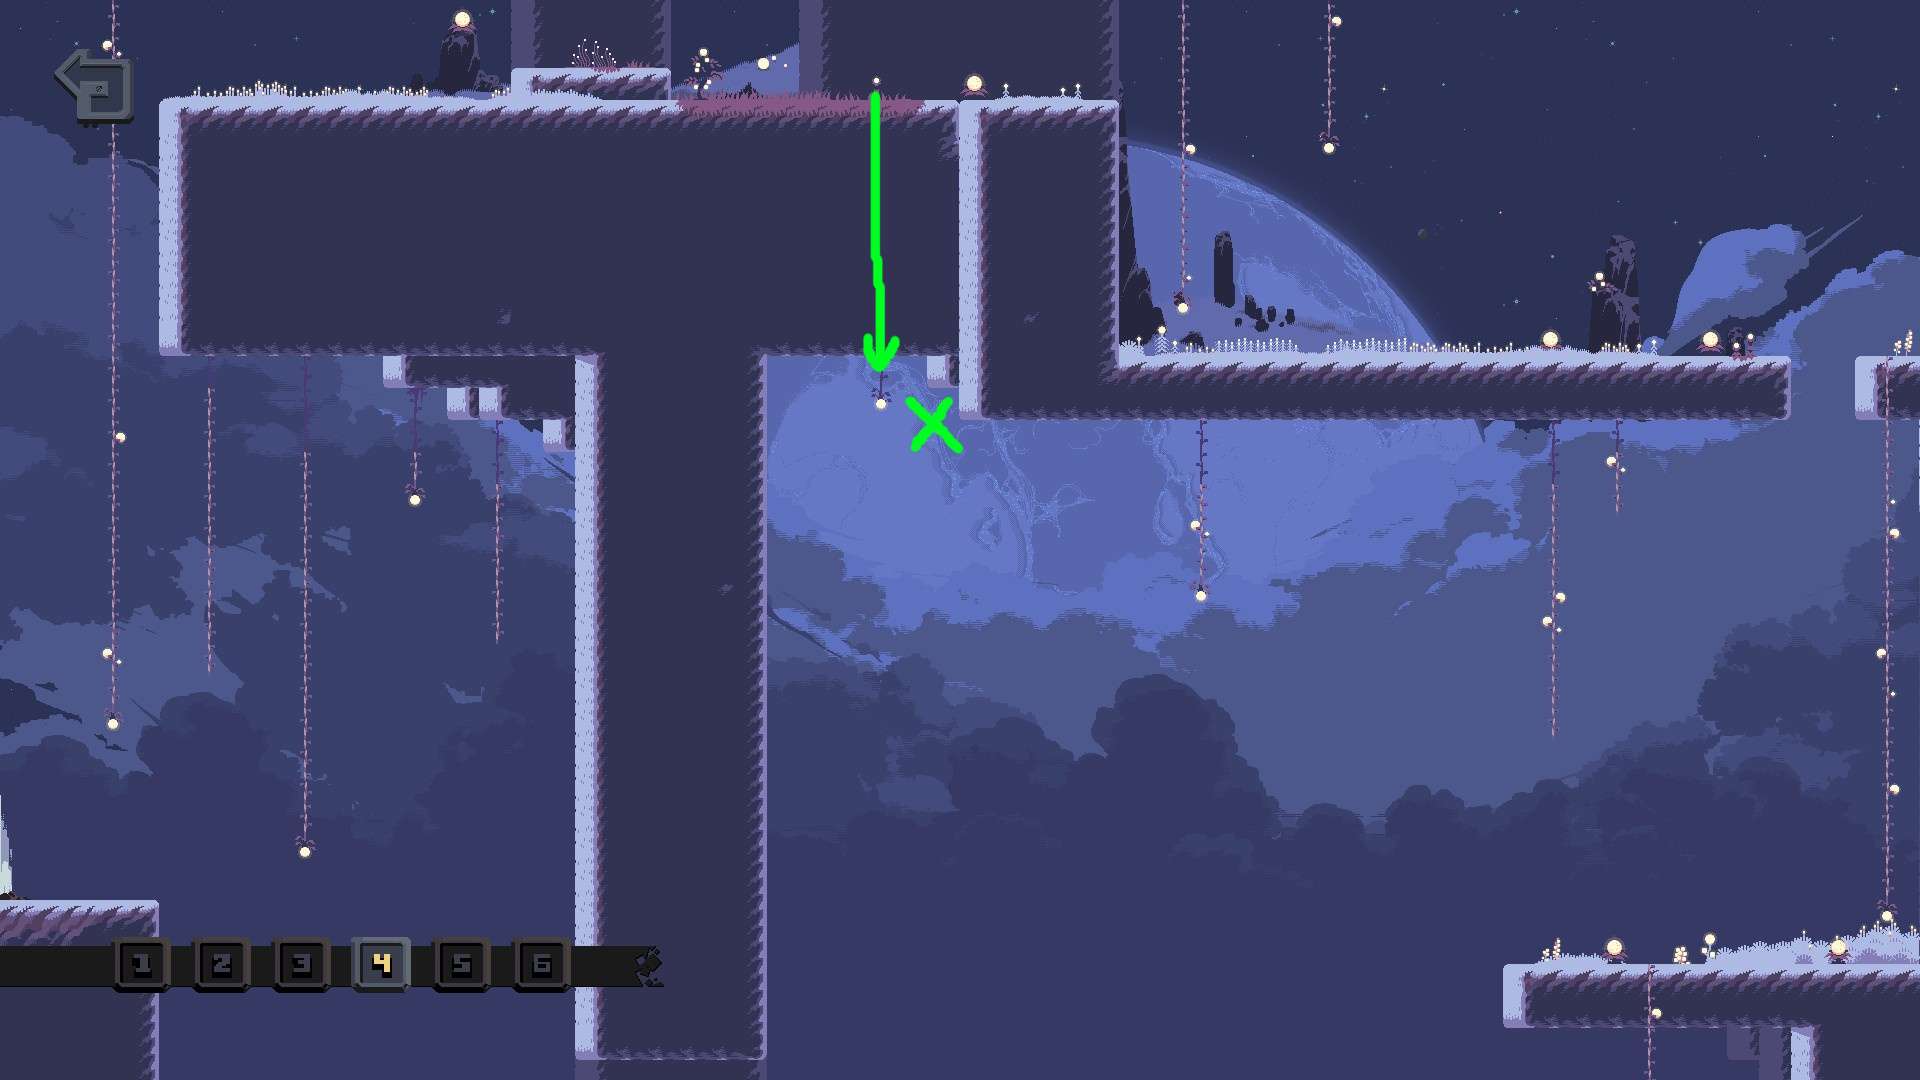
5: At the far right of the map, inside a cavern that is reachable by a walk-through wall and ladder. Mobility is needed to get to the ledge.

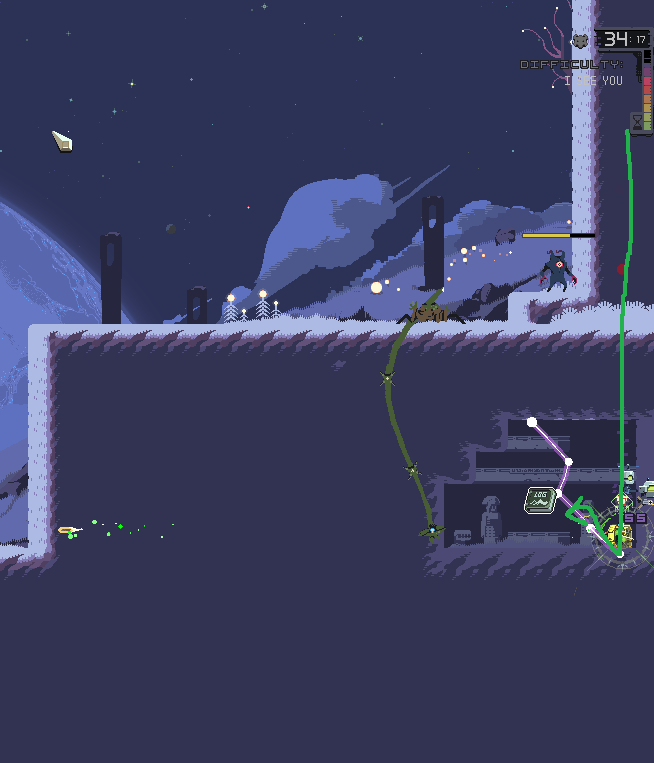
6: At the far right of the map at the center; mobility skills/items are mandatory. Can jump off higher ledges to reach if mobility is insufficient.

Ancient Valley
1: At the bottom right corner of the map, accessible by a walk-through wall.
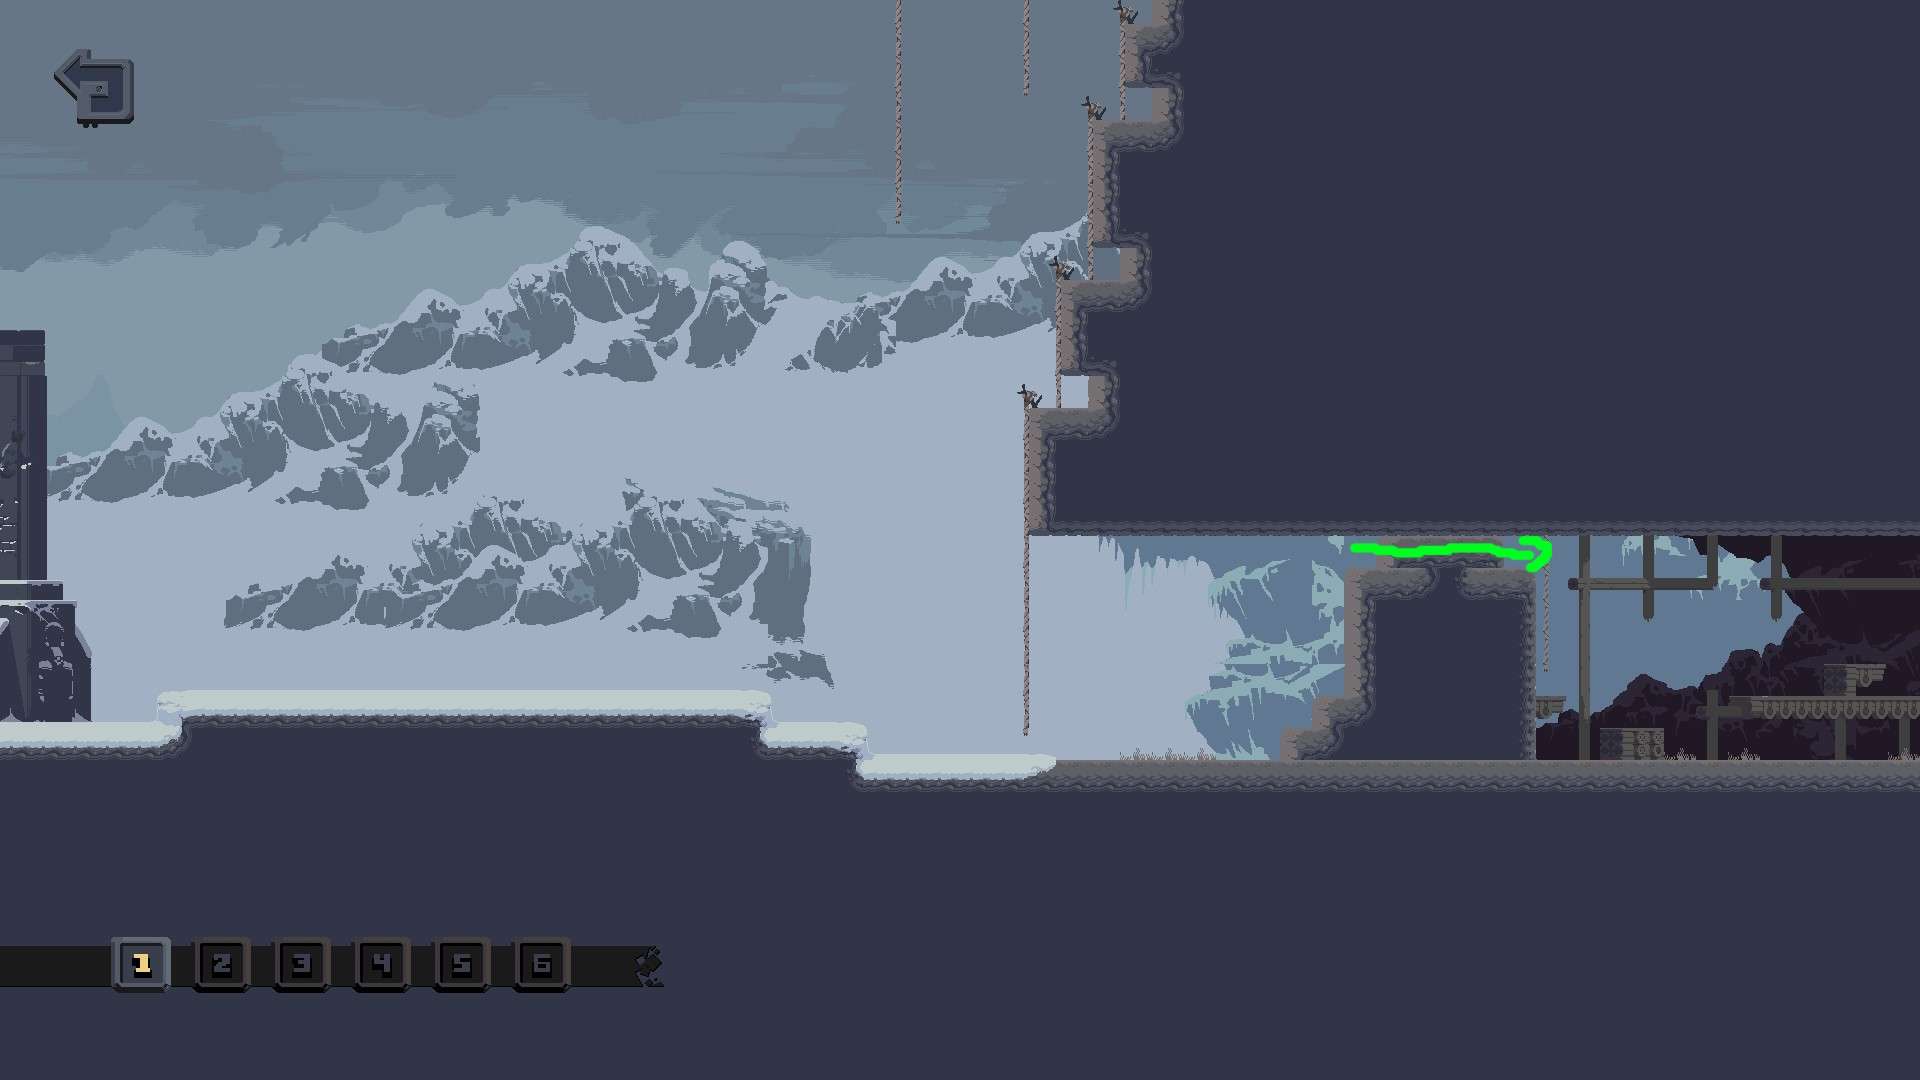
2: At the far right side of the map, reachable by a walk-through wall.
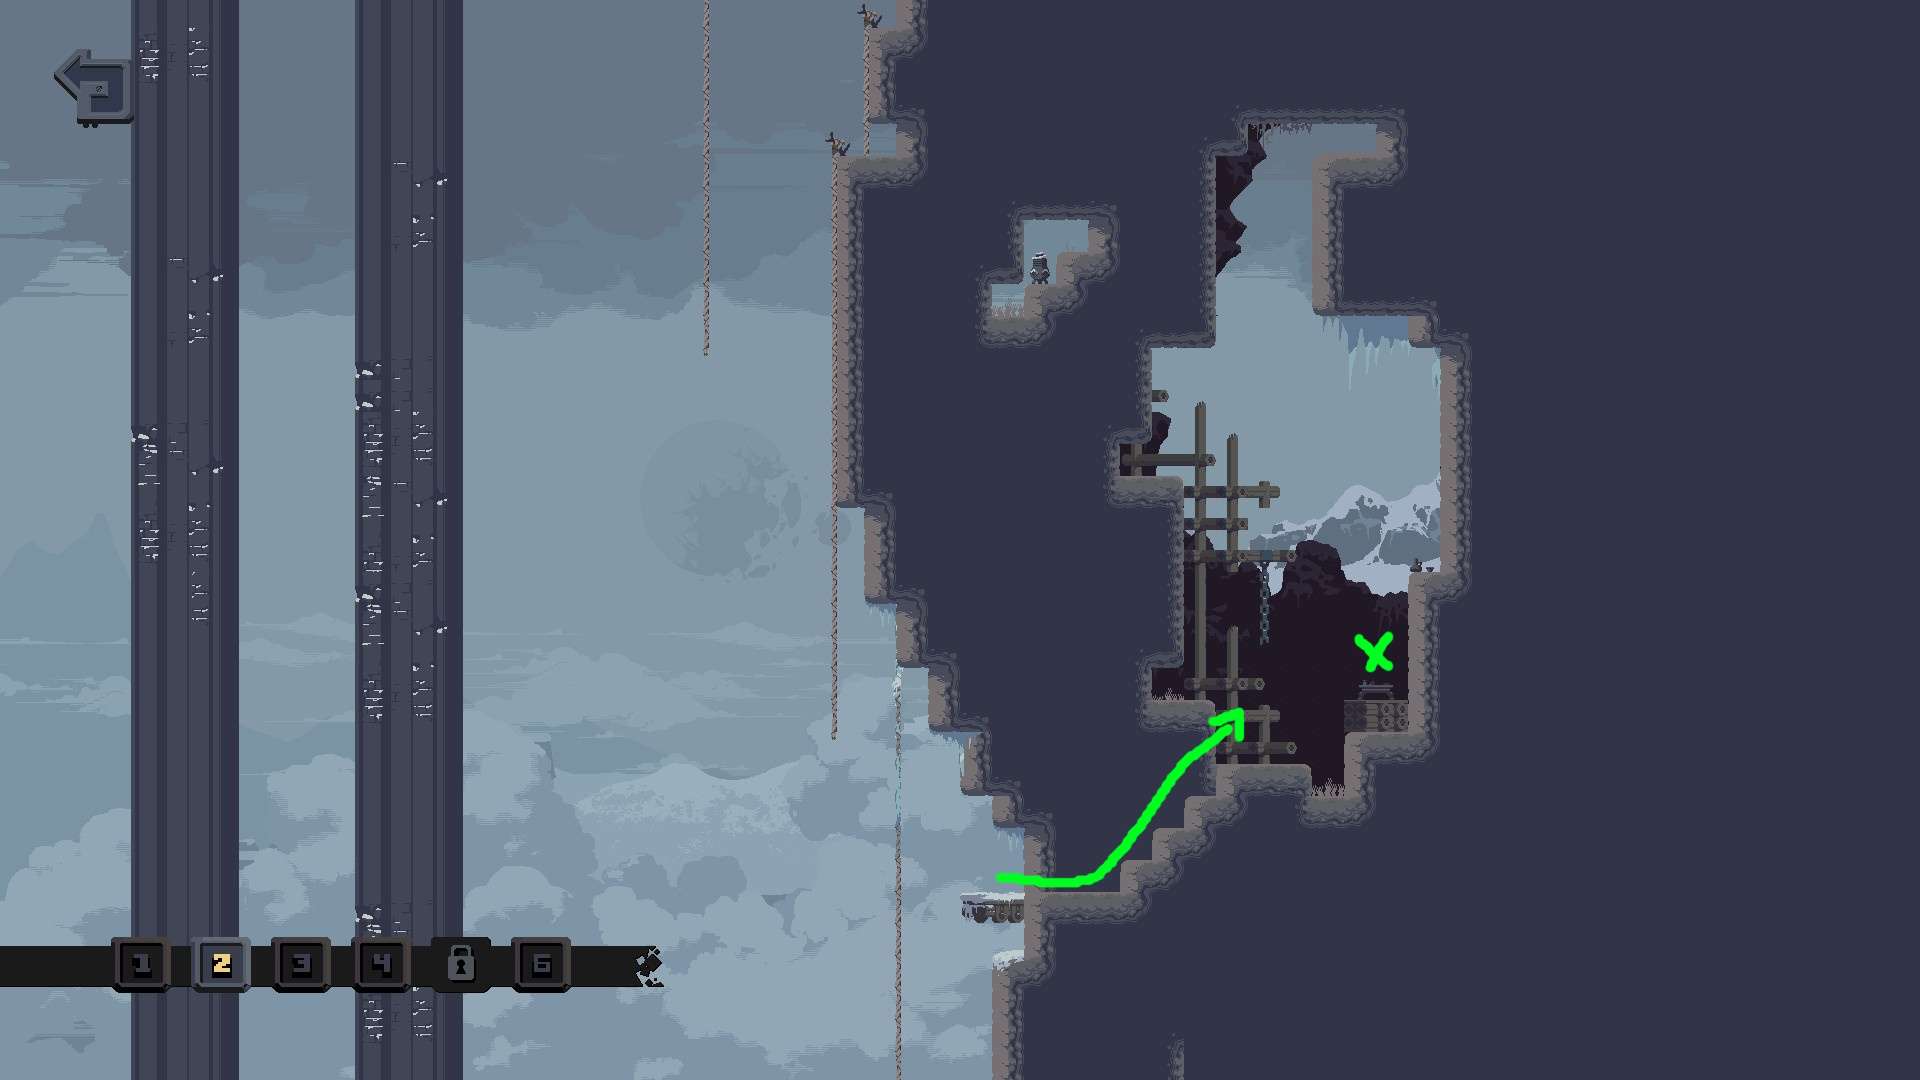
3: At the far right side of the map, reachable by a walk-through wall and a fall inside the mountain. Fall on the right side of the hole, then jump over to grab the log.
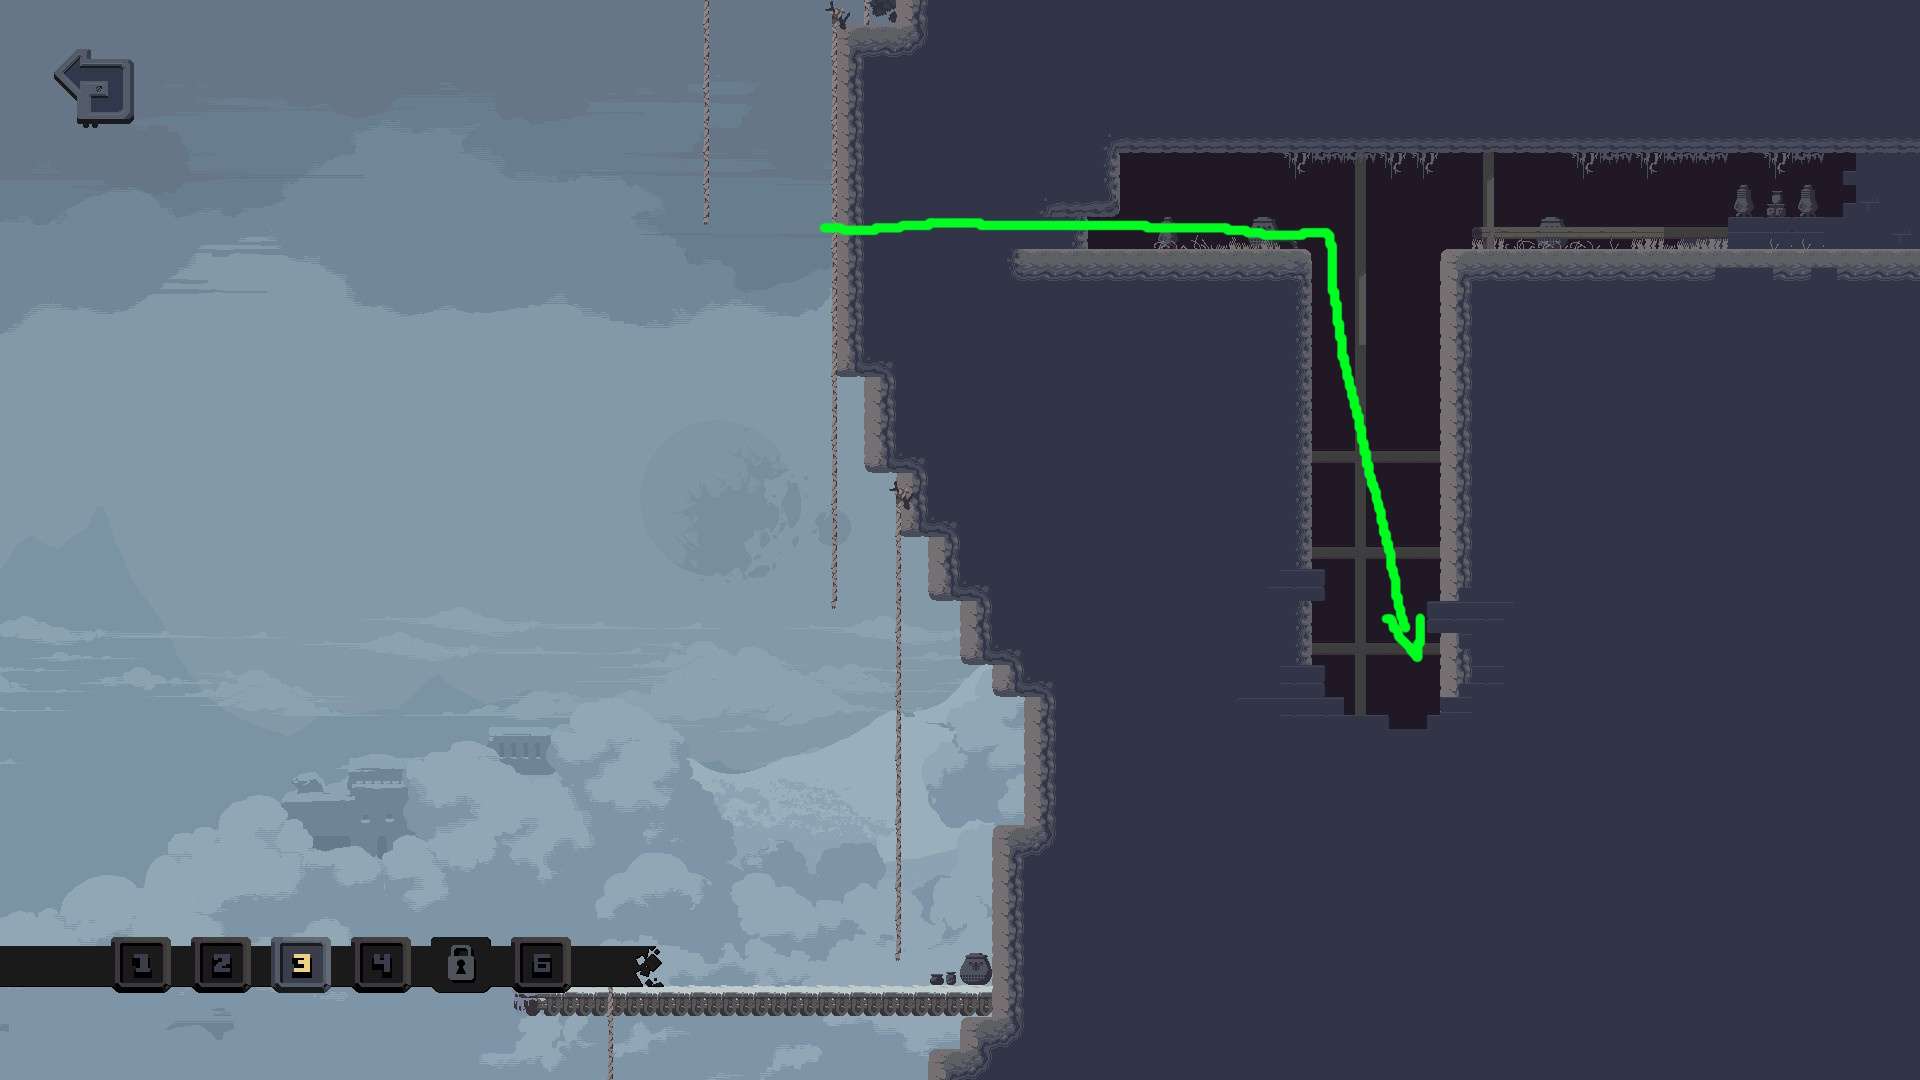
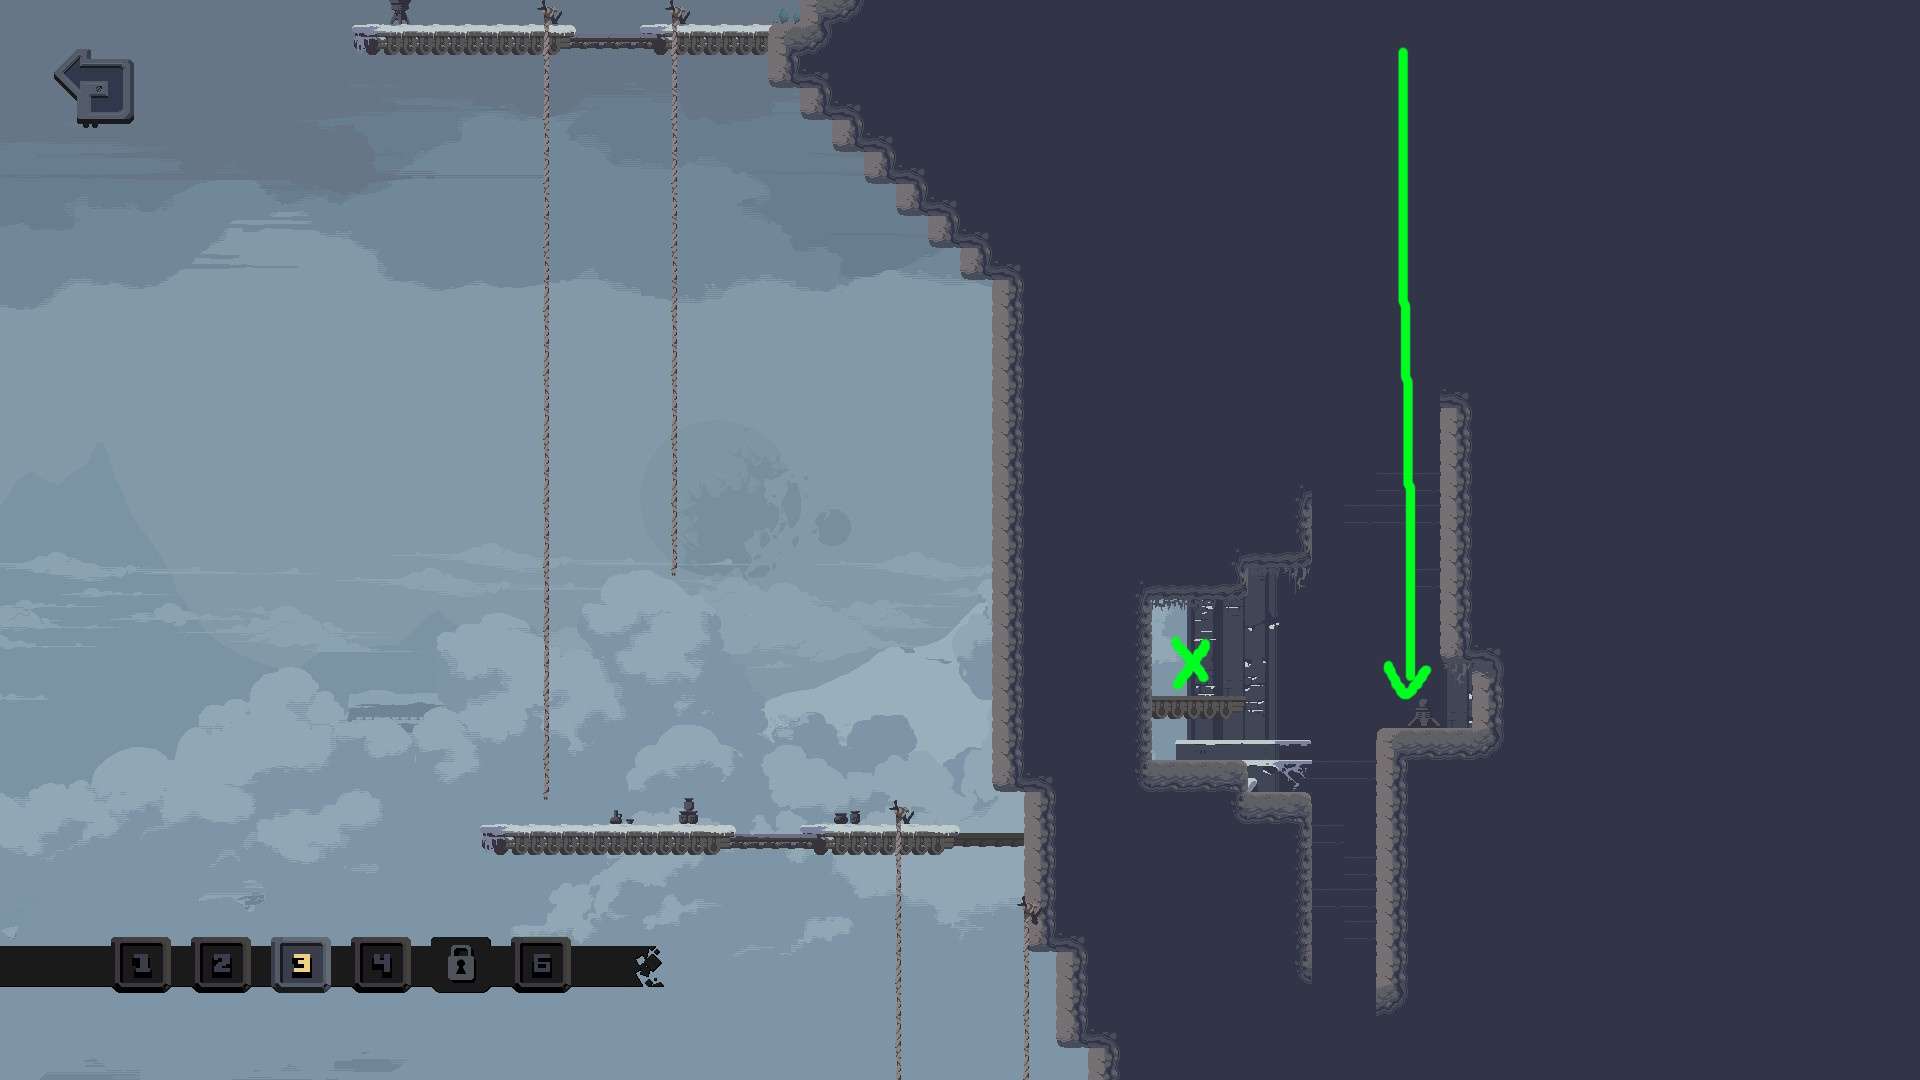
4: At the center of the map, around the bottom, there is a walk-through wall, containing the log. Either a mobility skill or item is required to reach.
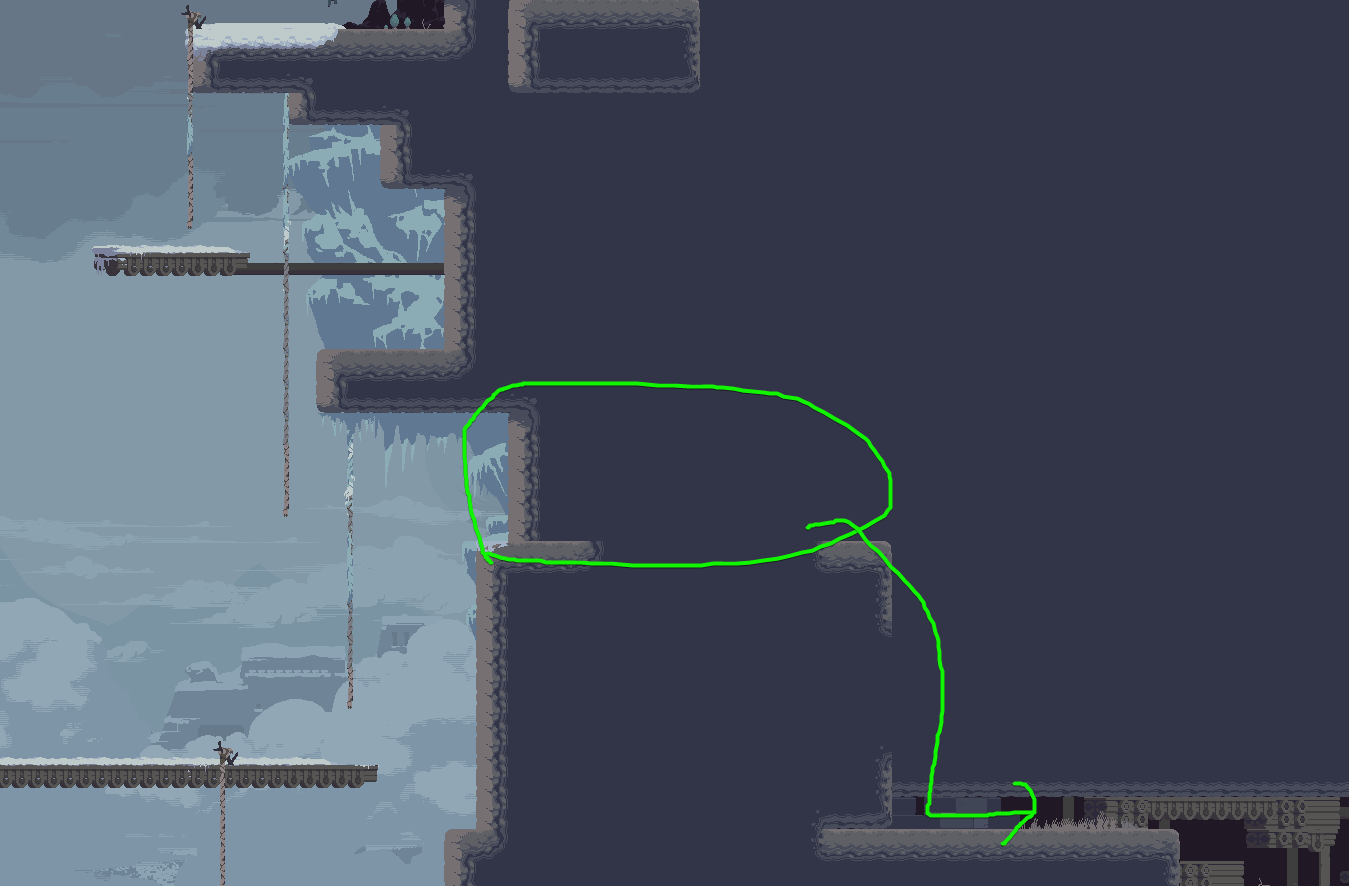
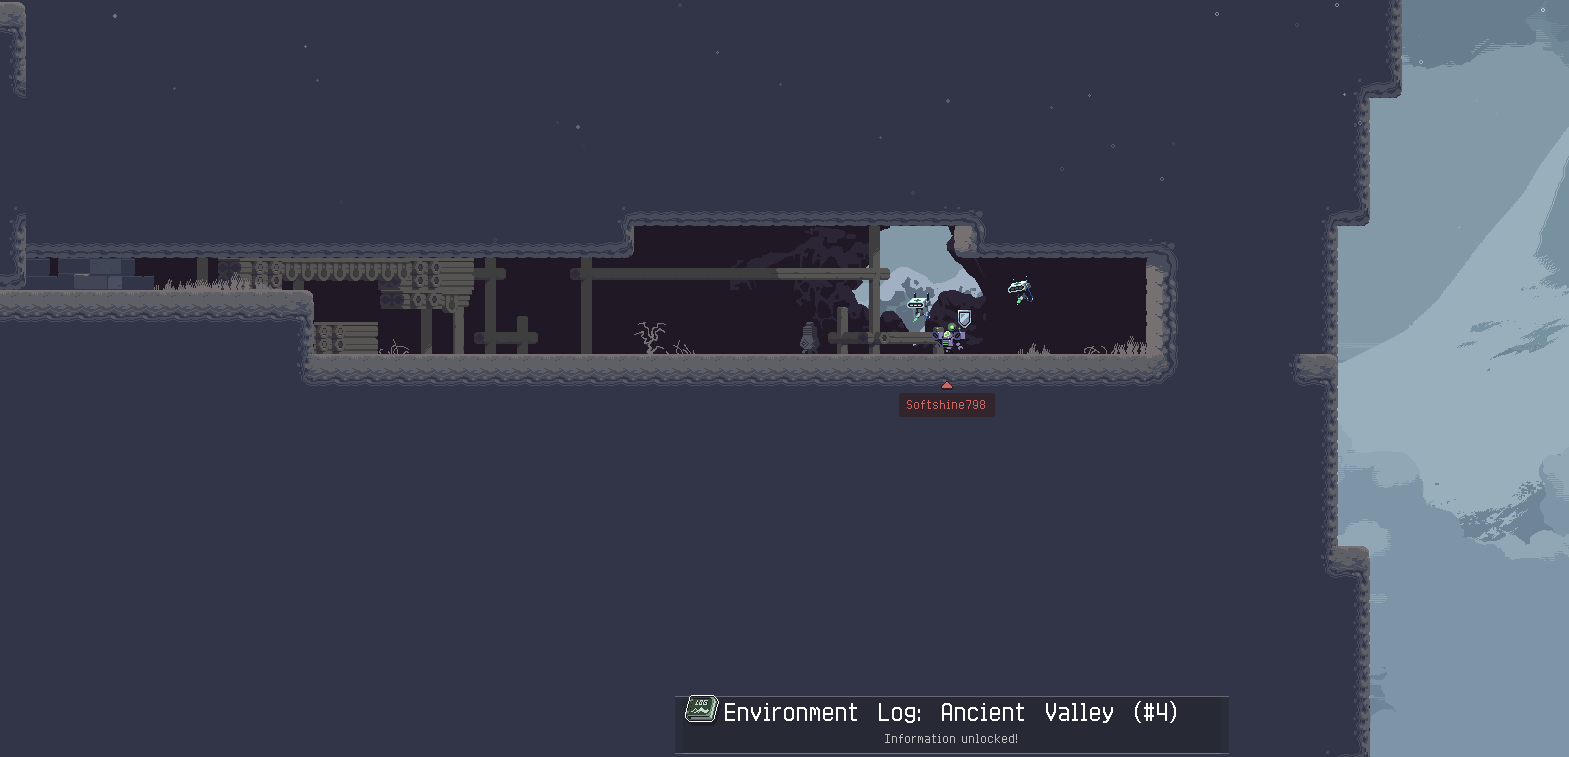
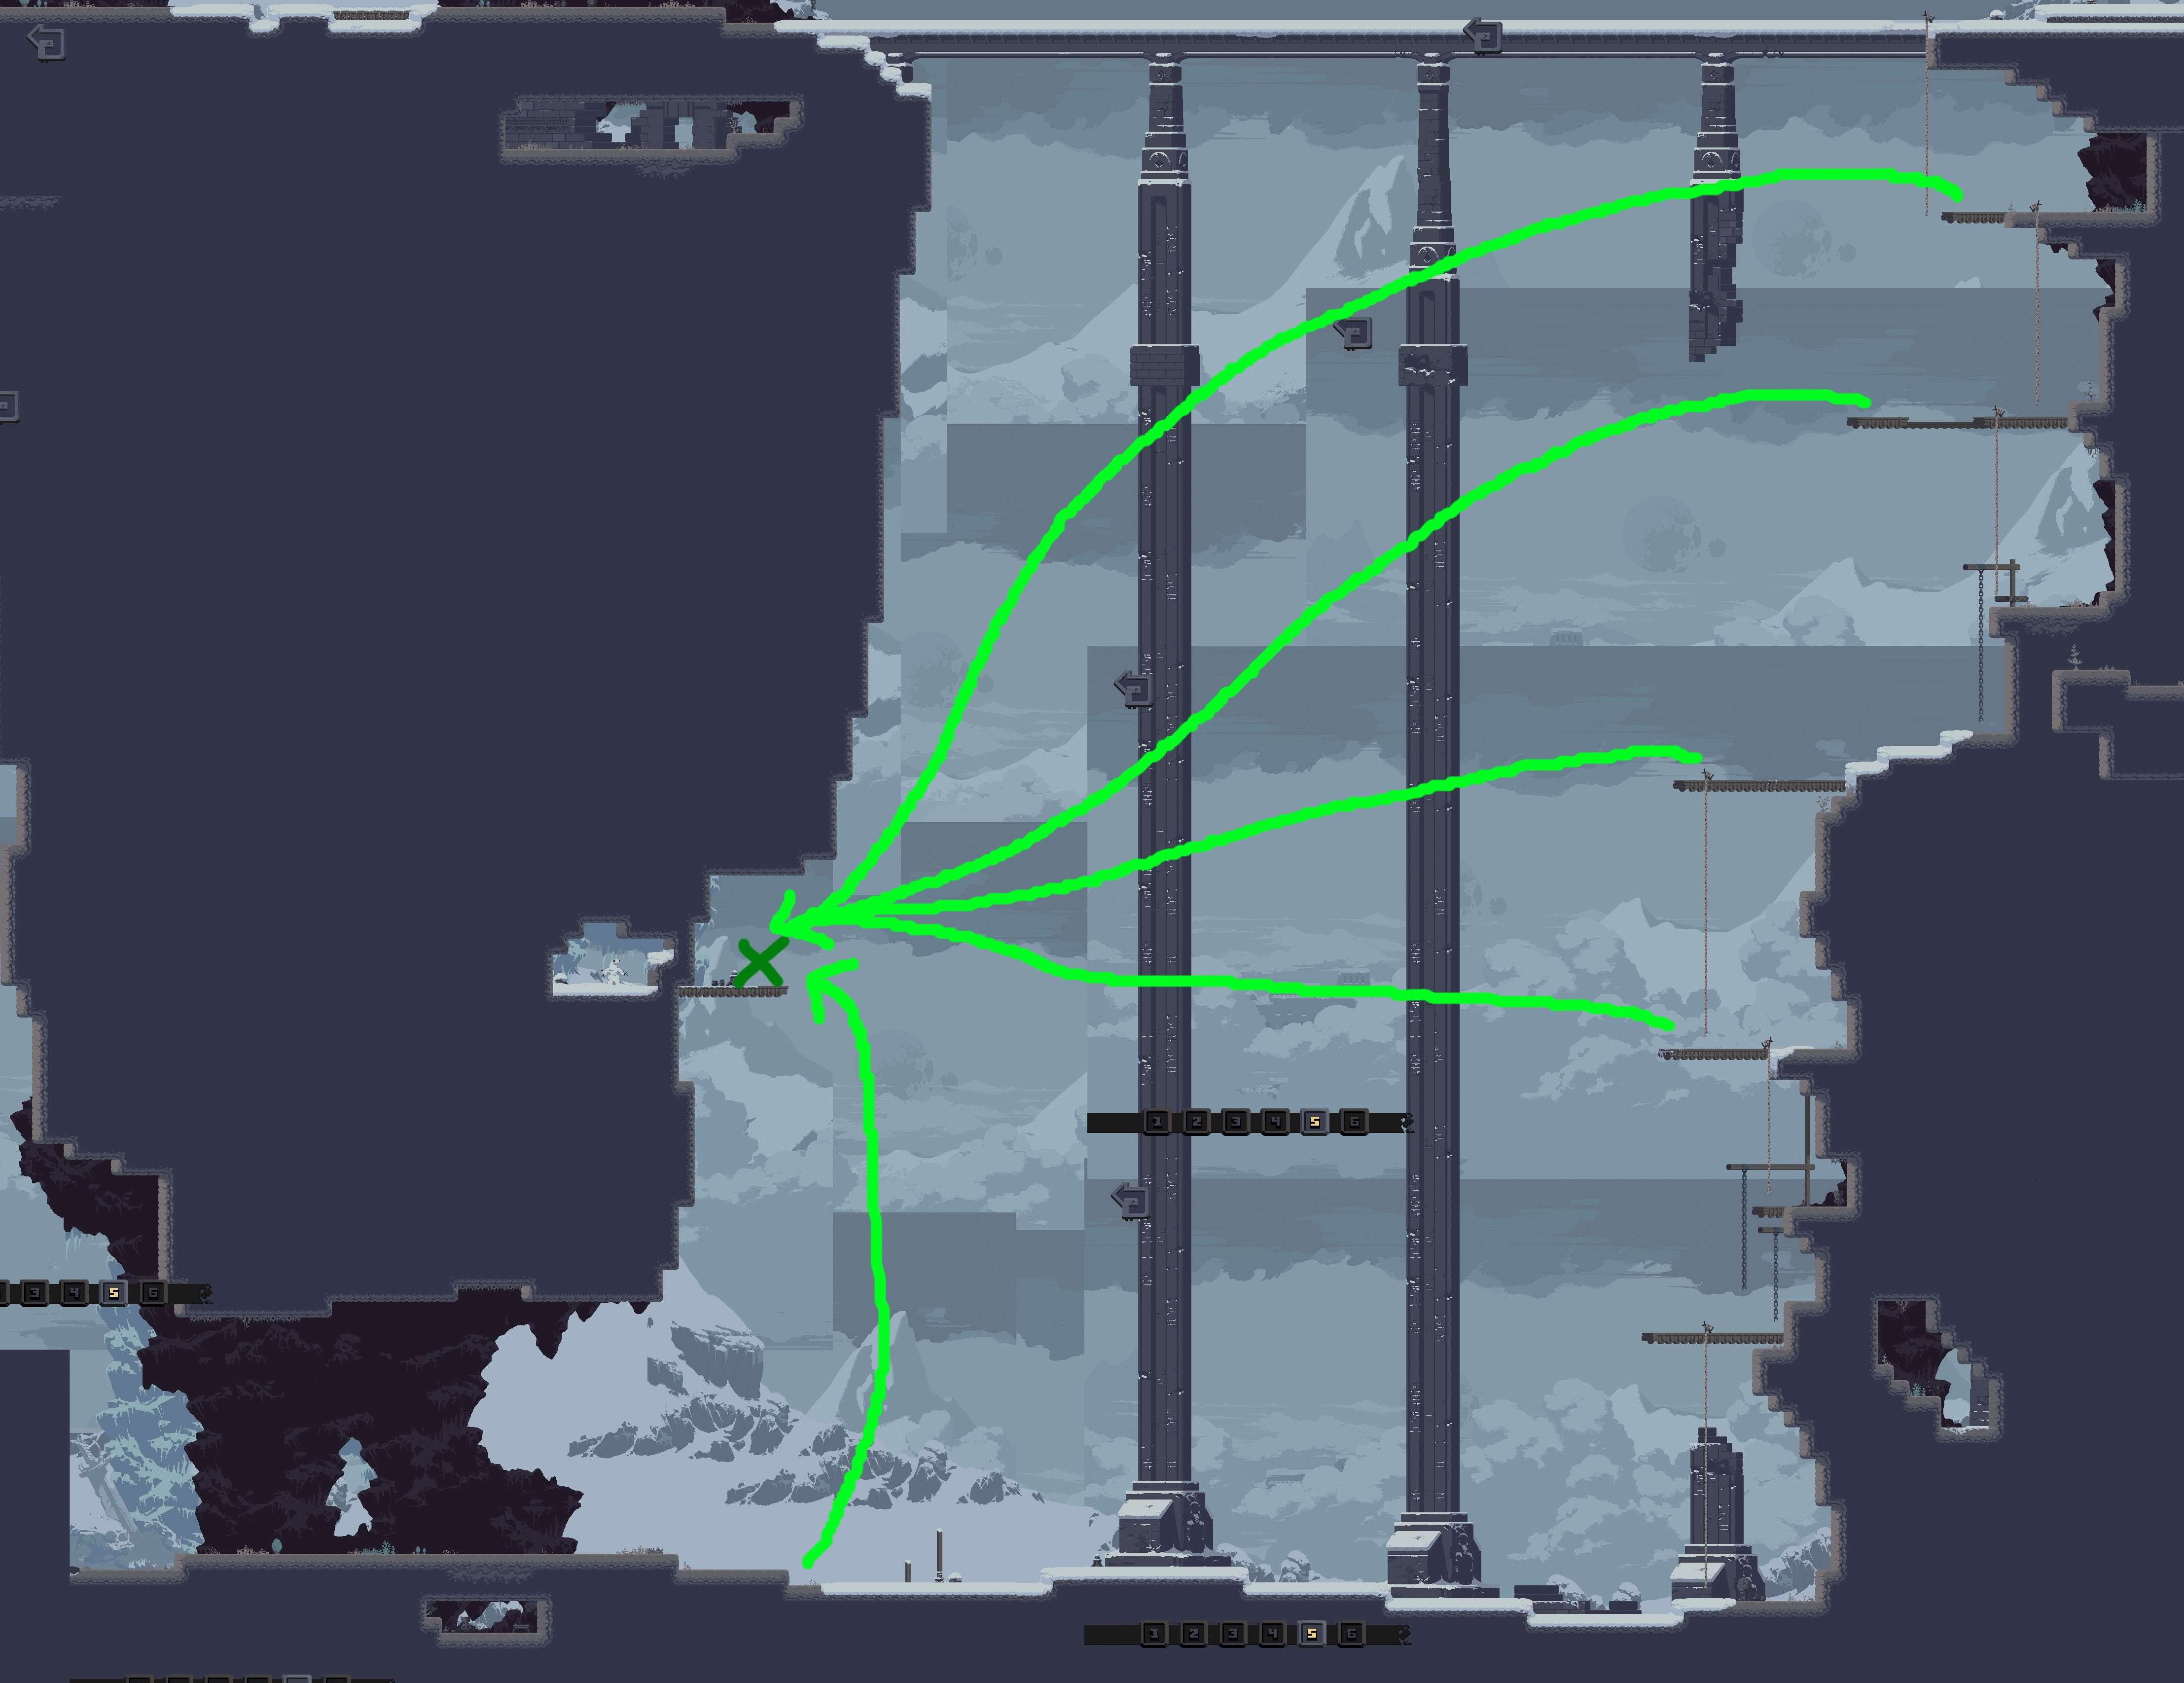
5: This is by far the hardest area log to reach. At the middle of the map, on the bottom right edge of the mountain in the middle of the stage. This log can only be reached from the far right side of the map with many extra jumps and movement speed, or from below with even more extra jumps. You cannot drop from the top into the area with the log. Using the Loader’s Hydraulic Gauntlet is the best way to reach it, but even with that skill you’ll still need extra jumps and movement speed.
6: At the far right bottom of the map, there’s a walk-through wall that can be reached either by mobility or jumping off the ladder.
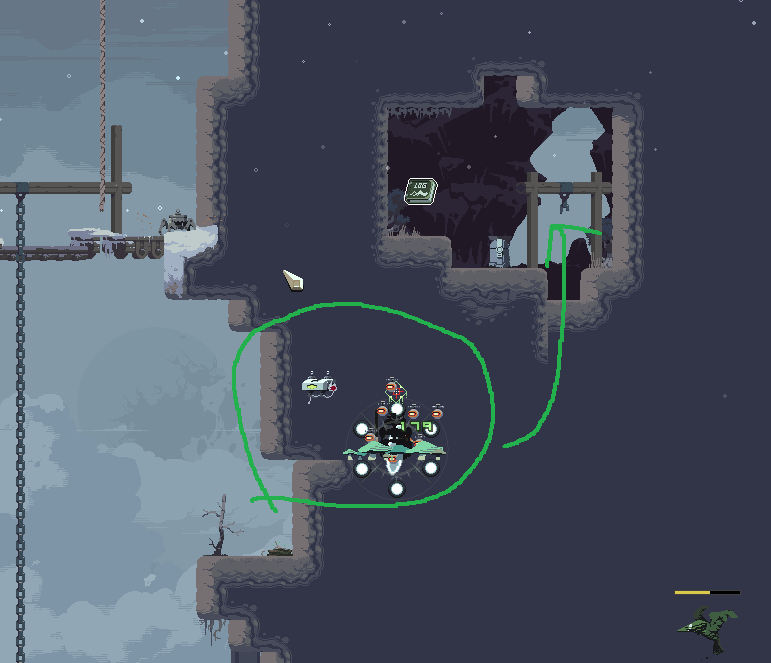
Sunken Tombs
1: At the top right corner of the map, reachable from below. Requires a couple extra jumps to reach.
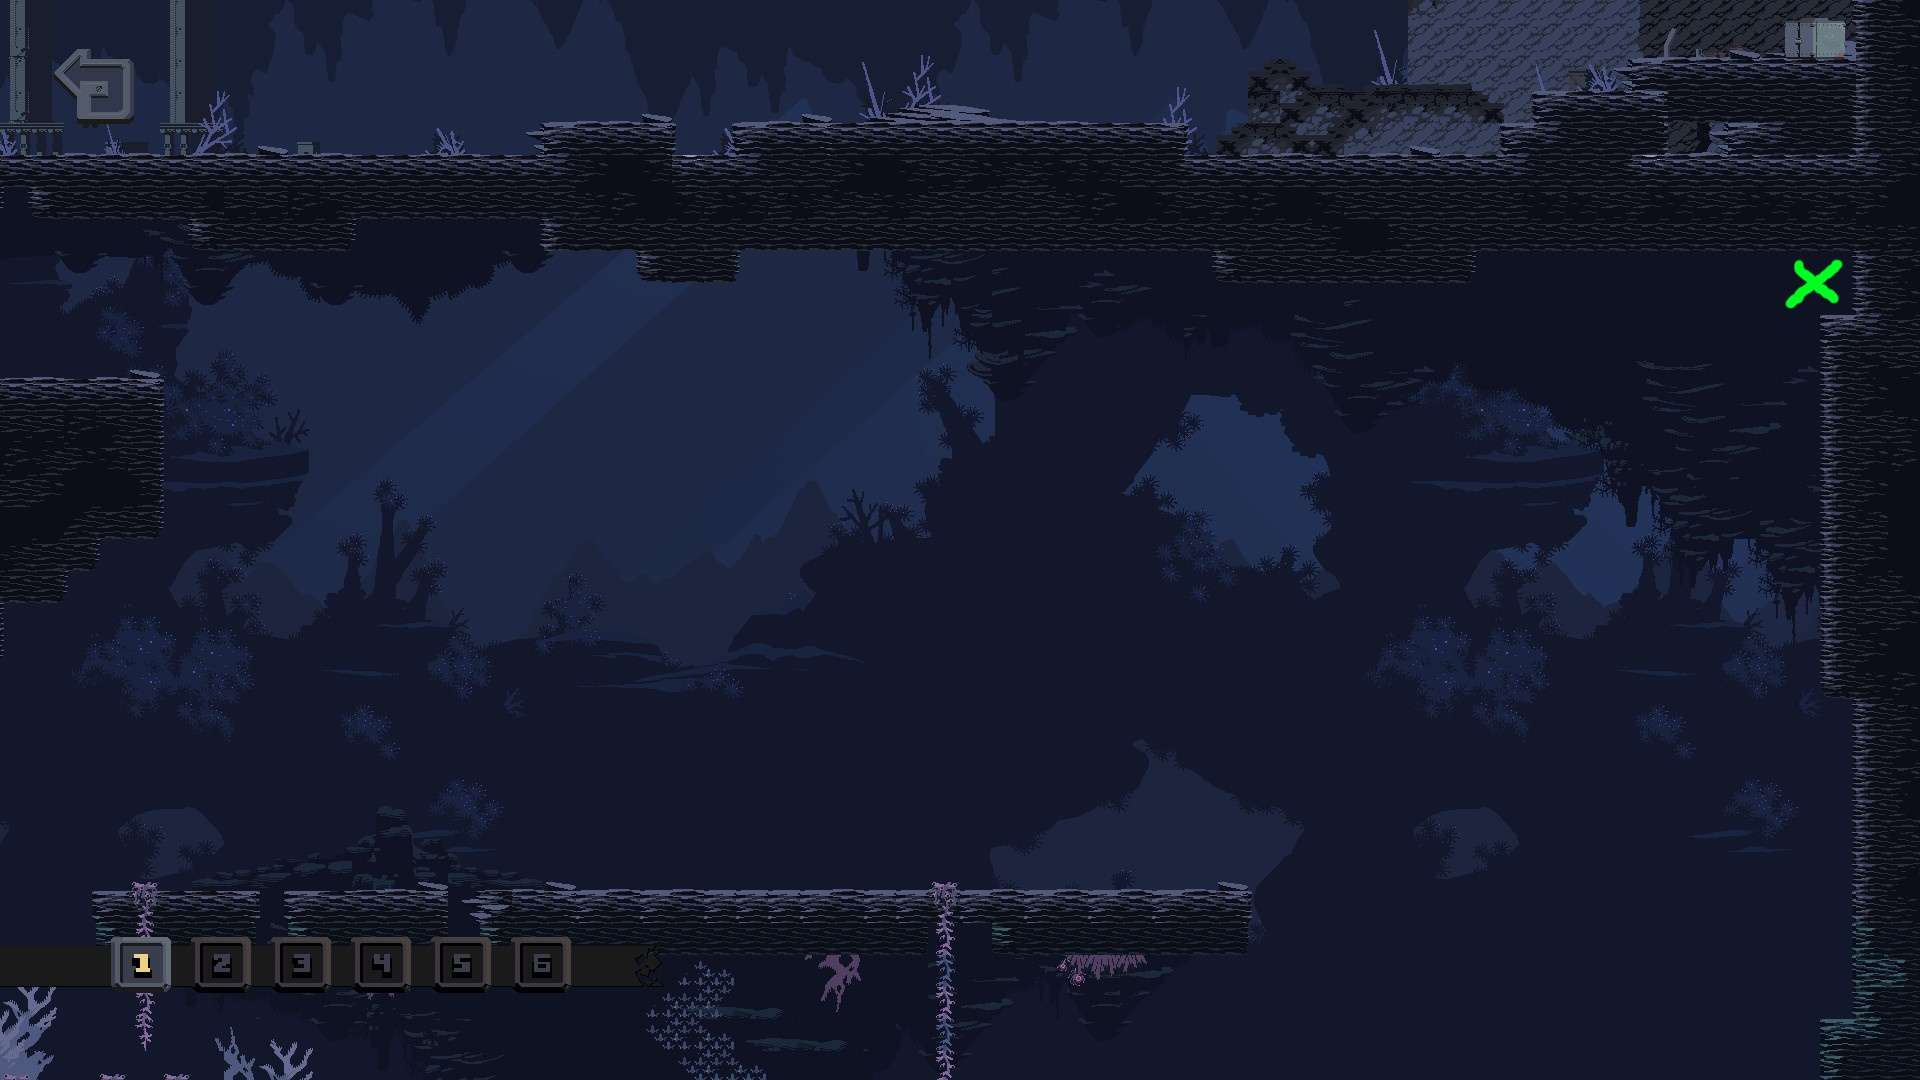
2: At the bottom left corner of the map, reachable by falling into the pit and then jumping back up towards the log. Requires extra jumps to reach.
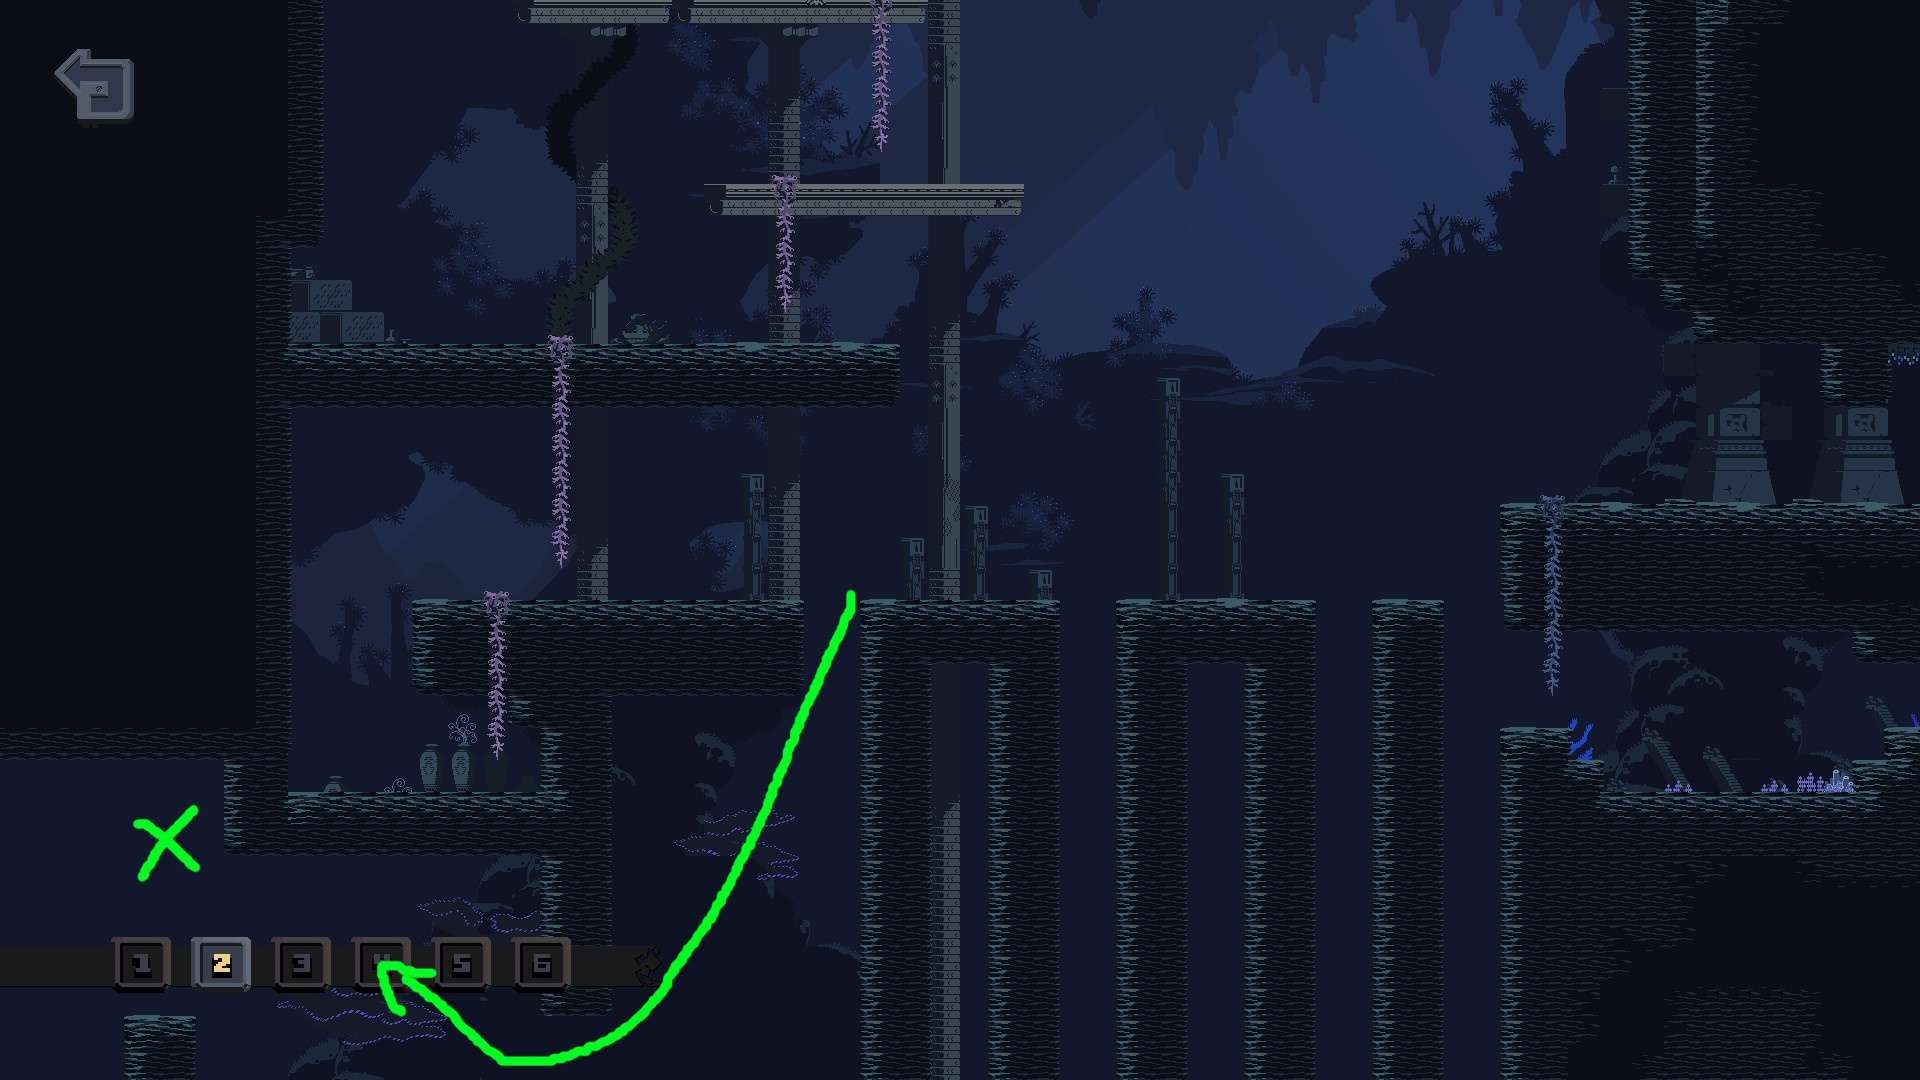
3: Right at the center of the map. Hug the wall as falling and you will encounter a walk-through wall.

4: At the bottom right corner of the map, reachable by a walk-through wall. Can be entered by dropping from the ledge above the entrance.
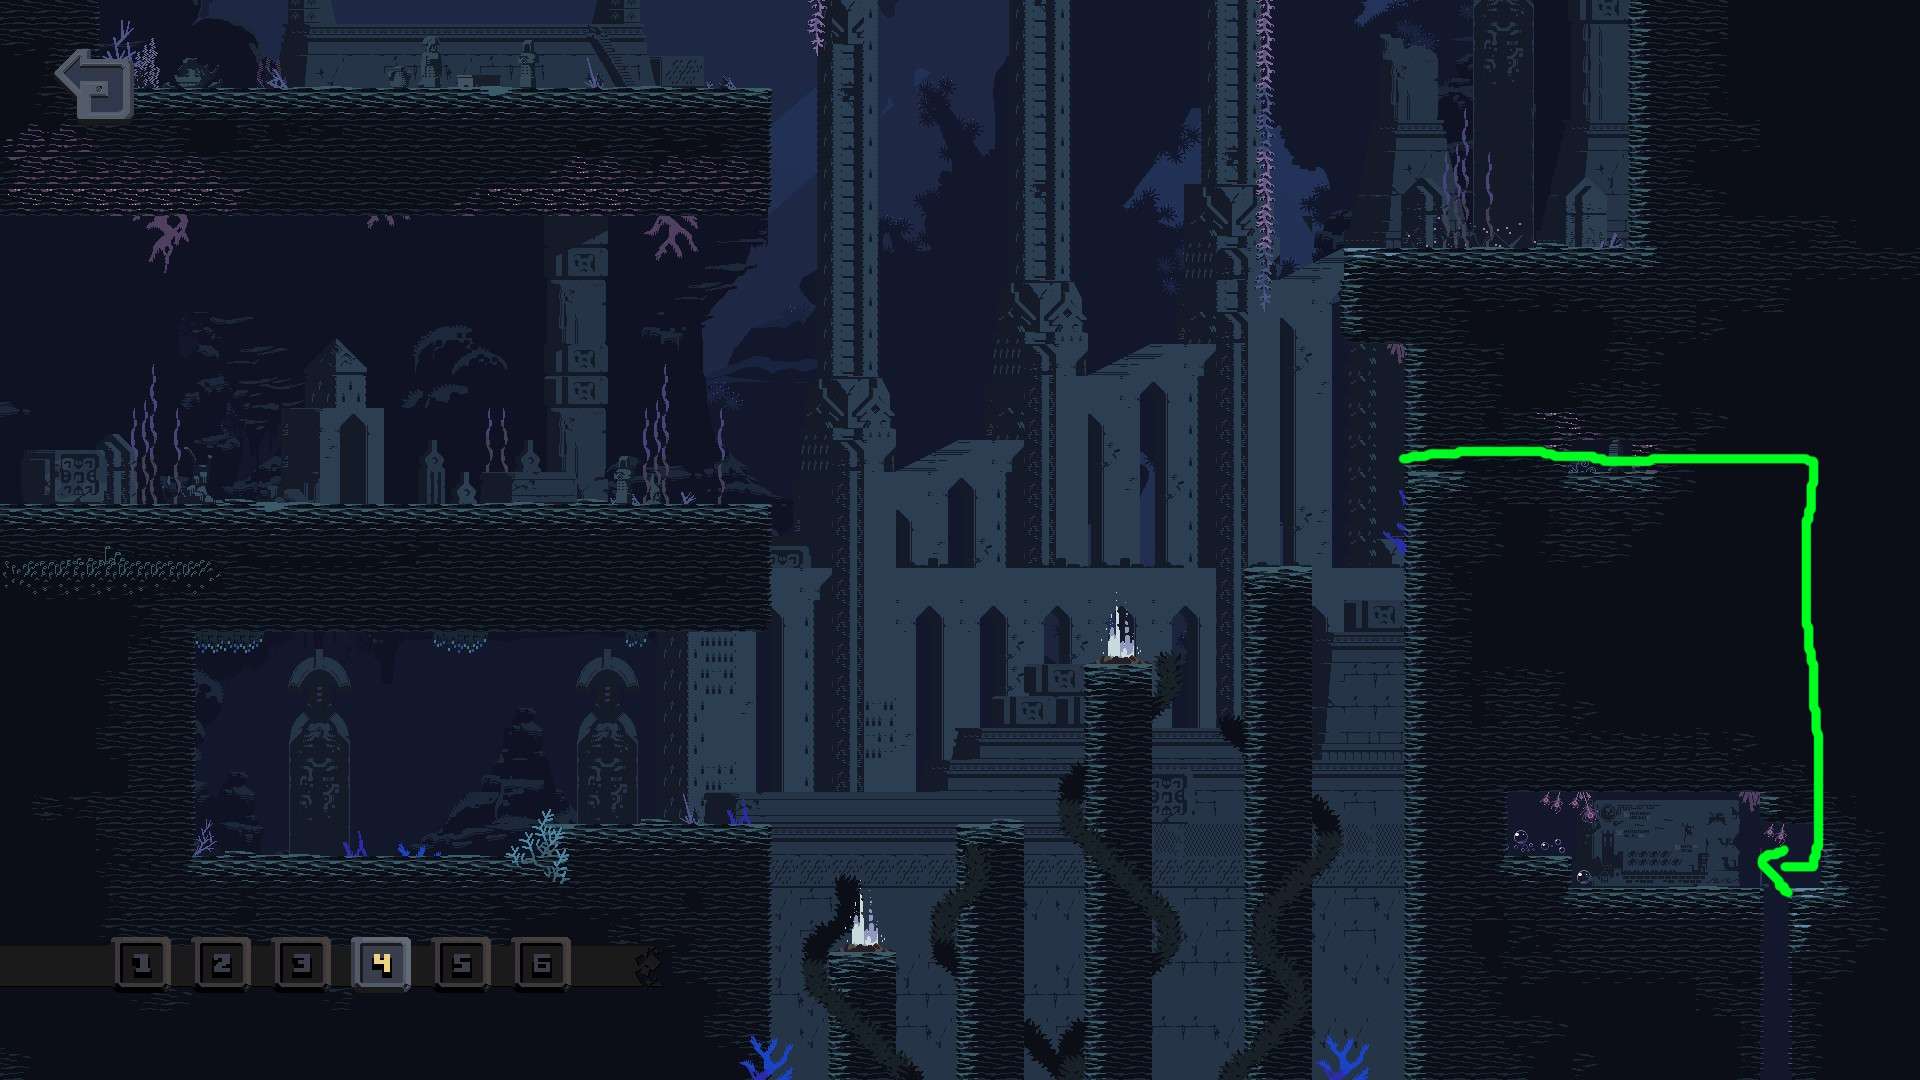
5: At the far left of the map, right before going into the water, hug the wall to walk into a walk through wall.
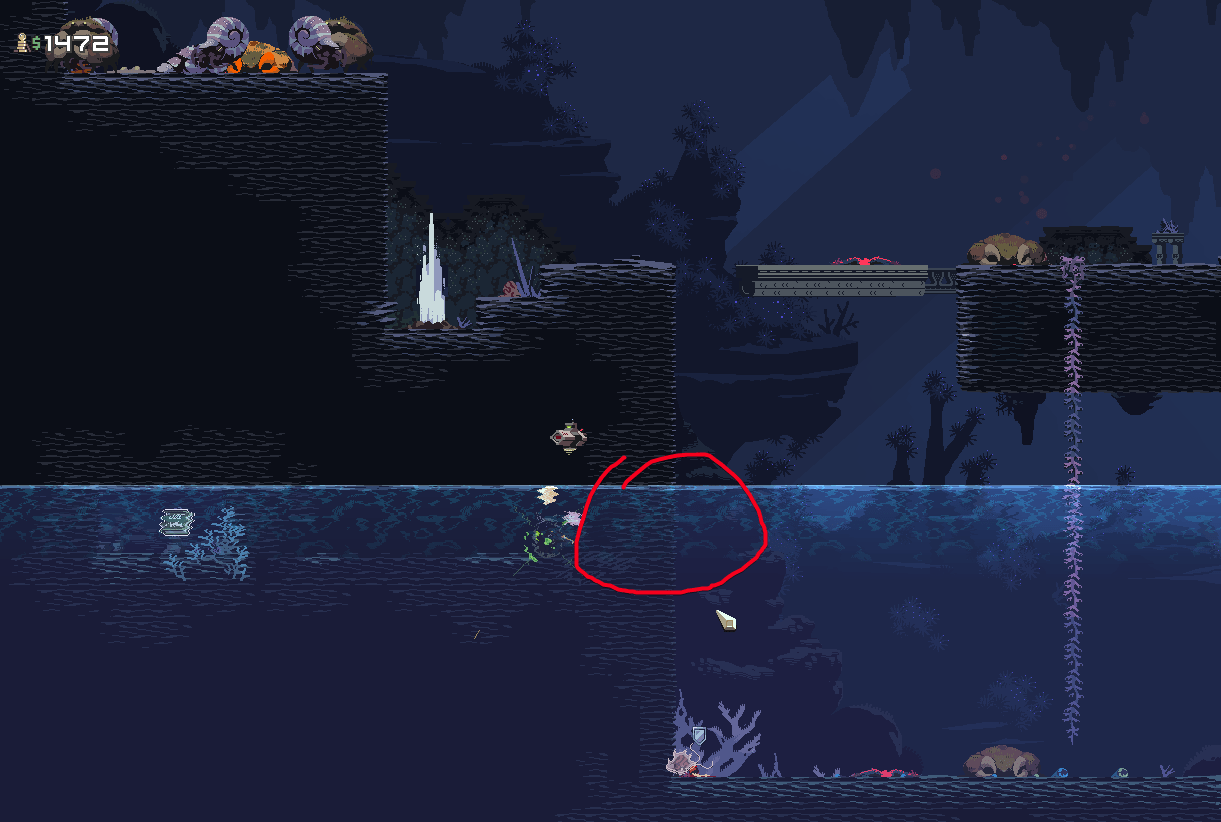
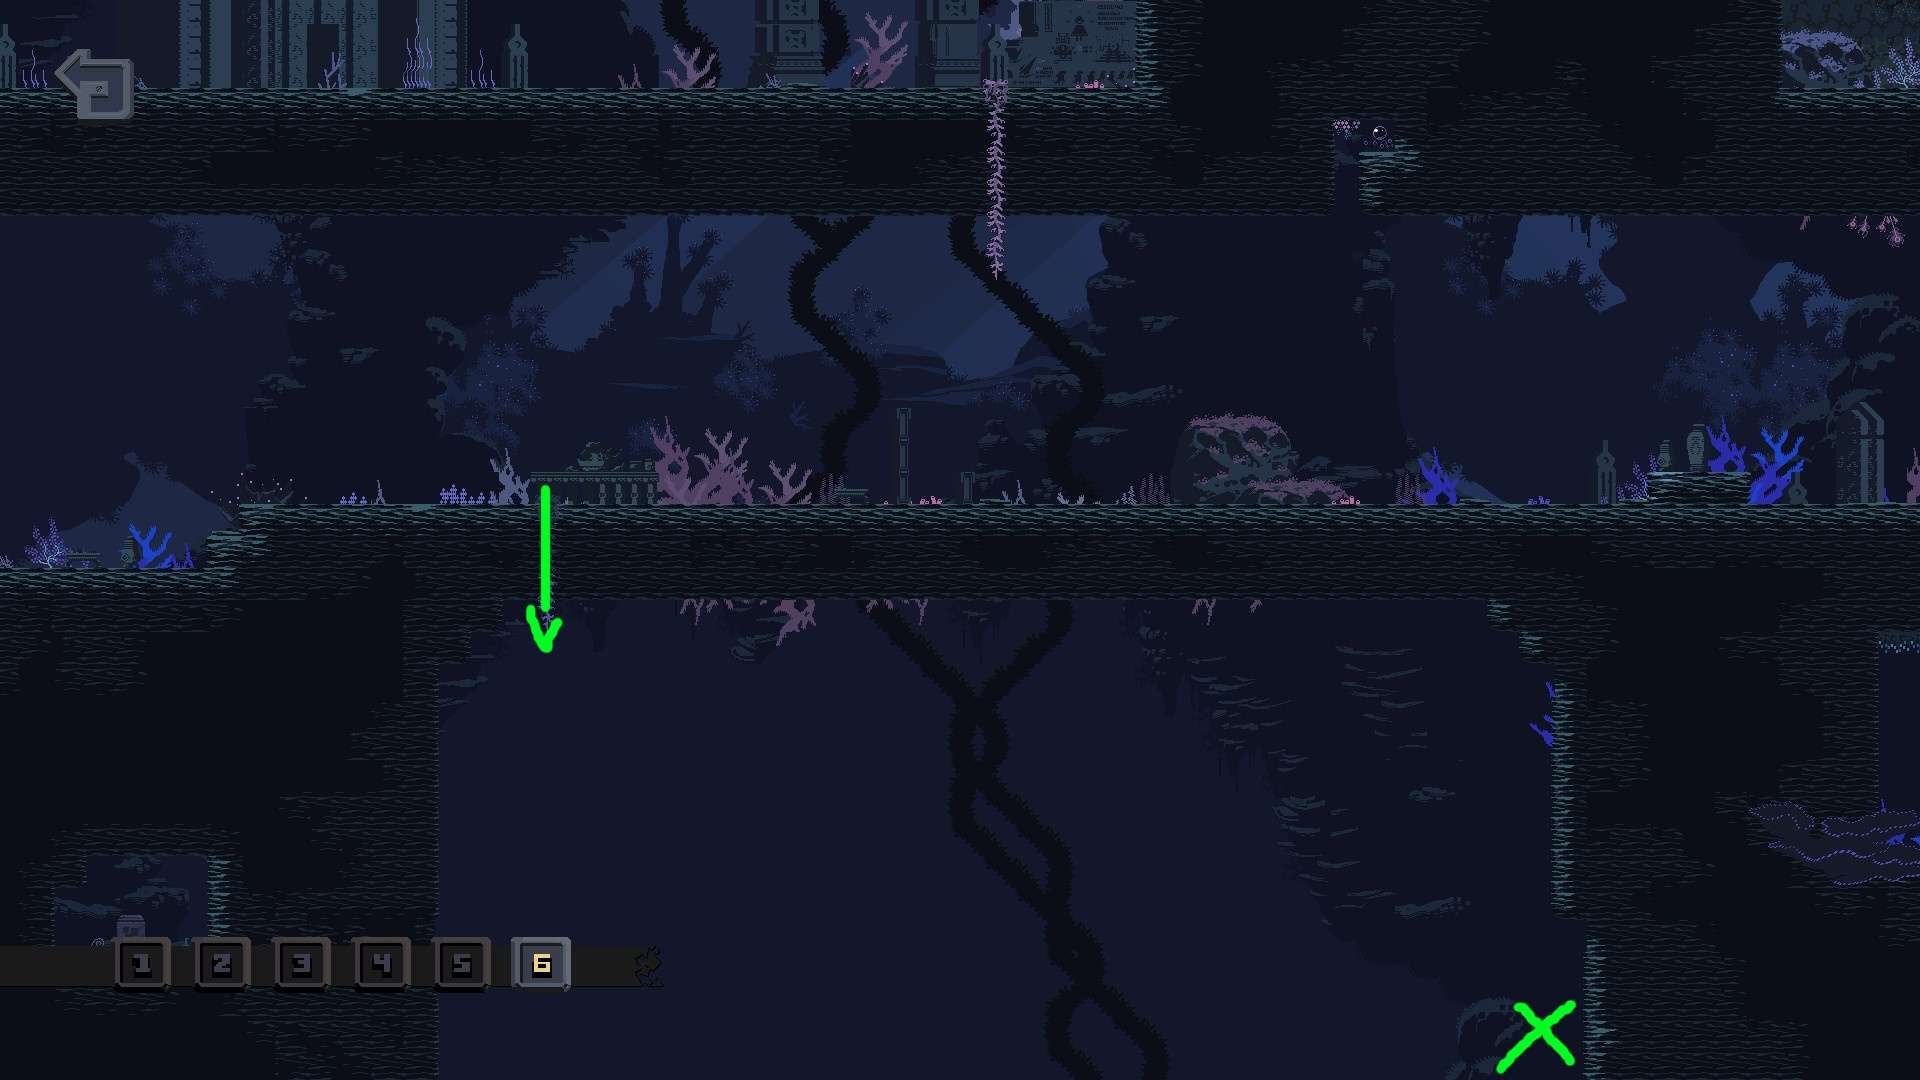
6: At the bottom middle of the map, reachable by a ladder. Some movement speed might be necessary to reach all the way to the log.
Magma Barracks
Miner Can Be Found in Variants 1 and 2
1: At the bottom right of the map, there is a path covered in lava. Past there, is an Elite Elder Lemurian that needs to be killed. At the right hand side of the area lies the log; mobility is needed.
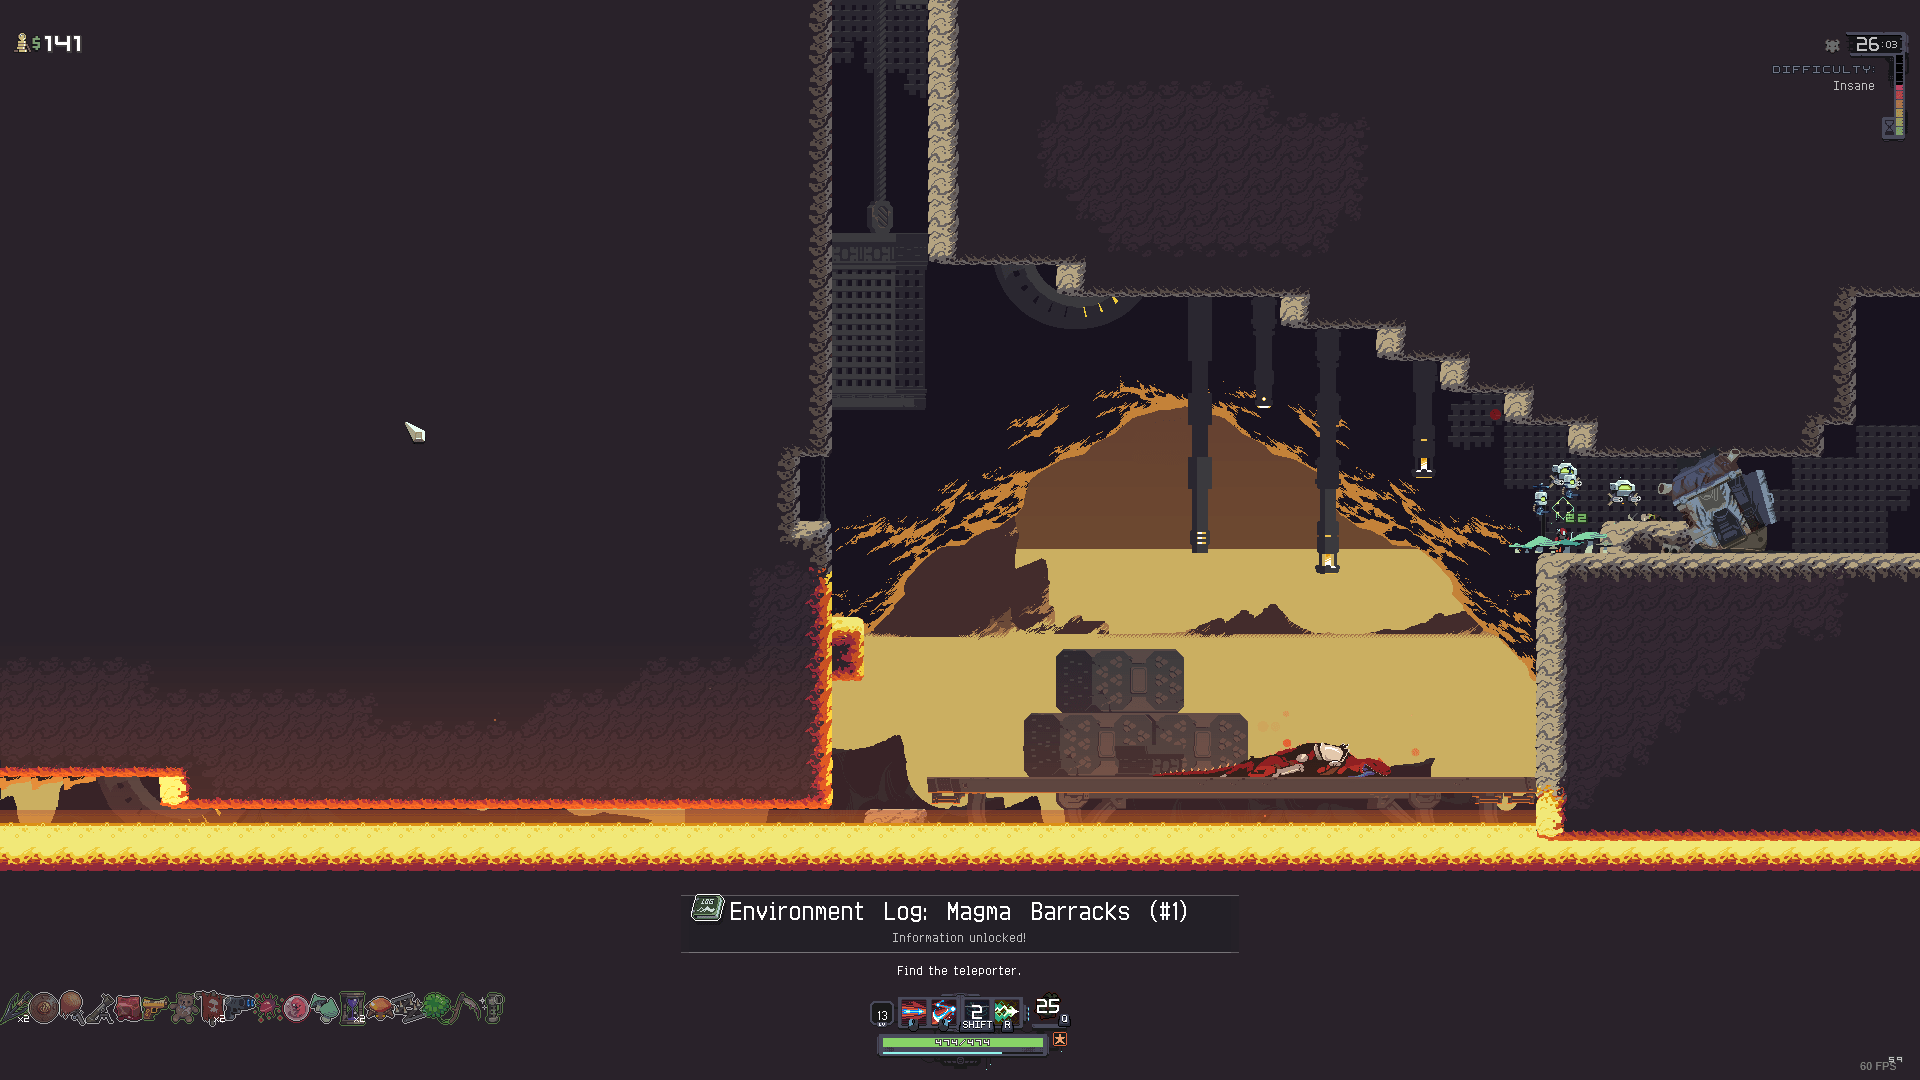
2: At the center of the map, there’s a walk-through wall that can be reached by hugging the walls as falling down.
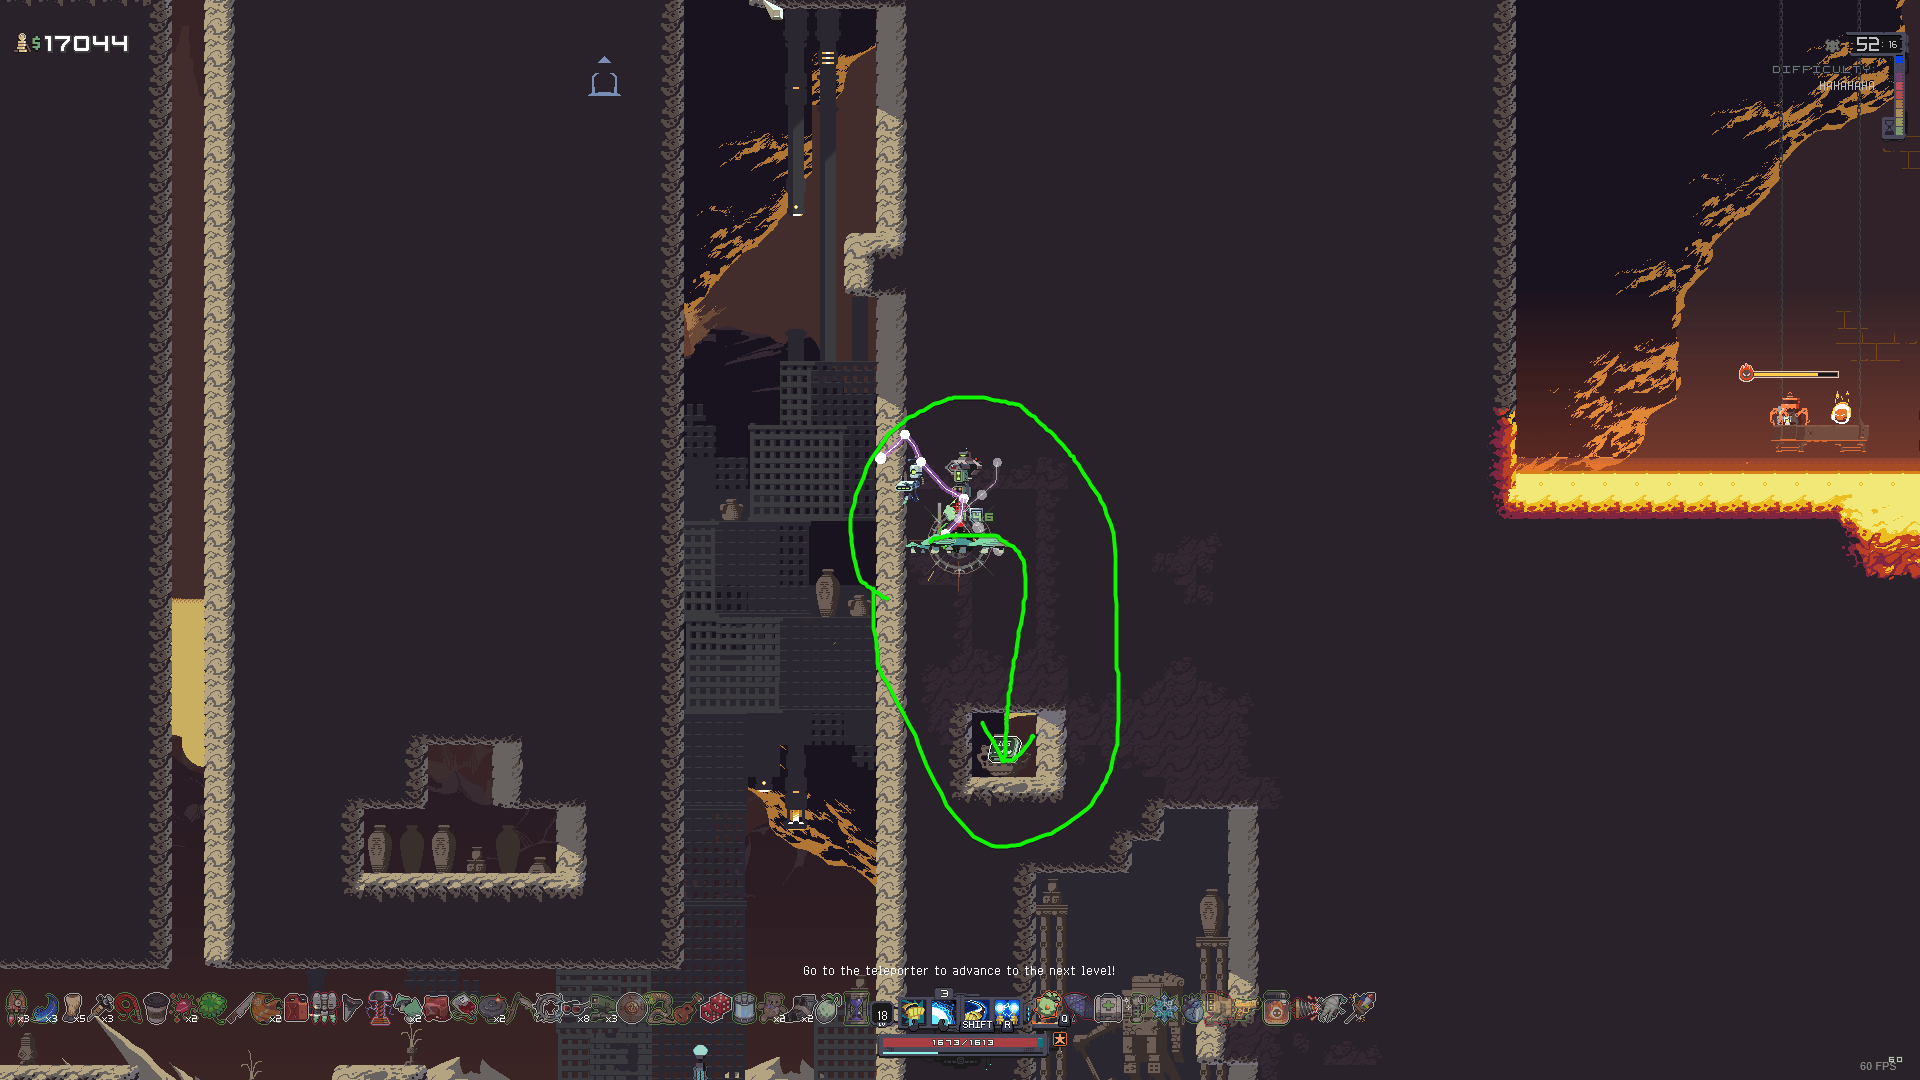
3: At the middle of the map, reachable by a walk-through wall.
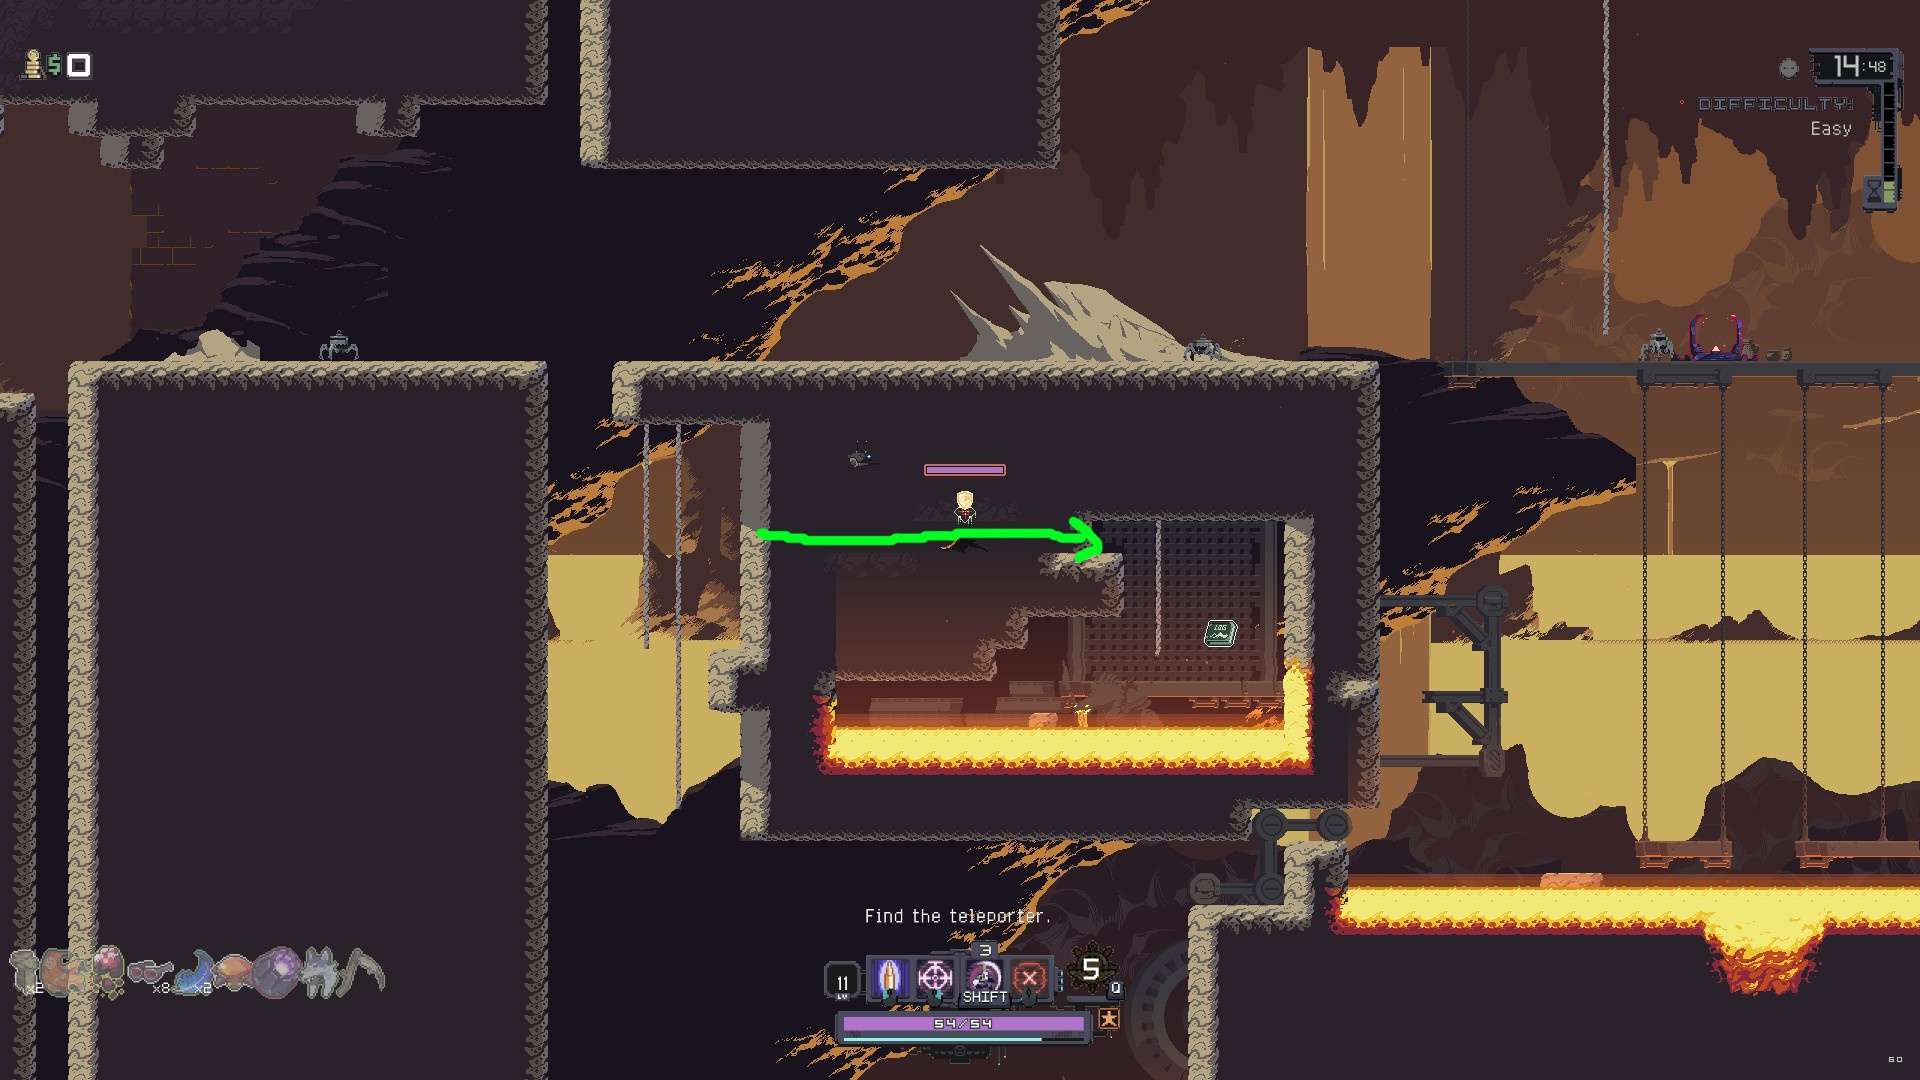
4: At the top left corner of the map, reacheable from below using extra jumps. There are no walk-through walls near it, so the below entrance is the only path towards the log.
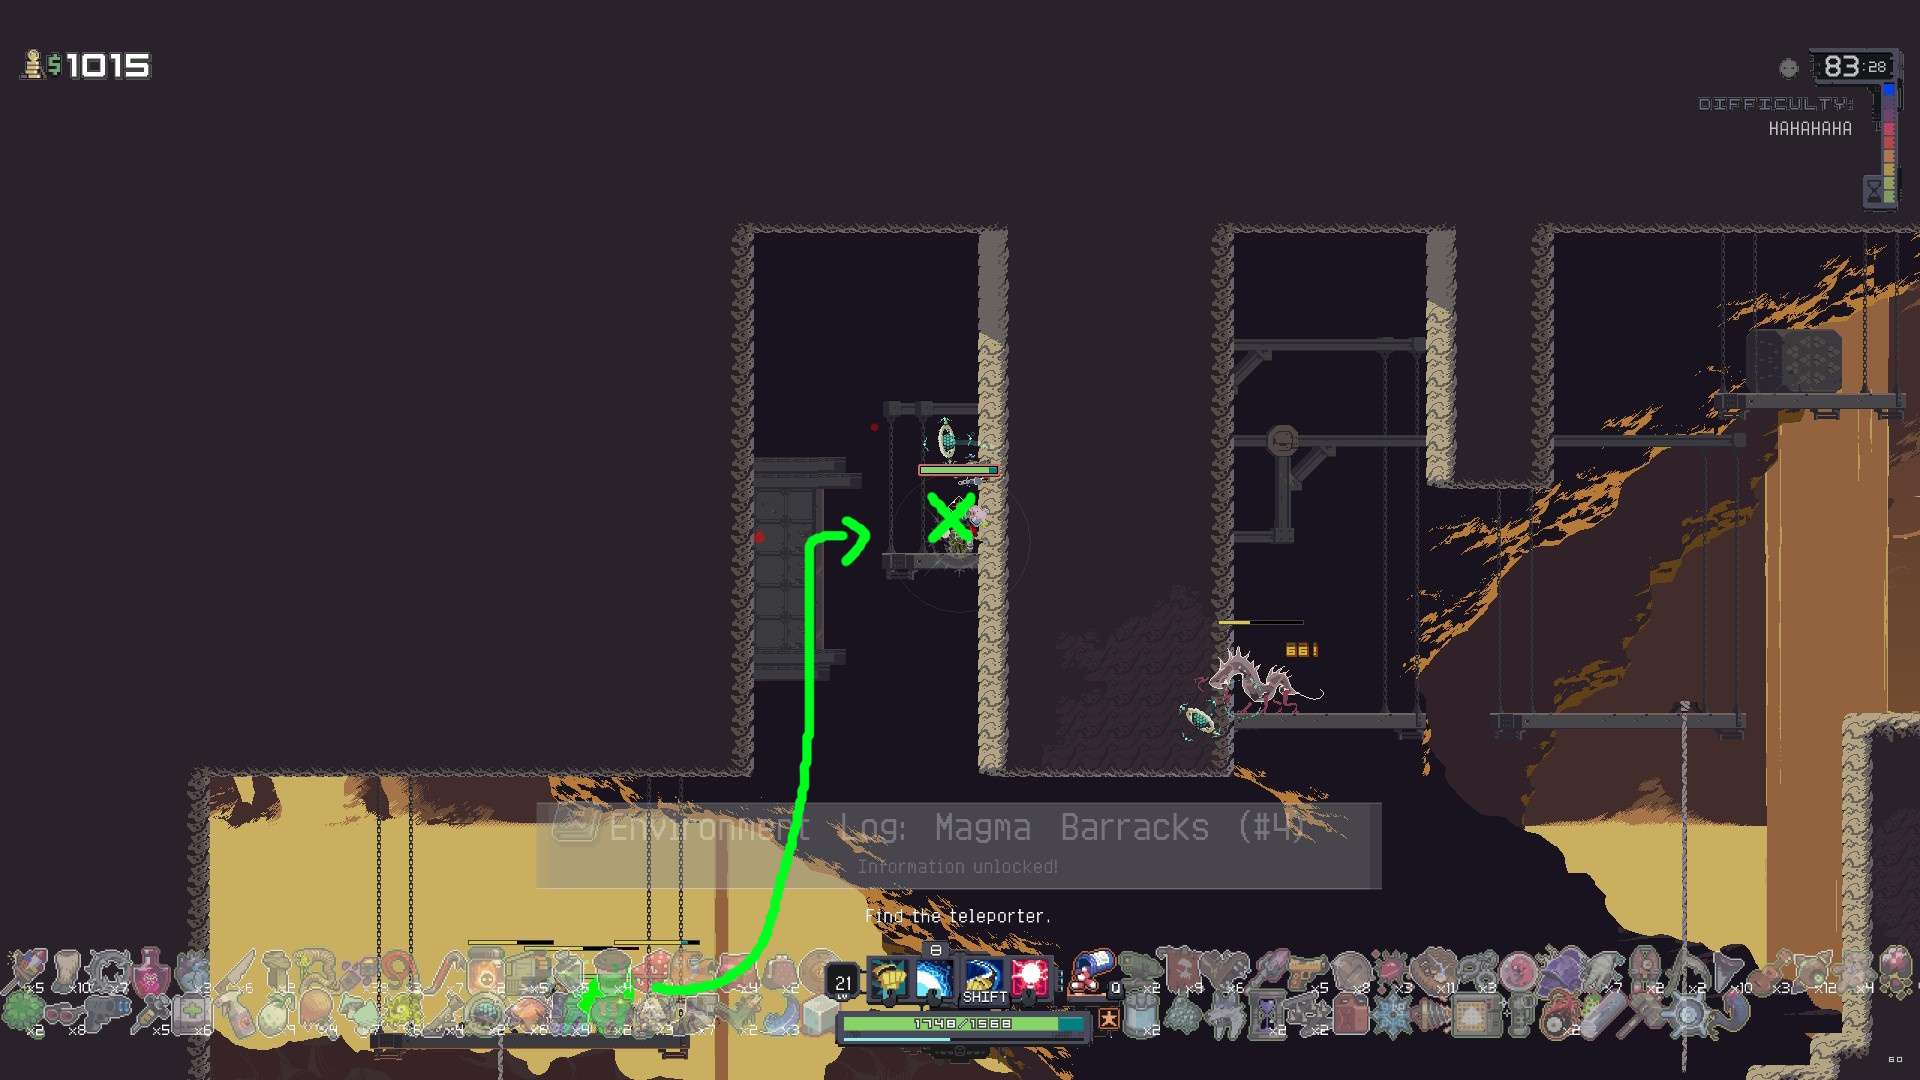
5: Right in the center of the map. Requires mobility to get to.

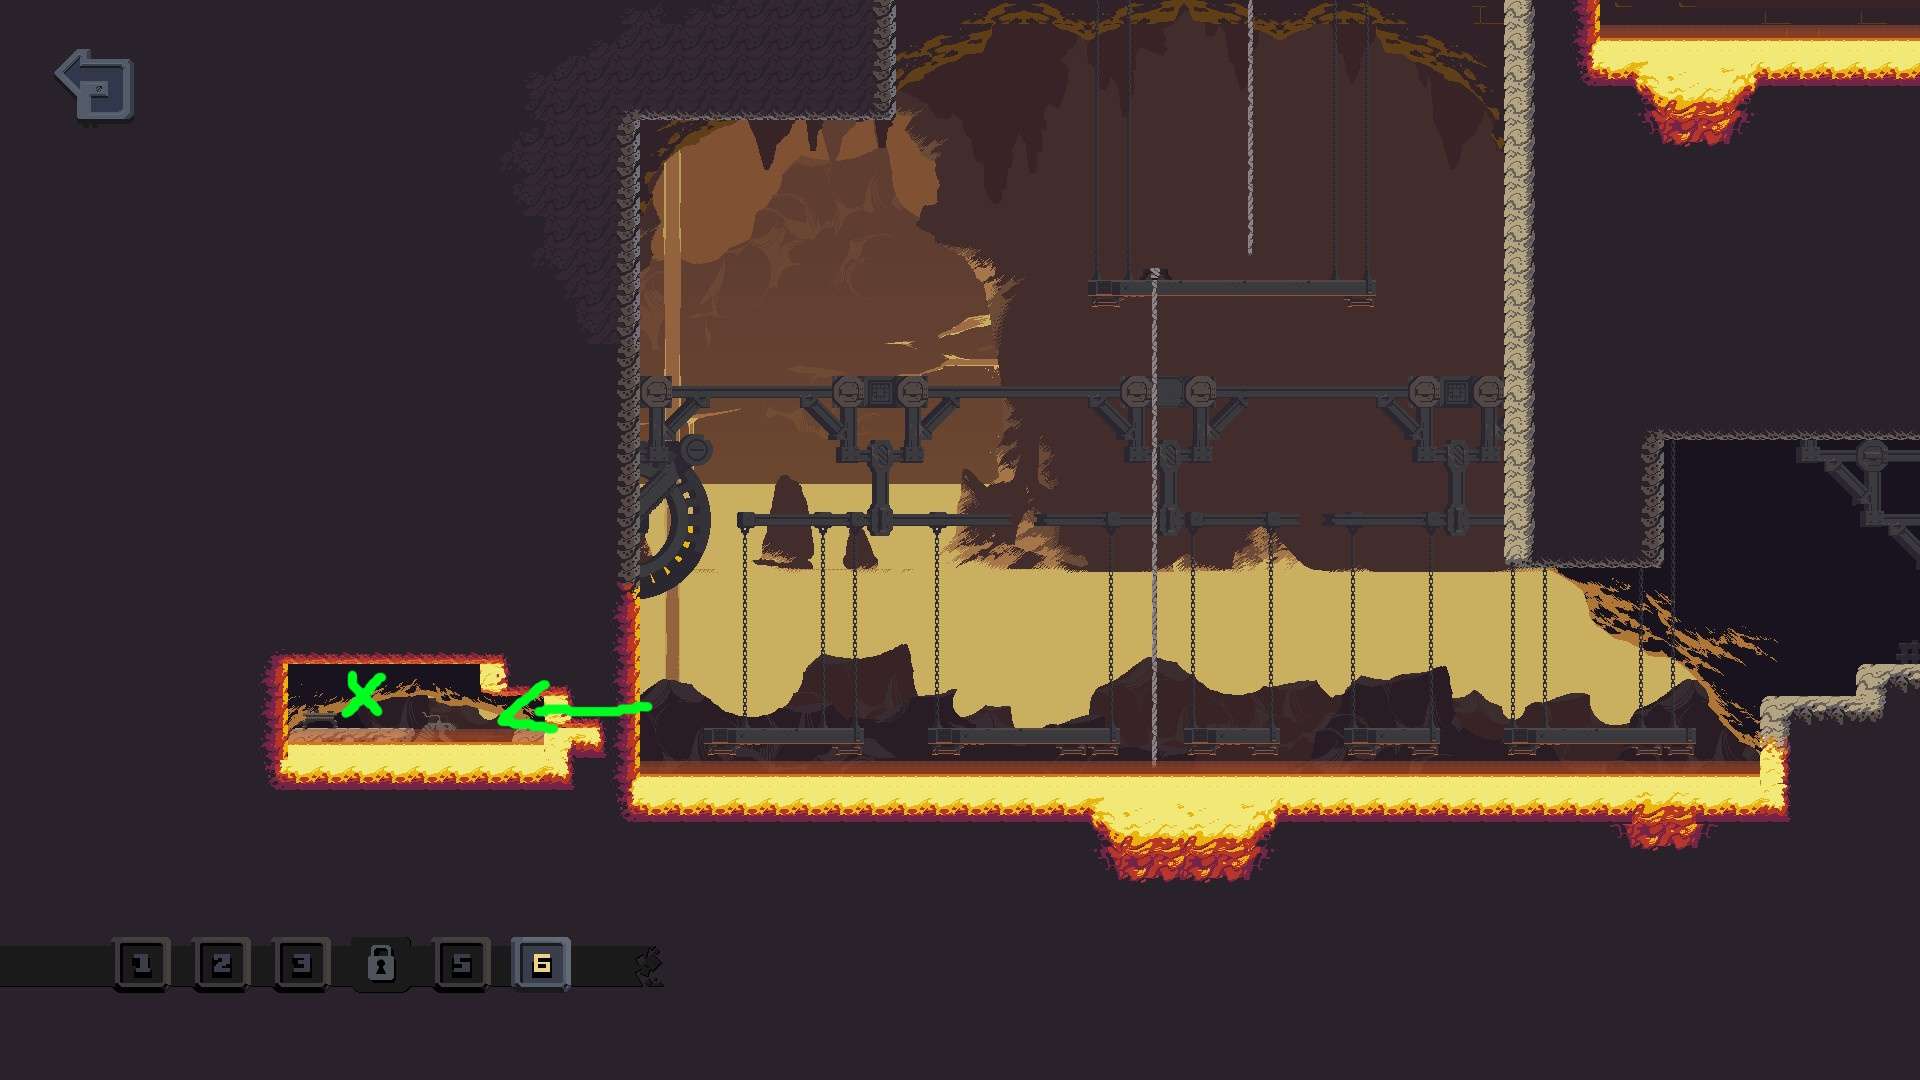
6: At the bottom left corner of the map, reachable by a walk-through wall.
Hive Cluster
1: At the bottom middle of the map, reachable by a ladder.
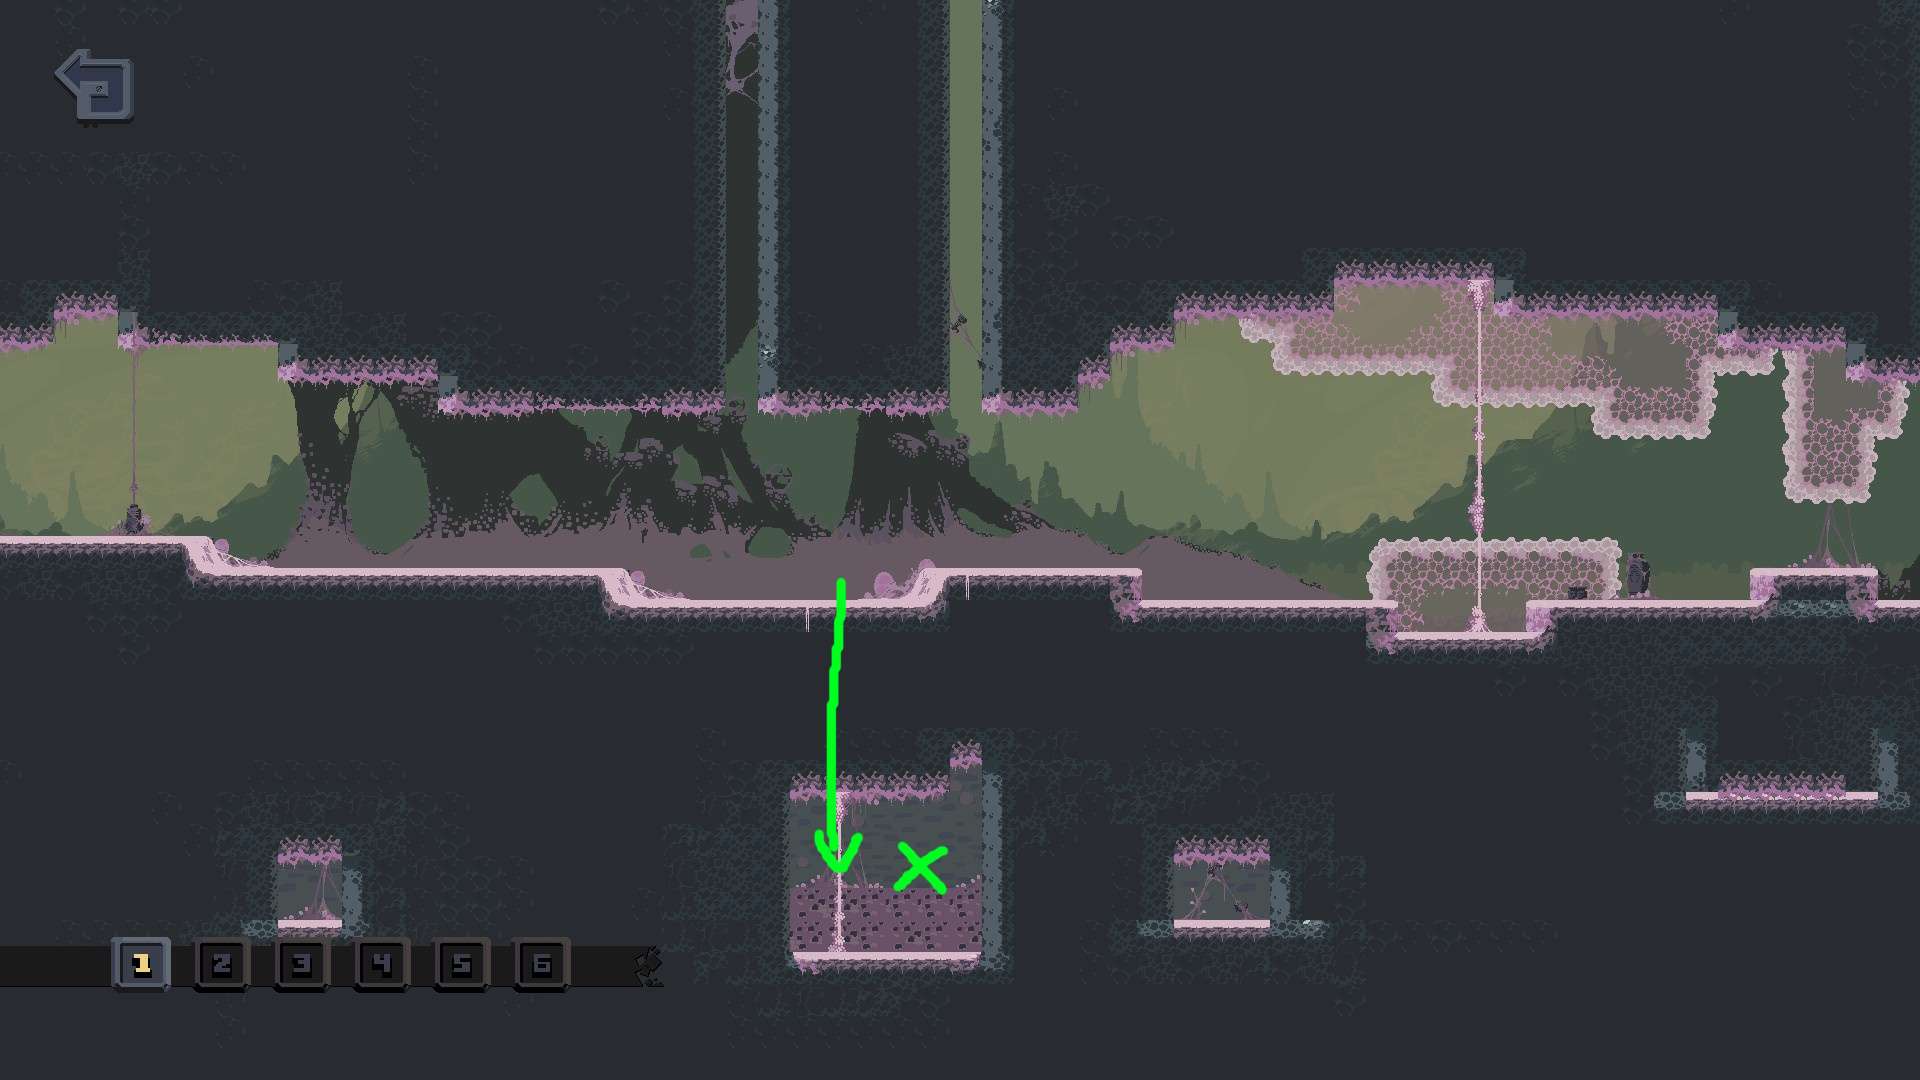
2: At the bottom left of the map, reachable by a ladder.
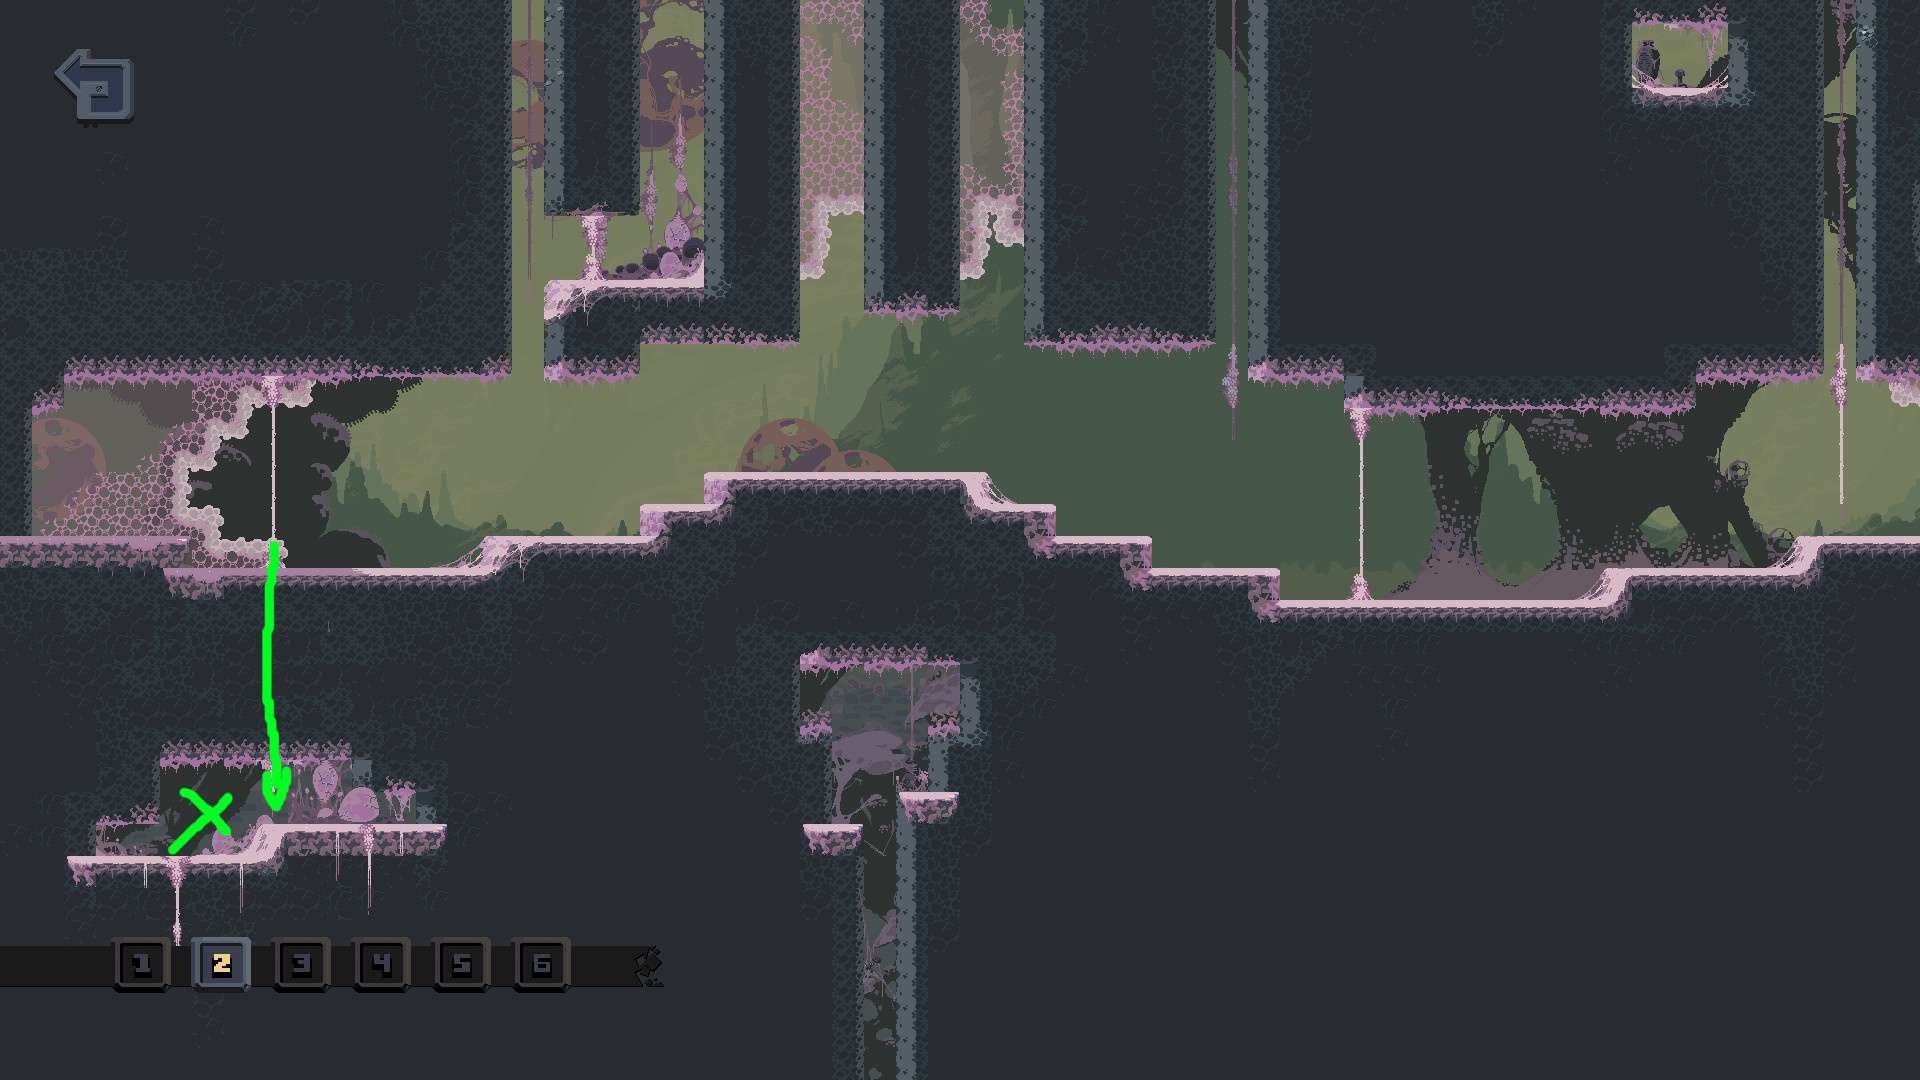
3: At the top left of the map, there’s a ladder that leads to a walk-through wall. It’s a bit hard to tell because of its appearence.
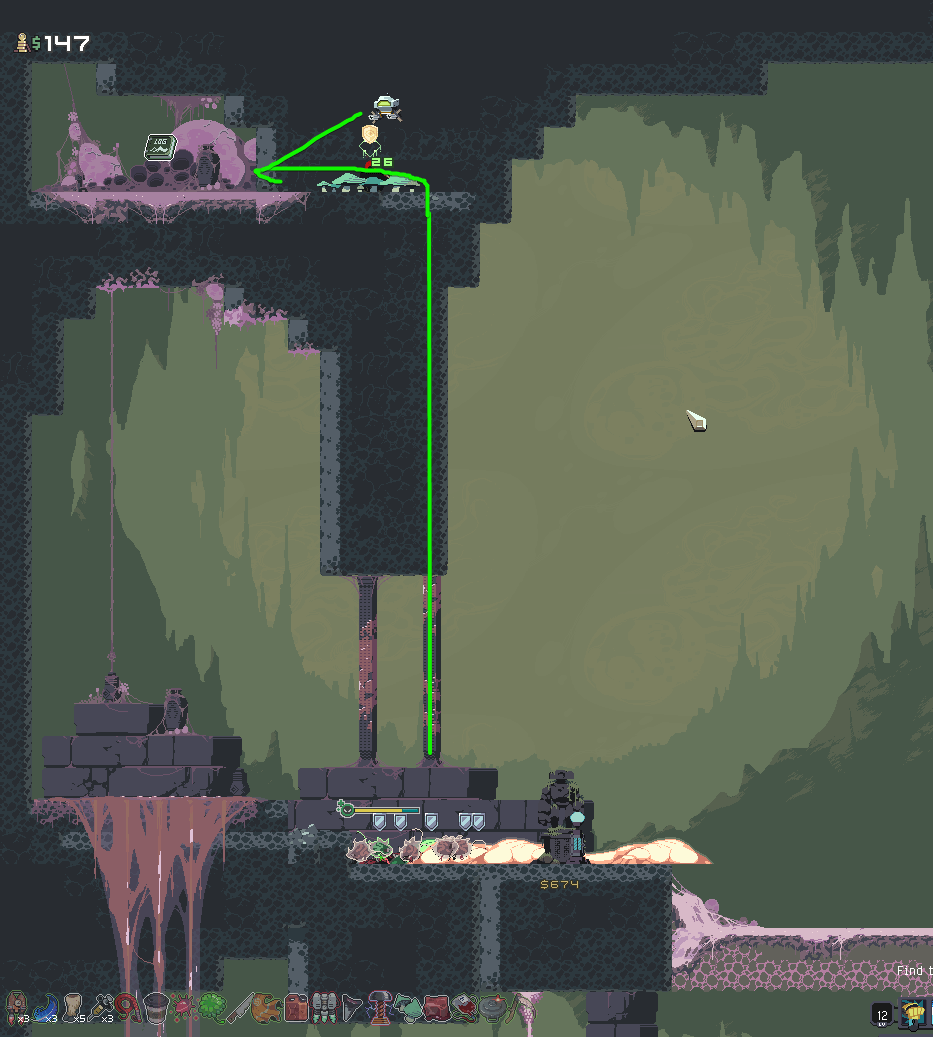
4: At the far right of the map, at the center, there are some ladders to climb and a little bit of platforming. Climb up the second ladder to reach the log.
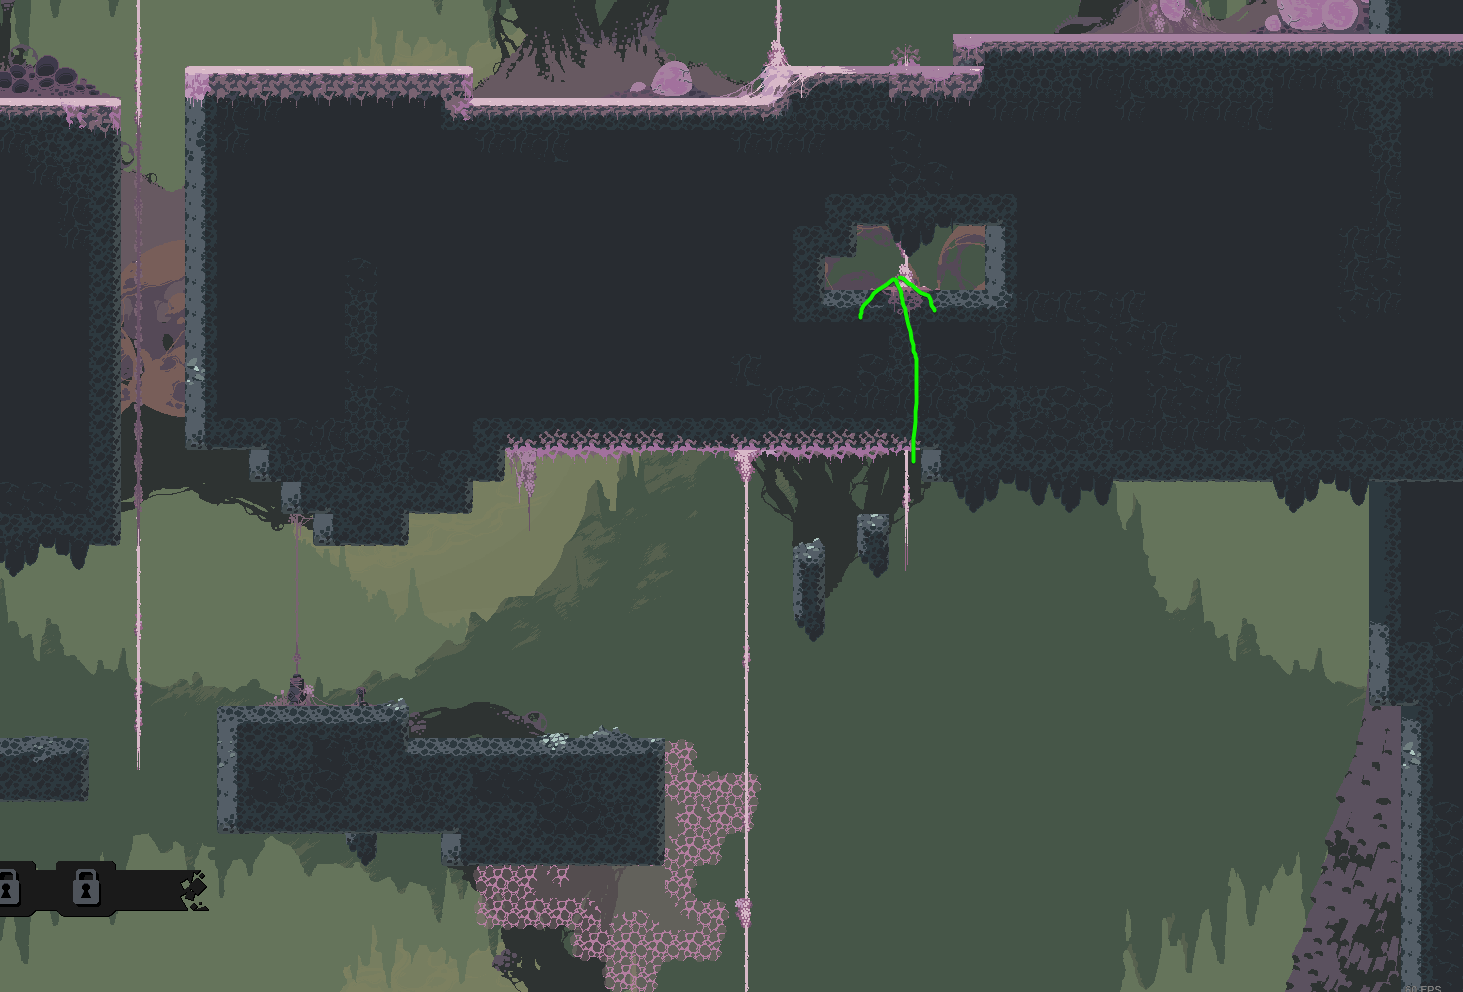
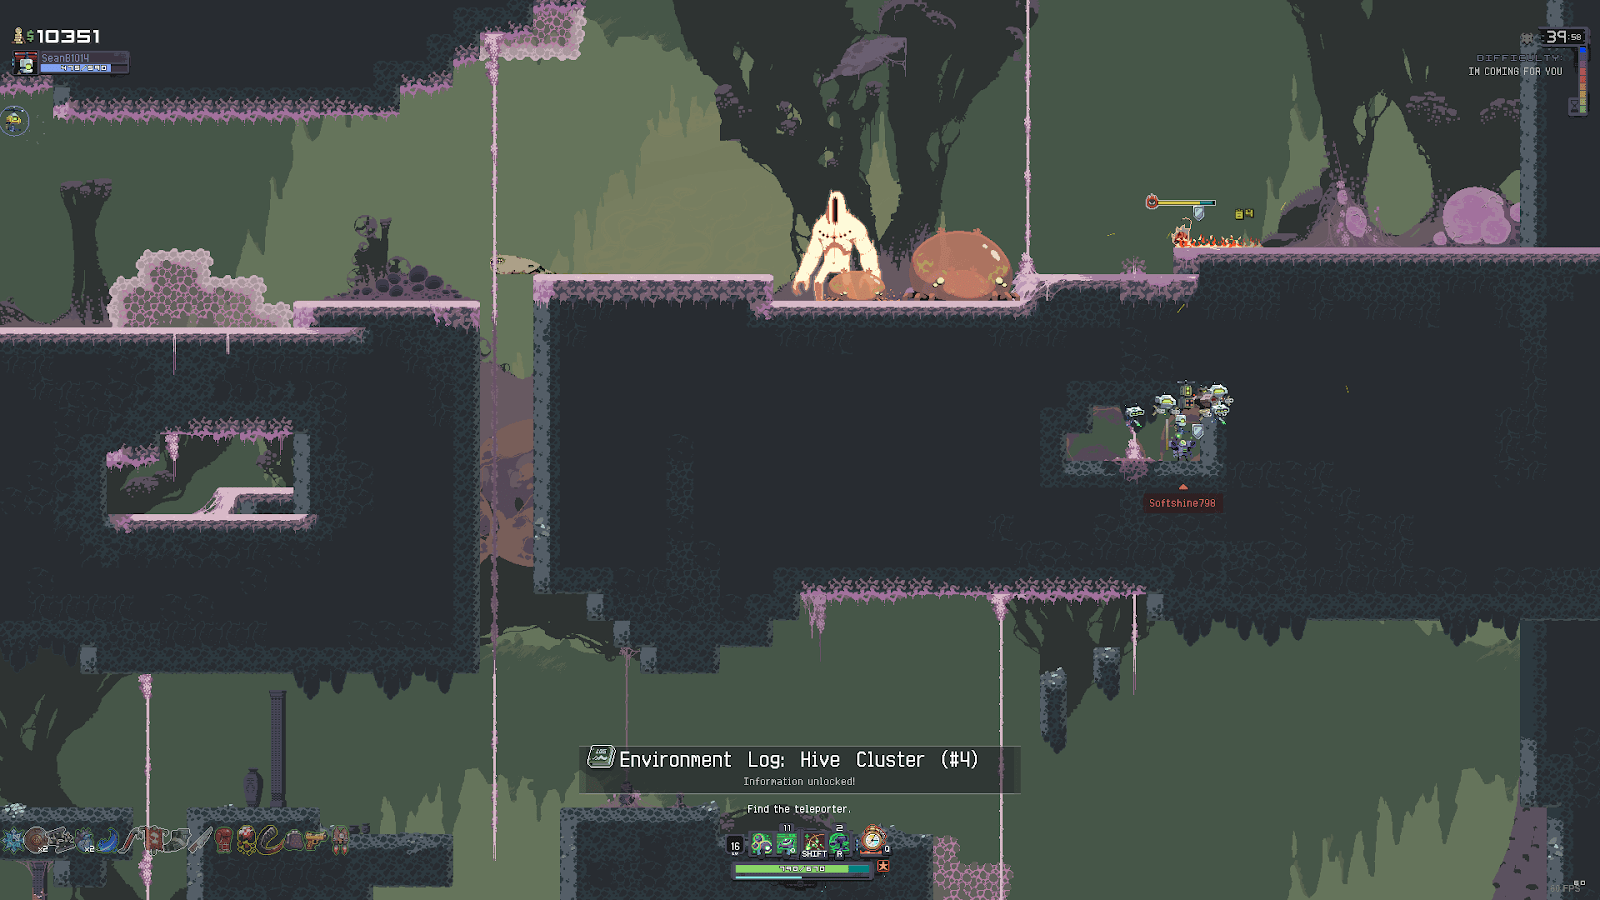
5: At the far left bottom of the map, there are a few ladders to climb to reach the log.

6: At the top middle of the stage, reachable by a walk-through wall. The Dissonance Artifact’s area nearby can also be used to more easily enter the walk-through wall.
Temple of the Elders
1: At the very far left of the map, outside of the building. Can go on top of the roof to fall down on ledges to reach. No mobility required, but do be careful of fall damage.


2: At the top left corner of the map, above the regularly accessible part of the map. Requires many extra jumps to reach, from the right.
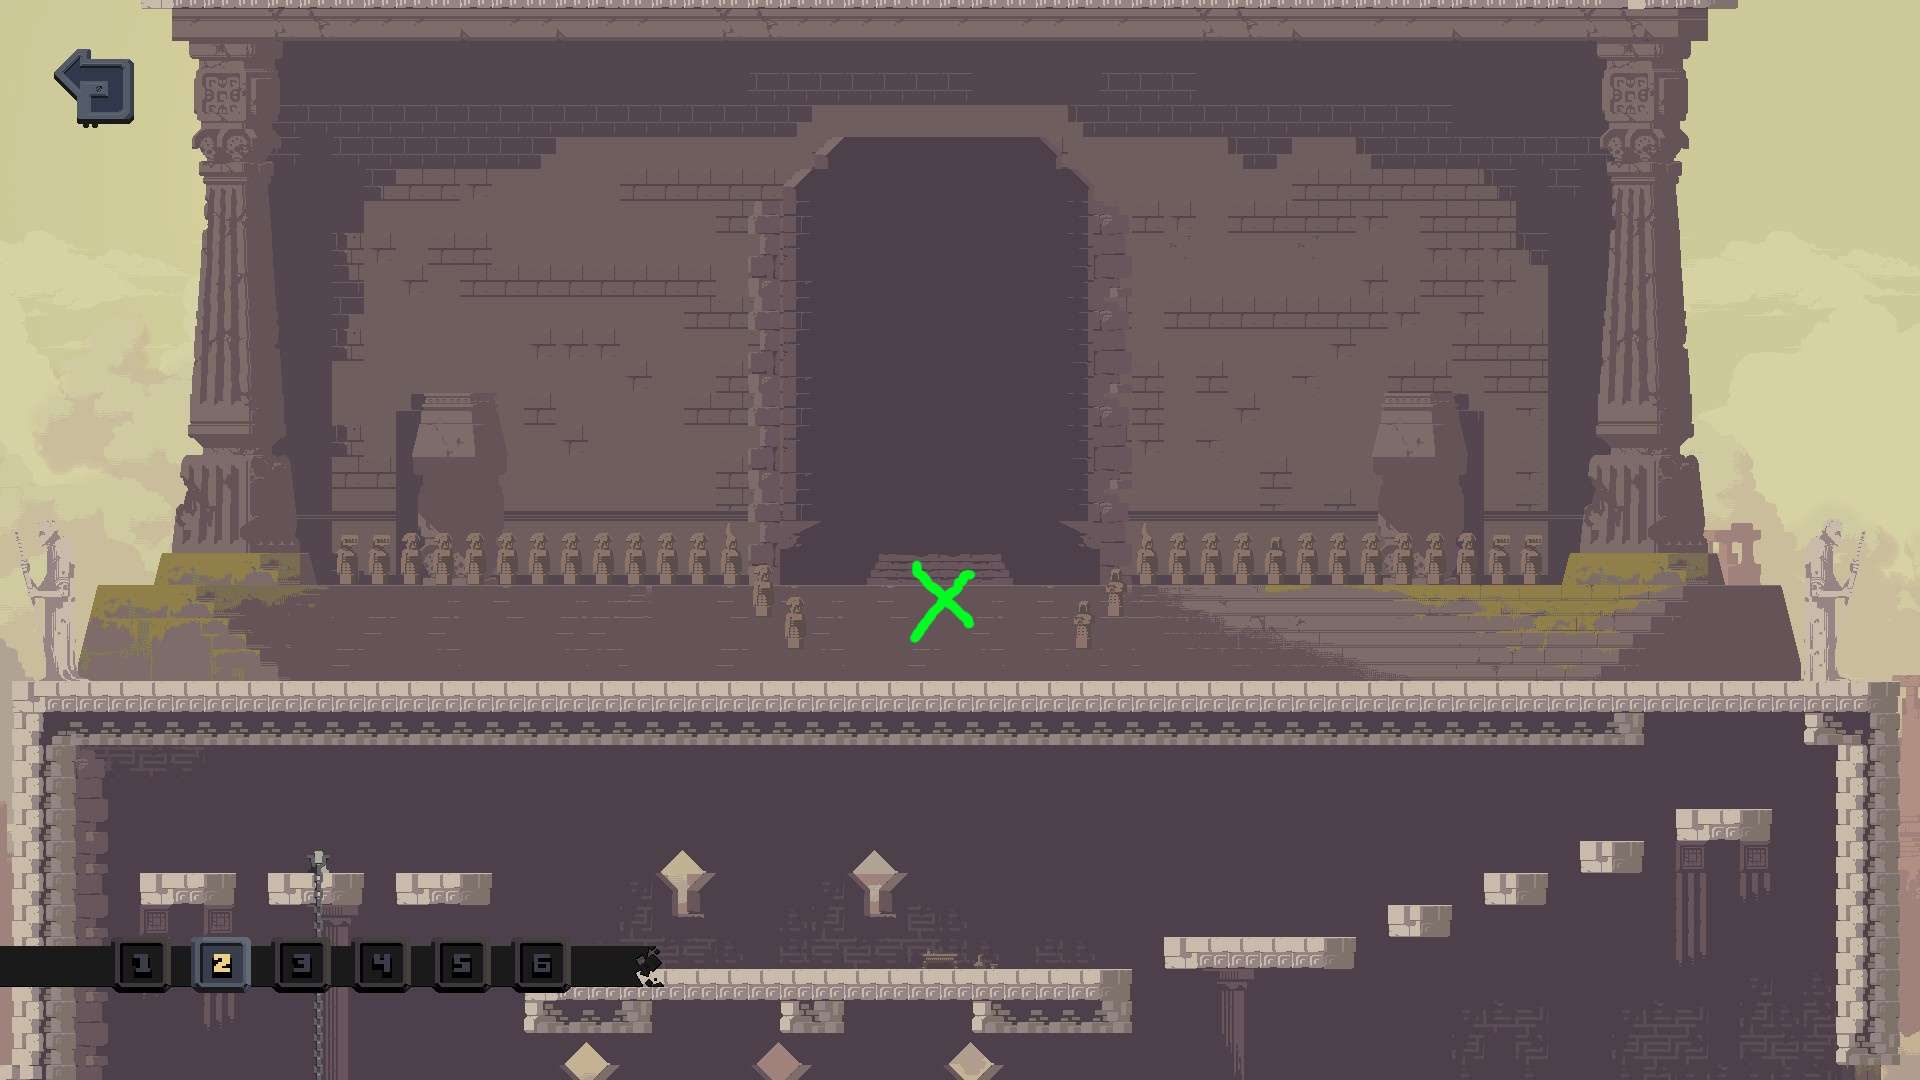
3: At the top left corner of the map, reachable from the right with many extra jumps.
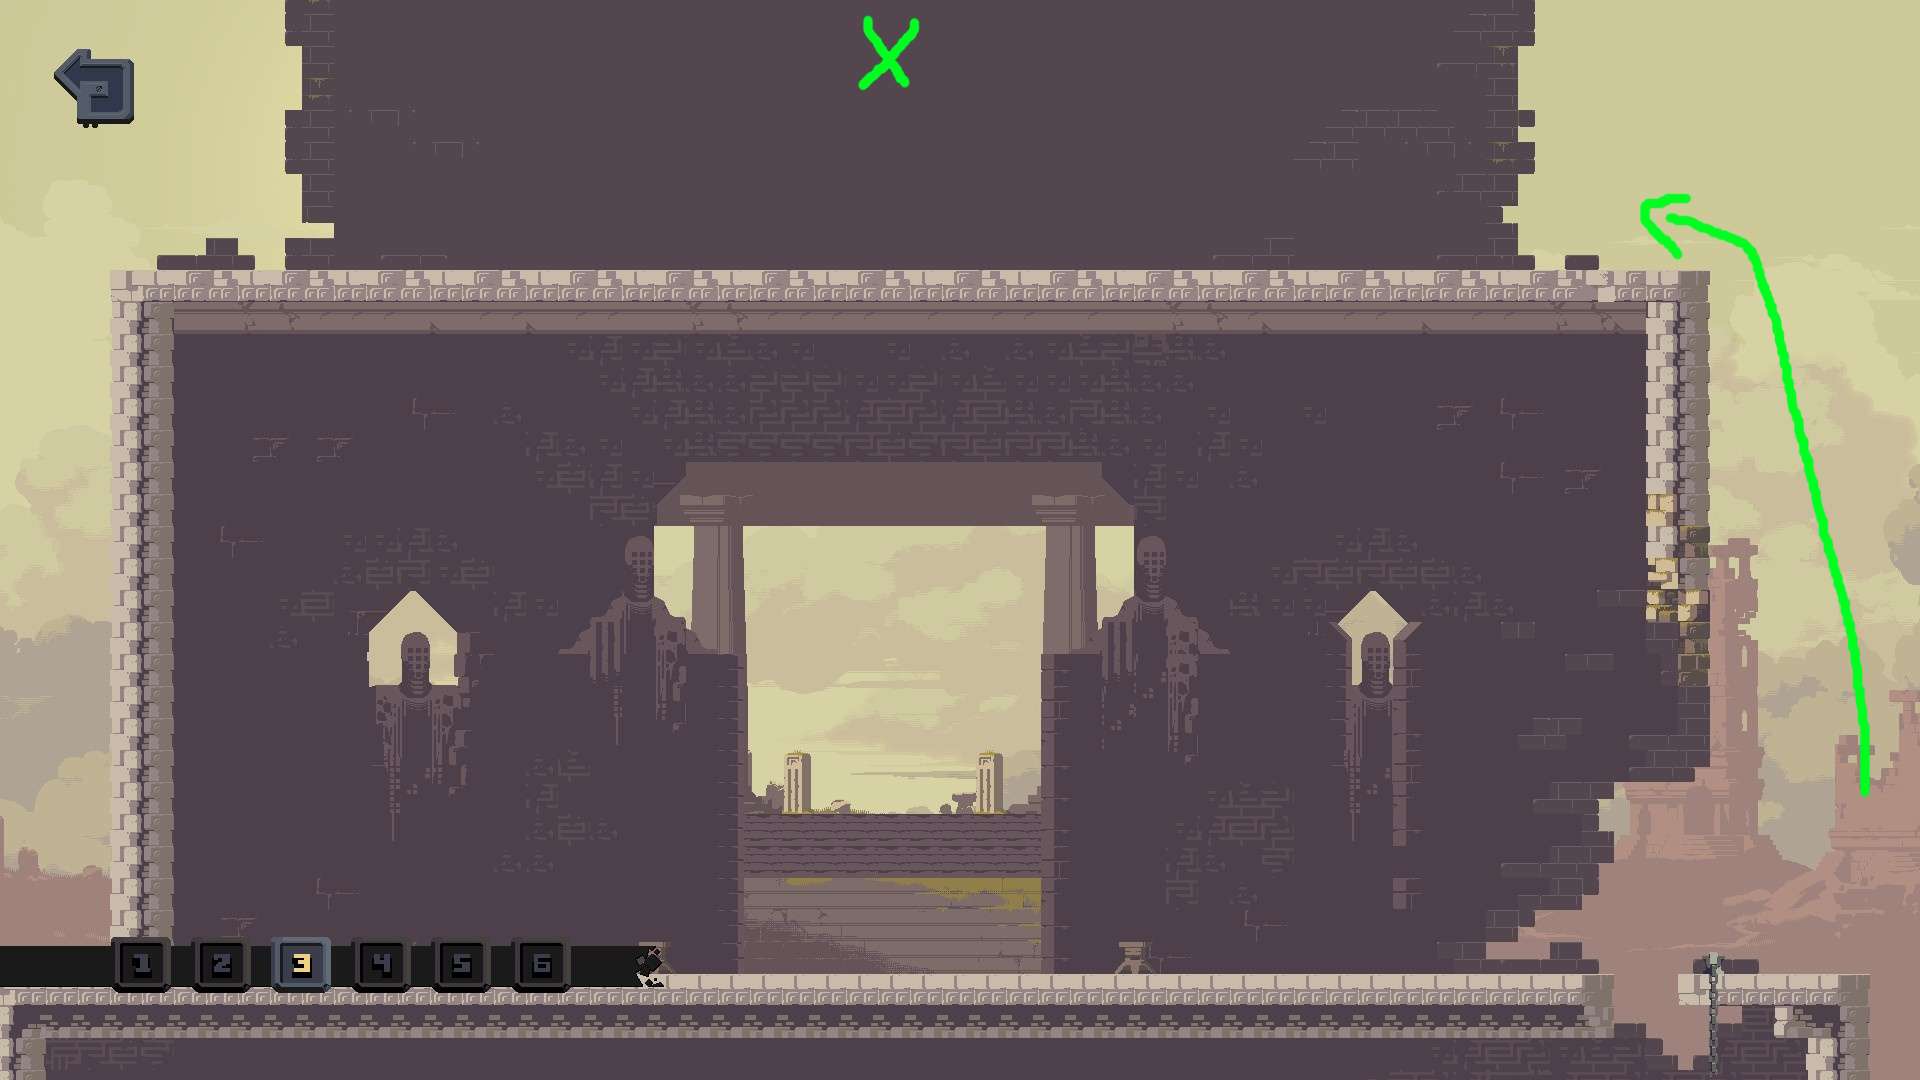
4: At the very top of the far right of the map. Either the left or right entrance can be used, but the right is easier because there’s less distance between the roof and the floor. Mobility skill or items required.
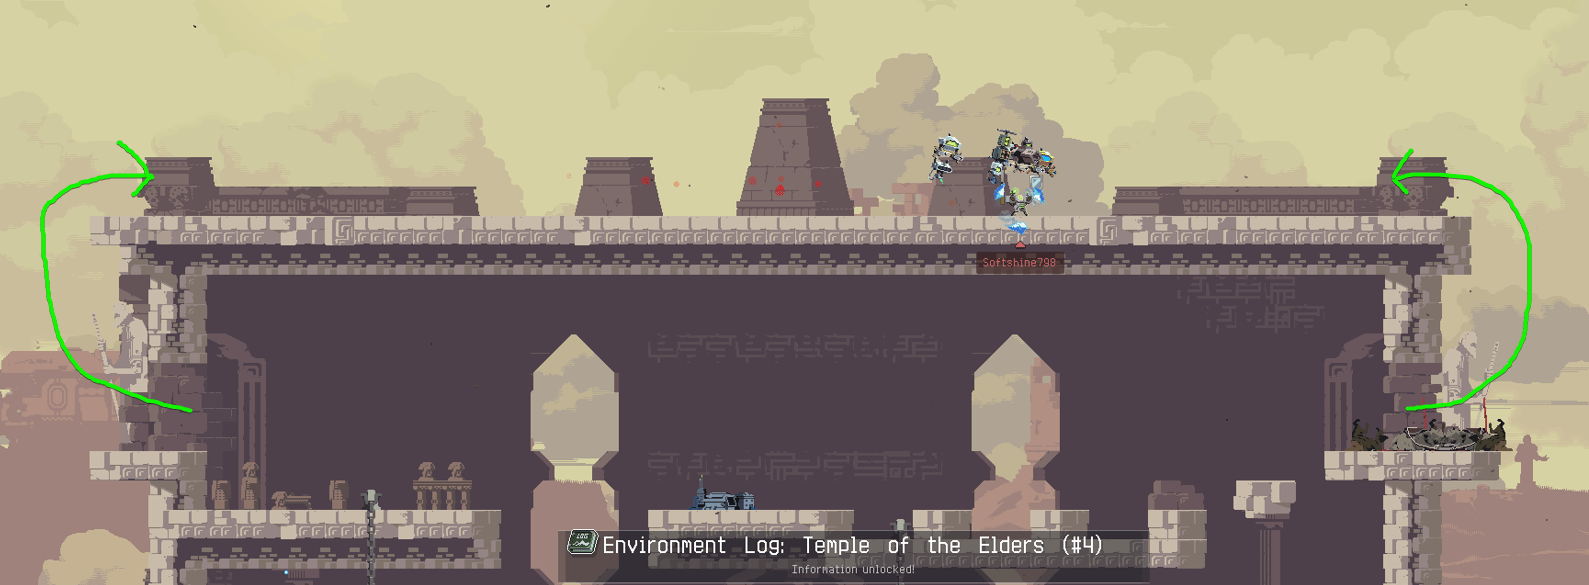
5: At the top middle of the map, requires many extra jumps to reach.
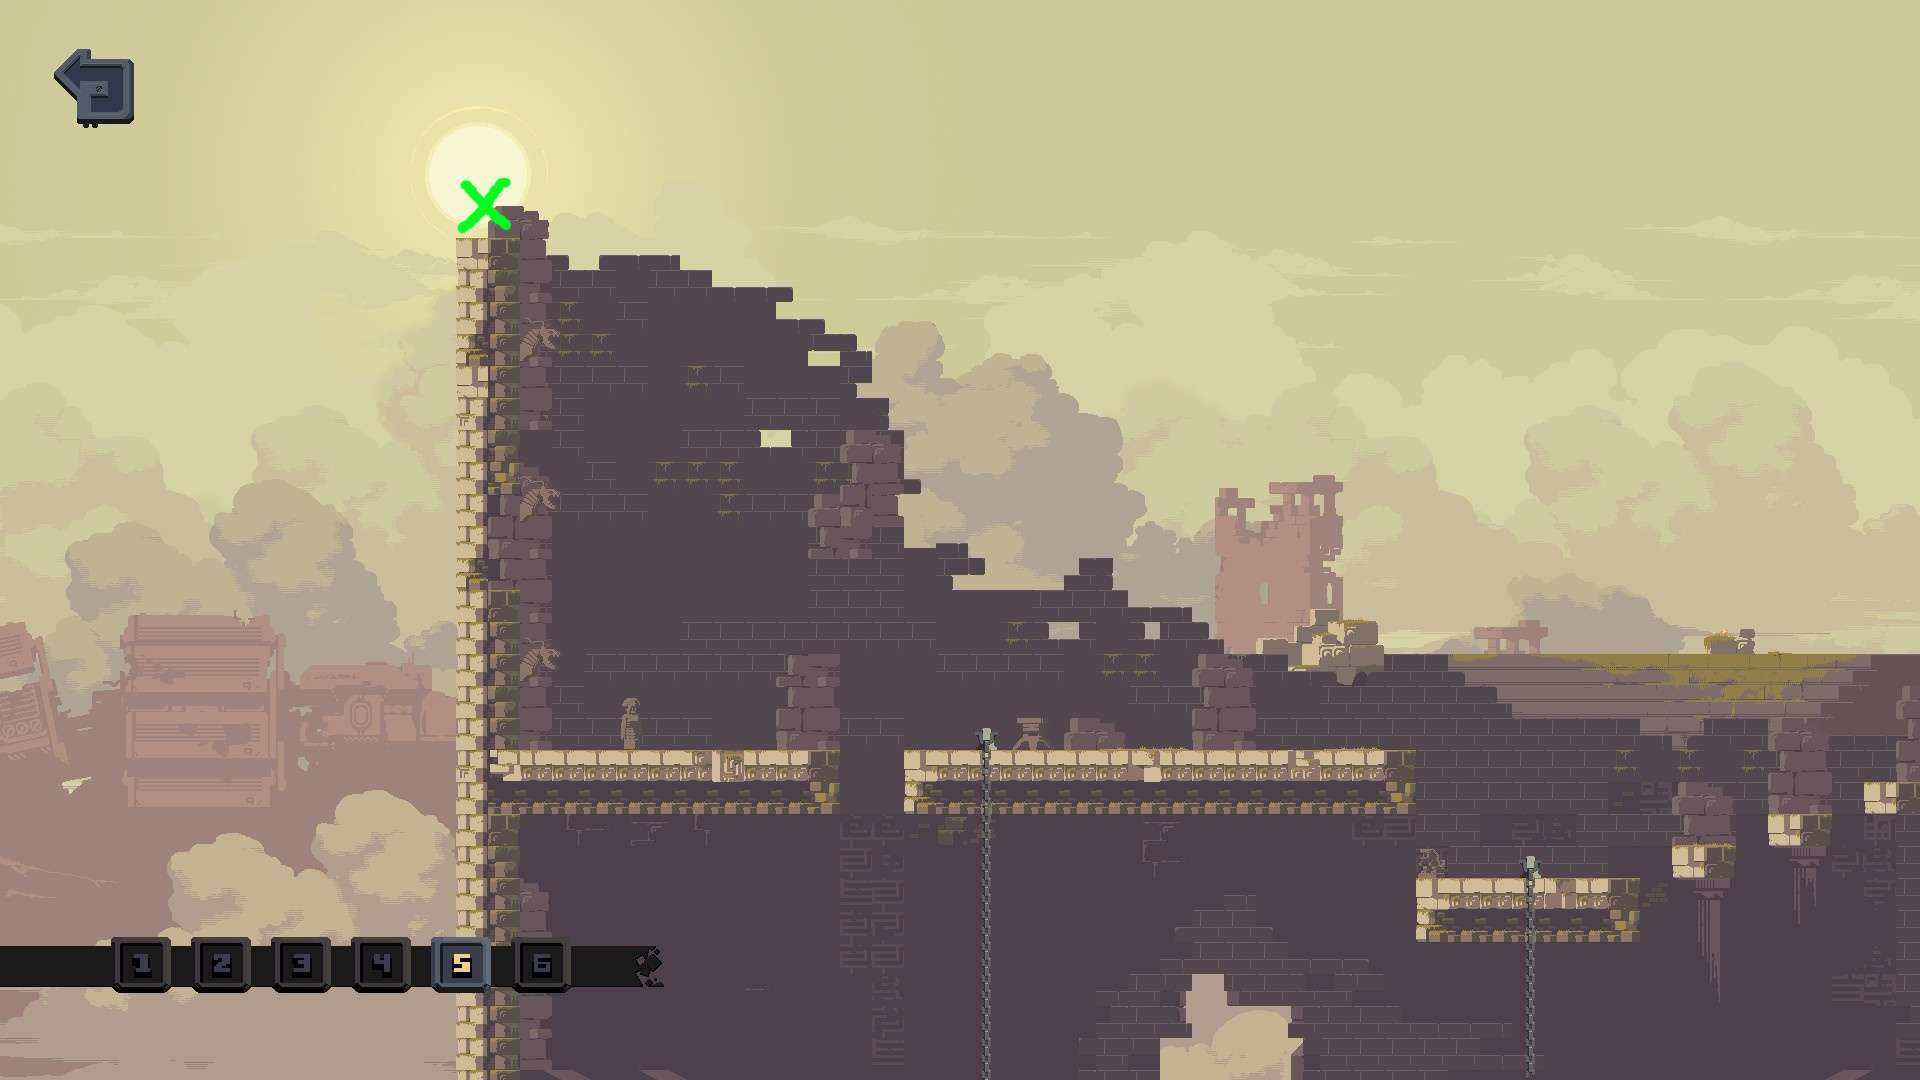
6: At the bottom left corner of the map, reachable using some mobility and extra jumps. Loader’s Hydraulic Gauntlet can be used to reach it as well.
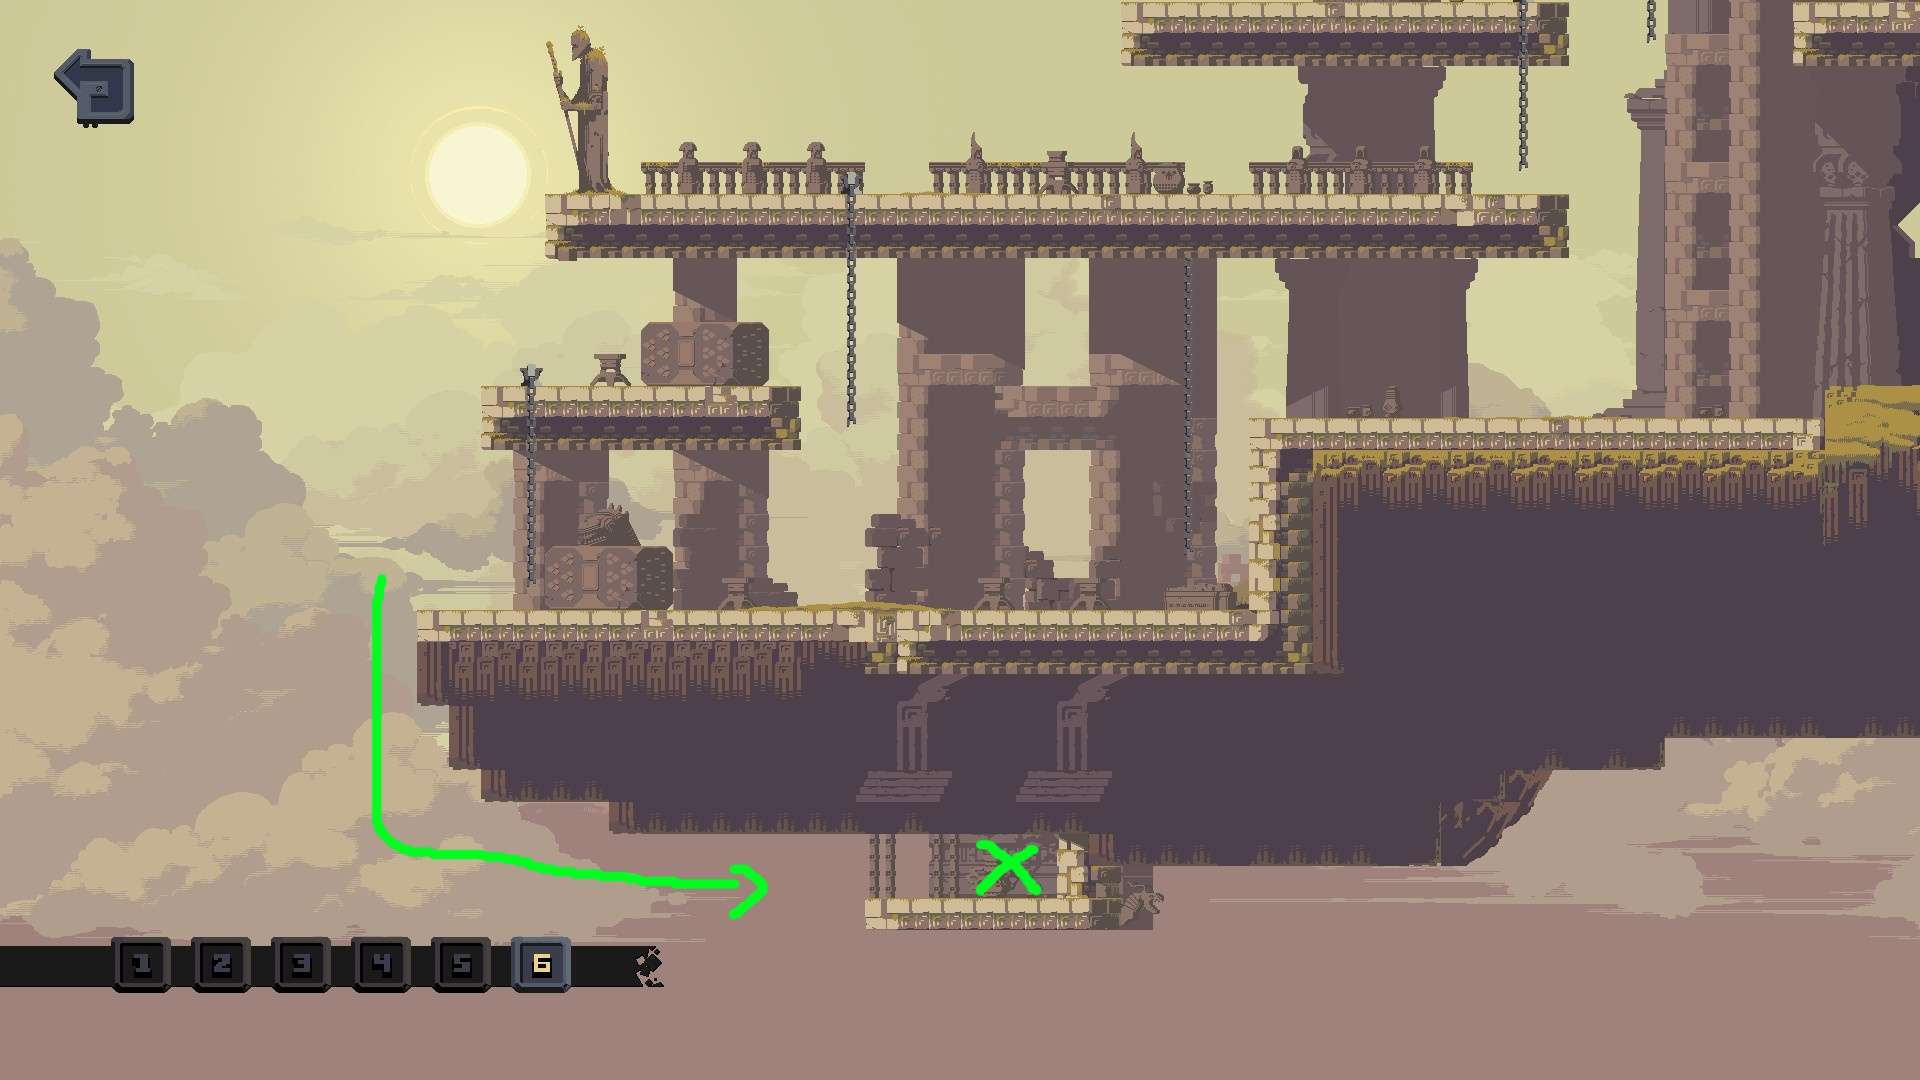
Risk of Rain
1: At the Cabin room, outside of it, is a ledge that requires a lot of mobility to get to. Get into the perch, then go left.
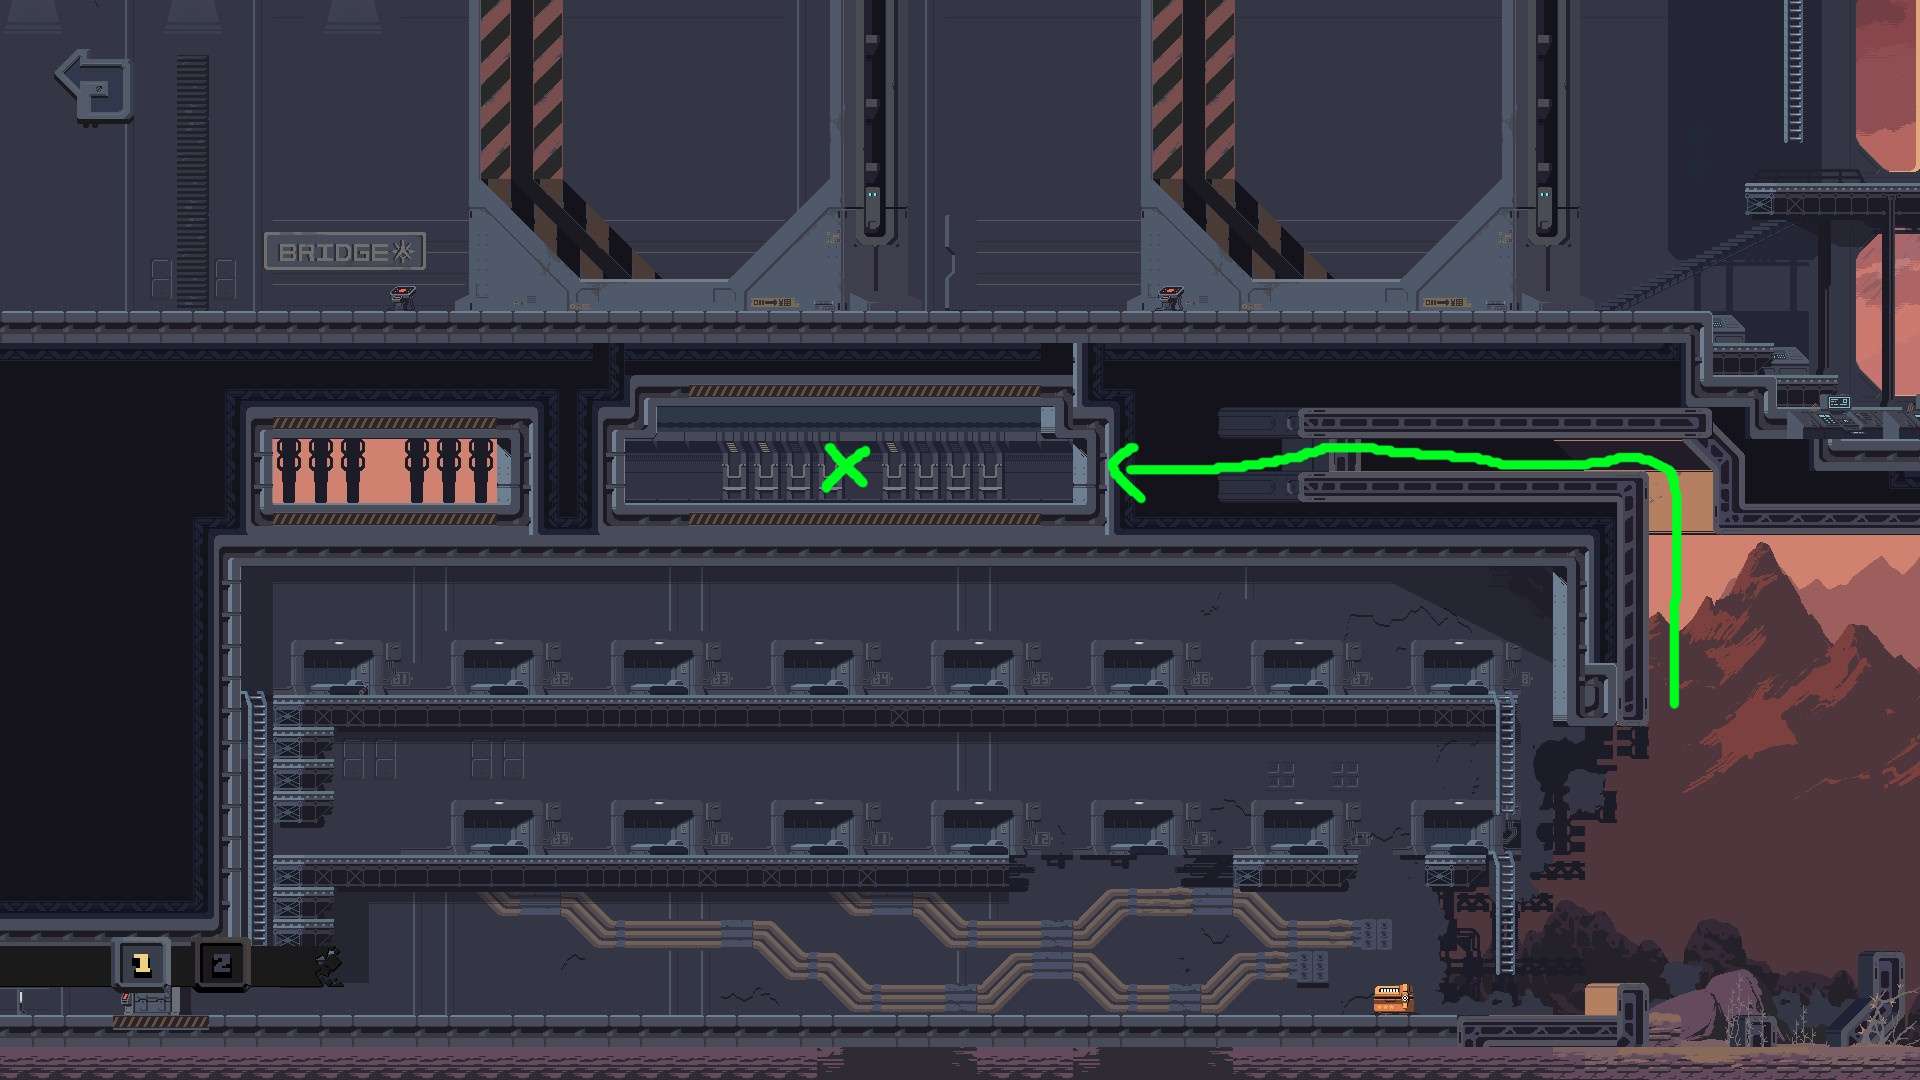
2: At the same exact location as log #1.
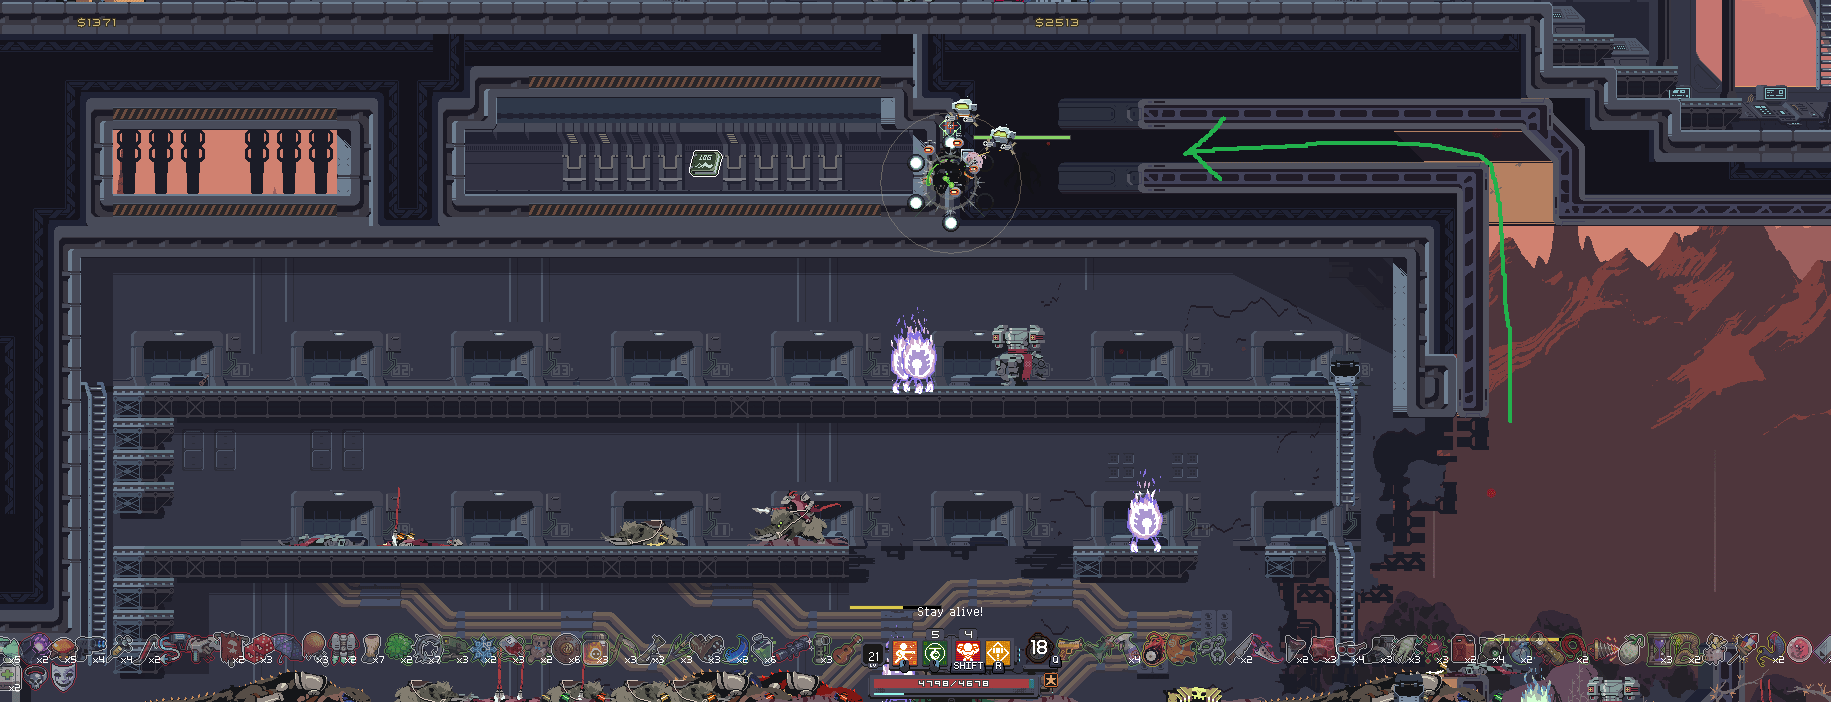


Magma Barracks #5 you don’t need to jump up to it, there’s a hole you can fall through in the lava above the alcove