
Basic information about Ruined King, an overview of the achievements in game, and a step-by-step walkthrough to complete the game with all achievements / trophies.
Note: Contains spoilers!!!
Basics (Part 1: Champions, Party, Experience, Movement, Scanning, Rest)
Ruined King is a turn-based RPG. You control one Champion (representative of your party of three Champions) in exploring the map, and combat encounters are fought by taking turns to make offensive or defensive moves.
Champions
Ruined King allows you to play six Champions: Miss Fortune, Illaoi, Braum, Yasuo, Pyke and Ahri. Each Champion has different stats and abilities. As your Champions progress through the story and win combat encounters, they gain experience, which allows them to level up.
Leveling up has multiple benefits: it restores their health and mana instantly, grants them ability points to improve their combat power, and at certain levels you will also gain rune shards which can be used to give them additional stats. Ability points and rune shards can be reallocated at any time without penalty, so you can experiment with different playstyles.
Party
Only three Champions can be active in your Party at any time. If you have more than three Champions, the rest will be considered ‘Away’. They will still gain experience from combat encounters, but you will not be able to select them or use their Dungeon Skills.
If you want to change the active Champions in your Party, you have to head to a Rest point to do it. Outside of Rest points, you can only use non-‘Away’ Champions.
Just like in League of Legends, it is recommended to have a balance of Champions in your team. Healing and shielding utility are invaluable in the game, especially against heavy-hitting enemies. You’ll also want to consider having at least one dedicated damage dealer so that combat encounters don’t drag on too long (wet noodle fights).
Experience
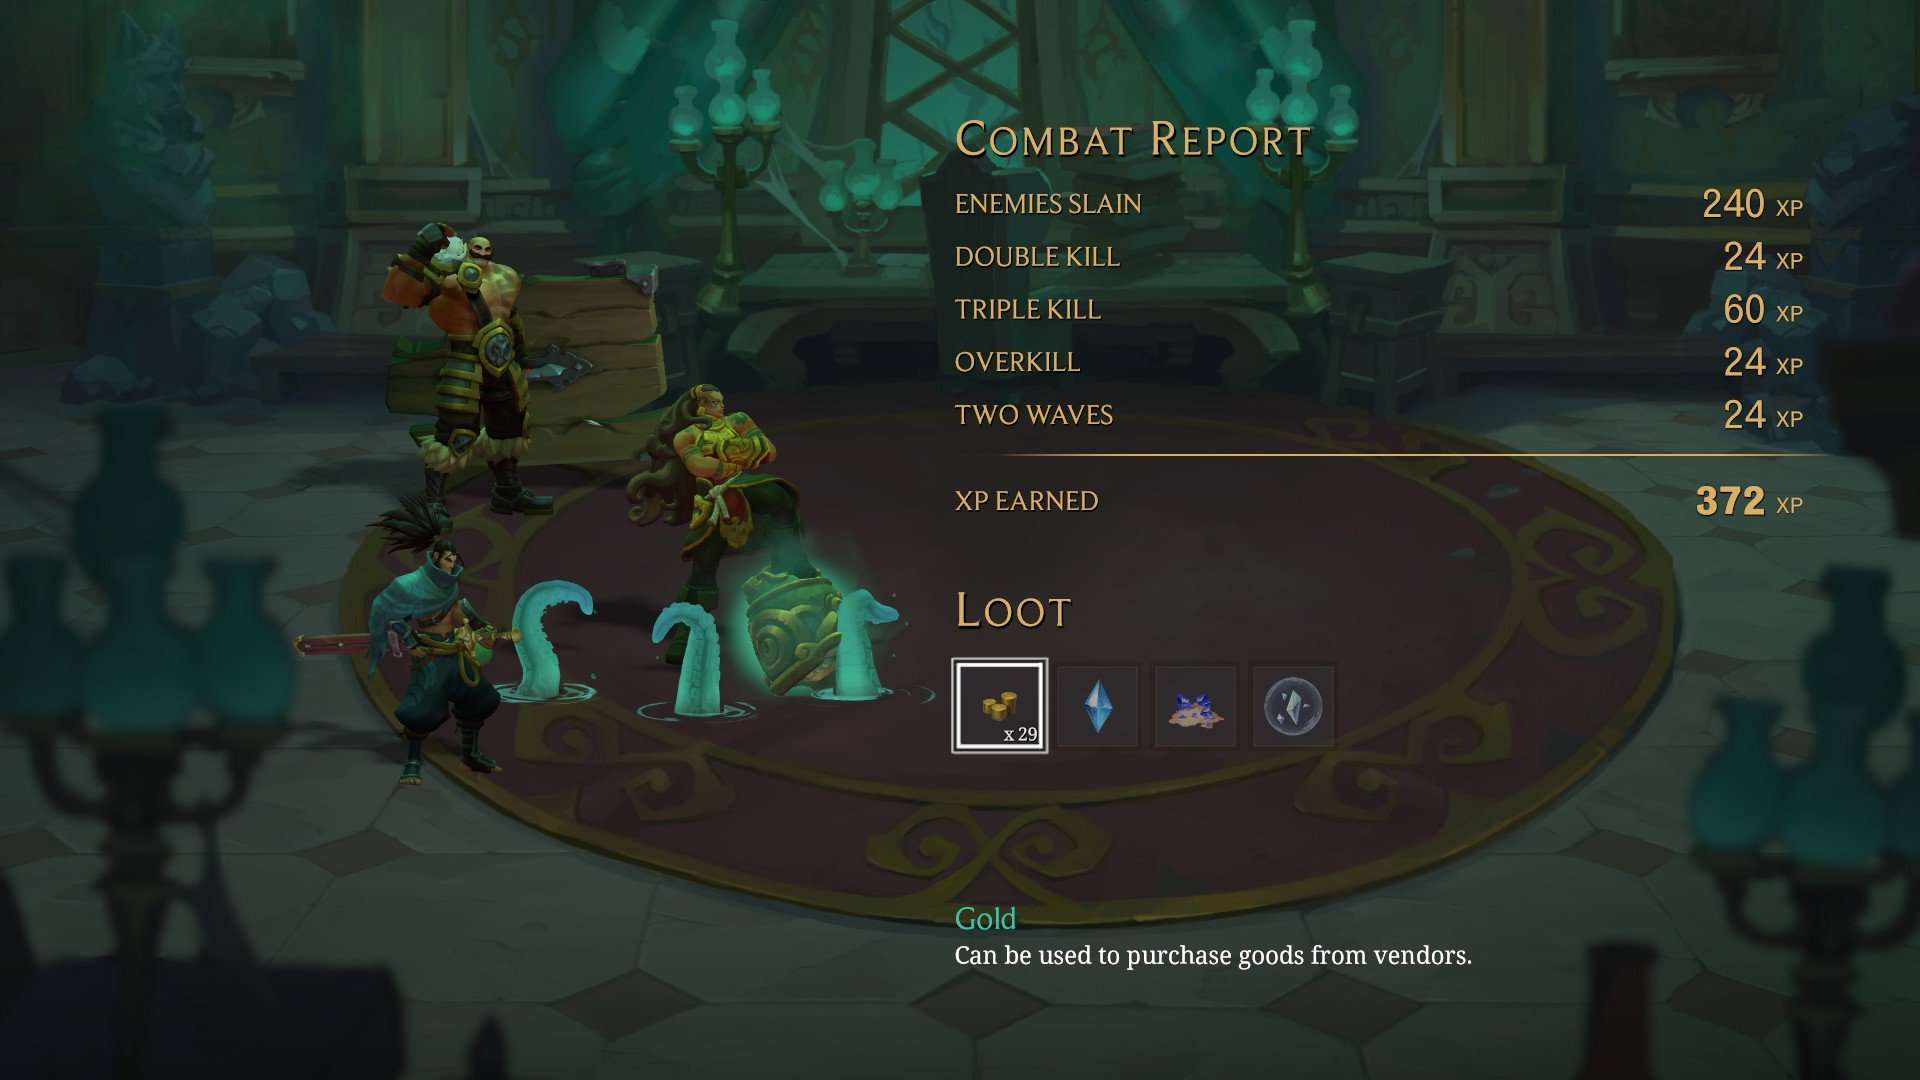
Combat encounters generally give a fixed amount of experience for a win, but there are some additional bonuses you can get as well. Double and triple kills (killing more than one champion at the same time, usually with a multi-targeted ability) grant extra experience. Other experience bonuses include winning the battle with full health, only using overcharge, etc. – these can really add up over multiple battles! Here’s one combat that I completed with four bonuses (more than 50% extra experience):
You gain more experience for winning combat encounters of a higher level than your Champions, and gain less experience for winning combat encounters of a lower level than your Champions. At its extreme, you can even gain zero experience if your Champions are too overleveled for the fight.
Movement and Scanning
Movement can be done with the mouse (by right-clicking to move to a location and left-clicking to interact), with the WASD keys, or with controller input. It’s not critically important to have micro-level movement precision in this game, so just pick any of these options that you’re most familiar with. I personally prefer using the mouse, though it has its drawbacks when going through doorways or when the map involves multiple floors. I temporarily swap to WASD for such situations.
Your Scan Environment button (middle mouse button, or other button mapped in your controls) is seriously your best friend in this game. There’s so much loot and too many things to interact with in the environment, that you should literally be scanning every time your character moves half a screen. Scanning will highlight interactable objects and people in white, which you can then click on to obtain loot or take other actions in game.
Rest
Apart from leveling up or using consumable Potion items, you can also restore the health and mana of your Champions by stopping at a Rest point (marked on the map with a torch icon). Most Rest points are free to use and can be used multiple times without penalty. There is also a Rest point at Baron’s Rest, but it costs Gold to use (the amount scales with your party level).
Here is a list of Rest points that your party can use on your adventures in Bilgewater. If your immediate region doesn’t have a Rest point, check the Region Map to see if there is one in an adjoining area that you can limp your way to.
- Baron’s Rest (costs Gold)
- The Warrens
- Docks Harbor
- Docks Blockade
- Grey Harbor
- Buhru Temple
Basics (Part 2: Combat, Lane Mechanics)
Starting Combat
When your Champion approaches an enemy, the enemy may respond by either aggressively moving towards your Champion, or running in fear (if your Champion is significantly higher-leveled).
If your Champion is within a certain range of an enemy, it will trigger a combat encounter. You can get an advantage in your combat encounters by using your character’s Dungeon Skill (Spacebar) to damage or negatively affect the enemies even before combat begins.
If you are close enough to multiple enemies, they may become linked and fight you together in a multi-wave battle. A chains icon will appear over their character models to warn you that this will happen.
Multi-wave battles can be advantageous in some situations (e.g. if your Champions gain benefits from takedowns) but can also work against you if you don’t have the resources to withstand so many foes at once. When in doubt, a general rule of thumb is to take combat encounters one by one so that you can use potions to heal back up before the next fight.
How to Fight
The turn-based combat in Ruined King means that when a combat encounter begins, a turn order is set out based on each participant’s Haste stat (higher Haste = earlier turn). The turn order is reflected by participants’ portraits on the Initiative Bar.
During combat, portraits and regions (explained below) move along the Initiative Bar from right to left. When a portrait reaches the leftmost side of the Initiative Bar, the corresponding participant will be able to take their turn (or perform an action, if they had already taken their turn and used a non-instant move).
- I don’t want to reinvent the wheel, so please check out the combat guide for an overview of the key elements first.
Taking Turns
Note that it being your Champion’s turn means that it is your turn to choose what you will do. As explained below, it does not necessarily mean that your Champion will perform the action at that moment.
When it is your Champion’s turn, you can do one of several things:
Quick Strike
- Hold down the right mouse button.
- Casts your base Instant Ability instantly when it is your Champion’s turn, auto-targeting the lowest health enemy.
- Usually good for finishing off low health enemies, or pulling off a clutch 1v1 if your enemy’s turn is coming up before you can cast an ability.
Instant Ability
- Select from the three available abilities under the ‘Instant’ tab.
- Note: the official combat guide is NOT accurate on the first sentence of this section – Instant Abilities do not have a cast time; as the name suggests, they cast instantly when it is your Champion’s turn.
- Usually good for generating Overcharge, defending against an incoming attack, or getting damage in before your enemy can react.
Lane Ability
- Select from the three available abilities under the ‘Lane’ tab. These are stronger than Quick Strikes or Instant Abilities.
- Varying cast times (not instant). This means that if you choose to do a Lane Ability, your Champion will only take the action later after the completion of the cast time, which could result in other Champions or enemies taking actions during that period.
- Usually good for damage/utility (being stronger than Instant Abilities) if you will be able to survive your enemies making their moves before your Lane Ability can go off.
Ultimate Ability
- Select from the three available abilities (unlocked progressively) under the ‘Ultimate’ tab. These are the strongest abilities in the game, but can only be used when your Ultimate bar is full. The Ultimate bar is shared among Champions and each use depletes segments of the bar, so think carefully about which Ultimate(s) would benefit your team most at that point in combat.
- Casts instantly.
- Usually good for damage/utility (being stronger than Instant Abilities) if you will be able to survive your enemies making their moves before your Ultimate Ability can go off.
Potion
- Click on the potion icon (to the left of the ‘Ultimate’, ‘Instant’ and ‘Lane’ tabs) to view the potions available. You can use a potion on any Champion, but it will consume the turn of the Champion who used it.
- Used instantly when it is your turn.
- Invaluable when you are taking more damage than you can heal / shield, or if you need to revive a fallen ally.
Technically, you can also choose to Flee (hold F to run away from the battle) but I won’t say any more about it, save that fleeing is not guaranteed and if you fail, your Champion’s turn is consumed without any contribution to the fight.
Lane Mechanics
The Lane mechanics accounts for a good part of the strategy in combat. It applies to Lane Abilities, which have a cast time.
The ‘default’ cast time occurs in the ‘Balance’ (middle) lane. You can accelerate the cast time (i.e. cast sooner) if you switch to the ‘Speed’ lane above it, with the tradeoff being lower damage. Alternatively, you can slow down the cast time (i.e. cast later) if you switch to the ‘Power’ lane below it, with the tradeoff being increased damage.
Initially, you will use the Lanes to counter enemy buffs/traits (which require specific Lane attacks to be dispelled) and for managing your damage output.
However, as the game progresses, you will also find the Hazard / Boon / Wildcard regions can play a critical role in a fight.
Regions
Regions appear on the Initiative Bar as large rectangles that multiple participants’ portraits can fall within. A region will mark participants when their portrait falls within that region, which occurs if either:
- They have used an instant-effect move, and their move in the next round (represented by their portrait) falls within the boundaries of the rectangle for the region.
- They have used a non-instant effect move (which pushes their portrait back by the duration of the cast time), and that portrait falls within the boundaries of the rectangle for the region.
When the region reaches the leftmost side of the Initiative Bar, it will apply effects to all marked participants within the region, and disappear after that. Different regions have different effects:
- Hazard and negative Wildcard regions (marked as a red rectangle in the Lanes) inflict negative effects or damage on Champions that have been marked by it.
- Boon regions (marked as a green rectangle in the Lanes) bestow positive effects on marked Champions.
- Positive Wildcard regions are also marked with a green rectangle and bestow positive effects on both Champions and enemies that have been marked by it.
In combat, you can hover over Instant and Lane Abilities to assess your options before making your move. Here is a list of factors to consider with the Lane mechanics:
- Current Turn – If there is a region coming up, can I cast a Lane Ability (instead of an instant-effect move) that will place my Champion in a green region / avoid a red region? Remember that there are three different options for cast time depending on the Lane you cast it from.
- Next Turn – Will the move used this current turn result in the Champion’s portrait falling within an upcoming region on the next turn?
- Opponents – If there is a green region coming up, can I cast an Ability that pushes them forward or knocks them back out of the region, so that the enemy does not receive the buff? (Note: if the green region comes from a Boon, it will not bestow benefits on enemies in the region; if the green region comes from a Wildcard, it will bestow benefits on both Champions and enemies in the region).
Basics (Part 3: Saving and Loading)
I actually didn’t expect I would have to make this section, but Ruined King doesn’t exactly have the most straightforward interface when it comes to saving and loading the game (?!) so here’s some information and tips on this:
Save Profiles
There are three “save profiles” in game. This means that you can have a maximum of three different playthroughs at the same time. Within each save profile, you have up to eight slots to manually save your game, and two autosave slots.
Selecting a new save profile will start a new game; selecting an existing save profile will give you the option to continue from the save file displayed, or load a different save file.
There’s currently a display bug where your save profile completion percentage on the title page can sometimes appear as 0% if you have multiple save profiles in use, but hopefully that gets fixed soon.
Saving the Game
When you are not in combat, pressing ESC will pause the game and bring you to the System Menu. The System Menu allows you to navigate to options (such as control input, graphics, audio and video), return to the main menu (i.e. the title page), or quit the game.
When you are not in combat, pressing TAB will pause the game and bring you to an In-Game Menu with options for equipment, abilities, runes, inventory, enchantment, journal, bestiary and fishing. Most importantly, this menu contains the save/load function.
When you are in combat, pressing either ESC or TAB will pause the game and bring you to the System Menu.
I completely understand that the developers didn’t want to allow manual saves during combat encounters, but it may be confusingly counterintuitive to new players that save/load is not on the System Menu (since most new players would be in the habit of pressing ESC when they want to end their game, and then ESC again when they realise there’s no save/load option).
If you’re not in combat and want to save your game, use TAB to get to the In-Game Menu. You don’t have to press ESC twice.
Of course, if you’re in combat and want to throw in the towel, you don’t have this option – you’ll either have to see the fight to its end, or lose all your progress since the last save.
If you choose to return to the main menu or quit the game from the System Menu, a prompt will pop up to let you know the time since your last save file and ask for your confirmation. Note that Ruined King uses an autosave feature, but does not guarantee an autosave when you exit from the System Menu.
Always ensure that you have made a manual save through the in-game menu (TAB) before navigating to system (ESC, or System from TAB).
Loading the Game
One particular annoyance that stood out for me (especially in the course of playtesting and writing this guide) is that loading a saved game will almost always start you at the entrance of that area (or a designated spawn point in that area), regardless of where you were in the area when you saved. It will also sometimes change your active Champion to a different one.
(Yes, imagine my frustration when I was toggling between different save files to test something, and then realised that I had to redo my progress from the entrance all the way to that point, on multiple files.)
Certain progress such as quest items / interacted objects in the environment will not respawn, but in some areas, the enemies there (or new enemies!) may respawn even if you had cleared them previously. Respawning is generally limited to the ‘common’ enemies; mini-bosses and bosses do not respawn.
Some people may consider this a good thing, since it opens up the possibility of “farming” enemies for gold and experience. That’s all well and good if it’s how you personally like to play RPGs. However, do note that your marginal gains will eventually dwindle as your Champions’ level rises above the enemies, and you may even come to a point where it takes more time to start combat encounters because enemies run away from you (see my writeup on “Experience” for more details).
If you aren’t intending to farm enemies, the main takeaway is this: the optimum time to save your game is after you have just entered a new area. Otherwise you may end up confused when you log back in, or worse, losing some progress and needing to spend more time to get back to where you were at the save point.
Generally, a new ‘area’ is entered when you go through a doorway or emerge from a path that has a blue arrow pointing into the area that you’re in. I’ve tested this on staircases (which also have the blue arrow between floors) and in most cases, they don’t count as a ‘new area’ for this purpose.
Achievements / Trophies (Part 1: Story, Completion)
At the time of writing this guide, there are 52 achievements in Ruined King.
Thankfully, many of these tie in with the plot development (i.e. they are unmissable / easy to naturally get, as long as you play through the story).
The next few sections provide an overview of the types of achievements that you can get in the game, and a brief explanation of how to obtain them.
If you want to be guided through the story, check out the Walkthrough sections of the guide, which will take you through obtaining every achievement in Normal difficulty (except Veteran and Heroic Ruination).
Story Achievements / Trophies (Unmissable)
These achievements will naturally unlock as you progress through the story.
Visions
Experience visions of Ruined King
Shared Purpose
Team up with Braum
Wind Walker
Have Yasuo join your Party
Put to Rest
Cleanse Grey Harbor from Black Mist
O Captain, My Captain
Have Miss Fortune join your Party
Deep Sea Fishing
Have Pyke join your Party
Fox Trot
Have Ahri join your Party
Into the Utter Darkness
Arrive at the Shadow Isles
Dying Grove
Meet Maokai
Maokai Renewed
Return Maokai to full strength
Reign of Terror
Defeat Possessed Gangplank
Defying the Warden
Defeat Thresh
Ready for Ruin
Pass the Test of Nagakabouros
Reckoning with History
Complete Windrake Isle
Completion Achievements / Trophies
You’ll get these for completing the story on the corresponding difficulty level. If you complete the story on a particular difficulty level, you will automatically get the achievements for completion on all easier levels (e.g. completion on Normal difficulty will give you both Storyteller and Ruination). It is not possible to get a higher difficulty achievement merely by changing difficulty at the end of the game.
Storyteller
Complete the story on Story Difficulty
Ruination
Complete the story on Normal Difficulty
Veteran Ruination
Complete the story on Veteran Difficulty
Heroic Ruination
Complete the story on Heroic Difficulty
Achievements / Trophies (Part 2: Champions, Abilities)
Champion Achievements / Trophies
These Champion progress achievements should also naturally unlock as you progress through the story.
Ultimate abilities will be unlocked for your party in the combat encounter when you first meet Yasuo. Your Champions will unlock their first and second Ultimate abilities as they level up, but the third Ultimate ability can only be obtained by completing Champion-specific quests given by Kalia in the Shadow Isles.
You’ll get Ultramaximus after your Champions have unlocked their first and second Ultimate abilities, and you have completed all six quests for the six Champions’ third Ultimate abilities. You can get five of them relatively early, but one of these quests is “region-locked” and you’ll only be able to complete it after sailing to Serpent’s Coast.
Full Potential
Reach Level 30 with any Champion
Ultimatum
Unlock a Level 3 Ultimate Ability
Ultramaximus
Unlock all Champion Ultimate Abilities
Achievements / Trophies (Part 3: Bounty, Arena)
Bounty Achievements / Trophies
When you visit the Bounty Board at the Docks Harbor, you’ll be able to unlock and claim bounty missions that reward you for taking down certain characters.
Bounty Cadet
Complete a Bounty mission
Bounty Captain
Complete 5 Bounty missions
Bounty Master
Complete all Bounty missions
Arena Achievements / Trophies
Arena battles can be fought in the Crucible at the Baron’s Rest.
Arena Champion
Complete 50% of Baron’s Rest Crucible battles
Arena King
Complete all Baron’s Rest Crucible battles
Achievements / Trophies (Part 4: Bestiary)
Bestiary Achievements / Trophies
The Bestiary contains details of enemies that you’ve encountered on your journey.
Animality
Complete 25% of the Bestiary
Animality can be unlocked prior to starting the Watchtower area, if you’ve completed all possible enemy encounters in the previous locations.
Hunter
Complete 50% of the Bestiary
Apex Predator
Complete 100% of the Bestiary
Bestiary Entries
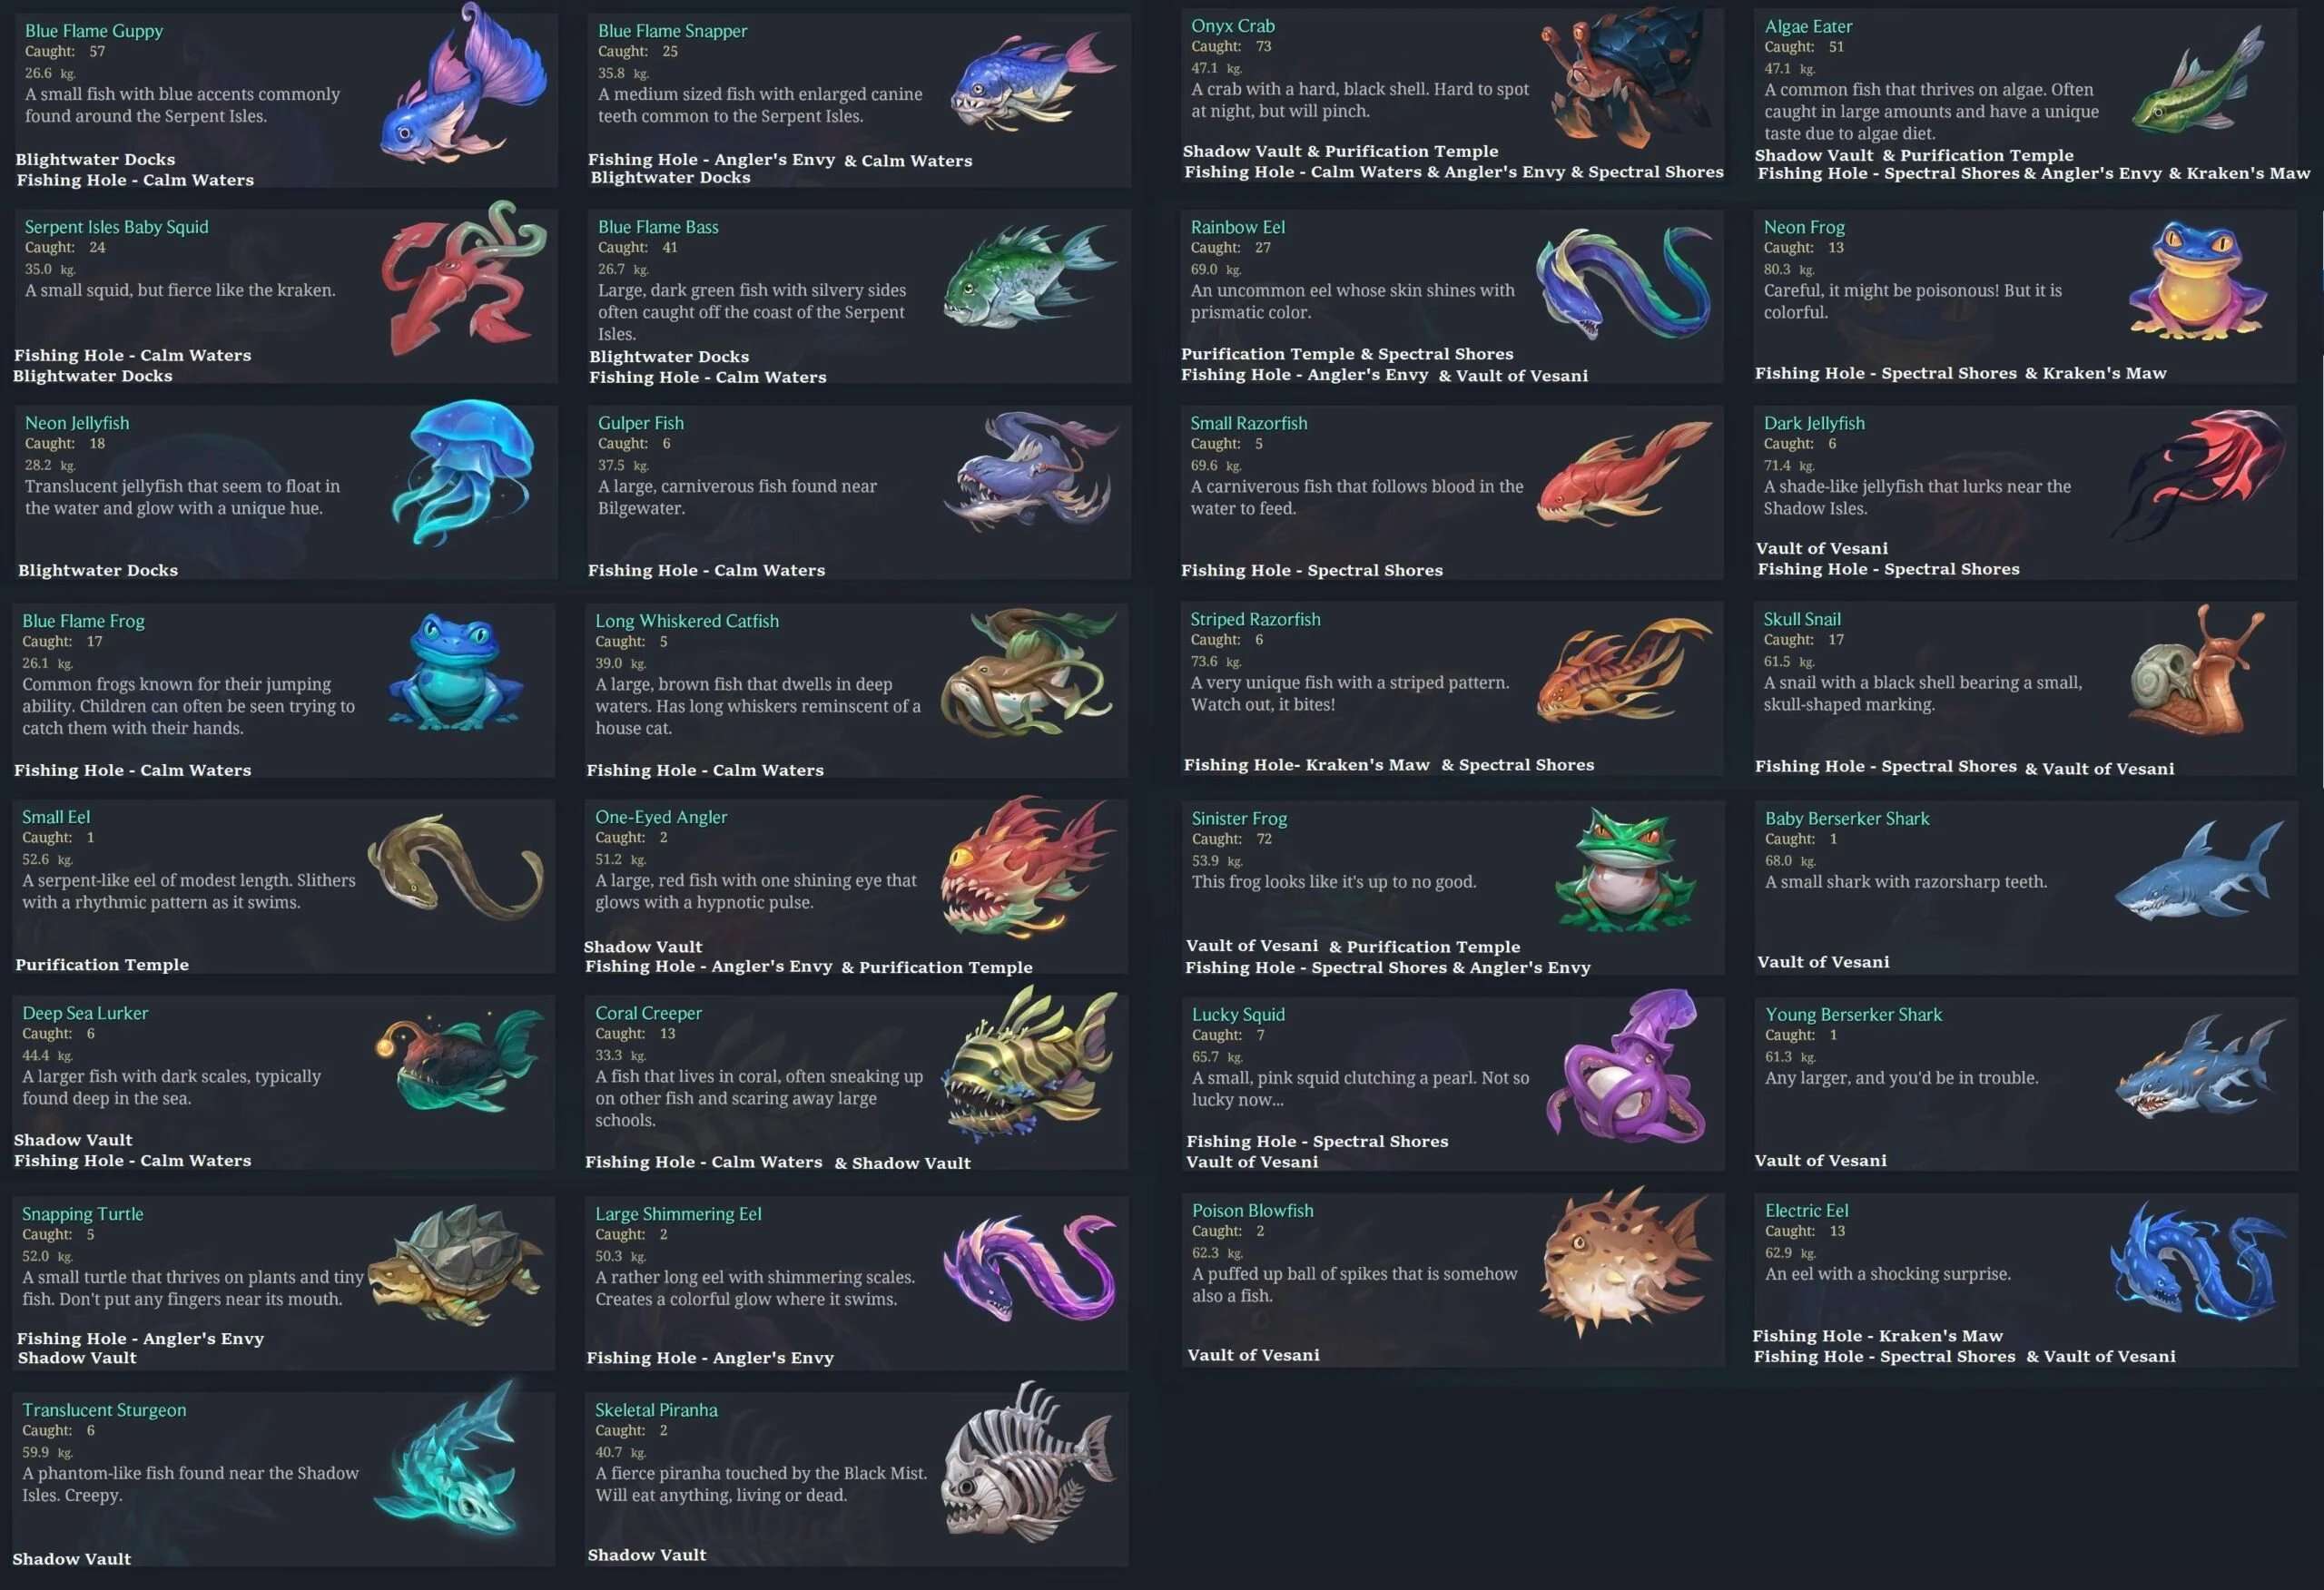
Here is the full complete bestiary, with an overview of the enemies and where to find them.
- Bestiary Entries Guide.
Achievements / Trophies (Part 5: Fishing)
Fishing Achievements / Trophies
You’ll have to go fishing for these ones! You can fish with an equipped rod and lure, at fishing locations marked with a fishing hook.
Treasure Diver
Reel in a Treasure cache while fishing
Big Kahuna
Catch 10 Epic Fish
Chum Bucket
Catch 100 Fish
Fishing Journalist
Catch every type of fish and complete the Fishing Journal
My personal preference for fishing is to play through the game to get the highest-level fishing gear I can have, then go back to the fishing holes to complete the journal. However, if that’s not your style, feel free to cast your line every time you see a fishing location along the way!
Click to enlarge…
Achievements / Trophies (Part 6: Consumables, Enchanting)
Consumables Achievements / Trophies
Chug down potions the way Yasuo goes for his flask, and you’ll get these in no time.
If you’re like me and can’t bear to use consumables “because just in case”, you can always save the game, enter a battle, chug those potions and then reload your game after the achievements pop.
Otherwise, these should come pretty naturally through the course of any Veteran / Heroic playthrough.
Potent Potables
Consume 10 Potions
Tons of Tonic
Consume 50 Potions
Enchanting Achievements / Trophies
If you’re like me and are super reticent to enchant your gear “because what if I get something better later”, you can always save the game, enchant random items and then reload your game after the achievements pop.
Otherwise, these should come pretty naturally through the course of any Veteran / Heroic playthrough.
Enchanting Novice
Enchant your first item
Enchanting Master
Enchant 30 items
Rare Infusion
Infuse 10 Rare Items
Epic Infusion
Infuse 10 Epic Items
Infusion Master
Infuse 30 Items
Achievements / Trophies (Part 7: Legendary Weapons)
Legendary Weapons Achievements / Trophies
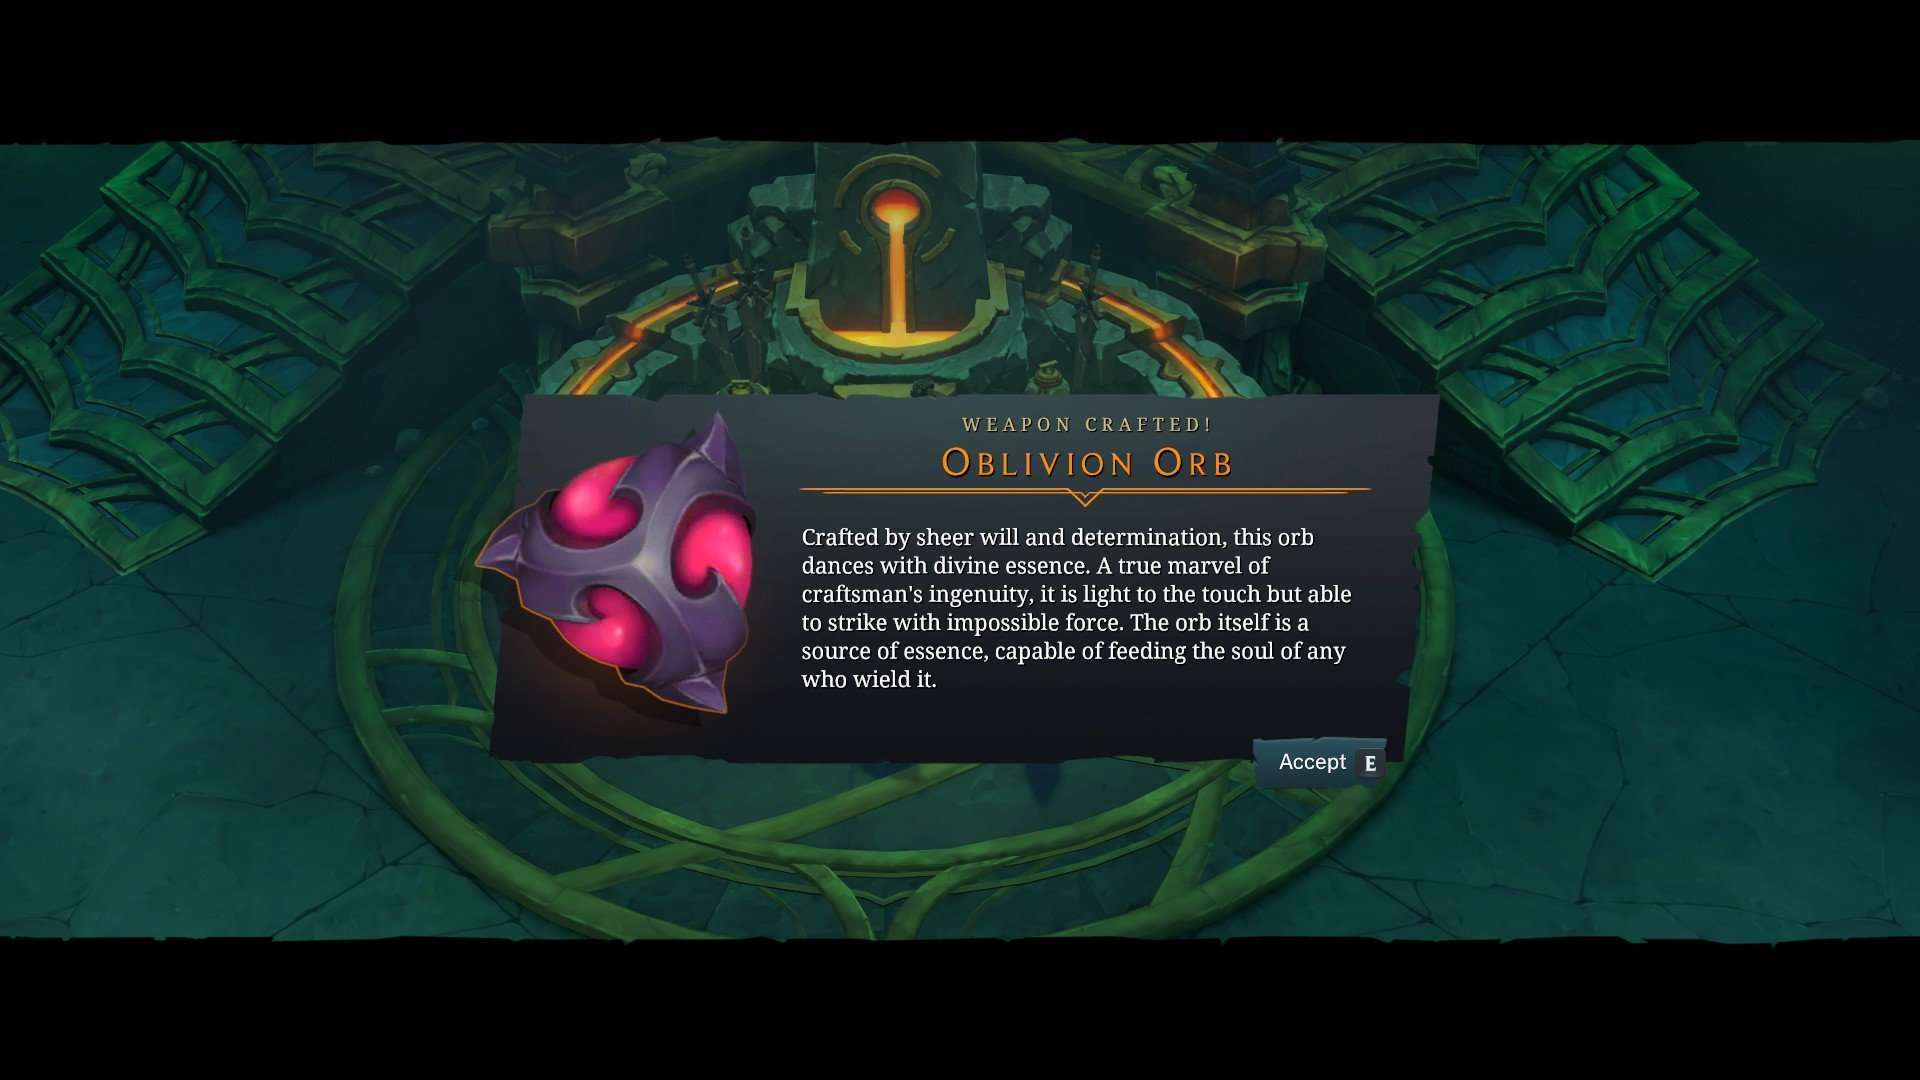
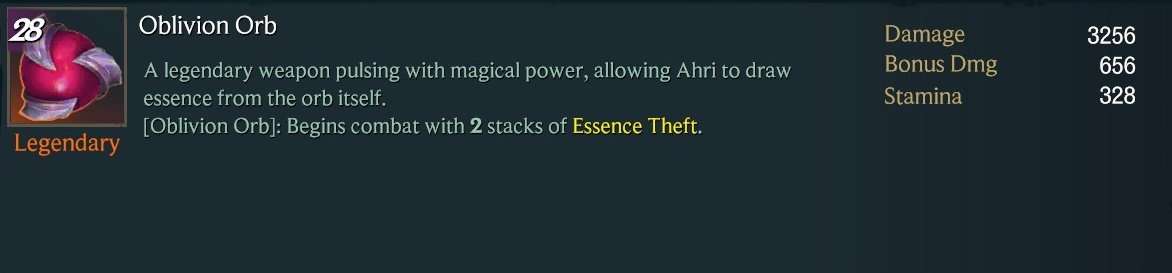
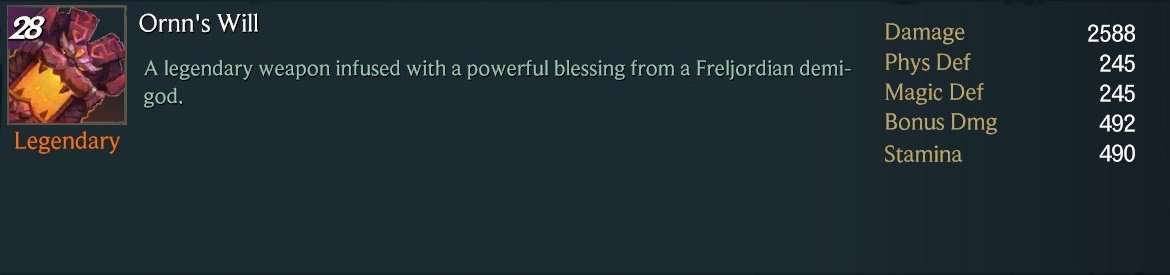
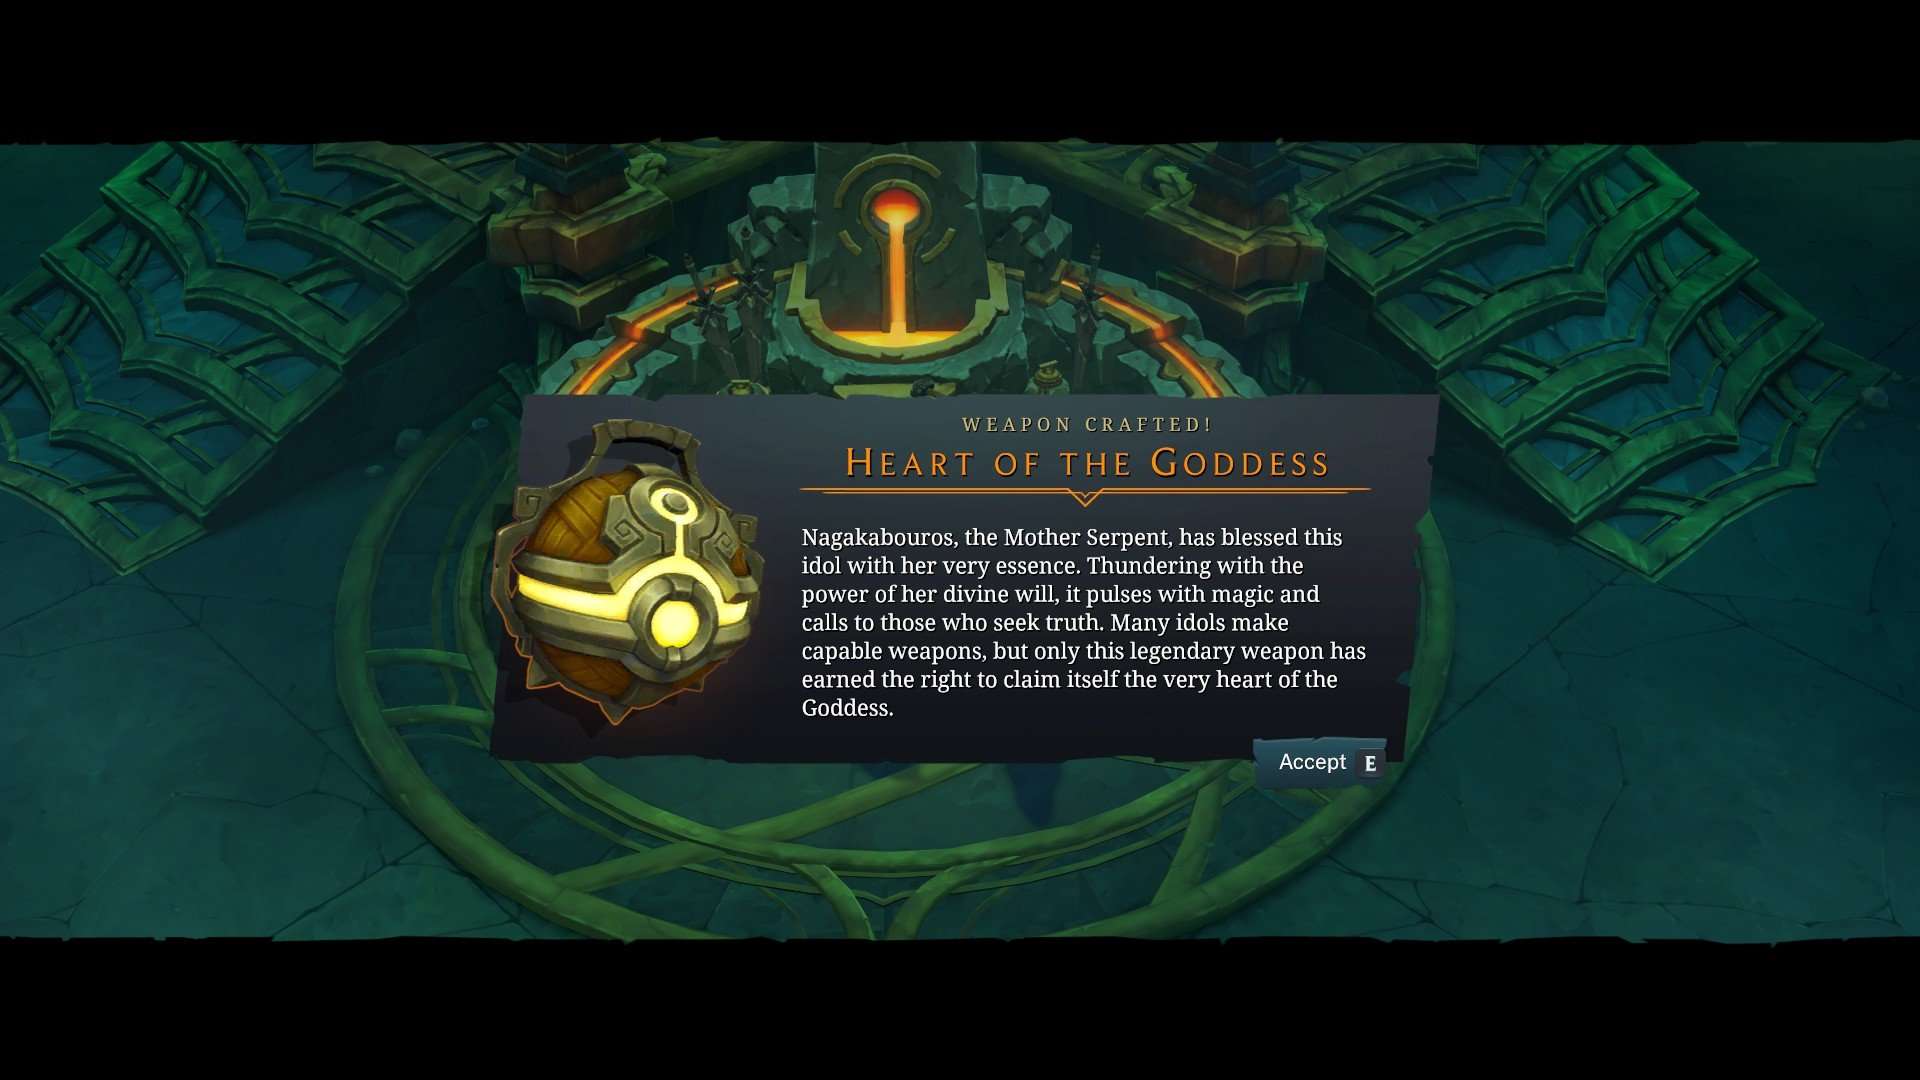
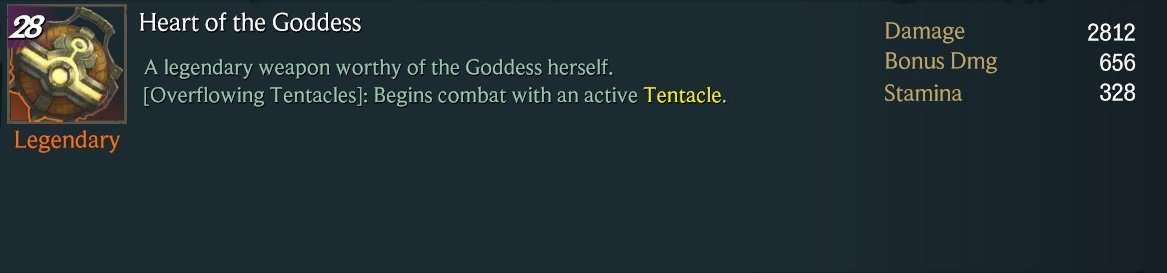
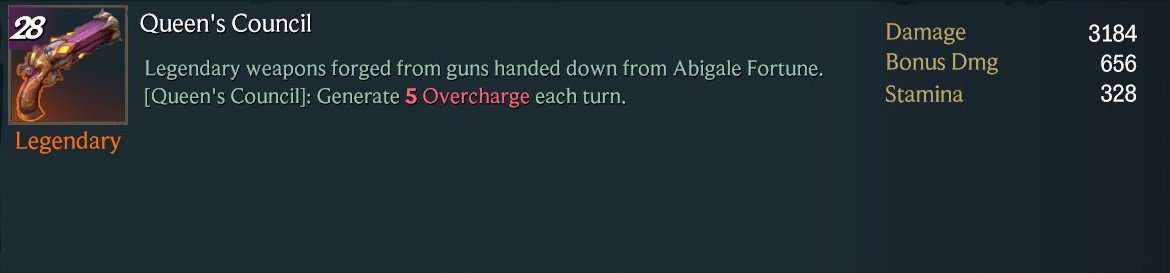
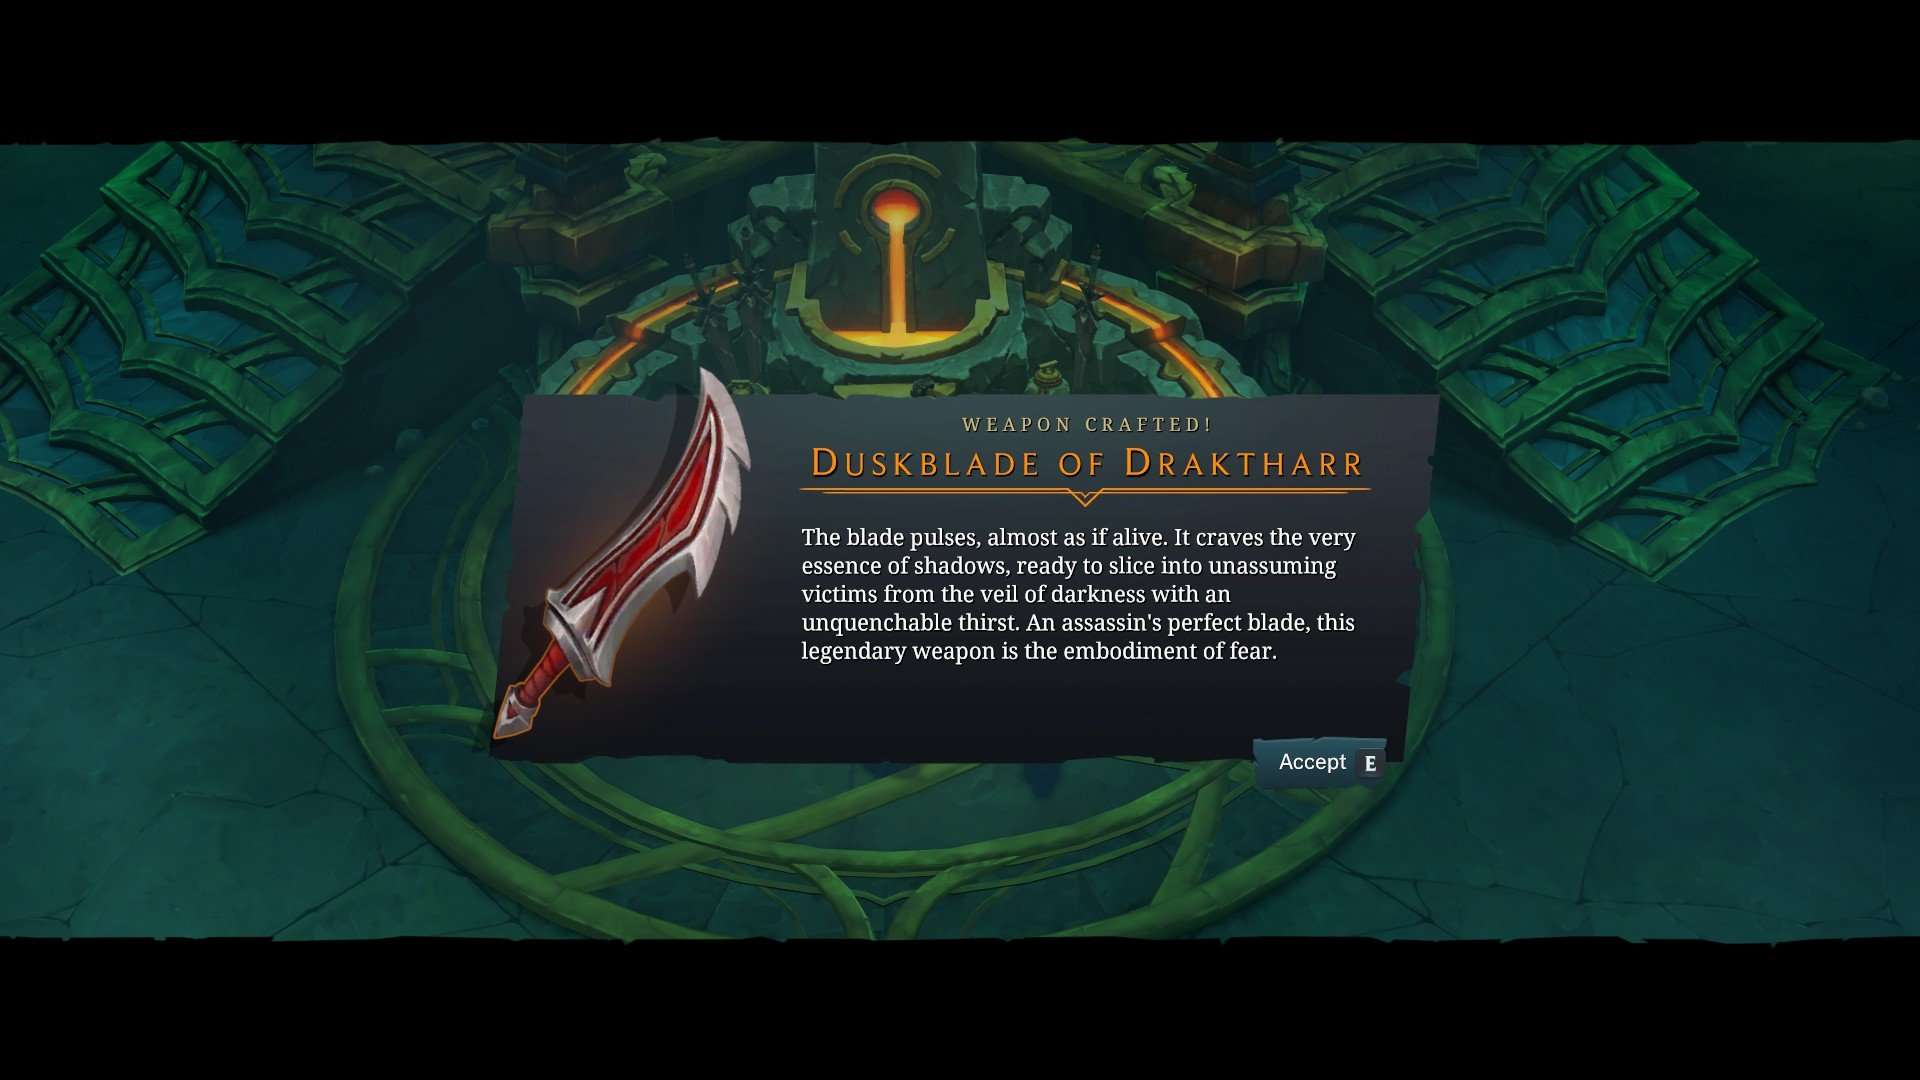
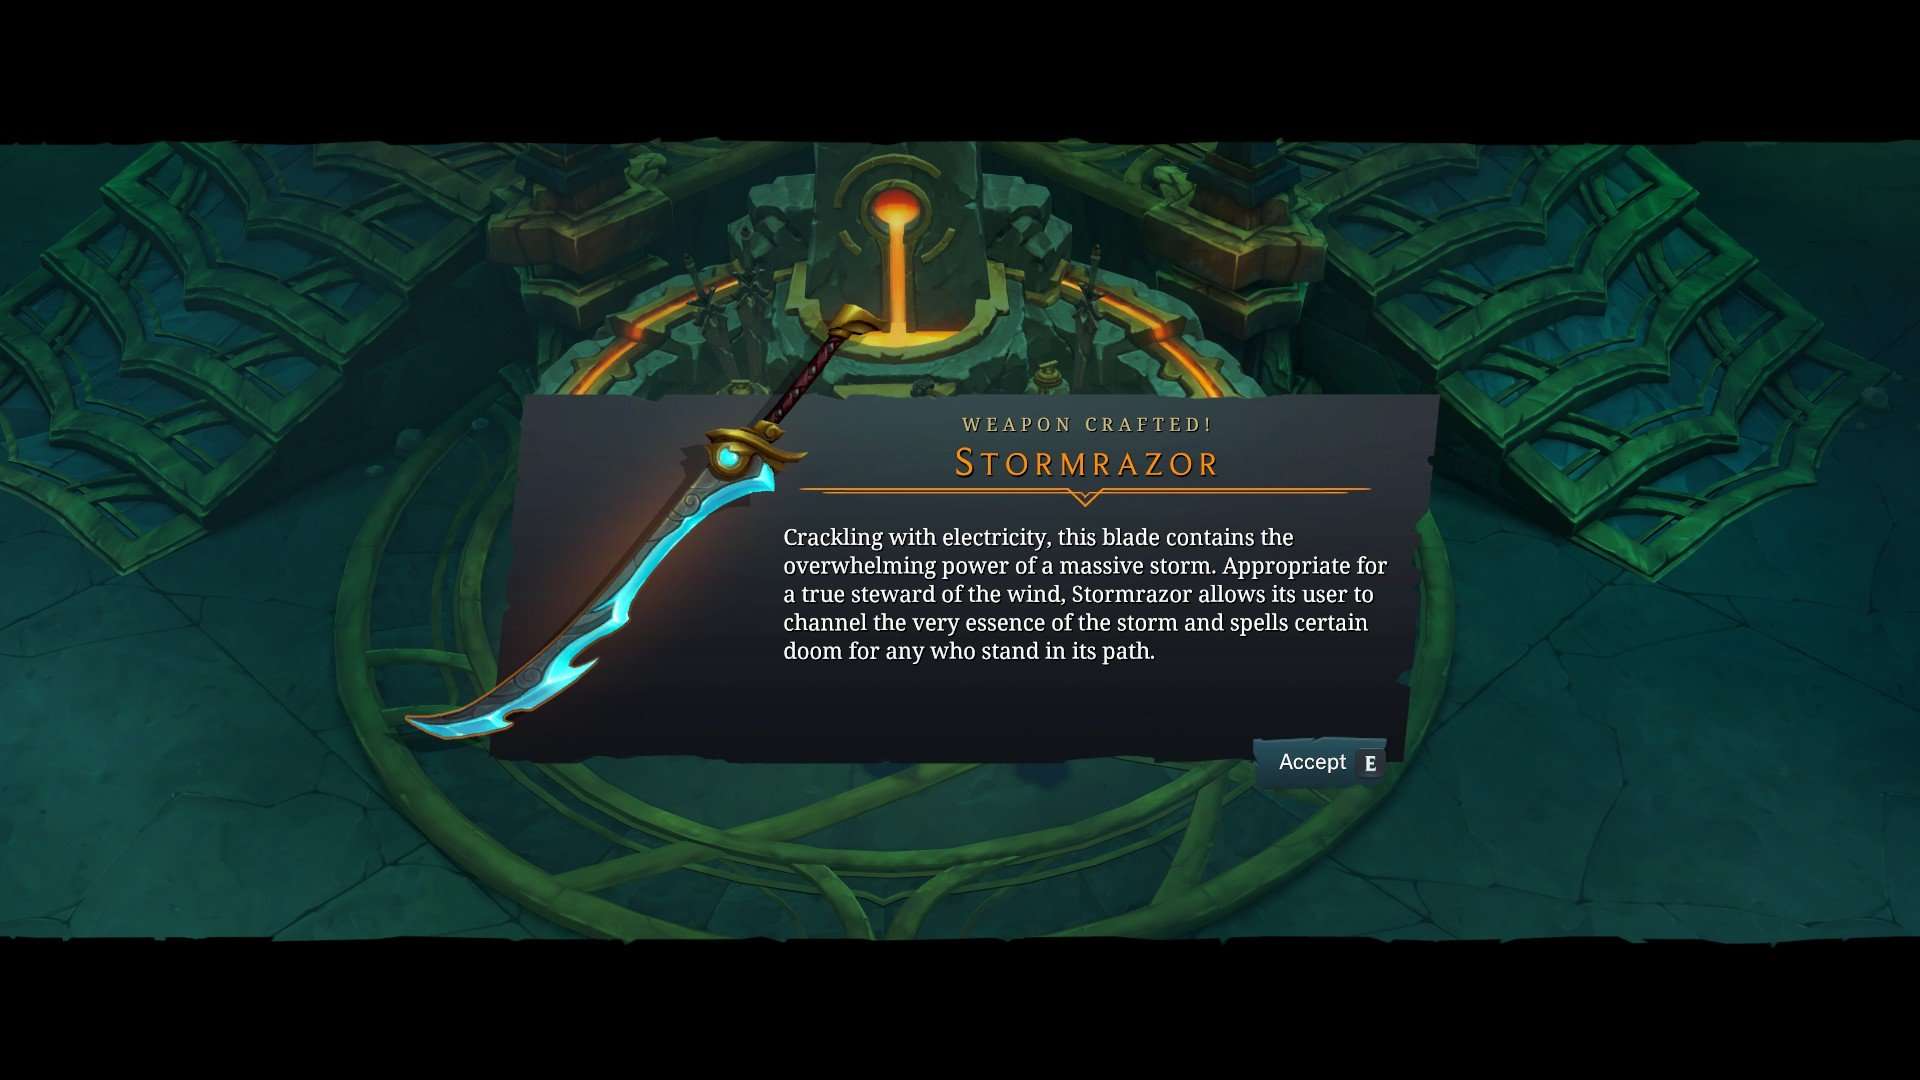
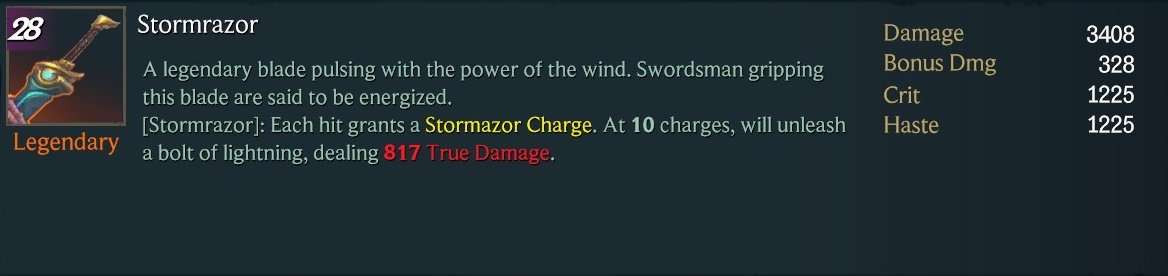
You can get Legendary Weapons which are more powerful than ordinary equipment. There are six Legendary weapons in the game, each unique to one of the six Champions. You can obtain these by completing the side quests relevant to that particular Champion.
Legendary Power
Acquire 1 Legendary Weapon
Ultimate Arsenal
Acquire all Legendary Weapons
It is possible to obtain Legendary Weapon components in the ordinary course of the game, most of them even before you complete the tasks to formally achieve the quests that grant them. As such, I don’t intend to reinvent the wheel to post a standalone guide for each one here; these will be integrated into the walkthrough to reduce the amount of backtracking required.
- Ahri – Oblivion Orb
- Braum – Ornn’s Will

- Illaoi – Heart of the Goddess
- Miss Fortune – Queen’s Council

- Pyke – Duskblade of Draktharr

- Yasuo – Stormrazor
Achievements / Trophies (Part 8: Rest Points)
Rest Points Achievements / Trophies
Along your journey, you can find Rest points which allow your party to heal to full health and mana.
Good Listener
View every character dialogue when at Rest points
Well Rested
Eat 15 Meals at Rest Points
Note that the ‘Well Rested’ achievement cannot be obtained simply by using the Rest point. After you obtain certain consumables which state “Usable when resting”, you will unlock the option to “Eat Meal and Rest” at the Rest point.
- Here are some of the consumables which your party can eat at a Rest point:
- Fermented Cabbage (increases Defense by 18 for a few battles)
- Shimmerwine (grants damage shield absorbing 40 damage for a few battles)
- Serpent Isles Fruit Bowl (increases Attack Power by 37 for a few battles)
Achievements / Trophies (Part 9: The Poro Bandit)
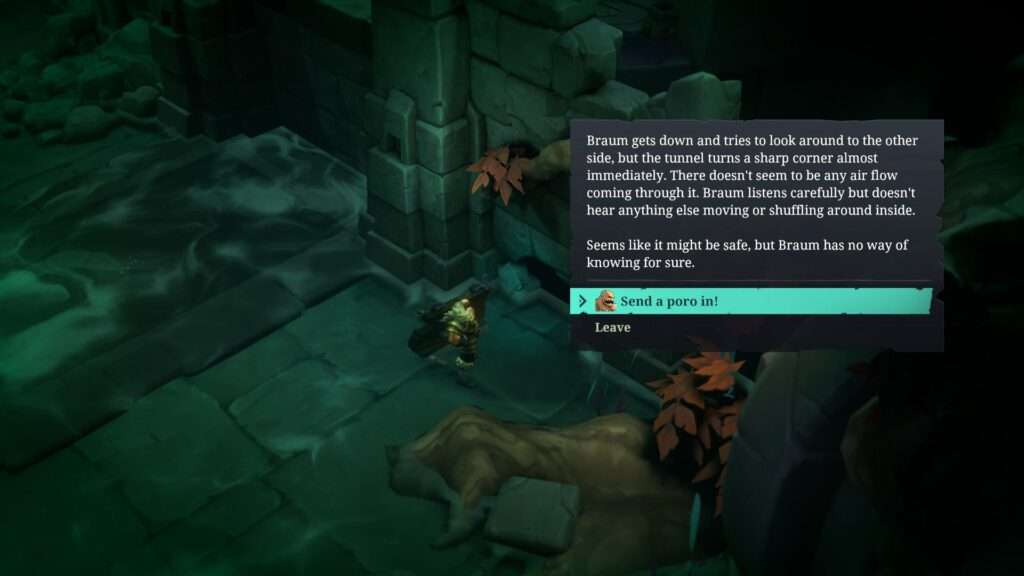
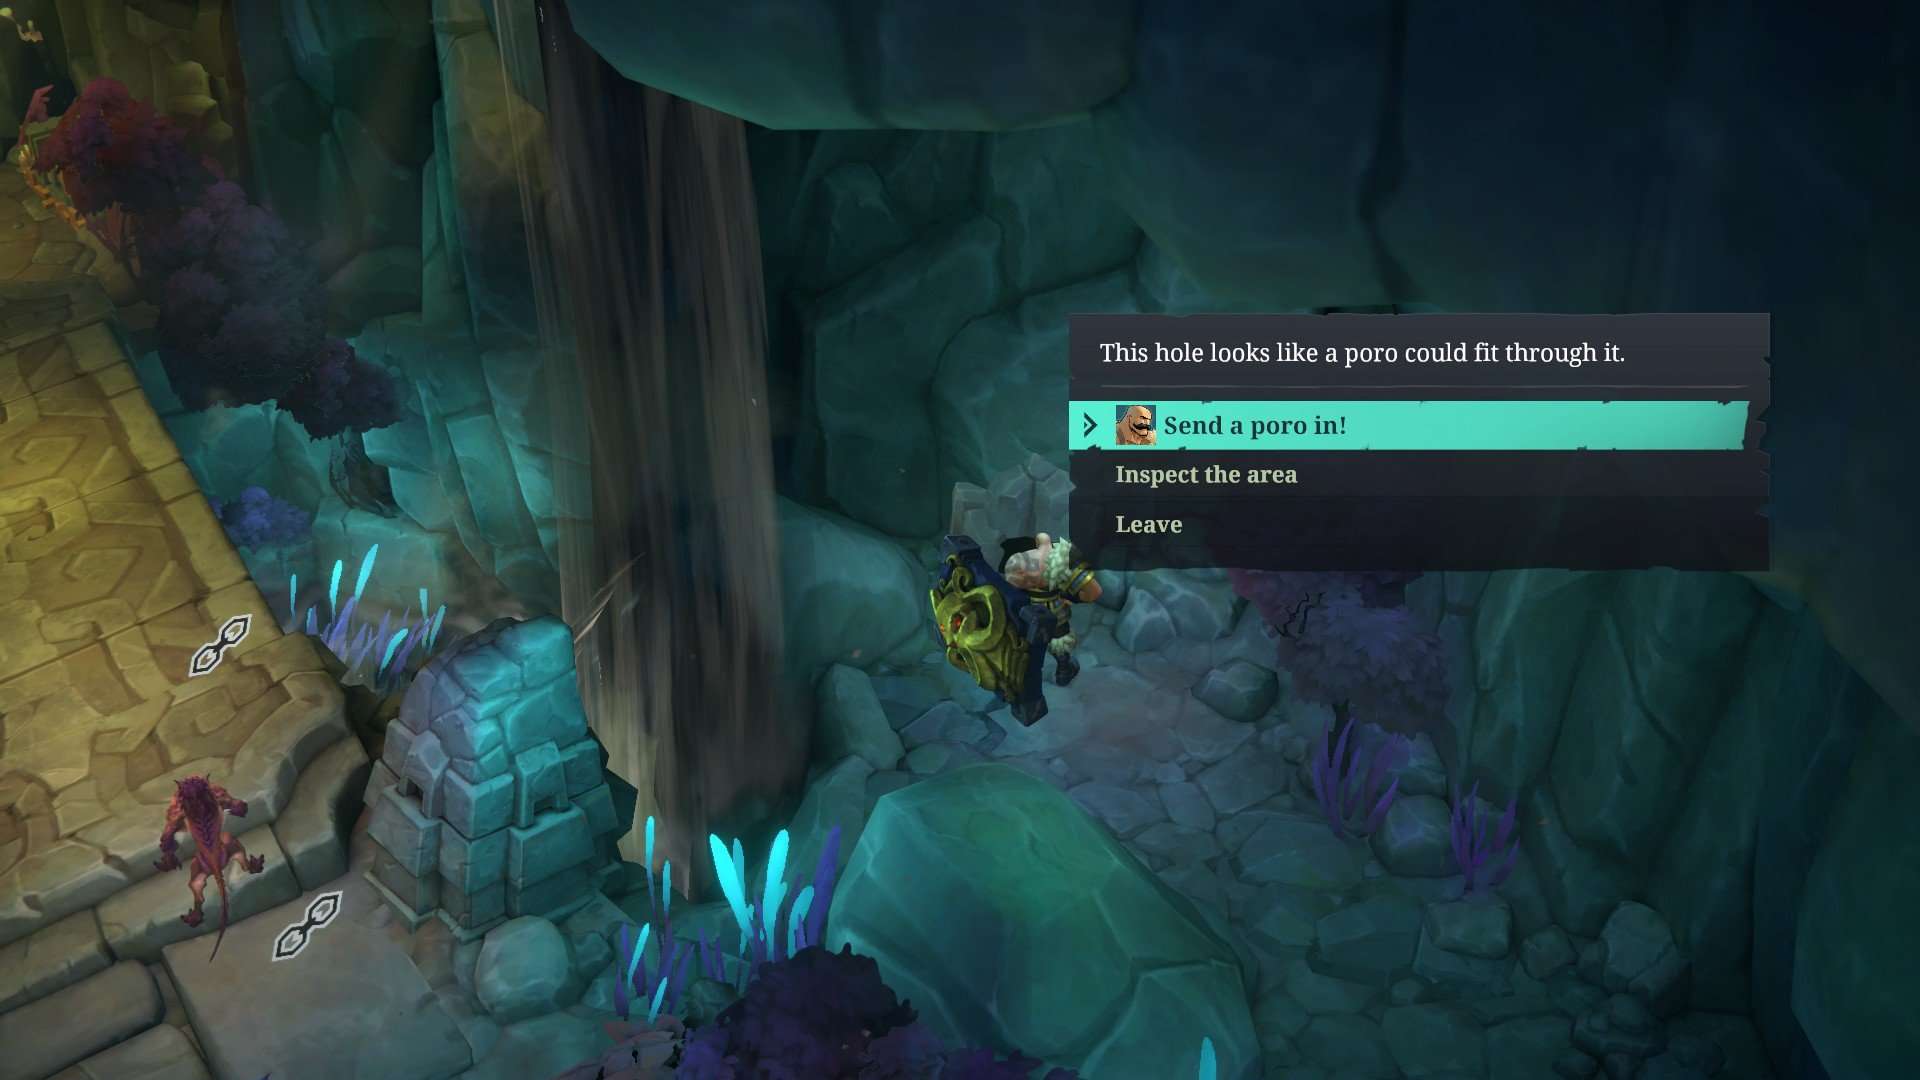
Braum’s Passive, Poro Pal, allows him to send a trusty Poro through holes in the environment to scout and scavenge for items.
Poro Bandit
Collect 5 treasures from Poro Holes
- Poro Hole #1
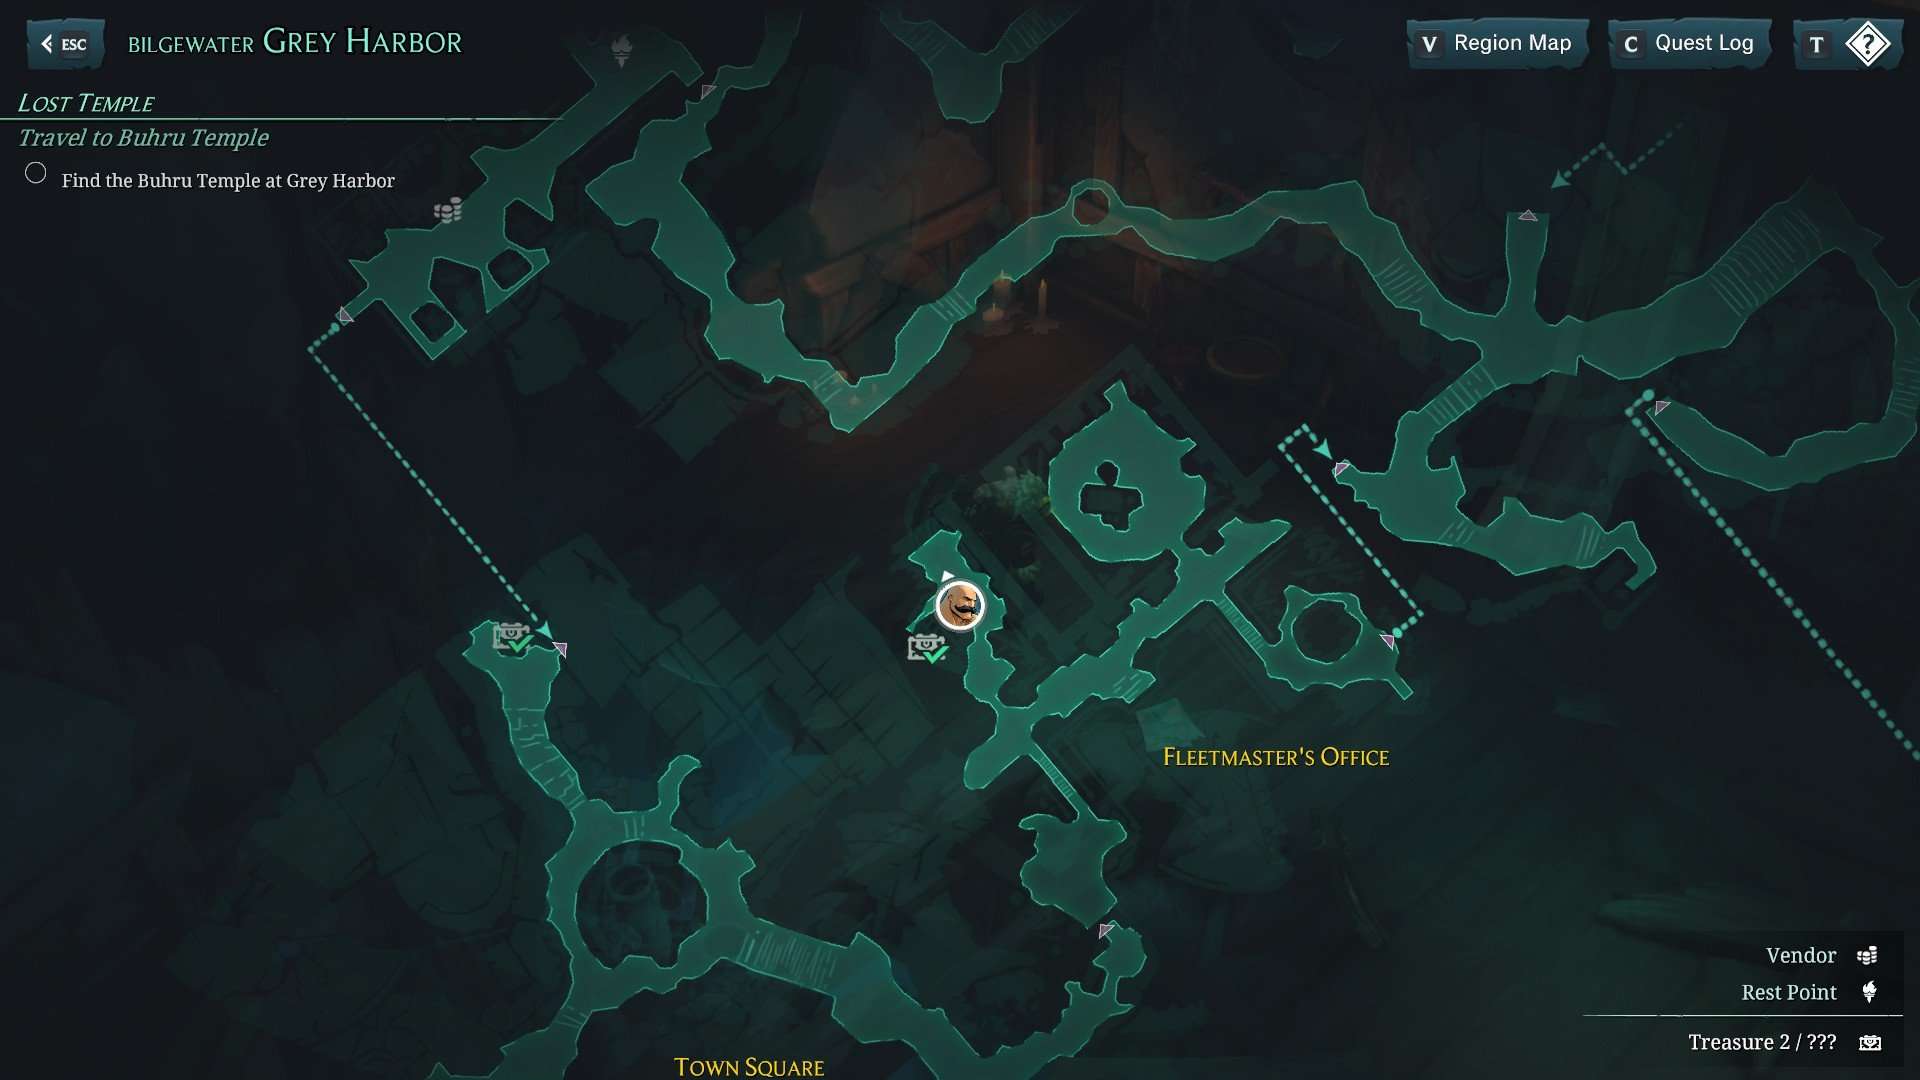
The first Poro Hole can be found in Grey Harbor, in the first room at the top of the stairs in the Fleetmaster’s Office. Sending a Poro through this hole gives you the Portmaster’s Key which unlocks the room to the east of it.

- Poro Hole #2
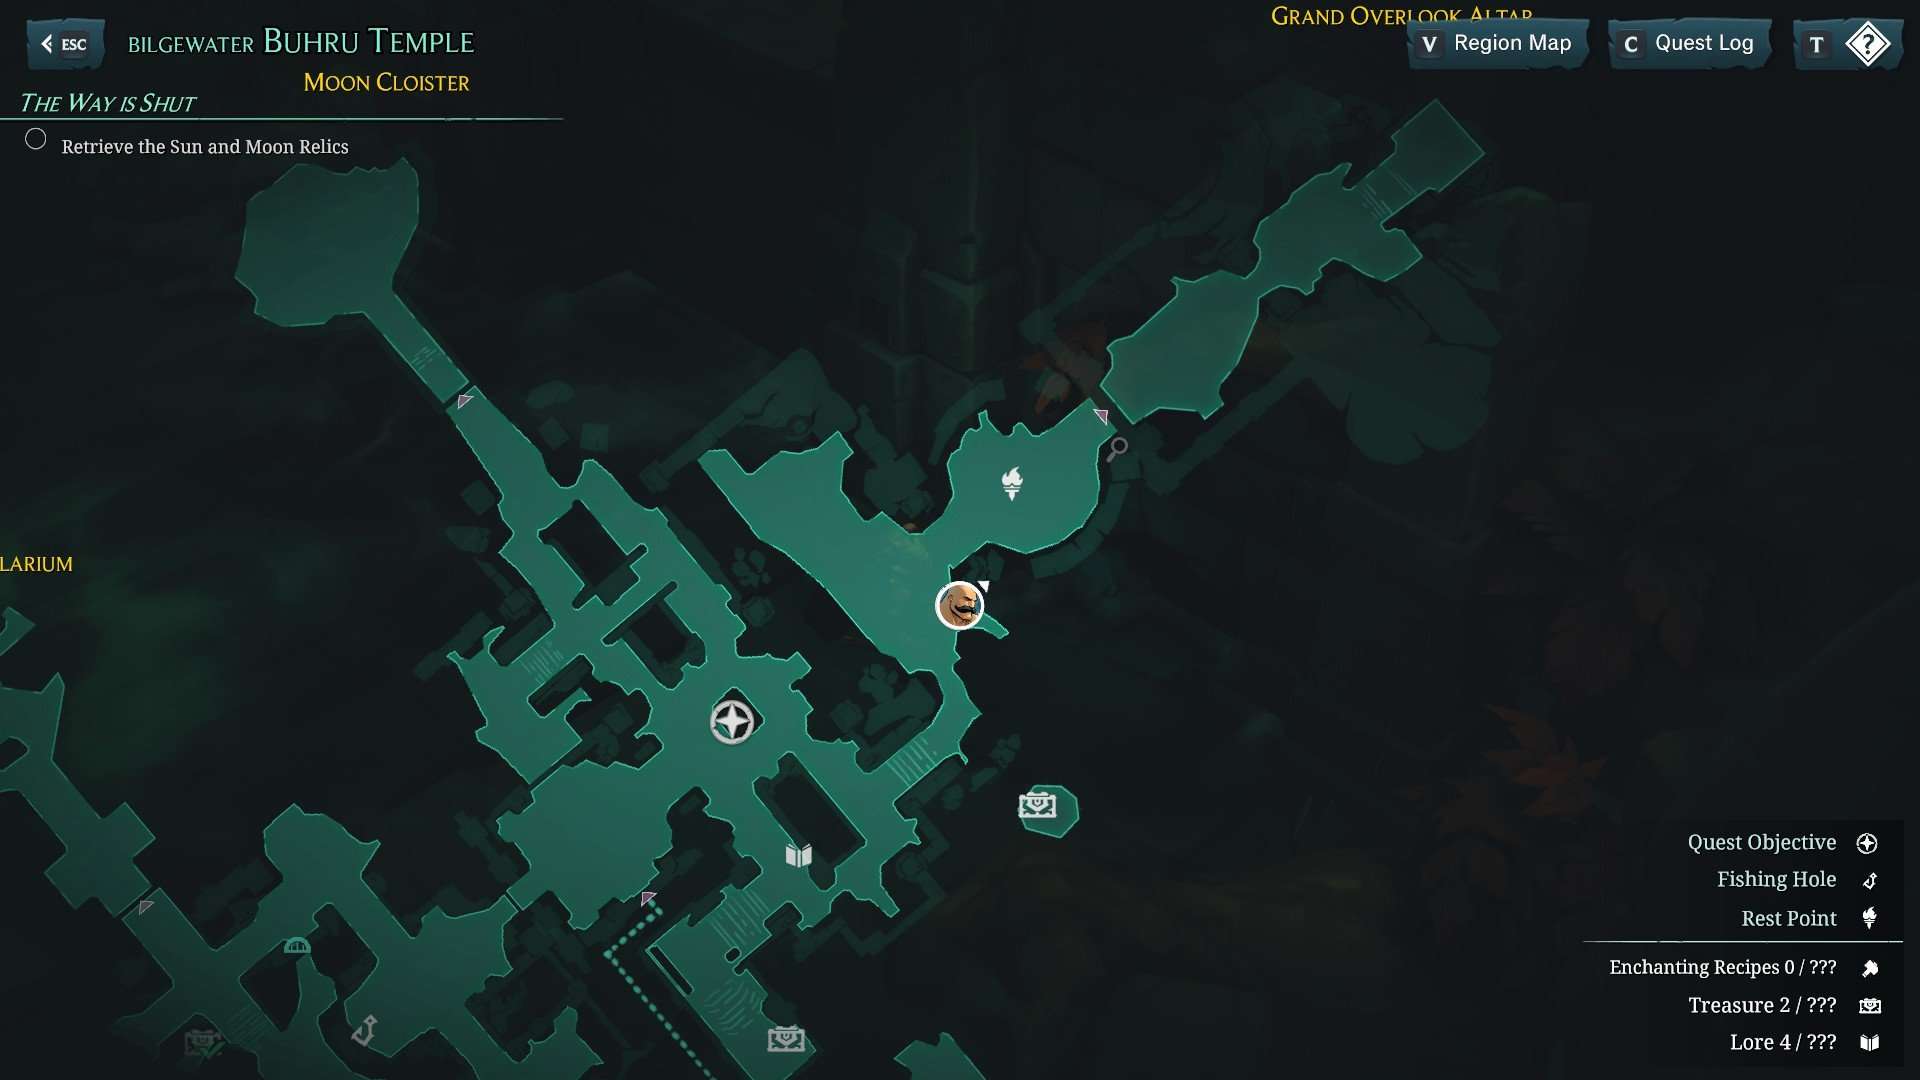
The second Poro Hole can be found in the Buhru Temple, in the north pool near the Sun and Moon plinth. Sending a Poro through this hole gives you the Defender’s Ring, Steel Fishing Rod and some Flavorful Worms.
- Poro Hole #3
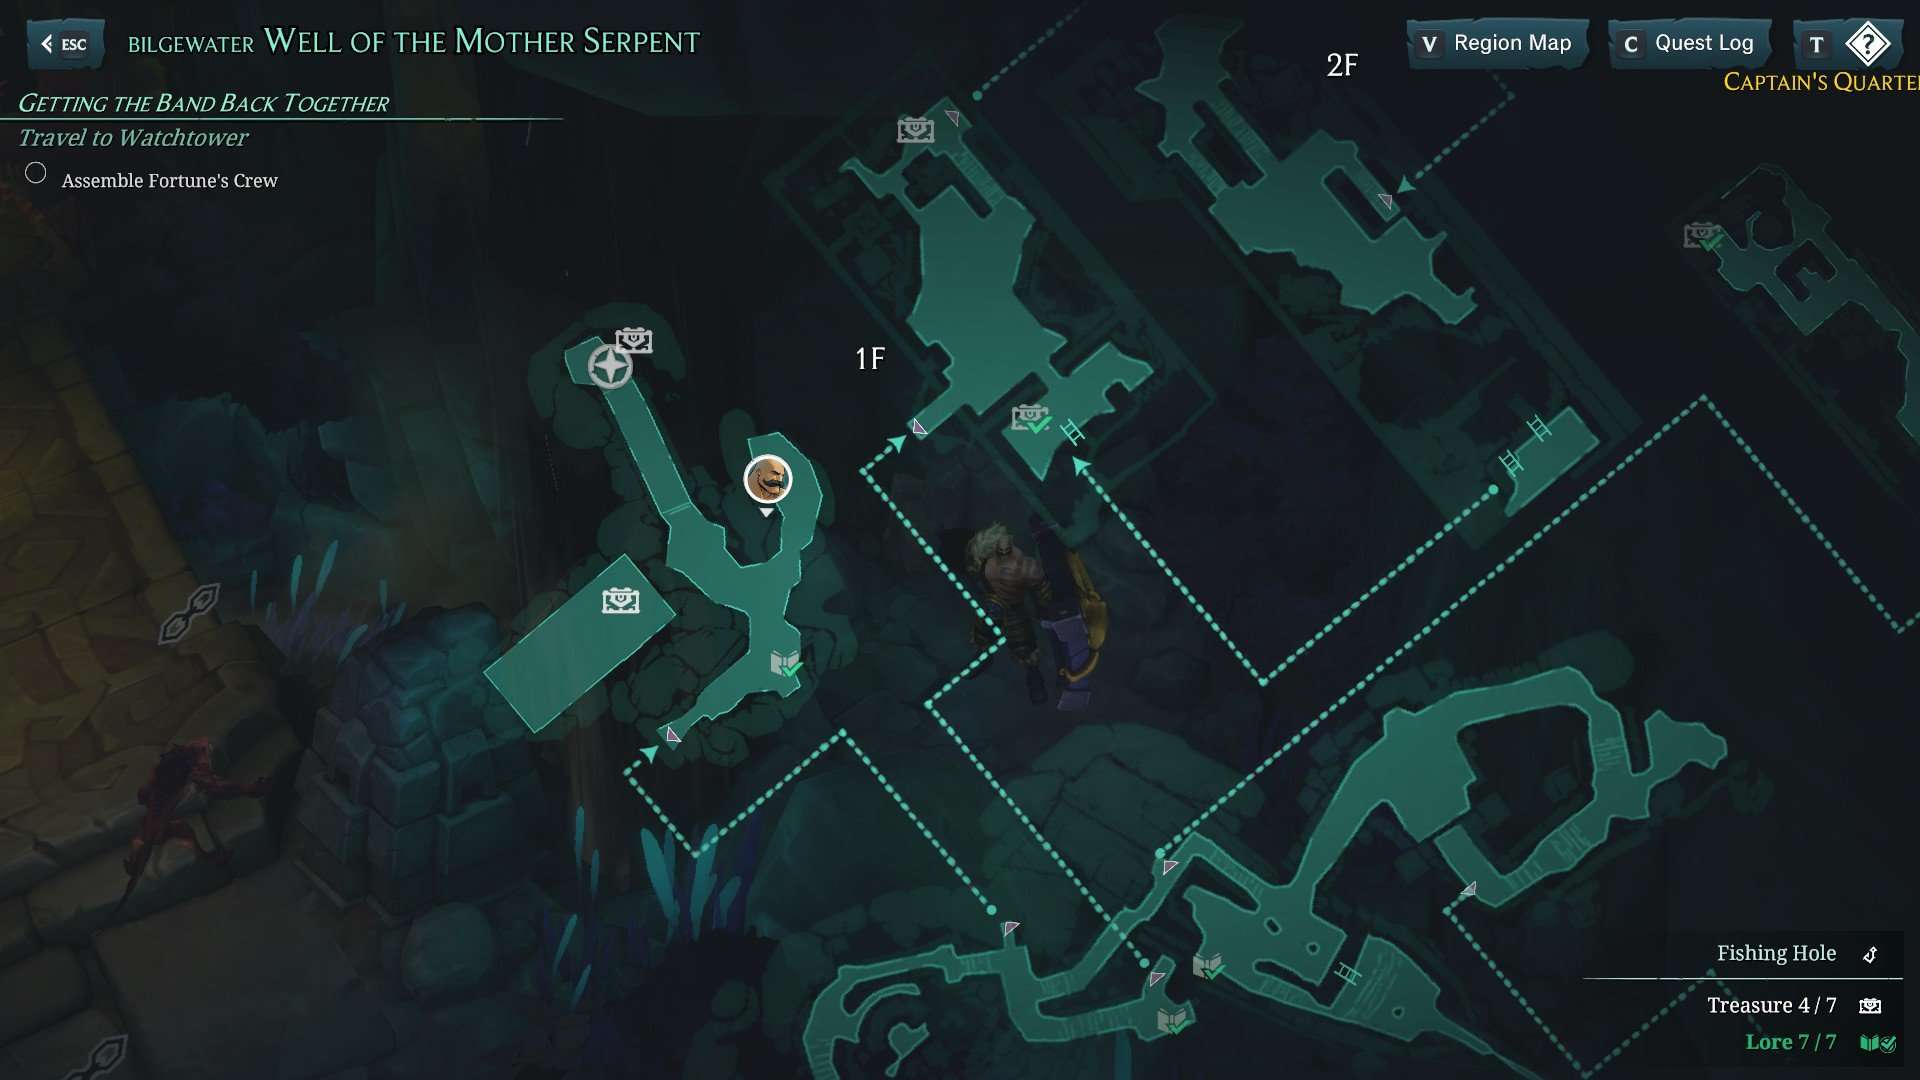
The third Poro Hole can be found in the Well of the Mother Serpent, in the northeast side of the area where you find the Razorfin Behemoth. Sending a Poro through this hole gives you Of Poros and Men, Vol 1.
- Poro Hole #4
…
- Poro Hole #5
…
Achievements / Trophies (Part 10: Others)
Lore Achievements / Trophies
Along your journey, you may find Lore entries which you can pick up to add to your Journal.
Well Read
Collect 50% of the Lore entries
Master Archivist
Collect all unlockable Lore entries
Skins Achievements / Trophies
You can get cosmetic skins for your Champions in-game. The Ruined skins from the DLC do not count towards this achievement.
Oh This Old Thing?
Unlock an alternate Skin for any Champion
Spring Catalog
Unlock all alternate Skins for all Champions
Currency Achievements / Trophies
Just like in League of Legends, the main currency in this game is Gold. Gold can be picked up from the environment, obtained as drops from combat and/or received as rewards for quests.
Money Bags
Acquire 100,000 Gold (cumulative)
You can also trade in Black Marks for items.
Marked For Debt
Acquire 200 Black Marks (cumulative)
The Rumor Monger Achievement / Trophy
The Rumor Monger is located in the Docks Harbor. She sells rumours which you can buy for 10 Gold apiece, unlocking side quests that you can undertake.
Town Gossip
Meet the Rumor Monger
Here is the location of the Rumor Monger on the map (marked with the ‘?’ icon).

Walkthrough (Author’s Note, General Strategy)
Author’s Note
This walkthrough is geared towards the new and casual player who just wants to enjoy the plot and collect all the achievements along the way, in a relatively efficient manner. It is premised on the player starting the game in Normal difficulty, without any of the DLC content.
Each section will walk you through the areas listed, with some specific details hidden in spoiler tags for those who want to try and work some things out on their own. To avoid spoiling too much of the game, I won’t go into detail on the actual storyline events (especially cinematics) here.
As this guide caters to the new and casual player, it does not analyse advanced techniques or evaluate min-maxing. It strikes a balance between being strong enough to survive battles without chugging potions every turn, without being too overpowered that it takes away the fun of the game.
I’d just like to say at the outset that there is no “one correct way” to play Ruined King. You may enjoy building an attack damage carry Braum with a Haste dispel/debuff Yasuo. Or you may have fun playing frontline Illaoi with a Crit-focused Miss Fortune. Or you may get a kick out of making Illaoi a drain-tank with a support Ahri or assassin Pyke. The list goes on.
Honestly, at Normal difficulty, you should just play the combat encounters in the way that you enjoy the most!
As such, while this guide contains recommendations for abilities, runes and equipment from time to time, these are based on my own experience and playstyle which is generally conservative. Ultimately, if you have a different playstyle or if you aren’t having fun with my Party build, please feel free to mix it up and try different things!
Walkthroughs are not set in stone, and the most important thing is that you shouldn’t feel restricted or constrained by my guide.
General Strategy
There are many different ways you can approach combat encounters, but here are some tips to consider when you build your Party.
Just like in League of Legends, it is recommended to have a balance of Champion types in your team. Healing and shielding utility are invaluable in the game, especially against heavy-hitting enemies. You’ll also want to consider having at least one dedicated damage dealer so that combat encounters don’t drag on too long (wet noodle fights).
There is no “one playstyle fits all” in this game, and actual combat encounter gameplay will vary quite a bit depending on your playstyle. Every playstyle will have its own pros and cons, and you may find yourself switching playstyles when fighting different types of enemies.
If your playstyle is more inclined towards single-target damage, one method of approaching combat encounters is to focus down enemies one by one. A dead enemy cannot deal damage to your Party, whereas a 1hp enemy can still hit your Champions with full force or apply a damaging effect. Of course, this method has its drawbacks when you face certain types of enemies, such as those that can resurrect or are temporarily immune to single-target damage.
If your playstyle is more inclined towards multi-target damage, one method of approaching combat is to whittle the enemies down relatively evenly to maximise your total damage. Generally, multi-target damage deals more total damage to the enemies while dealing less individual damage to each specific enemy. You usually deal the most damage when all three enemies are still alive; using multi-target damage on a single enemy is generally not as efficient as single-target attacks.
If your playstyle is more inclined towards crowd control and/or tankiness, one method of approaching combat encounters is to prioritise applying debuffs and negative effects to multiple enemies as quickly as possible, then switch to defense and sustain mode to stay alive while the enemies bleed out over time. Generally, this is a very ‘safe’ way to approach combat, but in some cases, it can be hard countered by Wildcard regions (e.g. healing, shielding) or enemies with more utility.
These are just some of the many playstyles that you may find yourself using in the game, and often, you may have to adapt your playstyle to the specific enemies or environment of each combat encounter. Again, Ruined King is a single-player game, so don’t worry about what others think and just play the game how you will most enjoy it.
And with that… on to the walkthrough!
Walkthrough (Abbreviated Version)
Here is a summary of the walkthrough below, for those who just want a reference guide without too much detail revealed for them. You can refer to the detailed walkthrough in the following sections for more information if you get stuck.
Fortune’s Estate
- Follow the linear path and use the appropriate lane attacks where required.
Slaughter Docks
- Go up the stairs to collect Lore entry Slaughter Docks – The Visionary (1 of 3).
- Enter the pub and complete the combat encounter to progress.
The Warrens
- Head left to collect Lore entry Slaughter Docks – The Visionary (2 of 3).
- Enter the Slaughter Shed and collect Lore entry Slaughter Docks – The Visionary (3 of 3).
- Complete the combat encounter in the Slaughter Shed.
- Achievements: Visions, Shared Purpose.
Docks Harbor
- Head west and talk to Owen for sidequest “Like a Dog in the Streets”, then complete the quest.
- Southeast of your starting point, talk to the Rumor Monger and buy all four Rumors in the shop.
- Exit to Fleet Streets and then Slums Market.
- Achievements: The Rumor Monger.
Slums Market
- Head northwest to collect Lore entry Slums Market – The Great Sapphilite Heist (2 of 5)
- Exit to Fortune’s Estate and then enter the Baron’s Rest.
Baron’s Rest
- Speak to the lady at the northwest for sidequests “Things We Cling To” and “Deadly Currency”.
- Enter the room on the right to collect Lore entry Baron’s Nest – News from Abroad – Noxian Deserter Found!
- Speak to Renee at the northeast to complete sidequest “A Matter of Discretion” and accept her next sidequest.
- Go to the east side of the second floor for sidequest “The Difficult Diner” and complete the quest.
Slums Market
- Head west and collect Lore entry Slums Market – The Great Sapphilite Heist (1 of 5).
- Enter Fortune’s Estate.
- Achievements: Wind Walker.
Grey Harbor, Smuggler’s Passage
- Enter the Fleetmaster’s Office and unlock the secret first Poro Hole for Poro Bandit achievement.
- Enter Smuggler’s Passage.
- Exit to the Clario Estate.
Clario Estate
- Enter the Clario Estate and unlock the secret chest in the spirit realm.
- Collect all three locket shards and place them in the ornate station.
- Achievements: Potent Potables (likely by this point, but no rush and no pressure).
Buhru Temple
- Enter the Buhru Temple and head into the catacombs.
- Collect the Lore entry Buhru Temple – The Naga-Speakers (1 of 6).
- Go into the next area. Collect the next Lore entries Buhru Temple – The Naga-Speakers (2 of 6), Buhru Temple – The Naga-Speakers (3 of 6) and Buhru Temple – The Naga-Speakers (4 of 6).
- There’s a secret here: use Braum’s Dungeon Skill to break the wall.
- Go into the next area. Activate the glyphs in the south pool and north pool.
- There’s another secret to unlock: second Poro Hole for Poro Bandit achievement.
- Retrieve the Moon Disk from the Moon Cloister and embed it in the plinth.
- Collect the next Lore entry Buhru Temple – The Naga-Speakers (5 of 6).
- Retrieve the Sun Disk from the Solarium and embed it in the plinth.
- Obtain the “Healer” enchantment orb.
- Complete the beam of light puzzle.
- Press down the completed Sun and Moon disk on the plinth to open the next area.
- Go to the Grand Overlook Altar and collect the last Lore entry Buhru Temple – The Naga-Speakers (6 of 6). Defeat the final boss.
- Achievements: Put to Rest, Potent Potables (likely by this point, but no rush and no pressure).
Fortune’s Estate
- Buy all seven Rumors from the Rumor Monger.
- Return to Fortune’s Estate and talk to Miss Fortune. There’s a secret here: set Miss Fortune as your active Champion and scan the area for a set of blueprints.
- Achievements: O Captain, My Captain.
Slaughter Docks
- Head towards the Captain’s Pub. There’s a secret here: interact with the strange swirling light.
- Go to the Slaughter Shed in the Warrens to fight Giffin the Hextech Thief.
Baron’s Rest
- Return to Renee in the Baron’s Rest to complete side quest “Through the Lens”.
- Talk to the Bard in the Baron’s Rest. Get the instrument from the musician in the Slums Market and source material from the merchant in the Baron’s Rest. Return to the Bard and give him both items to complete side quest “The Bard’s Ballad”.
Docks Harbor, Tide Stockades, Boat House, Lighthouse
- Watch the Count drown and find his wife to complete side quests “The Cursed Count” and “The Countess Evalista”.
- Claim the bounties for Malik and Giffin the Hextech Thief. Find “Housecrasher” Corvin, fight him and return to claim the bounty. Enchant Leviathan for the achievement.
- Help the sailor find Fluffy to complete side quest “Fluffy is Missing”.
- Get the loot from the Lighthouse. There’s a secret here: set Miss Fortune as your active Champion and scan the area for a set of blueprints.
- Achievements: Bounty Cadet, Enchanting Novice.
Well of the Mother Serpent
- Deal with the troublemakers in the Captain’s Quarters. This completes side quest “Sanctified Shakedown”.
- Use the cannon to clear the path and collect the treasure from Scavenger’s Plunge. Give the offering, then head to the westernmost exit of the top deck of the ship.
- In the next area, there’s a secret to unlock: third Poro Hole for Poro Bandit achievement. Also, deal with the Razorfin Behemoth so that you can claim your fourth bounty.
Baron’s Rest
- Enter the Arena and complete three combat encounters.
- Achievements: Arena Champion.
Walkthrough (Part 1: Fortune’s Estate – The Warrens)
Overview
This section outlines the gameplay from the start of the game, to Braum joining the party.
Achievements covered:
- Visions
- Shared Purpose
Side quests covered:
- N.A.
Lore entries covered:
- Slaughter Docks – The Visionary (1 of 3)
- Slaughter Docks – The Visionary (2 of 3)
- Slaughter Docks – The Visionary (3 of 3)
Fortune’s Estate (Day)
This section is a sort of ‘tutorial’ for new players to get the hang of how the game works. For more information, please check out the “Gameplay Basics” section.
After the cinematic, the story begins with Miss Fortune in her estate. Take some time to get used to the controls, and follow the linear path until the next cinematic. Don’t forget to keep scanning and picking up loot along the way.
There’s some loot in the first room as well as next to the large doors of the Parlor Room. You won’t be able to go to any other areas for the time being, so be a magpie and gather all the goodies before heading in.
After you head up the long flight of stairs, you’ll face your first combat encounter. Don’t bother drinking potions even if the game prompts you to – the enemies can’t kill you, and you’ll be back to full health for the next encounter.
Fortune’s Estate (Night)
Your second combat encounter is very straightforward, since it’s the game’s way of teaching you how the lanes work.
Follow the same linear path that you did in the daytime, fighting your way through the combat encounters. Respond to the call for help along the way (optional) before you meet Rafen again.
In combat, check the traits of your opponents and don’t forget to use the appropriate lane attacks where required. As before, don’t bother drinking potions even if the game prompts you to, and you can be relatively liberal with your mana usage. After the final fight, you won’t be playing Miss Fortune any more for a while.
Slaughter Docks, Captain’s Pub
In this area, you’ll be playing as Illaoi and her companions.
After the cinematic, don’t go into the pub yet. Head all the way to the east side of the first level for more loot, then go up the stairs near the huge sea monster tail, scanning along the way and picking up what you can. There’s a Lore entry for Slaughter Docks – The Visionary (1 of 3) here.
You won’t be able to access the northwest side of the first level yet, so don’t worry about it for now.
There’s a man standing facing the bar counter, with a sword at his side. Speak to him to trigger your first combat encounter as Illaoi. Don’t worry about taking damage or spending mana – you’ll level up after the encounter, which restores both bars to full.
Leave the pub and head northwest to The Warrens.
The Warrens
At the fork in the road, head left first to collect the Lore entry for Slaughter Docks – The Visionary (2 of 3). Fight, plunder the place, then equip the Weighted Brass Idol and the Ring of Resolve on Illaoi. You won’t be able to equip her companions yet.
Head back to the fork in the road and this time take the right-hand path. Follow the linear route to both treasure chests first to KO more bad guys and get some more goodies before we head to the Slaughter Shed.
Illaoi will level up twice en route to the second treasure chest, so don’t worry about using potions on her. If her companions take too much damage in the combat encounters, you can afford to use one or two of the minor potions on them if you want. However, don’t heal up after the last fight at the second chest – you’ll come to a Rest point soon.
Equip the Bilgewater Garb, and head into the Slaughter Shed. Pick up the last Lore entry for Slaughter Docks – The Visionary (3 of 3) near the door. Use the Rest point if you need it, then head on to the first boss fight.
Pyke will start the fight with an insta-kill on one of your companions, don’t panic. There’s no need to use potions or any defensive abilities, really. Just leave the fallen where they lie, and you can win the fight with just instant and quick strike attacks.
You get to watch some cinematics, and will earn your first two achievements:
Visions
Experience visions of Ruined King
Shared Purpose
Team up with Braum
Walkthrough (Part 2: Docks Harbor, Slums Market, Baron’s Rest)
Overview
This section outlines the gameplay from Braum joining the party, to Yasuo joining the party.
Achievements covered:
- The Rumor Monger
- Wind Walker
Side quests covered:
- Like a Dog in the Streets
- Things We Cling To
- Deadly Currency
- A Matter of Discretion
- The Difficult Diner
Lore entries covered:
- Slums Market – The Great Sapphilite Heist (1 of 5)
- Slums Market – The Great Sapphilite Heist (2 of 5)
- Baron’s Nest – News from Abroad – Noxian Deserter Found!
Docks Harbor
After the visitors depart, you can afford to magpie a bit before continuing with the main questline.
First, let’s put points in our abilities.
- For Illaoi, I personally went for 1B of Tentacle Smash (oddly, it’s called “Tentacle Slam” in the skill tree, perhaps a typographical error) and 1A of Grace of Nagakabouros.
- For Braum, I chose 1A of Stand Behind Me and 1B of Heroic Leap.
Now you can sprint around Docks Harbor, scanning and looting as you go. Here are the main interactions to look out for:
Head west first for a brief cutscene, and talk to Owen (the man near the dead body) to accept a sidequest “Like a Dog in the Streets”.
Retrace your route then go up the steps to the Bounty Board. The first bounty for Malik is up, but he’s level 7 so we aren’t going to try for that yet.
Talk with Hugo there. There’s a shopkeeper towards the east side, near the other flight of stairs going up. You can ask him about Alex, but there’s no need to go up the stairs yet.
Head back down, southeast of your starting point. Talk to the Rumor Monger (marked on the map with a ‘?’ icon) for an achievement:
Town Gossip
Meet the Rumor Monger
You should have at least 800 Gold by now – spend 40 Gold to buy all four Rumors in the shop, so that you can unlock more sidequests.
Let’s finish Owen’s sidequest first. Head north to talk to Lenny, then head south to talk to Daren (they’re marked on your map). There are two possible answers you can tell Owen: You get 300 Gold if you lie to Owen, versus 250 Gold if you tell him the truth.
Now, return to the Ship Salvage Yard to scan and pick up what you can. Not all the loot visible on the map is accessible for now. On your way back up the stairs, make a U-turn to your right, and interact with the glowing golden aurora beams for a conversation.
Equip the Guardian’s Ring and Regrowth Pendant on Illaoi, then head southwest towards the exit to Fleet Streets. On your way you’ll pass the locked Lighthouse door – don’t worry, we’ll come back later.
You’ll trigger a cutscene, and regardless of which options you choose, a combat encounter.
After you put those vagabonds in their place, leave for Fleet Streets. There’s a lot to explore here, but we’ll come back later. Head down the stairs to the southwest, scanning and looting as you go, then exit to Slums Market.
Slums Market
We’ll take Illaoi’s advice from the cutscene and enjoy the sights and sounds before going to meet Miss Fortune. Don’t bother buying equipment or supplies here, we’ll loot better stuff later.
Head northwest towards the gondola to collect the Lore entry for Slums Market – The Great Sapphilite Heist (2 of 5) – we’ll get the first entry when we leave this area. Go back to the central area and then southwest towards Fortune’s Estate. Take the lift down and then head north to the Baron’s Rest.
Baron’s Rest
After you go in, head northwest and speak to the lady alone at the table to complete the side quest “Things We Cling To”. Go through the first door to the north of her. You can enter the second door on the right for the Lore entry Baron’s Nest – News from Abroad – Noxian Deserter Found!
After you come out of that room, continue north and talk to the doorman before inspecting the door. Return to the lady to complete the side quest “Deadly Currency” and obtain the Arena Coin.
Return to the main seating area and head northeast to speak to Renee, completing the side quest “A Matter of Discretion”. Follow her up the stairs.
You’re free to trespass in the other rooms and loot more stuff on the way. If you walk past her and go into the third room, you’ll be treated to a nice little dramatic cutscene and more loot. Don’t bother heading west at the end of the corridor for now – the treasure chest requires a key to unlock, which you don’t have yet.
Return to Renee and accept the quest she gives you.
Now let’s go deal with a Karen in the restaurant! Return to the main seating area, but don’t go down the long flight of stairs yet. Instead, head east for a brief cutscene. Talk to the irate Karen to start the quest “The Difficult Diner”, then go to the end of this section and talk to the man at the counter who’s trying to sell ‘Seafarer’s Seltzer’. You probably can see where this is going…
Buy the Seltzer for 5 Gold, then head down the long flight of stairs and immediately go through the door to the north. Talk to the grouchy chef and then the poor waitress. Show her the bottle you bought, and sit back to watch revenge being a dish best served… shellfishly. If you’d like to have one last giggle, go back through the first door you went through for “Deadly Currency” to hear the Karen in the bathroom.
After the brief cutscene, take the key from the table and then use it to unlock the door to the north. This opens up more loot and another merchant.
We’re done with the Baron’s Rest for now, but we’ll return again later. Exit back to the Slums Market and then head west. There’s another conversation point to the north of the roundabout, if you’re interested.
You should level up (with full health and mana restoration) from the combat encounters on the way. I put ability points into 2A of Tentacle Smash for Illaoi and 1B of Concussive Blow for Braum.
Pick up the Lore entry for Slums Market – The Great Sapphilite Heist (1 of 5) and then exit to Fortune’s Estate. Deal with the goons in your way, then take the lift up.
Technically we were requested to proceed straight to the parlor, but no one said anything about looting along the way. Scan and pick up everything that’s not bolted to the floor before you head into the building.
After you come up the first long flight of stairs, don’t go into the Parlor Room yet. Remember in the tutorial when we weren’t able to explore the other sections of the house? Head south to a small little balcony filled with loot, and fill your pockets before going into the Parlor Room.
You can sit back and make yourself some popcorn, there’ll be quite a few cutscenes and cinematics to watch after that. After the last cinematic, pick up some loot and walk northeast. A combat encounter will be triggered and the third achievement will pop:
Wind Walker
Have Yasuo join your Party
Don’t go through the gate just yet. Head back southwest to the Rest point to heal back up. As an added bonus, you can also watch a Rest point conversation at the same time.
You should level up (with full health and mana restoration) from that last combat encounter. I put ability points into 2A of Grace of Nagakabouros for Illaoi, as well as 1A of Way of the Wanderer, 1B of Gathering Storm, and 1A and 2B of Steel Tempest for Yasuo.
Walkthrough (Part 3A: Grey Harbor, Smuggler’s Passage)
Overview
This section outlines the gameplay from Yasuo joining the party, to the completion of Smuggler’s Passage.
Achievements covered:
- N.A.
Side quests covered:
- N.A.
Lore entries covered:
- N.A.
Grey Harbor
For travelling around in Grey Harbor, I recommend using Yasuo as your main character.
Most of the enemies and environmental hazards in this area are air-based, and Yasuo’s Dungeon Skill Tornado Slash allows you to dissipate air-based hazards such as poison mist. Poison damage can add up over time, so try to start every encounter with a Tornado Slash. Another advantage of this skill is that it slows the enemy, which allows your Champions to get their skills off first – this can sometimes make the difference between winning and losing in turn-based combat.
Head north of the town square, dealing with any mist walkers you encounter along the way. Scan and fill your pockets with loot from both the outside terrace and inside of the building. There’s a barricaded door inside which we won’t be able to pass from this direction, but we’ll come back through here later.
Head back through the town square and deal with the rest of the mist walkers.
- If you have taken light to moderate damage, heal up with potions.
- If you have taken a critical amount of damage, you can go back through the gate to the Rest point. However, when you return, the enemies will respawn, so just run as fast as you can to the south side and try to avoid repeating the combat (and taking damage again).
After you reach the bottom of the stairs, take the west route. If you see patches of mist along the way, dispel them with a Tornado Slash. There is an arcane object here which can imbue a piece of equipment with great power; at this juncture I would recommend coming back later when you have higher level gear to make it more worthwhile.
Go back the way you came and head east. Enter the Fleetmaster’s Office.
At the top of the stairs, there will be a combat encounter with tamed Shrapnel Launchers. These enemies are higher level than you and can fire damaging shrapnel at you outside of combat, so I recommend going up the stairs to draw aggro and then running downstairs to catch them with a Tornado Slash when they follow you downstairs.
Go through the first door at the top of the stairs. After looting the room, go to its northmost corner and change your active Champion to Braum. Inspect the wall where the hole is and you can send a Poro through to pick up the Portmaster’s Key. Check out the Achievement Guide for the Poro Bandit if you want to see the map of the exact location.
Head northeast down the hall and use the Portmaster’s Key to unlock the door and enter the room. The safe description tells us that 2, 3 and 5 appear the most used; inspecting the painting reveals R3 L2 R[5] as the combination. Open the safe to reveal a Blue Flame Amulet which you can equip on Braum.
Go down the stairs and clear the area, then head out through the east door. Continue scanning and looting as you make your way east towards the treasure chest marked on your map. Equip the Silver Laced Tunic, Doran’s Ring and Fishbone Talisman on Illaoi.
Head back towards the crossroads. The north route is “heavily barricaded” and we don’t want to go to the Buhru Temple just yet, so take the route towards the southwest, for Smuggler’s Passage. We’ll clear out both Smuggler’s Passage and the Clario Estate before continuing with the main questline.
Remember to use Yasuo’s Tornado Slash on the mists and mist walkers in your way!
Smuggler’s Passage
Your Champions should level up before or soon after you enter Smuggler’s Passage. Consider putting a point in 2A of Concussive Blow for Braum. Once your Champions hit Level 8, they will also gain a Rune Shard that can be used to give them additional combat stats. I increased Yasuo’s crit chance by 5% (Way of the Wind Mastery), Illaoi’s healing power by 7.5% (Kraken Priestess Mastery), and gave Braum a deterrence shield (Bulwark Mastery), but you can choose whichever rune best fits your own combat style.
Enter Smuggler’s Passage and make your way to its end, avoiding the traps on the floor. It may look like a dead end, but it’s not. You can progress by opening a hidden passageway. Inspect the torch at the westernmost side of the cave, and flip the switch. You can use the Rest point here to heal your Party before continuing onwards.
Climb the rope and complete the combat encounter. After you go through the doors, you will need to use a specific mechanic to progress: sprint through the corridor of traps (hold both W and A to move diagonally, and don’t let go of the SHIFT key). You may have to back up a little to get enough momentum, but if you do it right, you shouldn’t take any damage from the cannons.
After completing the combat encounter, head east for the treasure chest. Beware: there’s an ambush lying in wait for you, so make sure you drink as many potions as you need before touching the chest!
Head north for a cutscene and a boss fight. Thankfully, you’ll start the fight with full health and mana regardless of your party’s status, so you don’t have to waste potions preparing for this. After the fight, scan and loot the room. Then take the west exit to find yourself back at the crossroads.
Yasuo and Braum should reach level 9 around this time, so you can put a point in 1A of Raging Wind for Yasuo and 1A of Unbreakable for Braum. Equip the Doran’s Blade on Yasuo and the Tavern Brawler on Braum.
Head northwest, scanning and looting and fighting enemies along the way. Don’t worry if your Champions are running low on resources – there’s a Rest point in the building up ahead.
Once you get to the building, scan and loot the room. You’ll find a Bounty Hunter Garb which you can equip on Yasuo.
Head through the west door to trigger a cutscene, then retrace your steps back to the Rest point and leave the same way you entered this building. Use Yasuo’s Dungeon Skill Tornado Slash to dispel the mist.
Defeat the enemy blocking your path, then head east to the Clario Estate. If you took a lot of damage from the enemy, it may be tempting to go back to the Rest point to heal up. However, if you do that, the enemy will respawn again when you re-enter the area. You’ll then either have to fight your way past it again, or wait until it moseys off before sprinting cleanly past it. Note that the enemy is rather large in size and the path is narrow, so avoiding it may get tricky.
Make your way to the end of the path and enter the Clario Estate.
Walkthrough (Part 3B: Clario Estate)
Overview
This section outlines the gameplay in the Clario Estate.
Achievements covered:
- Potent Potables (likely obtained by this point, but you don’t have to go out of your way to specifically unlock it here)
Side quests covered:
- N.A.
Lore entries covered:
- N.A.
Clario Estate
After entering the Clario Estate, go to the west side of the hall to unlock a secret. There’s a reason we went to Baron’s Rest before entering this area, and that’s so that we have Renee’s Ethereal Lens. Interact with the green swirling light to enter the spirit realm. This will reveal something at the top of the stairs: an enormous chest that’s not visible from the mortal realm. Open it for a Chipped Featherknight Talisman which can be sold for 4 Black Marks.
Then head through the door upstairs.
In the first room you’ll pick up a Jagged Locket Shard. The second room is technically optional; it contains an ambush that you can skip by just going directly into the large room from the door at the end of the hallway.
Even though we didn’t deliberately set out to farm experience, your Champions will be one level above the enemies you face at this point, so combat encounters should be less stressful for you. Continue taunting and tanking damage with Braum, topping up health with Illaoi and slicing through enemies like the wind with Yasuo. Or y’know, whatever playstyle floats your boat.
Exit through the northeast door and go up the spiral staircase. There’s a Ring of Stone in the chest at the foot of the stairs; equip it on Braum. At the top of the stairs, you’ll obtain the Small Locket Shard.
You can admire the lovely wide-angle view before returning to the large room. Exit through the southeast door there.
In the next room, there’s a barricaded door to the northeast if you want to explore and get another hint of what’s to come. Otherwise, head southwest. Ignore the huge ornate station for now, you don’t have everything you need for it yet. As the Terminator said… we’ll be back.
Beware ambushes! Dispel the mist and complete the combat encounters before plundering the area. Equip the Weighted Stone Pauldron on Braum, then continue down the corridor. You can inspect the portraits on the wall for another hint of what’s to come.
At the end of the corridor, exit to the next area. Open the treasure chest for a Blue Flame Idol which you can equip on Illaoi.
Head to the northeast corner and complete the mini boss fight, then pick up the Cracked Locket Shard. Depending on how conservative you are with your playstyle, you should have obtained the first potion achievement by this point. If not, don’t worry! You’ll definitely get it in the course of playing the game.
Potent Potables
Consume 10 Potions
Now we have everything we need for the huge ornate station earlier. Return to it and place all three locket shards for a cutscene. You’ll also be rewarded with the Clario Locket, which you can equip on Yasuo.
And with that, we’ve completed our exploration of the Clario Estate.
Head back out to the crossroads near the Rest point, and take the north path. Don’t worry about using the Rest point because there aren’t any more combat encounters until you enter the Temple, and there’s a Rest point in the Temple.
Walkthrough (Part 4A: Buhru Temple)
Overview
This section is the first of a three-part series for the Buhru Temple. This covers the gameplay going to and entering the temple, to the encounter with the first boss fight The Spider Queen.
Achievements covered:
- N.A.
Side quests covered:
- N.A.
Lore entries covered:
- Buhru Temple – The Naga-Speakers (1 of 6)
- Buhru Temple – The Naga-Speakers (2 of 6)
- Buhru Temple – The Naga-Speakers (3 of 6)
- Buhru Temple – The Naga-Speakers (4 of 6)
- Buhru Temple – The Naga-Speakers (5 of 6)
Grey Harbor
Continue north from the crossroads near the Rest point; at the next fork in the road, head left to the Buhru Temple. Don’t bother with the right-hand path unless you’re magpie-ing for loot; the way is blocked by a locked door that we won’t be able to pass for now.
After the camera zooms out to a super wide-angle view, head down the stairs.
There are golden aurora beams along the way that you can interact with for another conversation. Open the treasure chest nearby for a Serpent’s Ring that you can equip on Illaoi. Then follow the path and enter the Buhru Temple.
Buhru Temple
After the cinematic ends, scan and pick up whatever you can find in the area. Use the Rest point if you need it.
Change your active Champion to Illaoi and interact with the large structure to open the entrance to the catacombs, then descend into the darkness.
Remember the pressure plate traps from earlier? Careful, there’s one right in front of you. You can either sprint over the plate or walk around it (yes, there’s enough room on either side, even for a big guy like Braum). There are also a few floor spike traps, so tread carefully and avoid any suspicious cluster of dots on the ground.
Head west first to loot the area and collect the Lore entry Buhru Temple – The Naga-Speakers (1 of 6).Then retrace your steps back to the pressure plate trap, and head through the northeast exit into the next area.
Pick up the next Lore entry Buhru Temple – The Naga-Speakers (2 of 6).
There are quite a few dormant structures lying around; you can ignore them for now. They are actually part of a puzzle that we’re going to solve later.
Head down into the shallow water, continuing to scan and loot as you go. There are some sewer bars at the northmost corner of the pool, but you can also ignore them for now. They are the means of accessing the southeast treasure chest that you can see on the map but you will need to come back here after Pyke joins your Party, and use his Dungeon Ability.
When you’ve picked up everything you can find, continue forward and climb the stairs out of the water. Turn left at the top of the stairs.
You can go under the bridge towards the large ornate treasure chest which looks so tempting, but it isn’t what it seems: interacting with the chest will reveal an ambush, but by this point, your Champions should be strong enough to deal with it relatively easily.
Illaoi should level up again around this time, and you can put a point in 1A of Healing Mist.
After that, you can head onto the bridge (over troubled water) to pick up the Lore entry Buhru Temple – The Naga-Speakers (4 of 6).
Head towards the northeast area, being careful to walk around or sprint over the pressure plate trap.
Don’t go through the large door yet – head southwest first to pick up more loot, including the Lore entry Buhru Temple – The Naga-Speakers (3 of 6).
Before we progress with the story, there’s just one last thing to do in this area for now, and it involves a secret that has something to do with the northern wall herea. Change your active Champion to Braum and inspect the wall (between the glowing purple plant, and the spot where you picked up the third Lore entry). Use Braum’s Dungeon Skill Shield Stomp to break it; the reason for doing so will become apparent later.
Now we’re ready to go into the next area.
Enter the large door and continue northeast to the plinth in the middle of the room. Note that you don’t need to have Illaoi as your active Champion to do this; selecting the option to activate it will automatically change her to being active.
You’ll notice that there’s water on both the northeast and southwest bounds of this area, both of which render the terrain unpassable… for now. Head northwest.
There will be two creepy-crawlies ahead. In particular, beware the giant one, which has a ranged attack that can trap your Party in webs.
After you’ve dealt with the spiders, set Illaoi as your active Champion and interact with the TideShaper Stone dais there.
Press the plate down and select the option to channel the water to the north pool, then head southwest and wade into the south pool to find a glyph. Let Illaoi activate the glyph, then return to the dais.
Press the plate down again, but this time, select the option to channel the water to the south pool. Then head back towards the plinth and continue southwest to go down the steps and wade into the north pool.
We’re going to unlock another secret here. Follow the north wall and change your active Champion to Braum. There’s a hole in the wall on the northeast side of the pool. Inspect the wall where the hole is, and you can send a Poro through to get the Defender’s Ring which you can equip on Illaoi, Steel Fishing Rod and some Flavorful Worms. Check out the Achievement Guide for the Poro Bandit if you want to see the map of the exact location.
Now, wade to the northwest side of the pool to find the other glyph. After Illaoi activates the glyph, new enemies will appear in the area. Fight your way back to the TideShaper Stone dais, and continue northwest through the newly-opened area to enter the Moon Cloister.
The Moon Cloister
There’s something shiny up ahead but wait first. Head north(east) to open the chest for useful loot. Equip the Oracle’s Ring on Yasuo, Fishbone Talisman on Braum and the Chain of Neon Coral on Illaoi.
Touching the shiny thing will trigger the boss fight, so now’s the time to use potions if your Party is low on resources. Walk towards and pick up the Moon Disk to start the boss fight.
If you’re having trouble with this fight, here are two ways you can approach it:
The Spider Queen can almost-perpetually summon Temple Spiderlings to fight alongside her if you knock out the other spiders fighting alongside her. However, choosing to summon will use up her move for that turn. Therefore, you can either:
(1) Focus on taking out the smaller spiders with multi-target abilities that also do damage to the Spider Queen. Your goal is to kill at least one smaller spider before her turn begins every time, so that you force her to waste turns continually summoning spiderlings (which deal less damage than her) and she will not be able to directly attack your Champions as often. Then it’s only a matter of time before her health bar hits zero.
(2) Alternatively, first knock out the Giant Temple Spiders so that they will be replaced with weaker spiderlings. You can then ignore them for the time being and focus all your damage on the Spider Queen herself. Heal up any damage from the little spiders, then you can deal with them after taking out the Spider Queen.
Yasuo would likely level up from this fight, and you can put a point in 2A of Raging Wind.
Leave the Moon Cloister, return to the plinth and embed the Moon Disk. One down, one more to go.
In the southwest area, pick up the Lore entry Buhru Temple – The Naga-Speakers and open the chest.
Now let’s go find that Sun Disk!
Walkthrough (Part 4B: Buhru Temple)
Overview
This section is the second of a three-part series for the Buhru Temple. This covers the gameplay from the Solarium puzzle to the stage just before the final boss fight Xa’tal, The False Goddess.
Achievements covered:
- N.A.
Side quests covered:
- N.A.
Lore entries covered:
- N.A.
Buhru Temple
For now, we’re done with the area where the Sun and Moon plinth is. Return to the previous area.
New enemies have spawned, so take them out as and when they cross your path.
Head southwest towards the Solarium, and have Illaoi as your active Champion to open its entrance.
The Solarium
Go down the stairs and interact with the device to reveal a puzzle.
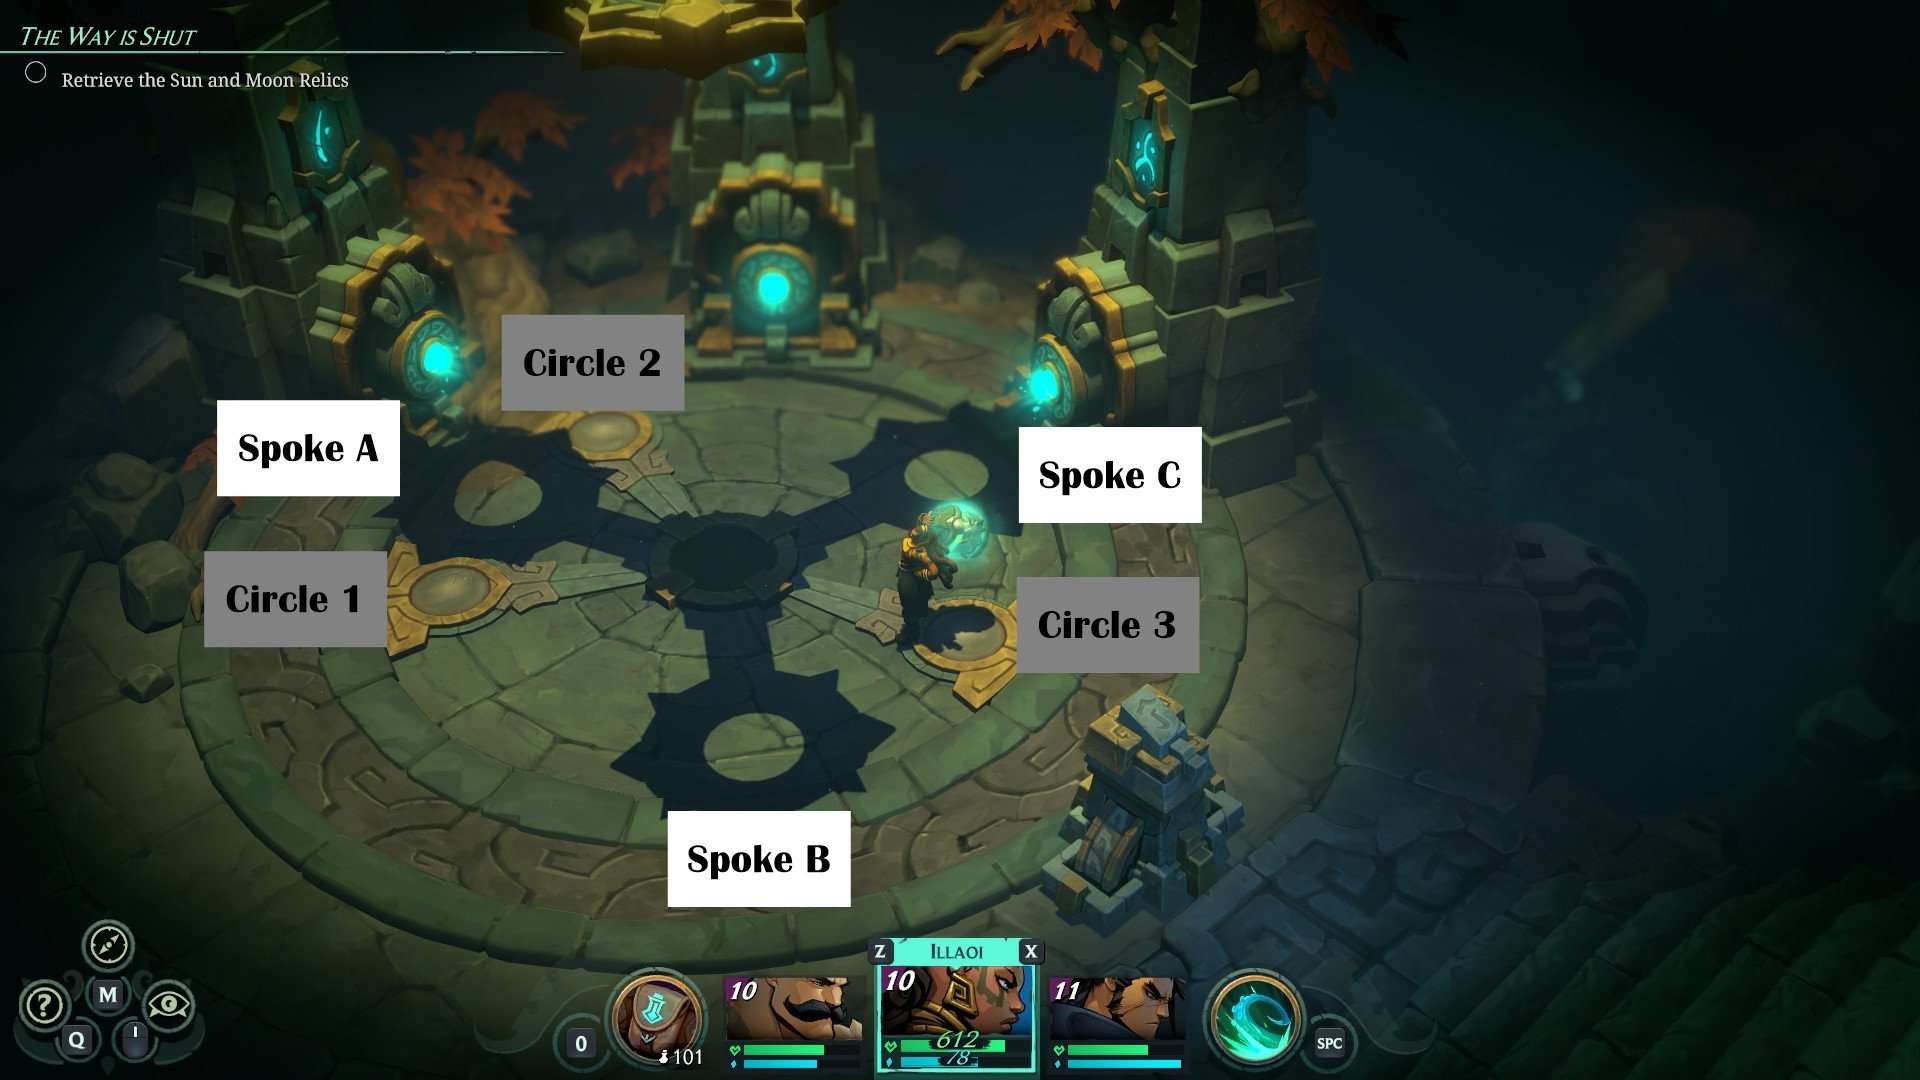
You need to align all three spokes with the circles on the ground in order to proceed. The three glowing blue devices are a mechanism for moving the spokes. Each device moves a different number of spokes for a different distance in an anticlockwise direction.
Here are some hints (but no answer) on how to go about solving this:
- (a) There are twelve possible slots that each of the spokes can land on.
- (b) The rightmost device moves all three spokes anticlockwise by three slots.
- (c) The middle device moves only Spokes A and C anticlockwise by two slots.
- (d) The leftmost device moves only Spoke C anticlockwise by three slots.
If you’re still stuck, here is the solution:
- Step 1: Activate the rightmost device three times in succession. Spoke B should become aligned with Circle 1.
- Step 2: Activate the middle device two times in succession. Spoke A should become aligned with Circle 3.
- Step 3: Finally, activate the leftmost device once. Spoke C should become aligned with Circle 2.

Take the Sun Disk and leave the Solarium.
Buhru Temple
After the brief cutscene, it’s time for us to follow the light. Again, take out any of the newly-spawned enemies that get in your way; you’re considerably stronger than any of them at this point.
Head northeast to the first light beam, and follow it to the first device. Activate the device three times in succession, which will reflect a line of light to the southwest.
Head southwest and follow the light to the second device. Activate the device once to reflect a line of light to the southeast.
Make your way across the pool. After you come up out of the water, there’s a levitating blue orb on the structure ahead of you. Interact with the orb to gain a new enchantment “Healer”.
Head southwest to the third device. Activate this once to reflect a line of light to the northeast. This is the reason why earlier on, we used Braum’s Dungeon Skill to break the wall, to allow the light to pass through.
We’re almost done with this puzzle. Return to the area with the Sun and Moon plinth, then head southwest and go down the stairs to the last device. Activate the device once to reflect a line of light to the northwest. This will complete the puzzle and grant you access to a hidden room.
If your Party had taken damage from any previous combat encounters, now would be a good time to use your potions before going into the room.
Enter the room, defeat the mini-boss and open the chest for a Protector’s Pin which you can equip on either Illaoi or Braum.
When you’re done, return to the Sun and Moon plinth to embed the Sun Disk. Press the completed disk down to grant you access to a new path to the north.
There’s a Rest point that you can use to recover your Champions’ health and mana, and you can also watch the new Rest point conversation here.
Now on to the last stage for the Buhru Temple!
Set Illaoi as your active Champion and let her open the door to the north. Go through to the Grand Overlook Altar.
Walkthrough (Part 4C: Buhru Temple)
Overview
This section is the third of a three-part series for the Buhru Temple. This covers the final boss fight Xa’tal, The False Goddess.
Achievements covered:
- Put to Rest
Side quests covered:
- N.A.
Lore entries covered:
- Buhru Temple – The Naga-Speakers (6 of 6)
Grand Overlook Altar
After you enter the Grand Overlook Altar area, pick up the Lore entry Buhru Temple – The Naga-Speakers (6 of 6).
There’s a boss fight ahead of you.
This boss requires a certain playstyle with specific mechanics. I recommend changing your Champions’ ability points up a little just so that you can make the fight a bit easier:
- Illaoi: Grace of Nagakabouros 1A and 2A, Crashing Tides 1A, Test of Spirit 1B and 2B
- Braum: Raised Shield 1A, Stand Behind Me 1A, Shield Slam 1A, Heroic Leap 1B and 2A
- Yasuo: Steel Tempest 1A and 2B, Way of the Wanderer 1A, Raging Wind 1A and 2A, Gathering Storm 1B
If you’re having difficulty with the fight, use the Inspect mode to read more about the boss’ mechanics. Here is the general approach for the fight:
Xa’tal is immune to debuffs and immune to most damage (i.e. she takes significantly reduced damage from direct attacks). She has the ability to summon Chanters to join her in battle.
Chanters do not have offensive combat abilities. On their turn, they will apply stacks of ‘Empowering Faith’ to themselves. If Xa’tal sacrifices a Chanter, she gains power proportionately to the number of stacks of ‘Empowering Faith’ on that Chanter. Xa’tal can sacrifice more than one Chanter at once, and will use this ability if her Chanters are getting low.
It’s not efficient to directly attack Xa’tal, since she blocks close to 90% of damage from an attack (e.g. a 60 damage attack only reduces her health by 7 points, and your Ultimate Ability barely tickles her). The main way to take her down is to make her absorb ‘Corrupted Faith’ from her chanters.
Debuff stacks on Chanters are converted to stacks of ‘Corrupted Faith’ when a Chanter is killed by a Champion. Each ‘Corrupted Faith’ stack will deal 4% of Xa’tal’s maximum health as true damage (i.e. will not be reduced the same way as damage from directed attacks). This means that outside of any healing, you can kill Xa’tal by applying 25 debuff stacks on Chanters before killing them.
Here is the more detailed strategy for the fight:
Begin the battle by getting your defences up, since Xa’tal can hit for a crazy amount of damage. Illaoi has Tentacle Barrier, Yasuo has Wind Wall, and Braum has Stand Behind Me.
Your most reliable way to apply debuff stacks on Chanters is to have Braum use a multi-target attack like Heroic Leap so that you can begin accumulating Concussive Blows stacks on the Chanters.
If you followed the skill point recommendations above, Braum’s Heroic Leap will apply three stacks to each Chanter and you can add another six stacks with Shield Slam, giving you the possibility to damage 48% of Xa’tal’s maximum health from just these two turns.
But applying debuff stacks won’t result in damage if the Chanter isn’t slain by a Champion. Once Braum has applied the first Concussive Blows stacks, immediately go to town on the Chanters with your other combat abilities so that you add more stacks and drop their health to zero as quickly as possible.
Note: if you reach 12 Concussive Blows stacks on a Chanter, all stacks will be consumed and the Chanter will be stunned. Your priority here is to get stacks, not crowd-control, so be careful not to hit 12.
Braum’s almost exclusively going to be applying debuff stacks with Heroic Leap and Shield Slam, while Illaoi continuously refills everyone’s health and sneakily gets more stacks in with her tentacles passive. Yasuo contributes with Bleed for even more debuff stacks.
Use multi-target abilities on Yasuo to get even more stacks of Concussive Blows in and, most importantly, kill the Chanters. It’s much better to “cash in” 4 debuff stacks on a Chanter early instead of getting greedy and letting Xa’tal sacrifice a surviving low-health 11 debuff stacked Chanter.
Don’t panic if Xa’tal has not summoned any replacement Chanters. It may be an unintended interaction, but Illaoi’s tentacles passive is actually very good against Xa’tal as a solo opponent. Xa’tal does not reduce the damage from Illaoi’s tentacles, which can each hit her for at least 5 damage per turn. This can result in more damage than a direct attack on Xa’tal herself.
If you knock out Xa’tal, any Chanters that are still in battle at that point will automatically be defeated.
Depending on how conservative you are with your playstyle, you should have obtained the first potion achievement by this point. If not, don’t worry! You’ll definitely get it in the course of playing the game.
Potent Potables
Consume 10 Potions
And with that, we’ve also earned another achievement:
Put to Rest
Cleanse Grey Harbor from Black Mist
After the cutscenes, take the east exit and unlock that mysterious door to return to Grey Harbor.
The fastest way back into town is to cut through the building with the Rest point and use its southwest door to reach the Town Square. Steamroll any unlucky foes who happen to cross your path – you’re significantly stronger than them now.
Walkthrough (Part 5A: Fortune’s Estate, Recommended Respec)
Overview
This section is the first of a multi-part series covering the other side quests in Bilgewater. We’re taking a break from the main quest line to sort these out first. This section covers the return to Fortune’s Estate and my recommended respec.
Achievements covered:
- O Captain, My Captain
Side quests covered:
- N.A.
Lore entries covered:
- N.A.
Fortune’s Estate
We’re expected back at Miss Fortune’s now, so let’s complete that part of the main questline before we head off on some side errands.
First, visit the Rumor Monger to buy all seven available Rumors. These are the side quests that we’re going to activate all at once and clear before we progress further.
Make your way back through Docks Harbor, Fleet Streets, Slums Market and Fortune’s Estate. You can fight the panic-stricken enemies along the way if you want, but it’s really not worth the trouble since you won’t get any experience from being so overleveled in these combat encounters.
Once you reach Fortune’s Estate, head straight up to the Captain’s Chambers and talk with Miss Fortune.
After all the conversations, you’ll get another achievement:
O Captain, My Captain
Have Miss Fortune join your Party
Don’t leave Fortune’s Estate yet. Go back up to the Captain’s Chambers. There’s a secret here: change your active Champion to Miss Fortune and scan the area. You’ll see an object glowing orange near the table to the west that you can pick up to receive the Ripped Portion of Abigale’s Blueprints.
Miss Fortune comes with her default weapons Shock and Awe and armor Captain’s Jacket which you’ll be using for a while, so feel free to use some white essence and infuse them under Tier 1 – Rare Infusion of the “Enchantments” tab, then further infuse them under Tier 2 – Epic Infusion of the “Enchantments” tab.
Recommended Respec
I recommend using Illaoi, Braum and Miss Fortune in your Party, because they provide a good balance of sustain, tankiness and damage. Also, we’ll need Braum’s Dungeon Skill later.
For Illaoi, consider Tentacle Slam 1B and 2A, Grace of Nagakabouros 1A and 2A, and Healing Mist 1A and 2A. Take the runes Healing Power Rank 1 and Healing Power Rank 2 to grant you the 3-rune attack power mastery perk in Kraken Priestess.
For Braum, consider Concussive Blow 1B and 2A, Raised Shield 1B, Stand Behind Me 1A and 2B, and Heroic Leap 1B. Take the runes Deterrence and All Defense Up to also grant you the 3-rune defensive mastery perk in Bulwark.
For Miss Fortune, consider Double Up 1A and 2A, Guns Blazing 1B and 2B, and Heart Breaker 1B and 2A. Take the runes Evade Up Rank 1 and Killing Blow to grant you the 3-rune attack power mastery perk in Gunslinger.
(Just for completeness, here’s the recommendation for Yasuo: consider Steel Tempest 1A and 2B, Way of the Wanderer 1A, Raging Wind 1A and 2A, and Gathering Storm 1B. Take the runes Crit Chance Up Rank 1 and Crit Chance Up Rank 2 to also grant you the 3-rune critical chance mastery perk from Way of the Wanderer.)
Equip Miss Fortune with the Clario Locket and Oracle’s Ring that Yasuo was holding, and equip Braum with the Protector’s Gorget.
We’re going to put the main quest on hold for the time being and deal with the side quests before we head to the Watchtower.
Walkthrough (Part 5B: Through the Lens, The Bard’s Ballad)
Overview
This section is the second of a multi-part series covering the other side quests in Bilgewater. We’re taking a break from the main quest line to sort these out first. This section covers two side quests.
Achievements covered:
- N.A.
Side quests covered:
- Through the Lens
- Bounty: Giffin the Hextech Thief
- The Bard’s Ballad
Lore entries covered:
- N.A.
Side Quest: Through the Lens
Exit to the Slums Market, but instead of taking the northeast exit to Docks Harbor, head southeast for the Slaughter Docks.
In the Slaughter Docks, head east along the long wooden bridge. After you find your feet on solid ground, interact with the golden aurora beams for another conversation. Then head southeast towards the Captain’s Pub, where you had first started playing as Illaoi.
We’re going to unlock a secret here: interact with the strange swirling light in front of you to reveal a large box. You’re not going to be able to open it, so just select the option to take the box. We’ll complete this side quest by bringing it back to Renee at the Baron’s Rest.
Go back up to the bridge where you first spawned as Illaoi. There’s a secret here: change your active Champion to Miss Fortune and scan the area. You’ll see an object glowing orange on the ground that you can pick up to receive the Aged Piece of Abigale’s Blueprints.
Bounty: Giffin the Hextech Thief
Retrace your steps, but instead of going back west to the Slums Market, take the north stairs up to the Warrens.
Make your way towards the Slaughter Shed. You can either deal with the enemies in your way, or just sprint past them.
If you did take on any combat encounters, use the Rest point in the Slaughter Shed to heal up before proceeding into the next area.
Be careful when going to trigger the combat encounter, Giffin has a large and surprisingly-long-range area of effect skill that can inflict quite a bit of damage before the combat encounter begins, if you’re caught unaware. If he starts firing, hide in a corner, then rush at him when his back is turned.
After the fight, there’s a secret to be unlocked at the northwestern end of the area. Interact with the strange swirling light to reveal a treasure chest containing a Cracked Featherknight Talisman worth 2 Black Marks. Loot the rest of the area before leaving.
You can use the Rest point again to heal up before heading back to Slums Market. If any unlucky enemies cross your path along the way, you can either sprint past them or teach them a lesson.
From Slums Market, head to the Baron’s Rest. Go upstairs and return the box to Renee to complete the side quest “Through the Lens”.
The Bard’s Ballad
Go back to the first floor of the Baron’s Rest and go through the leftmost door (where we did the side quest “Deadly Currency” the last time we were here. For some giggles, after you enter the corridor, you can interact with the first door on the right to hear the difficult diner still having some… issues with the shellfish.
Enter the second door on the right and talk to the Bard sitting alone at the table. Tell him that you want to help him become a better bard so that we can start the side quest “The Bard’s Ballad”.
Now we can leave Baron’s Rest.
First, let’s get the instrument. Head to Slums Market.
You’ll see a man playing some music near the centre of the area. Talk to him and buy Sandra for 150 Gold.
Next, let’s get the source material. Head back to Baron’s Rest.
Go upstairs to the room that we had unlocked with the key from “The Difficult Diner” incident. Talk to the merchant there and get the “Modestly Written Stories by Average Authors” for 200 Gold. (On that note, ignore the mismatch between the store listing and inventory description for the “Modestly Written” and “Fantastic Stories” books.)
Return to the Bard and give him both items. After the performance, he’ll give you a reward.
For those who are curious, here is the complete list of all the permutations through which you can complete this quest, with their corresponding outcomes. If you’re feeling particularly sadistic, you can save your game to watch the alternate ending(s) play out.
For 400 Gold and a dead Bard, get:
- Lilly and either “A Collection of Overused Cliché Tales” or “Modestly Written Stories by Average Authors”.
- Sandra and “A Collection of Overused Cliché Tales”.
For 400 Gold and a live bard, you can do any other combination of items. It’s interesting that merely changing the instrument to the expensive Belle can salvage the cliché tales that would otherwise have gotten him killed.
The Bard gives an identical response to receiving the most expensive / second most expensive instrument and source material, so it’s unlikely that you need the most expensive items to complete the quest.
Walkthrough (Part 5C: Count Quests, Bounties, Fluffy, Lighthouse)
Overview
This section is the third of a multi-part series covering the other side quests in Bilgewater. We’re taking a break from the main quest line to sort these out first. This section covers three side quests, the first three bounties, and access to the Lighthouse.
Achievements covered:
- Bounty Cadet
- Enchanting Novice
Side quests covered:
- The Cursed Count
- The Countess Evalista
- The Countess Evalista* a second quest, if you believed her the first time
- Bounty: Malik
- Bounty: Giffin the Hextech Thief
- Bounty: “Housecrasher” Corvin
- Fluffy is Missing
Lore entries covered:
- N.A.
The Cursed Count, The Countess Evalista
Now that you have Miss Fortune in your party, we can do the series of side quests involving the Count and Countess.
Head to the area near the Tide Stockades (where you met Owen previously for the “Like a Dog in the Streets” side quest). A crowd has gathered, and when you approach, a cutscene will play. Watch the Count drown to complete the side quest “The Cursed Count”.
This will unlock the next side quest “The Countess Evalista”. Go into the Tide Stockades, scanning and looting as you go. You don’t have to talk to the jailer at the front desk if you don’t want to.
The Countess’ cell is located in the Tide Stockades, at the end of the second floor. Interact with her to open up a conversation menu with two possible options:
- Option 1: You can choose not to believe her, which completes the existing side quest but does not give you anything further.
- Option 2: You can choose to believe her, which gives you a second side quest with the exact same name.
If you choose Option 2, here is the solution to complete the second side quest: Head downstairs to talk to the jailer. Select “Purty” as the name of the plant, and tell the jailer that it seems that someone is trampling flowers outside. The jailer will rush to the defence of the poor flora, leaving his post unattended. Pick up the keys and return to the cell; the second side quest will play out naturally after that.
Bounties
Now you can head to the Bounty Board to claim two bounties for Malik and Giffin the Hextech Thief. This will also give you the first bounty-related achievement:
Bounty Cadet
Complete a Bounty mission
Now we’re going to collect the third bounty, “Housecrasher” Corvin. He’s located at the Boat House in the easternmost region of the Docks Harbor.
Equip the Warrior’s Orb on Miss Fortune, the Noble’s Choker on Illaoi and the Protector’s Pin on Braum. You’ll be using this equipment for a while, so feel free to use some green essence. Infuse the Noble’s Choker under Tier 2 – Rare Infusion of the “Enchantments” tab, then infuse the Noble’s Choker and Protector’s Pin under Tier 2 – Epic Infusion of the “Enchantments” tab.
Then make your way to the Boat House.
At the Boat House, fight the doorman to gain entry to the room inside. After you enter the Boat House, open the chest and heal up if you need to, before initiating the fight with Corvin.
The fight should be manageable, especially at your Champions’ current level; after you’re done, return to the Bounty Board. Claim the third bounty for “Housecrasher Corvin” and add another two new bounties to your quest log.
Corvin’s bounty will grant you Leviathan, which I recommend you enchant with Quick Learner and equip on Illaoi once you get it. This will help with your experience gains, and also unlock an achievement:
Enchanting Novice
Enchant your first item
We’re going to go for the fourth bounty in the next section, but for now, just two more loose ends to tie up.
Fluffy Is Missing
You’ll likely need the Rest point after fighting Corvin, so let’s head there now. Use the Rest point to heal up, then talk to the sailor sitting in the corner near the Rest point.

Agree to go find “Fluffy”, which is actually the plundercrab you may have seen in the Ship Salvage Yard.
Mosey over to the Ship Salvage Yard and offer Fluffy the cabbage. It will follow the cabbage, so you can walk back slowly to the sailor leading Fluffy. You’ll probably have to walk a bit and stop to wait for it to catch up – if you sprint, Fluffy will lose you.
After you return to the sailor, hand over the cabbage to complete the side quest. You’ll receive 50 Gold and 5 Fermented Cabbage for your efforts.
Lighthouse
Back to the Ship Salvage Yard we go.
Head east and then go into the room under the dock. Open the treasure chest for more potions, then talk to the shopkeeper and trade in 20 Black Marks for the Lighthouse Key.
With your new key, go to the Lighthouse north of the Ship Salvage Yard. Unlock the door and pick up the loot on the stairs. At the top of the lighthouse, open the treasure chest to get a Troll Ring and Purification Ward that you can equip on Illaoi, and a Silver Bullet that you can equip on Miss Fortune.
There’s also a secret here: change your active Champion to Miss Fortune and scan the area. You’ll see an object glowing orange near the telescope that you can pick up to receive the Tattered Piece of Abigale’s Blueprints.
This is a very early Lighthouse pick up (you’ll notice the items are significantly higher leveled than your Party) with the intention of making the next section easier for new and casual players. Of course, if you want more of a challenge in your next combat encounters, you can refrain from equipping these items for the time being.
We’re going to go for the fourth bounty now, as well as the next side quest “Sanctified Shakedown”.
Walkthrough (Part 5D: Arena Battles)
Overview
This section is the fifth of a multi-part series covering the other side quests in Bilgewater. We’re taking a break from the main quest line to sort these out first. This section covers the first three Arena battles that you can do in the Baron’s Rest.
Achievements covered:
- Arena Champion
Side quests covered:
- N.A.
Lore entries covered:
- N.A.
Arena Battles
Head to the Baron’s Rest and go to the Arena. It’s the area near the bathroom and Bard, that we had unlocked earlier from the side quest “Deadly Currency”. Show the doorman the coin to gain access to the Arena – it doesn’t matter which dialogue option you choose to get in.
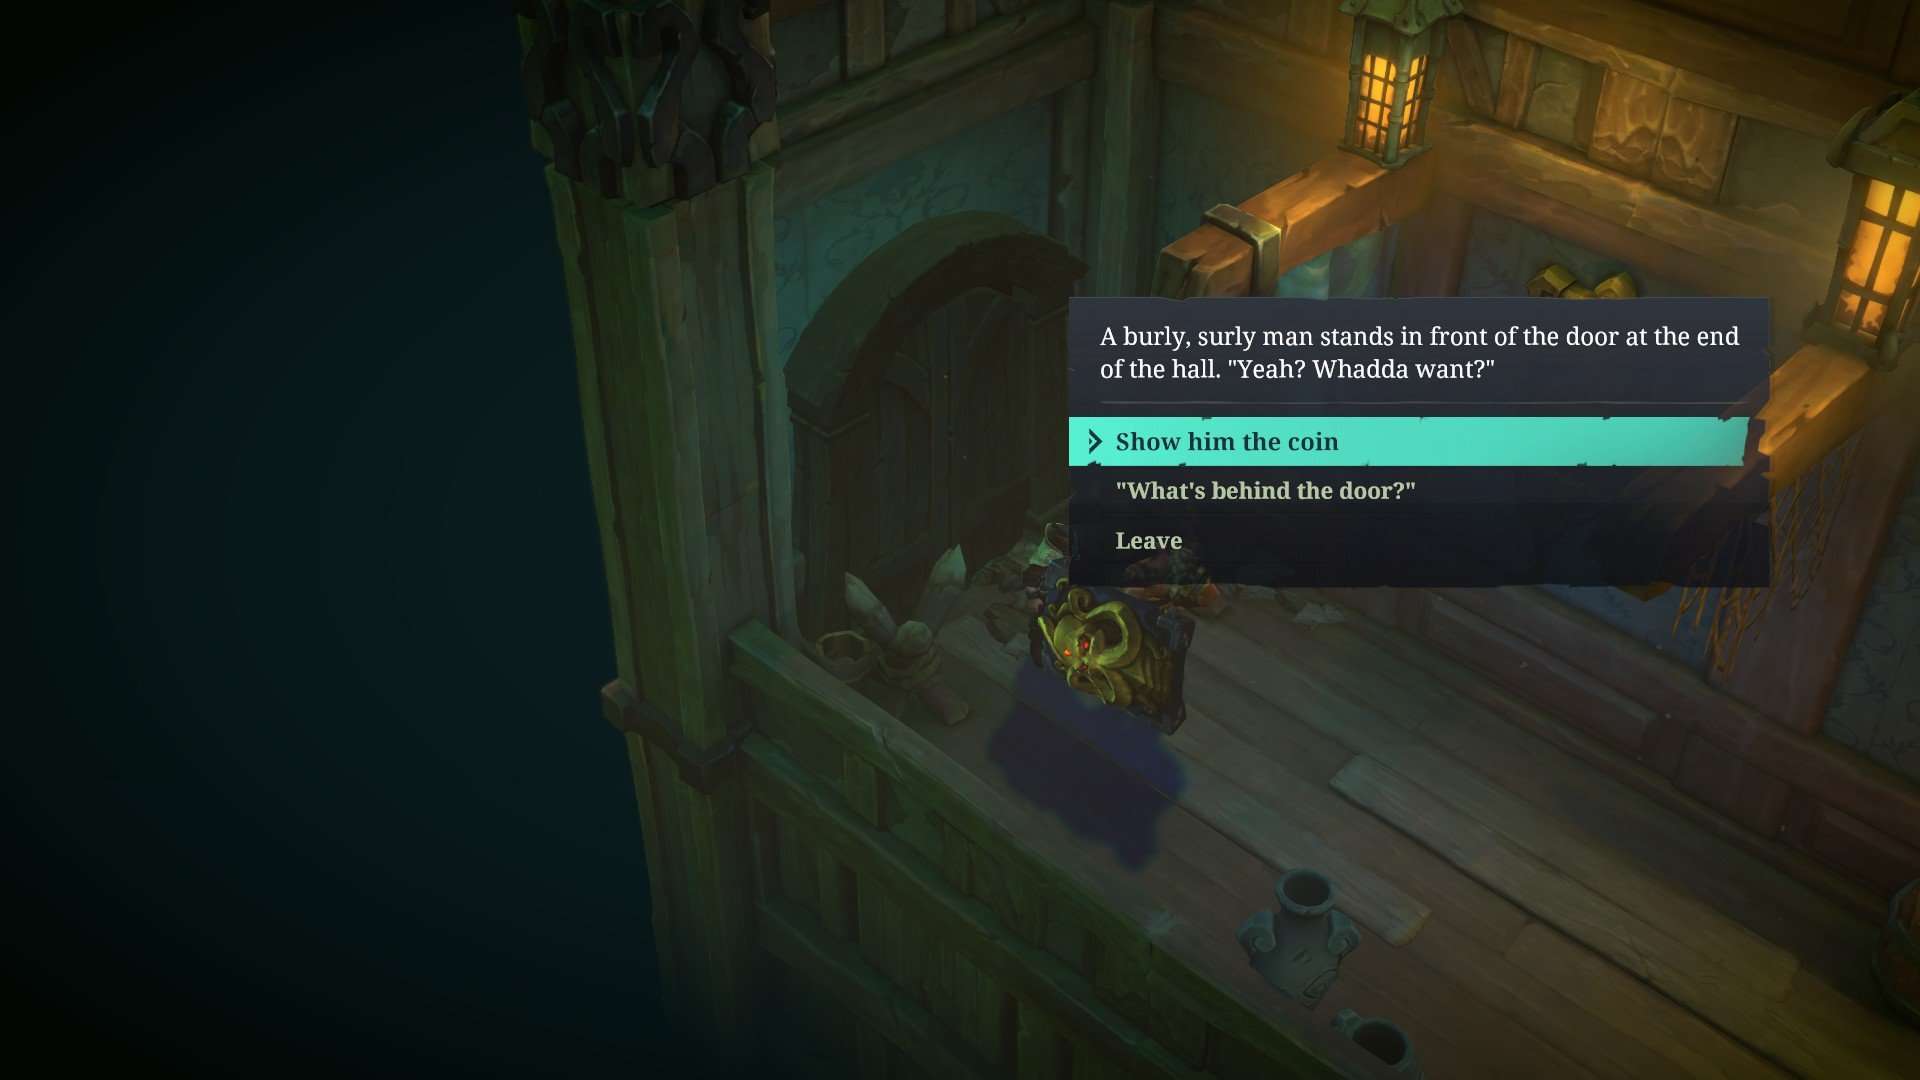
In the Arena, you will select a Champion (or Champions) to go into the arena and have a combat encounter with a pre-set enemy from the game.
It’s recommended for your Champions to be at least level 14 (if you’re short of some experience, consider completing the Fleet Streets sidequests described in Part 5F first before coming back) but if you’re game for a challenge, the third fight is manageable even at level 13.
Note that you could technically have incurred some heavy shoe leather costs to come back here multiple times for these whenever your Champions hit the corresponding level, but since this guide is built around efficiency (and to give a less stressful experience to the new and casual player) we’re going to do three battles one after another now.
First Battle
The first enemy is a Level 6 Shoal Walker that costs 100 Gold to fight. Defeating it gives you the Reinforced Leather Armour as a reward.
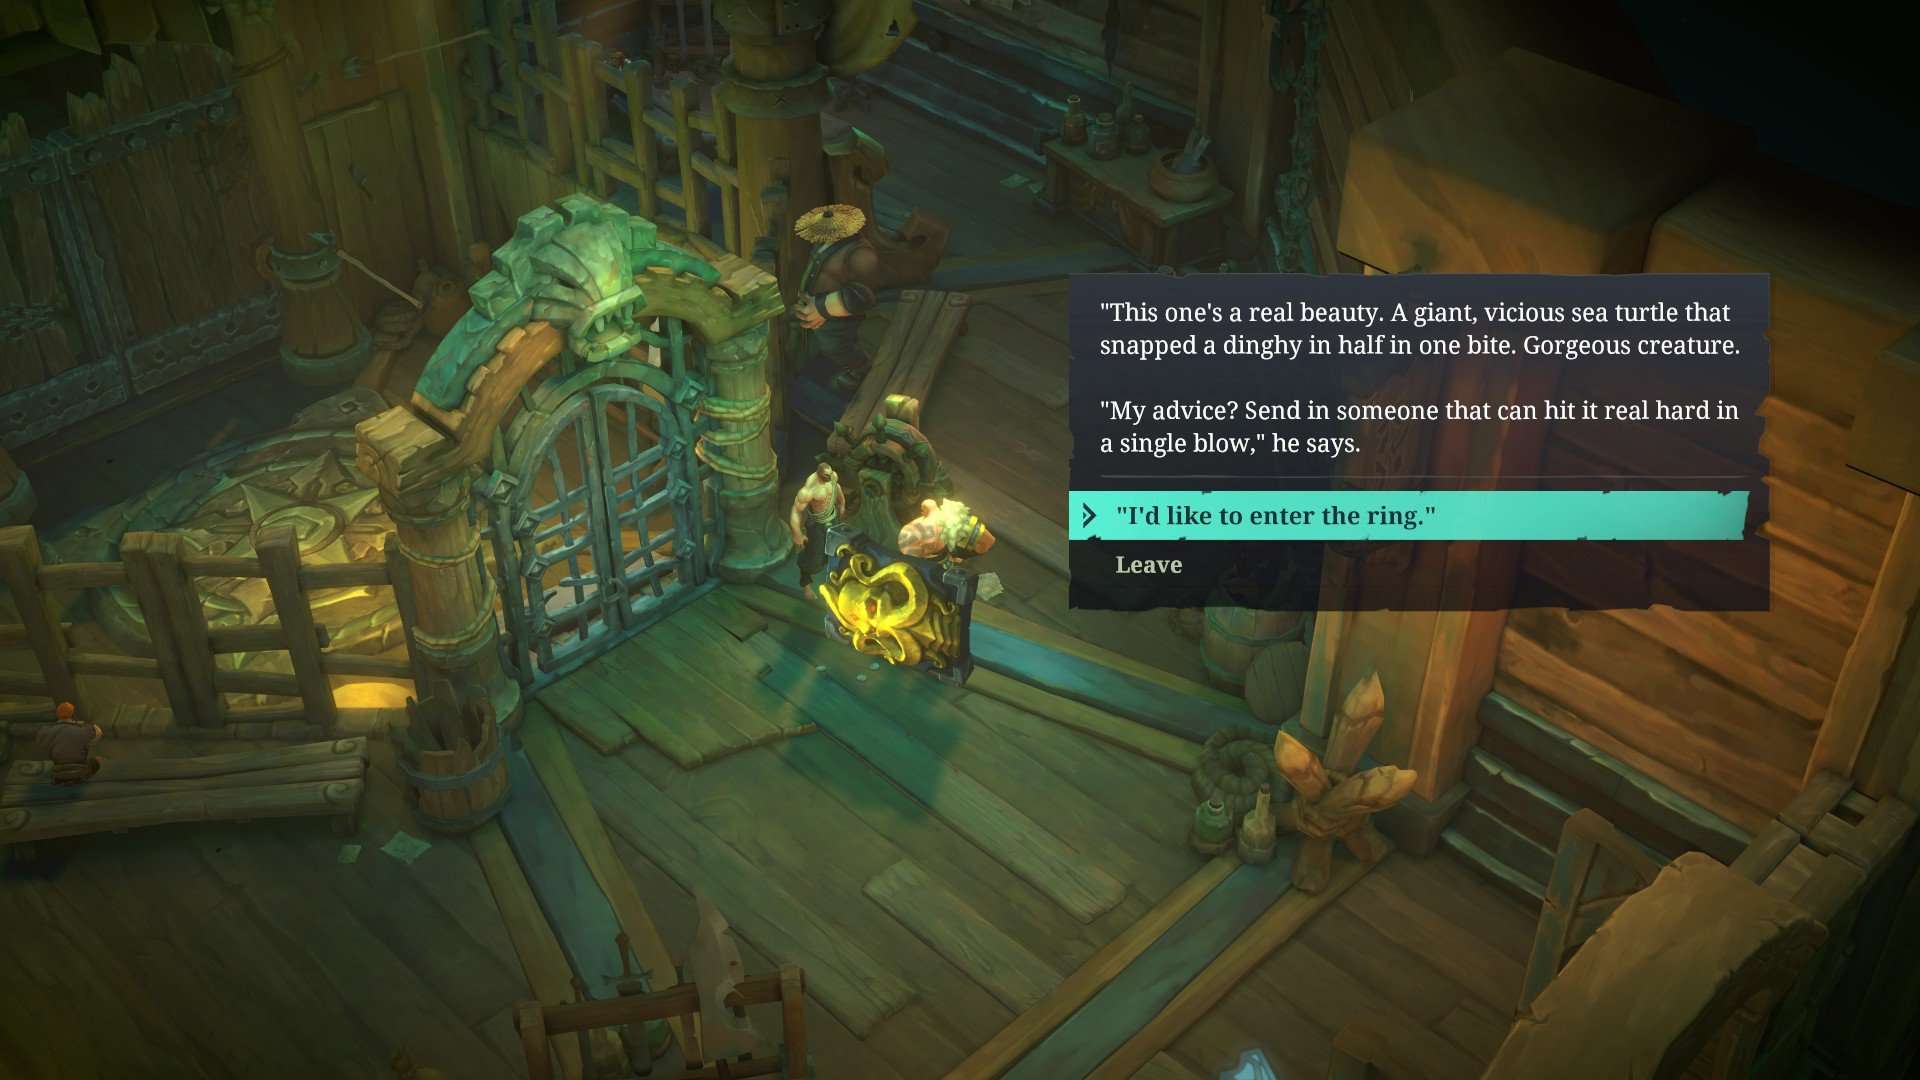
At this stage, it doesn’t matter which Champion you choose, since you’ll probably one-shot or two-shot it for zero experience.
Second Battle
The second enemy is a Level 9 Cannon Crab that costs 200 Gold to fight. Defeating it gives you the Dock Worker’s Pauldron as a reward.
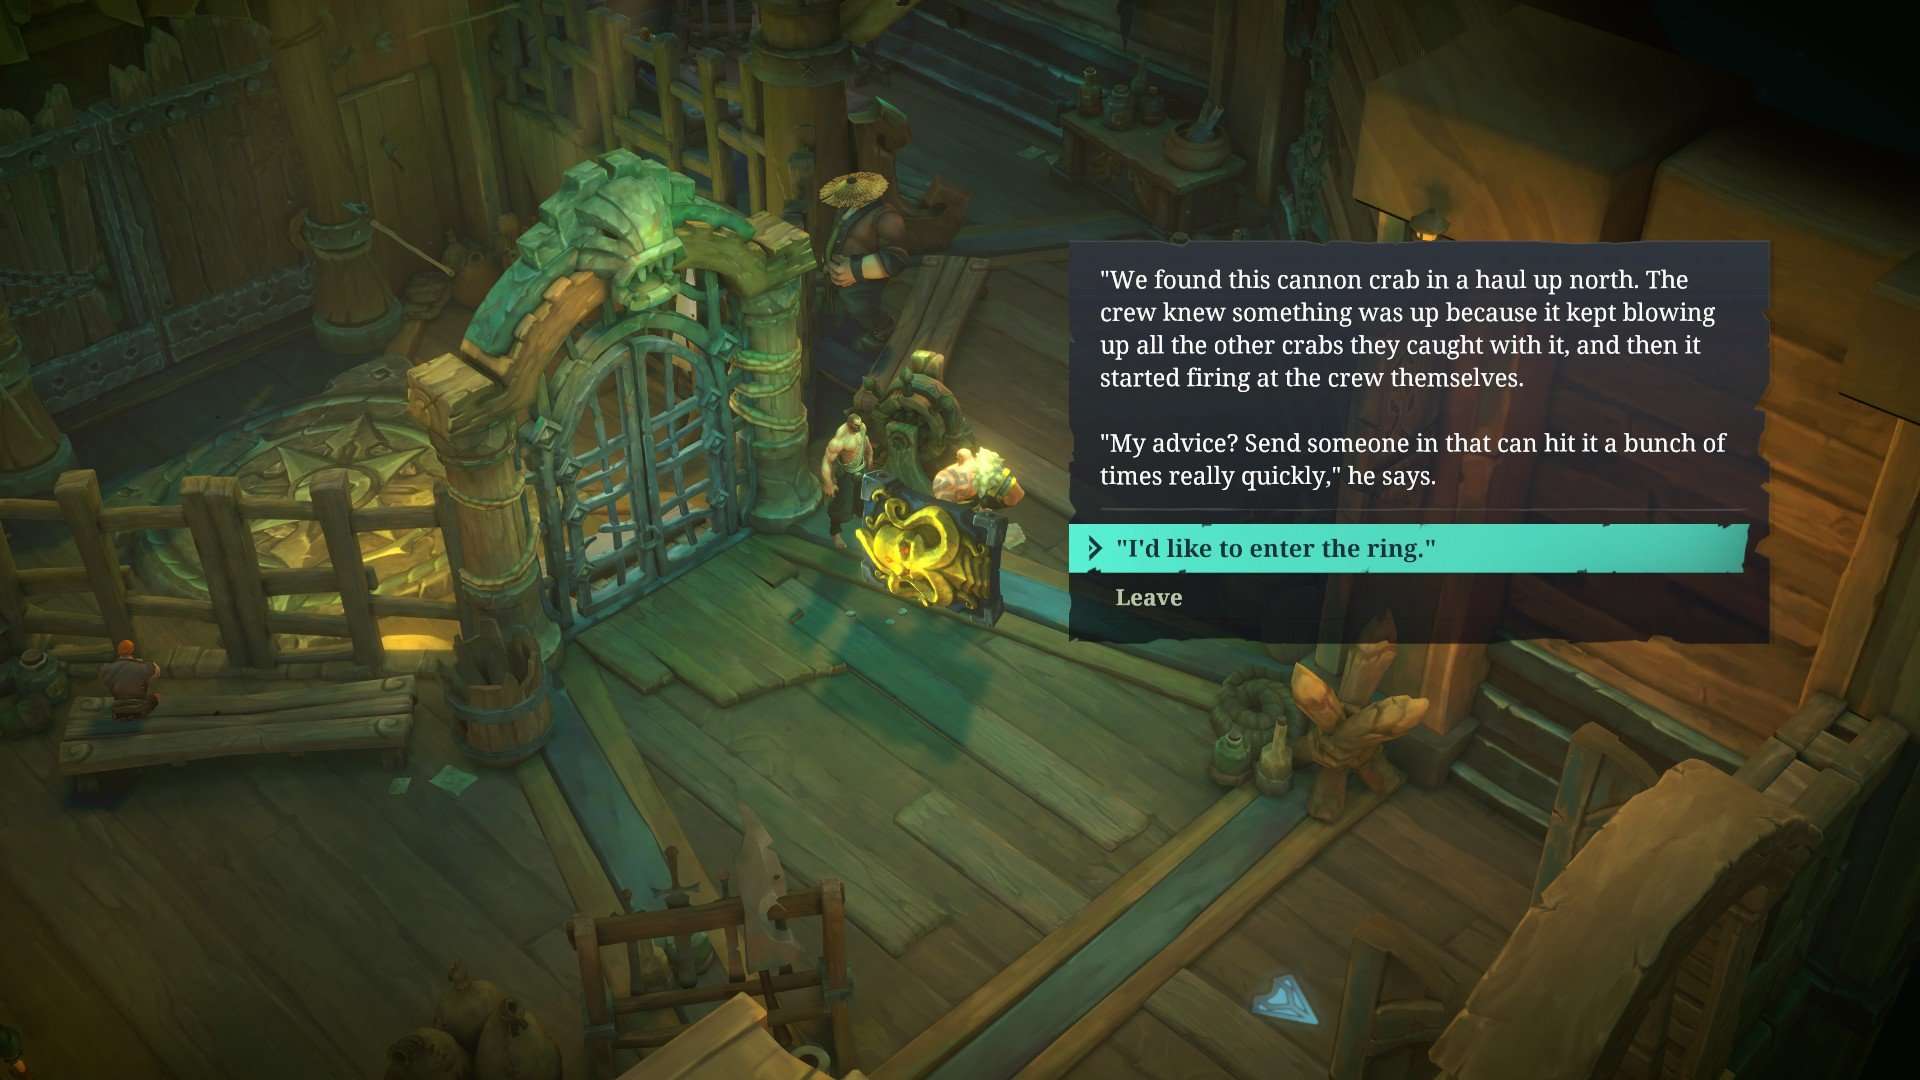
You should go with either Miss Fortune or Illaoi to hit it multiple times quickly, but again, you’re pretty overleveled for this fight.
Equip the Dock Worker’s Pauldron on Braum, then go for the third fight (which will be our last for now).
Third Battle
The third enemy is a Level 14 trio of crabs called Anguish, Destruction and Misery that costs 350 Gold to fight. Defeating them gives you the Inventor’s Pistols as a reward.
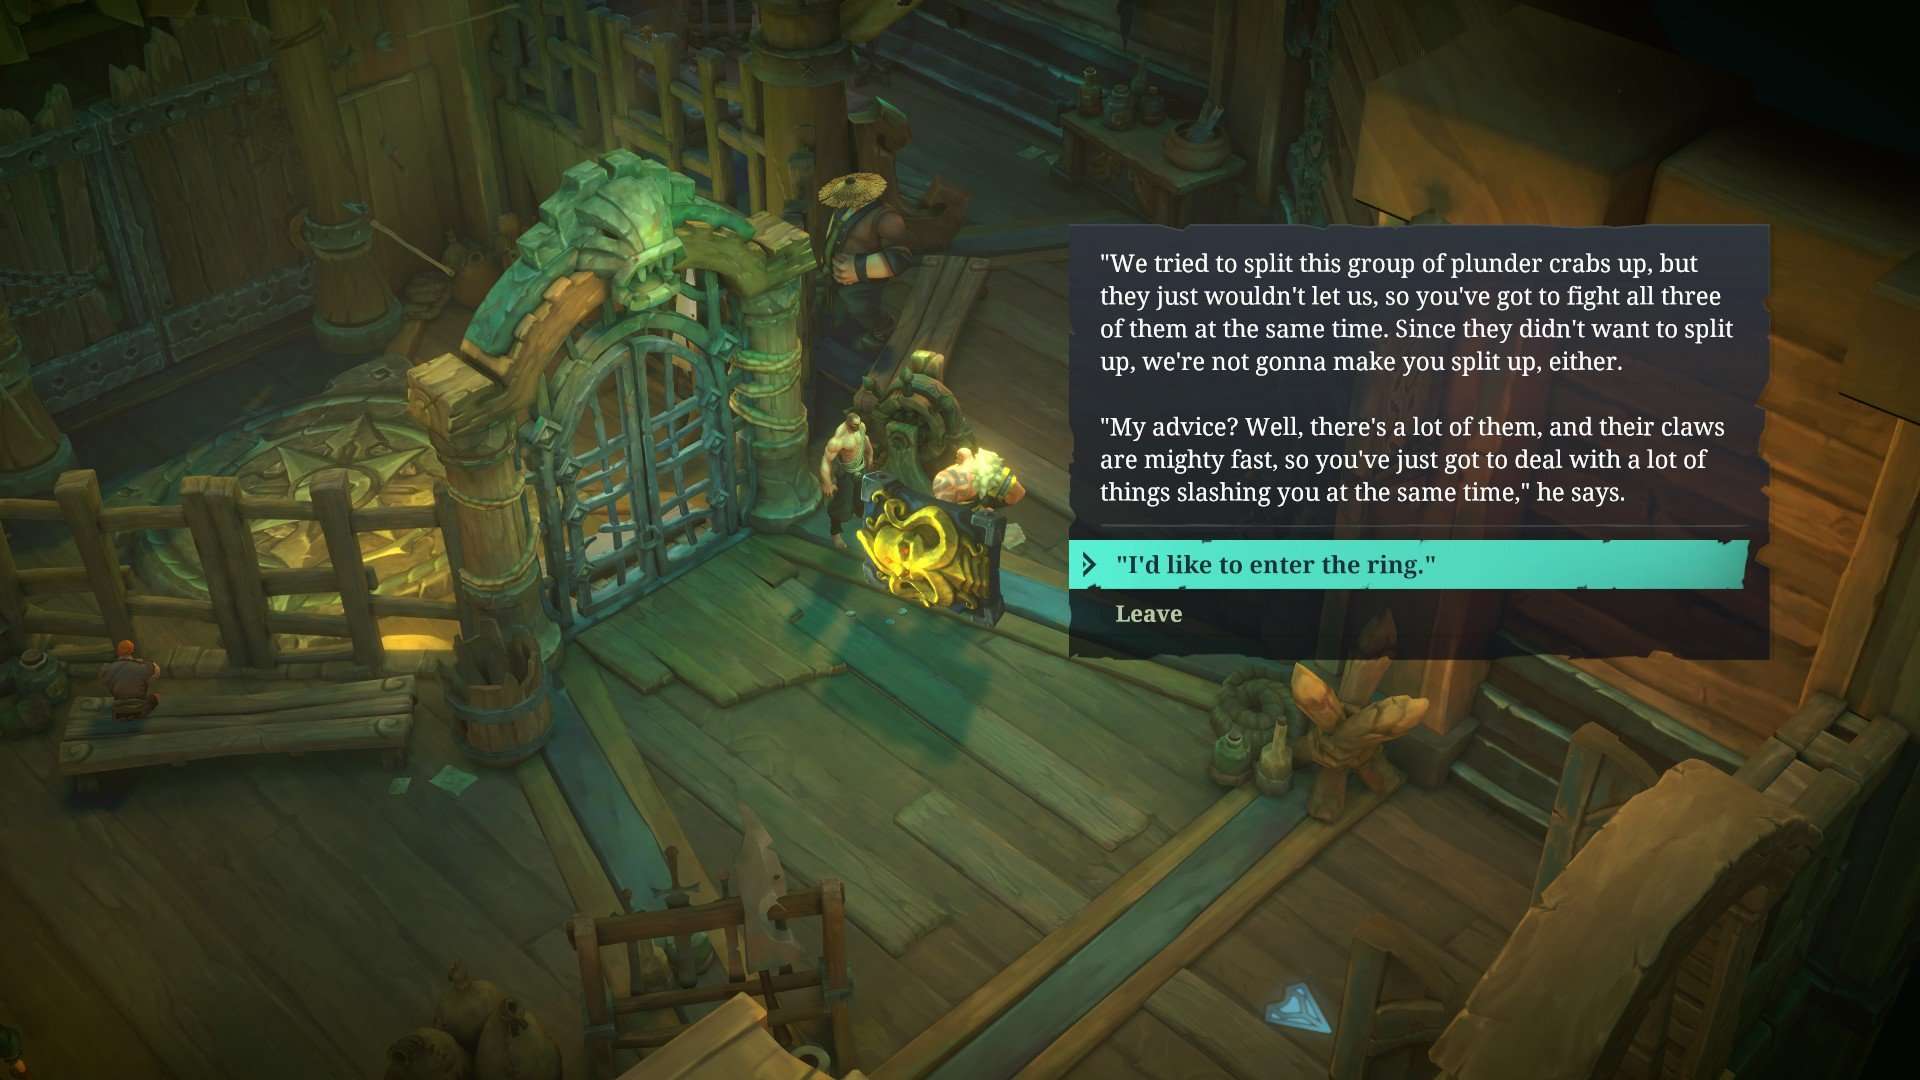
You can fight as a party of three; their health bars may look intimidating, but don’t panic. Focus them down one by one: one takes increased damage from speed lane attacks, one takes increased damage from balance lane attacks, and one takes increased damage from power lane attacks. Just make sure your own defences and sustain are in place, and it’s relatively straightforward.
Equip the Inventor’s Pistols on Miss Fortune, and we’re done with the Arena for now.
Oh, and finishing the third battle will also give you an achievement:
Arena Champion
Complete 50% of Baron’s Rest Crucible battles
Three down, three more to go! We’ll be back.
Walkthrough (Part 5E: Fleet Streets)
Overview
This section is the sixth (and last) of a multi-part series covering the other side quests in Bilgewater. We’re taking a break from the main quest line to sort these out first. This section covers the side quests in the Fleet Streets.
Achievements covered:
- N.A.
Side quests covered:
- Small Fish in a Big Bilgewater
- Debt Collector
- Friendly Neighbors
- Surface Appearances
Lore entries covered:
- The Great Sapphilite Heist (3 of 5)
- The Great Sapphilite Heist (4 of 5)
- The Great Sapphilite Heist (4 of 5)
Small Fish in a Big Bilgewater
Enter Fleet Streets from the side that’s closer to the Slums Market entrance (i.e. one level lower than the side closer to the Docks Harbor entrance).
Take a left at the first junction and pick up the Lore entry for The Great Sapphilite Heist (3 of 5). Continue down the stairs and pick up whatever you can find before going up the ladder.
At the top of the ladder, head up the stairs to your left. There are some golden aurora beams that you can interact with for another conversation. Again, continue to scan and loot the area, and pick up the Lore entry for The Great Sapphilite Heist (4 of 5).
Continue eastwards and enter the first large door on your left to meet the Banker. Talk to him to complete the side quest “Small Fish in a Big Bilgewater”. If you agree to help him, he’ll give you the side quest “Debt Collector” which we’re going to do now.
Debt Collector
After exiting the Bank, go back down the stairs and ladder to the first floor.
Head back to Slums Market and then go to the Slaughter Docks to find Tomen. If you’re interested, you can cycle through all of Tomen’s dialogue options until you find the one that works. The correct answer: first select “How do you know you’ve lost ‘the touch?'” followed by “You just need to get out there and try!” Who’d have thought that Braum would have been such an effective motivator?
Once you’ve got the money, return back to the base of the ladder at Fleet Streets, but don’t climb up towards the Bank. Instead, head northeast and cross the bridge.
First, let’s deal with the debt collection. Turn right and talk to Zeline.
You’ll be faced with four possible options. Illaoi can threaten her for the pacifist approach, or you can choose any of the other three options (asking nicely, telling her you aren’t hired muscle, or smooth talk) to trigger a combat encounter. It’s fine to be pacifist here, since she doesn’t give a unique Bestiary entry. Either way, she’ll give you the money she owes Tomen, but you won’t be able to see the dialogue from the other options after that.
Return to the Bank and speak to Tomen. He’ll give you Calvina’s Lucky Watch and 150 Gold, regardless of whether you tell him you had hurt them or not. You can equip the watch on Yasuo (or the non-active Champion in your Party) for a slight increase in gold gains, if you’d like.
Friendly Neighbors
Now go back to where you had met Zeline earlier and pick up the final Lore entry for The Great Sapphilite Heist (5 of 5). Go through the large door and speak to the storekeeper Chester to complete part of the sidequest “Friendly Neighbors”.
You may notice several treasure chests in this “mom and pop shop” on your map, but they’re not accessible from this side of the counter. Don’t worry, we’ll get them later.
We’re supposed to speak to the owner of the abandoned warehouse now, but first let’s pick up the last bits of loot out here.
Head northwest towards the treasure chest, making sure to use your scan button – there’s some loot which is blocked by the 3D view of the second level, so scan to reveal the white outline and then left-click on it to pick up the loot: you can do this even if you can’t actually see what your character is doing.
Open the treasure chest for a not-so-unexpected surprise considering these were the two noisy hoodlums from earlier. Regardless of which option you choose afterwards, you’ll receive a Sharktooth Necklace.
Retrace your steps all the way to the Bank, then head northeast. At the end of the bridge, you’ll see a brutish thug blocking your way.
If you aren’t ready for a fight, choose to walk away for the time being and come back later. Otherwise, walking forward will give you three options: you can pay 50 Gold to get him out of the way, you can fight him, or you can leave. Choosing to fight or leave will result in him fighting you anyway. Do not pay him the 50 Gold – if you do, you will avoid the fight but it’s quite likely that you’ll be unable to complete your Bestiary afterwards, because I haven’t been able to find this specific enemy encounter anywhere else so far. After defeating him, scan and loot the area, and interact with the golden aurora beams for another conversation.
Speak to the warehouse owner to complete “Friendly Neighbors” and unlock the side quest “Surface Appearances”. Then head into the warehouse.
Surface Appearances
You’ll notice that the enemies’ level suddenly goes up, almost double of the ones we steamrolled outside earlier. This side quest is the reason why we delayed coming back to Fleet Streets earlier, and are now here to do everything efficiently in one go.
Make your way along the linear path in the warehouse, dealing with the enemies along the way. Despite their high(er) level than the enemies outside, they’re still relatively weak so you should be able to get by without needing to use too much health or mana.
At the end of the linear path, move the crate and descend the ladder to the next area. Follow the path west, then at the fork in the road, take the southern path first. Go to the end of the path to trigger a cutscene and combat encounter.
After the combat encounter, walk towards the unconscious enemies. You’ll see a slight sparkle on the floor – interact with it to pick up the Smuggler’s Key.
Return to the fork in the road and then head west. Unlock the gate with the Smuggler’s Key, then go up the ladder to trigger another cutscene. You’ll face multiple dialogue options again but regardless of your choice, Beryl will ask you to talk to Chester.
Head into the next area for another cutscene featuring a painful backstabbing. The fight should be manageable considering the level differences, but if you’re having a hard time, consider taking down Chester first before focusing Beryl, since Chester redirects 50% of the damage done to Beryl and takes it on himself.
After the combat, your Champion will leave the room for the final cutscene. Even though the side quest will prompt you to return to the warehouse owner, don’t go back down the ladder yet. Return to the shop (on Chester’s side of the counter) to open the treasure chest on the ground floor and the other one up in the loft. You can equip the Defender’s Ring on Miss Fortune.
After you’re satisfied with your plunder, leave and go back through the warehouse to speak to the owner and complete the side quest “Surface Appearances”.
With that, we’ve completed the Fleet Streets area and its sidequests. Now back to the main quest line!
Walkthrough (Part 5F: Well of the Mother Serpent)
Overview
This section is the fourth of a multi-part series covering the other side quests in Bilgewater. We’re taking a break from the main quest line to sort these out first. This section covers the fourth bounty and the side quest “Sanctified Shakedown” in the Well of the Mother Serpent.
Achievements covered:
- N.A.
Side quests covered:
- Sanctified Shakedown
Lore entries covered:
- Buhru Missives (1 of 2)
- Buhru Missives (2 of 2)
- Thinking of Ilta
- The Lusty Legend of Haye Haraway (1 of 5)
- The Lusty Legend of Haye Haraway (2 of 5)
- The Lusty Legend of Haye Haraway (3 of 5)
- The Lusty Legend of Haye Haraway (4 of 5)
- The Lusty Legend of Haye Haraway (5 of 5)
Buhru Grotto
Head to the Buhru Grotto which is north of Docks Harbor (not to be confused with the Buhru Temple near Grey Harbor!)
In the Buhru Grotto, scan and loot the area. Head to the northernmost point to activate a conversation at the golden aurora beams. Then go to the southernmost point to activate another conversation at the golden aurora beams there.
After you’ve picked up everything you can find, head west and go up the stairs. Talk to the priest on the stairs and inform him that we’ll settle the matter now. Go up the stairs.
Well of the Mother Serpent
Make your way along the linear path. In this first area, you’ll pick up two Lore entries. The first one Buhru Missives (1 of 2) is on the ground near the pots after you’ve ascended the first flight of stairs; the second one Buhru Missives (2 of 2) is on the ground to the right of the lift.
After you come up from the lift, pick up the next Lore entry Thinking of Ilta in front of you. Continue along the linear path to trigger a cutscene involving the people at the wooden bridge.
After teaching them a lesson, continue along the path, scanning and looting as you go. At the top of this set of stairs, you can walk clockwise around the wooden table to get your hands on the loot inside.
Continue up the stairs. The camera will zoom out to show the abandoned ship in all its glory. Pick up the Lore entry The Lusty Legend of Haye Haraway (1 of 5) which is near the exit, before going into the next area.
The doors to your left and right are locked. Deal with the combat encounter in the middle of the room, then go up the stairs.
There’s another combat encounter at the top of the stairs. If you head east, you’ll see a large cannon but you can’t use it yet because we don’t have the gunpowder. Ignore the cannon for the time being; we’ll return here later.
Instead, go up the west stairs again for another combat encounter, then up again to be out in the open on the deck of the abandoned ship.
Pick up Lore entry The Lusty Legend of Haye Haraway (2 of 5) near the entrance of the area.
Head east along the deck of the ship. You’ll notice a little hatch in the floor that you can open – go down both ladders to access the treasure that was behind the locked door on your right earlier. Or you can wait until we unlock the door, it’s up to you.
Retrace your steps back to the deck of the ship. Go up the stairs to the west and enter the first door. Deal with the troublemakers, then loot the room after the cutscene. Make sure to collect two important items here before you leave:
- (1) Inspect the table and pick up the bag of gunpowder.
- (2) Walk behind the large chair and pick up the Lower Decks Key.
Now we can take the next steps for this area. Go all the way back to the first floor of the lower decks (where you entered the ship) and use the key to unlock both doors. Take all the treasure inside (if you hadn’t already used the hatch to pick up the treasure behind the right-side door).
Go back up the stairs and return to the cannon. Put in the gunpowder, then select the following options:
- (1) First, we’ll have to get rid of the large boulder blocking the path. Point the cannon down, then turn the cannon left. Fire to destroy the boulder.
- (2) Next, we’ll unlock a secret that we can pick up later. Turn the cannon right, then turn the cannon right again. Fire to score a bullseye on the seagull nest.
Head back to the top deck of the ship then go north.
Activate another conversation at the golden aurora beams along the way, then go down the stairs. There’s another combat encounter and another set of golden aurora beams for conversation. Pick up the Lore entry The Lusty Legend of Haye Haraway (3 of 5) before continuing down the path and into Scavenger’s Plunge.
In Scavenger’s Plunge, take the lift down and head eastwards for the Lore entry The Lusty Legend of Haye Haraway (4 of 5).
Scan to reveal a journal on the box, which you can interact with to read the journal entries. After reading “week 6”, look inside the box to trigger a combat encounter. You’ll also obtain the Golden Tithe Offering.
Head west. The north wall there “looks particularly fragile”. Change your active Champion to Braum and use his Dungeon Skill Shield Stomp to break the wall. Open the chest inside for a Kraken Shield which you can equip on Braum.
Now head southeast. There’s something glinting on the ground; if you had unlocked the secret from the cannon, it’s the treasure that we had shot out of the seagull nest earlier. Pick up the Calcified Ring (which you can equip on Yasuo) then retrace your steps all the way back to the abandoned ship.
Once you’re on the top deck of the boat, go all the way east. There’s an area even further east from the little hatch, out on the bow of the ship.
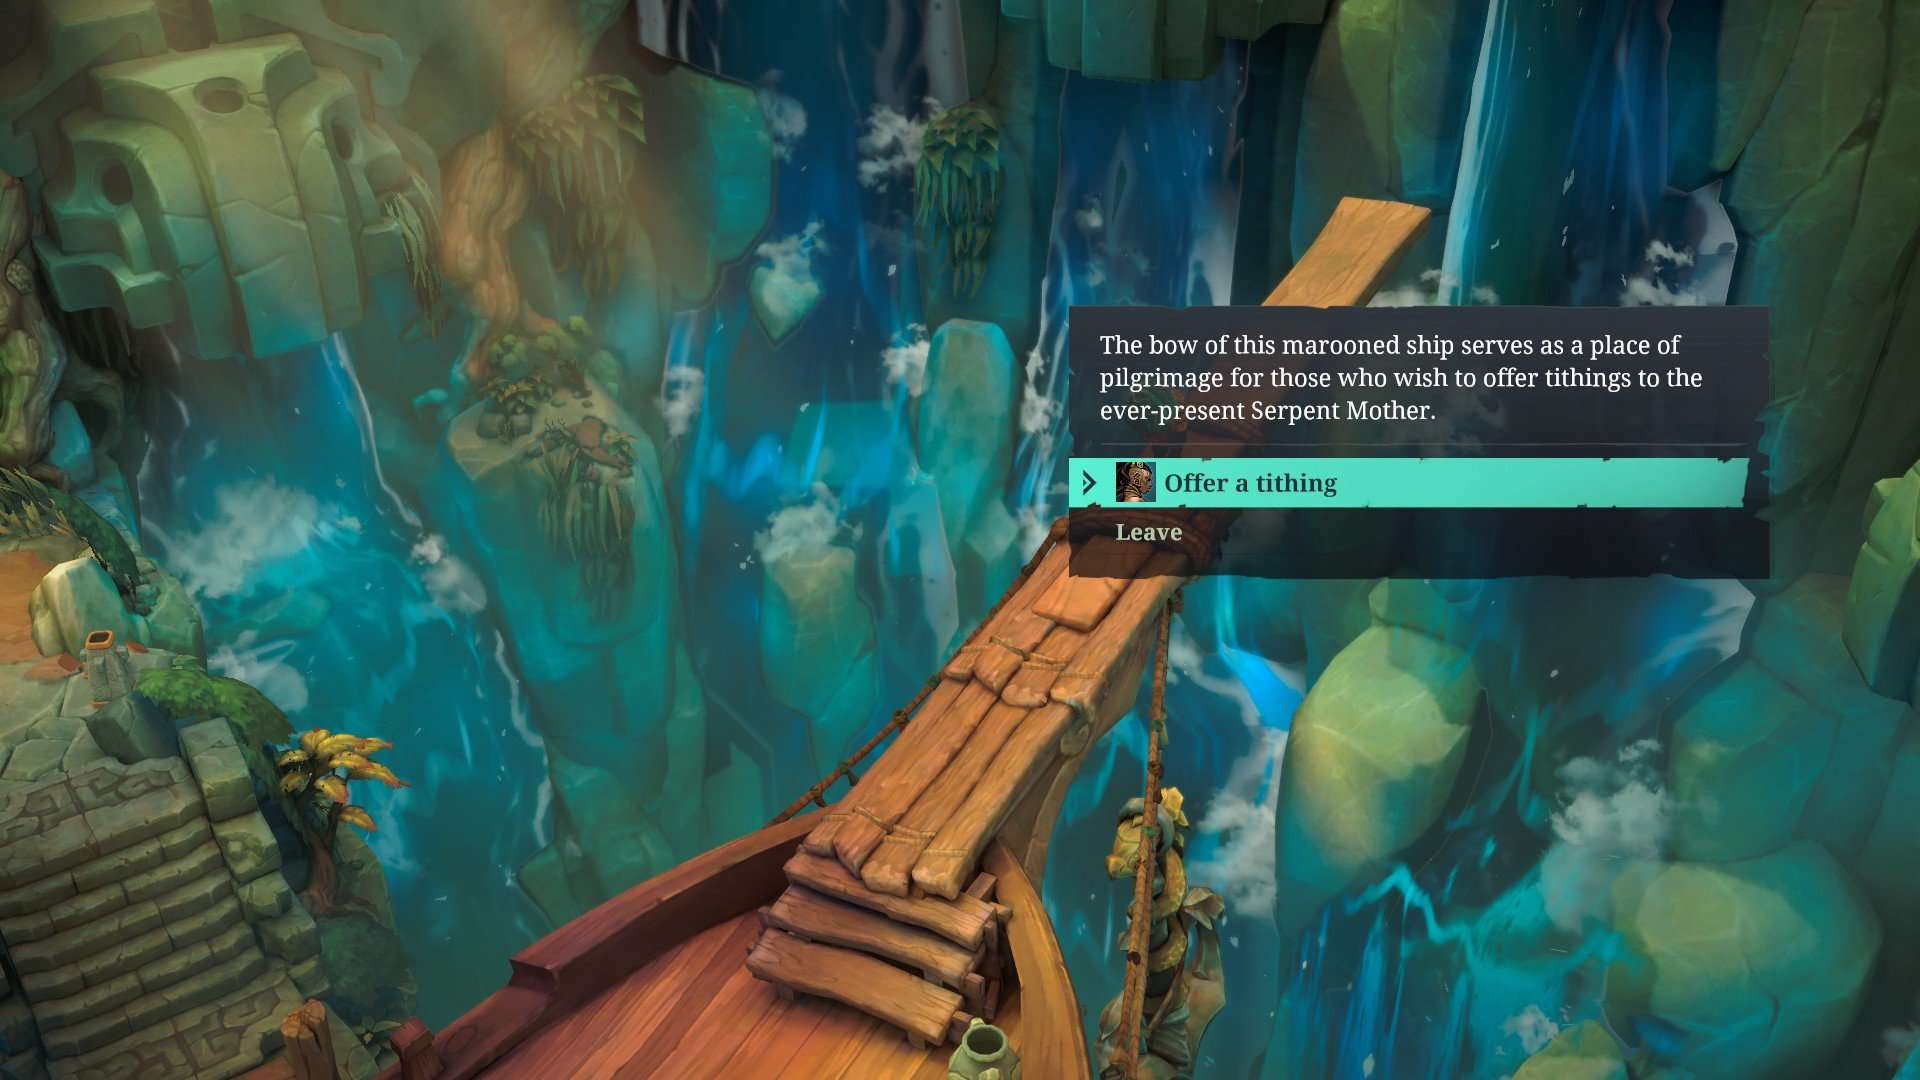
Offer the Golden Tithe Offering that we found earlier in Scavenger’s Plunge.
Now we’re going to go for a bounty. If you’ve taken too much damage from the previous combat encounters, you have two options: either heal up now using potions, or take the long trek back to Docks Harbor for (free) healing.
Once you’re ready to go, head up the stairs on the deck of the ship, but don’t go back into the Captain’s Quarters again. To the west of the Captain’s Quarters is an exit to another small area.
After entering the area, pick up the last Lore entry The Lusty Legend of Haye Haraway (5 of 5).
There’s another secret here. Go to the northeast part of this area and change your active Champion to Braum. There’s a hole in the wall. Inspect the wall where the hole is, and you can send a Poro through to get Of Poros and Men, Vol 1 which you can sell for 6 Black Marks. Check out the Achievement Guide for the Poro Bandit if you want to see the map of the exact location.
Heal up again if you need it, then proceed north to start the mini-boss fight with the Razorfin Behemoth. After the fight, open the treasure chest to get the Ripper’s Claw, a weapon for a character we haven’t met yet.
Now let’s just tie everything up with a nice big bow.
Head all the way back to the Buhru priest on the stairs in the Buhru Grotto, and talk to him to complete the side quest.
Return to the Bounty Board and claim your bounty for the Razorfin Behemoth – this will give you the Buhru Steel Pistols which you can equip on Miss Fortune.
Walkthrough (Part 6A: Watchtower District, Observation Deck)
Overview
We’re back on the main quest line now!
Achievements covered:
- N.A.
Side quests covered:
- Derelict at Duty
- Lost at Land
Lore entries covered:
- Gang Wars Are Bad for Business (1 of 6)
- Gang Wars Are Bad for Business (2 of 6)
- Gang Wars Are Bad for Business (3 of 6)
- Gang Wars Are Bad for Business (4 of 6)
- Chef Torval’s Cookbook: Prawn Pralines
Watchtower District
Head through Slums Market and Fortune’s Estate to get to the Watchtower.
After the cutscene, pick up the Lore entry Gang Wars Are Bad for Business (1 of 6) to your right.
Head up the stairs to the northeast and pick up the Lore entry Gang Wars Are Bad for Business (2 of 6) at the top of the stairs. There’s a loot barrel that’s blocked by the pillar, so make sure you scan and pick it up. Continue forwards and interact with the golden aurora beams for another conversation.
There’s a secret here: change your active Champion to Miss Fortune and scan the area. You’ll see an object glowing orange under the two men’s feet at the store. Pick it up to receive A Scrap of Abigale’s Blueprints.
There’s a Rest point in the Watchtower District area if you need one, but it will cost you Gold to use. If you’re thrifty like me, you can instead go up the stairs to the right here, and use the Gondola network to return to Docks Harbor and its free Rest point there.
Now head west, scanning and looting along the way. At the fork in the path, head south first. We’re going to make a quick detour to complete two side quests here.
Derelict at Duty, Lost at Land

Speak to Glass-eyed Joe to complete the initial side quest “Derelict at Duty” and start the second, “Lost at Land”. After he finishes his story, retrace your steps to the fork in the path, and head west.
The first crew member can be found at the wooden balcony, where the camera goes wide-angle. You can recognise him by his yellow fur.
- Hint (but not answer) regarding his identity: he wonders what it would be like to be a sea creature.
- Answer: his name is Fin, and you should give him the Diving Gear.
Continue west for more loot and the Lore entry Gang Wars Are Bad for Business (3 of 6).
Keep following the path.
The second crew member is near the elevator close to the Observation Deck. You can recognise him as he’s a large fellow with his back against the wall.
- Hint (but not answer) regarding his identity: his shirt is stained with food and drink.
- Answer: his name is Slim, and you should give him the Rations.
Now take the elevator down and follow the path northeast. You’ll pass another conversation point (with the glowing aurora beams) and there’ll be lots of stuff to pick up too. Continue walking until you come to a fork in the road.
The last crew member is at the fork in the road. You can recognise him by his wide-brimmed straw hat and fishing pole.
- Hint (but not answer) regarding his identity: there are marks on his nose from reading glasses.
- Answer: his name is Lin, and you should give him the book.
You’ll see another elevator to the north. Take this one up to return to Glass-eyed Joe and his crew. You’ll receive 400 Gold for completing the side quest “Lost at Land”, and an extra 350 Gold for getting all the names and items correct on the first try.
Watchtower District, Observation Deck
Now we’re going to clear out the area. Head east and pick up all the loot along the way until you find yourself back where you first entered the Watchtower District, then retrace your steps past Glass-eyed Joe and his crew, heading west on the upper level until you reach the Observation Deck.
Before going inside, pick up all the loot and the Lore entry Gang Wars Are Bad for Business (4 of 6).
Inside the room, you’ll get to see a demonstration of Miss Fortune’s Dungeon Skill. Pick up the Lore entry Chef Torval’s Cookbook: Prawn Pralines and interact with all the golden-outlined objects (both inside and outside) to piece together the full story of what happened to Graham.
We’re going to be a good magpie and get everything in the rest of the area first.
Retrace your steps back to the elevator (near where you had met the second member of Glass-eyed Joe’s crew from the earlier side quest) and head down to the lower level. Since you would already have had cleared out the east path earlier when you went to find the third crew member, we’ll go counterclockwise along this loop.
There’ll be some manageable combat encounters along the way. To make combat easier, you can consider using your Dungeon Skill to start the combat, since it counts as a multi-target attack which dispels the stealth that some of the enemies may otherwise begin combat with.
At the next fork in the road, you can take a short break from looting and pillaging. Pet the razorfin (named Professor Gilly) and talk to its owner. Then head south for another golden aurora beam conversation, and a treasure chest containing a Sailor’s Jacket that you can equip on Miss Fortune.
Retrace your steps back to Professor Gilly, then continue along the path. Pick up the Lore entry Gang Wars Are Bad for Business (5 of 6).
At the fork in the road (near where you had met the final member of Glass-eyed Joe’s crew from the earlier side quest), you can enter the large building to pick up another Lore entry Chef Torval’s Cookbook: Coconut Hagfish. This inn is a Rest point that you can use to restore your Champions’ health and mana, but it will cost you Gold to do so. Unless you really need healing, don’t bother paying for it. It’s definitely cheap in the grand scheme of things, but not necessary for now since we’re comfortably-leveled relative to the enemies here.
We’re almost done with this area. Leave the inn and head east, picking up the Lore entry Gang Wars Are Bad for Business (6 of 6).
Don’t go through the large ornate doors into the Ordinance Storehouse yet; we’re going to get the last remaining pieces of loot.
Continue heading east. At the bottom of the stairs, deal with the enemy encounter, then head north to pick up the Lore entry Chef Torval’s Cookbook: Foreword. Then cross the bridge to the east.
There’ll be two more enemy encounters at the end of this path. Be careful when crossing the bridge and triggering the combat encounter: the saboteur can damage you to start the combat, so avoid the red boundaries of his surprisingly long-range area of attack skill.
After you’ve dealt with the combat encounters, interact with the golden aurora beams for a conversation, then open the treasure chest. You can equip the Ionian Ring on Yasuo if you’d like.
Now let’s go find Isobell. Head back to the large ornate doors which mark the entrance to the Ordinance Storehouse, then go in.
Walkthrough (Part 6B: Ordinance Storehouse)
Overview
We’re back on the main quest line now! This section covers the Ordinance Storehouse.
Achievements covered:
- N.A.
Side quests covered:
- N.A.
Lore entries covered:
- Magnum Opus
- The River King’s Blessing
- Fortune’s Tellstones Record
- Grocery List
- The Morning Storm, A Bilgewater Serial
Ordinance Storehouse
After you enter the storehouse, a cutscene will play. Even though Braum’s capable of breaking through walls with his shield, it appears that this door is too much for even him to get through. Huh, who’d have thought that could happen?
You’ll see a plank that you can interact with – take the plank, then go to the chasm and interact with it to place the plank across the chasm. Walk across, then turn back and click on the plank. Select the option to take it with you; you’ll be grateful for it later.
There’s a Lore entry Magnum Opus right ahead. After scanning and looting, you’ll notice a pressure plate on the floor that looks like the cannon traps we encountered previously. You won’t be able to walk around this one, so back up a little and then sprint across (you can use SHIFT and WASD for this).
After you go through the door, a brief cutscene will play in the next area.
You’ll see a treasure chest to the north, but there’re also two cannon traps and three spike traps in the way. Move south to give yourself room to build up momentum, then sprint in a zig-zag line so that you avoid the spike traps and are gone before the cannons fire.
Pick up the Lore entry The River King’s Blessing and open the chest for loot, before sprinting back the way you came. If you take any damage along the way, don’t stop or panic – you’ll probably end up triggering the next trap ahead as well if you falter.
Continue eastwards, avoiding the traps in the way.
A brief cutscene will play, prompting you to switch your active Champion to Miss Fortune so that you can scan for the safe way through. Follow the footprints after you activate the scan. You do not need to sprint for this particular puzzle; precision is more important.
I’m not sure if this counts as an exploit, but here’s a tip regarding environmental damage from traps like this: if you do take any damage, don’t rush to drink potions. The game is coded in such a way that even if your active Champion takes lethal damage from an environmental source, the health of the Party cannot drop below one from such out-of-combat situations.

You won’t encounter any enemies in the storehouse, so it’s technically possible to YOLO and get through with 1hp.
Take the Lore entry Fortune’s Tellstones Record at the end of this puzzle, then head down the stairs.
In the next area, loot the room and then take the plank that’s resting against the east wall.
The plank puzzle here can get annoying because there are no clear indicators of where you have to click to open the interact options, so just move your mouse around in the general area(s) where the planks should go, and left click once the little magnifying glass icon pops up.
Head back towards the southwest side of the room. Place the plank and use it to cross to the left platform where there’s another plank. Pick up the plank there, and turn around to pick up the first plank that you had placed.
In the same manner, use a plank to cross to the right platform, then turn around to pick it back up.
Finally, place a plank between the platform and barrel (north of the platform). Walk out onto the plank, then place another plank between the barrel and the other side. Use this makeshift bridge to cross over, then turn around to pick up the plank that’s closer to you. You won’t be able to retrieve the other plank, but it doesn’t matter. Two are sufficient for our current purposes.
Pick up the Lore entry Grocery List in the corner, then head to the east side of this area. You’ll see that there’s a treasure chest out there that seems to be out of reach… or is it?
Place one plank down, walk out along its length and place the second plank down to reach the treasure chest. Then head up the stairs to the last section for this area.
In this last section, just scan and make your way along the linear path, picking up all the loot you can find. After the final cutscene, scan and pick up everything in the room (including the Lore entry The Morning Storm, A Bilgewater Serial) before leaving.
Watchtower District
Don’t worry if you had taken trap damage earlier in the Ordinance Storehouse. If you had followed the previous Part 6A walkthrough, there won’t be any more combat encounters left to bother you in the Watchtower District.
As such, you don’t need to waste your hard-earned Gold to rest at the inn. Head to the Gondola (in the northern area of the Watchtower District) and use that to travel to the Jagged Hooks Warehouse.
Walkthrough (Part 6C: Jagged Hooks Warehouse)
Overview
This section covers the Jagged Hooks Warehouse. If you’ve been following the walkthrough so far, this will be the last section of Bilgewater before we set sail on the high seas.
Achievements covered:
- N.A.
Side quests covered:
- N.A.
Lore entries covered:
- Terror Hook
- The Janitorio Robbery (1 of 3)
- The Janitorio Robbery (2 of 3)
- The Janitorio Robbery (3 of 3)
Jagged Hooks Warehouse
After you disembark from the Gondola, you can pick up some more loot before using the Rest point to heal up. You can watch another Rest point conversation at the same time.
Pick up the Lore entry Terror Hook on the counter before heading into the next area.
In the next area, you’ll have to make use of the environment around you to take cover from the sniper overhead. The weapon takes some time to actually fire after it locks on, and even if it does lock on, it will not fire if you make it to cover in time. There will also be audio cues for locking on (versus firing), so you can rely on these as well when breaking cover. Make your way from point to point as fast as possible, and the sniper won’t even be able to fire a single shot.
After the cutscene, start by sprinting to the left and taking cover behind the large sacks. Pick up the Lore entry The Janitorio Robbery (1 of 3).
Next, sprint north to the treasure chest, taking cover behind the boxes. You’ll be safe enough to open the chest.
Continue eastwards, hugging the north wall for cover.
On the east side of this area, you’ll see two standalone boxes with items on them, and a barrel to the right. Move southwest so that you keep the lower of the two boxes between you and the sniper, then just hold your position and let the enemies come to you. Start each encounter with a Dungeon Skill to make the battles even easier.
After the combat encounters, head east, staying close to the large pile of stuff in the centre. Open the large treasure chest before heading through the east door into the next area.
There’ll be two combat encounters in the next area, one of which you have to be careful about approaching because of the potential to take out-of-combat damage. After you deal with both of them, pick up the Lore entry The Janitorio Robbery (2 of 3). Then go into the north room.
There’re cannon traps here, but these run on timers not pressure plates. You can get past by sprinting straight for the ladder immediately after the leftmost cannon fires.
Climb up the ladder and loot the area. Then descend the ladder, but remember to take it with you when you leave. (It does make one wonder how in the world the Champions are carrying such bulky items around on their journey.)
To get past the cannons, sprint straight for the exit immediately after the rightmost cannon fires. Then exit the room. Don’t go back out to the open area where the sniper is. Instead, head to the easternmost corner of the area. Hover your mouse in the area until the little magnifying glass icon pops up, and place the ladder to get to the next area.
There’ll be a combat encounter at the top of the ladder, and an amusing little cutscene just before you pass into the next area.
In the next area, sprint past the double cannons once they’ve fired. Pick up the loot near the barrel in the north corner. There’s a secret here: change your active Champion to Miss Fortune and scan the area. You’ll see an object glowing orange that you can pick up to receive the Torn Portion of Abigale’s Blueprints. If you’ve been following the walkthrough, a brief cutscene will play and all the fragments will combine in your inventory into the Custom Pistol Blueprints. Hang on to those, we’ll use them to craft a truly legendary set of pistols later.
Continue along the path. A cutscene will be triggered, and you’ll be given three possible options on how to proceed with Corwin. You can accept his allegiance, which will give you the choice between receiving the occasional free crafting or free potion materials. Or you can reject or execute him, which will prevent you from receiving those benefits later on in the game. I personally went for crafting materials, since potions aren’t a major necessity on Normal difficulty.
Whichever option you choose, make your way down the stairs and deal with the combat encounter there. When you’re done, pick up the Lore entry The Janitorio Robbery (3 of 3) before heading back out to the open area.


No more updates for this guide? its a awesome guide hope it will be finish 🙁
Thanks man! You made my experience much more doable, since i do not have much time to play your guide allows me to enjoy a relaxing game 🙂 can’t wait to see the next part!
great guide! hope you can finish it. very helpful!
Where’s the part 5B of the side quests?
Sorry mate! The structure has been changed.
You can rest in…Baron’s Rest. Also you can use the rest points as often as you want I think
Finally there is a guide. The backtracking and navigation in this game is terrible, especially when there are many bugs. I just spent 3 hours looking for the Warehouse in Fleet Street as stated in the mission, but it turns out, the Warehouse is next to Baron Rest… I am looking forward to your guide.
P/s: there is a quest about ‘mom and pop shop’ and the warehouse above in Fleet Street that I could not complete. I have talked to the owner, investigated the smuggler, received the coin reward but the quest is still there. Is it a bug, or the quest still continues?
I think you’re referring to “Friendly Neighbors” – the quest should complete after you speak to both the ‘mom and pop’ owners and the warehouse guy. Speaking to the warehouse guy should also start the related sidequest “Surface Appearances”.
I won’t be surprised if it’s a bug, but I have a small suspicion about why you haven’t progressed for that area.
Hehehe i believe the suspicion is valid
Any Updates soon?