
The goal of this guide is to show you how you can decrypt the saves, edit them and recrypt them to use them in the game.
Guide to Savegame Edit
Intro
Hello guys, id like to share you a way to edit the Saves of Sheltered 2.
Some things you can do and what i will explain in this guide:
Debugging
- Change stuff which is “in use” to “not in use”.
- Render characters unstuck (not sure if same works with pets, but should be the same).
Character editing
- Edit Stats of characters.
Cheats
- Reveal map.
- Unlock Tiers.
This is just a small amount you can edit in the saves, you can experiment with them as you wish, but keep in mind to always backup your saves. Doing something wrong will corrupt your saves and will render them useless.
Decrypting the Saves
Step 1
Locate the saves, you can find them at:
- C:\Users[YOUR USERNAME]\AppData\LocalLow\Unicube\Sheltered2
Step 2
Make backup of every save you edit.
Step 3
- Visit Sheltered 1 Savegame editor.
- Click on “Click here to go to upload page” and then upload your save.
Step 4
Download encrypted save by clicking on “Download (encrypted)”(The file will be downloaded into your “downloads” folder on C drive.).
Important:
The Save will be automaticly renamed to savedata_01.dat. even if you uploaded a other savegame number. Remember the Number of the original save, we will rename it later.
We will continue editing the save in the next Section.
Editing the Saves
For editing the saves i Highly recommend using the free program called “notepad++” which you can get for free at Downloadpage Notepad++, you can use the normal notepad from windows if you dont want to download notepad++.
For the sake of this guide i will explain how to do it in notepad++.
Debugging Save
Change stuff which is “in use” to “not in use”
For this you need to look for the object you want to render not in use. Simply press CTRL + F to open the search.
There you just add in what you are looking for, in this example i will use the Radio transmitter.
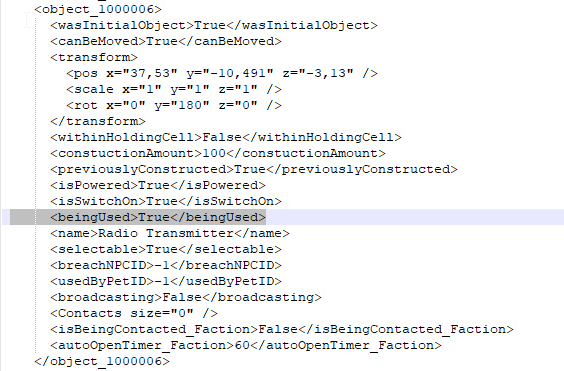
Here you simply change the highlighted “True” to “False”
Important: Everything you change is Case sensitive!
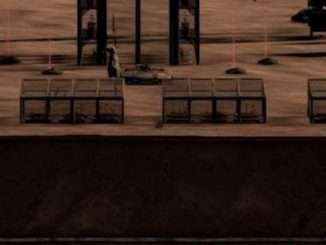
Render characters unstuck
For characters it is a little bit more complicated. Most of the character stuck cases is due to the animation getting stuck into an endless loop. What i do to make them unstuck is simply changing their animation into the idle animation.
Idle animation code:
<animHash>-541223289</animHash>
<animTime>0,05509559</animTime>
Now you search for the character which is stuck (keep in mind this doesnt work in 100% of cases and you might find better ways to do.
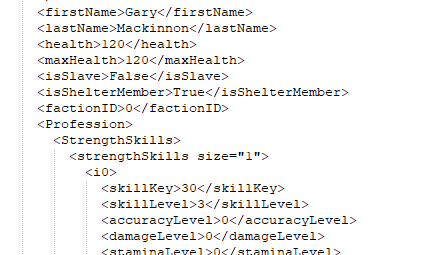
So when looking for the characters you type in the name in the Search like we did on fixing the items. In my Case the name is “Gary” Make sure to write down the lastname too just to make sure to edit the right character.
When you found the character, you should have something like this:
Now you have to scroll down and look for:
<interacting>False</interacting>
<interactingWithObj>True</interactingWithObj>
<animHash>-1422941828</animHash>
<animTime>0,04629194</animTime>
Here the character is actually using the radio transmitter. To make him stop using it and put him back into idle state, you change the “interacting with obj” to False. Then you change the anim hash to the idle one in the code provided further up.
Last but not least we need to look for the Item he used to change
<beingUsed>True</beingUsed>to False
Cheats
Edit Stats of characters
As in the other changes to character, we search the name like the above mentioned.
But instead of scrolling down, wie scroll up.
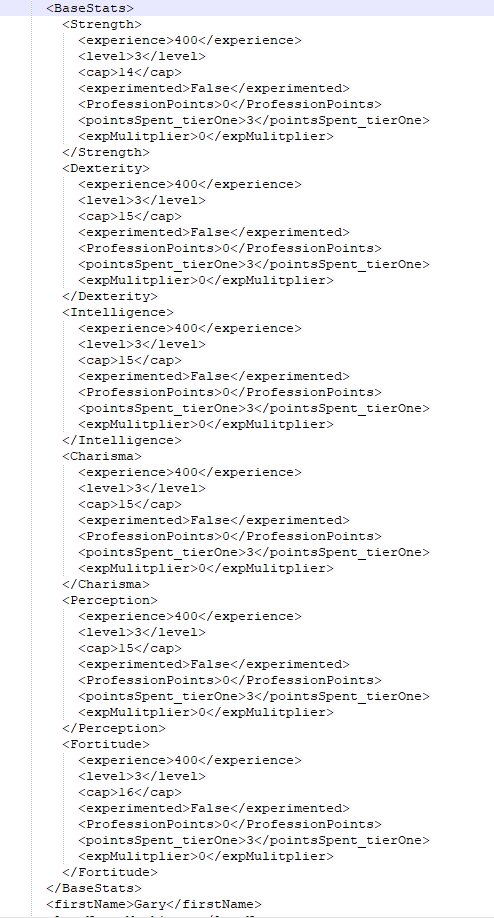
So here we can change following:
- The actual Skill level:
<level>3</level>- The actual Skill Cap:
<cap>14</cap>I didnt try to raise the stats above 20, feel free to experiment on own risk. Keep in mind that changing things above the basic max values may corrupt saves.
Reveal map
To reveal the whole map we need to change each hex into revealed state. With Notepad++ this is quite easy with one command.
First we mark the whole maptile sections so it only changes the revealing of maptiles and not other stuff. To do that just click in front of
<map>Then hold scroll down to the
</map>Note: its quite alot Map Tiles so you need to scroll down quite a bit.
While holding SHIFT click behind the
</map>To mark the whole text of the Map section
Now simply open the search this time with shortcut CTRL + H to open the replace prompt.
Make sure to tick the “in selection”
in looking for you add:
<Discovered>False</Discovered>in replacing you add:
<Discovered>True</Discovered>And then click “replace all”
Important: If you replace all without the checkbox and without marking the text you will reveal quests and other stuff which you might not want thus i don’t recommend it.
Unlock Tiers
Unlocking stuff is straight forward, simply search for:
<Unlocked>False</Unlocked>And replace with:
<Unlocked>True</Unlocked>As with the reveal map, you can replace all to unlock everything (including the stuff you get by Ally with the Factions) or you can manually unlock what you want. Its up to you
To unlock the Tiers you will have to Change the Faction Goals to completed too.
You do that by editing the appropiate Faction Goal.
- Unlock Tier 2 Drafting Table:
Look for:
<FactionAchievement_Building101>Change progress to
<progress>5</progress>- Unlock Tier 3 Drafting Table:
Look for:
<FactionAchievement_SkilledBuilder>Change progress to
<progress>5</progress>- Unlock Tier 4 Drafting Table:
Look for:
<FactionAchievement_ExpertBuilder>Change progress to
<progress>1</progress>- Unlock Tier 2 Workbench:
Look for:
<FactionAchievement_Engineering101>Change progress to
<progress>25</progress>- Unlock Tier 3 Workbench:
Look for:
<FactionAchievement_SkilledEngineer>Change progress to
<progress>25</progress>- Unlock Tier 4 Workbench:
Look for:
<FactionAchievement_ExpertEngineer>Change progress to
<progress>1</progress>- Unlock Vehicle Parts:
Look for:
<FactionAchievement_Mechanic>Change progress to
<progress>1</progress>- Unlock Medicines:
Look for:
<FactionAchievement_Chemistry>Change progress to
<progress>1</progress>- Unlock Guns:
Look for:
<FactionAchievement_GunCrafting>Change progress to
<progress>1</progress>There is alot more you can do.
Encrypting the Saves
To encrypt the saves again (Not doing so will make your save unloadable)
Step 1:
Simply go back to the upload page of the savegameeditor: Open savegame editor.
Step 2:
Goto the upload page and find the Savegame (Should still be in your downloads folder).
Step 3:
Download your encrypted Savegame.
Step 4:
Now rename the savegame back to the Savefile nr you had.
For example if you had:
“savedata_05.dat” rename it to the “savedata_05.dat” again
Note: If you dont see the file ending you dont need the “.dat”.
Final Step:
Copy the save back into your save folder and load the save in the game.
Be the first to comment