
This is a guide on helping you identify clues, creating portraits & ultimately making the right deductions to solve the case. Please note that this guide is not a step-by-step walk-through of the entire case in detail and also note that this guide obviously involves spoilers in regards to solving the case. Play the game your way first, make all the moral decisions you feel are right and refer to this guide if you are stuck and maybe want to start the game over and hunt all the achievements or if you are unsure on your current decision making.
Guide to Chain Reaction Case
Summary of The Case
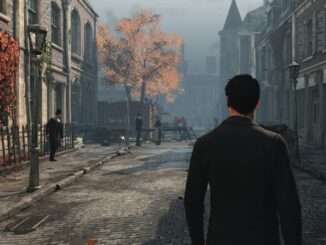
After completing Infamy, you’ll automatically start up Case #4, Chain Reaction. Once the Case starts, you’ll be riding with Watson aboard a carriage. You’ll suddenly come to a stop due to a huge accident and quite a few people are injured and in need of help. What seems like a freak accident turns into something a lot more sinister.
Mapping The Accident
After helping everyone involved in the accident, talk to the police and you will begin analyzing the accident to see how it happened. In order to begin, you must run around and examine the 13 Elements involved:
- The destroyed carriage close to the police
- The carriage sitting on top of the electrical current (Click on the fallen street light, then click on the base of it to open it, grab the tool and use it to remove the two power sources and cut the electricity)
- Pass the street light and examine the cart with pumpkins
- Speak with the man in front of the pumpkin cart and ask him all the questions
- Examine the fallen wardrobes between the pumpkin cart and the cart next to it
- Speak to the man in front cart by the wardrobes
- Examine the carriage in front of the burning building
- Click on the flag hanging from the left side window of the burning building, look inside to see the horse was blinded
- Examine the carriage attached to the horse that was blinded
- Examine the carriage next to the scaffold in the center of the area
- Examine the mechanism with the wooden beam on it near the pumpkin cart
- Put together the mechanism scene using Imagination Mode: Pumpkin, Balk, Lifting Mechanism, counterweight, platform. You will witness an axe sent flying.
- Lastly, examine the torn rope of flags across the street from the police
Begin mapping out the accident, use the picture below to click on each of the Elements in the order they occurred.

Head over to the cart that previously had electricity flowing underneath it. Go to the back side and examine the man inside:
- Neck – Dog Tattoo
- Left Hand – Electrical Burn
- Black substance on pants – Sticky Liquorice
- Foot – Pungent Mud
- Right Hand – “Rasco” Tattoo
Afterwards, notice the hammer underneath him, the solvent and cloth drenched in solvent in the crate, and the mud on the floor to the left of the hammer. Walk around to the street light side of the carriage and examine the side of it to see something was painted over, then use Sherlock Talent to notice there is some text.
Look back inside the carriage and grab the Solvent, then head back over and use the Solvent to wipe away the fresh paint and reveal “Underground Electric Railways Company of London”, then click it to continue. Next run over to the man in the front of the carriage and examine him:
- Neck – Dog Tattoo
- Left Hand – Electrical Burn
- Gun on waist – Revolver
- Foot – Pungent Mud
Head over to the left side of the carriage and use Sherlock Talent to notice something under the carriage by the sewer lid. Click to find a wire and follow it into the nearby building. Head upstairs and to the right to the 2nd door down. You’ll need to pick the lock to get inside and you’ll be given some new locks to use at that, though you can simply use Lockpick #3/4 twice to get inside easily.
Identifying The Suspects
Once inside walk over to the device on the table and examine it. Flip up levers 1 and 3 then use the Upper Lever. Then flip down Lever 1, and flip Up Levers 2, 3, and 4, then use the Upper Lever again. Head over and take the document: Smoke on the water, then look out the window.
Head back outside and speak with the police. You’ll have to locate five men that could be potential suspects, use Sherlock Talent to “scan” them:
- The man accused by the police
- The two carriage drivers standing by the mechanism in the center
- The man leaning against the building behind the above two men
- The man standing near the building with the electrical device
You will then open the Map of the Accident with and choose all 3 of the men who are NOT carriage drivers as “Suspect”, and the two drivers as “Not a Suspect”. Use the picture below for reference:

The Sewer
You will now be tasked with finding out where the carriage that was electrocuted came from, so head over to the carriage but go further down the street. Activate Sherlock Talent and you will notice mud on the sidewalk, a collision with the barrels, and paint on the pole nearby. Enter this shop and notice more mud on the ground, then pick up the document: Snake Nests and Conspiracy from the desk.
Try to enter the backroom and you’ll have to pick the lock, use Lockpick 2/4 on the inside lock and Lockpick 2 on the outside. Next use Lockpick 3/4 on the inside lock and Lockpick 3 on the outside to enter the room.
Examine more mud on the ground, them use Sherlock Talent to notice the carpet was moved. Move the carpet aside to find a secret passage leading to the Sewers. Head down into them.
Head right and follow the tunnel (there is only one path you can take as everything else leads to a dead end), you’ll find a forked path, go left and cross the bridge, then continue left. Take a right further ahead into another tunnel, then go left and up the steps to examine a blue machine. This machine (and another one nearby) controls the water in the sewer, you’ll be using it to solve a puzzle so do the following:
- Set the water level to 0
- Turn the wheel on the right to open the door
- Climb down the ladder
- Push the crate/barrels straight forward (away from the ladder) as far as it will go
- Climb back up the ladder
- Set the water level to 1/2
- Jump across to the other side using the crate/barrels as a platform
- Click on the pipe in the center to balance walk across it, you’ll have to do the usual and keep the Left and Right Sticks inside their circles
- Use the new blue mechanism to set the water to 0
- Use the lever to the right to move the ladder to the far left
- Climb down the ladder (near the lever)
- Push the crate straight forward (towards the ladder you just moved left)
- Climb back up the ladder you climbed down
- Set the water level to 1/2
- Use the lever on the left to lower the bridge (no need to balance anymore)
- Cross the bridge to the other side
- Go down the small ladder
- Jump across the crates and onto the ladder you moved left
- Climb up said ladder
- Turn the wheel to open the door
Portrait of Benjamin Fowler
- Tattoo on neck – Gang Member
- Cross necklace – Religious
- Left Hand – Manual Worker
- Right Hand – Smoker
- Right Leg – Injured Leg
Ask Benjamin all of the questions, when you ask him Victim Acquaintance, say Dog Tattoo.
Portrait of Thomas Garret
- Pale Face – He is ill
- Badge on chest – Anarchist Symbol
- Tear in arm sleeve – He is poor
- Black liquid on lower sleeve – Silicosis
- Left Hand – Works with electricity
Ask Thomas all of the questions, when you ask Ill, say Black Sputum.
Portrait for Reginald Butcher
Fast travel to Ormond Hospital. When you arrive, head to the far back and left side to find the man who escaped the police with his daughter. Examine the photo near him (black ribbon) and the writing on the back of it, pick up the document: letter from Karolinska University Hospital, and examine the clipboard on the side of the bed. Begin creating the Portrait for Reginald Butcher:
- Badge on chest – Railway Worker
- Center of waistcoat – Was once prosperous
- Ring on right hand – He is married
- Right Shoe – Recently Cleaned
- Bracelet on Left Wrist – Daughter’s Gift
Ask Reginald all of the questions. When you ask Cure, say Treatment of Meryl Butcher. When you ask Job, say letter from Butcher’s job.
Deducations
- Mr. Garrett’s Side Job + Electrocution = Insufficient Knowledge
- Mr. Fowler’s Work + Electrocution = Not a Specialist
- Anarchist + Bank’s Debtor = Anarchist Ideology
- Rebirth + Difficult Life = Criminal in the past
- Seriously Ill Daughter + Problems at Work = Butcher’s Problems
- Electrician + Electrocution = Butcher’s Trap
- Bank Robbery + Bank’s Debtor = Robbed Bank
- Big Bubble appears = Just an Anarchist
- Bank Robbery + Rasco Gang Tattoo = Rasco Gang
- Big Bubble appears = Fowler’s New Life
- Electrician + Bank Robbery = Underground Worker
- Big Bubble appears = Hopelessness
- Bank Robbery + Electrocution = Evil Plan
- Mr. Butcher is a murderer
With everything concluded you can choose to convict Reginald Butcher or absolve him.
Be the first to comment