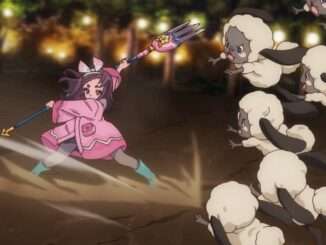
The fifth layer features the Dying Castle, a grim reminder of when the old kingdom teetered on the brink of collapse. You’ve come a long way on your adventure, but plenty of crafty monsters, fierce swarms, and powerful bosses stand in the way of your final descent.
Many of the monsters here use light and dark attacks. Equipping weapons with a Lightstone on the early floors and a Darkstone on the later floors will help you make short work of them. The fifth layer has lots of floors compared to the fourth, all much larger and more complex than what you’ve encountered thus far. You’ll find the last signal fire on Floor 20, which means you must complete the last 10 floors all in one go.
This page covers everything you need to know to conquer the fifth layer of the Abyss, including what monsters and obstacles await you.
- Total Floors: 29
- Recommended Level: 36
- Signal Fires Floors: 1, 6, 11, 16, 20
General Mechanics
Switch-Operated Turrets
These heavy artillery turrets fire cannonballs in a straight line whenever someone steps on their switch. Double-check the number of turrets and their directions before activating a switch, or you may accidentally take a cannonball to the face. Monsters can also activate the switches and find themselves caught up in the crossfire, so try leading them into a trap, or activating a turret to shake off any persistent pursuers.
Hidden Runes
Each layer contains a special object that reflects the atmosphere of that floor. Attack this object to earn lots of runes. In the fifth layer, dilapidated stone monuments surrounded by shining columns should catch your eye.
Notable Monsters
Shady Trolls
Shady Trolls are formidable foes with huge HP pools who pack plenty of offensive power. They rarely fight alone, which forces you to focus on taking them down while other monsters try to slip through your defenses. You can hardly ignore such a terrible threat blocking your way. Use your best skills to take it down ASAP, then retreat to a safe spot to recover before pressing on. The Shady Troll uses dark-type attacks and is weak against both light and magic, so use the Caster or a hero with a Lightstone equipped to send it back to the shadows.
Glow Gecko Mages
Although this layer has many powerful lizard-type monsters scurrying about, the Glow Gecko Mage is one of the most dangerous by far. Often appearing with other monsters, these mages stay out of reach and fire ranged magical attacks that cause confusion. The last thing you want is to become confused while surrounded by a horde of hostile enemies. Try to take out Glow Gecko Mages first. If you can’t, then keep a close eye on their attack patterns. All lizard-type monsters in the fifth layer are weak against dark damage, so any weapon with a Darkstone will serve you well.
Glitter Trees
These trees summon colonies of Glitter Bees, which cause confusion with their ranged attacks. Glitter Trees have a lot of HP and often show up in places where other monsters gather, so chopping one down will require you to hurl yourself into the hordes. Glitter Bees also have a large chunk of HP and usually keep their distance, making it hard to swat them down, especially when they swarm together. Glitter Trees will spawn one Glitter Bee after another, so you should either cut them down quickly or rush ahead before they become too much for you to handle. Slashing and dark damage are effective against these trees, so equip the Wanderer or Rogue with a Darkstone before fighting them.
Notable Floors
Floor 1: A Warm Welcome
As soon as you set foot in the fifth layer, a crowd of enemies will greet you. You must fight waves of monsters you’ve never seen before, making this a true test of skill.
On Floor 1, you’ll face three monster swarms:
- 2 Shady Trolls, 1 Shady Wraith
- 1 Shady Hatter, 2 Shadebats, 1 Shady Wraith
- 2 Night Wolves, 1 Shady Wraith
The Shady Wraith appears in all three swarms and creates a magic field that significantly boosts the attack power of any monsters inside it. The wraiths themselves can’t attack you, which lets you prioritize other monsters. If defeating these monsters proves too difficult or time-consuming, consider returning to the fourth layer to level up your heroes and upgrade their equipment. You may also want to use this time to track down a Darkstone to prepare for the battles that await you near the bottom of the fifth layer.
Floor 15: Gecko King (Mid-Boss)
The Gecko King summons two lizard-type soldiers at a time and attacks in different phases. Depending on the formation, this can be drawing in enemies with a magic vortex, healing its minions, or slashing with its greatsword.
Its soldiers attack in one of three formations:
- Glow Gecko Knight & Glow Gecko Rogue
- 2 Glow Gecko Pikemen
- Glow Gecko Archer & Glow Gecko Mage
You may struggle against the latter group’s long-ranged attacks, so take them out as soon as they appear. Since the Gecko King calls for reinforcements if no soldiers remain, consider leaving one alive to control the flow of battle. When the Gecko King summons a magic vortex, run and dodge in the opposite direction, otherwise it’ll suck you toward it. You can do almost nothing while trapped in the vortex, so stay out of its range until you can find a good opening to strike. Both the Gecko King and its minions throughout this layer are weak against dark damage, so make good use of any weapons equipped with a Darkstone.
Floor 28: Mecha Sergeant (Boss)
This mechanical golem has devastating counterattacks. Once its HP falls low enough, it enters a second phase with an explosive slam attack and faster dashing capabilities. The Mecha Sergeant can use a wide range of abilities, including a spin attack, two different laser beams, power punches, and even magic. The charged laser beam is especially difficult to dodge once the Mecha Sergeant sets its sights on you. It will fire about two seconds after it starts charging up, so memorize the timing to leap out of the way in time. Take advantage of the Mecha Sergeant’s weakness against piercing damage by fighting it with the Farmer or Archer.
Legendary Equipment
Click to enlarge…


Be the first to comment