This guide will explain how to mod in, or make, a new country. It will tell you how to make a country at the start of the game, and cover formables, too.
Guide to Create a Country
Introduction
This guide will cover how to create / make / mod a new country into the game so that it exists at the start of the game in 1836.
Important starting notes:
- It’s recommended to do text editing with a better editor than plain Notepad. My recommendations are Notepad++ (which is what this guide will use), VisualStudioCode and Sublime.
- All .txt files in the game must have the encoding UTF8-BOM. They may not work properly if they don’t have that. If you don’t know how to set the encoding, just copy an existing file and change its contents.
- Everything after a # in a text file is “commented out”, meaning the game ignores what’s written after the #.
- If you get some errors or something went wrong, it’s more likely that you made a mistake or didn’t follow this guide exactly. Almost nothing here is useless, so pay close attention!
Defining the Country
By “defining” we mean two things:
- A human meaning of “deciding where the country will be and what it will look like.
- A code meaning of telling the game information about our country so that it knows what the country is.
So first of all, think about what country you want, and especially where it will be located.
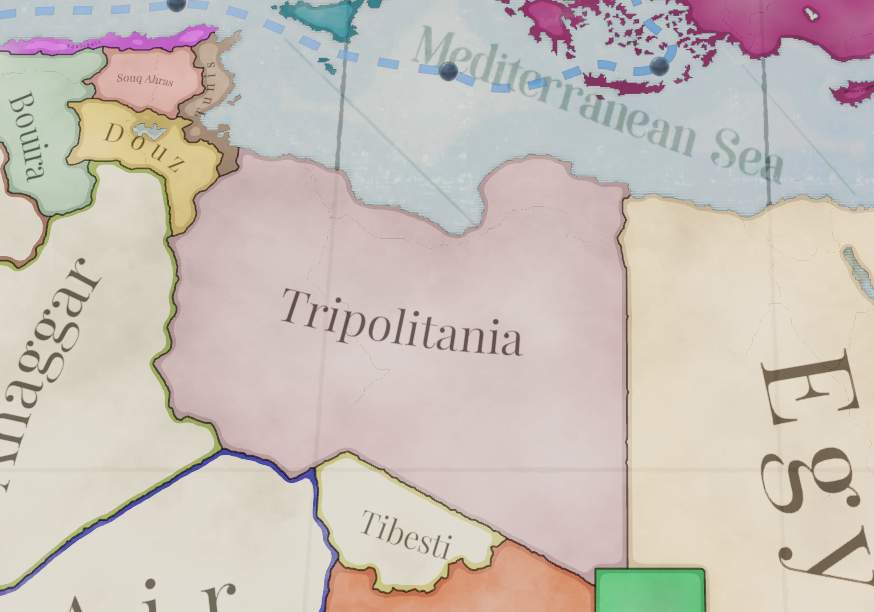
My country will be called Cyrenacia and will be located here in Tripolitania’s land.
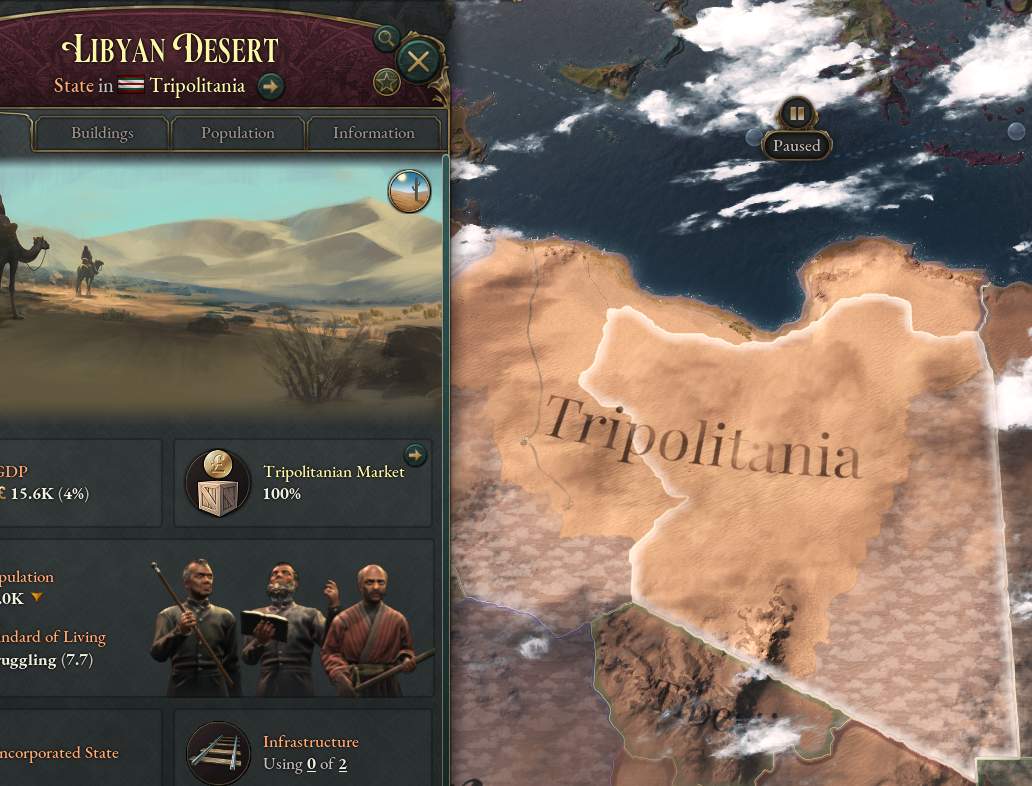
I think that I want to have it own the whole of the Libyan Desert state.
Now that I’ve decided those things and thought about some others, I need to decide on a tag (a three-character short code name for the country). I think CYR makes sense as a tag.
Let’s make sure that CYR isn’t already used in the base game by using Notepad++’s Find in Files function to see whether CYR shows up in the base game country definition files anywhere.
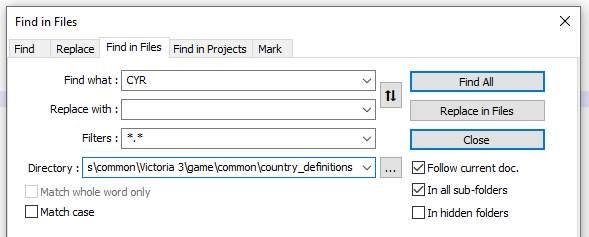
And it doesn’t, great! Now I’ll go to my mod’s country definition folder.

And I’ll add a definition for it.

As you may be able to see, there are some important parts to a country definition.
It starts with the tag, then you add a colour (this can be in either HSV360 format or RGB). Use some online RGB color picking tool, or image editing software to find the colour you want.
After that you decide what type of country it will be:
- Recognized – Mostly used for “western” countries.
- Unrecognized – Used for “non-western” countries, akin to Vic2’s “uncivilized”.
- Decentralized – For countries without a central system of government, usually used for indigenous people.
- Colonial – For countries that are colonies of recognized countries.
Then state its tier, which is essentially the size of the country:
- city_state
- principality
- grand_principality
- kingdom
- empire
- hegemony – At release in the basegame, only the country of India is a hegemony. Think of it as a megaempire
After that you’ll put the cultures in. The in-game spellings are usually the same as the code spellings, but not always. You can always double check in the base game’s common/cultures folder.
And finally say what state the capital is in. As above, this is normally the same as what’s written in game, except that spaces are always underscores, which is why my state capital is STATE_LIBYAN_DESERT instead of Libyan Desert. So your state will always be something like STATE_(NAME). If you’re not sure, check in map_data/state_regions or common/history/states.
Make sure you’ve got a closing bracket, too. Most fancier word processors like Notepad++, VisualStudioCode and Sublime have some way of doing this. Proper bracketing is very important!
Making the Country Show Up (Ft. the History Folder)
Now that the country is defined, let’s make it show up in the game. Right now, the game only knows that CYR is a possible country, but it hasn’t been told that it should exist. To do this, we need the history folder, and specifically these three folders.
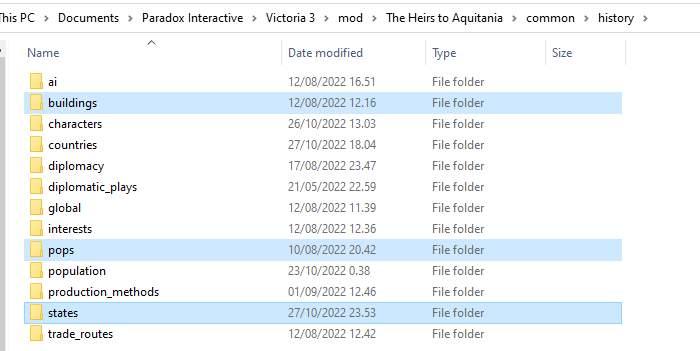
Let’s start at the bottom with states. The file(s) in this folder tell the game who owns what states (or what provinces in the state) at the start of the game, as well as information about what cultures consider the state to be their homeland. Let’s navigate to STATE_LIBYAN_DESERT:
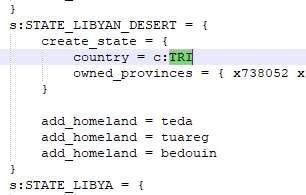
As we can see from the highlighted section, TRI (Tripolitania) currently controls the state. Let’s just change that:
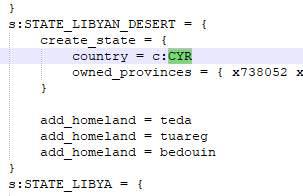
If you launch the game now, you will see that CYR controls the state, but it’s missing information about population and buildings, so it’s kind of useless.
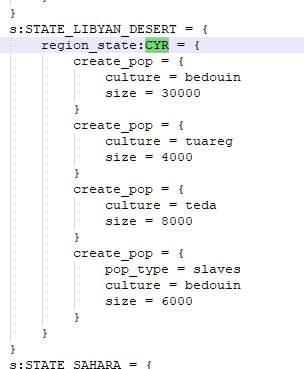
So head over to the pops folder, and once again find STATE_LIBYAN_DESERT, and there, too, change TRI to CYR:
And do the same in the buildings folder:

Here we can see that there are no buildings in the state. That makes sense, considering it’s mostly desert and has a very small population.
And with that, the history folder entries are done for now.
Finishing Touches
Our country is now playable, but if we launch the game it’ll be called CYR instead of a proper country name! That’s where localization comes in.
Localization is the way that you translate code into human languages like English. Let’s navigate to our mod’s localization folder.

You may see that I have a custom file name. The game supports that kind of thing, but some things are quite important. The file must:
- be .yml format
- have _l_english at the end of the file name (if your localization is English)
- start with l_english: in the contents of the file
I suggest just copying localization file from another mod or the base game and emptying it (except for the l_english: part).
The localization is pretty simple, as shown here:

TAG: "country name"
TAG_ADJ: "country adjective"
Just replace TAG with your own TAG, i.e. CYR in my case.
Again, you can boot the game now and the country will be visible, but I’ll recommend two more things.
- Your country needs a country history to customize what it’s like at the start of the game. This will tell the game what kind of technology it has, as well as laws and other information. I recommend just going and copying a similar country’s history. That’s what I’ve done for my country history.
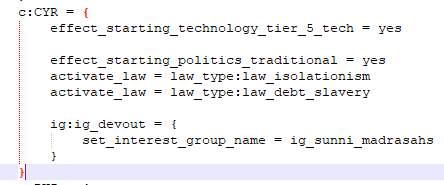
- Quite optional: Population information. The population folder in the history folder gives information about the people who live in the country, specifically their wealth and their literacy. You can create a new file for your country and the two following things can be added:
Wealth: (defined in common/scripted_effects/00_starting_pop_wealth.txt)
- effect_starting_pop_wealth_low
- effect_starting_pop_wealth_medium
- effect_starting_pop_wealth_high
- effect_starting_pop_wealth_very_high
Literacy (defined in common/scripted_effects/00_starting_pop_literacy.txt)
- effect_starting_pop_literacy_baseline
- effect_starting_pop_literacy_very_low
- effect_starting_pop_literacy_low
- effect_starting_pop_literacy_middling
- effect_starting_pop_literacy_high
- effect_starting_pop_literacy_very_high
I’ve decided to go with the following:

Finished!
Launch the game and voilà!
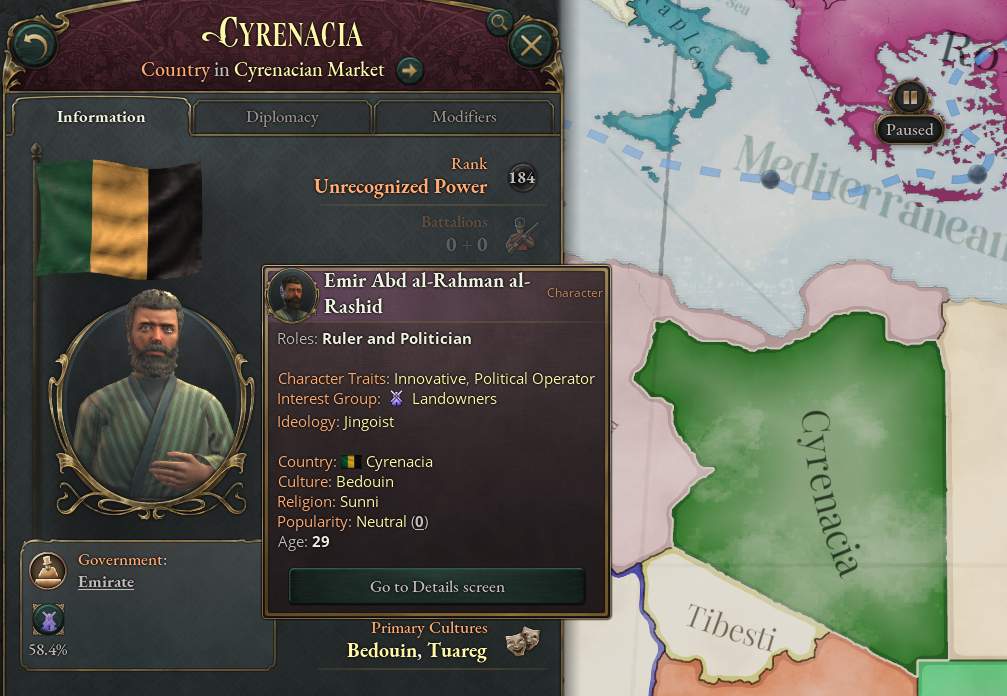
This guide will eventually cover creating a flag and setting characters, too. But this is enough to get you started!



How do I add resources to the state? Is it in the map editor?
State resources are tracked in map_data/state_regions.
I used to edit Morocco’s ruler but the changes doesn’t applies. The names I put were already localized so I don’t understand what’s wrong