
Quick guide for achieving 3 stars and complete wave 42 on Topless Mountain.
Guide to Topless Mountain Challenge
Trying to beat Topless Mountain can be pretty hard. You don’t have much money at first, and the enemies keep coming. But if you figure out the right way to do things, this level isn’t too bad and just takes a long time to finish. Luckily, you can speed up most of it.
The first group of enemies has 10 of them, and you’ll probably beat about half. Each new group will have 5 more enemies, and you’ll get better at beating them by 5% at certain points.
So you’re looking at 220 patients with an expected cure rate of 70% on wave 42.
I’ll give an overview of the strategy I used to run a successful hospital on this level.
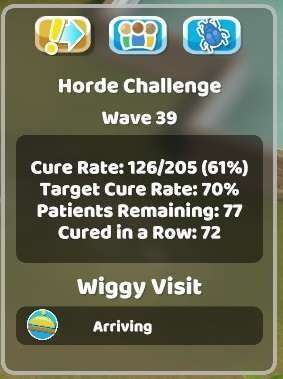
As an example; I reached a consecutive cure rate of 72 patients cured during wave 39 and going into wave 42 I had about 10 million in cash with 85 staff, 38 doctors, 24 nurses, almost all at level 4-5.
Along the way, you’ll obtain the following achievements:
- Curing spree – Get a Curing Spree on Topless Mountain.
- Life, the Universe and Everything – Complete Wave 42 on Topless Mountain.
You might also grab other misc achievements along the way if you didn’t unlock them yet, for example getting a level 5 surgeon, which is quite easy here and necessary for achieving a high patient flow and cure rate.
Warning
This guide contains possible spoilers for other DLC’s, mainly regarding to items you receive as a reward that will make this level easier.
General Strategy & Tips
You need to watch how much money you’re spending. I try to have enough money saved to cover at least three months of costs. That way, when you don’t make as much money towards the end of a group of enemies, you won’t run out of money. If you do this, you should always have money and save up a good amount. For me, around the time I got to the 20th group of enemies, I started making a lot of money and didn’t have to worry about it anymore. By the time the 42nd group started, I was spending about 200,000 per month and had over 10 million saved up.
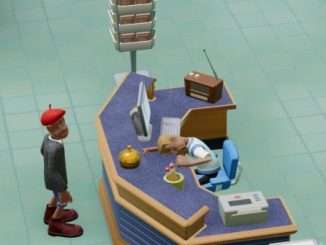
Don’t hesitate to send the last few patients home if you reached the goal of the wave, especially if they haven’t been fully diagnosed yet or they have an illness which takes a long time to heal (Fracture Ward and Surgery patients). Time is money and keeping a few patients around at the end of a wave can cost you a lot of money. For example: 3 remaining patients could net you 10k each if their treatment succeeds, but if a month passes to treat just the 3 of them, your staff wages will heavily outweigh your profits.
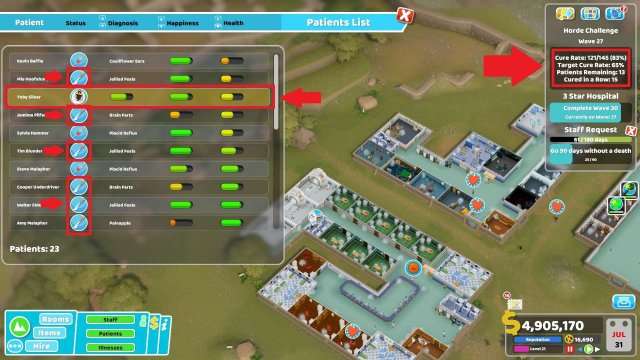
For example in the following screenshot, I reached the target cure rate (83% vs 65%) and profits started to decrease. The remaining 13 patients were mostly for the Surgery and one of them wasn’t even fully diagnosed yet. So I sent the ones marked in red home. If the treatment is already in progress, you can choose to keep them as it should finish soon-ish.
Set your hospital policy to ‘Fast-Track Treatment Decision’ with a ‘Diagnosis Threshold for Treatment’ of 80%. Set the queue warning length to 4, so you can keep an eye on rooms that are consistently crowded. If a room reaches a consistent queue of 6 to 8 patients while a staff member is present, your throughput is no longer optimal and you might want to consider adding another instance of that room.
Place sufficient drink and snack machines around your hospital, as well as arcade machines to keep your patients well fed and happy. Only place the following types of machines: Laxative Drink Machine, Luxury Drinks Machine, Luxury Snacks Machine.
Place Toxic Waste bins near your vending machines. Toxic Waste bins don’t negatively affect your attractiveness and hygiene when they’re full, whereas other bins do.
Don’t place any benches, since this slows down the patient flow due to the sit down / stand up animations. You’ll build a hospital for optimal throughput anyways, so they won’t need to stand for too long before they receive treatment.
Rooms
Start with the following rooms in the initial building:
- GP’s Office
- M.E.G.A. Scan
- Pharmacy
- Ward
- Reception
Get all rooms to level 4 by spamming Gold Star items on the walls. For the GP’s Office and the Pharmacy, add 2 Medicine Cabinet items to increase the diagnostic and treatment success respectively. Always place a Hand Sanitiser in each room to keep a high hygiene rating.
The Reception can be a Reception Desk from the Items list as well, but you’ll upgrade to a reception with multiple Assistants rather quickly.
Do not build any other diagnostic rooms other than the M.E.G.A. Scan room. This one will be your single powerhouse for diagnostics.
For the Ward, please refer to the following video by Pinstar detailing the Power Ward MK II. This Ward build ensures a high patient flow and treatment success:
As he indicates, increase the staff members of the Ward to 2.
Upgrade your Pharmacy and M.E.G.A. Scan to level 2 immediately. Then upgrade them to level 3 if your money is above 100k.
Other treatment rooms should be build when the game indicates they’re needed. Spam Gold Star items to get them to level 4 and place at least 3 fire extinguishers in the rooms, since this map tends to set your machines on fire rather quickly due to natural phenomenons. I also tend to upgrade the new treatment machines to level 2 as soon as I build them and upgrade them to level 3 when I see they start to get used a lot (see Patients Processed number on the room Stats page).
Make sure to check if your treatment rooms still have fire extinguishers on a regular basis, since the solar rays natural phenomenon will destroy them occasionally. It also helps to spam a bunch of them in the hallways of your treatment rooms, so a fire extinguisher is always at the ready for your janitors. In case you see a fire pop up or you hear the announcer say ‘the hospital is on fire’, immediately pause the game, drop a janitor in the room that’s on fire and place a fire extinguisher in the room if none are present. This will ensure the fire gets put out asap. You don’t want your machines to blow up, since building and upgrading them again costs time and money, which can be a disaster on these wave levels.
Eventually, you’ll need several rooms of the same type. A good indicator for this is as soon as you start hitting queues of 6 to 8 people or more. So as your progress, keep an eye on the queue indicator of your initial rooms and copy-paste the room in question and hire additional staff if necessary.
When the game prompts you to build a Fracture Ward, please refer to the Four Corners Fracture Ward setup:
Just like with the Ward, increase the staff members to 2.
When the game prompts you to build a DNA Lab, make sure to set it to treatment only.
Try to keep your diagnostic rooms close together so patients don’t need to walk for days to get diagnosed. So keep GP’s Offices and M.E.G.A. Scan rooms near each other in the same building.
This level has a hot climate, so you need to reduce the temperature in your rooms and hallways. Don’t use the Air Con units for this. Instead, use the Ice Sculpture from this DLC (75 Kudosh unlock, $300 item cost). Placing a single one in the center of rooms up to 4×4 is sufficient to cool the entire room (except for DNA Labs which require 2, since the Healixer gets quite hot).
Final Layout Example
My final layout looked like this:
- 1 big Reception in the initial building (10 Reception Pods)
- 14 GP’s Offices
- 3 Pharmacies
- 4 Wards (Pinstar)
- 2 Fracture Wards (Pinstar)
- 5 Psychiatries
- 6 M.E.G.A. Scans
- 3 Surgeries
- 2 DNA Labs (Treatment only!)
- 2 Injection Rooms
- 1 of all the other treatment rooms the game indicates you need as diseases get discovered
0 (yes, not a single one) of these: General Diagnosis, Cardiology, Fluid Analysis, X-Ray. All your diagnosis power comes from high-level GP’s Offices (add Medicine Cabinets as your budget allows to increase diagnosis power) and M.E.G.A. Scan rooms (add Deep Thing 1 as your budget allows to increase diagnosis power), coupled with well-trained staff.
Also provide a decent amount of Toilets and at least a 3×3 Staff Room in each building.
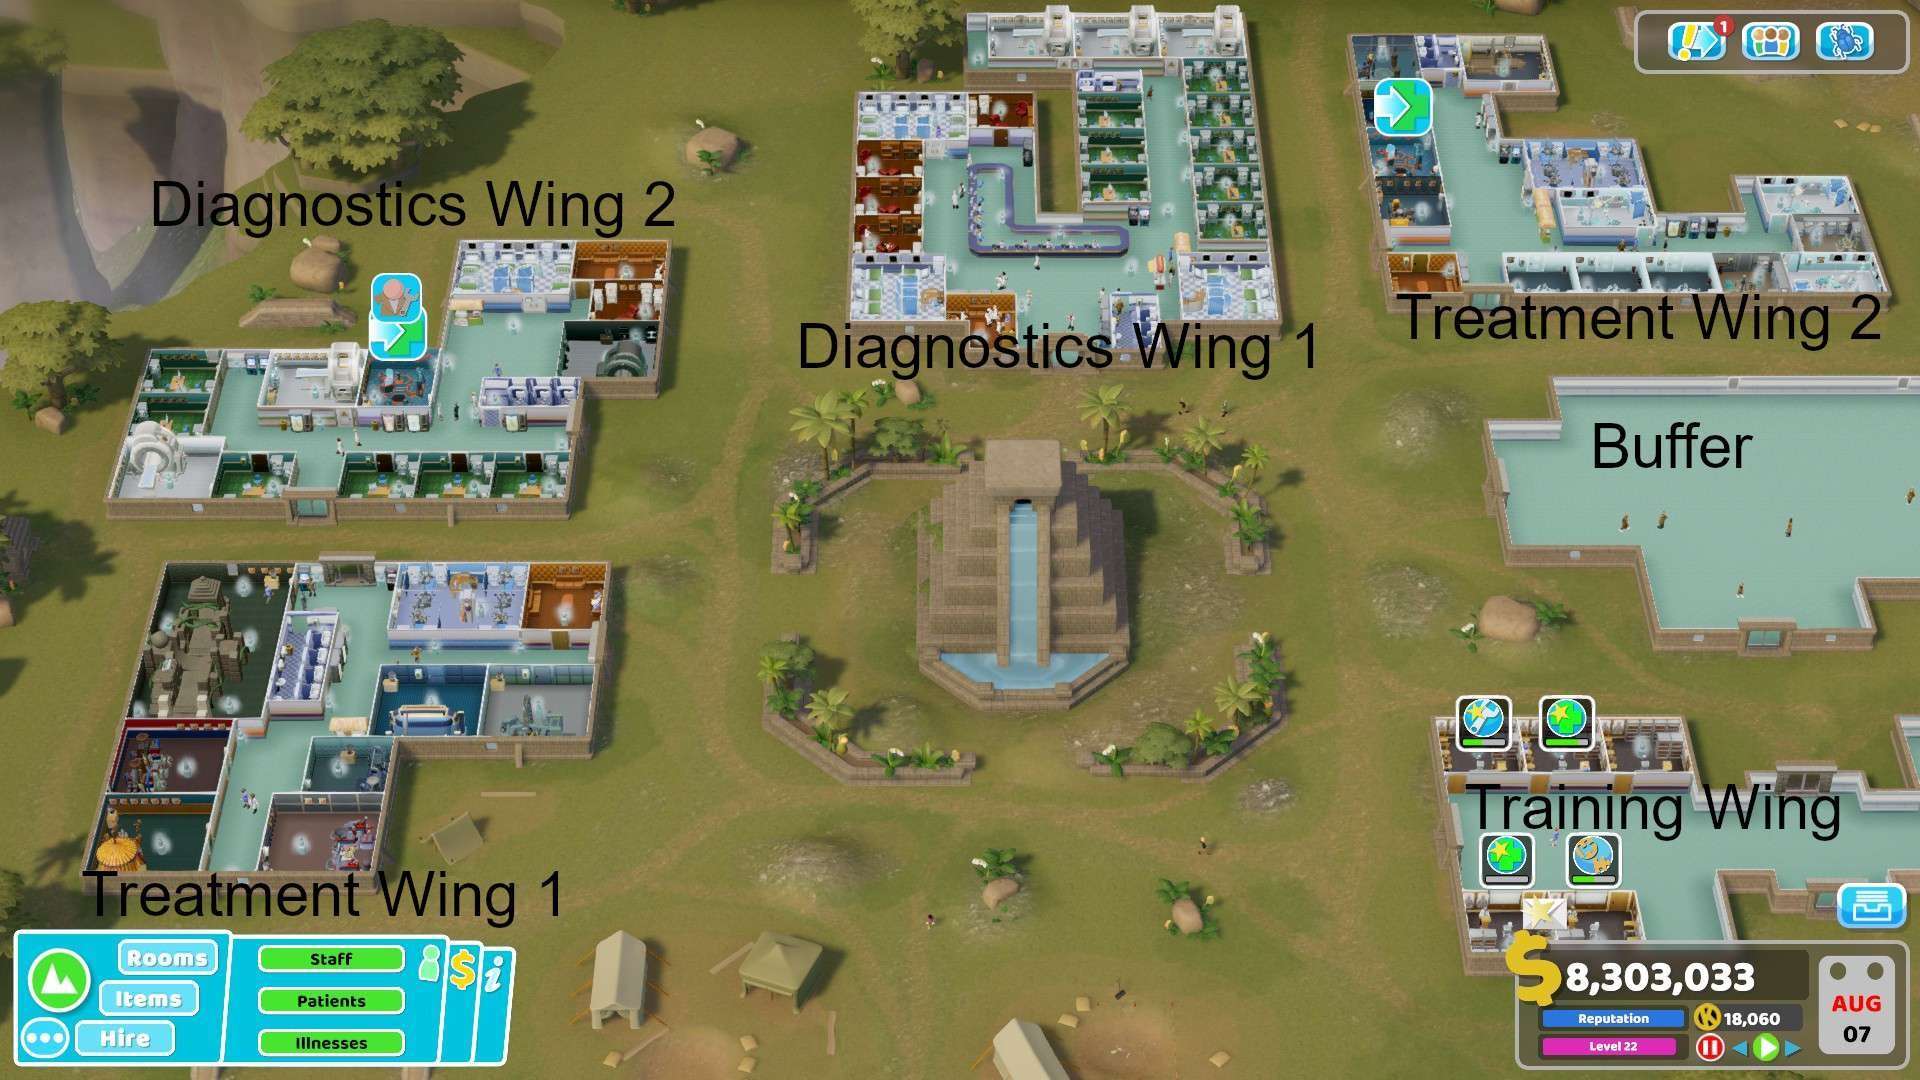
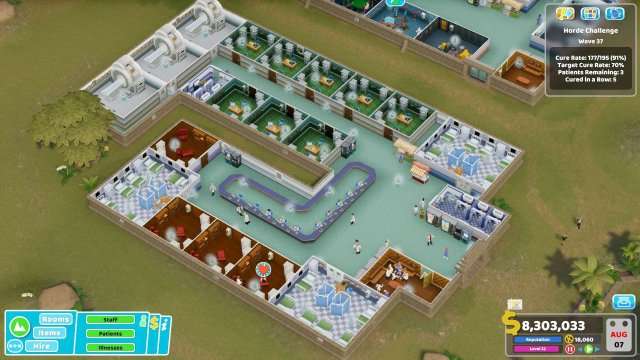
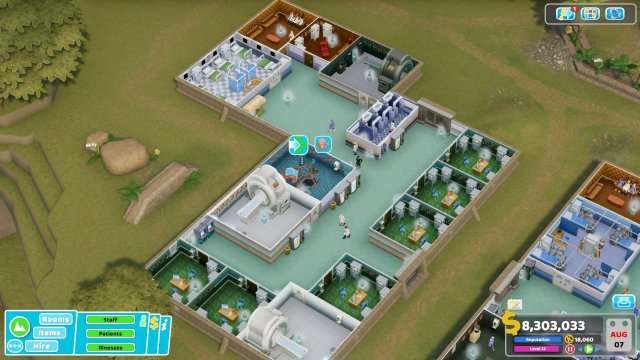
The diagnosis rooms and treatment rooms are grouped in separate buildings. Please refer to the screenshots below for an example of the final layout. Of course, at the start you can’t afford multiple buildings and will need to expand as the waves progress.
In-between waves you can pause the game and move your rooms between buildings to optimize your layout. You’ll want your diagnosis rooms close together to reduce travel time for your patients to get fully diagnosed. Your treatment rooms can be further away, since that will be their final destination before leaving your hospital.
Diagnostics Wing 1
This is the initial building + the expansion you can buy right next to it.
- Reception (10 Reception Pods)
- 8 GP’s Offices
- 3 M.E.G.A. Scans
- 3 Wards (Pinstar)
- 4 Psychiatries
In the later waves (30+) you’ll see queues up to 20 people at each Reception Pod. Don’t worry about adding additional pods and assistants, since by then you’ll have trained your assistants past level 3 in customer service, which will ensure the queues get processed quickly.
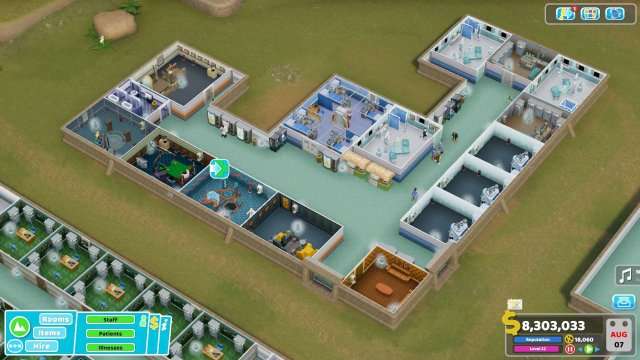
Diagnostics Wing 2
- 6 GP’s Offices
- 3 M.E.G.A. Scans (1 disabled as a reserve if another is on fire or under maintenance)
- 1 Ward (Pinstar)
- 1 Psychiatry
- 1 DNA Lab (Treatment)
Treatment Wing 1
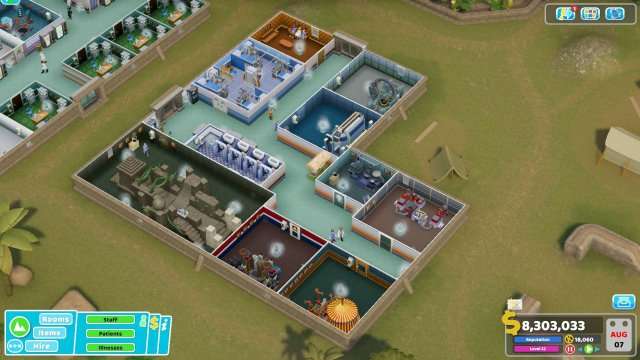
- 1 Fracture Ward (Pinstar)
- 1 De-Lux Clinic
- 1 Clown Clinic
- 1 Shock Clinic
- 1 Head Office
- 1 Pans Lab
- 1 Escape Room
- 1 Resolution Lab
Treatment Wing 2
- 3 Surgeries (Wall Monitors to increase Treatment)
- 3 Pharmacies (Medical Cabinets to increase Treatment)
- 2 Injection Rooms (Medical Cabinets to increase Treatment)
- 1 DNA Lab (Treatment)
- 1 Chromatherapy
- 1 Fracture Ward (Pinstar)
- 1 Pest Control
- 1 Correcting Pool (overlayed by the High priority ‘+’ sign of the DNA Lab)
- 1 Indentification
Training Wing
I added additional training rooms here when needed. The training room layout is optimized for fast training and is basically the build of this video:
Buffer
I used this to shuffle rooms around in-between waves. Sometimes you want to switch 2 rooms and then you can just drop one here temporary.
Staff
Try to hire staff with a single type of qualification or qualifications that are complimentary. For example, a doctor with both Radiology and Diagnostics is good, whereas a doctor with both Radiology and Treatment isn’t. In case there’s no staff available with interesting qualifications, hire staff with no qualifications. We’ll train them ourselves.
Try to avoid the staff with bad perks (unhygienic, hangry, etc.), or only hire them temporary until a suitable replacement shows up.
Avoid staff with ‘wants more money’ like the plague, especially in the initial waves, since money will be tight. Instead look for staff that ‘will work for peanuts’.
At the very start, try to get the following staff members:
- Doctor with either General Practice, Diagnostics or no qualifications.
- Doctor with Radiology.
- Nurse with Pharmacy Management or Treatment.
- Nurse with Ward Management.
- Assistant with Customer Service or no qualifications.
- Janitor with Mechanics
Keep an eye on your rooms, a staff member should be available for your core rooms at any time, so hire additional staff members as you see fit.
Get a Doctor with the Psychiatry qualification asap, you’ll need one after the first few waves.
Don’t promote your staff right away. Only do so when you’re ready to start training them to the next level of their qualification.
I kept only a single janitor with Mechanics I throughout the entire run to wave 42 and steadily upgraded equipment. I had 2 janitors with Ghost Capture to catch the occasional ghost. I focused all other janitors in the Maintenance qualification.
If you have the Robo-Janitor from the Close Encounters DLC, hire one of each of these as your budget allows. These are more efficient than human staff and require no pay, apart from their initial cost of 25k for the Robo-Kit + their deployment fee based on the type of robot
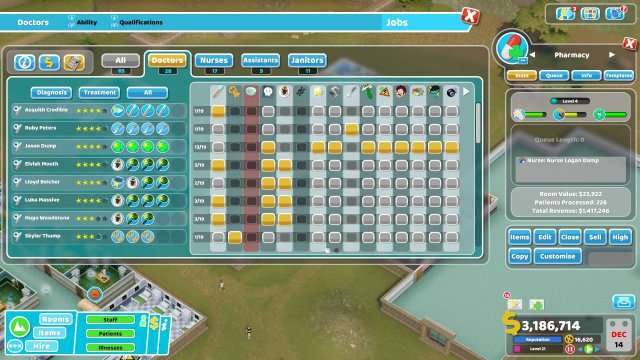
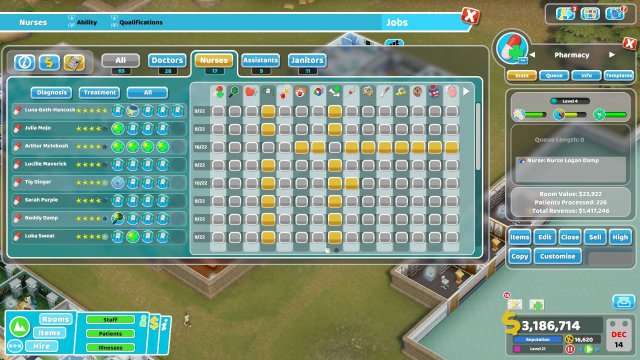
Job Assignment
After the first 10 waves, you should have enough staff with specific qualifications to be able to restrict them to work in rooms they’re specialized for:
- Doctors with General Practice, Diagnostics: GP’s Office only
- Doctors with Radiology: M.E.G.A. Scan only (+ GP’s Office if they have the Diagnostics qualification)
- Doctors with Treatment: any room, except GP’s Office
- Nurses with Ward Management: Ward and Fracture Ward only
- Nurses with Pharmacy Management: Pharmacies and misc treatment rooms
- Nurses with Injection Administration: Injection Room and misc treatment rooms
- Nurses with no specific qualification: all other treatment rooms except the ones mention above
Some examples:
Train your staff!
Add training rooms and train your staff steadily up to their max level in their qualification. For staff members with a qualification that only has a single level (e.g. Radiology), train them in complimentary qualifications:
- Doctors with General Practice: focus on reaching General Practice V
- Doctors with Surgery: focus on reaching Surgery V
- Doctors with Psychiatry: focus on reaching Psychiatry V
- Doctors with Radiology: focus on adding Diagnostics IV (also vice versa, train Radiology on doctors with Diagnostics)
- Nurses with Pharmacy Management, Injection Administration: focus on reaching Treatment IV
- Assistants: focus on reaching Customer Service V
- Janitors: focus on reaching Maintenance III or IV
Also hire some doctors and nurses where you focus on reaching Treatment V to populate the misc treatment rooms that don’t have a specific qualification tied to them.

Nice Guide!
Is Psychiatry treatment only or both diagnos and treatment?