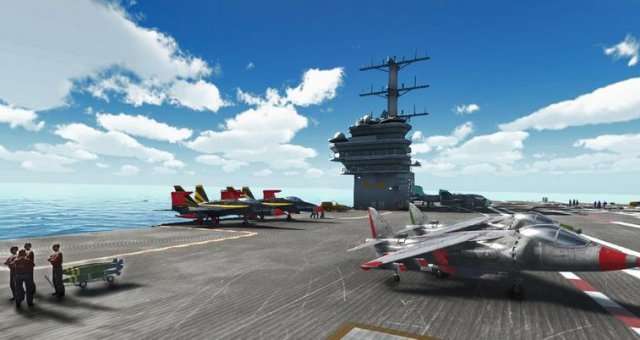
Frustrated when trying to park your craft? Check this out!
Introduction
I am writing this guide in order to give a hand with the pathfinding and parking on this fun game, which seems to be frustrating some. Truth be said, once you learn the trick behind the pathfinding for your craft, everything becomes easy peasy!
In this guide, we will be learning about both how to organize planes on your deck, and how to move them around.
For making explanations easier, I have finished a simple easy-mode quick game so I could move the craft to check their paths and relocate them at my own leisure to show the different examples.
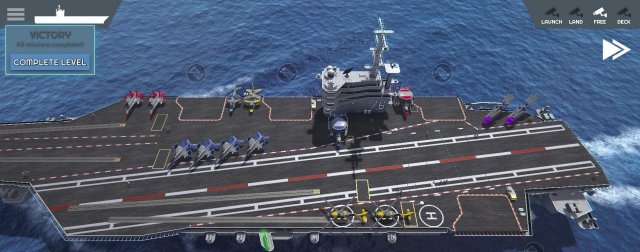
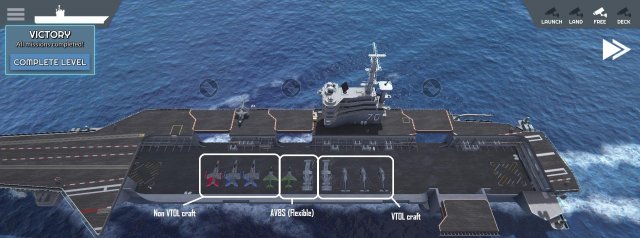
This is the carrier setup we will be working with, which has a little bit of everything:
Let’s get started!
Organize Your Craft
Whenever the situation permits, I try to keep my aircraft organized by areas of the carrier, this makes it easier to locate what you look for and know what you have available at a glance.
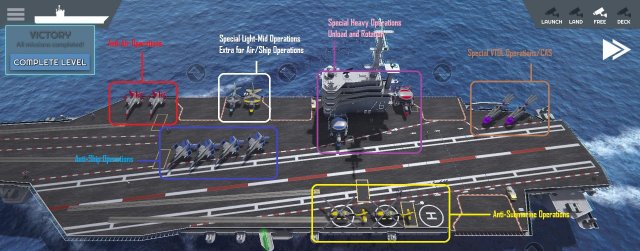
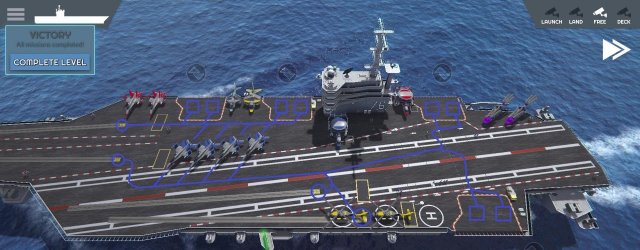
Let’s look at the following example:
Please keep this image handy, as later in this guide, I will refer to each area with the color I assigned to it.
Here I have an example setup for a generic balanced mission, with a couple planes prepared for anti-air missions, four for anti-ship, and an electronic jammer in case it is required. (Red, Blue and White highlighted areas). I also sometimes use the white area to keep green (CAS) loadouts in case land attacks are a possibility. Keep in mind that some missions will require you a more heavy attention onto red, blue, green or even yellow plane loadouts, so plan accordingly!
My copters are usually prepared at yellow areas, when the mission is submarine heavy, I also station a couple on the brown area to keep them resupplied at all times. Otherwise, I always keep a couple of refueled craft for marine missions there.
I usually reserve the purple area for the recon craft (Hawkeye) and the supply planes and choppers.
Unless you have extras, you usually want these back into the air as soon as possible, these two spots give you the quickest access to the middle launch catapult, and VTOL landing locations, keeping the two on the front free for your fighter operations.
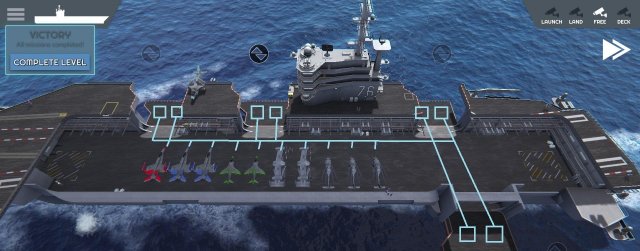
Let’s also talk about what we have under the deck
Your planes will always require to launch from one of the catapults, I usully keep these parked near the front of the carrier, where they can quickly access the two on the front.
VTOL (helicopters and the ospreys) always require to be launched from the VTOL locations, hence why I always keep them at the right side, for quicker access to that area.
Your Harriers (AV8S), are a super handy and flexible asset, that can launch from both catapults and the VTOL pads, keeping them around the middle section will assure they can equally reach either side quickly. (Keep in mind they always land on the VTOL locations though!)
Pathfinding Basics
We are done with organization, so let’s talk about pathfinding! You may wonder why I am so picky with the locations for each kind of craft. This serves an additional purpose, as each of the colored areas has an slightly different pathfinding in some sections.
Try to see your craft as if they would be moving in rails, and everything will become way easier, I have prepared several images showing these “rails” to help you learn the different paths
We will start with the “blue” section, which is the most significative, as it shares paths with everything else:
The master trick to avoid problems when moving planes around, is to learn which paths they follow while moving, in order to prevent giving orders that make them run into eachother. This is specially critical with the positions nearest to the runway, as mistakes can leave more than one plane stuck in the middle or the runway, with the potential explosive fun related to such mistake.
In case of heavy outbound traffic, you can always use the catapults on the rear for your fighters, I disadvise using the one that is under the VTOL pads if you are in a helicopter-heavy mission, as it may also cause lots of explosive fun if your choppers try to land during a launch. (Note: As I do not use this one too much, I will reference it as the “4th catapult” from now on)
With that said, you preferrably want to keep your fighter craft to the front of the carrier whenever possible, the paths there are the least interfering with the runway, and the two catapults on the front are away from it, so you can even delay launches from them without danger.
Your helicopters should always resupply or part near the rear of your aircraft, as the VTOL launching pads are only available on the rear.
Moving either the fighters to the rear or the helicopters to the front will result in later frustration trying to avoid the incoming landings while trying to move your take-offs around.
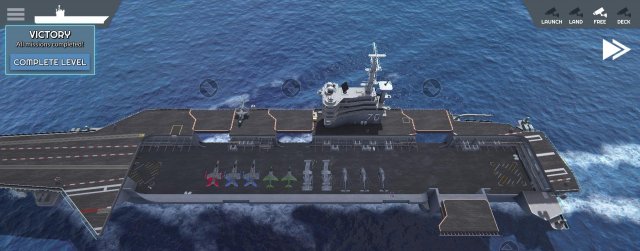
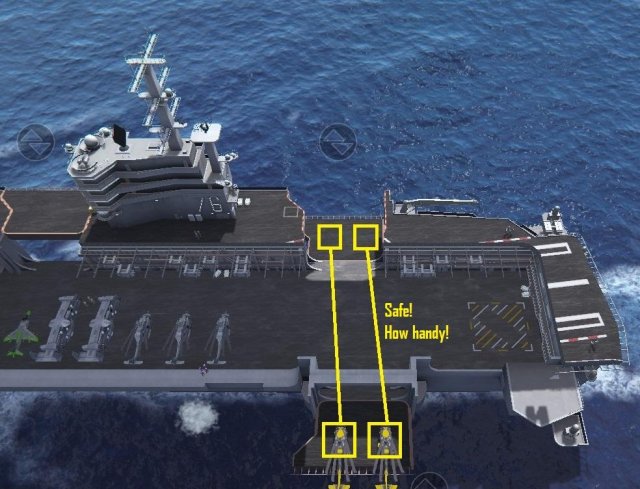
The section under the deck of your carrier is more straighforward, but also easy to clog, as your craft only have one path they can follow, take a look:
That said, always time your craft so they do not run into eachother (one elevator at a time, give the first one you move about one second to get off the elevator to give some space to the other plane to be able to move, never have to planes cross positions (left go right, right go left) at the same time.
Pathfinding Quirks – Front Half
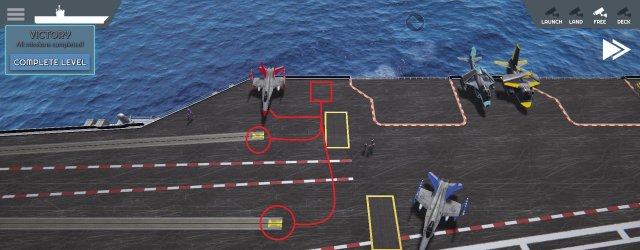
Let’s give some focus on the particular pathfinding found at the front of the carrier:
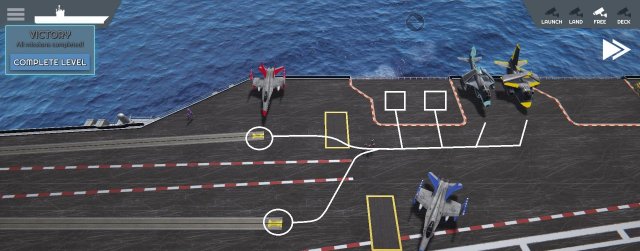
The two craft on the red area seem to share the same rail for the front catapults, otherwise, they will pathfind to the rest of locations just as shown on the previous diagram (blue paths)
If you want to launch these two quickly, the trick is to launch the one on the right side first, then the one on the left. (Send the right one to the far catapult, and the one on the left to the near catapult, in the mentioned order, the little delay between click will give the first one time to move away from the second!. This will make both arrive almost at the same time!)
Opposite rule goes for the white area in order to prevent both planes from running into each other, first move the one on the left to the farthest catapult, and the one on the right to the nearest, in that order. This will make sure they will not run into eachother)
If you want to send these anywhere towards the rear, do it in the opposite order. The one on the right first, to the farthest location, then the one on the left to the nearest.
TIP: Same rule goes with the craft on the front elevators!
Pathfinding Quirks – Real Half
Pathfinding-wise, your rear half is the most complicated and most prone to explosive fun, as most of the paths cross the runway. Let’s take a look into it and I will show you some of my tricks to prevent your craft to run into eachother in this critical section of your carrier.
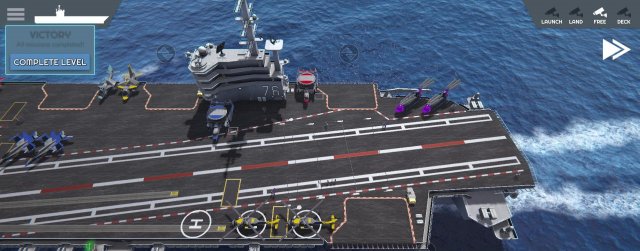
VTOL (Vertical Take Off and Landing) pads:
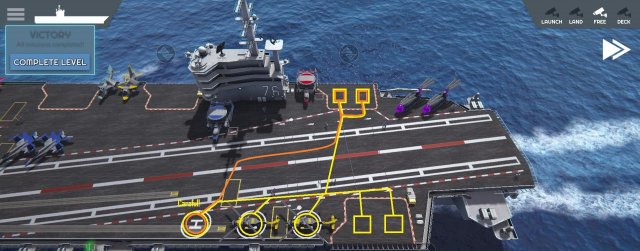
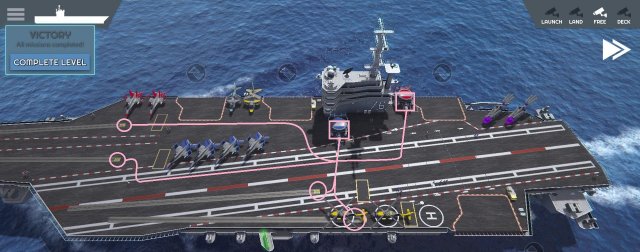
Ok, so if you take a look into the pattern here, you can see that switching your helicopters between the VTOL pads is perfectly safe even with incoming landing traffic on the runway. Moving to the top elevator and brown section (where our purple helicopters are located just now) makes your choppers cross the runway.
Now, pay attention to the orange line. The VTOL pad most to the front has a different pathfinding, which interferes with the runway for the longest time. You can avoid this problem by moving that craft to a different VTOL pad or the bottom elevator.
More optimally, as you can safely move the choppers between the VTOL pads and the elevator (they do not get in the runway, you may prefer to use the elevators to reach the other side safely:
Now, let’s talk about the purple area. This is the only location where your resupply craft can unload their cargo, and tends to be the optimal location to handle craft that need to resupply quickly and get back airborne as soon as possible:
Due to its pathfinding, the one near the bridge (middle) is more optimal to use, and you should prioritize this one as much as you can, using the second one as backup. Specially for refueling and unloading your supply craft.
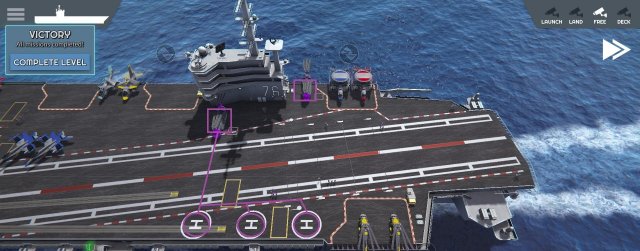
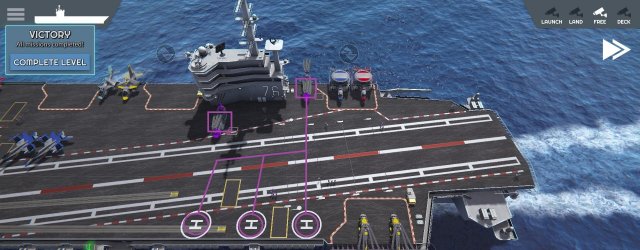
If you have any inbound resupply helicopter, your VTOL pads most to the front and rear are the best bet. Compare the paths followed from each position:
Front is good for the front resupply area:
Rear is good for the rear resupply area:


Be the first to comment