
Comprehensive Guide for Intermediate and Advanced Players.
Initial Unit Purchases
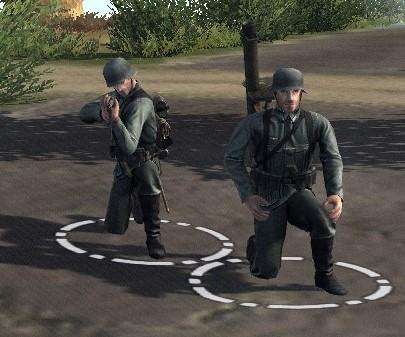
Buying your first units is very important in a short battle. These units fight first and decide how fast the game goes. So, think about what you buy to take the first area fast. In a normal battle, you need at least three types of units: one that heals, one that fights many soldiers, and one that fights weak tanks. Also, keep about 150-200 points to buy more units later. This helps you take the first area well.
There are many ways to deal with infantry early-game. All too often players will purchase a mortar as a means to take out the first line of flags. While this is not a wrong choice, it is a poor choice. On Normal difficulty, it is not too big of a deal, as you have 800 mp to spend on units. However, on Hard and Heroic you will only receive 600 and 500 points respectively. At 275 points, a single mortar will be costing you nearly half, or more than half of your mp total at mission start. Also, the mortar is on average slow to kill its targets which makes the mortar very inefficient, because speed is very important when it comes to capturing the first flag.

A lot of soldiers can take the first flag. This works better on the Hard difficulty than the Heroic difficulty. If you buy enough soldier groups, you can plan how to take the first flag. If you save points to buy a unit after taking the first flag, you can buy 3 soldier groups on Hard, but only 2 on Heroic. Soldier groups have different guns for close and far fights, a healer, and many grenades.
German and British Infantry Squads also come with a leader armed with a special weapon, either the StG 44, or the EM-3 Riflegrenade. The EM-3 is especially useful, because it is effectively a short-ranged artillery rifle, and the StG is the best SMG-class weapon in the game (yes, we all know it’s really a rifle, but the game classifies it as an SMG for…reasons).
Another way is to purchase a bunch of AT Infantry. This works better with AT rifles, than AT rockets, as the AT rifles can be used effectively against infantry even at long ranges. Another advantage that the AT rifles have over rockets is the ability to pierce and eventually destroy sandbags and other types of cover that the enemy might use.
It might take a while, but eventually AT rifles can completely blow away a section of sandbags, whereas no matter how many AT rockets you shoot, they simply cannot destroy most types of cover. The down side of using a large amount of AT infantry to take the first line, is that it takes precious time to amass that many AT teams. However, this can be somewhat negated since you don’t have to worry about lacking a counter to the light armored vehicles that show up early in the game.
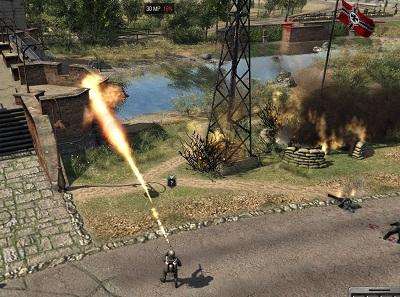
Flamethrowers are a very lethal way to clear out enemy infantry, and as a bonus they can potentially be used against vehicles as well. The only problem is getting them into position to fire, but once they do then they will more often than not clear their target within a matter of seconds.
Snipers, in the hands of the right player, can be an extremely effective choice when it comes to clearing out a flag. Using snipers in conjunction with other infantries is advised, as snipers lack the rate of fire to clear out an area in good time. Instead, target priority is a must, because without proper target priority, snipers become little more than a glorified rifleman.
Heavy Machine Gun teams, costing 25 points more than an Infantry Squad, are a very efficient way to assist in clearing out enemy infantry. While their usefulness drops off dramatically after capturing the first flag, their utility in attacking and capturing that first flag cannot be emphasized enough. Most commonly seen as the defensive positions that pop up when you capture a flag, the purchased HMG are a two man variant that requires both crew to move around the battlefield.
The benefits of the HMG are threefold. First and most obviously, the withering amount of bullets that it can shoot can be quite deadly. Second, the HMG forces enemies to take cover, allowing the rest of your men to engage the enemy on more favorable terms. And lastly, if a soldier manning the HMG is ever killed, you can simply re-man the gun with other soldiers. Additionally, the HMG can put out instant sandbags if you ever find you need the extra protection.

Capturing the First Line
After capturing your first flag, no matter which one you chose, you will now be calling in some kind of reinforcements with all those points you’ve been saving up. Ideally, you will want to order something that will ensure that you can deal with at least light armor, but preparing for medium armor is advised. No matter what you purchase, you will also want them to help your remaining forces clear up the first line. To this end, all options unlocked are viable to some extent. However, some are a lot more useful than others, or have extra utility beyond the first line.
For all factions, AT Guns are a good choice, as they can easily take out enemy armor with very little micromanagement from the player, allowing the players to focus on capturing the rest of the flags with their initial force. If you are having trouble with the AT guns switching to HE shells, you can either use those shells up, or simply drop them out of your inventory. By doing this, you will ensure that your AT gun is always ready to engage enemy armor.
Elite Infantry (Rangers, SNLF, etc.) come with 10 well equipped soldiers and their own armored halftrack. For the Allied factions, the M3A1 comes armed with the very lethal .50 cal HMG, which can even take out lightly armored vehicles, but the real source of AT is the 2 AT rocket soldiers that come with the squad, allowing them to defeat all but the heaviest armor from close to mid range. The halftrack can also be used offensively against the first line of defense since there are no AT guns present to defend the first three flags.
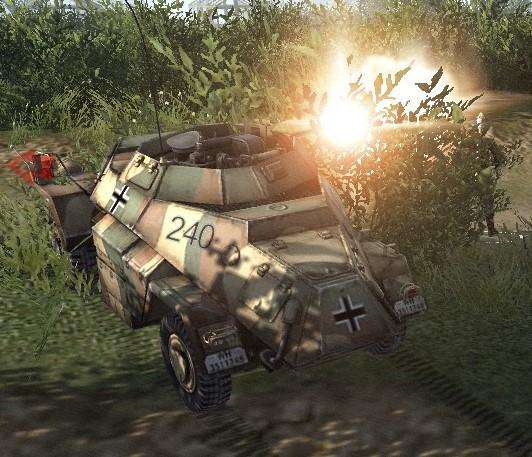
Each faction has access to an armored car (AC), and they are all very different. The only charicteristics shared by all ACs is their light armor and ability to tow things around the field. Despite being lightly armored, even one AC is more than most infantry can handle, assuming the AC stays out of range of thrown grenades. The speed that ACs can move from flag to flag also makes them great at helping your infantry finish the capture of the first line, however for most of them their usefulness becomes more limited after the first line as they start to encounter heavier enemy armor and AT guns.
Most decently armored tanks that you gain access to on the first line are expensive, with the Matilda being a very significant exception. However, just like with the armored cars, they also have more than enough defense to crush their way past the first line, and also deal with enemy vehicles that may threaten them. The only vehicles that are NOT recommended for capturing the first line are the SU-85, as it lacks a machine gun, and every tank that costs 500 mp unless you somehow managed to amass that much MP quickly.
The AA Gun is a decent choice when purchasing a unit to take the first line. Most of these weapons are 20mm autocannons that can shred masses of enemy infantry quickly, and all of them have some kind of AT potential, allowing them to also destroy lighter vehicles. While slow and often vulnerable, if you get these weapons into a good position you will not be disappointed by what they can do. When used in conjunction with AT guns, they make a slow but devastating pair, especially when they have infantry support.
When you’ve finally captured all three flags of the first line, you will get a bonus of 300 mp, access to your faction’s special unit, and the computer will launch a counter-offensive to try to reclaim its lost territory. This is a good time to organize your units, and your team. While many players have different ways of organizing their games, I find that it’s best if you either pick lanes, or pick combat buddies, or some combination of the two.
Picking lanes allows players to focus on a certain area of the battlefield, and having combat partners allows two or more players to synergize with each other. Sometimes it’s good to have skilled infantry or armored players roaming the field. These are the players who will give your team a bit of tactical flexibility to your line. Whatever your team decides to do, now is the best time to do it, and brace for the counter-assault.
Capturing the Second Line
Your next major obstacle will be the light AT guns defending the second line, and increasingly tough enemy armor to contend with. Most maps naturally flow in a left-to-right play when it comes to capturing the enemy’s flags, but occassionally some maps have physical obstacles which prevent this from flowing smoothly, or which provide better opportunities than moving from left to right. To this end, light AT guns are not that big of a challenge unless you are unprepared to face them. A few of the best ways to take out light AT guns are as follows:
Medium armor is often one of the best ways to take out light AT, and all factions except Japan have access to some kind of tank that can withstand the shells of enemy light AT guns. The best suited tanks from all factions to this task are the Sherman, StuG, Matilda, and T-34. Special care must be taken if facing Japanese though, as their light AT guns can pierce even the formidable armor of a T-34 given the right circumstances. When attacking with tanks, it is not necessary to get close to the enemy when using HE shells (HE shells do the same damage at any range), because the only benefit you gain by closing the distance is increased accuracy.
Just stay at a good distance and toss HE shells in the enemy’s direction until the ATs are down, but also be careful not to expose your side armor while maneuvering into position. If you’re feeling confident and aggressive though, most of these tanks have frontal armor that is strong enough to deflect a light AT shell at point blank range. As always, support these expensive machines with infantry to ensure that they don’t get ambushed by a random infantry soldier.
It is possible to destroy light AT guns with infantry, but this poses a few problems.
- 1) AT guns have unlimited HE shells, unlike yours. This means that it will fire HE shells at your troops until it is put out of service.
- 2) Light AT guns have a fast reload time. With the average reload time of these guns being around 3 seconds, by the time your guys stand up from being knocked on the ground, the AT gun is firing another shell at you. This can devastate large squads of troops if you’re not careful.
- 3) Light AT guns are usually positioned so that they can cover each other. If you plan on sneaking up on these guys, you will either need luck, skill, or lots and lots of smoke.
Typically though, most maps have at least one spot where infantry stand a good chance at taking out a light AT gun or two, and thus punching a hole in the line that can be used to outflank the rest of the AT guns to a greater or lesser extent. Soldiers armed with riflegrenades are particularly useful in this task, as are soldiers armed with AT Rifles and sniper rifles which can easily decrew an AT gun, allowing the rest of the infantry to advance unmolested.
Your own AT guns can be used to put hostile AT guns out of service. Typically having longer range and greater destructive power than the light AT guns defending the first line, AT guns can also be moved into position behind either soft or hard cover before firing, increasing their survivability. As they only come with 5 HE shells each, you may want to pick up some extra shells from a supply truck before attempting this, or simply use AP shells instead to decrew the enemy guns, and potentially damage the guns themselves.
Whatever choice you make, after capturing the second line, you will get another 400 mp one time bonus, and the enemy will launch an even larger counter attack along with heavier armor.
Capturing the Third Line
The Third defensive line is often one of the more (if not the most) challenging parts of a skirmish. You do not yet have access to your best units, but you are also facing some of the heaviest units that the enemy will be throwing at you. On top of that, you may or may not start to come under artillery fire as you approach the flags you intend to capture.
And to make things worse, the vast majority of your tanks will be out-classed by the enemy AT guns you’ll be facing, most of which will be medium AT, but will sometimes include the fearsome 88mm Flak cannons. A few significant exceptions to this is the Tiger, StuG III, and the Matilda, but more on that later. All in all, it can sometimes be a complete nightmare to advance past this portion of the map.
At this point, you need to be aware of your resources, and what they’re capable of. Some of them, at this point in the game, are relatively useless, and others will excel at different things. There are so many different methods and units you could use to capture the 3rd line that it would take forever to describe all of them in detail. Instead, I will here simply go over some common tactics, and let the readers decide which method they would like to use.
Before that, however, you need to decide which flag you will be attempting to capture first. Generally speaking, there are 3 types of tanks slotted into these roles that are similar for all factions. On the left will generally be some heavy up-armored tank that is capable of absolutely ignoring enemy AT guns for the most part. In the center you will have an artillery option. And on the right, there will be some kind of Heavy Tank Destroyer.
The countries that don’t follow this are the Soviet Union, and Japan. For the USSR, the Heavy Tank, and Heavy TD are switched around, but for Japan, the “Heavy Tank” slot is filled with a typically sub-par tank. Better than what you have available, but still paper thin compared to the choices that other nations have. It is advised that you try to have the resources necessary to buy the unit you want immediately upon capturing the flag, otherwise, ensure that you can hold out long enough until you do have the MP.
After you’ve selected which flag you want to capture, whether it be by terrain or by the unit it offers you, I strongly advise focusing on it as much as possible. As I mentioned before, there are many ways to do this. One of them being the good old infantry assault. Now, the Infantry Assault is difficult, and costly to pull off without support. However, the longer reload time on the larger AT guns means that your men will be taking larger, but fewer HE shells to the face. As always, use prone and go slow, and use whatever cover you can find, including crater holes created by HE shells and artillery.
Once you manage to kill the first AT gun, exploit the gap in the line, and try to work towards the other AT guns. Use smoke often and liberally to move from position to position, and build sandbags when necessary, preferebly while under the cover of smoke. Most importantly, don’t use large squads, break your men up into groups of 3 maximum, but sometimes it is wiser to use single men. When one unit is advancing, lay down covering fire to support them, and “leapfrog” your squads from position to position. Using only infantry is difficult, but not impossible to do.
Another viable option is an Armored Breakthrough. This method is costly in both resources and time, and requires you to amass several tanks and focus them on one point of the battlefield. The goal here is to bring too many tanks to a single point in the line, and overwhelm the enemy’s defenses. The tanks you use, however, don’t need to be fancy.
I recommend having at least one tank with a nice gun (like a T34/85) to deal with any enemy armor that might show up. As a bonus these higher end tanks are also more accurate than most others available, and can shoot AT guns more accurately than others. Whichever tanks you use is your choice, and it is possible to even use most Armored Cars to help supplement your attack.
Casualties will likely be high, however, which is why you should invest in multiple cheap tanks. This is where Britain has the advantage, as their Matildas are dirt cheap, but Germany also has an advantage here in the form of the StuG and Tiger tanks, both being capable of eliminating Medium AT from long range if they’re able to get into a good position with LOS on the target, however, sometimes this isn’t always possible.
Vehicles armed with repeating cannons such as the T-60 or the various AA units are also a viable choice to bring along. No, they won’t destroy the gun, but their cannon can pierce the gun shield reliably from medium range. This can either kill the men crewing it, or even cause a “Gun Damaged” result, or both, putting the gun out of action for a considerable amount of time. As a bonus, these types of vehicles are extremely lethal to infantry, and will help your main tanks in an area where they sometimes struggle against entrenched soldiers.
If you’re having trouble knocking out those AT guns, and neither of the above methods have worked out for you so far, you may want to consider bringing in some artillery. Most nations don’t have access to any artillery outside of the mortar (excluding Japan and USSR), however Japan has a very unique unit that is often overlooked. Mortars are slow, expensive, relatively fragile, and have limited range and damage capacity. The Japanese, however, get access to the Ho-ni 2 self propelled artillery gun in place of an AA tank. Costing just 25 more than a mortar, the Ho-ni 2 is much more useful, even if it is a bigger target. Given how much Japan’s tanks have trouble assaulting AT guns, I cannot recommend this unit enough.
The method that I find most effective, however, is what is known as the “Combined Arms” approach, that I’m sure many are familiar with. The concept is to use many different types of units in concert with each other to achieve a goal that would be tough for any single element to do on its own. This is such a versatile concept that it’s hard to describe it with any detail, because there are so many different ways to execute it properly. You could use mortars to cover advancing infantry, you could use infantry to distract AT guns while even a single tank picks them off one by one.
Once that happens, you can rush the tank up to more aggressively deal with infantry while your own infantry works their way to their individual objectives. In a real battlefield, this tactic would also include the use of air units, but our selection is limited to only land. Even so, Combined Arms perfectly exemplifies the saying, “The whole is greater than the sum of its parts.” What this means more or less is that teamwork and coordination between different elements on your team can help pull you through a difficult situation that would be almost impossible otherwise.
Once you capture the first flag, and purchase your first Heavy unit, you should have a much easier time pressing along. Be careful of enemy heavy tanks however, as once you capture the entirety of the 3rd line, the enemy will send several of their best tanks. This is the moment where you will see multiple Churchills or King Tiger tanks rush your positions.
As a counter, I’ve learned that the Heavy Tank Destroyer option is often one of the best ways to deal with this, even if it is the most expensive unit you can purchase. Fortunately, you receive a 600 MP bonus for capturing the line, and it is recommended that you should put those resources to good use. The units purchased, as always, are up to you.
Capturing the Final Flag
If you’ve managed to make it this far, and survived the Heavy Tank rush, then the game should be more or less over by now. Use whatever units you have left, relying heavily on the Heavy Tank and Heavy Artillery option to blast apart the enemy’s final defenses. Be wary of the occassional Heavy Tank coming onto the field, but I’m sure you’ll be able to handle it.
A special note must be made of the Nebelwerfer at this point. Unlike most multiple fire rocket artillery, the Nebelwerfer’s rockets are large enough to damage the top armor of many tanks, including the Jumbo. This usually only happens when it scores a direct hit on the engine, but I’ve had “Turret Damaged” results as well. If it hits your engine, it’s likely to progress to an engine fire, that will almost always progress even further to a “Hull Destroyed” result.
A damaged turret wouldn’t be so bad if the Nebels weren’t so darn good at knocking your tracks out as well. So, when going up against a map with Nebels, just be careful knowing what they’re capable of, and make your own judgements on the field.
In your final assault, it is the player’s perrogative to destroy the AT guns or artillery first, using their own heavy tanks or artillery. This choice will depend greatly upon which units you have remaining on the field. However, all too often do I see players using the Artillery units to attack swarms of infantry.
The infantry should be very low on your priority list, because there are so many other units that can engage them effectively. Unless enemy infantry is overrunning your lines, I suggest that artillery focus on eliminating the enemy’s fixed positions (AT and Arty). Once the AT guns are gone, your own armor will be able to blaze their way up to the enemy’s flag and finish the game. Good job, commander.
Unit Guide Intro
Many country’s units are very similar. Here i will go over the basic unit types per slot, and give basic compositions of each selection. After this section will come the detailed country reviews, where i highlight certain units, and explain how each country’s units differ from the norm, and what part of the game they perform best at…or…something like that.
General Overview
Infantry Squads
Infantry are your mainstay, and will supply you with much of the manpower you need throughout the course of the game. Primarily suited for defending locations against other infantries, your infantry will require support to overcome any serious resistance. A single squad comes with 5 Riflemen, 2 SMGs, 1 LMG, a Medic, and a Squad Leader, who is typically armed with a regular SMG. The mixed selection of weapons within a squad is what makes them rather flexible.
A single squad is able to lay down a significant amount of suppressing fire, or alternatively, they can hold their own in close range firefights if necessary. In emergencies, the 3 SMG soldiers have an AT grenade to use against vehicles, and smoke to provide offensive or defensive cover. Every soldier except for the LMG and Medic have at least one frag grenade. The Rifles and LMG have sandbags to deploy cover for your troops which will assist in holding positions. The main drawback of this standard infantry squad is the quality of soldiers being sub-par with the exception of the Squad Leader.
AT Team
Each nation has either an AT rifle or AT rocket in this slot. When purchased, you will receive two soldiers armed with SMGs that are identical to other SMG infantry, with the excpetion that both soldiers have a higher weapon skill in their preferred AT weapon (Rifle or Rocket skill). Rifles are better at longer ranges, but cannot penetrate the amount of armor that a rocket can, while rockets are extremely close ranged, but typically lethal to most armor.
Both can be used against infantry, and often to devastating effect. It is a common practice to use the AT rifle as a sort-of sniper rifle against soft targets. AT rockets, when used against infantry, expand from the point of impact outward in a cone, spraying shrapnel and heat across anything caught in the narrow arc.
Flame
All flamethrower infantries are the same. Two soldiers, identical to SMG infantry in almost all respects. However, the Flamethrower soldier only comes armed with the flamethrower and gas tank. Flamethrowers are often difficult to get into position, but absolutely lethal to any infantry that they fire their weapon upon. In a pinch, any flame based weapon can also be used against vehicles as well. Aim for the engine and, with enough application of flame, the tank will receive an “Engine Destroyed” result, which often progresses to a “Hull Destroyed”.
Sniper
Snipers are useful for taking out high priority targets. Slow to fire at any range over roughly 30m, the slow rate of fire means that target selection is important for them to be used most effectively. Snipers also have a few special tools that are mostly unique to them. Three camoflauge kits allow them to place bushes wherever they want, even on concrete. They also carry one ammo smoke grenade that is used to bring down a single crate of ammo, allowing you to resupply infantry. The last tool is a single knife which can be thrown to silently silence an enemy. Usually not useful, but it’s there if you need it.
Elite
The best of the best, these soldiers have an unrivalled stat line, and bring the tools of war to match their skill. Each nation has their own slight variation of these soldiers, which all boils down to equipment. What is common between all nations though is that they are, at their core, mechanized infantry. Arriving in an armored halftrack, each squad has 10 soldiers typically armed with 6 SMGs, 2 LMGs, and 2 AT soldiers. However, the differences between each nation is so great that they cannot be adequately explained here.
HMG
The HMGs of each nation all operate so similarly that the differences between each gun are almost insignificant. Mounted on a tripod, and carried by two soldiers, the HMG is a heavy suppression weapon that is typically seen on all maps as the immobile 1 soldier variant that pops up around CPs after you capture them. Very lethal to any infantry caught out of cover, the abundance of HMGs make this selection obsolete very early in the game, and I can only recommend it for the initial purchase of the game.
Mortar
A popular unit to most commanders, the mortar’s use on the battlefield as a light artillery piece is inarguably useful. However, in MoW:AS, the cost of these weapons is often prohibitively high for skirmishes. Despite this, mortars are often the only artillery piece that commanders have access to until the final stages of the game, making them very popular to many people.
AA
Effectively super heavy machine guns, the light cannons brought to the field with AA guns are absolutely devastating to enemy infantry, and can also be a threat to light vehicles as well. Most of these weapons can put out a truly large amount of firepower in a very short period of time, and as a bonus, almost all of them can be towed around the battlefield, allowing for quick relocation of firepower.
AT
A favorite amongst defensive minded commanders, the AT gun’s utility cannot be overlooked. In skirmish, this is often, but not always the most cost-effective option when it comes to destroying enemy armor. When positioned properly behind soft or hard cover, the AT gun can engage and destroy most medium armor with ease. A common problem that most commanders have when using these is the tendency for the AI to choose HE ammo instead of AP ammo.
To help prevent this, you can either: 1) Use the HEs up, 2) Drop the HE ammo out of your inventory, or 3) Set the gun to return fire. The last option will require a bit more micromanagement, but it’s seldom that a vehicle will surprise your AT gun and destroy it without you knowing. As with the AAs, these units can be towed around the battlefield for quick transportation.
Supply
Unlike the supply truck that starts at the base camp in each standard skirmish, these trucks carry weapons for vehicles as well, not just infantry ammo. These trucks are essential for any army expecting to spend an extended amount of time on the battlefield, and as a bonus, they can tow guns around the battlefield.
AC
Armored cars are light scout vehicles used for harassing the enemy and engaging light to medium armored vehicles. Most are armed with a light cannon comparable to cannons armed on many light tanks. As a bonus they can also be used to tow guns around the field.
AA
Anti-Aircraft vehicles might seem out of place, since there are no aircraft in standard skirmishes, but these vehicles are absolutely lethal to infantry and light vehicles. Commonly equipped with at least one but up to 4, 20mm cannons, and boasting a very high rate of fire, even just one of these tanks can hold infantry out of a large area as long as it has ammo.
Tank 1
Each nation has access to two tanks. Typically, the lighter and cheaper tank goes here. These tanks are usually good at supporting infantry, and aren’t generally well suited for extended engagements vs other armored vehicles.
Tank 2
This tank slot is generally where the main battle tanks go. While not the best tank you will have in your arsenal, these are the ones that are most well rounded, and can help carry you through many early and mid-game engagements with enemy armor. Eventually these tanks will be out-classed by tougher or more lethal enemy armor, but a skilled player will know how to overcome that challenge with one of these tanks.
TD
This slot is typically occupied by some kind of tank or armored vehicle that is designed to engage and neutralize other enemy armor. Typically carrying an improved cannon, these vehicles are a must for most armored players.
Heavy Tank
Heavy tanks are gas guzzling juggernauts that can wade through enemy AT fire seemingly with immunity. While not always equipped with the best gun, it doesn’t matter as much since they can still shrug off enemy fire, close the distance, and destroy most targets with relative ease. While not invincible, these vehicles are definitely a powerful tool of war.
Artillery
A favored tool of destruction, most of the units in here are powerful rocket artillery vehicles, with a single exception. The heavy rockets shoot a single shot that can decimate any almost any target, while the smaller rocket launchers fire volleys of high explosives in rapid succession that blanket an entire area with explosive explosions. All units in this slot are very useful in destroying fixed enemy positions, but, with a couple of exceptions are completely incapable of defending themselves and are quite fragile.
Heavy TD
Without exception, these supremely expensive vehicles are specifically designed to hunt and destroy the strongest and toughest tanks that your enemy brings to the field, and are the best source of AT that you will be able to purchase in the game. Most are relatively fragile, compared to their prey, however they can often out-range their targets by quite a distance. Aside from their designated role as tank destroyers, most of these vehicles have limited utility on the field. On harder difficulties though, it is hard to argue with the often much needed firepower they can bring to the table.
Unit Review: USA
Infantry Squad
The US Infantry Squad is a very strong choice when bringing soldiers onto the field. The main and most obvious advantage is that the standard rifleman is equipped with the M1 Garand, which can put out much more fire than other nation’s bolt action rifles. Additionally, the Thompson is one of the better SMGs in the game, and the BAR, while having a small magazine, is still a good support weapon.
Anti-Tank Team
Armed with a Bazooka, the AT infantry are a strong choice when countering enemy armor. Unfortunately, the Bazooka can only go through 120mm of armor, and given non-ideal combat situations, this isn’t always enough to bring down some of the heavier German tanks, or even some medium tanks if equipped with schurzen (ablative side armor).
Rangers
Rangers are a highly effective unit when used properly. The M2 Carbine is one of the few rifles that performs very poorly at long ranges, but this is mitigated by the fact that it excels at close range firefights. The Johnson Rifles and LMGs are also good firearms as well, and when wielded by Rangers they only become more effective.
The M18 Recoiless Rifle boasts a slightly longer range than most rockets, however, it also has only 100mm of penetration making it even more situational than a Bazooka. The obligatory halftrack that comes with the Rangers comes with the ever present .50 cal HMG which can be either used on the halftrack, or dismounted and carried by one of the Rangers. All in all, the Rangers are an effective unit that can square off against almost any threat and succeed.
M45 Maxxon
The Maxxon AA is the US anti-air unit. While standard skirmishes don’t have any enemy air units, AA’s are still more than capable of decimating enemy infantry units. Armed with 4 .50 cal machine guns, the Maxxon doesn’t have the penetrating power of other naton’s AA guns, but it has a higher rate of fire than most, and can still can go through light vehicles and cover.
M1 AT
The M1 AT gun is an important unit in the US arsenal. It’s a commonly known fact that US AT capabilities are sub-par all around when compared to the Germans. The M1 closes that gap only slightly, allowing the US player to take on tanks like the Pz4H a little more confidently, and at a low cost compared to the Sherman. However, heavier tanks like Tigers and Panthers will still be a major threat, as the M1 still lacks the penetrating power to engage their frontal armor.
M8 Greyhound
The well equipped Greyhound, is a very effective unit when used against infantry, and is also capable of threatening medium armor. Unique amongst armored cars, the Greyhound has both a main cannon as well as an armor piercing HMG, similar to (but slightly weaker than) the 20mm cannon that the Sdkfz 222 is armed with. Unfortunately, the crewman firing the .50 cal will be exposed to small arms fire, allowing concentrated fire or snipers to rob the Greyhound of some of its firepower temporarily.
M24 Chaffee
The Chaffee is a light tank with a big gun. Performing similarly to the British Crusader tank, the Chaffee also sports angled armor, for what it’s worth. However, the little extra defensiveness that the Chaffee receives from this is often negated by the very large and scary guns that are pointed at it. The Chaffee’s main cannon is effectively identical to the gun on the Sherman, giving it good stopping power and range, but a long reload.
The main benefits that the Chaffee has over the Sherman are quite significant, one being that it has a lower profile than the Sherman, allowing it to use cover much better than the Sherman ever could. Secondly, it is also much faster than a Sherman, allowing it to get into position to fire, or retreat to cover while it reloads. And lastly, the pricetag is 150 less, so if you’re only paying for the gun and not the armor, then you’re saving a decent amount of points by going with the Chaffee.
M4 Sherman
The iconic M4 Sherman tank actually boasts what should be decent frontal armor. However, the powerful German guns that are equipped on various platforms are powerful enough to cut straight through the front armor with ease. The Sherman is plagued by a host of weaknesses, including it’s relatively high cost, however, in the hands of a skilled player the Sherman is still a formidable weapons platform.
Boasting a quite large 76mm cannon, the Sherman can still do respectable damage if it can get into position quickly enough. Unfortunately though, the M4 is completely outranged by a large list of German armored units that it has to contend with, making getting into position that much more of a problem.
M16
The M16 AA halftrack is a quad .50 Maxxon plopped atop the standard M3 halftrack. While not a popular choice, the M16 is still a very effective anti-infantry unit, and with some skill can also be used against fixed positions or enemy light armor in a pinch.
M10 Wolverine
The Wolverine is a tank destroyer, but unlike almost every tank destroyer that exists, this one has a turret. While expensive, the Wolverine can fill a very important role in the US arsenal by providing the second highest AT from a vehicle found in US skirmishes, a role that is only surpassed by the Slugger. However, this utility comes at a price, and the Wolverine has armor that is almost paper thin. Proper positioning, cover, and hit and run tactics will keep the Wolverine alive long enough to do its job, as will target priority.
M4A3E2 Jumbo
The Jumbo, is simply put an up-armored M4 Sherman. There’s nothing special about it aside from the fact that it is extremely hard to destroy. Equipped with the standard Sherman cannon, it still is troubled with (relatively) low penetration power, low accuracy, and long reload, however this is all made up for by the fact that the Jumbo can close the distance with most German tanks and AT guns to destroy them.
M4A3 Calliope
The Calliope is the USA’s artillery option. And once again, it’s a Sherman. Trading out the .50 cal for a bunch of rockets, the Calliope is one of the better artillery choices in skirmish, depending on what your intention is with them. Able to fire 2 salvos of 16 (?) rockets before reloading, the Calliope can rain high-explosive death on enemy positions over a wide area, clearing out any heavy guns as well as infantry if they haven’t taken cover.
Unlike most artillery choices though, the Calliope is capable of defending itself if enemy infantry or tanks get uncomfortably close. When using the Calliope as a tank, it performs identically to the standard M4 Sherman. (Note: The rocket carriage atop the Calliope can be permanently destroyed.)
M36 Slugger
The Slugger is a lightly armored, but heavily armed tank destroyer. It is capable of destroying up to a Panther at a moderate range on the frontal armor. Realistically though, you’ll want to be taking side shots as with most things, and that will allow the Slugger to engage almost any tank and score a penetrating shot at long ranges. A thing to know about German tanks, is that the highest side armor that they have is 80mm, and it is rarely sloped to any significant degree. On higher difficulties, if you are expecting many large and scary tanks, a Slugger may be a good choice to purchase.
Unit Review: Germany
Infantry Squad
The German Infantry Squad is mostly average when it comes to their soldier’s weaponry. There are, however, 2 soldiers who really stand out amongst the unit. The first and most obvious one is the MG soldier, who comes equipped with the infamous MG 42. The other one is the Assault Squad Leader who starts the game wielding the highly accurate Stg 44.

AT Team
The German AT soldiers come equipped with a Panzershrek, making them an extremely good choice at any point during the game. For Germans, the utility that the Panzershrek has is unique as it’s the only AT rocket that the Germans have that can reload, as well as it also having the 2nd highest AT value in the game for rockets (the only thing that is higher is the Panzerfaust, see below).
Panzergrenadiers
Panzergrenadiers are an extremely strong choice when fielding troops. Remember how much we like StG44s and MG42s? Well that’s pretty much what this unit is made of. 6 StG44s, the best “SMG” in the game (yes, we all know it’s not really an SMG), and an MG42 on a halftrack that can be dismounted if you want. Additionally, there are also a couple of G43s, which are very similar to Garands, and a pair of Panzerfausts on each AT soldier that comes in the squad for a total of 4 shots.
Compared to other nations though, this squad lacks in AT, despite the effectiveness of the Panzerfaust. Also, the Panzerfaust is a slow-flying weapon, unlike it’s cousin, meaning that there is a higher chance for it to miss, which wouldn’t be so bad if you could reload them. But as a Panzerfaust is a shoot-and-discard weapon, you will have to be relying on other sources of AT if you run out of shots. Fortunately for Germany, this often isn’t a problem.

PaK 38
The PaK 38 medium AT is relatively poor as far as AT guns go. This is the exact same gun that is equipped on the Pz3J, and it suffers from the same problems of low penetration values vs common targets (see below). One thing that the PaK has going for it is that it is much easier to hide than the Pz3, allowing enemy armor to get much closer to it so that the AT gun can pierce the enemy tank. Given all the other strong options for anti-tank that you have in Germany’s arsenal, it is recommended that you avoid getting the PaK 38 when possible.
Sdkfz 222
The Sdkfz 222 is an excellent AC that can quickly clear out enemy infantry with its 20mm cannon, and can even engage light vehicles. While it’s utility is limited after the first line, it can still perform in a supporting role using it’s cannon to penetrate an AT gun’s shield and hard cover alike.
Wirbelwind
The Wirbelwind is probably one of the most underrated units in Skirmishes. It is the most well armored AA tank available for purchase, and comes with a quad 20mm mounting in its turret. The turret, being the weak point on the tank, is large, obvious, and open-topped. However, the hull is very well armored, being identical to the Pz4H minus the schurzen with a whopping 80mm of front armor. This allows players to deploy the Wirbel much more aggressively than one would normally deploy AA tanks.
Pzkpfw III ausf J
The Pz3J, is a poor choice when purchasing armor for the Germans. Small, and relatively poorly armored, the Pz3 will struggle against many of the tanks you will commonly be facing, especially Shermans, Matildas, and T-34s. That being said, the Pz3J is not useless, and if a player needs a little extra mobile firepower, then the cheap Pz3J is not a bad choice, especially when it comes to providing infantry support.
StuG III
The StuG is a formidable AT platform, and with 80mm of sloped front armor, it can shrug off a truly ridiculous amount of incoming fire at times. With these defensive capabilities, the StuG can also be used on the offensive to help neutralize enemy AT guns. The main and obvious drawback of the StuG is that it has no turret, meaning that if it gets tracked then it is a sitting duck until it gets repaired.
Pzkpfw IV ausf H
The Pz4H is another powerful piece of German armor. Armed with the same cannon as the StuG, the Pz4H also comes with a turret and 80mm of frontal armor, and schurzen which act as ablative side armor (mostly to protect it from AT rockets). While not as defensively strong as the StuG, the inclusion of a turret gives the Pz4 better tactical flexibility when it comes to lining up its shots.

Pzkpfw V “Panther”
The Pz V Panther tank is arguably the best tank available to the Germans in Skirmish mode. While it has marginally less armor than the Tiger, the front armor of the Panther is sloped allowing many shells to simply bounce off of it. The side armor of the Panther is much weaker though, and must be protected. Additionally, the main cannon sported by the Panther is significantly better than that of the Tiger’s, even though it is of a smaller caliber allowing it to engage foes that the Tiger would struggle against.
Sturmtiger
The Sturmtiger is what is known as a “self propelled assault gun”. With about 150mm of sloped front armor, there is very little that can pierce its front plating, which means that this unit is perfect for breaking enemy Heavy AT positions.
When within its relatively short range, the Sturmtiger will launch a single but devastating rocket at the enemy and destroy pretty much everything within a good radius around the impact point, armor and infantry alike. Just like most tank destroyers, the Sturmtiger lacks a turret and must be positioned facing the enemy, meaning that if tracked the Sturmtiger will be relatively vulnerable until it is repaired.

Jagdpanther
The Jagdpanther (JP) is the best tank destroyer available to the Germans in skirmish, and performs just as admirably as you would expect. While having relatively weak armor compared to the gun it is carrying (armor that is similar to a StuG), the cannon is second to none, and can pierce through almost any target that it is pointed at. If playing on Hard and Heroic, I cannot recommend this unit enough. Players must exercise caution, though, as the JP is relatively fragile compared to the enemies that it is designed to hunt.
Unit Review: USSR
Infantry Squad
The USSR Infantry Squad is exceedingly average. The PPSh’s are probably one of the more effective SMGs in the game, but their accuracy and damage-per-round leaves much to be desired during longer ranged firefights. The one unique advantage that the Soviet infantry have is that each Rifleman carries an incendiary molotov cocktail, which can be used to set both vehicles and enemy infantry aflame, or to intentionally start fires in buildings or foliage. As with all flame attacks, when attacking vehicles aim for the engine.
AT Rifle Team
AT Rifles are very under-rated in skirmishes. No, they’re not going to kill a StuG or anything, but they can be used to destroy cover, or be used as a budget-sniper. And for the price of one Sniper, you can get 4 AT rifles. The Russian DPRS AT Rifle is average compared to all other nation’s AT Rifles.
Red Guard
The Red Guard are a very important unit for Soviet infantry players. They are the only way that the Russians can get an AT rocket on the field without salvaging one off the ground. The small arms that are carried by the Red Guard are above average, and the Bazookas are mediocre at best, but having a Bazooka is much better than not having a Bazooka.
ZiS-3
The ZiS-3 AT gun is minimally better than the cannon carried by the T-34. In fact, they are so similar that when choosing between the ZiS and a tank, it really will all come down to personal preference.
BA-11
The Russian BA-11 carries a light cannon that can be used to engage up to medium armor. The BA-11, however, has a very long hull, and unless you are driving in reverse, then the vast majority of the hull must be exposed in order to fire the main gun. While it can be useful, the vehicle’s design limits its usefulness in heavier engagements.
T-60
The T-60 is a small and cheap tank that is equipped with a very rapid firing 20mm cannon. While it won’t win any awards for its armor, the small size and speed can make it hard to hit at times. I must admit that I have jokingly used mass T-60 rushes to overwhelm enemy AT positions before. The combination of the rapid firing AP gun, small profile, and speed make this possible, even if I can’t recommend doing so as standard practice.
Su-76
The Su-76 is a relatively poor choice available to Soviet players, and I can only recommend using it in an emergency situation. This is because the Su-76 is plagued by a host of weaknesses that only accentuate how much of a waste of points it can be. Starting with the most obvious drawbacks, it is open-topped, has no turret, and has very thin armor, making it very vulnerable to anything larger than an AT rifle (and from the side even that can be a threat).
The small size of the SU is it’s only good point, but this isn’t much, especially when you consider the fact that it wields the same gun as the ZiS-3 (see above). When thinking about buying the SU-76, I advise considering purchasing a ZiS-3, or saving resources for a T-34 or a squad of Red Guard.
T-34/76
The T-34/76 is a solid tank that, in the hands of a skilled player, can square off against any German medium tank. With relatively thin but sloped armor on all sides, the T-34 can bounce shots off of its armor that would normally be a threat to it. Normally Light AT guns aren’t a problem, however, special care must be taken when fighting against the Japanese because their Light AT are the best out of any faction, and are only slightly worse than Jap Medium AT guns. In Manchuria, for example, the terrain also does not allow the T-34 to take full advantage of its sloped armor, making the Jap Light AT even more of a threat. (check which version of t-34 it is)
T-34/85
The T-34/85 is a much better version of the T-34 that is armed with a bigger gun. This gun is capable of competing with newer tanks like the Pz4H on an even level, and can even be a major threat to Tigers given the right circumstances. Aside from having the bigger 85mm gun, this version of the T-34 also has much better turret armor, for what it’s worth.
Su-100 (Tank Destroyer)
The Su-100 is the best TD available to Russia, and unlike the other nations the Su-100 is on the left flag where the heavy tank normally is. This can change the order of play a little bit for players, but it doesn’t necessarily have to. As always, it’s up to the player’s choice, and while the Su-100 isn’t always the best choice, with a bit of creativity it can be put to good use. The Su-100 like all other TDs can effectively engage most any tank from the frontal armor with ease, and side armor with a near garaunteed chance of a kill.
Katyusha
The Katyusha comes on a truck armed with about 16 rockets that, like the Calliope, fire in two salvos. While not as numerous as the Calliope, the rockets are larger, and have a larger blast radius as a result. Care must be taken though, as the Katys are extremely fragile to even small arms fire, and they need to be placed in a relatively safe location.
IS-2 (Heavy Tank)
The IS-2 is one of the Soviet Union’s most formidable tanks. While it has very strong sloped frontal armor, it is not completely invulnerable and carries a few weaknesses with it as well. As with all heavy tanks, it is depressingly slow and will take a while to get anywhere. However, once it gets there, it will definitely make an impact on the battlefield. Able to withstand heavy AT rounds at long range, the IS-2, given time, can help break through the front line. However, a couple of the biggest drawbacks have to do with the powerful main cannon.
The first being that the IS-2 carries a fairly limited amount of rounds, and will repeatedly need to be resupplied if it gets into an extended engagement. The second is that the reload time for the IS-2 is also depressingly slow. When compared to the King Tiger tank, which has a reload time of 8 seconds, the IS-2 takes a whopping 12 seconds to reload, which is a significant disadvantage in tank vs tank combat. Despite this, the IS-2 is a very strong choice when bringing heavy support, as it’s main gun is only marginally less effective than the Su-100, and can combat other heavy tanks competently.
Unit Review: Commonwealth
Infantry Squad
The UK Infantry Squad is better than most infantry squads, due to a few very unique advantages that British weapons have over their contemporaries. First and most obviously, the ASL for the British comes equipped with a riflegrenade, which can be used to provide short range indirect fire on anything that needs high explosives lobbed at it. The riflegrenade can be effective from the start of the game all the way to the end due to the utility that indirect fire brings with it.
Another advantage the Brits have is the Lee-Enfield rifle. While having a longer reload time and a higher magazine capacity than other bolt action rifles, it also has a slightly higher rate of fire. When used en masse, these rifles can churn out a respectable amount of firepower that can either suppress, or even kill targets at a long distance. And to top it all off, the squad comes with the ever-reliable Bren LMG, a solid weapon that has no real drawbacks.
AT Rifle Team
British Boyes AT Rifle is average compared to other nations, however I must highly recommend against purchasing this after the initial purchase of units. The AT Rifle is as good as all the others, and can still be used as a budget sniper, but the SAS team comes equipped with one, and they are much better soldiers than the AT Riflemen.
SAS
The SAS are the best infantry that the UK has to offer. Sadly, the UK has decided to arm them with an AT rifle. While this isn’t necessarily bad, I feel that most people would have preferred to have another PIAT instead. And speaking of the PIAT, it is arguably one of the better AT weapons in the game since it shoots in a low arc that has the potential to land on top of it’s target, potentially hitting the weaker top armor of a tank.
The SMGs that they carry are similar to the normal Thompson, they just have the drum magazine. Fortunately, the normal Thompson is already a solid weapon, and leaves little to be desired. However, the Vickers VGO is one of the spots where this unit shines. Arguably one of the top 3 LMGs in the game, the VGO has an extremely fast rate of fire, rivalling the MG42.
Oerlikon
The 20mm Oerlikon performs just as well as the other 20mm AA guns available. I will not say anymore due to space restrictions.
AT Gun
The British AT gun is a solid AT gun, and is also the gun equipped by the Crusader. When choosing between Crusader and this, you are making a choice between cost and mobility.
Daimler
The Daimler is probably the best balanced out of all of the ACs, and is armed with the same cannon that the Matilda is armed with, making it good at engaging medium tanks from a longer range than most ACs can manage. With its turret sitting lower to the ground, and also sitting squarely in the middle of the hull, it has an advantage over the Greyhound and BA-11 in the fact that when it fires, it is typically exposing as little of itself as possible.
Crusader AA 2
The Crusader AA2 is in my opinion redundant in the Commonwealth’s lineup. It has decent armor, but nothing that’s going to save it from serious opposition. And costing just 50 points less than a Matilda, I would most days rather have another Matilda instead. Get this only if you want to quickly wipe out infantry and aren’t too concerned about defensiveness or enemy armor.
Matilda
As an Infantry Tank, the Matilda is without a doubt the best tank in the 350 mp slot. Boasting formidable front and side armor, these tanks will steamroll any AT guns that are in their way until you start to see Flak 88s. And roughly 7/10 times, the Matilda will be able to defeat a Flak 88 at max range when used by a skilled player. The downside to this sturdy tank is the fact that it carries such a small gun. When faced with anything larger than a Pz 3, the Matilda will struggle against the larger cannons that these tanks wield.
Crusader
The Crusader is a Cruiser Tank, and it carries the exact same cannon as the medium AT Gun. The 6 pdr is a respectable cannon, that can deal with most medium tanks easily at long range. However, this is offset by the extremely thin armor on all sides of the Crusader. The Crusader is supposed to be fast and maneuverable, and it lives up to that, however the large size can at times make the Crusader a bit unwieldly to use.
To offset this a little bit, the tank sits very close to the ground, and has a small turret, meaning that if you can manage to find a spot that is somewhat “hull down”, you can simply peak over the terrain and fire. Some people find the 500 mp price tag not worth it, but I feel that the mobility, and more importantly the penetrating power to be more than worth the cost.
Cromwell
The Cromwell is also a Cruiser Tank, and I honestly have trouble liking it sometimes. Sporting much improved frontal hull armor, it still is not enough to protect it from the larger caliber German guns. On top of that, the turret armor is still very light. But the worst part about the Cromwell, is that it has an inferior gun when compared to the Crusader. It is still good enough to engage most medium tanks, but it’s not as good as the Crusader’s 6 pdr.
By the time you get the Cromwell, you will be beginning to push into the 3rd line, and will be facing progressively heavier tanks. Also, the top armor of the Cromwell is light enough that a direct hit from artillery will likely cause it to explode with no chance of recovery. I don’t know, it might just be me, but I prefer to have the Crusader over the Cromwell. Maybe I’m just using it wrong, or maybe I just prefer different things.
Churchill Mk. IV
The Churchill Mk IV is an Infantry Tank. There are many problems with the Churchill, but lets start off with the only good thing about it. It is capable of withstanding direct hits from Flak 88s and other large caliber guns, and usually destroying what is shooting at it. Now for the bad stuff. First of all, the Church 4 is a very large and obvious target. Sometimes this can be a good thing since the Church can easily withstand incoming fire from all but the largest guns, but unfortunately, usually, it’s not a good thing.
Why you ask? It’s because of the way the tracks are exposed, and thus when taking fire from just about anything larger than a rifle, there’s a pretty good chance that the Church is going to get at least one track disabled. The other thing that is bad about the Church 4 is that it is equipped with the exact same gun as the Crusader. While not exactly a bad gun, it’s not exactly the best gun either, and will sometimes have trouble engaging heavier tanks. All in all, like most things British, it’s not pretty, and it’s not the best, but it gets the job done.
Priest
The Priest is a US designed SPG (self-propelled gun), and unlike all the other heavy arty choices in skirmish, this one is more traditional and fires volleys of shells that spread over a target area, then takes forever to reload. This is both better and worse than other naton’s arty, depending on what you are trying to do. But I mean, hey, it’s artillery. For the most part, I rarely use this unit as the Churchill and the rest of the team are typically able to clear up the AT guns before the need for artillery arises.
Sherman Firefly
The Sherman Firefly, wielding the 17 pdr AT gun, is quite possibly the best tank available in the British skirmishes. Filling the “Heavy AT” role, the Firefly is still a tank, and performs just as admirably as you would expect a Sherman to. The cannon of the Firefly is capable of gutting even a King Tiger from long-ish range, which is no easy feat.
Unit Review: Japan
Infantry Squad
The Japanese Infantry squad, like the Soviets, is exceedingly mediocre, with their small arms having no significant advantage over other nations. However, each rifleman comes armed with a Hand Bomb, which is a weapon that takes practice to use, but can be effective against infantry and vehicles alike.
AT Rifle Team
The Japanese AT Rifle is slightly above-average compared to other nation’s AT Rifles, which is actually a really good thing. Since Jap tanks suck so much, the types of tanks that Japan will face are toned down a lot as far as armor values go. Meaning that purchasing an AT Rifle at almost any point in the game doesn’t feel like a waste of points. Yay, finally!
SNLF
The Special Naval Landing Force (SNLF) bring a bunch of cool stuff to the table for Japan. Always the ones to be different, the Japanese halftrack has not one, but THREE MGs attatched to it. However, only one can be detatched and carried around with you. Rude, I know… Vehicle aside, the squad comes armed with a bunch of pretty cool SMGs that are comfortably above-average when it comes to SMGs.
The rockets though, are also above average, and on harder difficulties, very necessary when it comes to destroying enemy heavy armor, especially when facing Britain which will bring the very tough Churchill AVRE to the field.
Type 2 AA
The Type 2 AA performs just as well as the other 20mm AA guns available.
Type-2 AT Gun
The Type 2 AT is a solid weapon, able to engage most armor at medium ranges. However, against the various British Infantry Tanks, you will find yourself wanting something with a little more firepower.
Type 92 (AC)
The Japanese Type 92 is a mobile machine gun nest. Bristling with 4 MGs, one of which is mounted on its top turret, the Type 92 AC excels in the anti-infantry role. But, as it has no AT its utility is limited after the first line.
Ho-ni 2
The Ho-Ni 2 is a Japanese SPG that fires a volley of 6 HE shells on its target. Very useful in game since the Japs don’t have many ways to deal with AT guns reliably.
Ha-go
I’m not sure why the developers decided to keep the slots all priced the same for every nation, but especially for Japan. The Ha-Go, quite simply put, is rarely worth it’s points cost. Armed with a small cannon, this tankette is only really effective versus similar light tanks. It really can only be used reliably against enemy infantry, and will exploded if an AT crewman simply sneezes at it.
Chi-ha 57
The Chi-Ha is better than the Ha-Go, but still far overpriced for what it is. It cannot stand up to even light AT guns in the field, but can at least engage enemy armor somewhat reliably. Against any similarly classed medium tanks it will struggle, however, and is completely outclassed by the US Shermans and Soviet T-34s.
Ho-ni 1
The Ho-Ni 1 is one of the few armored vehicles that I can recommend purchasing for the Japs. The penetration power of the Ho-Ni 1 is pretty consistent, and can reliably engage most vehicles at a very long range.
Chi-he
The Chi-He is a decent tank, if you’re not paying 1000 MP for it. It has a better gun than the Chi-Ha, and can engage light armor reliably, but still struggles against many commonly found medium tanks.
Ha-to
Large, and vulnerable, the Ha-To brings a single-shot long range rocket to the field that is very useful in taking out AT positions. Care must be taken when positioning this on the field though, as it has a tendency to explode easily.
Chi-nu
The Chi-Nu is as good as it gets in Skirmish mode. The gun carried by the Chi-Nu is marginally better than that carried by the Ho-Ni 1, but sometimes you need that extra bit of penetration power. Additionally it has a turret, and better armor, which is always cool, but this also makes the Chi-Nu a larger target.

Amazing thank you