
This guide aims at getting you all achievements. There are many, many spoilers!
Bosses
False Knight

Fought in the Forgotten Crossroads at the very beginning. Hit him until he pops out of the armour, then hit him more. Do this a few times and he’ll crash down, making him an easy target.
Can technically be skipped after he rages for the first time by destroying a piece of the left wall and fleeing.
Failed Champion

Dream version of the False Knight. Quicker. His smash attacks deal double damage.
I recommend doing this lategame with ten charm notches using Joni’s Blessing, Quick Slash and Fragile Strength (don’t worry, dying to dream bosses does not break fragile charms). You can tank through his attacks and keep hitting him, you have more than enough HP and don’t have to worry about healing. Use a fully upgraded nail too.
Hornet

Fought in Greenpath. Attacks are easily dodgable as she’s slow and clearly shows what she’s doing. Remember that you can jump and attack enemies below you safely – great when she dashes or walks along the ground.
Hornet, again

Hornet appears in Kingdom’s Edge again, where she tests your strength for a second time. Exactly the same fight, except for a new attack – spawning trap balls, which you can attack away. She is a lot quicker, but this should not be a problem as you have more abilities and nail strength by now.
The Mantis Lords

Fought at the bottom of the Fungal Wastes/Mantis Village. Similar to Hornet in that they’re not extremely fast and telegraph their attacks well. Once you defeat the first one, you get to fight the other two at once. They have two different boomerang attack which always take the same path – you can heal during those safely, if you postion yourself correctly.
Soul Master

Fought in the Soul Sanctum at the top of the City of Tears. Loves tp teleport around the place. Juke his homing balls into the wall, jump and attack downwards when he charges, jump to the left or right when he smashes the ground. If he fakes a smash, you can dash in the air. You have enough airtime to avoid the shockwave.
He has a second phase once he falls down where you will not be able to heal. Avoid his smashes by dodging left and right, hit him when he stands still and fires balls.
Soul Tyrant

Dream version of the Soul Master. The hardest of the three dream bosses because he’s an actual fight. Quicker than the Soul Master. I used Fragile Strength, Longnail, Dashmaster, Quick Focus. Keep practicing the fight until you can reliably dodge his attacks – the strategy stays the same.
Dung Defender

Fought in the Royal Waterways. Enjoys throwing poop balls and being a bouncy ball. You can hit the poop balls and him in ball form to knock them away. If one is about to hit you, you can attack upwards to stay safe and bounce it away. You can safely attack him when he stands still and throws one or two poop balls.
Broken Vessel

Fought in the Ancient Basin. Dashes around, stomps the ground, spawns orange ghosts. I recommend using the Defender’s Crest which you got from the Dung Defender. The poop cloud deals very little damage, but the orange ghosts only have 1HP and hence will not be able to attack you, making the fight easier.
Lost Kin

Dream version of the Broken Vessel. Just like the Failed Champion, you can use Joni’s Blessing/Quick Slash/Fragile Strength and tank him while beating him to a pulp. Otherwise, Defender’s Crest still works if you don’t want to deal with the spooky ghosts.
The Collector

At the top of the Tower of Love. This area technically belongs to the City of Tears, but you will have to access it from Kingdom’s Edge for the first time. She throws glasses from the ceiling which spawn weak enemies and jumps around. The cealing rumbles at the places glasses fall down or when she jumps down, so just sidestep. Vengeful Spirit helps a lot with clearing small enemies if they overwhelm you.
Zote

Boss of the first colosseum round – but only if you let him live in Greenpath. He needs to survive, else he will be dead and not be the boss.
Not an actual fight – just beat him around.
Traitor Lord

Fought in Queen’s Gardens. At the top left, behind a shadow wall. He’s like a melee traitor mantis encountered in Queen’s Gardens/the colosseum, but bigger and more dangerous. Fight him like you would one of the melee traitor mantis things.
Herrah the Beast

One of the three watchers, encountered in Beast’s Den in Deepnest. Not an actual fight, just hit her a few times.
Guarded by a maze.
Monomon the Teacher

One of the three watchers, encountered in the Teacher’s Archives in Fog Canyon. Not an actual fight, just hit her a few times.
Guarded by Uumuu, a huge jellyfish. After attacking Uumuu a few times with no effect, Quirrel will join you. He will disable Uumuu’s protection for a few seconds from time to time – this is when you can and should attack (or heal, if necessary).
Lurien the Watcher

One of the three watchers, encountered in the Watcher’s Spire in the City of Tears. Not an actual fight, just hit him a few times.
Guarded by the Watcher Knights. You can attack them by bouncing on them with downward attacks – just be careful in case they bounce up. If two of them gather up, you can kite them to a wall and then quickly go to the other wall. They will walk up to you slowly in most cases, giving you time to heal.
Charms
Charmed

Get any charm.
Enchanted

Get half of Hallownest’s charms.
Blessed

Get all of Hallownest’s charms – then, return to Salubra and buy her Blessing.
Colosseum of Fools
Warrior

Beat the colosseum’s first trial.
Conqueror

Beat the colosseum’s second trial.
Fool

Beat the colosseum’s third trial.
Not much to say about these three trials, as it mostly boils down to practice and skill. I recommend going in with a level 4 nail. After completing round 2, you can upgrade to the perfect nail, which helps in round 3.
You can oneshot both primal aspids and the red hornet bugs with a great slash if your nail is upgraded enough. For charms, go with normal fighting charms – either a nail build or a spell build.
If you die, your shade spawns in the weird dark room to the left of the colosseum’s bench. To the right of the colosseum’s bench, there’s a secret wall leading to a hot spring.
Best of luck – the colosseum’s round 3 is probably the hardest achievement in the game.
Completion
Cartographer

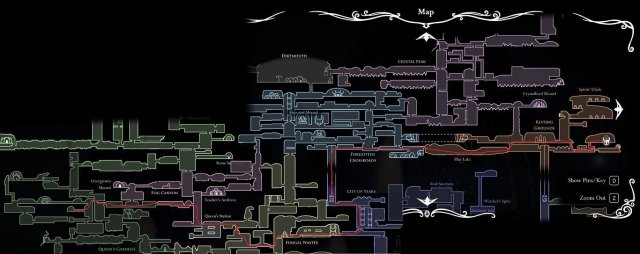
Buy all of Cornifer’s maps. He’s pretty easy to find due to a paper trail and his humming leading to him. Even if you miss him in an area, you can go back to Dirthmouth and purchase the map you missed from Cornifer’s wife.
Completion

Achieve 100% completion and finish the game. The things that count for 100% completion are:
- All nail upgrades: 4%
- The Dream Nail : 1%
- The Awakened Dream Nail: 1%
- The four mask upgrades: 4%
- The three soul vessel upgrades: 3%
- The Kingsbrand: 2%
- The Crystal Heart: 2%
- The Mantis Claw: 2%
- The Monarch Wings: 2%
- Isma’s Tear: 2%
- The Mothwing Cloak: 2%
- The Shade Cloak: 2%
- Vengeful Spirit, Howling Wraiths, Desolate Dive: 1% each
- Shade Soul, Abyss Shriek, Descending Dark: 1% each
- The three nail arts: 1% each
- Herrah the Beast, Monomon the Teacher, Lurien the Watcher: 1% each
- Galien, Marmu, Markoth, Xero, No Eyes, Elder Hu, Gorb: 1% each
- Brooding Mawlek: 1%
- Gruz Mother: 1%
- The Collector: 1%
- Uumuu: 1%
- Nosk: 1%
- The Traitor Lord: 1%
- The Broken Vessel: 1%
- The Watcher Knights: 1%
- The Dung Defender: 1%
- The Soul Master: 1%
- The Mantis Lords: 1%
- Both Hornet fights: 1% each
- The False Knight: 1%
- The three colosseum battles: 1% each
- 36 charms: 1% each
- The Seer’s final words when showing her 2400 essence: 1%
Once the three dreamers are defeated, you can enter the Black Egg Temple. In there is a bench, right before the final fight. Resting there unlocks seeing your completion in % in the inventory screen.
Once you have 100%, fight the final boss. The achievement unlocks after the credits.
Steel Soul

Finish the game in Steel Soul mode. If you want to scum the achievement, you can quit to menu and will reset to the last bench you rested at if you’re about to die.
Since you’re not allowed to die, I recommend using the Fragile Charms as they cannot break.
Steel Heart

Finish the game on Steel Soul mode with 100% completion. You need to do exactly what you have to do for the Completion achievement, but not die in the process. The hardest part is probably the colosseum. Good luck!
Void

This is the achievement for finishing the 36th charm, the Void Heart.
You will need the Shade Cloak and 1800 dream essence to unlock this.
First, go to the top left part of Queen’s Gardens and past the void gate. Fight the Traitor Lord and proceed to the White Lady’s place. She will give you the first half of Kingsoul, the final charm.
Next, go to Palace Grounds in Ancient Basin and hit the white armour with your Awakened Dream Nail. This will not work with the Dream Nail – it has to be upgraded.
You will be teleported to the White Palace – a platforming challenge. Use both Hiveblood and Grubsong so you cannot die in this place – it makes it easier. Once you’re at the end, whack the Pale King a few times and pick up the second part of Kingsoul.
Now, equip Kingsoul and go to the bottom of the Abyss. A new path will be accessible by stomping it. Navigate through the maze until you find your reflection. Use your Dream Nail on it to change your Kingsoul to the Void Heart. This charm needs no notches and cannot be unequipped. Unlocking it unlocks the achievement.
Caution: The game has three endings. Finishing the Void Heart blocks you from accessing the first ending, but allows you to get the other two endings.
Dream Essence
Attunement

Collect 600 essence.
Awakening

Collect 1800 essence and talk to the Seer.
Ascension

Collect 2400 essence and talk to the Seer one final time.
Essence values:
- Lost Kin – 400
- Soul Tyrant – 300
- Failed Champion – 300
- Markoth – 250
- No Eyes – 200
- Galien – 200
- Marmu – 150
- Elder Hu – 100
- Gorb – 100
- Xero – 100
This adds up to 2100. You need 300 more from essence trees and ghosts.
Essence trees can be found at:
- Kingdom’s Edge’s climb
- Big, open area in the Howling Cliffs
- In the wide room in Deepnest, right of Beast’s Den
- In Greenpath, when going there from Queen’s Gardens
- In the Ancestral Mound, where you unlock Vengeful Spirit
- In the destroyed elevator between Ancient Basin and the City of Tears
- In the Spirit’s Glade in the Resting Grounds
- At the bottom right part of Queen’s Gardens
- In the Forgotten Crossroads, at the top of the room right of the grub room
- In the room below the City Storeroom stag station
- At the top right of Crystal Peak
- In the Resting Grounds, outside of the Seer’s room
- In the room connecting the Fungal Wastes and Fog Canyon
- In the Hive
Endings
The Hollow Knight

You get this achievement for defeating the Hollow Knight without having the Void Heart equipped. Just fight the Hollow knight once you unlock the doors to the Black Egg Temple – the fight is pretty easy. Keep bouncing on his head with downward slashes. If he parries, bounce and dash in the direction he’s looking so you can keep bouncing on his head with ease. Once he starts stabbing himself, spam attacks. If he rests on the ground, you have enough time to heal two times.
Sealed Siblings

Defeat the Hollow Knight with the Void Heart equipped. Once Hornet interrupts the fight, keep attacking the Hollow Knight to kill him.
Dream No More

Defeat the Hollow Knight with the Void Heart equipped. Once Hornet interrupts the fight, use your Dream Nail on the Hollow Knight to enter the final boss fight against the Radiance.
The Radiance deals two damage with every attack. Avoid the balls like you would avoid the Soul Master’s balls. Avoid the light beams by shadow dashing through them. Avoid the swords by shade dashing through or dashing through spaces between. Attack the Radiance’s body from below – if you time your jumps and attacks right, you can attack it very quickly.
Passing of the Age

This achievement is unlocked by finishing the Mr. Mushroom secret and unlocking a post-credits scene.
Mr. Mushroom needs to be found and talked to (with the Spore Shroom charm equipped) seven times, in this order. I am not sure when he starts spawning – it’s after talking to the White Lady or defeating the Hollow Knight once, I think. If somebody knows more, tell me in the comments.
Mr. Mushroom locations:
- Go right and down from Queen’s Station.
- In Kingdom’s Edge, in the long room left of the Hive.
- In Deepnest, at Galien’s grave.
- In the Howling Cliffs, at Nailmaster Mato’s place.
- Between the Broken Vessel’s arena and the location of the Monarch Wings.
- At the left end of the Fog Canyon, below the Overgrown Mound.
- At the bottom of the long drop in the Howling Cliffs, where your journey started.
You are not locked out of your save file if you complete an ending. Once you complete an ending and reopen your save file, you will be placed at the bench you last rested before the fight. This means that you can get all three endings in one run.
Grubs
Grubfriend

Find half of the imprisoned grubs.
Metamorphosis

Find all 40 imprisoned grubs.
After finding the Love Key in the bottom right of the Queen’s Gardens, enter the Tower of Love and kill the Collector. After the fight, you can pick up the Collector’s Map, which will reveral the map locations of all grubs.
After returning all imprisoned grubs and receiving all wards, return to Daddy Grub for a small bonus.
Hunter’s Journal
Keen Hunter

Unlock all basic journal entries in the Hunter’s Journal.
True Hunter

Unlock all of the Hunter’s Notes in the Hunter’s Journal and receive the Hunter’s Mark.
Find every enemy and boss in the game and kill them enough to receive their upgraded entry. Small enemies respawn when reentering a room, all enemies (except for bosses) respawn when resting at a bench.
Some enemies cannot be killed and need to be found in the environment and interacted with. Lumaflies, for example, are found in the Teacher’s Archives.
The following guide shows all Hunter’s Notes.
Mask Shards
Protected

Find four mask shards.
Masked

Find all 16 mask shards.
The mask shard locations are as follows:
- Sly’s store, 150 geo.
- Sly’s store, 500 geo.
- Sly’s store, 800 geo.
- Sly’s store, 1500 geo.
- Bretta’s house in Dirtmouth after rescuing her below Mantis Village.
- Falling from the Fungal Core in Fungal Wastes into Deepnest, left of the Mantis Village.
- Queen’s Station.
- In the Hive, after smashing a wall with a big bee.
- From the Brooding Mawlek, a boss behind a secret wall in the left part of Forgotten Crossroads.
- After delivering a set amount of grubs to Grub Daddy.
- Above the bench in Crystal Peak, after killing the second form of the Crystal Guardian.
- In the left part of the Royal Waterways.
- From the Seer, after 1300 essence.
- Greenpath, in the Stone Sanctuary (where you fight No Eyes).
- In the Forgotten Crossroads, below the hot spring room.
- The Grey Mourner’s request.
Soul Vessel Shards
Soulful

Find three soul vessel shards.
Worldsoul

Find all nine soul vessel shards.
The soul vessel shard locations are as follows:
- Sly’s store, 550 geo.
- Sly’s store, 900 geo.
- From the seer, after 700 essence.
- Left of the elevator connecting the Forgotten Crossroads and City of Tears.
- Two rooms above King’s Station.
- Deepnest, in the room above the tram station.
- In the stag nest, after unlocking all stag stations.
- In the Greenpath room connecting to the Queen’s Gardens.
- In the room below the Ancient Basin’s tram station, after donating 3000 geo.
Speedruns
Speedrun 1

Complete the game in less than ten hours.
Speedrun 2

Complete the game in less than five hours.
Speed Completion

Achieve 100% game completion and complete the game in less than 20 hours.
Special Actions
Purity

After fully upgrading your nail, talk to the Nailsmith and kill him.
Happy Couple

After fully upgrading your nail, talk to the Nailsmith, but do not kill him. Instead, go to Nailmaster Sheo at the left end of Greenpath, where he will be. Talk to him to unlock the achievement.
Neglect

When finding Zote at the top of Greenpath being eaten alive, do not rescue him from the bug. Return later to find his dead body and attack his mask, unlocking the achievement.
Solace

Bring the Grey Mourner’s (located in right end of Resting Grounds, behind a breakable ceiling) flower to the grave in Queen’s Gardens.
This route is pretty safe. I’ve used it two times and did not have any problems.
Tips: If you have it, the Glowing Womb charm spawns flies that suicide on enemies. Combined with the Defender’s Crest, it spawns exploding flies. This can keep you safe (have not tried myself, but heard good things). You can use fragile charms freely since you do not want to get hit anyway. For nail builds, Longnail or the Pride charm help a lot. Spell builds should also work well due to being able to attack from a distance.
From patch .15 onward, breaking the flower saves the game, which means savescumming (alt+f4 when the flower breaks) does not work any longer. This means that you have to do this legit.
Caution: The following guide shows alternative solution to obtain Solace Achievement!
Witness

Talk to Quirrel one last time at the right end of the Blue Lake after fighting against Uumuu with him in Fog Canyon.
Notes:
You can’t get Purity and Happy couple on the same save file.
If you let Zote die, you will not be able to fight him in the Arena, which means you cannot get Neglect and Rivalry on the same save file.
Stag Stations
Connection

Open half of Hallownest’s stag stations.
Hope

Open all of Hallownest’s stag stations and discover the Stag Nest.
The list of stag stations is as follows:
- Dirtmouth
- Forgotten Crossroads, bottom right
- Greenpath, top left
- Queen’s Station, between Fungal Wastes and Fog Canyon
- Queen’s Gardens, middle
- City Storerooms, top left of the City of Tears
- King’s Station, at the right part of the City of Tears
- Resting Grounds, right
- Deepnest, at the left part, next to Beast’s Den.
- Stag Nest, after unlocking all other stag stations
Written by LikeABoss.





Be the first to comment