
Easily set up and run a MORDHAU online multiplayer server.
Step #1: Downloading Server Files
To set up a MORDHAU server, follow these steps:
- The server files will then download to the directory you selected.
- First, download the server files. Go to your Steam library.
- Move your cursor over “LIBRARY” in Steam, then select “TOOLS” from the dropdown menu.
- Scroll down until you find “MORDHAU Dedicated Server” in the list.
- Install it to your preferred location on your computer.
Step #2: Configuring Your Ports
There are 4 different ports that you will need to open in order for your server to show up in the master list and for others to be able to join you.
Note: You will need access to the admin panel of your ISP in order to open ports.
The following ports need to be opened:
- 7777
- 7778
- 27015
- 15000
In this guide I won’t be covering how to set up port forwarding as it varies from provider to provider and can be different on each web panel.
Step #3: Creating and Configuring Your Server
Once you have successfully port forwarded your server, you will need to go to the directory in which you have installed the server files to. For example, mine are under:
- S:\Steam\steam\apps\common\Mordhau Dedicated Server
Within the folder, you should see the following folders and files, not including the shortcut:
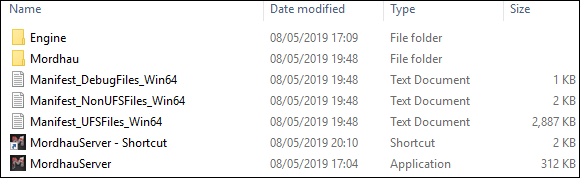
Firstly, you will need to run MordhauServer.exe at least once in order for the server to create the configuration file so that you can change the settings from default.
Once you have ran the server for approximately 1 minute, you need to open task manager and close the following processes:

Once this step is complete, your configuration file should now be created under:
- Mordhau Dedicated Server\Mordhau\Saved\Config\WindowsServer
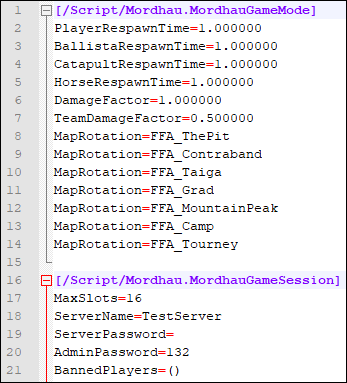
The name of the config file is “Game.ini”. You will be presented with a file that looks a little like this:
[/script/mordhau.mordhaugamemode]
PlayerRespawnTime=5.000000
BallistaRespawnTime=30.000000
CatapultRespawnTime=30.000000
HorseRespawnTime=30.000000
DamageFactor=1.000000
TeamDamageFactor=0.500000
MapRotation=FFA_ThePit
MapRotation=TDM_Camp
MapRotation=SKM_Grad
MapRotation=FFA_Contraband
MapRotation=TDM_Tourney
MapRotation=SKM_MountainPeak
MapRotation=FFA_Taiga
MapRotation=TDM_ThePit
MapRotation=SKM_Camp
MapRotation=FFA_Grad
MapRotation=TDM_Contraband
MapRotation=SKM_Tourney
MapRotation=FFA_MountainPeak
MapRotation=TDM_Taiga
MapRotation=SKM_ThePit
MapRotation=FFA_Camp
MapRotation=TDM_Grad
MapRotation=SKM_Contraband
MapRotation=FFA_Tourney
MapRotation=TDM_MountainPeak
MapRotation=SKM_Taiga

[/script/mordhau.mordhaugamesession]
MaxSlots=16
ServerName=Server Name
ServerPassword=
AdminPassword=
BannedPlayers=()
In order to change the map rotation, simply remove or add any of the “MapRotation=XXX_Xxxxx” lines. For example, if I wanted my server to run FFA (Deathmatch) only maps, then the server config file would look like this:
Optional – Logging Console:
Once this is done, I recommend creating a shortcut of MordhauServer.exe, then right clicking to go to “Properties” to get onto the following screen:
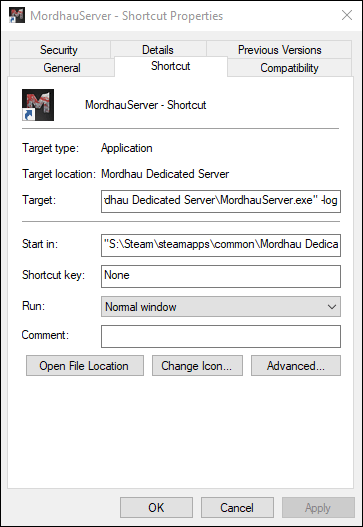
Once you are on this screen, add “-log” onto the very end of the “Target” line. Once you open the shortcut, your server will no longer be “invisible” and you will not have to go to task manager to close it down.
Step #4: Host!
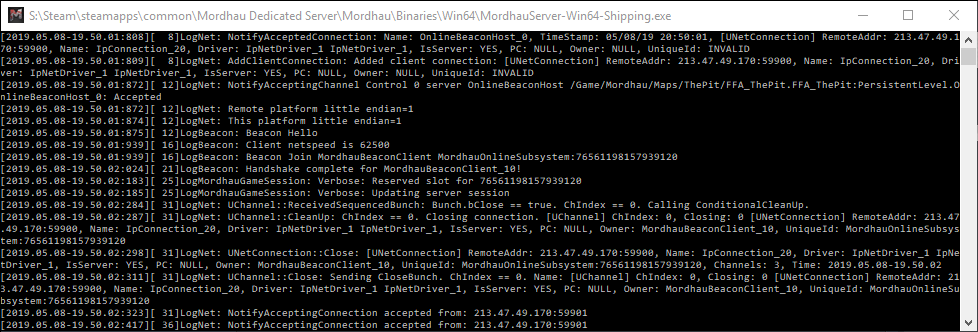
For the final step, simply open the MordhauServer.exe or use the highly recommended shortcut method I had used and you will be greeted with a small console window which opens up along with the server and logs each event in the server, including the startup, the connections and admin logs.
Be the first to comment