
This is a quick guide to getting started in Fallout Shelter so you don’t run into issues that could affect your in game advantage at the beginning and over time.
Getting Started: Don’t Believe His Lies!
So you have decided to download the popular Fallout Shelter, congratulations!
If you notice in the beginning of the game there is an overall tip section that the fallout character provides you and sometimes forces you to build or expand certain rooms depending on how far you are in the game. Most of the tutorial is beneficial and most certainly important to the game mechanics; however, the fallout character does not tell you about certain aspects of building these areas will do aside from producing your essentials: Energy, Food, and Water.
This guide will help you understand before you begin or go further into the game of what things must be considered before creating rooms, asigning dwellers, and reaching objectives/quests.
Creating Rooms
The first thing you must do, as the game forces you to do, is to create four rooms (The Energy Room, the Diner, the Living Room, and the Water Production Room).
Before you build them in any section of you can you must consider the following:
- You can expand any room up to three sections (in most cases, there are some exceptions). However you cannot expand to three sections if a different room type, an elevator, or a rock is obstructing its path
(i.e. If I have a single living room adjacent to a energy room which is adjacent to a elevator at each end, I cannot expand either the living room or the energy room).
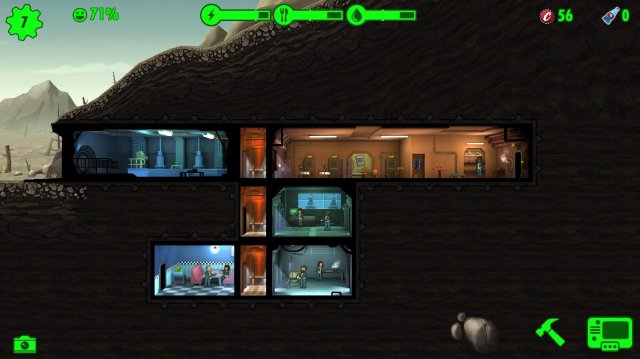
(Example of three rooms is the living room in this picture. Noticed I kept the rooms seperate from one another so I can expand the rooms to three which is the max possible).
- Building a room of the same type(i.e. I build a energy adjacent to an enegry room) increases the ammount stored and produced of any production/space. You still have to pay the caps to build the room but depending on how much you have built the price increases.
- You can upgrade a room to increase ammount stored and produced of any production/space but can only upgrade to a certain extent (ammount of upgrades varies but in most cases 3 times). Each upgrade costs caps.
- If I have a single or double room of the same type (i.e. an energy room or two energy rooms adjacent to one another that are equivalent in upgrades) that has been upgraded X (X= the level of upgrades you have completed on the room) number of times; attaching one or two LESS upgraded room(s) does not expand the single or double room you have already created (The game will view the rooms seperate from one another).
In such a case you must upgrade the single or double LESS upgraded room to the same X number of upgrades as the one you will attach it to. While considering this, please also consider bullet point # 3. - Upgrading a double or triple room of the same upgrade level and type, will upgrade the entire section more than if you were to simply have seperate rooms. (i.e. 3 seperate fully upgraded rooms that are not adjacent to one another will produceless than a room that is fully upgraded and consists of three adjacent rooms of the same type).
- Expanding a room will allow more dwellers to occupy a space over a single or double room.
- More rooms, more problems. If any incidences happen, it is best that your dwellers are in close proximity to the issue so they can resolve it faster to avoid losing your resources or having to revive your dwellers.
- Try to avoid deleting rooms until you can use your caps for more effective rooms in the later parts of the game.
Despite what I have said in all of these points, there are some rooms that do not neccessarily have to be expanded. Personally I like to keep several storage rooms without expanding them past two rooms. However, this decision is yours.
Getting Caps Quickly: Objectives/Quests, Stranger Man, Etc.
Despite what the game tries to entice you to do (PURCHASING CAPS and LUNCH BOXES). If you are playing this game casually neither of these are neccessary to be effective and great in the game. The following are quick tips to getting objectives cleared at the beginning or later parts of the game to get caps quickly:
- Objectives can be tricked: Some objectives in the early part of the game ask things you may have already but may or may not “neccessarily” have done. One example is to “assign dwellers to the correct room”. Dwellers have specific rooms that they are best in based on their SPECIAL (a + mark will appear over the room if its a good fit for the dweller. If you have already done so simply remove the from the room and assign them to a different room briefly, then move them back. The game does not recognize that he/she was in the room before therefore easy caps. The same can be done with putting outfits on, and sending a dweller into the wasteland, and other objectives.
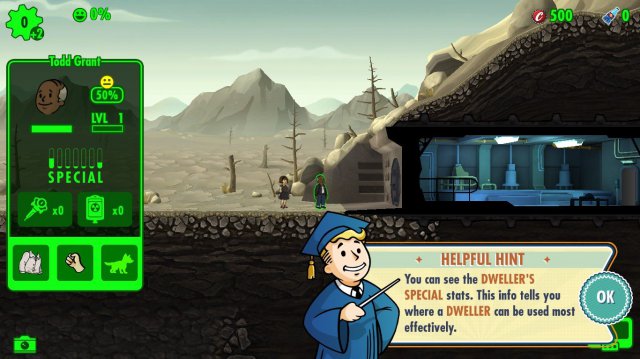
(Example Below is placing the man in the energy room because she has a high S)
The Stranger Man appears at random points hear out for the suspense music and find him fast, quick way to get caps and easier if you have less rooms.
- Passing objectives, some objectives are hard to reach because you don’t have a certain # of dwellers or they take a long time, X them out on your objective. This is always suggested if the # of caps is less that 50. Passing them up also provides you with the chance of getting objectives that are reachable and possibly for a lunchbox or pet.
- Leveling up dwellers instant caps, however, if you are further in the game increase their luck to get more caps
- Rushing a room is not suggested but if you are trying to reach an objective or really need the caps (to increase dwellers satisfaction or get more of a resource) rush the room if the chance of incidence is less than 50%.
- If you have a pet that multiples the objectives can reach, you can always reassign the pet at any point of the game to a different dweller to reach such an objective faster.
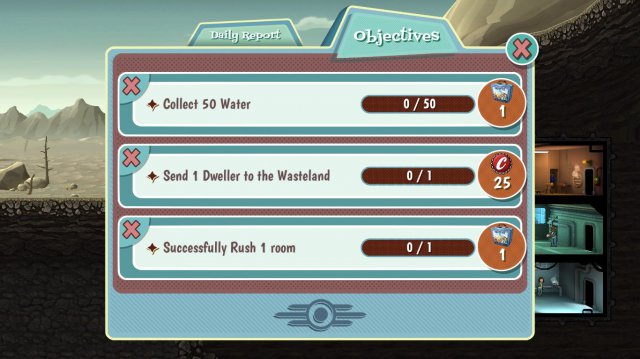
(Example: Below is my avaiability to reach 2 objetives easily, I may decide to rush them to get the lunch boxes easily.)
Other Gameplay Tips
- Upgrade your vault door ASAP!!!
- Scrapping is better than capping. If you have enough caps, it is always better to scrap items if you can because some items are hard to come by.
- Don’t send dwellers into the wasteland! The item drop is based on how far they have traveled over time. Better items require them to be gone for a long time but even when they have found efficicent items, the time for their return is equivalent to their venture, plus a loss of stimpacks and radaways.
- Always send dwellers with a higher level than the required level for objectives. I have had three level 50 dwellers with great items and almost maxed out SPECIAL go on a level 30 quest, with 7 stimpacks and 7 radaways, I had to revive one and lost all the items they found on their quest just because it was too much for them. It is always best to send dwellers with at least 10 of each on objectives and higher levels.
- Invader Tree of threat Increasing as I go along (Thieves < Radscorpions < DeathClaws < MoleRats and Radroaches) Mole rats and radroaches are your worst nightmare. If they are not remediated in the room they first appeared they will take everything from you if a room is unattended. Make sure you have every roomsecured if possible.
- Don’t use quantum cola for passing objectives or reaching quests if you can. You can save them for when needed.
- Always keep 10,000 caps available on hand for any issue you cannot forsee.
- Sign in every day to get caps.
- Once you get the radio station, its better to get new dwellers rather than having them pregnant.
Written by Carbonate!






Be the first to comment