
A comprehensive analysis of all the classes in the game that identifies the best abilities, passives, and most powerful combinations.
Introduction & General Information
This guide is meant to be a simple way to see the stats for each character type. It also shows how useful they are and different ways to play them effectively. Because of this, there will be information about things you can unlock in the game. Character types that reveal important story elements will be marked if possible.
Keep in mind that how I describe each character type is based on what I experienced playing the game at its hardest setting. If I made a big mistake about what a character type can do, please tell me. This is mainly for new players who want to understand the character types without having to spend a lot of time leveling up or using their ability points in a bad way.
This guide is not meant to provide you with the perfect builds to cheese your way through the game. Rather, it is meant to provide guidelines and perspective to help you make your own decisions about how you want to defeat your opponents.
In general, most of the classes and their abilities can be used throughout the majority of the game and have some use that isn’t completely overwritten by the more powerful classes deeper in the tree. Unlike Final Fantasy Tactics, the early classes aren’t necessarily a trap — but the later ones certainly have their fair share of boons, including better stat growths.
It is important to remember that being in a class and having its passives unlocked will automatically give you access to them so long as you stay in that class, meaning you could have a character classed as a Mercenary who uses Health Expert, Sturdy Grip, and two passives from outside of the Mercenary class at the same time.
The growth of your statistics in Fell Seal is based on the class you gain levels in. While there are certainly ways to min/max your stat growth to get the best statistics, I would caution players from obsessing about what classes their characters are gaining levels in. As long as you aren’t diverging too far from leveling in physical (ATK) or magical (MND) classes, it’s very difficult to “ruin” one of your characters by giving them “bad” growths.
The difference in having a few extra points in a statistic is negligible by the end game and, in my opinion, it’s not worth sacrificing your peace of mind or time fretting over optimal level gains. If you want to make up the difference, gain another level over your enemies rather than leveling a character back up from Level 1.
As a note, you should never relevel Kyrie. She receives bonuses to her attributes throughout the game that will not carry over if you relevel her.
Gender doesn’t affect your characters’ growths or capabilities in any way. A male Mercenary will end up the same at level 99 as a female Mercenary. However, there are two classes that are gender locked later in the game: The physically focused Lord and the magically focused Princess. For this reason, you may want to consider making your male characters physical classes and your female characters magical, but this is not at all a requirement.
Mercenary
- Maul
- Sword
- Axe
- Light Armor
- Heavy Armor
- Shield

As a baseline class, Mercenary has okay growths and abilities that are useful but not necessarily always powerful.
Forceful Strike will be a mainstay for the early game, as it provides additional damage when “slamming” an enemy against a wall, does AoE if another enemy is behind them, or will outright kill a character if they can’t swim and are pushed into the water. (Swimming units have a flipper next to their movement information) Field Aid is useful as a single target debuff remover in a pinch that everyone will have access to, but there are better options from stronger classes further into the game.
Power Strike and Mind Strike are both great ways to hamper dangerous characters’ damage before you kill them. Flash Strike is quite useful for situations where an enemy has a particularly crippling Counter ability, like Root, Poison, or Cripple. Stunning Strike is a fine way to delay an enemy, but it’s a large action investment that does little damage for something that can be accomplished long term with Slow or just killing an opponent outright.
As a note, most of the Mercenary’s offensive abilities have a range equal to your Weapon, making its kit particularly good as a secondary in classes that have access to range weapons, like Ranger or Gunner.
Mercenary’s real benefits come from its passives, all of which have a fair share of utility for most of the game. Health Expert will get you a significant chunk of extra hit points that will typically let a character survive an additional hit at most points of the game, but it is also particularly good if you are overleveled. Counterattack is quite good early but is rapidly outpaced by other counter abilities once it becomes less likely that your characters are being attacked by adjacent enemies.
Sturdy Grip lets you wield a two-handed weapon and a shield (or two two-handed weapons if you have Dual Wield from Assassin). Shields are not as superb as they are in other games; they will account for about a 4-6% increase in your DEF/RES and give you additional evasion. In most circumstances, this makes them a better, cheaper defensive accessory than what you can buy at an equivalent level, but bear in mind that not all classes have access to two-handed weapons.
Altogether, the Mercenary has a diverse kit that can arguably be useful for most of the game, but you will likely be eager to move onto classes with abilities that are more interesting, even if the Mercenary does a lot of different things quite well.
Scoundrel
- Dagger
- Crossbow
- Light Armor

Scoundrel is a very speedy class with otherwise mediocre growths and some interesting offensive abilities but a lot of useless bloat inbetween them. Scoundrels are almost exclusively going to want to use Crossbows because their best abilities have a range equal to the weapon they use.
Dirty Hit, Arterial Cut, and Fleet of Foot are both perfectly reasonable ways to start off a fight and can have their utility in the early game. Dirty Hit in particular will be mainstay in reducing the damage you take until you get access to more powerful status ailment. Any ability with “Steal” in its name borders on useless, particularly on lower difficulties.
Steal Buffs is the exception to this rule, as this is the first buff clearing ability you will have access to in the game, which is a huge boon when Alchemystics and similar buff-spreading classes are involved in the enemy composition. Sneak Attack is quite a good ability on a character that has good mobility and can frequently net side- and back-attacks, particularly if they are ranged and can stay out of the line of fire themselves. Sneak Attack is hard countered by the Knight’s No Flank, which is a frequent early passive on higher difficulties but disappears towards the mid-game. Still, that x.06 modifier is deceptive in that it’s usually criminally easy to get side attacks in this game with 4+ movement.
Attack Expert is quite useful for your ranged or glass canon physical damage dealers, especially early in the game when the front loaded +24 is a substantial bonus. It’s a good way to save your poorly leveled damage dealers or give a boon to already optimally leveled, killy characters. This is a passive you’re always happy to equip until you get to more specialized builds. Exploit Weakness is skippable. It’s very difficult to give a passive slot to, as critical rate is usually low even with enhancing gear, so Exploit Weakness might not even trigger over the course of the battle.
Scoundrel has some great early game tricks but pretty lackluster growths outside of speed, meaning you want to snag what you can from the class and move onto bigger, better things quickly.
Knight
- Sword
- Spear
- Robe
- Heavy Armor
- Shield
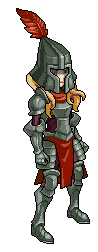
Knights are big, slow, tanky boys with the stat growths to show it — even against mages. There is a lot to love in this class and it is an instance of a class that is good enough to be mastered before moving on if you choose, as all the Knight’s abilities are useful.
Defend is somewhat lackluster outside of desperation because the healing is based on your character’s MND stat, which is often going to be low when going down the physical tree. Protect is niche but can be useful; it lasts until the start of the Knight’s next turn and will apply the Knight’s counter ability while calculating damage based on their DEF/RES, not the protectee’s. This can be devastating with the right counter.
Defensive Hit is great early, particularly with DEF buffing spells, but it will fall off as the game progresses. Taunt has a guaranteed 100% Berserk chance against non-immune enemies, which is absurdly powerful against the right target, particularly if they don’t have the debuff-reducing passive Resilience (which is common early) or allies that can reliably remove the status effect.
Chivalrous Spirit is a fine way to start a larger battle, as Rebirth doesn’t ever timeout, but later enemies or harder difficulties will have a way to circumvent Rebirth or just kill you after you come back. Its MP requirement makes it difficult to find a turn to use in battles that have a smaller map, however. Heavy Hit is a good way to start off a fight, especially if you’re building a career Knight who doesn’t have the offensive killing power of other classes with better ATK stat growths; few classes can claim to do 1/3 a target’s health, especially against the HP tanks that are frequent later in the game.
Thorns provides incredibly boring chip damage and there are much, much better counters to invest in. You can skip it pretty happily. No Flank is a good early passive to pass around on your characters who are on the front line, but it runs the risk of making your character the least impressive target — a fact which Knight growths already make them struggle with.
It’s sometimes better to trick the AI into hitting a Knight in the back than to let your squishier characters become a target. Life Font is one of the best passives in the game and should be a mainstay on most of your frontliners because of its absurd scaling utility. Even late in the game, Life Font is one of the best ways to manage your damage without committing actions to healing.
One For All is an incredibly interesting ability that can be built around as a gimmick. With Knights, you’re going to want to use a spear so that you have maximum area of effect for the ability to trigger. Especially with a low speed knight, a hasted, high speed character can potentially get off two attacks before the knight gets another turn and the One For All dissipates. This is a great way to harry down single opponents in a quick burst of single-target abilities.
On lower difficulties, One For All gets pretty substantial value from just two allies ganging up on a single enemy and will likely let you kill an enemy from just that onslaught. However, it’s also possible to take One For All to other classes with access to guns (dual wielded!) and bows, which will let you provide overwatch support to all of your allies and potentially contribute to the death of 2-3 characters with up to 5 attacks from a single action. The action economy gain on this ability is huge.
Templar
- Scythe
- Sword
- Mace
- Heavy Armor
- Shield
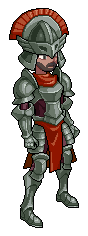
Templar are more offensively minded Knights who have great RES but average DEF. Their abilities can vary wildly in usefulness but the good ones are really good. Some of their abilities rely on MND, which is a hard ask. Templar as a class is not, unfortunately, as universally useful as Knights, and their low DEF stat makes them quite awkward, but some of their abilities are powerful throughout the whole game.
Holy Chant is hard to target without hurting your allies and relies on you having a decent MND stat, which largely makes it underwhelming unless it’s being used against multiple enemies that are weak to Holy. Soothing Chant has a better healing ratio than Defend and affects an area, both of which make it easier to spend an action doing in a pinch.
Cleansing Blade is one of the reasons a Templar can be so useful. The .5x damage rate is extremely deceptive, as purging multiple buffs from your opponent will substantially increase the damage, especially if you’re removing a DEF Up buff. Siphon does respectable damage, but it has 2 range and the dual purpose of building your MP for a finisher ability while preventing an enemy from building their MP towards stronger spells. Emboldening Chant is a great buff to start a battle with.
Rapturous Chant is actually a great panic button if you can manage to press it at the right time, as the healing is significant and you can bring the character back from the dead if you successfully stabilize. Righteous Blade is the aforementioned finisher and is one of the best single target melee abilities in the game. It does a huge (2.8x!!) amount of damage that you can cast once every other turn if you use Siphon liberally, and Holy is one of the most universal elemental weaknesses.
Templar’s passives are underwhelming. Resilience is very niche as your opponents don’t frequently utilize debuffs and the reduction of a round isn’t significant enough to warrant a passive once you have access to a Druid or Plague Doctor who is able to easily remove them. Evade Attack is one of the worst counters in the game and falls off very hard very quickly, as enemies will rarely if ever use basic attacks against your characters.
It’s possible that Evade Attack could find some use with Berserk-driven shenanigans, but the AI is typically smarter otherwise. Defense Expert is the one highlight in the passives, especially if you pair it with Defensive Hit in the early game, and it scales fairly well. Still, you have five other characters to contend with the AI’s attention and the best way to deal with the susceptibility of your squishy characters is to kill your opponents rather than turtle up a character the enemy is already want to ignore.
Overall, Templar are best when Holy Justice is being used as a secondary for a physical class with decent MND growth, as there are some good abilities but its stat growths and passives aren’t great.
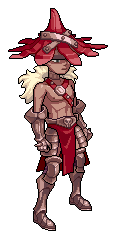
Reaver
Templar 5⠀|⠀Scoundrel 4
- Scythe
- Sword
- Mace
- Heavy Armor
- Shield

Reaver is a “bad” class with some interesting abilities that can be effective if you’re willing to tow the line between success and disaster. I have to emphasize just how bad Reaver is as a class to level in and fight in — it has some of the worst DEF and RES growths, bottom tier SPD growth, is barred from heavy armor, and simultaneously lacks access to shields AND two-handed weapons, all for an ATK growth that is good but not worth the losses elsewhere.
That being said, there’s nothing particularly wrong with the Reaver’s abilities, though a handful of its skills are poor versions of unique class abilities. Primal Cry is hard to hit more than one enemy with because of its vertical limitation, but it’s a great way to start killing enemies. The debuff is always great, but most Reavers, even if they level with a different class, are likely going to be one of your slowest characters, making it difficult to get mileage out of the debuff by chaining attacks with your other characters. The DEF Down ailment is also not guaranteed.
Whirling Blow is a great skill in conjunction with Into the Fray; it’s almost impossible to hit three characters without teleporting or flying, but hitting two is great value. Spread Pain does lackluster damage and the transference of debuffs has limited use considering how infrequently enemies debuff you, but it feels great when you successfully hand off Poison or Bleed to another character and its usefulness increases later in the game as enemies have more debilitating Counters and easier access to AoE ailments.
Primal Blow and Primal Wave are perfectly reasonable ranged attacks for a melee class, especially considering their damage and Blow’s vertical allowance. Reckless Blow is better than most self-harm abilities when you’re at full health but gets more dangerous than equivalent skills as you get further below 75%. It’s the Reaver’s best way of dealing burst damage and can be without consequences if you’re building Life Font or have a speedy healer on standby. Desperate Blow is an incredible kill move. Unfortunately, the practicality of using it before you die is sometimes questionable, but it’s very easy to get value from this skill when it’s paired with Health Expert.
Into the Fray and Bloodlust are fairly self explanatory in their use — if you’re charging into the center of the enemy, they’re going to do you a lot of good. Bloodlust is affected by the percentage of health you have missing, not the value of the health you’ve lost. You aren’t going to be aching to put them into a passive slot when you’re not in the Reaver class, though, and as stated before, fighting as a Reaver is not ideal.
Critical: Rebirth is never worth using and is the worst of the “Critical” counters. I would much rather pop Rebirth at the beginning of a battle than waste my counter on an ability that might not even trigger when I need it to because my character was killed before they can be in critical status. On a slow character (which Reavers are), Rebirth can mean that your character lasts for an additional hit before a ranged character finishes them off — and that’s assuming an enemy skill doesn’t circumvent the Rebirth in the first place.
Altogether, I don’t find the Reaver practical on higher difficulty levels. The ease with which enemies can disable or pummel you into submission when you overreach with a character that has low speed shouldn’t be underestimated. There are more tempered ways to do what the Reaver does without sacrificing your defenses — or your life! Part of the issue here is that the Marked and Demon Knight classes do everything the Reaver wants to but better.
Ranger
Scoundrel 4
- Axe
- Bow
- Crossbow
- Light Armor

Ranger is a fast class with good ATK growth that has a toolkit with variety, all of which make it a really nice class that maintains its usefulness for most of the game in lieu of a Gunner’s more debuff orientated kit. As a note, ranged weapons in Fell Seal are very generous vertically and have no line of sight penalties or restrictions.
Rooting Shot is an incredible ability, especially early on when your opponents are more melee-based or physically orientated, and it’s almost always a good way to start off a battle. Balm is a poor man’s First Aid that nonetheless provides the utility of not having to use a Remedy to get rid of debilitating debuffs, particularly Mute. Scout is a good self buff with a niche quality of life bonus, but it becomes killer with Know Weakness. Collect Pelt is useless under most circumstances, but can be helpful if you’re trying to grind components. It doesn’t necessarily increase the rarity of the drop, but guarantees one.
Rain of Arrows is deceptively good in that it has a vertical allowance of 10 and does very respectable damage when your opponents are lined up along a bottleneck; hitting 3 enemies is like Christmas here, but it’s very easy to get the high ground on a two-wide bottleneck and rain hell down on your enemies while they contend with your tanks. Multishot is similarly useful when you’re trying to pair damage with one of your mages. Sniper Shot is an incredibly good finishing move, even if it takes forever to come online because of the MP cost. The Root debuff is negligible as long as you’re being very conscious about your positioning and can be completely ignored later in the game with accessories that provide immunity to Root.
Rangers are a great class to sit in because they have two stat increasing passives that are both useful. Obviously Know Weakness and Evasion Up put you at the whims of the RNG, but there are ways to increase both values with accessories and class masteries that can shore up some of the randomness.
It’s not unreasonable, for instance, to hit a 40-50% crit rate and 20-25% evasion rate with minimal effort as a Ranger, and both of these statistics are very difficult to increase without help from these passives. Countershot is a perfectly reasonable counter ability for a ranged damage dealer and although there are other options, it’s a convenient pairing for a high crit rate if you’re not looking to grind towards more debilitating or universally good counter options.
Ranger is a great place to stop if a ranged physical damage dealer is all you’re looking for in your generic, even if the ATK growths aren’t stellar.
Peddler
Ranger 5
- Dagger
- Axe
- Crossbow
- Light Armor
- Shield

I will admit that I’m not particularly fond of the Peddler’s playstyle but that doesn’t under any circumstances mean the class is bad. Maps naturally have choke points and bottlenecks and the AI is oftentimes predictable about which routes they’re going to take. Getting an extra turn before a character reaches you can be a substantial boon. It certainly helps that the Peddler’s stat growths have great defenses and good speed, though their attack is lackluster. As a note, all Traps immediately end the turn of any enemy and have a 100% chance of inflicting their status effects assuming the enemy isn’t immune.
Lacerating Trap is the most boring of the options, as Bleed struggles to be useful on higher difficulties — you don’t want your enemies getting extra turns for the ailment to tick. Immobilizing Trap is great for stuffing characters with short range kits as long as you leave them to squirm by themselves. Painful Trap will halve a character’s current hit points, which is a great way to open up an attempt at killing an enemy as they approach, particularly those with tanky kits.
Alluring Trap is sometimes the best and worst skill in the Peddler’s arsenal depending on the difficulty and the enemy kits. You have to be careful not to hit someone with Resilience and the Charm can be outright useless if you’re throwing out AoE effects or the enemy has access to debuff removing abilities. Later in the game, numerous enemies are immune to Charm. But guaranteed Charm is so powerful when it works. Sales Pitch is a godsend, but the self-targeting restriction can make it awkward to hit everyone you want in the heat of battle. Haste is never bad, even if it’s only on two of your characters.
Critical: Quicken is better than the Reaver’s Critical: Rebirth and Assassin’s Critical: Mirage. Getting an extra turn to immediately heal and back off or charge in and kill those last couple enemies is great at the best of times. But I found that, more often than not, with particularly speedy characters, I would have survived until my next turn anyways.
There is a major issue with the enemy hitting you so hard you never trigger the counter, too. Item Potency and Patented Usage combine to give the Peddler a lot of variety with their items, particularly just as you have new materials to craft upgrades for them. There is always an ebb and flow to the Peddler’s strength — when you get new upgrades or finally get Throwing Gloves to increase item range, he’ll be one of your best characters… and then five battles later, as you’re still clinging to the same materials, he’ll be one of the worst ones.
If you’re willing to grind components, the Peddler can be a potent asset with a lot to his toolkit. If you would rather not bother with patrols as you play the game, it’s probably best to skip this class unless you’re really comfortable with the trap metagame.
Gunner
Mercenary 4⠀|⠀Knight 4⠀|⠀Ranger 4
- Guns
- Light Armor

If Rangers are the ranged physical damage dealers of the game, Gunners are the super safe but less speedy physical status inflicters with outright absurd range and better ATK growth to boot. As a note, ranged weapons in Fell Seal are very generous vertically and have no line of sight penalties or restrictions.
Focus is perfectly fine when you need to use it to help set up an assassination of a single character, but I find myself relying on debuffs more often than I do kill shots, especially considering you start most maps in range of several enemies as a Gunner. In other classes, particularly magical ones, Focus can be a potent way to setup kills.
Slowing Bullet is, ironically, one of the Gunner’s worst skills but can be a boon for lowering the threat of an enemy when your other abilities can’t do the job because of Berserk immunity or ability diversity. The base chance for the slow to land feels restrictively low as well. Crippling Bullet and Silencing Bullet are both capable of taking a character completely out of a fight, especially on lower difficulties that have enemies with less diverse kits. Mute and Cripple are two of the hardest effects to get access to or immunity from in Fell Seal.
Enraging Bullet is a safe man’s Taunt and is best used against physical classes who have dangerous and diverse kits, but the base chance is low like Slowing Bullet. Opportunistic Bullet is a nice finisher if your troops are spreading around a myriad of debuffs but your Gunner will usually spend their turn spreading the ailment love instead of stacking them on a single character, so you need help from your allies to make Opportunistic work. Magic Bullet hits high DEF guys with low RES for your turn’s MP gain, which is situationally useful for enemies like Pektites that have absurd DEF but abysmal RES.
Concentration is fine and is a worthwhile reason to sit in the Gunner class but you will probably never want to slot it otherwise. Height Advantage is deceptively good because Fell Seal has a lot of steep slopes and dramatic height differences — unlike Final Fantasy Tactics and Tactics Ogre, most “steps” in Fell Seal have two height. It’s not difficult to get a 30% damage bonus with minimal effort assuming you don’t start a battle with a severe height disadvantage.
Teleport Other is a double-edged sword that oftentimes goes very well for you as often as it goes very poorly and is probably not worth your counter slot unless you’re desperate, which you shouldn’t be by the time you unlock this class.
As a note, guns can be dual wielded.
Assassin
Gunner 4
- Dagger
- Bow
- Robe
- Light Armor

For a class that requires so much investment to unlock, Assassin has good stat growths (that speed!) but a close-range, debuff orientated kit that can feel underwhelming after playing in the Gunner for so long. Assassin does a mixture of things earlier classes do in one package that leads up to (and gate keeps) Dual Wield with filler abilities.
Blind Powder, Dispel Powder, and Sleep Powder all do very low damage and have medium range that puts you in the line of fire. Blind Powder is ultimately a better and ranged version of Dirty Hit from Scoundrel. As a ranged buff remover that also does damage, Dispel Powder has its fair share of uses, but it’s a single-target version of the Druid’s Dispel that does damage. Sleep Powder can hit two adjacent tiles to the one targeted, but the base chance to hit is significantly lower than the Fellblade’s Sleep Blade and guaranteed consistency is often more important than better range on higher difficulties.
Collect Bounty is the human equivalent of Collect Pelt but has more uses in preventing Rebirth because human classes have an easier time gaining it, particularly during the late game optional content. Mirage is a good way to start off a battle, as it prevents any hostile action against your character. The Assassin’s speed will also let you use it as a relatively consistent panic button if need be.
Assassinate is obviously a great finisher because it does so much damage, but it also serves as an excellent way to start killing a character. Hitting someone with Poison and Bleed simultaneously will quickly drain any health they have remaining, making them a juicy target for your other characters assuming they don’t heal. However, if they do heal or use a Remedy on the debuffs, you’ve essentially gained action economy over your opponent.
Sabotage is both a get out of jail free card for your injured allies and a way to reposition your enemies if they try to hole up in choke points or behind tankier characters. It’s important to note that if you Sabotage an enemy who can’t swim into water, it will automatically kill them, and this is oftentimes the best use of the skill considering it’s absurd vertical allowance.
Cautious Step is a fine utility passive but not one that you necessarily want to carry around with you all the time. You’ll be happy you have it when it’s useful for an encounter but it’s certainly not an ability that you’re excited to see in the Assassin’s kit. Critical: Mirage, like its other cousins, struggles to be useful at the right times and is often not the answer to every problem. Unfortunately, even on lower difficulty levels, by the time you are high enough level to be an Assassin, you will be at the point where your opponent is going to have the burst to kill your characters before they can even hit critical.
Dual Wield is obviously the big selling point of the Assassin, but it requires some finesse to work with. It’s particularly good with elemental weapons against their respective weaknesses or with two weapons (usually knives) that have a chance to inflict different status effects. Dual Wield does not work with most skills unless they explicitly mention that they use a “Regular Attack,” so the limits of Dual Wield are not necessarily as vast as they might first seem! The skills that make the best use of Dual Wield are Knight’s One For All, Warmage’s Infused Edge, and Ranger’s Countershot.
For Dual Wielding, there is a difference between “making” or “doing” a Regular Attack and “counting as” a Regular Attack. Infused Edge “does a Regular Attack,” which means your Warmage will attack with both its dual wielded weapons. Most of Fellblade’s kit “counts as a Regular Attack,” which will not make them attack with both of their dual wielded weapons. Instead, the attack will utilize the elemental affinity of the main hand and all the status ailments of both equipped weapons.
Assassin is a kit that really benefits from being a secondary skill for a class that gets rough and dirty in the melee and not as an assassin who can only wield daggers and bows. Other than SPD, which is phenomenal, all the growths are lackluster compared to most other offensive classes.
Mender
- Staff
- Robe
- Light Armor

Mender is a class with a specialty in healing that is never outdone by any of the other classes further down the tree. You can ostensibly sit a character in Mender until they master it without wanting for much from other classes. It is the only basic class with access to Mass Heal I (Plague Doctor has a similar ability with a much worse range and half the healing), both Revive spells, Heal II, and Rebirth, which puts Mender in a class distinctively of its own.
If you want a healer, you use a Mender and you’re almost never upset with its performance. The only lackluster aspect of Mender’s utility is their ability to remove debuffs from their allies, which they can only provide once a turn to a single ally. This is fixed by Druid’s Dual Cast passive, which is one of the few things outside of its class that the Mender wants for.
Renew is a fine but not great counter that will increase your survivability marginally or counteract Poison/Bleed. Blessed One is a great quality of life passive that will keep your healer alive from pot shots from distant enemies much more thoroughly than Renew will, meaning you won’t have to rush your healer into the line of fire in order to benefit from the AoE of Mass Heal to keep yourself alive while providing support to your allies. Both of these abilities make it incredibly easy to manage the health of your Mender from chip damage or outright assaults from the enemy.
Mana Font is the real gem of this class for those who are just transitioning to bigger, better things. With or without movement increasing boots, Mana Font is a huge boon to anyone who is expected to be casting a spell once a turn. With 3 movement, it increases your MP generation by 30%, from 10 to 13. This is, bar none, one of the best passives to equip to all your mages until you get to the point where you have better MP economy options, none of which you will unlock until you’re quite far down the mage true or you unlock secret class badges.
Wizard
Mender 2
- Rod
- Light Armor

Like Mender, Wizard is a class that your character can happily spend most of their lifetime in. While there are certainly other classes that get access to similar spells that exploit elemental weaknesses, Wizard does it so well and consistently that there’s little room for complaint. Wizards have the flexibility of working with their MP pool and casting the right spell for the right situation; lower level magic for when the battle has just started and they don’t have a large store of MP, higher level magic for when they need to hit an area hard, and single-target spells for when something needs to be assassinated.
The presence of Smart Casting makes navigating the battlefield with a Wizard significantly easier and, for later classes, this is an ability that will make Burst abilities safer for your allies. Boon is a passive that doesn’t provide a lot of excitement but works really well as a reason to stick to the Wizard class longterm. Both of these passives make for a good pair of class specific abilities to supplement ones from other professions. Magic is a cheap counter ability that won’t break any records but does its job phenomenally considering how early you get it and how often the enemy is thirsty to attack your squishy mages when they have the opportunity.
If you don’t want to grind, stick one of your characters in the Wizard class until it’s mastered before moving on.
Alchemystic
Wizard 4
- Staff
- Crossbow
- Robe
- Light Armor

Alchemystic is the king of supportive buffs in Fell Seal and boasts a pretty substantial Speed growth to boot. This is the class you choose when you want more of what you already have in other characters. Most of his spells are particularly good in the first few rounds of a battle before you clash with the enemy.
Mass Shield and Mass Aegis are fine, but higher difficulties feature more diverse offensive capabilities from your opponents and having your DEF increased typically means your opponent will just hit your RES. Still, there’s nothing wrong with taking less damage. Mass Barrier is largely skippable under most circumstances but can have limited efficacy at the start of certain battles where delibitating effects like Charm are particularly numerous — and there are at least a couple of these.
Mass Renew is a more universally great way to start a battle than earlier spells because it’s a useful way to mitigate the damage you will inevitably take, no matter what the source is. Haste and Mass Haste are expensive, but Haste is one of the overall best effects in the game and spreading this around liberally throughout a fight is a useful way to ensure your best characters are getting more actions in the longterm.
Mass Insight is the only way for basic classes to increase their MND score in battle and can help enhance the power of your hybrid and magic focused characters substantially. Refresh is largely skippable. Its best use is to extend your offensive characters’ ATK UP and CRT UP buffs, but it’s often difficult to aim the Refresh and you’re usually better off doing something else with your action once you’re in the thick of things. Soul Tendrils is a neutral element equivalent of the Wizard’s second tier of spells that costs a prohibitively large amount for the minuscule work it does, but it gives you the potential of having something other than Wizard as a secondary skillset.
Side Effects is a cute way to do additional damage or healing while spreading buffs and debuffs. The bonus to damage is tiny and often won’t be noticed, but the extra healing when paired with something like Mass Renew can be quite helpful for giving your characters an extra hit to survive with or managing damage over time.
This is a nice quality of life gimme for those fighting in the class that you won’t use outside of an Alchemystic unless you’re pushing to combine it with Plague Doctor effects. Resistance Expert is fine and is another quality of life passive if you want to sit in Alchemystic, but it’s not something you’re ever eager to use a slot on. Mage classes are already going to have high resistance and likely not be targeted by the enemy with spells, making an additional buffer of RES a moot point.
Mystic Shield is the single best defensive counter in the game. That proclamation comes with a laundry list of “buts,” of course. In a general use sense, Mystic Shield makes your character immune to a hit after every single one of their turns. For obvious reasons, this is especially good on speedy characters. Unlike Mirage, Mystic Shield won’t stop status ailments, but they function similarly in almost every other way.
The AI also doesn’t seem to take the presence of Mystic Shield into consideration when they choose which character they’re going to target, meaning you essentially kill a single enemy action every time a character with Mystic Shield takes their turn. This all comes with a few downsides, mainly the fact that you’ll rarely have more than 10 MP to work with at the start of your turn. That’s a small price to pay for the safety Mystic Shield affords you on higher difficulty levels where your goal in every battle is to survive an onslaught from enemies that are much more powerful than you.
Plague Doctor
- Maul
- Rod
- Staff
- Robe
- Light Armor
- Heavy Armor
- Shield

Plague Doctor is a mishmash of Mender, Wizard, and Alchemystic with great defensive stat growths for a mage, very good equipment options, and a supportive kit that isn’t spectacular at anything but does a lot of different things okay.
Recovery is a very poor healing spell but it’s the first and easiest way to get access to ranged status effect removal, which can make it invaluable until you unlock Double Cast. Poison leaves something to be desired in terms of raw damage but can be a great way to whittle down faster characters when the opponent doesn’t have access to many instances of Barrier.
Mass Slow has a very prohibitive range without the use of a Staff, especially if you’re using Treatment as a secondary skill on a class with worse equipment options. Hitting 2-3 enemies with the Slow debuff can be massively helpful in close fights, though. Mass Thorns suffers from the fact that Thorns itself is very underwhelming and the spell has a high MP cost for minimal effect. You don’t even want to use this spell at the beginning of a fight because it stunts your ability to cast better spells.
Mass Weaken is a great answer to enemy compositions that feature a lot of healers who are turtling without offensive power and can ensure a kill on high value targets who you are otherwise struggling to kill before a Mender gets to them. Poison Burst is quite a bit more exciting than its single target counterpart. Getting most of the enemy team poisoned, especially in conjunction with Wizard’s Smart Casting, can very quickly put the AI on its back foot. A Remedy used is sometimes a turn wasted — and that can be valuable.
Fortitude is a fine passive to have in your back pocket, even if it isn’t particularly exciting. If you’re being stingy with your money or are avoiding grinding, it’s a great way to avoid dishing out cash for status resisting accessories but it isn’t something that you always want to use a passive slot on, especially later in the game when accessories get better at handling statuses.
Barrier is a bad counter and it’s a shame that you *have* to buy it to progress through the ability tree, because you should almost never have it on unless you’re fighting a monster encounter that features a myriad of status ailments. Counter: Barrier won’t even protect your character if the first hit they receive in a battle comes with a debuff. Permanence is good in the right situation, namely when paired with other, better debuffs than what the Plague Doctor has access to. I’m looking at you, Charm and Berserk.
Plague Doctor struggles with the fact that it doesn’t have any bursty, powerful, single-target spells both offensively and defensively. On lower difficulty playthroughs, you can fairly easily look at the Plague Doctor with some disappointment and move on, but some of its utility abilities are invaluable when combined with the right skills and passives, as mentioned above. In general, Plague Doctor has access to several tricks that are quite potent before you get higher end abilities like Double Cast and Economy and it’s easy to forget just how good its stat growths and equipment options are… but there are so much better and more diverse kits out there.
Druid
Mender 3⠀|⠀Wizard 5⠀|⠀Alchemystic 3
- Rapier
- Rod
- Staff
- Robe
- Light Armor
- Shield

Druids do, wear, cast, and grow just about everything. It might be underwhelming to work through Mender, Wizard, and Alchemystic to unlock a class that uses a lot of skills you’ve already seen, but the versatility of the Druid is its greatest strength. It also has access to one of the best passives in the game and the most diverse equipment list of the spellcasters.
Most of these spells have already been covered in some manner, but there are a few new ones. Bleed is great when you need to avoid hitting your allies with area of effect magic and will typically do more damage to a single target over time than other spells if the Bleed debuff sticks.
Dispel is one of the few ranged buff removers in the game and has an area of effect on top of that, making it clutch for dealing with enemies buffed by an opposing Alchemystic. Total Shield is great combined with Double Cast, as it doesn’t suffer from reduced efficacy and is a great way to target multiple frontline characters who aren’t adjacent to each other. After all, being adjacent for the sake of your buff spells also makes you adjacent for the sake of the enemy’s offensive spells.
Adaptive Affinity is a lackluster Counter unless you’re desperate, and you shouldn’t be by the time you have Druid unlocked. The damage boost is very niche when there are numerous ways for enemies to deal damage to you that don’t involve elemental damage. Creatures who attack you with any kind of element are typically resistant to the element they’re using anyways. Mind Expert is a great quality of life passive that you won’t necessarily ever have the room to use outside of the Druid class, but is an incredibly good reason to want to fight in the class.
Double Cast is the nuts. Its best and easiest use is to enhance the breadth of your healing capabilities. Stick this on your Mender and rejoice as you can use a combination of Panacea, Heal I, and Heal II twice in the same round depending on your mana pool. Later in the game, when you have access to ways to bolster your mana at the beginning of a fight, it becomes a relatively easy task to assassinate any enemies with elemental weaknesses. Double Cast changes the landscape of what you can do with your actions every round, even if you sometimes don’t have the MP to cast *everything* you want, it teaches you the value of smaller, low MP spells — and the Druid gets a wealth of them in its kit.
Sorcerer
Druid 5
- Rod
- Robe

Sorcerers’ ability is called “Lay Waste,” and it’s an appropriate descriptor for a class whose spells attack all of your enemies simmultaneously. This class has limited equipment possibilities but has the best MND growth in the game, one of the best passives, and a secondary passive that works really well with its kit.
The problem with Sorcerer is that it’s slow and boring. Lay Waste spells don’t come online until your third turn, and that’s assuming you don’t cast a spell that costs more than 6 MP. Leveling through the class until you get Economy is a slog. Lay Waste is best on maps with a lot of human enemies, but even then you have to be cognizant of equipment giving them immunity to certain elements. In battles with monsters, you have to rely on the more expensive Holystorm and Voidstorm in order to get damage in. And you will almost always be subject to a slew of Counter abilities in response to one use of Lay Waste.
That’s not to say Sorcerers aren’t potentially grossly overpowered. Eruption obviously helps with some of the woes of not doing anything while you wait for your MP to pool. Economy, in or out of the Sorcerer class, is easily one of the most potent passives in the game, particularly when combined with Druid’s Dual Cast while using less expensive spell kits than Lay Waste.
On lower difficulties, Sorcerers can very easily kill off a large portion of the battlefield without having to engage with the enemy. But Lay Waste is significantly less useful on maps that are claustrophobic and full of nearby enemies. Higher difficulties will make it harder for the Sorcerer cheese to actually work. But not every map is this way, and a Sorcerer sitting on Economy, Mana Font, and using Ranger’s Focus every turn they can’t cast a spell is a pretty surefire way to cheese the game. This gets even better with secret class access.
Gadgeteer
Scoundrel 3⠀|⠀Wizard 3
- Maul
- Mace
- Light Armor
- Shield

This is an odd class that does everything well, nothing spectacular, and somehow manages to simultaneously have the strangest and most diverse skill set with two interesting passives. Gadgets are objects that you can craft and use an unlimited number of times by a character with the Gadgets ability. Gadgets cannot ever affect the user, whether the effects are good or bad. Like with the Peddler, Gadgeteers are at the mercy of your willingness to grind components to unlock all their abilities. Their strength is bottlenecked by your story progress, which determines the components you have access to.
Here are some of the most prominent and unique gadgets: Harmonizer is a great management tool if you pair it with the Wizard’s Smart Casting passive. Generator is great because Haste is an incredibly useful buff. Demoralizer doesn’t do any damage but it’s one of the few abilities that reduces DEF and RES simultaneously. Similarly, Molecular Infuser is a great buff for your characters who have kits that utilize both ATK and MND.
Energizer is one of the most absurdly powerful utility abilities in the game because of it gives a mage two turns of free MP generation and allows them to immediately get to their biggest, most devastating spells or fast tracks your physical damage dealers’ finishers. Dispelatron is one of two ranged buff removal spells in the game. Healbot isn’t great healing, but it exists for emergencies. Surpriser-Plus has a 100% chance to inflict Weaken while doing damage, which is one of the easiest ways to ensure an enemy can’t heal.
Absorb Mana is one of the best passives in the game, as most classes use MP in some form. There are sometimes when the enemy composition makes absorbing MP difficult, but this passive is oftentimes a fairly straightforward way to almost double the amount of MP a character gains every round assuming you’re willing to withstand attacks from your opponents.
Mana Expert lets you cast a 25+ MP spell for your first turn or gives you a stockpile of MP for subsequent rounds if you aren’t close enough to the enemy to let loose an onslaught. Mana Expert is outpaced by Mana Font over the course of a longer battle, but for higher difficulties, getting rid of those first couple of enemies is oftentimes the key to survival moreso than longevity. As the game progresses, Mana Expert becomes less tenable in a passive slot once you can craft an item that can provide a similar benefit at the start of every battle.
Again, Gadgeteer is a weird class, but the stat growths are so good and there are so many fun toys that it’s worth playing around with to see if the class suits your playstyle.
Gambler
Scoundrel 3⠀|⠀Mender 3
- Dagger
- Spear
- Light Armor
- Shield

Gambler is a class with a very unorthodox, purposefully random kit with a couple of really nice highlights and accessibility to spears. Its growths are largely focused on ATK and SPD, with average to low defenses. More than any other class, the Gambler’s damage and healing abilities are quite powerful early but scale exceedingly poorly.
Wild Card: Spade and Wild Card: Diamond are phenomenal abilities in the early game but quickly fall off as their damage doesn’t scale with increased ATK and MND like normal attacks do. Early in the game, Wild Card: Club and Wild Card: Heart can be a great way to get access to buffs you otherwise wouldn’t be able to cast, but the randomness of the ability will quickly become a frustration once you can more consistently cast certain buffs. Pile On has limited range and is difficult to aim but can be a nice quality of life bonus to the Gambler’s kit whenever the opportunity to use it presents itself on a silver platter.
The real meat and bones of the Lady Luck kit is found in Allure and Quicken. Allure is the only way to access Charm outside of hidden classes and the % chance is quite high for the advantage it confers. Quicken is a great way to hand off your turn to another character but, more importantly, can be Double Cast when paired with the Druid’s passive. This can cause a very potent alpha strike with two of your best damage dealing characters to kill off enemy characters in quick order.
Fleet of Foot is an incredibly boring Counter that provides minimal action economy unless your enemy is spamming root effects on you. The extra movement range can sometimes be useful, but it frequently isn’t. Lucky provides a 5% bonus to your chance to Evade, Crit, Hit, and Steal, which makes it a perfectly okay passive for the early- to mid-game. Initiative is an impressively potent passive when it’s utilized in the right situation: Ambush battles where you start at a severe positional disadvantage, Alchemystics spreading early buffs, speedy characters spreading debuffs twice before the enemy can move, etc.
As a supportive character with some interesting passives and access to spears, the majority of the Gambler’s kit is lackluster but the few useful abilities it has makes up for the deficits where it counts. Your love for the Gambler is going to be completely contingent on your willingness to abuse Allure and its Charm effect.
Fellblade
Knight 3⠀|⠀Wizard 3
- Sword
- Dagger
- Rapier
- Robe
- Light Armor
- Shield

With great hybrid offensive growths, acceptable defensive ones, and a diverse kit, Fellblade is one of the most potent hybrid characters for the early- to mid-game and its kit is useful throughout the entirety of the game despite not having as much offensive oomph as some of the later hybrid classes.
As a note, many of the Fellblade’s abilities “count as a Regular Attack,” which means several things: The attacks will have the elemental affinity of the weapon. They will be considered Skills and Regular Attacks for the purposes of Counters. And, perhaps most importantly, they will have a chance to inflict the status ailment tied to the weapon you’re wielding — both weapons, if you’re using Dual Wield.
Poison Slice does the most damage of the Fellblade’s abilities but as a status ailment Poison is typically lackluster unless paired with Bleed, and many enemies are immune to one or both of these. Sleep Slice is invaluable as a battlefield control spell and is arguably one of the most useful enemy management abilities in the game.
Decay Slice is a great way to isolate an enemy character and prevent them from being healed by their allies, oftentimes requiring a Remedy and a heal from the opposition through the use of a single action on your end. Miasma has very niche use because it’s difficult to aim without Smart Casting, but a composition that makes a very aggressive use of status ailments could utilize it to good results. Health Siphon is an excellent health management tool that scales incredibly well the more you spread status debuffs among your enemies.
As a spell, it also works with Infused Edge and will “dodge” the Cripple ailment. The random nature of Chaos Slice is made up for by the fact that your opponent is guaranteed to be affected by a debuff that they’re not immune to, with a 100% hit rate. Black Blade is an easy way to deal damage to two characters and potentially inflict Blind, but it doesn’t count as a Regular Attack and therefore won’t spread any status ailments tied to your weapon.
Malice is a great quality of life passive for those who are sitting in Fellblade and is a useful passive for any character whose kit revolves around spreading status ailments instead of doing damage — like, for instance, Gunners. Versatile is similarly useful but not exactly an ability you use up a passive slot for unless you are pushing a specialized build.
Any character who is using Know Weakness from the Ranger tree to will get a lot of bang for their buck here, but especially crit-centric Warmages who use Infused Edge to use two abilities in one action. Obviously, this also opens up mages to crit builds, though this is more difficult to optimize. Evade Magic is a fine passive, but you’re never going to trick the AI into “accidentally” trying to hit you with a spell while you have it up. There aren’t enough battles with a plethora of mages to make this a universally worthwhile counter but it can occasionally be okay in the right situation.
Altogether, Fellblade is one of the best classes in the game for managing the battlefield while dealing damage to your opponent. It can function as a debuffer, a damage dealer, an assassin, an HP draining tank… and can fit into all these roles fairly interchangeably depending on what weapons and passives you choose. There are certainly better damage dealing classes in the game, but Fellblade does a little bit of everything perfectly well and doesn’t have a huge cost of entry.
Warmage
Plague Doctor 3⠀|⠀Fellblade 4
- Scythe
- Mace
- Rod
- Robe
- Light Armor
Special Classes, Secret Classes, and Final Notes
I wrote this guide during the pique of my interest in Fell Seal. I’ve since done almost everything I intend to do with the game unless additional content is released. I don’t have any intention of finishing the guide in the fashion I originally wanted to, but hopefully there is enough information here to help someone despite its incomplete state.
Here are some notes about the non-basic classes:
Most character specific classes are good but not necessarily overpowered and should be pursued in some form, particularly considering these characters have higher starting statistics than generic characters. These are great for lazy players who aren’t trying to min-max and are comfortable taking the benefits from strong classes.
All secret classes are worth exploring. They have good counters and great passives that can’t be acquired anywhere else and most of them have the best growths in the game, even compared to character classes.
Marked – This is a great early game class that doesn’t necessarily scale well if you grind to get more powerful job classes. Counter: Slow is powerful throughout the entirety of the game and Light is the most useful element to exploit during story battles.
Demon Knight – Ultimately a better version of the Reaver save for its lack of ranged abilities. Cleave is absolutely absurd. Pairs well with Siphon for hitting its finisher and Life Font for maintaining its health.
Anatomist – Hands down the best healer in the game once you have Double Cast, Legendary Healer, and Heal II. Reanimate is almost always worth casting if you can afford to, because it will take the focus off your powerful characters and is excellent for preventing your enemies’ resurrection abilities.
Spymaster – Optional class; have to undergo a side quest to obtain. There’s nothing here to dislike, because Doppleganger will basically give you any secondary skillset you want. There are better class combinations, but this one is unique and its passives are very convenient.
Bounty Hunter – Know Weakness I+II is the nuts. Boomerang Bounce is great for killing non-swimming characters from afar. Counter: Bleed isn’t very good, but all the Bounty Hunter’s abilities are unique and powerful, especially Shadowstrike, which is super safe. Unfortunately, the kit is largely out shined by any min-maxing done with Know Weakness with other classes — dual wielding One For All, for instance.
The Exiled – By the time you unlock this class, you probably don’t care about leveling up another character’s jobs, which makes its effectiveness questionable. That said, Chilling Touch, Hallowed Body, and Pounce make Kairu an amazing Warmage secondary with a status effect on his weapon.
Werewolf – Again, Know Weakness I+II is the nuts. Counter: Cripple can completely decimate enemies if put on someone that’s drawing attention. Bloody Trophy is a way better way to get around Rebirth than most other abilities. You can one-shot characters with MP Absorb and Focused Rage. The rest of the kit is mostly just being cute.
Vampire – 100% Charm and uninhibited movement through Bat Form are the crux of this class’s power. Bleed mechanics are cute but not overpowered, especially considering how frequent Bleed immune enemies are.
Lich – Dark abilities aren’t actually great, especially considering you’re probably using Kyrie and Yates’ classes already. Lich is all about getting access to Blood Magic, which lets you do some crazy powerful things incredibly early in a fight and can allow mages to use Mystic Shield.
Vessel – None of these abilities count as spells, so they can’t be double cast or infused. Hallowed Body and Hallowed Mind are a power boost and a survivability boost for Warmages. There are some fun spells on a class that has incredibly good growths and great equipment access but is largely underwhelming.
Princess – Female only. Double Cast II where all the appeal of this class comes from. It also has great growths, another excellent passive, a perfectly passable defensive counter, and a kit with both healing and light magic which are almost all the spells you’ll need to cast in later story battles. Easily one of the best classes all around.
Lord – Male only. Cleave is the major appeal here. The passives are great, Rally is an amazing way to start a fight, and the access to a myriad of ranged abilities that reduce enemy statistics all make this an amazing class.
Be the first to comment