
Guide of hunting class c tanks, or hunting in general, made long.
Preparation
Skills
- Vanguard*****
- Explosive Expert II****
- Armor II****
- Trigger Happy***
- Armor Damage***
- Component Damage***
- Heal Amount***
- Salvage II**
Taking less damage is useful. You will get hit, and too much damage means you lose. Dealing more damage is also useful. It saves bullets and time in fights, which saves items.
Weapons
- Assault Rifle is a must, AR5 provides highest DPM, Al-76 is next, if you are less ammo efficient you can choose the AR4.
- The Granatgevär m/49 provide a quick solutions for crowds, while avoiding the need of flare.
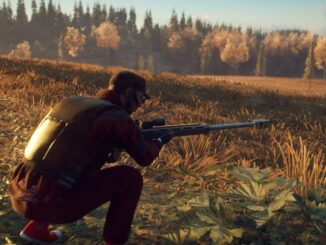
- The Sjöqvist Semi-Auto provides the highest DPS, great for shoot and duck with the aid of hard cover.
- The 12G Pump Action allows you to shoot accurately while strafing without aiming down sight.
- SMG and the Pvg 90 in your inventory can both improve your ammo economy for a more sustained hunt.
- Your pistol can save you ammo of the primaries when killing harvesters, .32 FML use the least space, while .44 HP kills weak spot faster.
Bringing hunting rifles is pointless.
Loadout
An assault rifle with an m/49 is a good setup. A submachine gun or a Pvg 90 can be used when the assault rifle is out of ammo. Shotguns are also an option, but they deal less damage over time.
Only bring the guns you need as weapons in your inventory affects the ammo drop from machines.
Gather Resources
The command bunkers feature two levels of residential areas. These areas can be distant from the Warboard, requiring extended search times. However, they typically contain high-value resources, making them prime locations for resource acquisition, provided they are not under a cooldown period.
A thorough search of one residential area should yield sufficient resources to initiate a self-sustaining operation.
Smoke grenades are generally not useful. Carrying EMP or explosive deployable devices is not recommended, as their effective range is limited, and manual detonation is challenging due to the auto-aim system’s focus on robotic targets.
Assault rifle ammunition offers the most efficient use of inventory space, followed by 12-gauge shotgun shells and 9mm submachine gun ammunition. .50 BMG rounds are the least space-efficient.
Knowing your items
Simple and standard medkits are the most space efficient, then advanced, then paramedic.
Fireworks causes machines within around 10 meters to shoot at the general direction of the center, easily causing friendly damage.
Flares causes machines within medium range to fire at it, ignoring the player, however doesn’t work on tanks.
Choosing Target
You can’t choose to kill class c only as you will run out of ammo really fast, you’ll need to kill class a and b machines to refill your ammo, and class a runners are especially good for heals.
Runners
Typically appears in groups of 4, can be one more or less
- All classes drop simple first aid kit
- Class c drops SMG ammo, HE shells, 12 gauge
- Class b drops 9mm Pistol, 12 gauge
- Class a drops .32 ACP only
Hunters
Typically appears in groups of 4, can be one more or less.
- All classes drop standard first aid kit
- Class c drops .44, 12 gauge, HE shells(rarely)
- Class b drops 7.62
Tank
- All classes drop advanced first aid kit
- All classes drop AR/SMG ammo, 50 BMG, HE shells
- Class a tends to drop mostly pistol ammo
Harvester
Most often followed by a pack of runners.
- All classes drop advanced first aid kit
- All classes drop 12 gauge/hunter rifle ammo
- Class c can drop .44
- Class a tends to drop mostly pistol ammo
Actual Fighting
Runners
If you see them first, fire a HE at the center of the group, all within about a 10 meter radius will die instantly.
If surrounded, run away and let them chase you, they will more or less group together, and a HE will take care most of them.
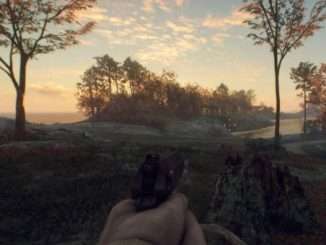
With AR, aim at the center of mass, aiming at the fuel tank carefully isn’t worth the damage you take.
When red laser starts aiming at you, run sideways, walking alone won’t dodge the shot, return fire after they fire.
Hunters
If you see them first, fire a HE at the chest of the center one, if they are grouped close enough, firing 2 shots will kill them all.
- If surrounded, fire HE at the 2 that are closest together when given the chance.
- Avoid slowing down if there are more than 2 remaining.
- With AR, aim at the chest, slightly off to one side, one full health should take about 35 shots from a 7.62 rifle.
When they are rushing right at you for jump attack, run right toward them and they will overshoot you.
Class b’s ballistic missile only does gas damage and not explosive damage, so it is ok to take it as long as you move out of the zone quick enough.
Harvesters
Take out the following runners first. Take out the rocket pods on the back, be careful that it can fire backwards(by some magic?).


You can shoot the exploding ticks when dealing with class c, but they do little damage to the harvester, so you might want to destroy the tick deployer instead.
Finish off by shooting other weak spots, typically destroying all weak spots on the back is already enough to kill it.


Tanks
To fight a class a or b tank, stay at a distance of 20-25 meters, simply walking sideways can dodge the rocket barrage of class a while the class b’s ballistic missiles requires you to run sideways, also mind that sometimes they will fire 2 ballistic missiles in a row. You should take out the concussion pulse amplifier at the rear-end of the hull with SP/HP and close in if possible.

The ideal range of fighting a class c tank is about 10 meters, where you can force the tank to keep turning and not use it’s weapons, be careful that walking too close will still cause you to be hit by concussion pulse.


The main armor plate is by far the easiest target, and behind it is four component, 2 large on each side and 2 small at the bottom corner.
Destroying the main armor plate also makes it easier to target the top and side leg controller, mind that the side leg controller is covered in armor on the side.
- You can target the mid-leg control when you are on it’s side, below the second cable clip.
- The mid-leg control needs AP ammo to be damage on class c, like the top hinge.
- You can also target the knee hinge, tho it is a way smaller target.
When the tank turns their back at you which they sometimes do, you can shoot at the fuel tank and the tick deployer.
At close enough range you can target the head, which for a component has a very large health pool and thus can inflict huge damage on the tank. However as it is very small and is isolated from other weak spots, shooting at it at longer range is likely a worse choice when compared to other larger weak spots.
The machine gun has a extremely high health pool and is not worth taking out, the explosive weapon on the other hand can be taken out relatively easily with AP ammo.
The top hinge can only be damaged by AP rounds frontally and is very difficult to aim at, so it’s not worth targeting.

Be the first to comment