
Support class can determine the flow of the game for the whole team. Here’s how to be effective in the role.
What Support Class Does
As Support class, your loadout is almost identical to that of the basic Rifleman except for one key difference: instead of a deployable ammo resupply box, you get a deployable supply crate. Like the ammo box, the supply crate can be placed once per respawn, without conflicting with previous placements.
Each supply crate grants 100 supply points to the local vicinity, which are used by other classes for a number of critical functions:
- by Squad Leaders, for placing garrisons that allow the entire team to spawn on-location (50 pts).
- by Anti-Tank class, for placing anti-tank guns that massively improve the anti-tank capabilities of the position (100 pts).
- by Engineers, for placing munitions, manpower, and fuel nodes (each 50 pts), as well as barbed wire and sandbags for defense (each up to 30 pts).
What are These “Nodes” You Speak of?
The three nodes correspond to the three types of resources you see at the top when you open up the in-game map: munitions, manpower, and fuel. Each will have a current rate of resource inflow shown, in units/min. Nodes increase that rate drastically, allowing your team far more options for combating the enemy. All 3 resource types are used by commanders for their various abilities (bombing runs, strafing runs, supply drops, etc.).
- Munitions are used every time tank, artillery, or AT guns are reloaded. If you want that kind of support, you will need good munitions flow.
- Manpower is used for spawning. If you want to keep your team numerous in the field, you will need good manpower flow.
- Fuel is used for vehicle respawns. If you want sustained tank support despite losses, you will need fuel flow.
The placement of nodes on the map determines how much they improve the flow rate of resources. In other words, the further up the map they are, the more they will generate.
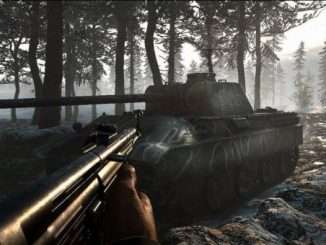
How to Be Effective
As support, you control when and where these key assets get placed. While commanders can airdrop supplies, they cost team resources and distract him from the many other things he’s already trying to deal with. You, on the other hand, can easily place supplies every time you spawn, and then go on to rejoin the fight like any other class.
An important thing to realize is that many other players do not understand very well how supply- and resource-based functions work. If you want your team to perform well, you should take a proactive role in encouraging your squad and nearby players to place down their nodes, set up useful garrisons, and place deadly AT guns when necessary.
I have found that following my squad leader and bugging him to place a garrison when we are in a good position for one has massively helped the team as a whole by making sure all squads can join the fight together. Likewise, when the team has not been placing resource nodes as they should be doing, I have found that going to a concentration of friendly squads and guilt-tripping the nearby engineers into finally placing their nodes can even turn the tide of a losing battle. So many engineers and squad leaders simply do not understand well what they need to be doing in regards to resources, and a simple nudge like that with a little explanation goes a very long way.
In the same vein, when the team is struggling to deal with an enemy tank nearby, finding a nearby anti-tank class and offering to drop supplies for him to build an AT gun can very well solve the problem. They often forget or are simply unaware that they can place an AT gun, and often the situation is too dire for them to push to flank a tank, fire all their rockets, and then attempt to resupply or respawn and do it again. If the point is regularly being assaulted by tanks, that’s even more reason to get an AT gun down, especially if you can find a spot with good covering sightlines. You can even hop on his gun as a loader after it’s placed to keep the rounds flowing downrange.
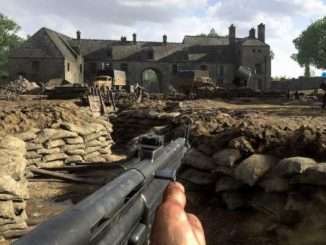
You should keep an eye out for good locations to drop garrisons and resource nodes. On or near the furthest controlled point is an obvious choice for both. For garrisons, suitable fallback positions and forward flanking positions can also really boost the team’s effectiveness, getting everyone back into the fight faster. For resource nodes, an inconspicuous spot in the woods near the front can work well, because nodes are not destroyed by the enemy capturing a point. Just don’t take too long to get your squad’s nodes down, or your team’s resources will suffer.
If you are respawning several times fighting for a point, you might as well dot the landscape nearby with supplies as you respawn so that the other classes can make use of them as they see fit. Make sure to announce it on proximity voice chat as you do so, and suggest any deployables you think might help the situation. This will allow squad leaders to keep replacing destroyed garrisons, engineers to finally do their jobs, and AT guys to pop up a gun if and when they decide it’s worthwhile.
However, if you are currently moving forward with your squad leader, you should hold onto your supplies until you reach a good spot for a garrison and/or nodes. Again, don’t be shy about pushing them to place down their assets!
As a final note, don’t forget what you’ve learned here when you play as a Squad Leader. You can have just as much effect by directing your squad toward the same goals as I’ve described above.

Be the first to comment