
A guide to the infantry in Hell Let Loose focused on the basic mechanics and gameplay elements.
Other Hell Let Loose Guides:
- How to Officer (Basics).
- Infantry Tips for Beginners.
- Tank Guide.
- Maps.
Getting Started
Optimizing Options
The very first thing you want to do when starting HLL is to set the view distance for team and squad member symbols to 250 or 500m. to avoid friendly fire as good as possible. Its frustrating to get team killed by a new player because he didn’t see your symbol over your head. Please don’t be that guy!
Finding a Server
Try to pick a server within your region to avoid high ping. There are a lot of servers which only allow communication in their language. Please respect it and if you don’t speak that language don’t join the server. It does not help you nor your team if you cant communicate.
Picking a Site
Once you joined a server with an ongoing game you are given the choice to either join the US or German forces. Sometimes, if there are too many players on one team, you are forced to join the other team. However you shouldn’t care too much about the team you pick, since both have somewhat equally loadouts.
The german heavy MG and Panzerschrecks are arguably stronger but for now you just want to get started so choose whatever team you want.
Choosing a Squad and Class
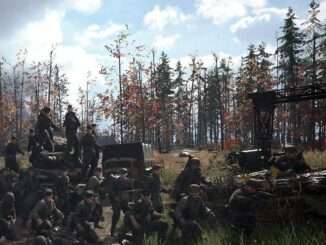
Choosing a squad: Before you can choose a class you first have to choose a squad. Infantry squads consist of 6 players with different roles within the squad. I’ll cover some of them later into this guide. For now you should simply choose a squad and start to communicate with your squad. Communication is key to win in this game!
Choosing a class: Once you joined a squad you have to pick a class. If you are not sure what to pick its a good idea to ask your squad if there is a class that is needed! Most of the roles are equiped M1 Grand or Kar 98k depending on the team you picked. Exceptions to this are the Assault, Automatic Rilfeman, Squad Leader and Machine Gunner. For your first game I would recommend to pick a role armed with a M1 Grand or Kar 98k.
There are some roles which can only be taken once. For example the medic, support, etc… If you see that you can pick one of these you should do it, because most of the time this helps your team more than a normal rifleman.
The First Steps on the Battlefield
Using the Map / Getting an Overview
Spawning
Once you choose your squad and class you are ready to spawn! You now have to choose a spawnpoint on the map by selecting it on the map and hitting the deploy button. You should take a look where your team and squad are located and spawn close to your squad (marked as the green players on your map). If you are unsure where to spawn and where to go, ask your squadmates to help you out!
On the map you can also see which points have been captured by your enemy, by your team are beeing captured right now. If you choose to spawn close to a point that is either beeing captured by your team or the enemy you should watch out, you might spawn into heavy fire or artillery and you should try to find cover immediately!
Player Movement
Every once in a while you should take a look on your map to keep updated on the movement of your team. This gives you an idea where battles take place, where you should move with care and where you are relatively safe. It also prevents teamkilling, since you can see if these moving guys in the distance are friendly or not!
Closing up to Your Squad
This can be a tricky one. Depending on your position and the position of your squad you might have to run for a while to keep up to them. If this is the case you can ask your squadleader to deploy an outpost so you can spawn right into them. If that is, for some reason not possible, you can close up to them on foot. But be aware that there might be enemys between your squad and you! Try to move quickly but avoid drawing attention of enemys.
Working with Your Squad
Once you reached your squad, or earlier, your should ask for your current orders and known enemy postions around so you can work together efficiently.
Always stay within your squad to provide maximum safety for all of you. Single players are easy targets but a whole squad can be a deadly force if played well together. Be aware that you should still keep a few meters between you and your squadmates to avoid getting killed all together by a tank or a granade. 6 Players behind one tiny wall is an easy target, but 6 players well spread in good cover are hard to kill!
Play Your Role
Always keep in mind that you fill a special role within your squad and adapt your playstyle to your role! Work well together, place supplies or ammo if your squadmembers or squadleader ask for it. Overall communication is key to playing your role. For example as a medic its not your job to go first into a trench. You should be a bit behind your squadmates to be able to revive them if they go down.
Movement
Always adapat your movement to that situation you are in! Before moving you should think “How can I get there without getting killed?” Check your surroundings before making a move and decide if its safe to go and what is the safest way. The terrain around you might give you some options to move relatively safely even under heavy fire. Make sure to look for your best way out, there might be a small hill behind you which covers you when you go prone. This sometimes means to take a small or even large detour to get to your destination safely.
Smokegrenades
Smoke is an awesome way to block your enemys vision on your movement. The Medic and the Squadleader have access to smokegrenades. If you are under fire and have to move make sure to use them or ask someone to use them! Again, communication is key here. Once you deployed the smoke you are relatively safe to move. But keep in mind, that the enemy might shoot through the smoke and can get you killed if you are unlucky. If the enemys have a heavy mg faceing your direction you should be very carefull because they can easly lay supressive fire into the smoke and get you killed far more easily than rifles.
Supressive Fire
Another way to move safely is to supress your enemys. If you have teammates with heavy mgs or automatic rifles they can open supressive fire onto your enemy to force them into cover, creating space for you to move. And again, I can’t say it enough, communication with your team is key to success.
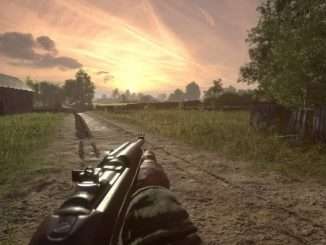
Combat and Cover
The combat in HLL is unforgiving. If you take a wrong step or peek out too far you are dead before you can even see the enemy. It takes a while to figure out when to peek, move and shoot but you will soon get into it.
When playing a rifle a single bodyshot on the enemy will get them down but be aware that they can be revived by a medic. Headshots are an instant kill and can’t be revived. So if you have time to aim you should go for a headshot, unless you want to bait their medic out of cover to kill him while he is reviving. An experienced medic won’t fall for that, but sometimes its worth a try.
Spotting Enemies
Once you spotted one or more enemies it is important to give their position to your sqaud so they can support you in combat. Simply call out the direction you saw enemys by checking the compass on the bottom of your screen. Sometimes it can be a bit tricky for your squadmembers to spot the enemy, if you can give them a significant detail of the environment its a lot easier for them to support you. Don’t forget to tell your squad how many enemys you saw too!
For example: “Infantry, 50 North-East, behind the stonewall, two or more!” Keep it short and simple so your squad can react as fast as possible.
Positioning
Make sure to get a good position to shoot from. Always try to stay behind cover to minimize the body you show to your enemy, making it harder for them to hit you. But keep an eye on your surroundings, the enemy might already be flanking you! You should also watch out for grenades comming your way. Grenades are incredebly good to force you out of cover or kill you behind it. If you are under fire on open field you are in deep trouble and you have to react quickly. You should be aware of your options. How many enemies are there? Can I kill them even without cover? Are they far away and do I have a chance to run into cover before getting killed? Can they still hit me when I go prone?
Shooting
If you are in a good position and your squad is aware of the situation, or you just have to fight now then its finally time to use your gun. Always aim down sights to kill enemies which arent standing right in front of you! Hipfire is uneffective even at close range with a rifle! When your enemy is a bit further behind you want to hold your breath to steady your weapon and to zoom in a bit.
Once you shoot you should immedialty check for a kill. Did the enemy fall down or did he just go prone? Is he still moving? If not, good job! You just killed your first enemy! You can also check the scoreboard and take a look if your “combat score” went up, but be aware that only enemies only count as a kill if they let go or can’t be revived. When an enemy gets revived you don’t get any points. (Please only use the scordeboard if there are no more enemies around, who might be aiming at you or your squad).
After a few matches you get a better idea on wether an enemy is dead or not, even on long distance. The key to winning a gunfight is patience! Take your time to aim correctly and then fire one deadly shot instead of firing as fast as possible and hoping some bullets hit the enemy.
Stay behind cover, peek, aim, kill, go back to cover. If you are standing or crouching behind cover, the leaning funtion is your best friend. By leaning out of cover you only show a tiny bit of your body which makes it very hard to hit you.
Hitting Running Targets
There is no bullet travel time in HLL yet, so your weapons are hitscan! To hit a running target its best to line up on him, follow his movement with your crosshair and pull the trigger once you are sure you are on him. This can get tricky on greater distances but once you got into it you can do some impressive long range kills. Oh and you can see the beautfil animation of you enemy falling face first into the dirt. Enjoy it, you earned it!
Supression
Soon into the game you will notice that, when under heavy fire, your screen turns black and white and your gun starts shaking. This is thesupression mechanic. When a lot of fire is around you, grenades or artillery explode nearby, you get supressed, meaning its harder for you to see and aim. Whenever you get supressed by enemy fire you want to find the best cover possible within your area to avoid getting killed. After you found some decent cover you should try to get out of the supression zone to get back into combat. Move with extreme care and then wait until you are not supressed anymore. Don’t try to fight back when fully supressed! Its one of the easiest ways to send you straight back to the spawning screen.
Bandaging
Every once in a while you will get hit and start to bleed. When this happens you can select the bandage by pressing F and use it by holding F again. If you don’t use the bandage you will slowly bleed out and die. However again the timing to using your bandage is key. Before using it you want to make sure that no enemy is in close proximity that is a direct threat to you, since you are an easy target while healing yourself. If you need to, you can still kill a few enemies before appliying the bandage. You also want to find the best cover available in close range and use it while healing.
When you run out of bandages you can resupply them at an ammo box or ask your medic to bandage you!
Roles and Some Basics Tips
Officer
- The officer is the leader or the squad. He has access to the voice chat with the commander and other squad leaders.
- He gives orders himself or gives orders to the squad he recieved from the commander.
- He can build outposts, garrisons and place squad markers on the map.
- I recommend not to play the Officer until you got some experience in the game, since communication in three different channels, placing markers, coordinating your attacks and keeping an eye on your spawnpoints can be a bit overhelming at first.
- Once you’ve played a few rounds and want to try it, go ahead, its great fun if you are succesfull!
Rifleman
- The rifleman carries an ammo box on which his teammates can get new ammo once he placed it.
- Always place them when asked by your team.
- If you find yourself fighting a lot of tanks you would want to bring a rifleman, your antitank will thank you!
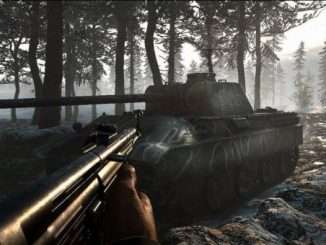
Anti-Tank
- The name says it all. You bring down tanks! Always make sure to get a good angle on the enemy tank. Try to aim for the side or back of the tank, since it does a lot more damage! If possible always try to hit the back, since it does the most damage.
Machine Gunner
- As the machine gunner you are armed with a heavy mg. As the machine gunner a good positioning is key. Place yourself in a spot where you can cover a lot of ground infront of you.
- Lay down supressive fire onto the enemy and show them what a storm of bullets tastes like!
Assault
- As the assault you are well armed for short and mid range fights using a machine gun.
- You want to jump into trenches first, clear houses and lay down supressive fire? Then the assault is for you!
- But don’t push too much, and make sure your squad can follow up.
Medic
- As the medic your primary job is to revive your fallen teammates!
- You surely can take part in gunfights but don’t forget to bring your friends back to life.
- As the medic you should stay a bit behind your team to avoid getting shot first, but not too far behind to make an easy target.
- You should pay close attention where your friends die and if its safe for you to revive them. If its not, dont go!
- Use your smokes to revive teammates in its cover.
Engineer
- As the Engineer its your job to lay traps for your enemies and repair your teams tanks.
- You can lay down anti tank and infantry mines in strategical points to get easy kills onto unknowing enemies.
- You can also build repairstations with supplies for your tanks.
- If you want to be loved by all tank crews, play an engineer!
Support
- The support brings supplies to the battlefield, which are needed to build garrisons, repair stations and anti tank guns.
- A support is needed in every squad for that reason.
- Good communication between you and your squadmembers is most important, so you can deploy your supplies whenever needed.
- If you join a squad and you are not sure what to play, the support is always a great option!
Automatic Rifleman
- The automatic rifleman plays much like the assault. You lay down supressive fire when needed and you are great on short and mid range, but if you can also get some nice kills on longer range.
- Always make sure to supress your enemies and support your allies with your hard hitting fire.
- Don’t fire only to kill, use your fire to get an advantage whenever needed.
Be the first to comment