
This guide is aimed at every type of player, whether you are brand new to the game and want to knows the basics or if you are here for some useful tips you should probably find at least one piece of information that could help you out.
What is Autonauts?
Let’s start with the very basics.
What exactly is Autonauts?
Autonauts is a game about building, planning and automating tasks to make your life easier. In Autonauts you don’t fight monsters, you don’t try to get rich or to beat opponents. Instead you grow at your pace and build a colony a little bit bigger every step of the way.
The main ways to “progress” in the game are by filling the conditions for rewards at the Academy and by doing new researches.
- The academy is mostly here to give you starting indicators of what you could do next. You can see that as a soft tutorial of sort. Each task you accomplish gives you a reward varying from outfits only used for cosmetic purposes to unlocking the access to brand new structures and objects.
- Research is the way you get access to more advanced technologies and therefore objects and structures. You don’t have access to research at the very start of the game you instead need to build a Research Station.
A Colony Made of Robots and Colonists
Your Colony will eventually be filled with you, your Robots and the Colonists.
A Colonist living in a hut (on the left) and a second generation Robot holding planks (on the right).
- The Robots are the main focus of Autonauts as the name implies. You can create Robots at the very start of the game and then learn to build greater ones throughout your progression. Robots needs to be taught actions to repeat after by themselves (more on that in the dedicated section below). The whole point of the game is to learn to automate any action you could perform yourself so that your Robots do everything for yourself. And yes, Robots can do everything you can (except teaching other Robots).
- The Colonists are treated very differently in Autonauts than in most games of similar genre. They essentially work as generators of Wuv. Wuv is the ressource that fuels your research to unlock new technologies. Basically you place a Colonist on the ground like you would place any other object of the world and then you need to fill its needs to get Wuv in exchange (again more on that in the dedicated section below).
To summarize it works as if you were the head of a big robot factory where you have full control over every robot and those Robots work to produce Wuv by using Colonists (which would be the machines of the factory in our example).
What You and Robots Can Do
Now that we have a general idea of what the game is all about let’s have a look at what you and therefore every Robots can do. This is not meant to be an exhaustive list but rather some good tips to have a better idea of the range of actions you can perform. Also the entirety of the guide assumes that you have been through the tutorial included in the game and I won’t go over the basics taught in the tutorial for the sake of efficiency.
Stacking several items of one kind in your hands
Each and every object of the world has a specific weight and most of them can be stacked on top of each other and carried around that way.
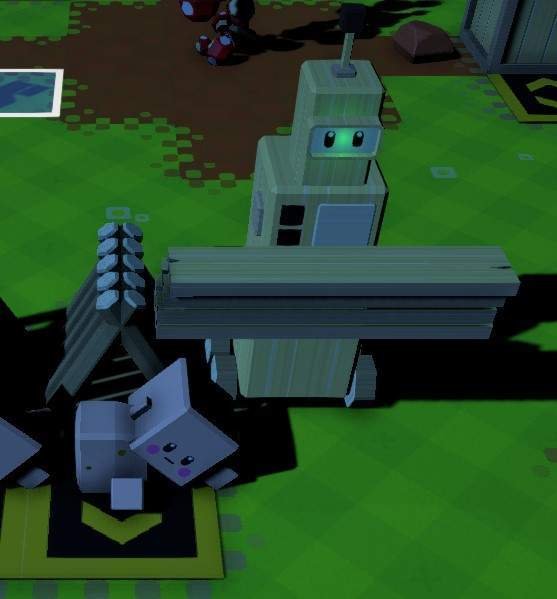
Here our character holds 4 stones stacked on top of each other as represented at the bottom of the screen by the 4 rocks in the “hands” part of the inventory.
Not only this is obviously useful for yourself when you need to help on a specific task but this becomes a huge time gain when you make proper use of this for your Robots. Be careful as Robots carry capacity varies based on their “Bod” part and whether they have a Power upgrade or not.
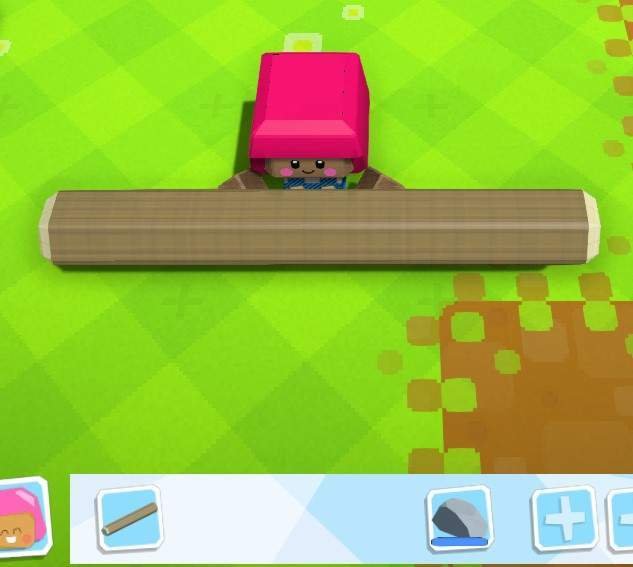
If an item is heavy it will uses several slots of your “hands” inventory (you can see it with the log in the next example, it uses all 4 of the “hands” inventory).
Using your Backpack to carry even more stuff
Not only you can carry up to 4 items in your hand depending on their weight but you can also stash things in your precious backpack. By default your backpack has a capacity of one slot and Robots need a “Backpack Upgrade” installed to have access to a backpack.$
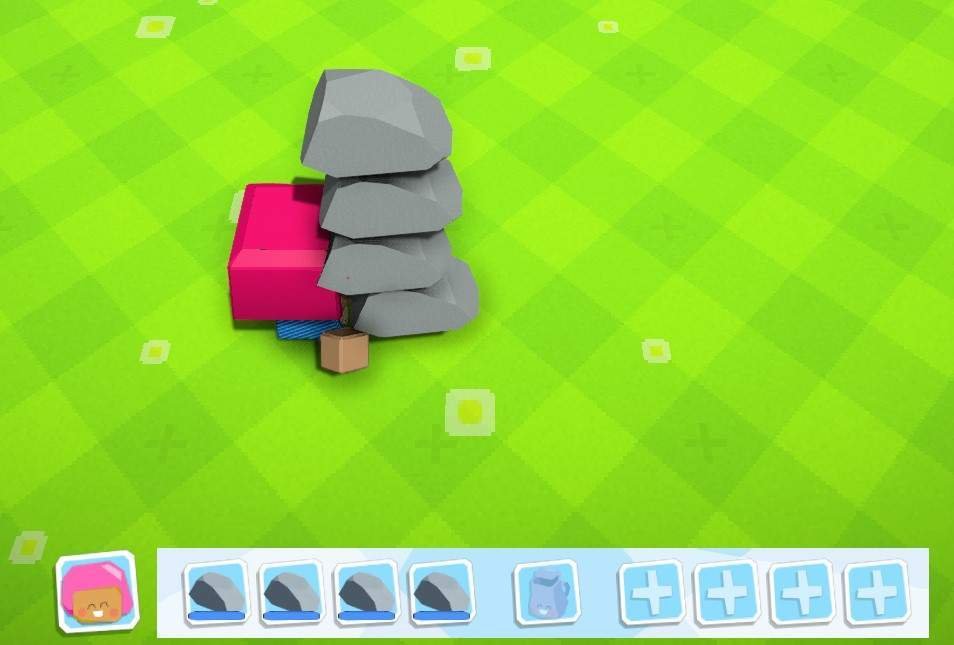
Here you can see our character holding a heavy log in its hands while having a stone preciously stored in its backpack. Using your backpack is particularly useful when you need to bring different items from one place to another, you only do the trip once instead of twice!
Upgrade yourself and your Robots for maximum efficiency
You may notice some “+” icons on the right of your inventory (and your Robots’). These are the Upgrade slots. Your character has 4 slots while the Robots have at least 1 and more based on their Head part.
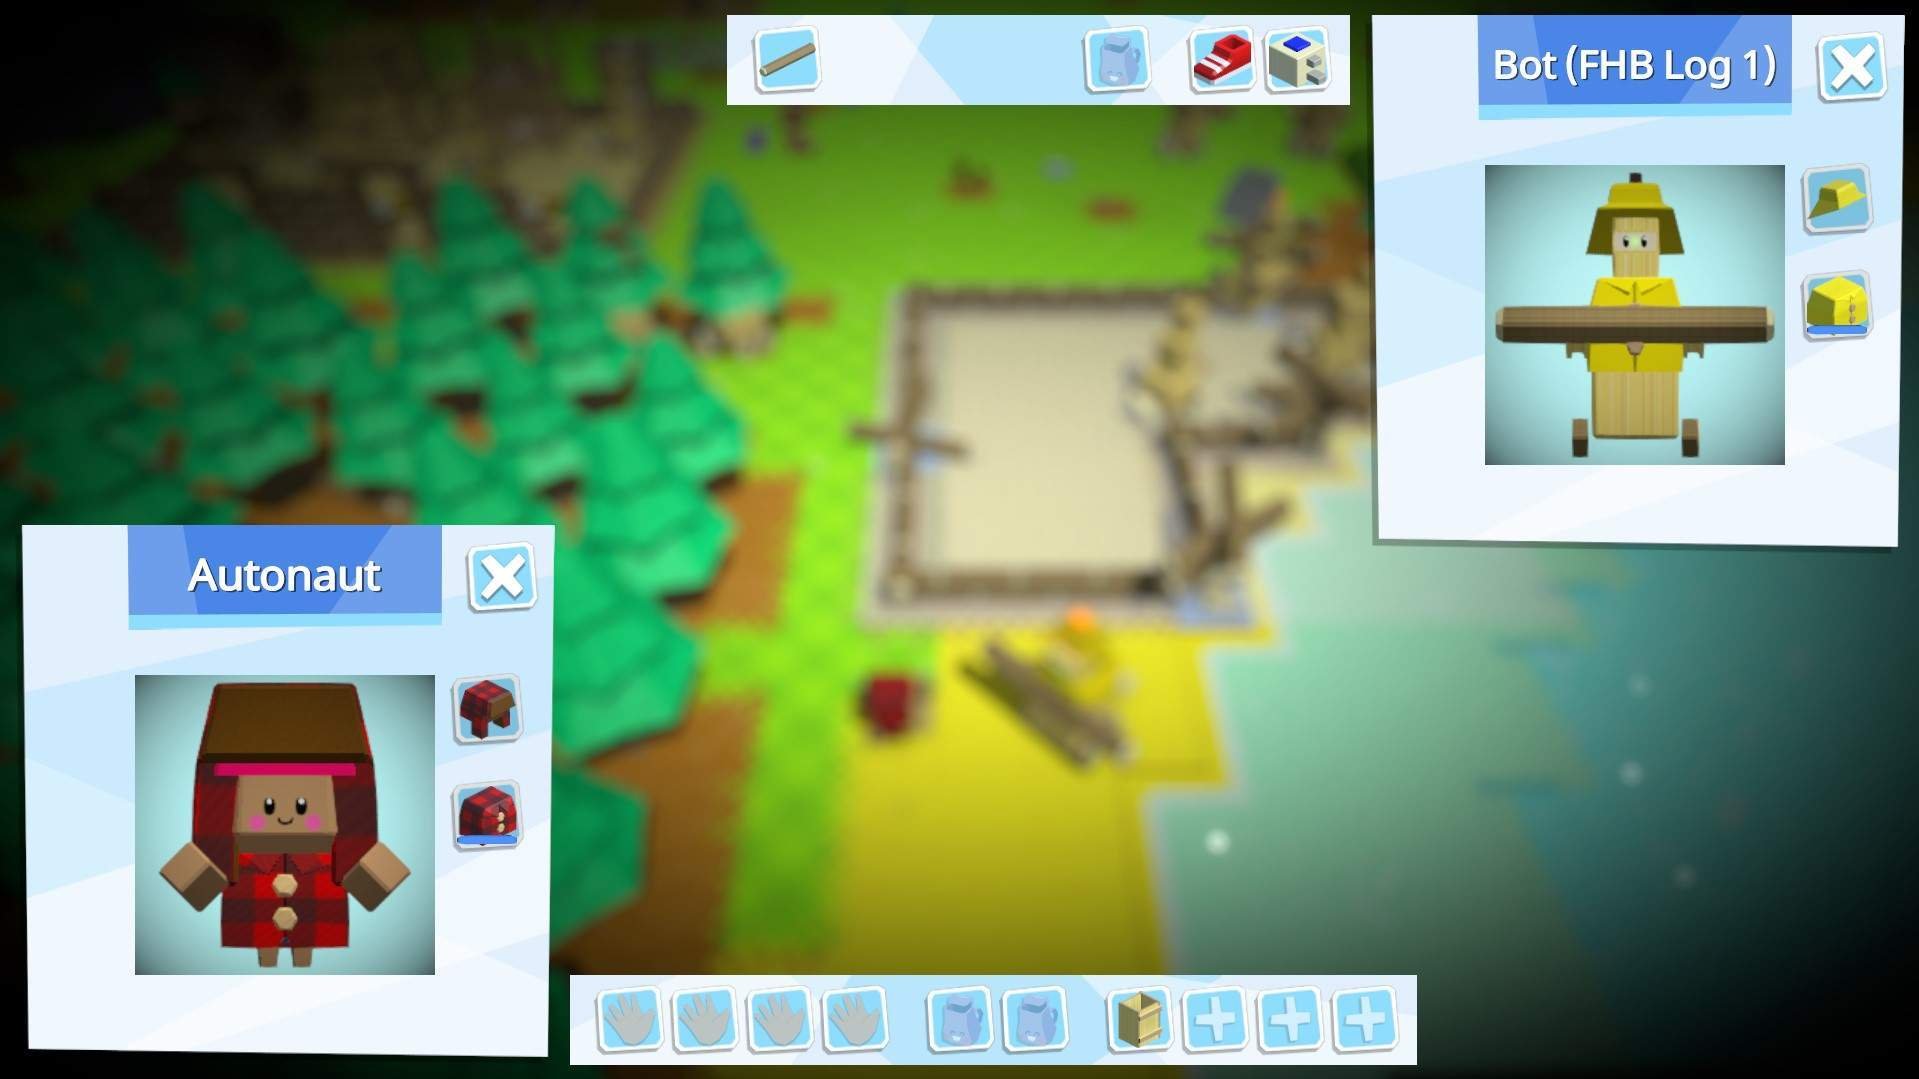
In this example you can see that our character has a Backpack upgrade while our Robot has a Locomotion Upgrade and an Energy Upgrade (improving its movement speed and energy capacity respectively). And yes, you can dress your Robots the same way you can dress your character.
Your Robots can do what you can
It may sound stupid but always remind yourself that any action you can perform, your Robots can (except for programming other Robots). I insist on that fact because the tutorial does not show you a very big range of actions your Robots can perform and some simple tasks performed by your Robots can save you so much time. A simple example of that is the task to recharge the battery of a Robot. You can have several Robots in charge of recharging discharged Robots or even include that action to Robots already busy with other jobs (so they can recharge each other once in a while).
I strongly recommend you to mess around with the Robots programming part of the game, try about everything you can think of and see how Robots behave. The possibilities are genuinely limitless.
Programming Robots: How to Git Gud with Scripts
The biggest part of the game is without a doubt programming your Robots well. Generally you want your Robots to do most, if not all the work while you do almost nothing. The best way to be efficient and move forward is to program new Robots while the ones you programmed before are working for you.
As I said in the previous part I cannot stress enough you really should experiment with programming as much as possible. The interface is very user friendly and easy to understand, so mess around with it you cannot do anything detrimental so enjoy yourself.
I am in no ways an expert and I don’t think that there will ever be “good” or “bad” ways to play the game and program your Robots. However it is possible to give general advices to make things easier for yourself and widen your panel of possibilities.
Looping all the time
Loops are vital to make more sophisticated Scripts for your Robots to follow. The tutorial makes a good job of teaching you the most basic use of Loops being the “Forever” and “Until ? is full” options.
The former forces your Robots to perform all the actions inside the Loop forever (or at least until you shut it down manually) while the latter forces your Robots to perform actions inside the loop until the structure you choose becomes full (a single crafted item counts a crafting station as full so be wary of that when you plan your Scripts).
The “Exit if fail” clause
The “Exit if fail” clause (let’s call it “ExIf” from now on) allows your Robot to gets out of the loop whenever it is impossible for the Robot to perform the actions inside it. Remember that your Robot will still do the loop following its applications’ conditions as long as it can, it will exit the loop only when it cannot anymore.
Let’s check out a very basic example of how we can make use of an ExIf.
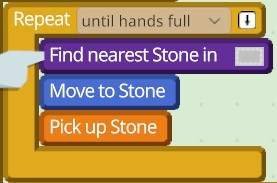
In this Loop the Robot will:
- Search for a Stone in the designated area.
- Move to the Stone and Pick up the previously selected Stone.
The conditions for the loop to happen is “Until hands full” which means that the Robot will continuously Look, Move to and Pick Up Stones until its hands are full.
So far things are pretty simple, we created the loop so that the Robot moves as much Stones as possible at once instead of picking them up one by one.
But what if we want our Robot to perform its next actions as soon as possible if there is no Stone available in the area ? For example Stones may be available in the designated area very rarely and it may take a very long time for your Robot to finally gets its hands full.
Come in our ExIf clause. As you can see in the top right hand corner of the image the small white box next to the Loop condition has a pointing down arrow. This means that this condition does have an ExIf clause and therefore if the Robot cannot perform these actions it will stop trying and move on with the rest of its Script.
This means that IF the Robot can stack up to 4 Stones it will but if there is no other Stones to pick up at that moment it will still go on with its actions (which in this example would be to put them in storage).
The ExIf clause opens up an infinite amount of possibilities for your otherwise limited Robots. For example you can setup a Robot to perform some actions Forever with an ExIf clause. This is particularly useful for cases where you want your Robot to quickly scan an area to perform an action once in a while. Maybe you want your stone gatherer Robot to sometimes re-charge your other Robots, well you can do just that with a simple Forever ExIf loop (it can work fine with a Times 1 loop as well in this example.
A word on memory limitations
Each Robot has a limited memory capacity which materializes as KB. Each KB translates to either one line of script or a Loop. In this example we could add at most 5 lines of Scripts and/or Loops to the Script of our Robot.

Starting Robot have a very poor Memory capacity so you will be limited at first with the type of actions your Robots can perform on their own. To improve the memory of your Robots you need to give them a better Head part or install Memory upgrades to them. Don’t install a memory upgrade on every of your Robots though as other upgrades can be more interesting if you don’t need the extra lines of Scripts.
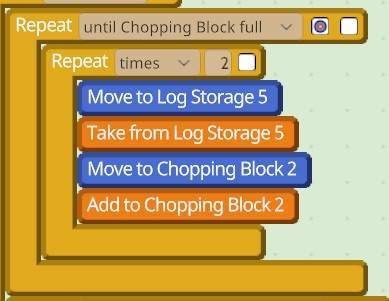
Here is an example of a small Loop of Script made to reduce the amount of Memory used to perform an action. The Robot will pick up and load a Log on the chopping block twice in a row with only 5 lines of Scripts instead of doubling the 4 lines (we save 3 KB that way).
If you find you are short on Memory try to see if you can’t take shortcuts to save up on Memory, just be careful that your Robot can still perform its intended actions properly though!
The types of Upgrades a Robot can have
Here are the 6 types of Upgrades you Robots can have access to (at least to begin with), each of these upgrades exist in several levels of efficacy. For example the Crude Power Upgrade increases the carry capacity of your Robot by 1 while the Good one increases it by 2.
- Brain: Improves the Memory Capacity of your Robot.
- Power: Allows your Robot to carry more items at once in its hands.
- Sensor: Increases the radius in which your Robot can scan an area.
- Locomotion: Improves the movement speed of your Robot.
- Backpack: Lets the Robot use a Backpack to store objects in it while carrying other items in its hands.
- Energy Efficiency: Increases the Energy capacity your Robot has, allowing it to last longer without needing a recharge.
A word on Signs
Signs and other similar items let you use more advanced interactions with your Robots. When you interact with a Sign you can change its text but also its area of influence. This area can then be used dynamically by Robots to perform action.

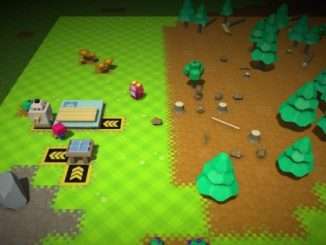
In order to do so just click on the Select Structure button (you might want to click on that picture to see it closely) and then select your Sign. This means that the Robot will then perform its scanning action within the boundaries of the area designated by the Sign. The Sign can then be held by anyone, including Robots, to be moved around.
This can obviously be used for a huge array of actions. One example is to build quickly structures. You can tell one Robot to constantly look for blueprints in the vicinity of the Sign and bring it materials and then place your Sign next to any structure you want to build, and move your Sign around when needed. This is just one example, you can create a giant snake party if you prefer, of even be a shepherd.

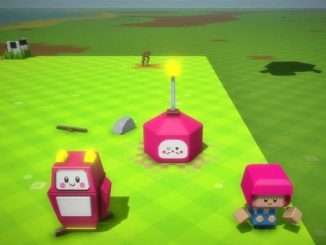
A silly example of my Sheep Robot coming to pick up some Berries around the Sign.
Get Wuv From Your Colonists
Colonists are the second big part of Autonauts and serve as a way to progress in the game as well as being forced to adapt to increasingly more complex technology requirements.
With bigger needs come bigger rewards
Your Colonists start at Level 1 and can get more sophisticated as you give them access to more things. By doing that they gain in Level and start to have more complex needs.
Each Level of Colonist gives more Wuv than the previous one, for example a Colonist Level 2 with all its needs fully satisfied will give you 10 Wuv whereas a Colonist Level 1 will give you only 1 Wuv. However if you try to give more simple things to fill your Colonist needs it will give you less Wuv as if it had not evolved. For example a Level 2 Colonist will give you only 1 Wuv instead of 10 if you give it regular berries instead of preparing it proper meals.

Here you can see some Colonists Level 2 in their Hut waiting to be taken care of (with some 10 Wuv around on the ground).
Basically the idea behind Colonists Level is that each Level requires you to deliver more sophisticated goods to your Colonists forcing you to significantly improve your industry.
Wuv is then used in the Research station and serves as a form of currency to research new technologies. This means you can technically keep Level 1 Colonists and get only Wuv 1 by 1 but the exponential increase in demand and production with subsequent Levels makes it suicidal at best.
It’s important to note that Colonists are not really “beings” in that they don’t have a lifespan or anything like that. They are immortal things you give stuff to and get Wuv back from it.
A word on Colonists’ need gauges
The gauges representing the Colonists’ needs are meant to be seen as cycles that end and not gauges to be filled. Your Robots will bring what the Colonists need only when their cycles end and not whenever they can.
The idea is that you get X Wuv regularly because their gauges got emptied. They don’t give you Wuv on a timer while you need to maintain their needs as much up as possible. It works more like a constant trade situation where you need to regularly give them goods to get your Wuv back in exchange. This is not a simulation life game, you don’t need to directly feed your Colonists, it’s more like an offering that needs to be done regularly in order to be given a reward back.
This section may be a bit weird to some but I just wanted to really clarify that point as I think this specific game mechanic is vital to the game to keep its “stressfree” approach. You can decide to shut down all your Robots at once if you want without suffering consequences in the long run, the second you turn your industry back on you can resume offering stuff to your Colonists and get showered with Wuv again like before.
This is not a race against the clock, it is a balance to be found to generate the right amount of ressources you want/need.
Structures VS Objects
It is important to make the difference between Structures and Objects.
- Objects are generally what can be picked up by your character or Robots and interacted with directly. Stone, Log, Crude Bucket, you name it.
- Structures are entities in the world that cannot be moved directly. Many things can be a structure. A workbench is a Structure, a crate is a Structure, any floor tile you build is a Structure, the list goes on.
Structures have several specific properties that can make them really easy and practical to manipulate.
You first need to place the blueprint of whichever Structure you want to build, then bring the materials to it and voilà, you got yourself a Structure!
When the Structure is in place you can move it instantly from one place to another by going in the Blueprint menu and pressing the Move button (M keybind by default). This doesn’t even require you or any Robot to go to the structure, you can do it at any time as much as you want (remember you can also rotate Structure, R keybind by default).

Whenever you remove a Structure it is not actually deleted but instead stored in your Blueprint menu. You can see a number next to the icon of the Structure telling you how many you have stored ready to be placed instantly. Here in this example I have 6 Crude Workbench and 1 Bot Assembly Unit ready to be placed.
So if you never need to re-organize everything or to make changes you can very easily “delete” (store) your Structures and place them after somewhere else at no cost. This is super useful when you start to get access to walls and floors, so you can place old stuff in buildings quickly.
If you ever want/need to delete an Object you can only do it by throwing the Object at the second Wonder (Wonders are special Structures unlocked by doing specific achievements, this one isn’t hard to obtain and you get it fairly on). The wonder being the Mystical Stone Head, it basically eats anything you throw into it (including Robots, if you feel like sacrificing them for whatever reason).
Tips to Stay Organized and Enjoy Your Time Playing
The game may not have any “difficulty” since there is nothing opposing you directly (I would argue that Cows are actually evil being but that’s another story) it might still get a bit overwhelming at times when you start to realize how many tasks you need to automate.
Sure it’s easy to get some logs, planks and poles going but the second you start to get into agriculture or slightly more advanced wood-based products it might be a bit much to take in for some.
The easiest way to tackle complex tasks is to go step by step. Sure you can’t have one Robot taking care of all your woody needs at the start of the game but if you cut the journey into steps you can set yourself up a nice industry in no time.
For example one Robot cut the trees, another one carry the logs to storage, another one transform logs into planks and then store them, another one does the same for pole, some robots create tools for everybody to never run out of tools.
It’s best to have one task = one Robot at first (especially since starting Robot have very limited Memory) and then when you have access to better Robots and you are more comfortable with scripts you can go back to old automated processes and try to make them more efficient by having maybe less Robots for the same amount of Tasks.
Take the time to automate “short” tasks as much as possible
Try to always ask yourself “Could this task be automated in any way to save time ?”. 90% of the time you can save yourself a lot of time by having a Robot doing a task instead of doing too much yourself. For example you can show how to build Structures to your Robots once and then keep those Robots ready to build other Structures simply by moving their deisgnated areas to where you want to build your new Structures. One Robot brings logs, another brings planks and so on, instead of doing it by yourself every single time you need a new pellet early on.
Going back to “old” Robots can make you a lot more efficient
The more you play the game the better you become with Scripts. Not only that but you also gain access to more advanced Robots with greater capacity. It is often really beneficialy to go back to some Robots you haven’t “programmed” in a while to see if you can’t make them even more efficient (sometimes simply by changing/giving them new upgrades and sometimes by changing their script).
For example at first you might need/want to have Robots do very few tasks because of their limited memory. One might build Axes while another one store them in a crate. Well come back later on and upgrade your first Robot to do both tasks and use the second Robot somewhere else. It’s a very simple example but you will discover a lot of new things you may haven’t thought before and get unexpected results that way.
The Autonautopedia is your friend, check it often
The Autonautopedia gathers many useful pieces of information on pretty much everything you can interact with, from how to gather this and that ressources to how to build that specific object. Anytime you encounter something new (like a new type of plant you need to use) just check your Autonautopedia to have all the relevant information (TAB keybind by default).
Remember that you can check how to interact with an item with ALT
Some Objects might have unique ways to interact with, if you press ALT while hovering any time you can see what kind of interactions you can have with it. Try all of them to see what they do when you are not sure, you might discover some cool things.
There is no time ticking, no evil monster about to attack you or anything of the sort, enjoy the ride
Autonaut has a very specific approach that never forces you to do anything at any time. If you want to take 200 hours to setup the mode ludcirous wood industry with basic Robots then do it. Nothing forces you to play any specific way. Just be wary of those pesky cows, they tend to eat stuff that you leave on the floor.
You can dress up your Robots, just saying
Be the first to comment