
More Star Wars: Jedi Fallen Order Guides:
- Where to Find the Double Bladed Lightsaber.
- Tomb of Eilram Walkthrough (Wind / Ball Puzzles).
- Jedi Temple Walkthrough (Ice / Light Puzzle).
- Raise the Spire of Miktrull Walkthrough (Tomb of Miktrull Puzzle).
- How to Get More Stims (Canister Locations Guide).
- Bogling Companion Location (How to Find).
- How to Save Your Progress.
The game, while gorgeous, does have some optimization issues. This bite-sized guide will help you alleviate some of the stuttering/lag you’ll encounter while playing. Windows 10.
Fixing the Problem
Plain and simple, no matter your hardware configuration, Fallen Order is going to stutter.
That’s just an unfortunate truth for this game. This is because of how the game handles loading/unloading assets. As you move through an area or begin a cutscene, you’ll immediately notice the game will briefly “freeze” for a second or two, repeatedly for several seconds. The game is dynamically loading new areas and assets as you move, and unloading the area you had previously traversed. It’s going to affect pretty much everyone. However, there are a few steps you can take to bring this down to a manageable level so that it does not severely impact your gameplay.
Step One: Ensure the game is installed on the fastest drive available
Simply put, the faster the game is able to load these assets, the less it’ll stutter. When installing the game, set the install directory to an SSD. For those with NVMe or PCIe SSDs, this will make a significant difference.When you install the game (and have more than one drive), you will be presented with a dialog box that will ask you where to install the game.
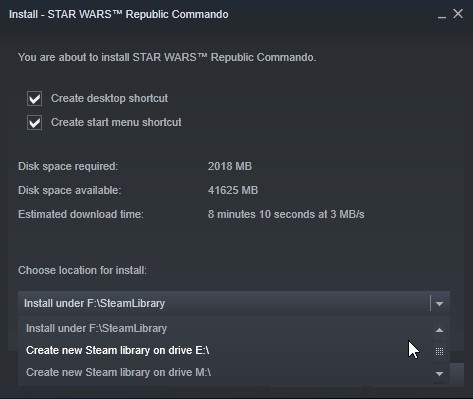
In the drop down list, find your preferred SSD (with at least 55 GB of space) and select it. If you do not have a Steam Library already on that drive, you will be presented with the option to do so automatically. For those with cheaper SATA SSDs, they’re going to struggle a little, but it’ll still be better than running this off of a hard drive.
Step Two: Close all non-essential programs.
Next, you’ll need to free up some system resources to ensure the game has some breathing room and it isn’t having to fight with other programs for CPU calls. You can easily find which programs are using significant resources in Task Manager.
Open Task Manager by pressing Ctrl+Shift+Esc (Windows 10).
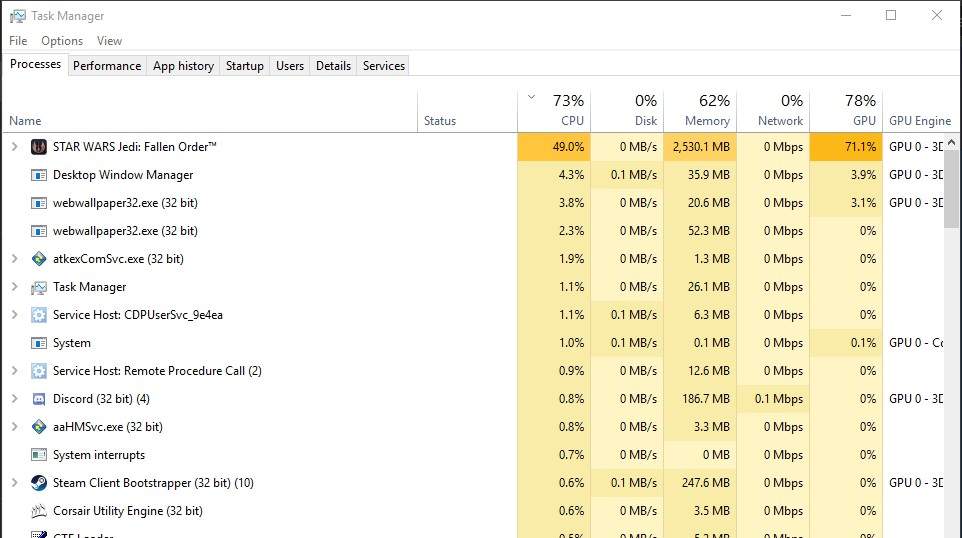
At the top, click ‘CPU’ to sort the programs based on how much they are utilizing the CPU. Close any non-essential programs (web browsers, Photoshop, other games etc). Ensure that you recognize what those programs are before closing them, otherwise you may accidentally stop a critical process or compromise your security (leave your anti-malware program running!). This will prevent other programs from using CPU resources the game will need. Now you can start the game.
Step Three: Change Process Priority.
By changing the game’s process priority, you will give it higher-priority access to system resources, allowing it to perform the operations it needs to do first before other programs on the system.
With Task Manager still open, click the ‘details’ tab.

Once you have found the game in the list, select it with left click, then right click, click Set Priority, then select either High or Realtime.

Selecting the latter will grant the game the best access to the system resources in draw/operation calls, but may cause stability issues with the rest of the system. I personally haven’t had issues, but selecting High will still improve things.
Step Four: Game Settings.
And this is our last stop! Once you’re in the game, there are a few options you might want to adjust to help things along. Because each system is different, enabling this options may cause more problems than they solve, so if you’re still experiencing problems, try adjusting or disabling these options and see if things improve.
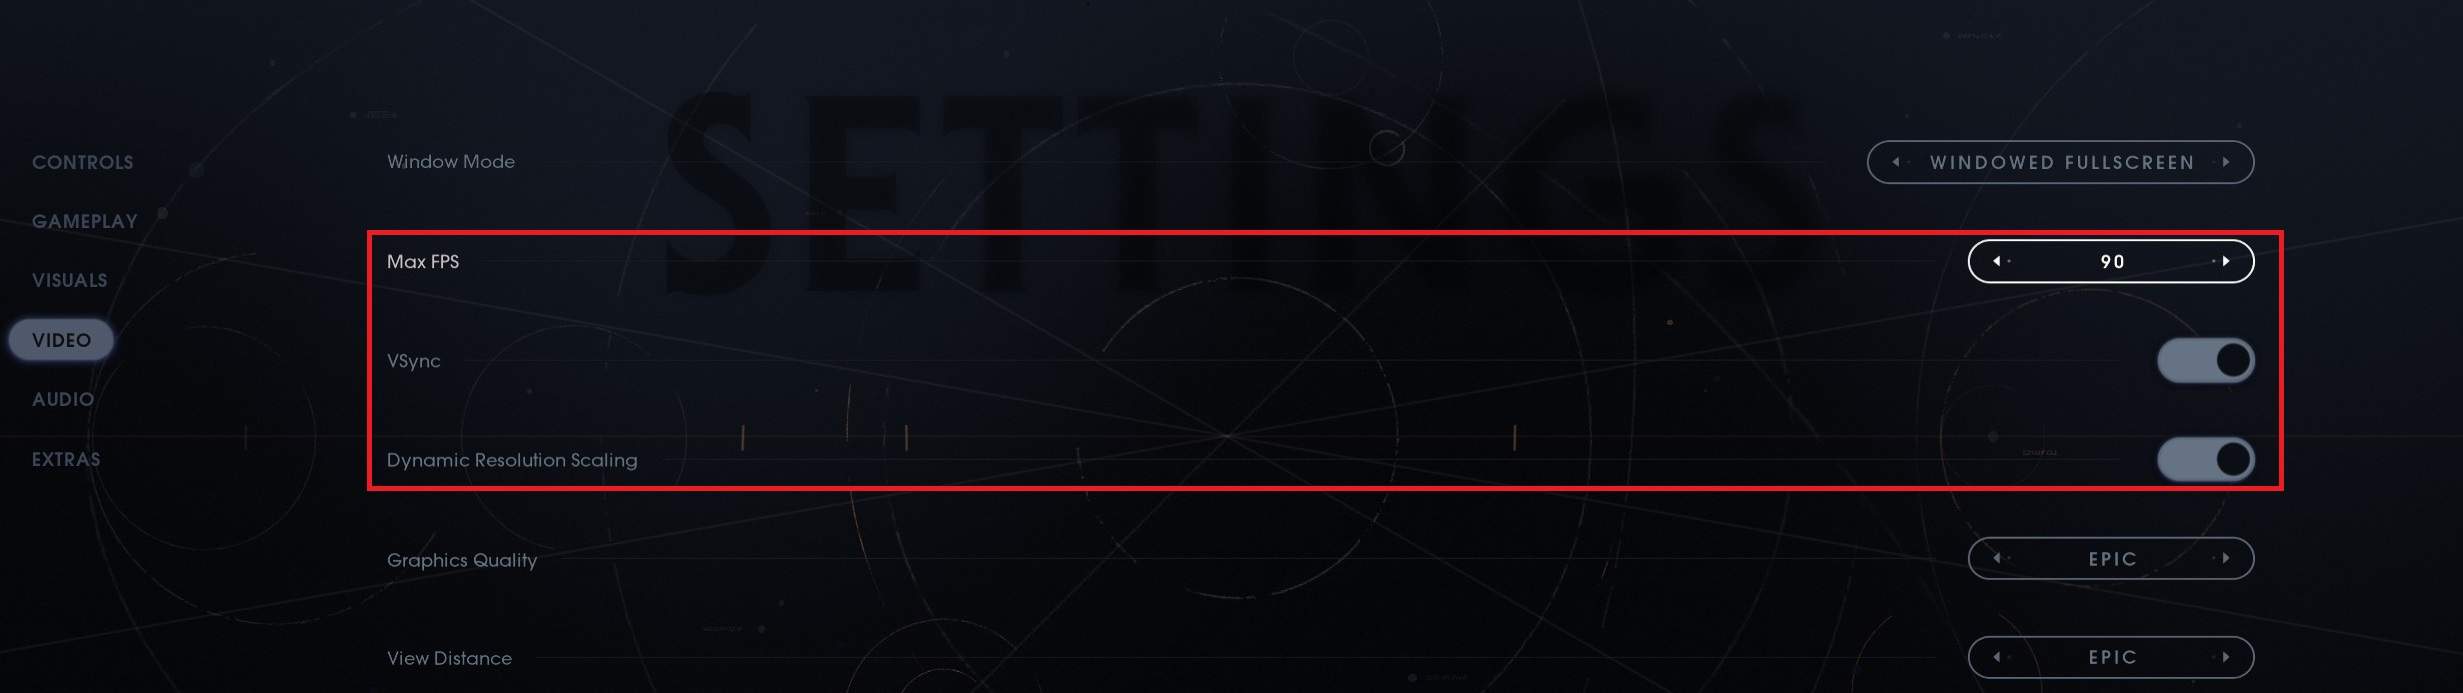
Set ‘Max FPS’ to the value closest to the refresh rate of your monitor; 60hz, 90-100hz and 120hz are the most common.
Enable VSync. This will ensure the game’s FPS output matches your monitor’s refresh rate. This will keep the game from rendering “useless” frames and wasting resources.
Enable Dynamic Resolution Scaling. This automatically adjusts the game’s rendering resolution as you play, while keeping the scaled output at the same resolution of the display. This can help with legitimate performance issues more than it might with stuttering. It’s also the most likely of the three to make things worse, so if you have issues, disable this first.
That should do it! Bear in mind, however; almost all players will experience some stutter no matter what. This is unlikely to solve the problem completely, but it will mitigate it substantially. The game should be more or less bearable to play now!
How to Fix 99% of the Stutter (Windows 11)
Going to keep this as brief as possible, last night i isolated what is causing the stutter and **** performance in this game. This morning i worked out the best way to fix it…
Basically the stutters are being caused by the EA app and more specifically, its background services. Now you cant stop the EA app and services, you have to have it running to play the game which is quite annoying and intrusive tbh, anyway…
There are 2 ways to remedy it, one manual, which u have to do every time you start the game and the other is automatic with a small program..
Here’s how to do it manual, i suggest trying with this first. And if its a success, which it will be, get the program…
So, load the game, left ctrl, left shift and esc at the same time to open task manager, click details on the left pane. List it by alphabet and scroll down to e for EA. basically right click all the EA running services and under priority select low.do that for them all. Because the game is open the star wars.exe will be listed further down, you can put that to high priority, it wont hurt.
Alternative automatic method…
Download dAffinty, it can be found with a google search in all your favorite places.to be honest its a useful app to have on your computer regardless of this.
install and run it then load the game so all processes are running (EA stuff and the game itself). windows key to dAffinty, it should be in the system tray, scroll down through the list in the app and do the same as u did before, select the EA stuff and set affinity to low and u could set the game exe to high aswell for good measure. If you have a registered version of the app u can apply to config and switch on enable monitoring and start with windows and just leave it so whenever u play the game it automatically sets affinities.
After doing this it will feel like a completely different game, it just works. Im sure if we could completely turn off that EA app and its services it would clear up 100% of the stutters but unfortunately that isn’t possible and for those of you that don’t know what setting the affinity on programs is doing, it is basically prioritizing what programs utilize your computers processor.
Thanks for reading, and may the Force be with you.

Be the first to comment