
Amateurs talk strategy. Professionals talk logistics. It’s an old and slightly worn-out saying that is nevertheless true. Guns need ammo, tanks need fuel, and soldiers need food. This guide explains how to keep your units in supply.
Introduction
Amateurs talk strategy. Professionals talk logistics. OK, I’m not being very original here, but it’s an old and slightly worn-out saying that is nevertheless true. Guns need ammo, tanks need fuel, and soldiers need food. If your units are not in supply they become weak and are easily picked off by the enemy because they can’t defend and they can’t run away.
Here is how it works in the game. Your units receive supplies once at the start of each turn, but only if they are in a supplied hex location. If not, they are considered out of supply for the turn, and the adverse effects start to kick in. We’ll get into details of which hex is supplied and which is not later when we discuss how the supply network works, but first, let’s start with some basics.
Supply Sources
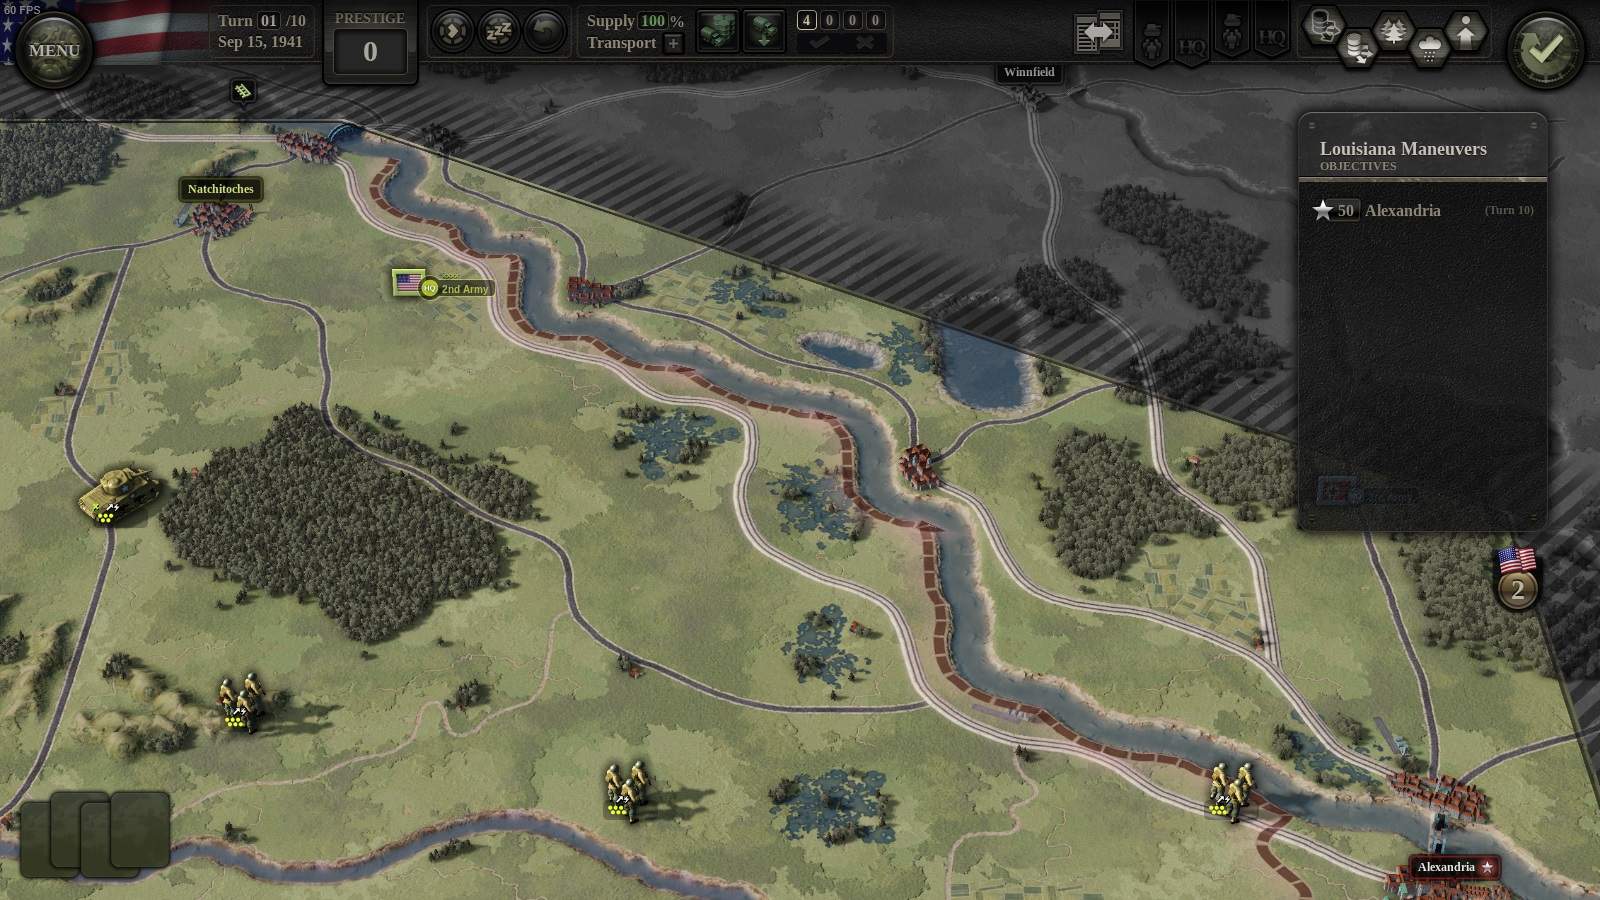
So let’s start with what we know. In screen #1, we see three US infantry units and a single US armored unit, during the Louisiana Maneuvers of 1941. The units are trying to reach their objective in Alexandria (lower right), but for the purpose of this explainer, I will make them just stay in place for the next couple of turns.
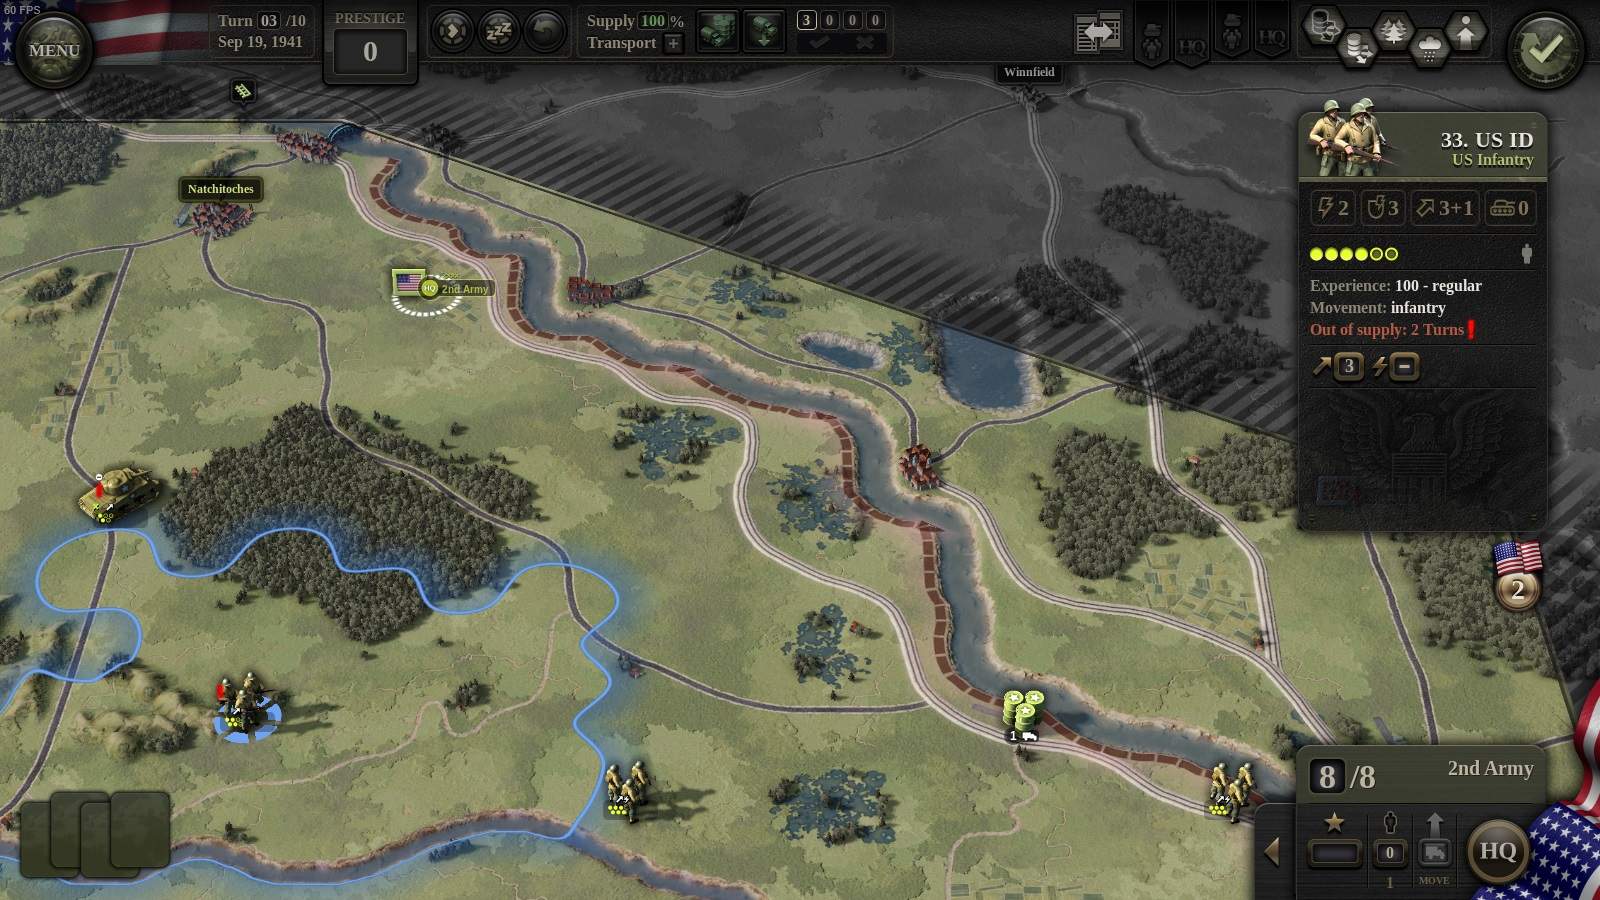
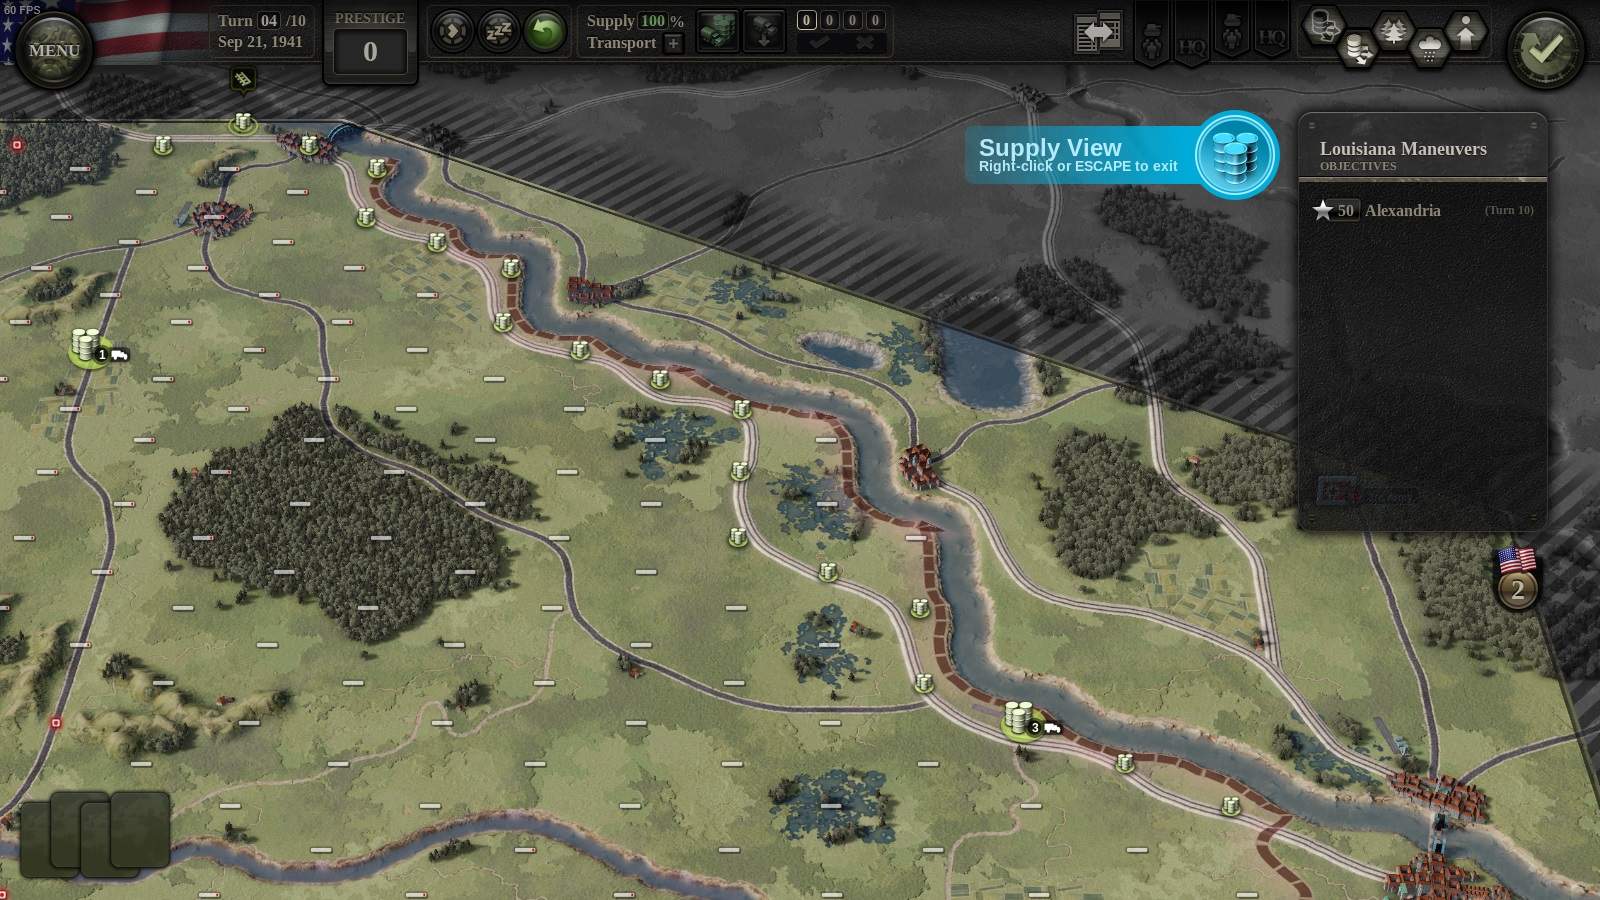
Units need to be supplied on every turn, otherwise they become weak and ineffective. They receive supply at the start of the turn, but only if they are in a supplied hex (location). In screen #2 (below), I press the Supply View button (hotkey V) to check which hexes are in supply and which aren’t.
Supply originates from a supply source (upper left), and then spreads along rail without restriction. You can see that hexes on the rail line itself are supplied (barrel icons). However, farther afield, only a narrow strip along the rail line is supplied (horizontal bar icons). All other hexes on the map are unsupplied (red dots).

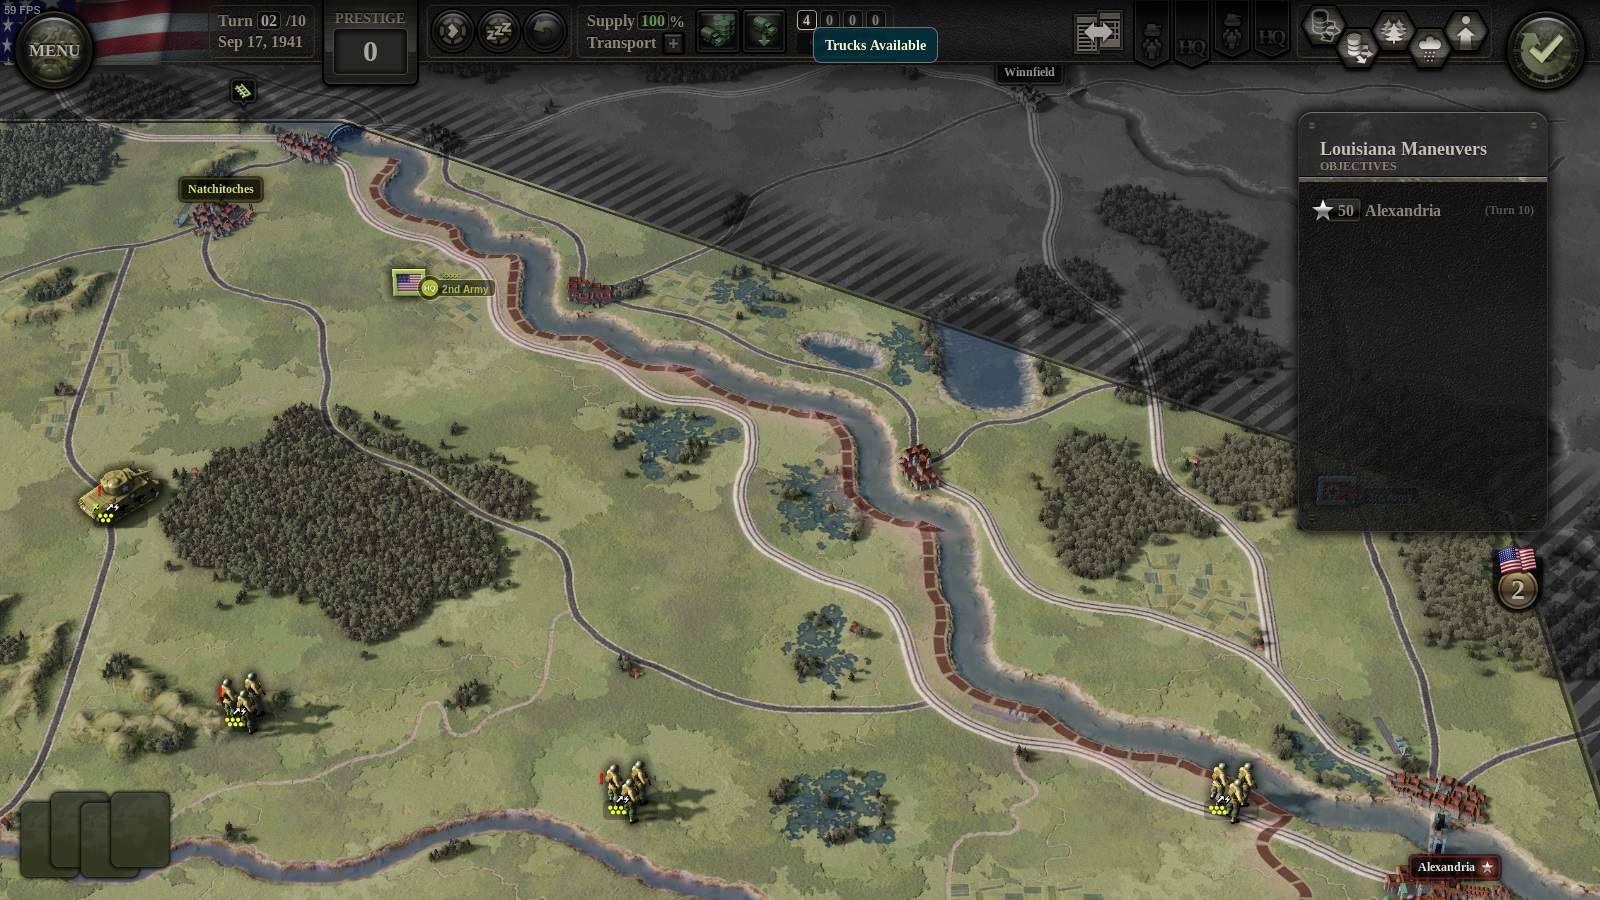
The supply view also tells us that three of our units are out of supply (diamond w/ red dot): the armored unit, and left and central infantry units. Infantry unit to the right is in supply because it sits on a supplied rail hex. After I press End Turn, screen #3 shows you what happens on turn 2: the three units now have a red out-of-supply marker (exclamation icon).
Supply Hubs
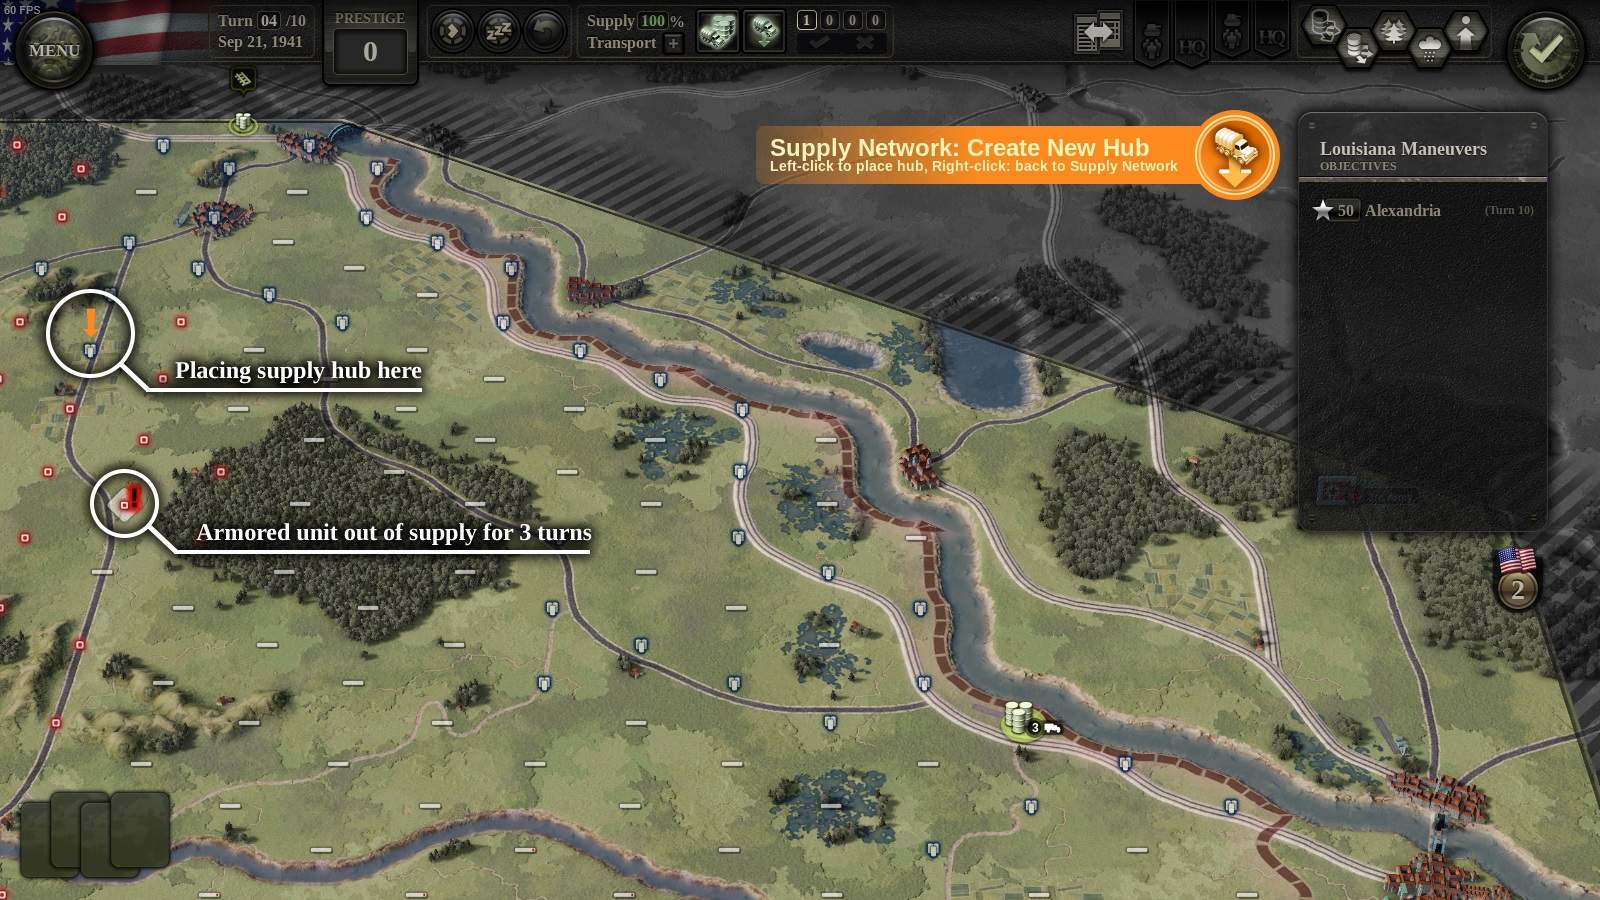
Alright, now I will create a supply hub to push supply outside that narrow strip around the rail line. In screen #4, I press the Create New Hub button (truck w/ arrow) to see where I could place one. You can see that most of the highlighted locations are on the rail line itself (white/blue barrels). Let’s focus on those on-rail locations, and we’ll remember to mention the other ones later.
I decide to place a supply hub close to my objective in Alexandria, so I click where the orange arrow is pointing to.

I have created a new hub, and immediately you can see (in screen #5) the area it supplies. This hub has a supply range of 5 MPs (movement points) or 1 truck. In Unity of Command II, range is usually shown using trucks as shorthand: 1, 2, 3, 4 or 5 trucks simply mean 5, 8, 10, 11 or 12 MPs respectively.
The area supplied by this hub is traced out using the hub’s 5 MPs: we start with 5 and count down to 1 using cost values from the supply column of the movement table. You can tell, for example, that it costs 3 MPs to enter a swamp hex, while it’s only 1MP for clear terrain.
Notice how my central infantry unit is not shown in this view anymore: this is because the new hub will be able to supply it! The other two are still out of supply, but we’ll deal with that later. I hit ENTER (important!) to accept hub placement, and then immediately press End Turn to see what happens next.

Units out of Supply
It’s now turn 3, and my armored, and leftmost infantry unit have been out of supply for 2 turns (screen #6). On the first turn a unit is out of supply, the only effect is that it doesn’t recover from suppression like it normally would. On the second turn, two of its steps become suppressed and the unit loses its AP (action point), meaning it cannot attack.
It gets worse from there: a unit on its third turn out of supply becomes fully suppressed, it doesn’t receive full MPs for the turn (meaning it cannot cross rivers) and it doesn’t even capture territory when it moves. Additionally, on all following turns the unit will lose steps and specialists as stragglers. I would like to avoid this happening to my units, so let’s see what can be done.
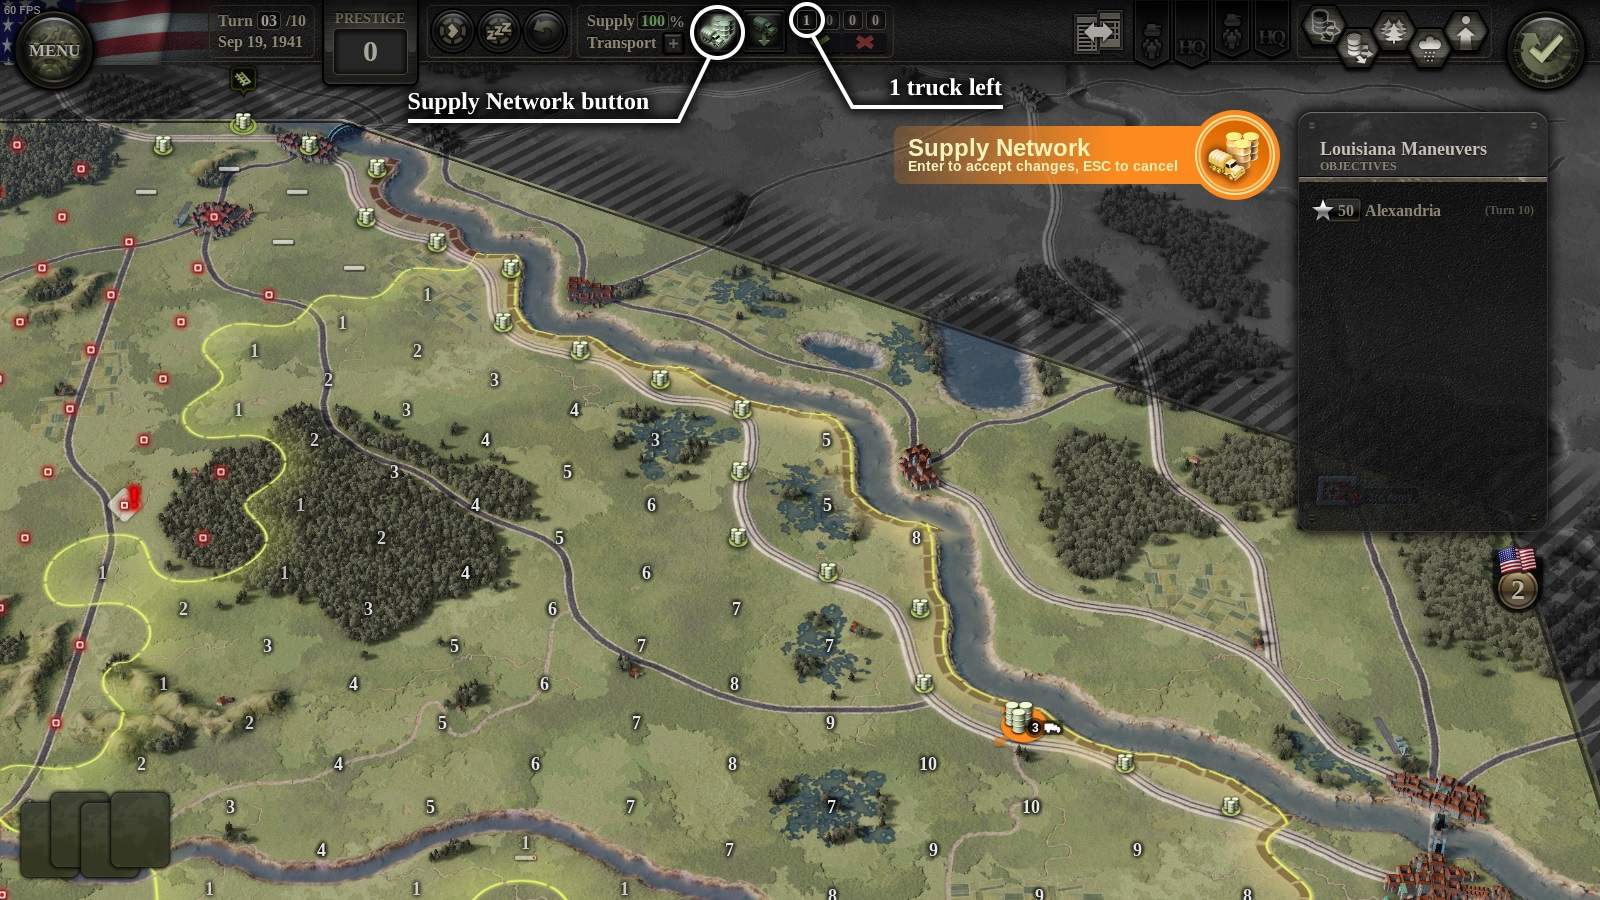
To supply my leftmost infantry unit, I will extend the range of the new supply hub by adding two more trucks. I press the Supply Network button (truck and barrels), select the supply hub, and use the mouse wheel to add trucks. I then hit ENTER to accept. You can see the result in screen #7: the leftmost infantry unit is now in-supply. Success!
So far so good, yeah? The snag is, we only have 1 truck left. Trucks are a limited resource, just like everything else in war. The game shows us how many we have available to use right now (1, highlighted) and how many are incoming on the next three turns (0, 0, and 0). I will use my last remaining truck on the next turn, so for now let’s just press End Turn and see what happens.
Supply over Roads
Unity of Command II treats roads separately from rail. Both roads and rail allow for quick passage through rough terrain: notice how, when using the road, we’re able to trace through forest hexes for just 1 MP in screen #7.
The roads however, don’t allow supply to spread without restriction like rail does. What you get instead is this: you are allowed to place a supply hub on any road hex within 5 MPs from rail (supplied rail).
This is how I’ll supply my armored unit, which is 3 turns out and sorely in need of supplies. I press Create New Hub again to see (screen #8) that I can place a supply hub on a road pretty close to the unit. I place the hub, and confirm with ENTER. There!
I could go on but I think you may be getting the point by now. My final supply situation is shown in screen #9 below. Between the 3-truck hub near Alexandria, and the new 1-truck road hub, my entire area of operations is neatly supplied.
This post has grown long enough, but I hope it was a good read. I will leave you with some teasers:
- Supply Disruption: notice how some of the in-supply bars in screen #9 have a little red in them? Placing a supply hub on road (as opposed to rail) introduces some uncertainty as to whether your unit will actually receive supply when the turn starts. Other things introduce disruption too: mud, snow, ruined cities, stragglers, etc.
- Emergency Supply: if your units are out of supply, their HQ might be able to re-supply them. HQ supply is usually a bit more robust, so re-supplying units is possible, but it costs the HQ some of its CPs (command points). There are tradeoffs to be had.
- Capturing Enemy Supply Hubs: when you capture an enemy supply hub, all friendly units within 1-truck distance become instantly supplied. This can be pretty useful for a supply starved force.
- Removing Trucks: not shown in this explainer, but you can remove trucks from supply hubs too. When you do so, they become available on the following turn.

Be the first to comment