
This guide is intended to be a compendium of all the essential tips and tricks that everyone will want to know immediately and not after 1000 hours of time spent playing the game. Warning – reading some of these may cause involuntary weeping at all the time you wasted suffering because of your ignorance. Suffer no more.
Ultimate Campaign Guide
Absolute Essentials You Need to Know
Never set the battle timer to “Unlimited”
There are nasty bugs which can cause you to not be able to kill the last of the enemy and therefore not be able to win the battle, you will have to concede defeat. I saw this in Shogun 2 when the AI attacked by castle and I beat the attackers, but they had a reinforcing army, but that army would not enter the map, therefore I could not kill them to win. “60 Minute” timer maximum, if you cannot win in 60 minutes, you deserve to lose.
20 minute timer trick
Conversely, if you set the battle timer to 20 minutes and are defending, as long as you can keep 1 unit that survives and does not rout until the 20 minute timer is up, you can “win” by causing a Draw even against an enemy you should absolutely lose to if you try to fight. This works best in minor settlements that do not have walls, as causing the Draw will stop the AI for a turn (they only assault once per turn in a siege) and may give you time to rush reinforcements to the settlement.
Speed up your gameplay
You can speed up (and slow down again) actions/movement by pressing R. You can permanently speed up actions at the start of your campaign by going to top left of your screen, clicking the “Camera” icon, and clicking “Fastest” for everything. You won’t get to watch what happens as it happens, but you also won’t have to wait as long to get through the End Turn calculations either. Do this right at the start of your campaign.
Notifications
At the bottom right, if you uncheck all those boxes, you can turn off all those notifications, or just the ones you do not care to see. If you do this, at the same time, you can check a box on a Hero (and maybe a settlement?) that will cause you to receive a notification that you have not used that hero that turn, so important heroes & lords will still be addressed every turn but those that you plan to park somewhere for 50 turns will not bug you every turn.
Research
If you are not researching anything, winning battles can reward you with a Follower that gives +10% to Research Rate. I also got one of these from a successful Steal Research action by a hero, so hero actions while no research is active may reward as well. I have personally confirmed this in my Ikit Claw campaign, as once I finished all research there is, I started repeatedly getting those followers after battles. So get in the habit of ceasing all research at the start of your turn, fighting all the battles and performing all the actions you need to do in your turn, hopefully gaining a bunch of +Research % Followers (do not forget to assign them to your Lords & Heroes), then Resuming research before you End Turn.
Using magic properly
If you hate magic and mages because you think that in order to use burning head or other “go straight in a line” spells, that you have to move your mage into the right position, ooh boy, you are going to love this tip. As you click the icon to cast the spell, you can hold down the mouse and rotate the spell in the direction you want, then release and the spell will fire in that direction.
Character details page
Here you can give your Lord & Heroes all sorts of items like Weapons, Armor, Trinkets (like +20% Ward Save items), Magic Wands on Magic Casters; etc. These should be obvious, but the tips below are not as obvious, and what this guide is really here for. Pay Attention!
You can replace a lord! You can disband Lords and they will return to your recruitment pool (and stop costing you money by decreasing the Supply Lines penalty) and after 5 turns they will be available to recruit again. A lot of times this works on Immortal Generic Lords (although you probably need to disband the units in their army first before you can disband them), but sometimes disaband does not work on these Immortal Generic Lords, and it often does not work on Legendary Lords. Workaround? You replace them with another, low level lord, then disband that lord. So you have a use for the crappy low level lords that you get via confederation or that you got at the beginning of your campaign but ended up disbanding for some reason early on and never ended up leveling them.
Perfect use for this is if you your Faction Leader is Level 40 and you want to replace him with a different lord to level that lord up (while after 5 turns have your faction leader available to summon to a hotspot or have him lead a crusade at the other end of the map from where he was); or, if you had Franz conquer all of Norsca and now you want him to lead an invasion of Araby and The Southlands, but it would take 10-20 turns to get him down there leading that army, and his army isn’t that great anyway, you could just replace him, then disband that whole army and have Franz recruit another one closer to the action once he becomes available again. You could even have the army recruited and ready to go using another lord then have Franz replace that lord.
Side Note: If you want a great way to get rid of all those worthless banners and followers such as scarecrow banners and +4 leadership against (insert faction) followers (or those Pigeon Pluck Pendants), here is a tip that I confirmed. If you have a Lord that you intend to disband and leave him disbanded (or just recruit him to defend a settlement where he is likely to die), you can give him the worthless banners and followers, and you could disband him while they all show the (1) icon indicating it will be 1 turn before they are added to his retinue, and if you later re-recruit him, he will have those banners and followers.
Mounts
You can select/change/remove the Lord or Hero’s mount if you have given them one. Note that you can change a mount once per turn, and you can do it instantly, so if you need to dismount a Lord from his horse so he can scale the walls in a siege, you can do that right before you attack. And you can you re-mount the Lord before a field battle. Note that mounts increase the upkeep cost of your Lords & Heroes; Lizardmen Skink Priests and Skink Chiefs on Ancient Stegadons are expensive! If you do not need your Lords & Heroes on a mount, it is a good idea to remove them from their mount so that they cost you less in upkeep.
You can rename Lords & Heroes
You can sort your Lords & Heroes a number of ways, but if you take the time to figure out a good naming system, you could sort by name, and be able to first do everything with your Lords, then your Assassin heroes, then your Steal Research heroes, then your Damage Walls heroes, etc. Note that there are 2 spaces for names, so you can put Ezio in the top line and “the Assassin” or “de Assassin” or “da Hitman” in the bottom line, and their name will show as “Ezio de Assassin”. You can also put their name in the top line, and put their key usage in the bottom line, such as “Damage Walls” or “Assault Garrison” so that hero is easier to find when you need that particular use. I highly recommend you come up with such a system and set it up as you recruit heroes and move along in your campaign, late game hero management can really make you hate ever having recruited heroes to begin with.
Replenishment
Lords, Heroes and Single Entity units (Giants, Doomwheels, Carnosaurs, etc) do not benefit from the Post-Battle option that immediately replenishes your forces, they only benefit from getting healed in battle by spells or items that regenerate their health before the battle ends (Life Magic spells are good example), or from the replenishment from being in your own province, settlement, or Encamp Stance (which can be further boosted by items and hero skills).
Above is very important to know if you want to do lots of fighting in enemy territory or in the ocean. Heroes and single Monsters can be awesome, but also awesome is the ability for an army of 19 units to instantly heal to full health and unit numbers after each battle as long as they do not take too much damage and choose the post-battle replenish option.
Auto-Resolve
I almost put this as the top this is so important. I see so many posters on Reddit crying about losing units to auto-resolve, when once you know this information, it makes it easy to strategize around it.
- The Balance Bar does not represent your chance to win, it represents your projected losses! Now, if the bar is like 80-90% Yellow (in your favor), I do not believe I have ever lost when auto-resolving with such high % in my favor, it is almost a certainty that you will win. If the Balance Bar is roughly even, you may win or you may lose, but either way you will probably suffer severe losses.
- Auto-Resolve hates damaged units. This can work for you or against you. Let’s say you have an army with a couple heroes and/or a few artillery in it. Let’s say you auto-resolve a battle, you win without any units being totally destroyed, but your heroes and/or your artillery take substantial damage (this often happens to heroes in auto-resolve, the game thinks they ran out front and tanked a ton of damage).
Now let’s say you do not give your units a chance to fully heal and you fight another enemy with those heroes and/or artillery in a damaged state, and you auto-resolve. There is a good chance auto-resolve will kill 1 or more of your heroes and/or artillery. Plain and simple.
And keep in mind my tip about Replenishment – Heroes and Single Entity Units do not benefit from Post-Battle Replenishment (which can under the right circumstances heal all the units in your army to full health). So let’s say you create a Skaven army with Lord and just Doom-flayers and Warp Lightning Cannons in it (no Doomwheels or Heroes). You could send that army to do Treasure Hunts or fight Ocean Rogue Armies, auto-resolve the battles, choose the Post-Battle option for Replenishment, the entire army be fully healed, so that you can continue to stay at sea and not have to land to replenish.
This can work for you when fighting an AI army or garrison that has damaged units in it. How might you make sure the AI army is in such a state? Oh I don’t know, perhaps by using a few of your heroes that have the “Assault Units” and “Assault Garrison” skills to soften the AI up a little before you attack with your army…
- A Sweet Tip – Let’s say you have full army of good units like Saurus Warriors but they are damaged from battle, and you go to fight a smaller, weaker army that you should be able to beat, but the Balance Bar shows 50/50 or so; even if you win, you going to lose whole units and suffer tremendous casualties.
- The Tip – Combine your units so that instead of having 19 weakened units, you have let’s say 14 full health units. Perhaps now the Balance Bar shows 80/20 in your favor, yes?
By the way, this is perfectly logical. Units with less troops will be weakened by further casualties faster and therefore reach the point of breaking, shattering and being run down and slaughtered sooner than a fully trooped unit even if you command them in battle, and auto-resolve knows this.
AI Combat Bonuses Change the Game
Key info
On very hard battle difficulty, armor-piercing ranged damage is king!
On normal battle Difficulty (Note that you could play a Very Hard campaign but with Normal Battle Difficulty) your melee units should be on an equal footing with the AI’s melee units, which may make units like Cavalry actually fun to use (I’ve only played Very Hard so far and Cavalry have almost never been fun for me to use). This also means that on Normal Battle Difficulty if you buff your melee units with Red Line Lord Skills, your melee units may become murder machines against the AI.
On Very Hard Battle Difficulty, the AI melee units become the murder machines, and you need Red Line skills just for your melee units to have somewhat close to the effectiveness they had on Normal.
I will write it again for emphasis, on very hard battle diffculty, armor-piercing ranged damage is king! Factions like High Elves (if you have the Sisters of Avalorn DLC), Skaven (particularly with The Prophet & The Warlock DLC), Vampire Coast, Dwarves and Empire have a huge advantage in this regard.
See “Normal vs Very Hard” video for a perfect example of how a battle you could easy win on Normal difficulty may be impossible or at least excruciating to win on Very Hard:
List below of Campaign bonuses the AI get
At normal, the AI gets
- 50% Reduction in all attrition types.
- 4 Hef influence gain per turn.
- “Replenishment_characters: 10”.
- Research cost reduced by 100%.
- Slave rite cost reduced by 100%.
- 6 Ritual currency per turn.
- Slave decline reduced by 30%.
- Slave impact on public order reduced by 30%.
- Agent success chance reduced by 5% (so it’s actually a penalty).
- Building construction costs reduced by 15%.
- “Conquest_resistance_to_occupation_mod: 40”.
- All recruitment costs reduced by 15%.
- Replenishment rate increased by 4%.
- Immunity to infighting attrition.
- +40 City growth per turn.
- +3 Horde growth per turn.
- +4 Public order.
At legendary, these become:
- 80% Reduction in all attrition types.
- 7 Hef influence gain per turn.
- “Replenishment_characters: 16”.
- Research cost reduced by 100%.
- Slave rite cost reduced by 100%.
- 12 Ritual currency per turn.
- Slave decline reduced by 60%.
- Slave impact on public order reduced by 80%.
- Building construction costs reduced by 30%.
- “Conquest_resistance_to_occupation_mod: 70”.
- All recruitment costs reduced by 60%.
- Replenishment rate increased by 9%.
- Immunity to infighting attrition.
- +125 City growth per turn.
- +9 Horde growth per turn.
- +10 Public order.
And at legendary they also get more bonuses:
- Plague infectivity reduced by 30%.
- Plague lifetime reduced by 30%.
- Taxes increased by 60%.
- All unit upkeep reduced by 40%”.
Save Scumming
If you are playing on any difficulty below Legendary, if you do something that “rolls dice” like a hero actions, treasure hunt reward, Invocation of Vaul rite, etc, that produces a result you do not like, such as a critical failure for your hero action that kills your hero or the absolute worst possible item from a treasure hunt, here is what you can do:
First, you need to save before you do anything so that you have a save you can revert to (duh). Quick save is your friend (Control + S).
Certain actions reset the dice and the reward. Fighting battles, other hero actions, etc, but none of these are the best.
The best option is Failed Diplomacy. You get a result or a reward you do not like, revert to your save before that action (Control + L is quick load), then go into diplomacy, find an AI faction that hates you and will refuse any treaty or request you ask for, click on a treaty and make your demand, they reject you, go out of diplomacy, save, perform the action. If the result still sucks, revert your save, do the failed diplomacy trick again, save, try your action.
Oftentimes a Critical Failure will turn into a failure after the first time you do this, so that is basically the game telling you that the dice were not in your favor for at least a couple of throws, but even so, if you do the failed diplomacy trick enough times, you should get a good result eventually.
Important: be aware of “Exhaustion” and “On Guard”. If your hero assassinates or wounds an enemy hero, they will become “Exhausted”, meaning their success chance will be in the toilet for a couple turns, meaning they will almost always certainly fail. MAYBE you might be able to get them to succeed using this trick, but it isn’t worth it until they recover.
Also, if you perform an action against an enemy and you fail, they will probably be “On Guard”, which increases their success chance for causing you to fail. So if your hero fails to “Assault Units” against an enemy, and then you save and start save scumming with other heroes trying to “Assault Units” on that army, all those other heroes now face an uphill battle because of the enemy lord being “On Guard”.
Global Recruitment Reduction
If you build 10 of the same recruitment building, global recruitment time for units produced by that building will be reduced by 1.
So if you build 10 barracks, you should be able to recruit those infantry units anywhere in 1 turn.
Campaign Movement Glitches
Summary – You can hold down the right mouse as you drag a line to where you want to move your army and see how much movement points it will cost you. However, if you aim to be at exactly 50% or 25% move points left and still be able to switch to a desired army stance, be advised that certain terrain can force your army to move a little further than intended, thereby using move points and causing you not to be able to change stance. It is often a good idea to “leave some in the tank” to make sure this does not happen, especially which changing your army’s stance is critical. This issue can also be caused by certain followers and events that boost but glitch your movement to such a degree that you would have to leave 70%+ move points in the tank to be able to switch to Raid or Encamp stance (I confirmed this in my Ikit Claw campaign when 3 Warlock Engineers and the “Favorable Winds” event caused exactly this scenario). See below for more details.
“Holding on right mouse button as you drag lets you measure out how much movement you want to use up. With the bar on the bottom left showing the percentages. So you can use 75% of it to move towards a spot, then use the remaining 25% for ambush stance for example. If you right click somewhere, you can press space at anytime to have the character immediately stop moving. They aren’t locked into completing that movement. More useful these days due to the fog of war changes and such”.
“Caveat: The movement bar % is not accurate if you start getting campaign movement buffs on the army. It shows you % of unmodified movement points that you have left, but the stances require % of your modified movement points. In some extreme cases I’ve had it at 30%+ remaining on the bar and unable to go into ambush stance because of the number of boosts”.
In support of the above Caveat, in my Ikit Claw campaign, when I had 3 Warlock Engineers with max Increase Mobility skill, Scribe on the Lord, and especially the “Favorable Winds” +25% campaign movement range Event (from ocean Treasure Hunts), I think I had to have over 70% of my remaining movement points remaining in order for my army to be change to “Raiding” or “Encampment” Stance, when without any movement boosts the army should be able to do either at 50% movement points remaining.
“Tt seems that it’s also not clear which abilities modify this and which don’t. As far as I can make out, if the general has +x% then it’s fine, whereas if they are granted a boost by a building or an embedded hero then their % movement becomes inaccurate”.
“I’ve only ever had problems when heros have joined the army the same turn and the heroes’ movement range isn’t enough”.
“100%. No heroes leaving or joining on that same turn. Happens to me every time I play TK cause the Necrotect never leaves, I need his healing”.
“The way to avert that is by putting the army in the stance you need before the heroes join. However, what /u/paeyvn is referring to is a genuine bug that’s been in the game since the beginning. As far as I can tell, it occurs when your lord is given a movement boost by an embedded hero or local building (not by a global effect or ability of the lord themselves). Try it out with the Tomb Kings and a necrotect, and their various movement buildings, or with the Dwarves & an engineer.”
Razor Standard & Banner Of Eternal Flame
Key info from an old post:
Razor Standard only applies to melee attacks. So putting it on ranged units is worthless.
Banner Of Eternal Flame’s +8% Weapon Damage only applies to Melee; however, the banner’s Fire Damage applies to both Melee and Ranged, and the banner gives an aura that affect multiple units, so if you put the banner on Empire Crossbowmen you could turn them into brutally efficient purgers of the Undead.
More Useful Goodies
If you capture the Galleon’s Graveyard (Count Noctilus’ island capital in the middle of the map in the ocean), the reward is “Immunity from storm and reef attrition.” A very nice quality of life perk.
Noctilus with his Galleon’s Graveyard can be a good trade partner since he is unlikely to be destroyed, therefore he would be a reliable source of income.
However, a comment on Reddit suggested a very good point. If you capture the Galleon’s Graveyard, that is an extremely defensible Major Settlement that should make it very difficult for the AI to beat you down to the point of total defeat. If you are playing on Legendary for example and you are worried that you might lose the campaign if you simply try to fight from your starting area, or you want to try something risky but do not want to lose the campaign, capturing Galleon’s Graveyard is probably a great strategy.
If a Non-Immortal lord is killed (fully dies, not just wounded), you do lose everything that was on that lord, armor, weapons, items, and Banners and Followers…
You can hover your mouse over an army banner to see what benefits that army is providing to the region/province. Something I just noticed after 570 hours of play time…
How to Determine Climate Type
Her is a tip that may make you smack your head and say “DUH!”, but not knowing this caused me and at least a few other posters I have seen a great deal of frustration.
Need to know what climate type a province/region has? Hover your mouse over a region until a black text pops up, that text box has in there what climate type that region has.
This is very important for certain situations such as Bretonnia’s Questing Vow where you need to win a siege battle against a Major settlement in a “Desert or Jungle” climate.
The Map
Effective communication requires understanding of what is being discussed. For those who struggled to remember the names of the continents in Warhammer 2, a quick guide:
The Old World
This is “Europe”, the area inhabited by The Empire provinces including Sylvania, Bretonnia, Tilea, Estalia, Kislev.
Norsca
The northern-most and mainly frozen part of the map, where the Norscan tribes raid down from. To the far right is the Chaos Wastes where the Warrios of Chaos spawn.
The Southlands (and Araby)
This is “Africa”, the continent in the Southeast of the Vortex map (and the continent that The Old World connects to on the Mortal Empires map), with the northern half part being “Araby”, which is the area that would be Egypt to the Northeast (where Khemri is), Libya and Algeria to the north (Bretonnians), and Morocco and Mauritania to the west. “South Africa” would be where Kroq-Gar and Queek are, with those islands in the Southeast Corner being like Madagascar.
Lustria
This is “South America”. Pretty self-explanatory, this is the continent in the Southwest of the Vortex map. There are now a bunch of Legendary Lord factions here, hence many now call this the “Lustria-bowl” due to the bloodbath.
Ulthuan
The circle-island in the Northeast of the Vortex map, with the swirling Vortex over the island in the sea at the center.
Naggaroth
This is “North America”, where Malekith and the Dark Elves live in Naggarond to the north, Morathi in the area where Texas/Northern Mexico would be, with Mazdamundi in “Central America” in the connecting part between Lustria and Naggaroth. I had trouble remember the name of this area because of the similarity between the names Naggaroth and Naggarond.
Extend The Diplomacy Screen
When you go into the diplomacy screen, the diplomacy list that shows the factions is quite short and forces you to scroll a lot.
At the top left of that list, there is a little icon that you can grab and extend the diplomacy list up so you can see more of the factions at once.
A simple quality of life improvement.
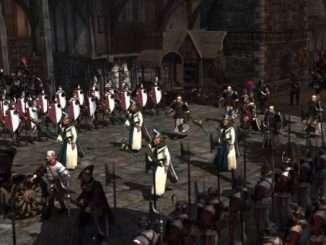
Cheese Strategies
The Top 5 Cheeses from video below:
Some other cheeses
Attacking reinforcement enemy army when they get in the map, so they rout out of the battlefield.
If you have handgunners when you siege an enemy, you can line them up right at the gate, smash it open, and then use your lord to pull a single unit at a time from inside the walls to follow you to your line of gunners. Great for decimating a defending undead force with just one lord and a few handgunners.
Use 5 agents on one town and totally obliterate the town defenses ( walls + garrison ) so even a mediocre army can take lv 5 settlements. This requires a Damge Walls hero and 4+ Assault Garrison heroes.
Hide nearly all units and only shows the units that can effectively harass the enemy. With the skaven you often can kill a half army that way and you need nearly nothing to prepare that.
If an enemy has a well-defended settlement with an army right outside next to it that would butcher your forces if you sieged the settlement but you have an excellent field army that can easily win a field battle, attack the army outside the settlement to draw out the defending army and garrison to a field battle.
Use a single lord (or your weakest army) to ‘besiege’ a city that the enemy has a full stack army next to, then attack their full stack army with another of your armies. Then the garrison can’t reinforce, but the besieging army can reinforce your attacking army.
Send big monster (or a Lord on Foot with skills in defense and survivability) into enemy center, once the enemy commits their forces and starts wailing on it blast them with the rest of your army being artillery.
Kiting with one or two fast units so AI has to split its forces while the rest of your army hammers weak points in the enemy line.
The magic conduit cheese where you have a load of backup wizards spamming it while hiding while a powerful flying wizard blows the crap out of the enemy as you have a near limitless amount of magic.
The gyrobomber doomstack cheese where you hide your general in a bush while you gain air superiority and wipe out missile units so the enemy cant do anything then withdraw and repeat, though this is not so great against the elves and such but very effective against Lizardmen and Vampire Counts.
As Tomb King Settra, Raid The Sentinels faction in The Black Pyramid of Nagash province early in the campaign. The faction won’t move unless you declare war on them and always hates you anyway.
Pull AI forces off the city walls by attacking an artillery piece at the city square with a flying unit cheese.
Use a single Lord (or as Skaven, a stack of Skavenslaves) as bait with an army in Ambush Stance right behind to bait the AI into attacking your bait so you can destroy them. Similar strategy is to have a weak settlement to bait the AI into attacking but you have an army next to it in Ambush Stance.
Your ambush can only be spotted from a distance if it is in line of site of another faction (friend, enemy, whatever). The recent patch nerfed sight lines, so you can move a solo lord forward to the edge of an enemy’s movement range, and put your army in ambush just out of sight. No ambush buffs required. Especially useful against main factions, since they go first in the turn order, and thus some random other nearby faction can’t detect your army.
The “Join war against…” cheese, where you can declare war on a faction without having to fight their allies, just by choosing an enemy of that particular faction (which there usually are) and offer to join war, which for some reason only puts you at war with that one faction without having to deal with their allies.
Playing as tomb kings if you can recruit new lords at level 5 get the canopic jar hoarder skill to max and disband them you will get 3 canopic per turn; do it every turn with the new lords that show up in your Lord Pool and you will have infinite canopic jars.
Siege Defense
You can stretch units out on walls such that they cover multiple towers at once. So if siege defense victory requires that you have your forces defending the town square but you still want your towers to do some damage to the enemy, you can take your crappiest large sized units and spread them along the walls to have all your towers firing, while your best troops defend the chokepoints to your victory point.
Predicting Rebellions
If you have a province where a rebellion is about to occur, where will the rebellion spawn?
Answer:
Obviously if you only own 1 settlement, the rebellion will occur in that settlement’s region.
If you own the province’s Capital/Major Settlement, the rebellion will always spawn in that settlement’s region.
If you do not own the Capital/Major settlement but you own 2-3 minor settlements, the rebellion will occur in the most recently conquered minor settlement.
Public Order Tip
If you have a province that is important to hold for your strategy but has significant negative public order issues that cannot be resolved with a Public Order (PO) building and/or commandment, or you cannot waste a building slot on a PO building, here is a tip:
Recruit a Level 10 hero so that you can immediately put 3 points to max out a campaign (Blue Line) skill. then put 3 points into the Spread Public Order skill, and then give that hero every +Public Order Follower that they can equip, and park that hero in that province you need to keep happy, and it should do the trick.
Be the first to comment