
Guide to Train Driving
Safe & Effective Train Handling for Newcomers
This guide aims at providing an introduction on how to safely operate the trains and navigate the track network of Derail Valley. It is written mainly for the complete newcomer to the game and also to train sims in general you probably won’t get much out of this if you’re already a veteran in another train simulator.
This guide goes into a fair bit of detail about train handling. Don’t read this if you want to figure things out on your own!
Getting Started
For this guide, I assume that you’ve already done the tutorial. And don’t forget to read the guides that the tutorial gives you. They contain very useful information about your locomotive and the game’s functions in general.
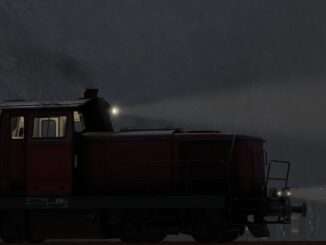
As a new player, you’ll only have access to the small shunter diesel locomotive, so this is the only one I’ll be focusing on in this guide.
Throttle, Acceleration, Driving Your Train
Throttle
There’s one basic rule: be gentle on the throttle. A locomotive isn’t a car. Steel wheels on steel rails don’t have the same adhesion as rubber tires on tarmac, and high acceleration isn’t what the loco was built for in the first place. You’re almost guaranteed to just end up with the wheels spinning helplessly if you do “floor it”, which causes high wear on the wheels which is costly (for you!) to repair.
You should also always consider that your engine will burn a lot more fuel and require more maintenance (again, higher costs!) if you keep pushing it longer and harder.
You can use the sander if you want or need more traction, but that also comes with higher costs (even the sand alone has to be paid for.)
The bottom line is, go easy on the throttle and move slowly through the notches. Quarter to half throttle is usually more than enough with light trains on level tracks. Only when going uphill or pulling heavier loads, you’ll need to apply more throttle to keep your train moving.
Engine Temperature
Always watch your engine temperature. You really want to avoid overheating your engine or even going into emergency shutoff, for this damages the engine quite a bit which requires costly repairs. The little shunter is not very good at going uphill at speed, often you’ll find your only option to avoid overheating is to throttle down to a lower notch and just climb the hill slowly. That will most likely mean saying good bye to your job’s time bonus, but the engine repair costs won’t be worth thrashing up the hill with smoke pouring out from under your hood.
One other important note about overheating: always run the locomotive forward if possible, except when you’re doing shunting jobs where it doesn’t matter because of the short distances. The engine is under the front hood, as is the big radiator, and so the engine gets a lot less cooling when running in reverse.
Coasting
A great way to keep engine wear and fuel/oil consumption to a minimum is to coast. You can get the most benefit out of this when you’ve learned the map quite well and know roughly where the gradients and where the long fast stretches are. Even though the tracks in Derail Valley are dominated by sharp curves and steep gradients, there are also some stretches of track where you can drive for a long while without needing the throttle once.
Tonnage Rating
The introduction states that the shunter is rated for 400 tons. That however does not mean that it always can pull that weight or is always limited to pulling 400 tons. Going uphill, you’ll find that the little engine can comfortably pull only substantially lighter trains than its max. rated tonnage. On the other hand, at slow speeds and on level terrain, the little diesel can easily pull more than 400 tons. Keep that in mind when picking your jobs.
Braking and Stopping Your Train
Independent / Locomotive Brakes
As you know from the tutorial, your train has two brake systems. The independent brake which only works on the locomotive and is quite responsive, and the train brake which reacts a lot slower but works on your locomotive and every car in your train.
I recommend that you only use the independent or locomotive brake when running your locomotive without cars, but you can also safely ignore the train brake if you are pulling a light train (say a string of empty cars). The locomotive brake provides enough brake force to even stop such a train, but keep in mind that the braking distances when using only the locomotive brake increase a lot as your train gets heavier and/or you’re moving downhill.
The locomotive brake can also be very helpful to maintain speeds when going down gradients with shorter/ligher trains or even to slow down for an upcoming lower speed limit.
Train Brakes
However, as soon as you’re operating heavier trains, such as loaded cars, you’ll really want to start using the train brake. Using it requires a bit more skill and forward thinking than the near-instantly applying locomotive brake. Due to the way the train brake works, there is a noticable delay between you pushing the lever in the cab and the train starting to slow down. You always must factor this in when you use this brake. The longer your train is, the longer it will take for the brake to reach the desired brake force (this is because the change in brake pipe pressure propagates from one car to the next).
Releasing the train brake also takes considerably more time than releasing the loco brake, and again this time is longer the longer your train is.
Both brakes can also used in combination, using the train brake to provide a base level of retardation and then your locomotive brake to slightly modulate this as needed where an increased train brake application would be too much (say if for instance your speed is increasing slowly on a downhill stretch).
Coupling and Shunting
As if simply keeping the train on the tracks wasn’t complicated enough, now we also have to throw switches, couple cars, load and unload them? Trust me, this is where the real fun starts! Here are some basic hints.
First, and probably the most important one of them all: keep your speed low! 15-20 kph should allow you to safely navigate most if not all switches and tracks in the various yards without having to worry about derailments. Also, it’s a low enough speed to avoid excessive damage costs if you do end up hitting something (didn’t see those three empty flatcars on the track you were moving into, eh?).
Switches
Always check that you can safely pass them. If in doubt, climb down your engine, walk over to the yard or siding, and visually check that your path is clear and all switches alined correctly.
When moving a cut of cars from one track to another, double check that the last axle of your train has actually cleared the switch before you throw it and push the train into the new track, or you may end up with the car across two tracks!
You can safely run through trailing point switches that are aligned against you.
Coupling and Moving Cars
Coupling cars is a delicate procedure that requires precision driving. You should approach the cars you want to couple to at low speed. Try to avoid hitting the cars at more than 3 kph. It will take some practice, but eventually you’ll do it intuitively. Until then, it’s probably better to come to a stop a bit before the car and then throttle up and slowly crawl towards the car. Make sure that your engine’s and the car’s buffers actually meet, or you might find it impossible to connect the coupler’s chain!
Don’t forget to connect the brake hoses and open the valves after coupling to a consist Also, it’s important to know that not all cars that got spawned on the same siding are necessarily one consist — they can be several consists that are not coupled together! This is especially important if you want to push the whole string of cars out of the track: if some of them are not part of the consist, they also won’t have their brake pipes connected (and thus their brakes fully applied!).
When uncoupling cars somewhere, it’s usually best to first apply a bit of train brake before uncoupling and disconnecting the brakes. If you close and disconnect the brake pipe with the brake fully released, the car will remain unbraked after uncoupling — and roll away if you bump into it again (for instance, if you want to couple to it again!) Inversely, if you disconnect the brake pipe before closing the valves, the train and your engine will immediately go into maximum brake application.


Be the first to comment