
How to Start Modding
Before Started
Before you get started, things you will need are:
- C&C Remastered Source Code.
- Microsoft Visual Studio.
- Notepad++ (recommended not required).
TL:DR Version
- Download Visual Studio.
- Make source code changes you want to.
- Build DLL with Visual Studio.
- Place DLL into mod /data folder.
Visual Studio Setup / Source Code Location
I could not make Visual Studio 2019 function correctly. I used Visual Studio 2017. You might not need to use 2017. However, 2019 caused the game to crash when I tried to package the files.
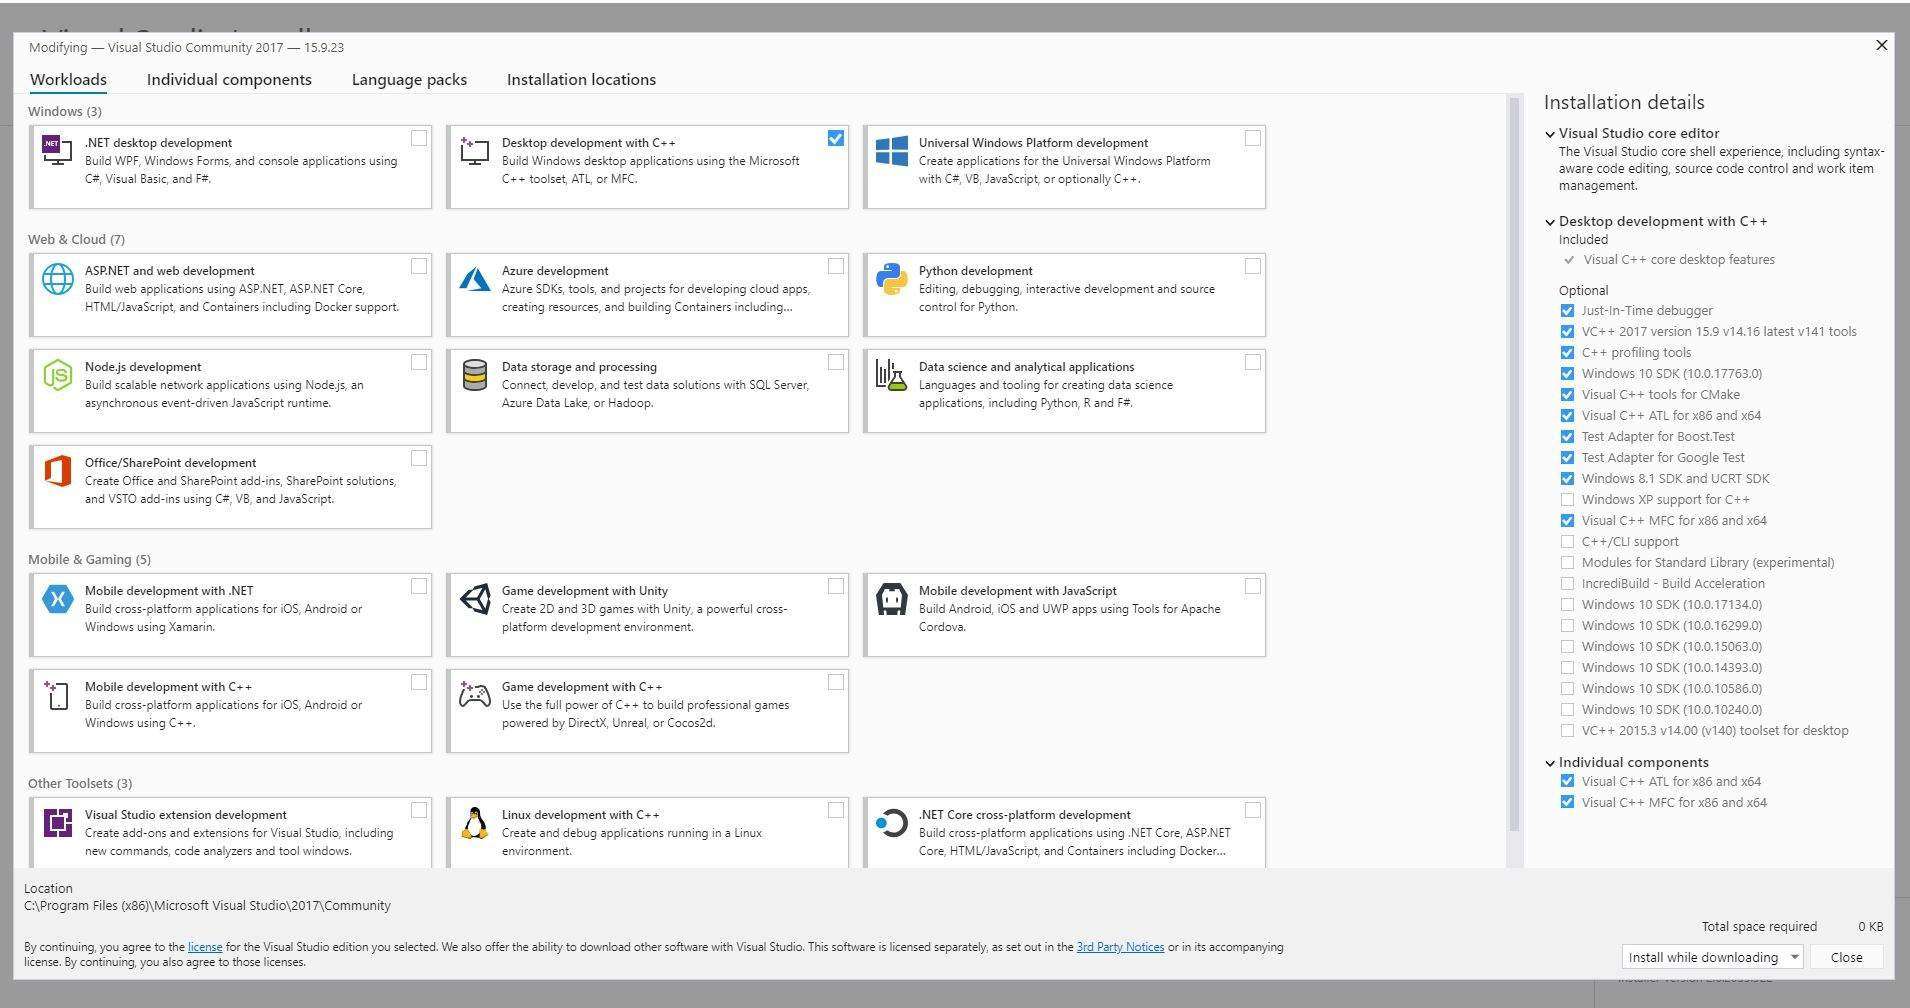
You will need to download MS Visual Studio to package source code into a .DLL (Dynamic Link Library) in order for the game to use it.
- You will then need to use Visual Studio with certain features, including C++.
- Options in the screenshot are what I have installed but may not be strictly required.
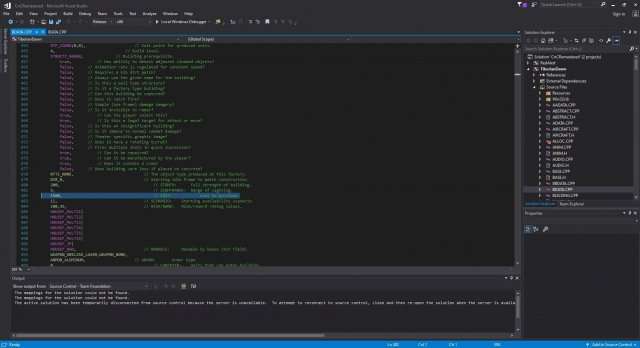
Once you have Visual Studio installed, navigate to the Source Code folder and locate a file named “CnCRemastered.sln”.
The C&C Source Code is installed automatically with the game download.
By default it is usually located in:
- C:\Program Files (x86)\Steam\steamapps\common\CnCRemastered\SOURCECODE
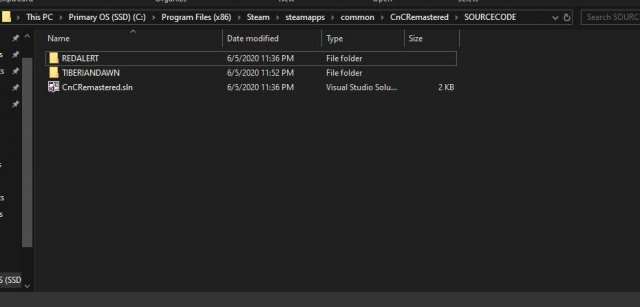
Launching this file should now open Visual Studio and add a “Solution” to VS Studio on the right side menu. This should show “Red Alert” and “Tiberian Dawn” under the solution.
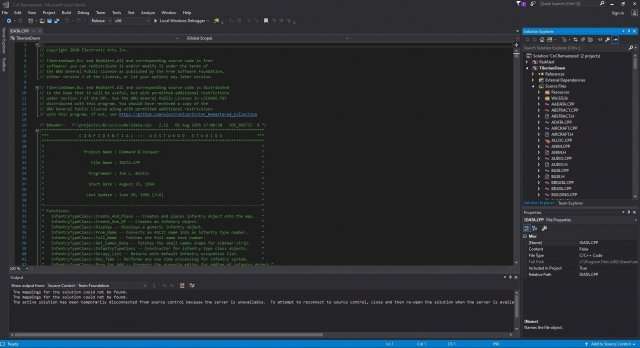
Source Code Editing
You can either use Visual Studio to expand the source code and edit the files, or do it another way.
Other ways include navigating to the Source Code and opening files individually with Notepad++ or any other preferred Text Editor.
To make changes to source code, simply change text listed in the many different text files listed.
There are far too many files for me to list what each one does, you will have to do that work yourself.
For example, if we want to edit the cost to build things, we would want to find out which file contains this information.
So we want to probably find something in the source referencing “Cost”, because hopefully the original programmers used a variable or some kind of reference that makes sense.
You could do this by searching files manually, but this could take a long time.
Alternatively, You could open all the files in Notepad++ and use the “Find in all Open Files” search option.
Note: There are multiple ways to do this, however my method is probably not the preferred way.
My method is to use something to search for strings in all the files, and I used Powershell with Windows because its what I know, and its fast.
So I will search all the files for a string called “Cost” with powershell using the following code:
get-childitem "C:\Program Files (x86)\Steam\steamapps\common\CnCRemastered\SOURCECODE\tiberiandawn" | select-string "Cost" -allmatches 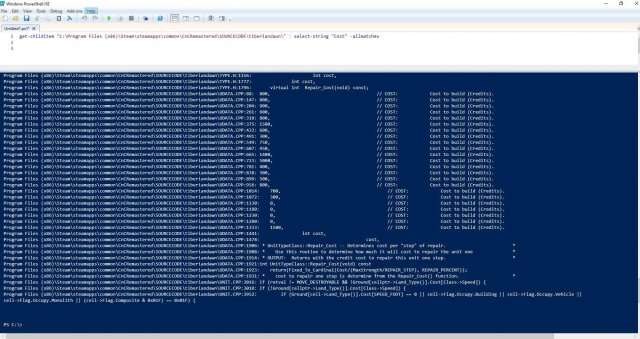
This shows me a bunch of info, but mainly I see 3 that stick out.
- UDATA.CPP
- IDATA.CPP
- BDATA.CPP
If you read the files its obvious they are divided into Units, Infantry, and Buildings files. So if I wanted to edit the cost of a NOD Obelisk, I would look at BDATA.CPP. Use a control-F Search to search for “Obelisk” will bring up a block of definitions for that building.
Thankfully the code is commented, so look for a line that says:
- 1500, // COST: Cost to purchase.
Modify this cost how you want and save the file.
Visual Studio – Building DLL
Assuming no other changes you want to make, is to build the DLL File and create a mod folder. In Visual Studio under the Solution on the right side menu, you would right click on “Tiberian Dawn” and select “Build”.
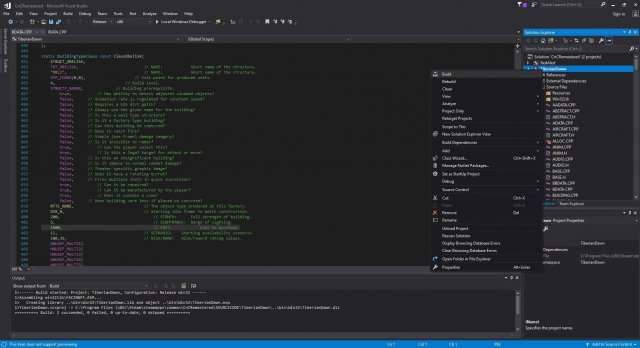
Make sure you pay attention to the Output at the bottom of Visual Studio. If it mentions failures, it may not build the .DLL
At this point all the files in the source should be compiled into a .DLL File and 3 others.
This will normally be saved in the same location as the Source, under a folder called “Bin”.
Important: Do not rename the file from TiberianDawn.dll
Note: I am not sure if the .PDB is actually required, but it is attached to the official PetroGlyph mod so I assume it is.
- C:Program Files (x86)Steamsteamappscommon CnCRemasteredSOURCECODEbinWin32TiberianDawn.dll
- C:Program Files (x86)Steamsteamappscommon CnCRemasteredSOURCECODEbinWin32TiberianDawn.pdb
Creating a Mod Folder and Workshop
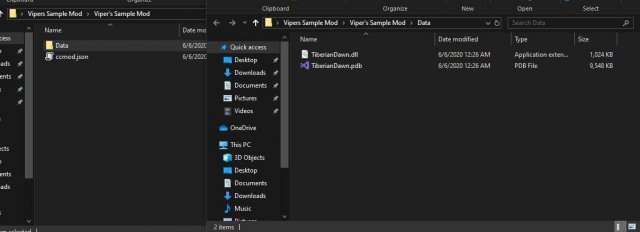
Next is to create your mod folder. Create a new folder in Windows and name it whatever you want your mod to be. In the folder you will want to place:
- Another folder named “Data”.
- A new text file named “ccmod.json” (Not .txt).
Place your modified “TiberianDawn.dll” and “TiberianDawn.pdb” inside of the “Data” folder.
Your CCMOD.JSON is a description file of the mod. Example:
{
  "name": "Vipers Sample Mod - TD Only",
  "description": "Changes various things",
  "author": "ViPeR",
  "load_order": 1,
  "version_low": 0,
  "version_high": 1,
  "game_type": "TD"
}
Now your Mod is complete, and you can add it to the game. Place in your My Documents folder: DocumentsCnCRemasteredMods.
Be the first to comment