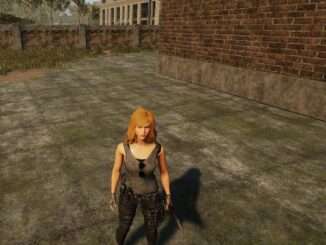
10 Tip and Tricks for Surviving
These are 10 simple tips that I picked up in my first 10-20 hours of playing that will hopefully prevent you from making some of the same mistakes I did early on.
Tip 1: Research Prioritisation
You should focus on some benefits over others. Finish the ‘Worker’ and ‘Builder’ benefit groups first. The ‘Worker’ group makes resource gathering faster, and the ‘Builder’ group lowers building costs. These together will reduce the time you spend gathering, letting you explore and fight zombies more.
As well as completing those two categories asap I would also pick up ‘Zombie Hunter’ (you have to also take ‘Animal Hunter’ as a prerequisite) which increases damage to zombies and at least one level in ‘Porter’ which increases your inventory size.
Out of necessity you’ll also need to take ‘Junior Engineer’ and ‘Engineer’ as some of your earliest research because they’re required to make traps.

Tip 2: Health, Stamina and Condition
The three bars at the top represent ‘Health’, ‘Stamina’ and ‘Condition’. The first two are self explanatory however ‘Condition’ is different.

‘Condition’ determines your maximum ‘Health’ and ‘Stamina’. ‘Condition’ decreases over time but you can reverse the effects and return ‘Condition’ to full by eating certain foods. Most cooked food as well as the ‘Energy Bars’ will work.

Tip 3: Have Two Sections for Your Base
The reason for this is that the zombies will take the most direct path to you. If you are not near your important stuff the zombies won’t be either.
- Section One: Your HQ where your storage, crafting stations, research table and bed are. Lightly protected with a trap or two just in case.
- Section Two: What I call The Gauntlet. This is where you will build most of your defenses and have the zombies run through all of your traps.
This way if you have trouble during the night your respawn point and other important stuff should be kept out of harm’s way.
Tip 4: Upgrade Your Base Early
You must upgrade to stone and then metal before the sixth wave. Exploding fire zombies appear then. They burn wood structures, and their explosions damage stone. Even before wave six, large groups of zombies on nights four or five can destroy wood quickly. This can cause big problems. The resources needed to upgrade your base to stone and metal are not much. You can upgrade a medium-sized base by night three or four. It is better to do this early. Repairing and rebuilding later will take more time than gathering the resources now.

Tip 5: Let Traps Kill Zombies
In the early game when resources are scarce it’s far more efficient to let your traps kill the majority of the zombies during the horde. Reloading a trap costs one ‘Tree Branch’ compared to one ‘Tree Branch’ and one ‘Piece of Iron’ for every five arrows. So, resources to damage output is exponentially higher for traps. You’ll probably want to save your iron for nails and building or for arrows while you’re out exploring.
Tip 6: Gather Bones and Hide Always
The main resources required for upgrading your weapons and accessories are animal bones, feathers and hide. It’s best to hunt any animal you see on site or you may find yourself unable to upgrade at some point because you haven’t managed or bothered to hunt any of the dozen pigeons (as an example) you have seen along the way. Something to note is that the only way to make ‘Processed Leather’ is with ‘Rabbit Skin’. You’ll want a decent supply of this for later.

Tip 7: Place Animal Traps Early
It’s a good idea to place a few of each of the three types of animal traps as early as possible. They catch animals fairly quickly so make sure to check and reload them frequently. This will give you a steady supply of meat for health regeneration as well as hide and bones for weapon upgrades throughout the game.
Tip 8: Use Cars for Safety
Most zombies won’t be able to get to you while you are on top of a car. Due to the fact they have no path to you if you are on a car, they will either start attacking random things or wander around aimlessly. This will most likely not work all the time with particularly large zombies or ones with jumping attacks.
Tip 9: Avoid Killing With Headshots
In the current stage of development, if you kill an enemy with a headshot ALL of the arrows in that zombie (not just the ones in their head) will go flying everywhere when their head explodes. Sometimes you can pick up all or most of the dropped arrows but often you’ll only be able to salvage a few. This isn’t a big deal later in the game but early on you’ll want to save those arrows.
The best thing to do is start with a headshot or two then finish them off with a body shot or melee.
Tip 10: Trick to Pick Up Arrows From Unkilled Zombies
This might take a little practice and you won’t need this trick frequently but it might make your life easier in a tough spot. If you are in a position mid fight where you have run out of arrows you can pick up the arrows from the attacking zombies without getting hit.
The ‘Take All’ function has a slight delay while you pick the item up. If you time it right you can ‘Take All’ while a zombie with arrows in it is running towards you and you’ll pick up the arrows stuck in the zombie, along with whatever else you were picking up. If you keep your last two arrows for this, you can shoot them both into the ground in front of you which will enable you to use the ‘Take All’ function.
Hopefully these tips help to keep some of you alive! Happy surviving!


Be the first to comment