
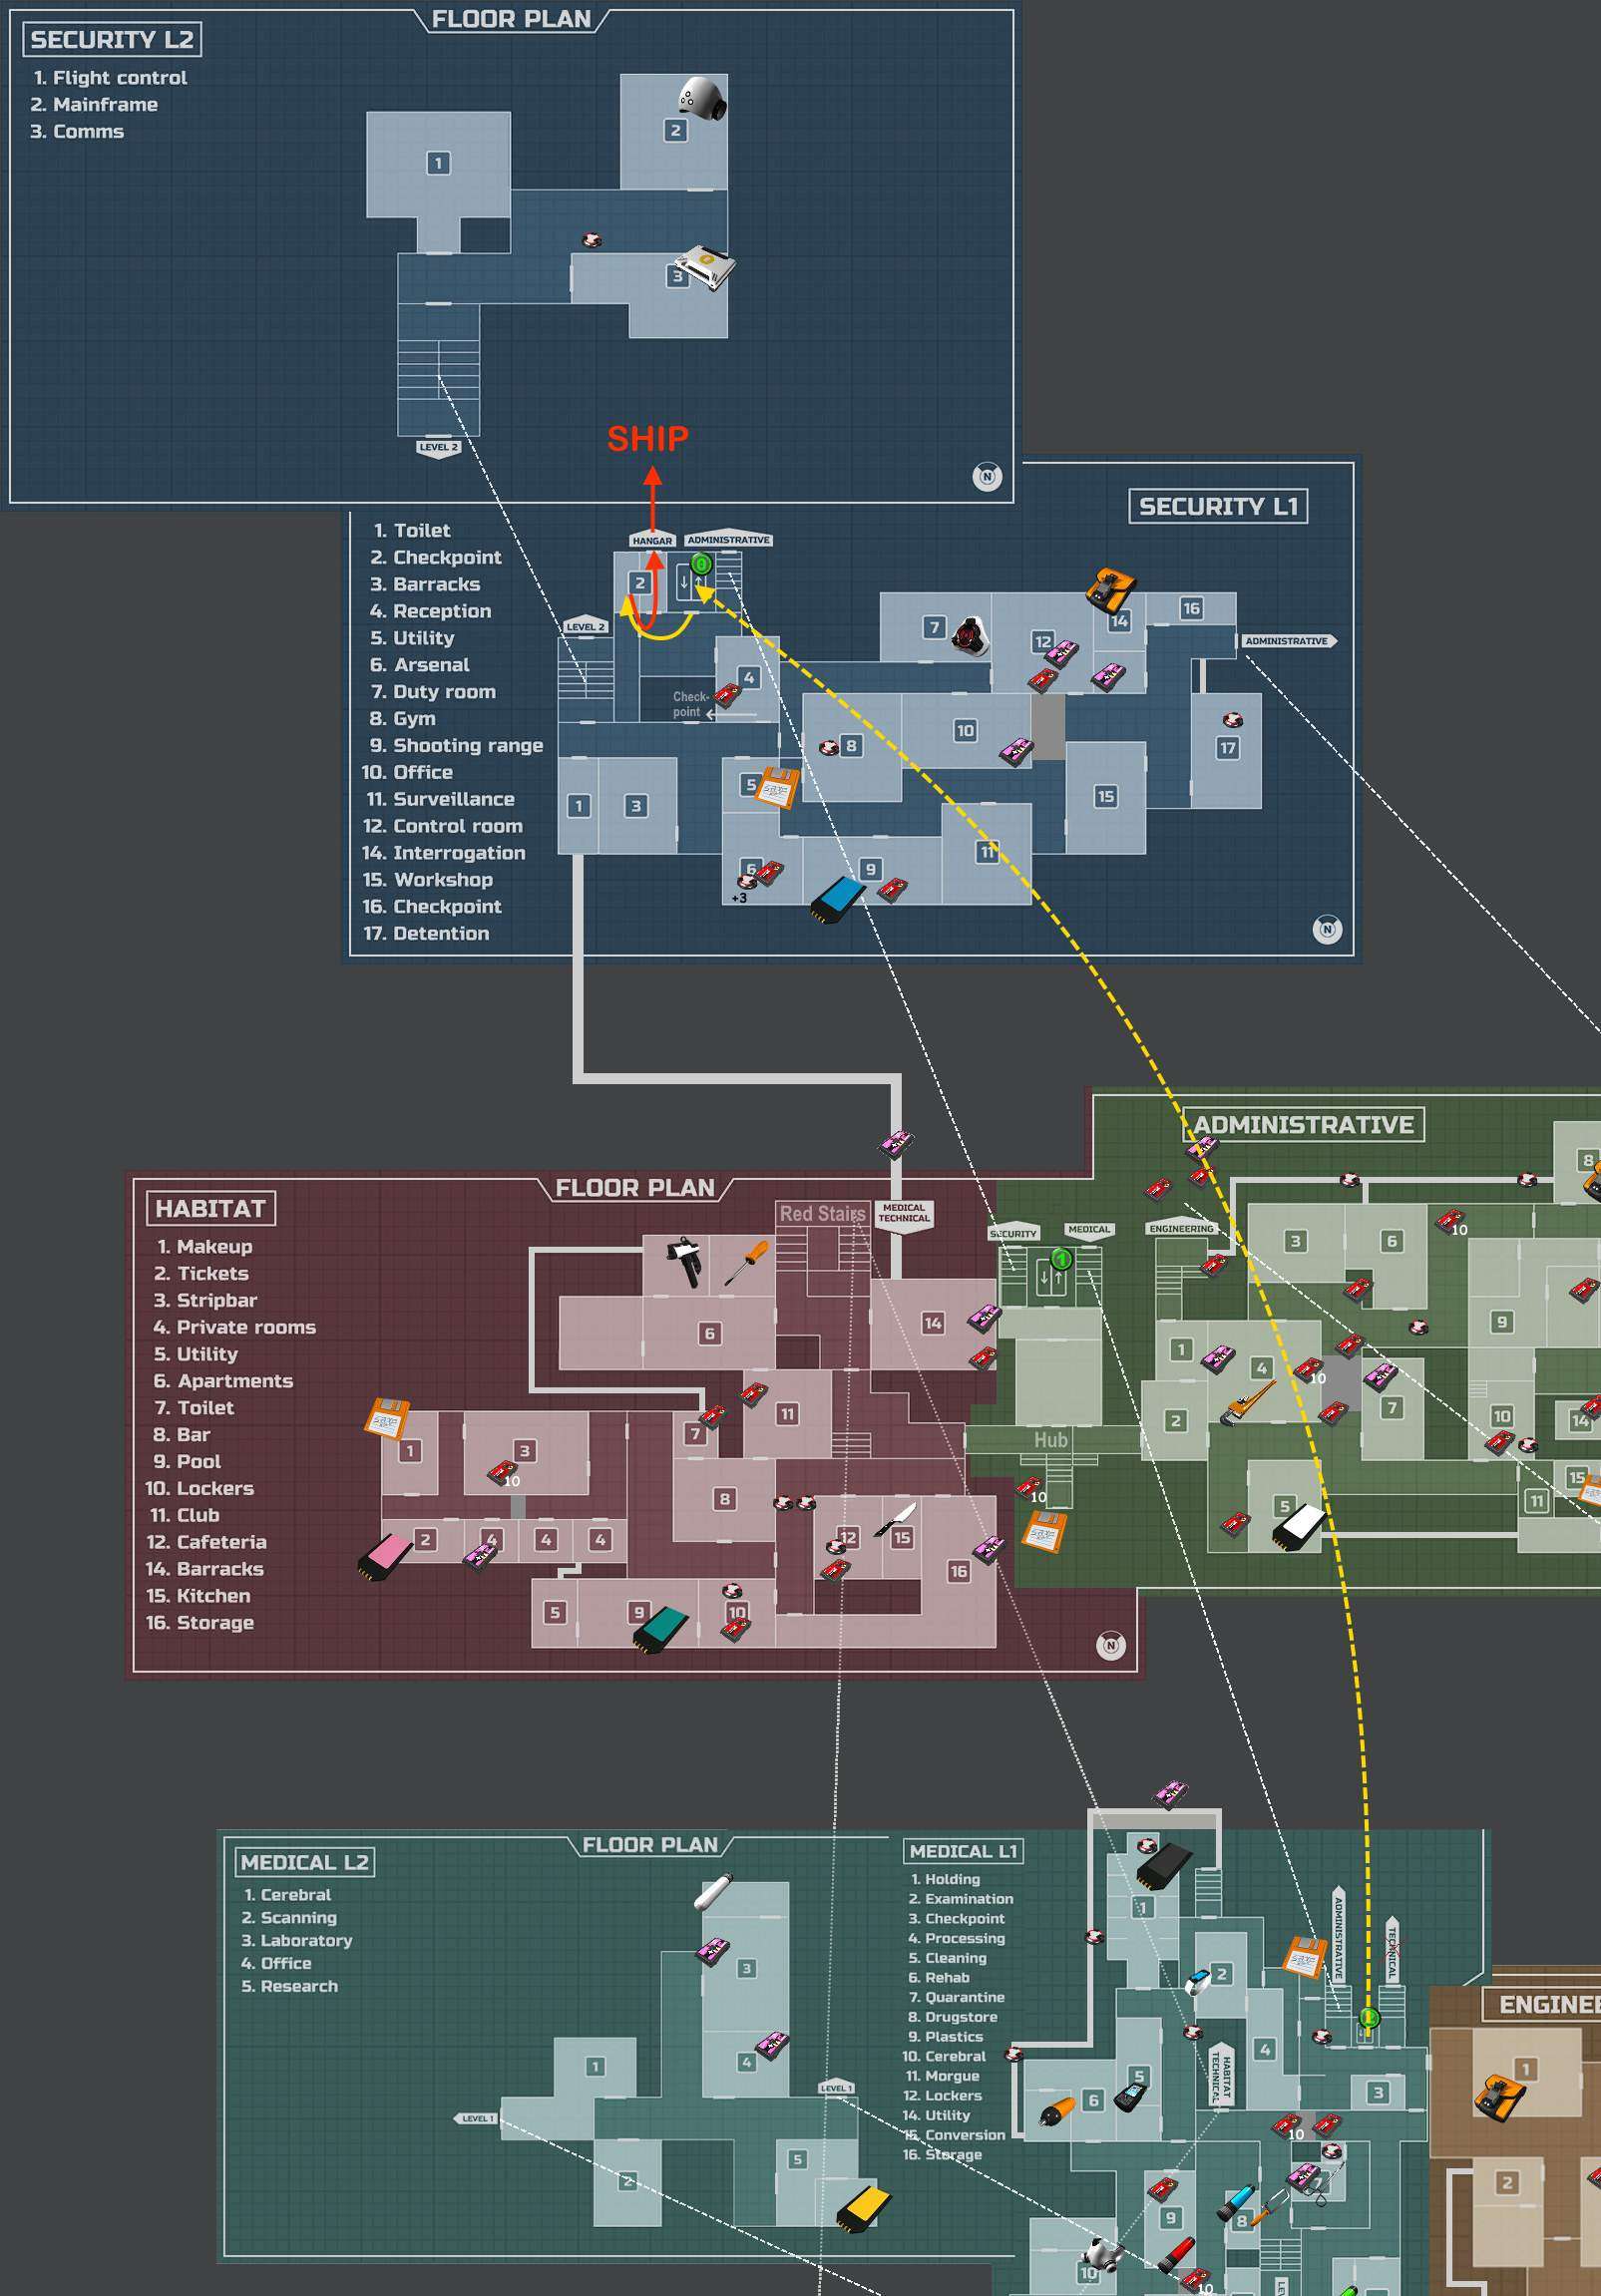
Straight forward walkthrough with maps and videos. This route can be done in 60 minutes.
Easy 1-Hour Walkthrough
Pistol
Why: This is a shooter, we need a gun (to save time we don’t get the pliers, we shoot mines).
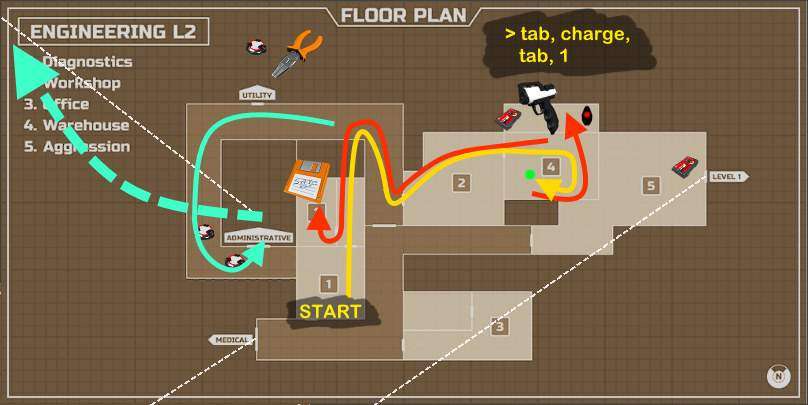
To get the pistol, the quickest way is to release the enemy, carefully move past it, and pick up the pistol and ammunition. After that, you need to open your inventory (usually by pressing the TAB key) and move the ammunition onto the pistol to load it. Close the inventory again (TAB key) and then select the pistol, which is in the first quick slot (usually the 1 key). Lastly, aim at the enemy and fire. A helpful hint is to have your mouse cursor positioned over the second inventory slot beforehand.
Normal way to get the Pistol:
Save: Where you started (1 Diagnostics).
Screwdriver
Why: Needed for Damage Upgrade – we want that as soon as possible. (Also required for White, Teal, Blue, and finale).
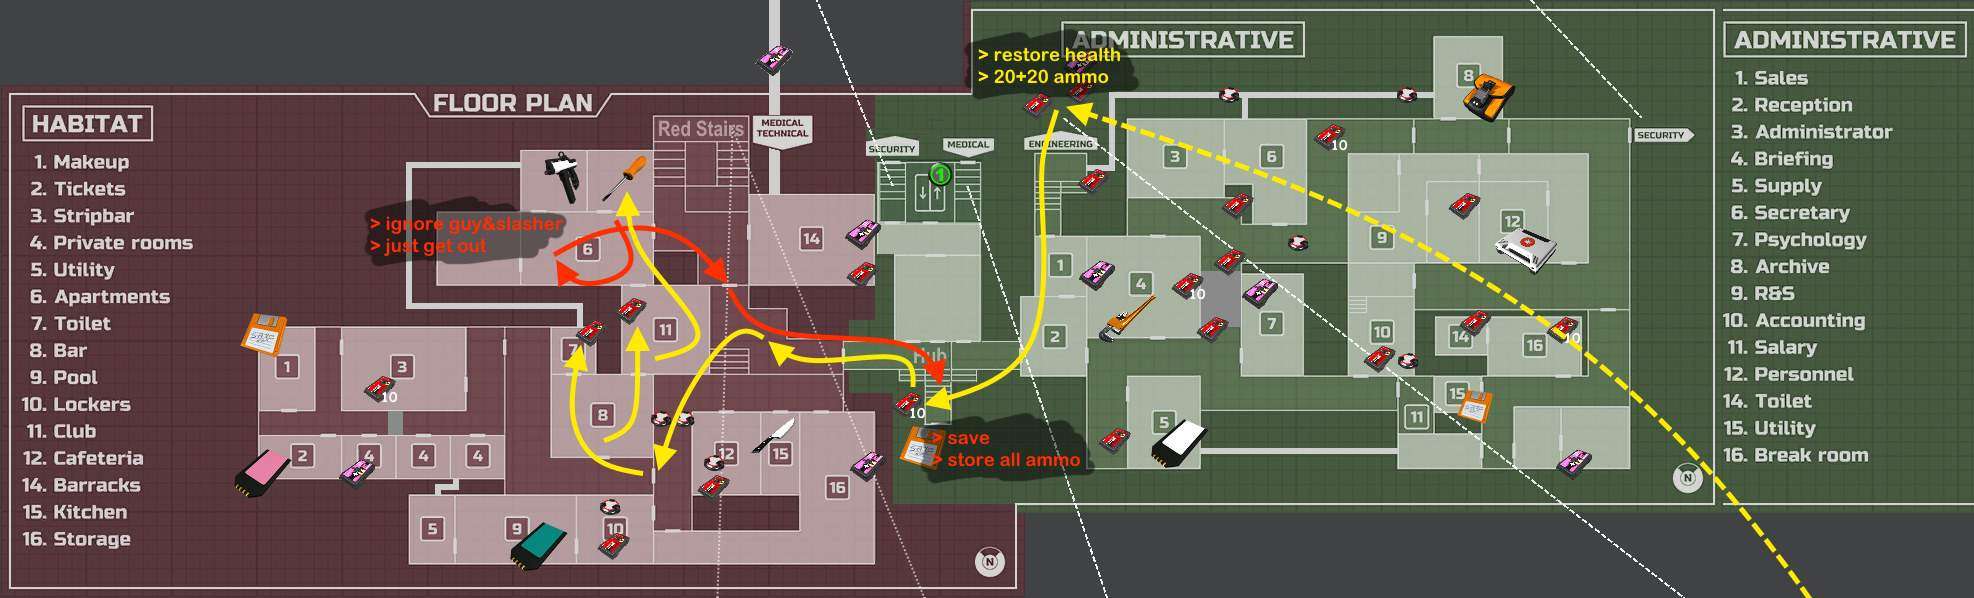
Save: Hub
- – Store all ammo, you gonna get more.
(You should now have your pistol and screwdriver in your pouch, and keep them to the end).
Damage Upgrade + Wrench
Why: The upgrade nearly doubles your fire power. We need it to save ammo. The Wrench is required to continue to the next level (also Forceps + Teal key).
Save: Start (don’t go all the way back to Hub, takes 25 seconds.)
- – Store all ammo, you gonna get more.
- + Take (or rather keep) Wrench with you, we need it next.
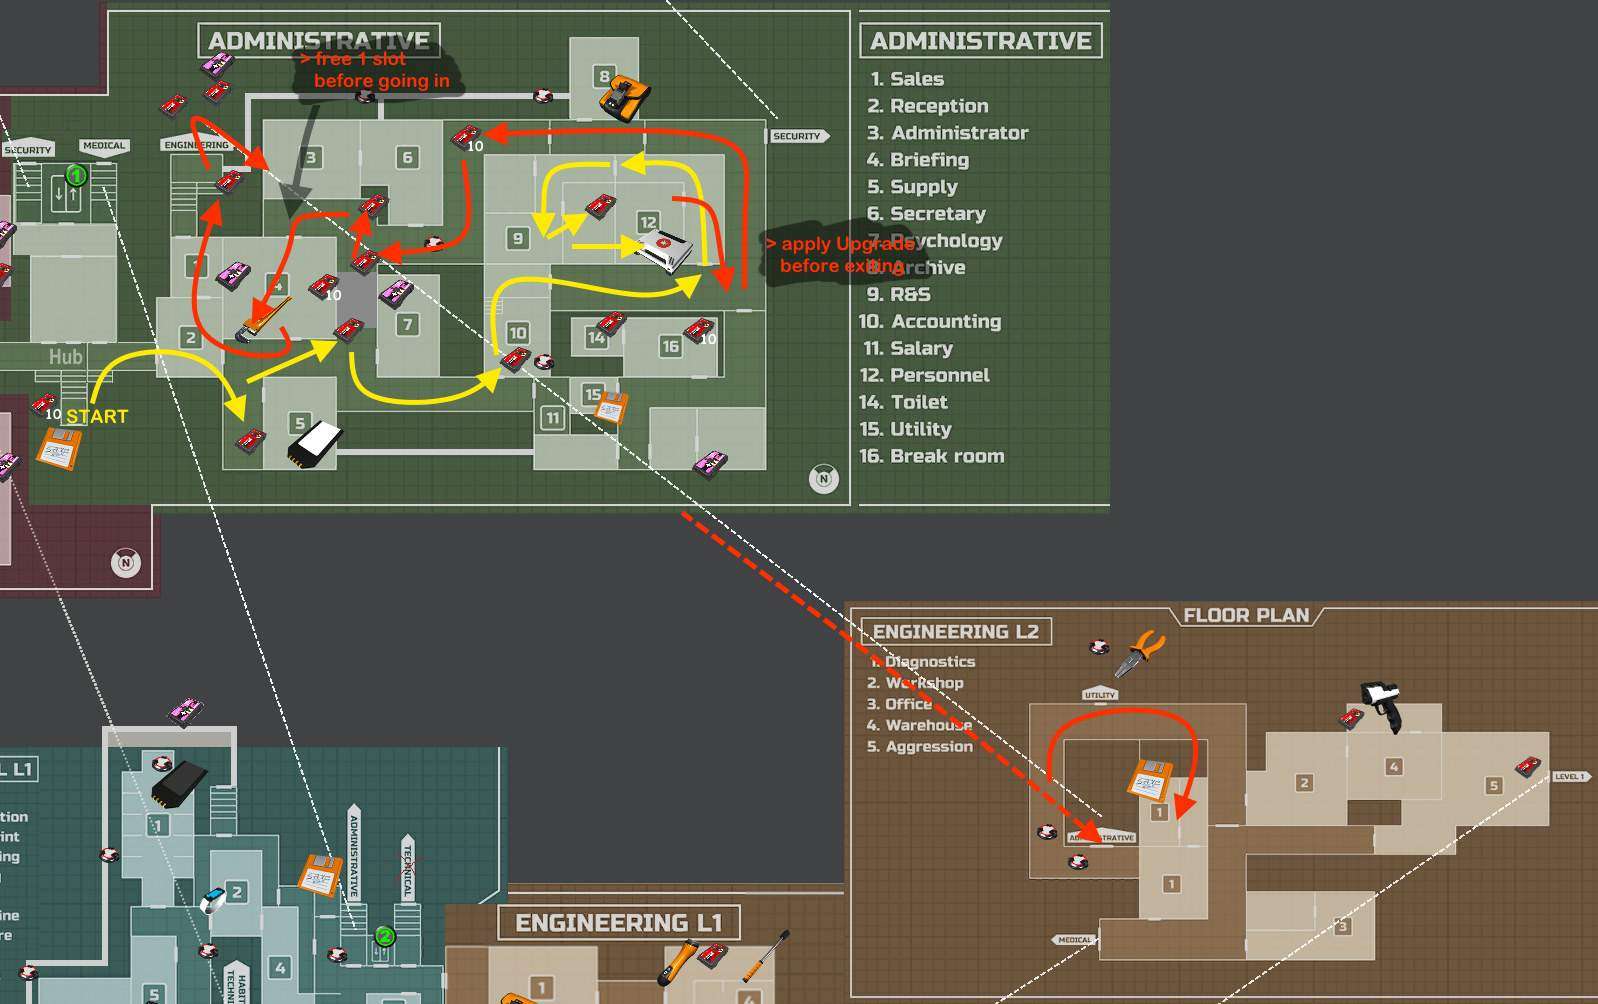
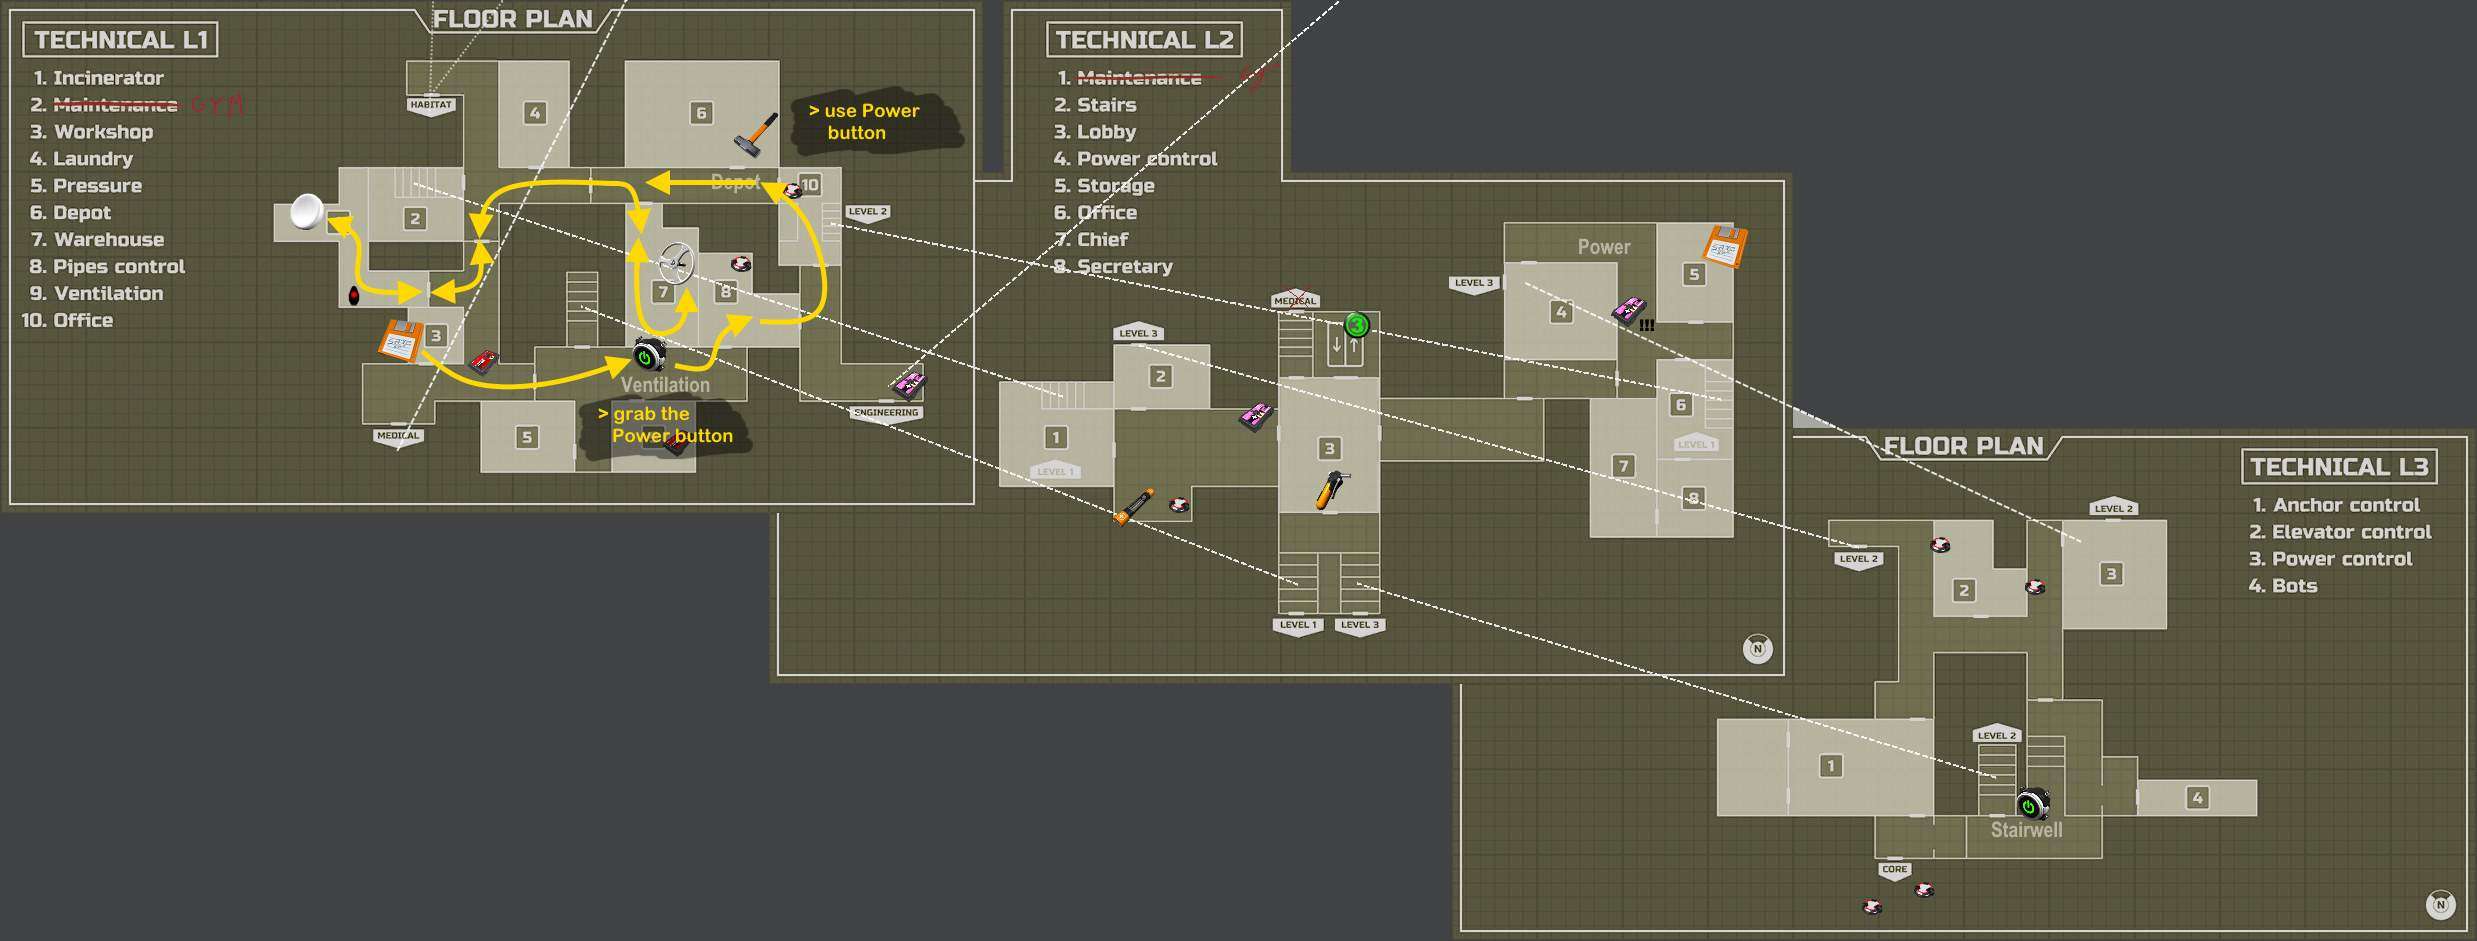
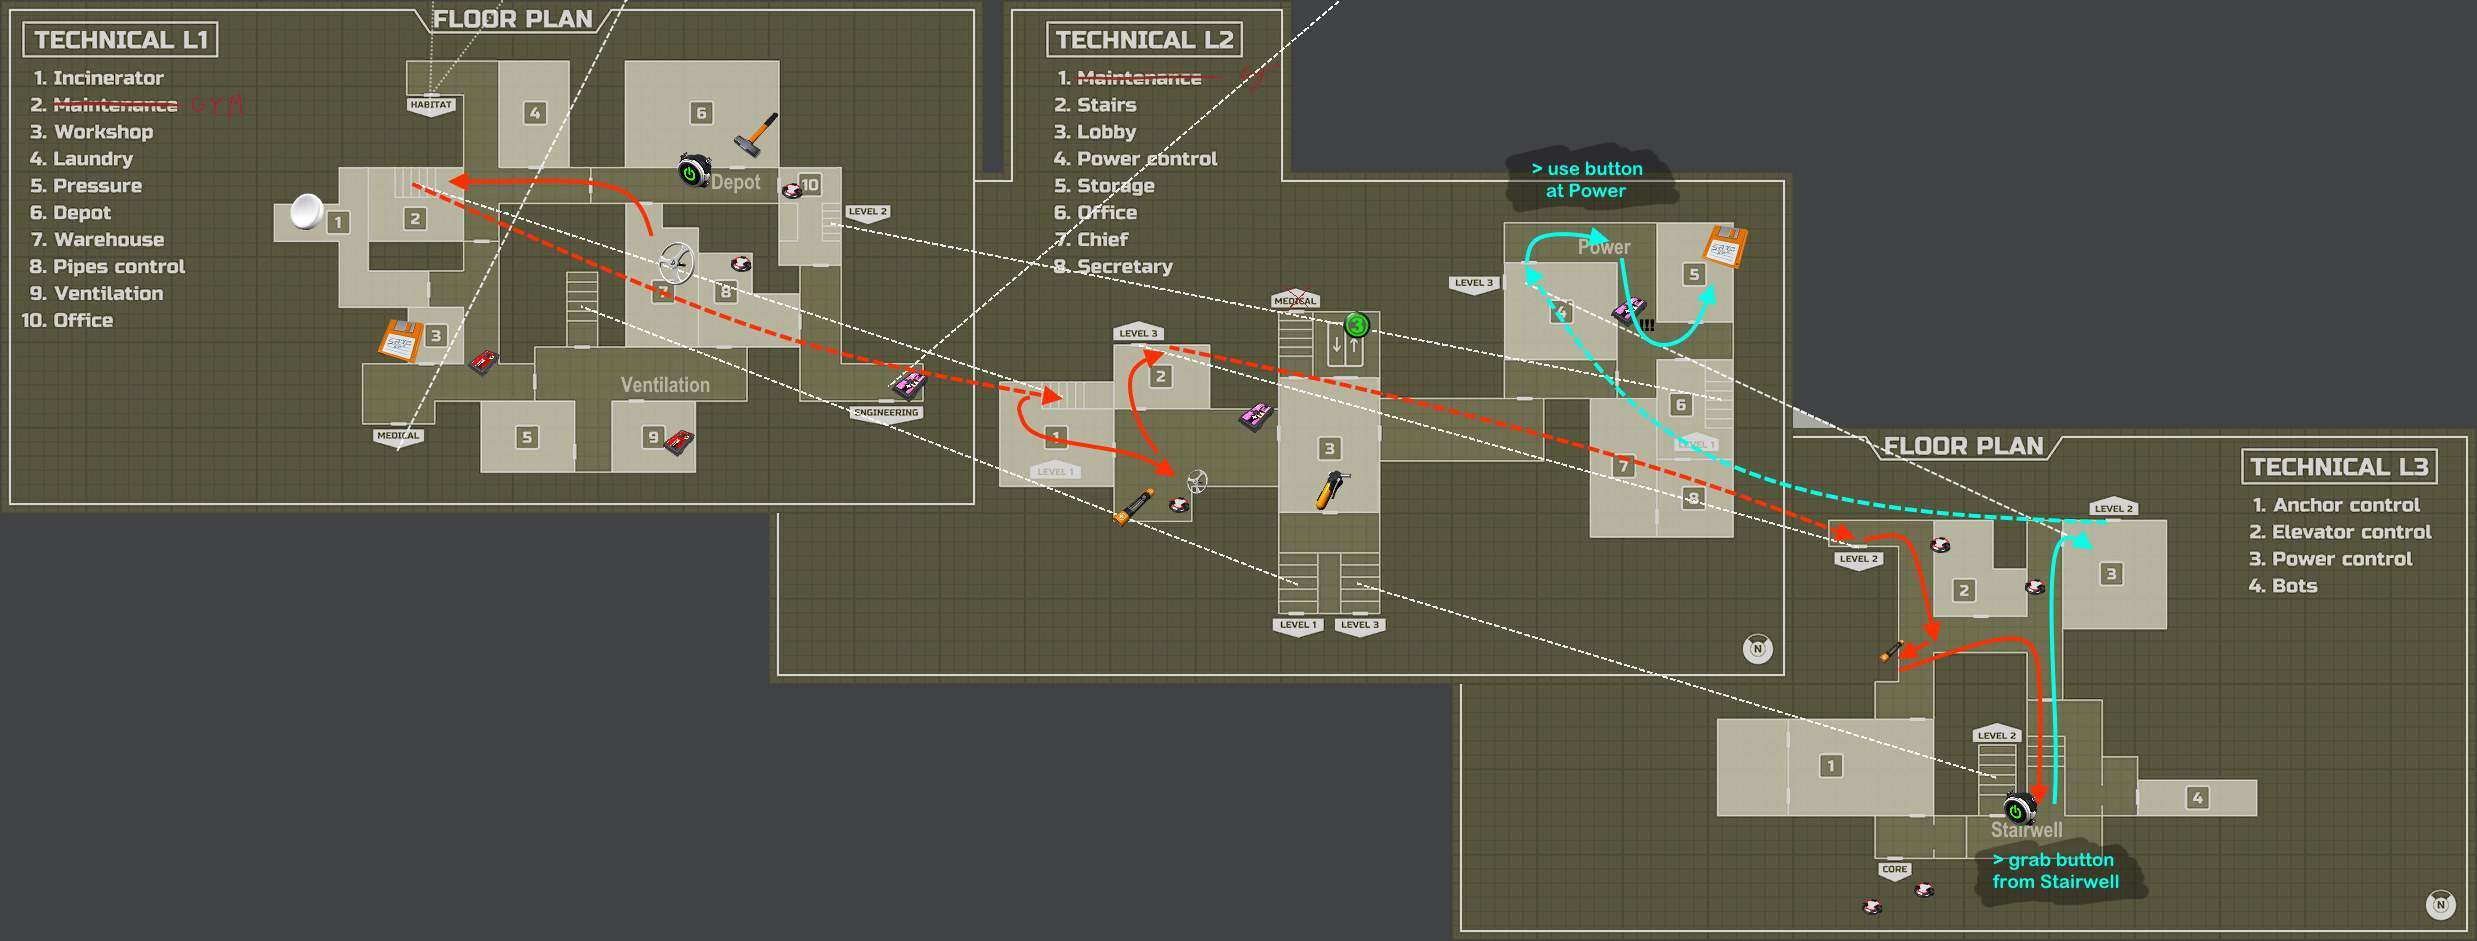
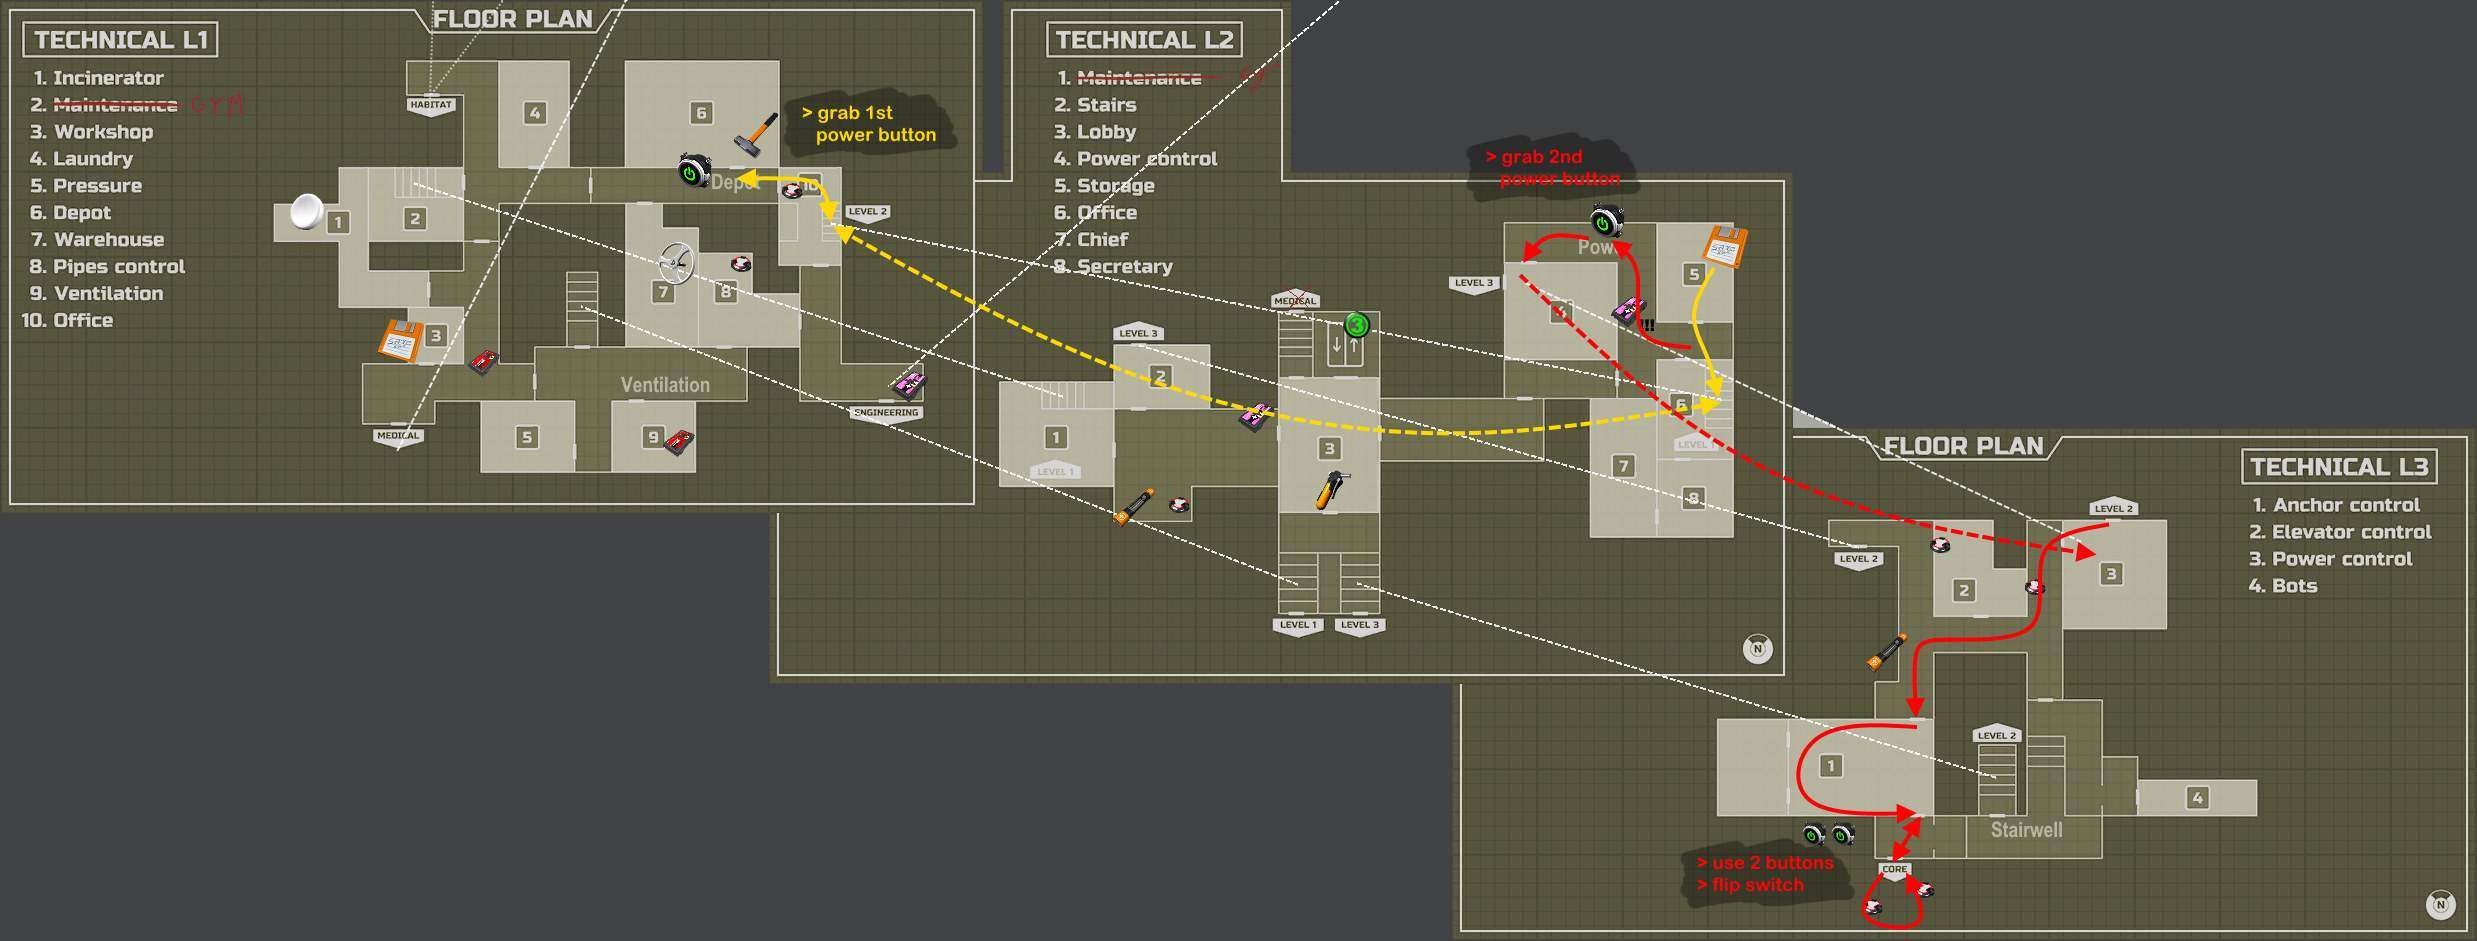
Orange Key
Why: To open door to white button cap (which opens a path to a lever that we need up in Security later, as well as a remote control.)
Save: Middle of Engineering, 9 Repairs.
- – Store all ammo, you gonna get more.
- – Wrench.
- + Orange.
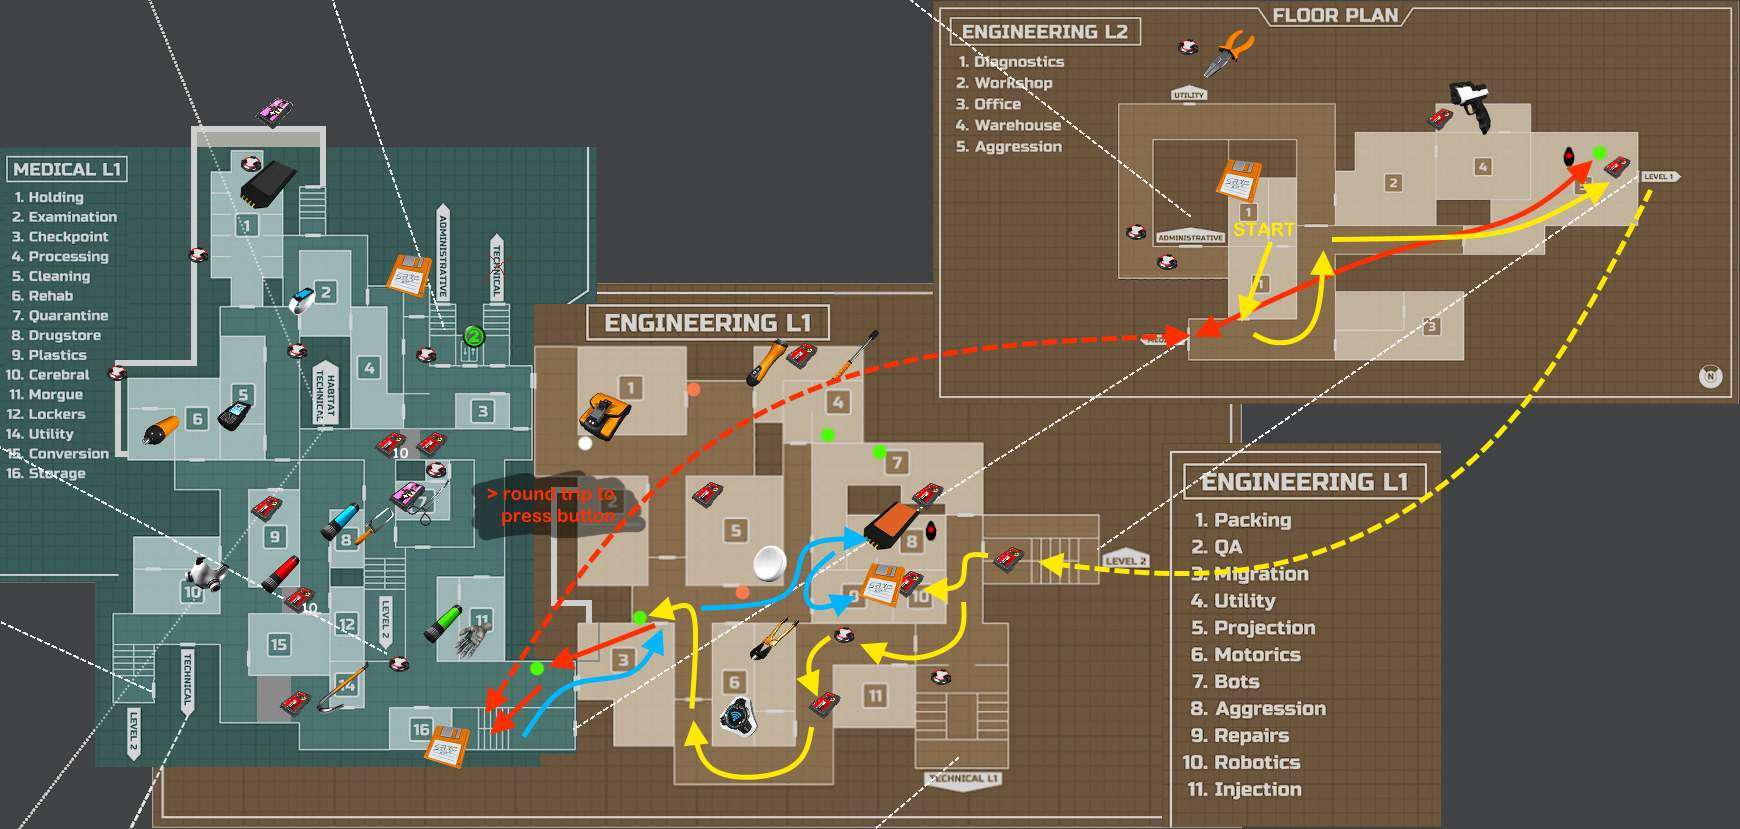
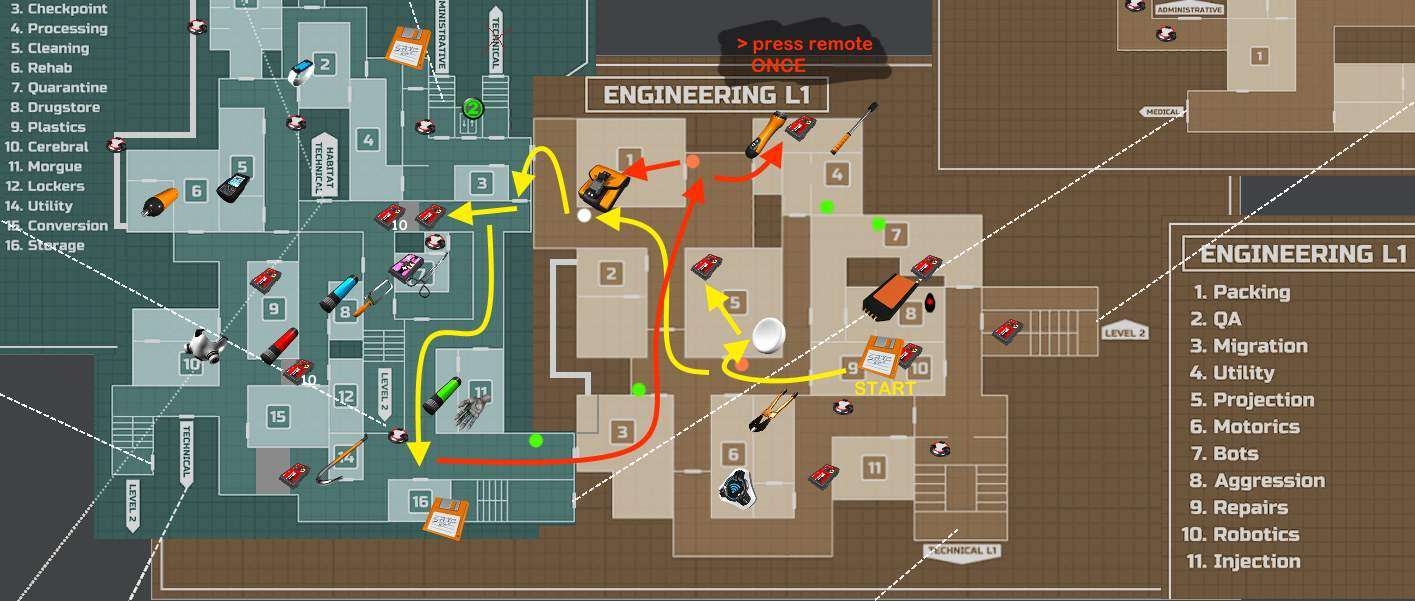
Remote Control
Why: The Wi-Fi remote control (aka Clicker) is required to open the door to the bolt-cutter (needed later in Security).
Save: In Medical, 16 Storage.
- + Keep Orange.
- + Keep the Remote.
- After saving go for the Pouch and the Remote.
- While still in 4-Utility press Remote once to open the other door.
Lever + Boltcutter
Why: Both are required in Security later, lever for a forklift, bolt-cutter to open gate to Jammer.
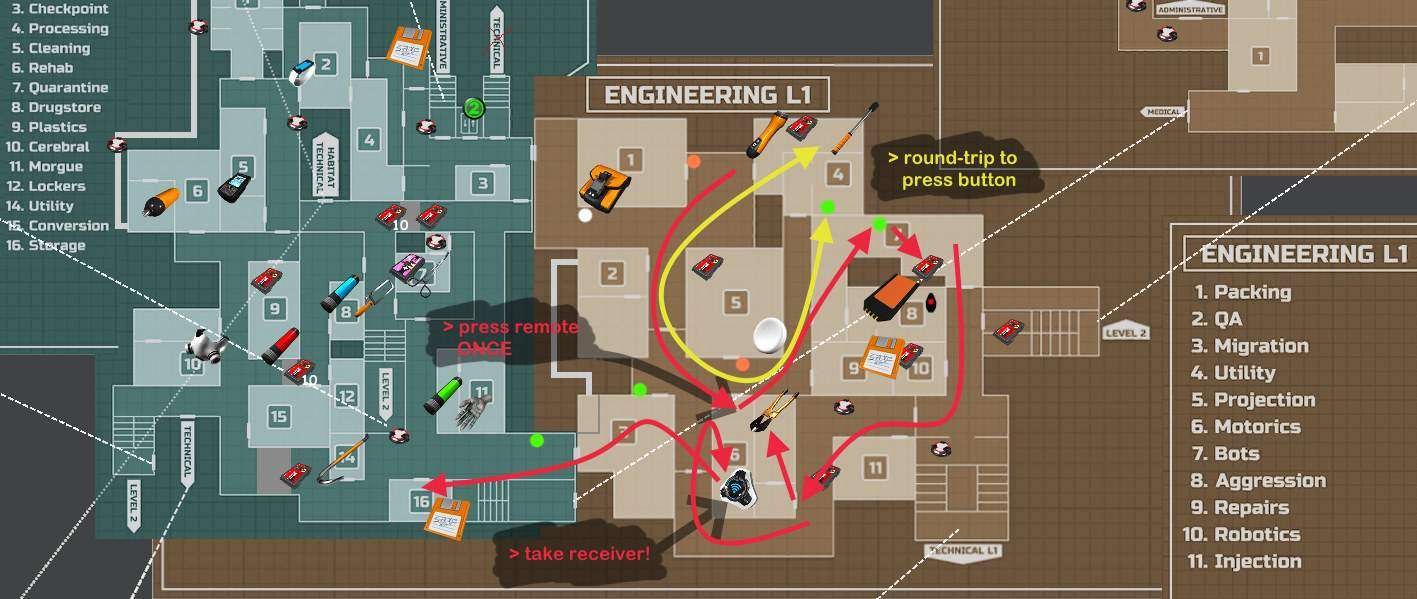
- Round-trip to get lever.
- Remember to press Remote once in 6 Motorics.
- Take Boltcutter.
- Remember to take the blue Receiver button.
Save: Medical 16, Storage
Drop Orange key once you have the pouch (right-click to let it fall on the floor, we need a free slot next. What’s on the floor will stay there for the entire game. We may pick it up on our way back if we need it. Of course you are free to store it in your inventory, it just takes longer.)
- – Store ammo (we still get more).
- – Wifi Remote.
- – Wifi Receiver.
- – Boltcutter.
- + Wrench for forceps.
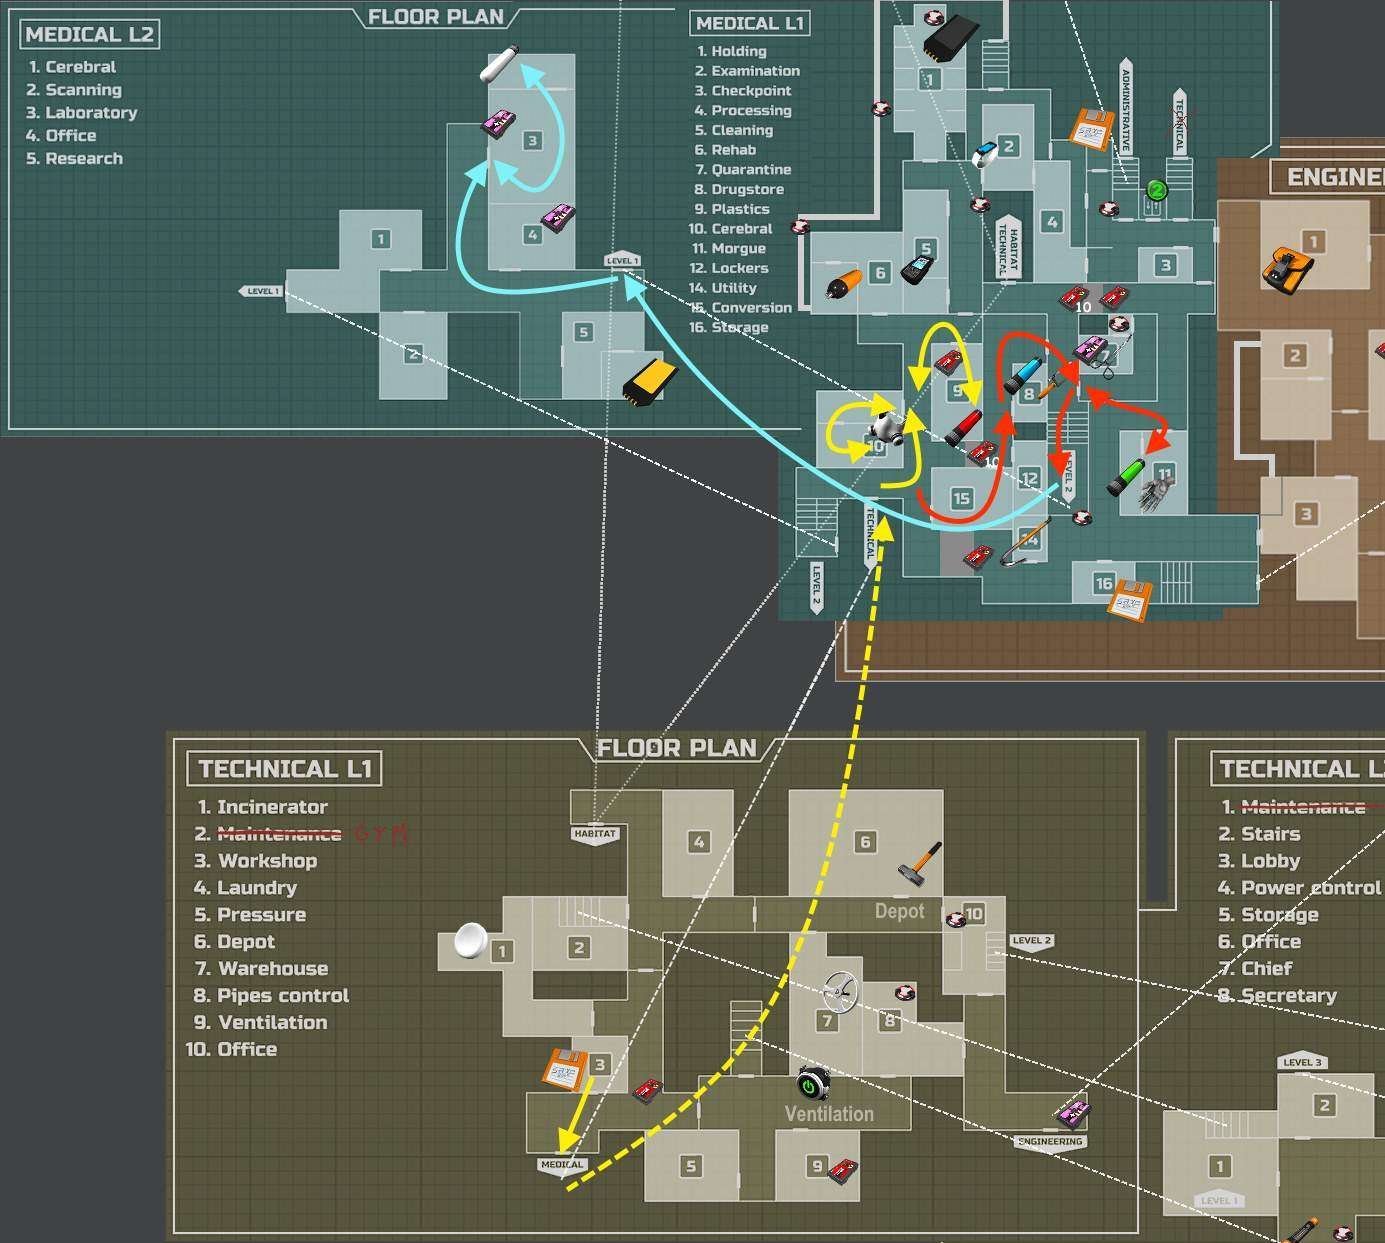
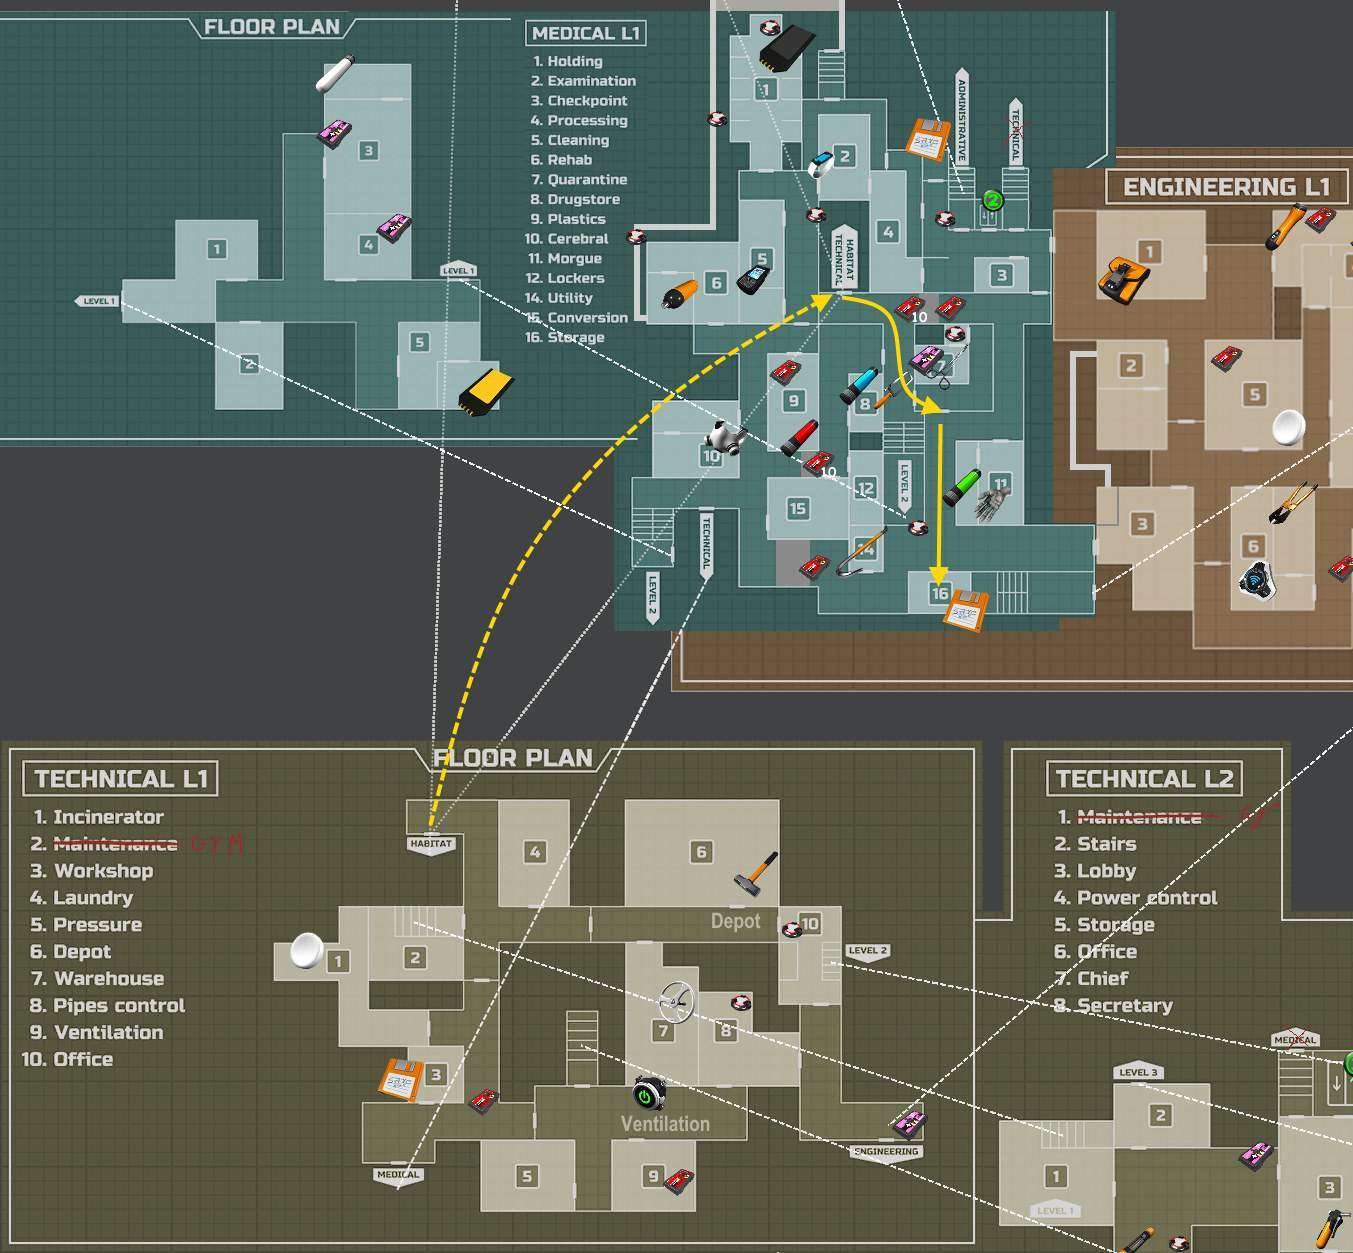
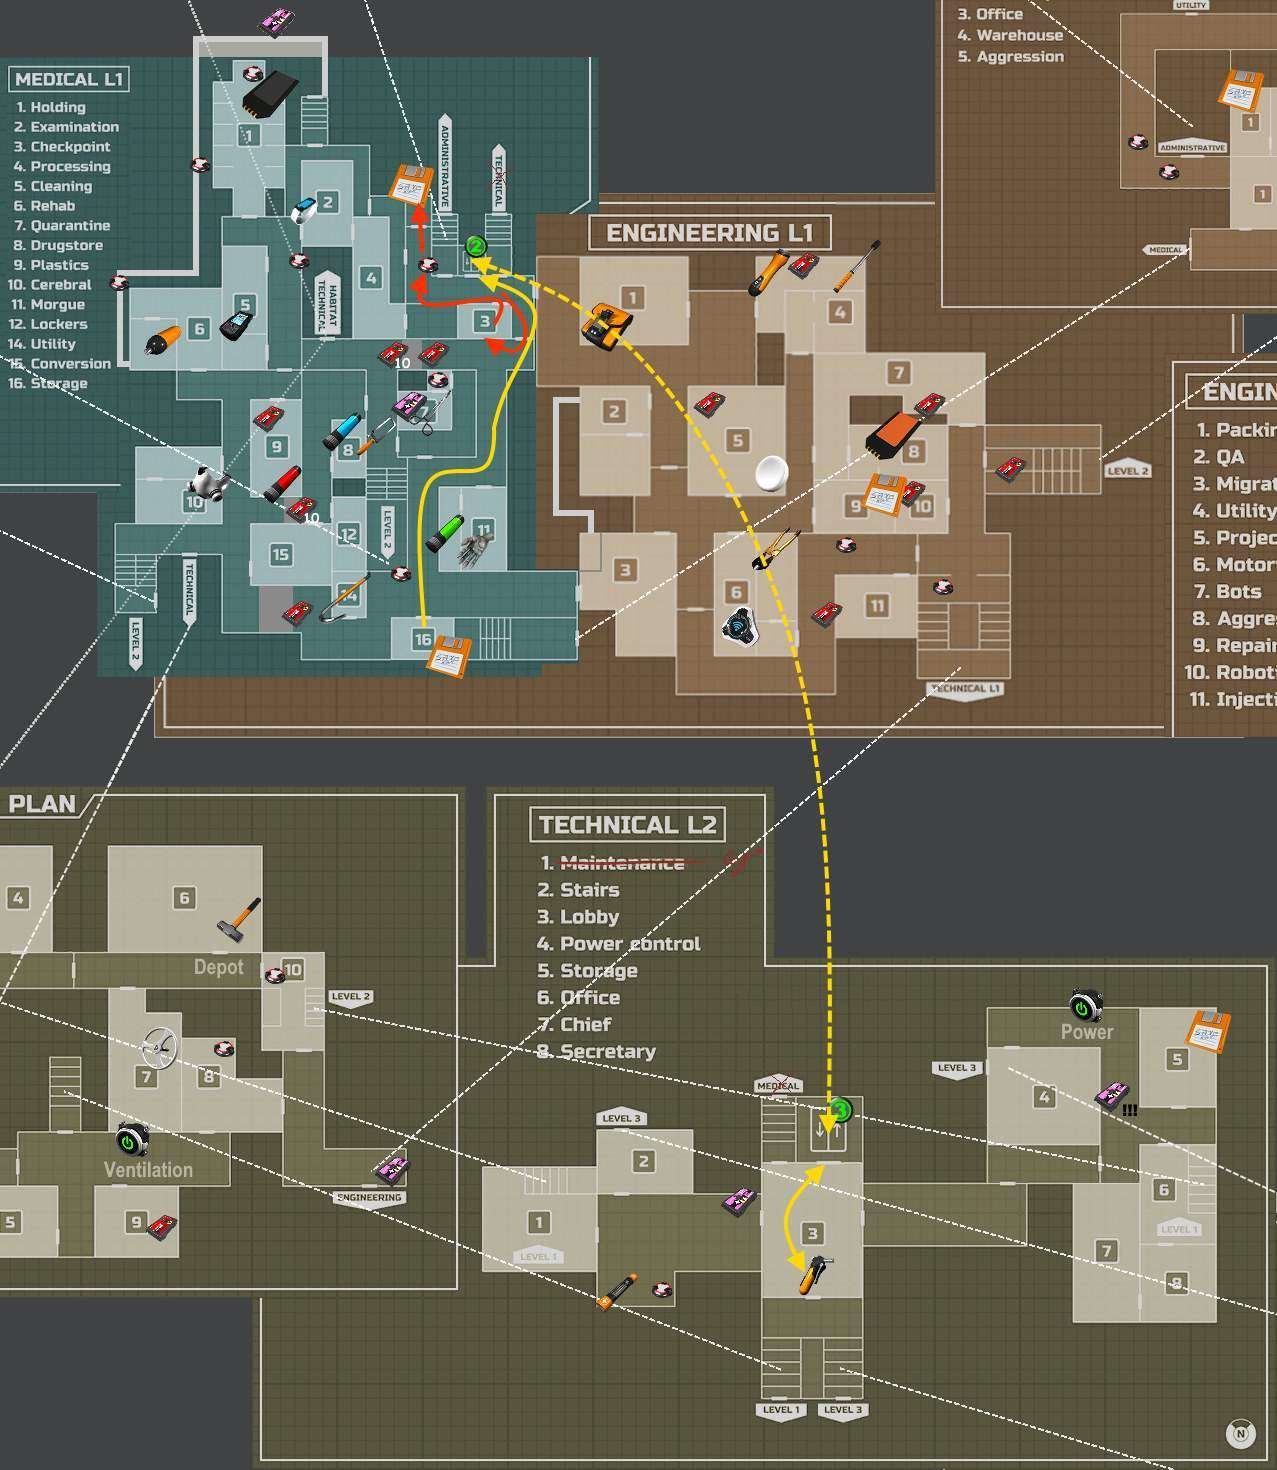
Crowbar, Forceps, White Key
Why: We need both Forceps (look like siccors) and White Key to get the Teal keycard (which opens doors in Medical later). You can’t miss the Crowbar on your way (need it for White key next and up to Security).
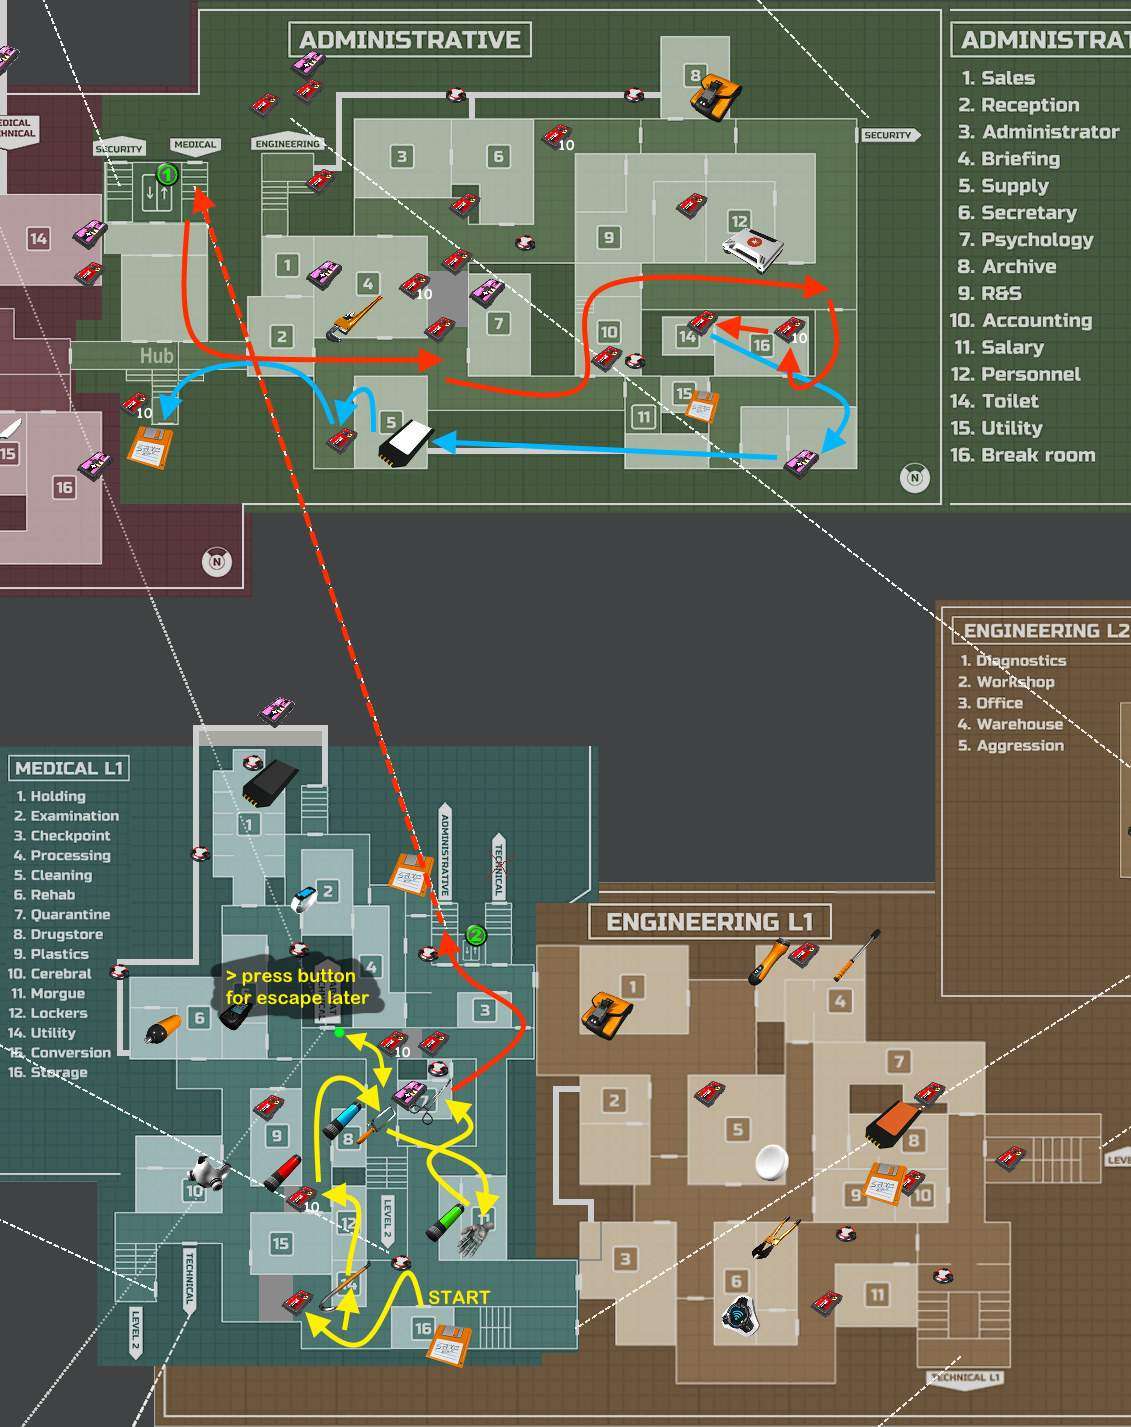
(Optionally save in 15 before 16+14).
Save: Hub.
Drop saw immediately after use + Drop hand immediately after use.
- + Crowbar (to get into Security).
- + Wrench (to get into 3 Stripbar).
- + White (to get Knife).
- + Forceps (to grab Teal key).
Teal Key
Why: It’s on our way up to Security, so we grab it now (opens doors in Medical later).
- (Use Forceps in pool drain).
- Drop White key immediately after use.
- Drop Wrench after use.
- Drop Pink Keycard immediately after use.
- Drop Forceps immediately after use.
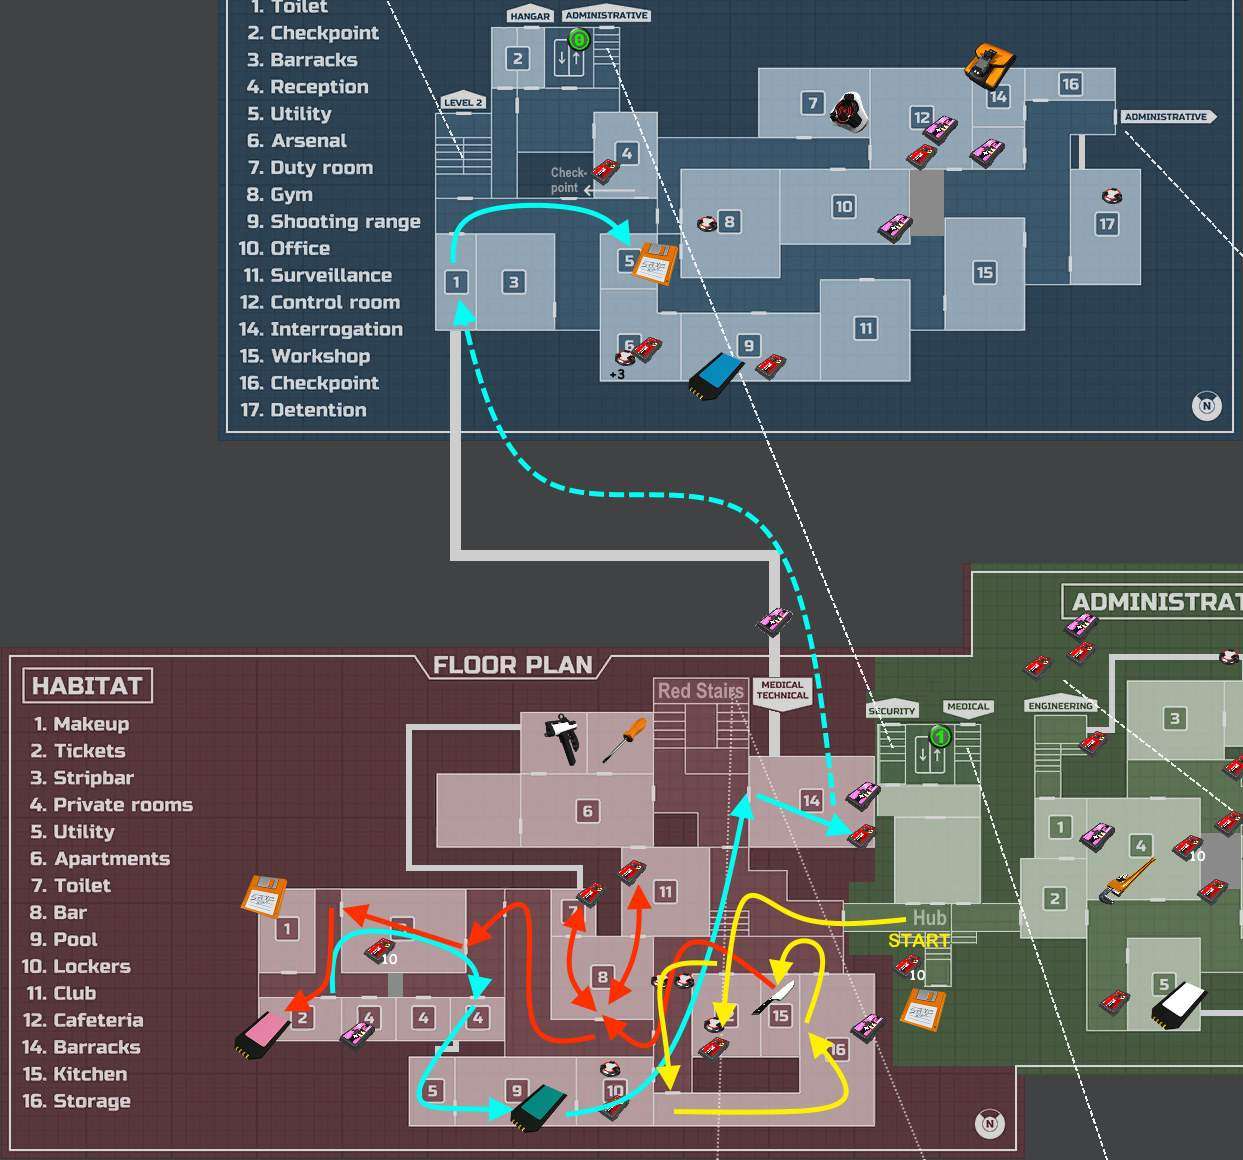
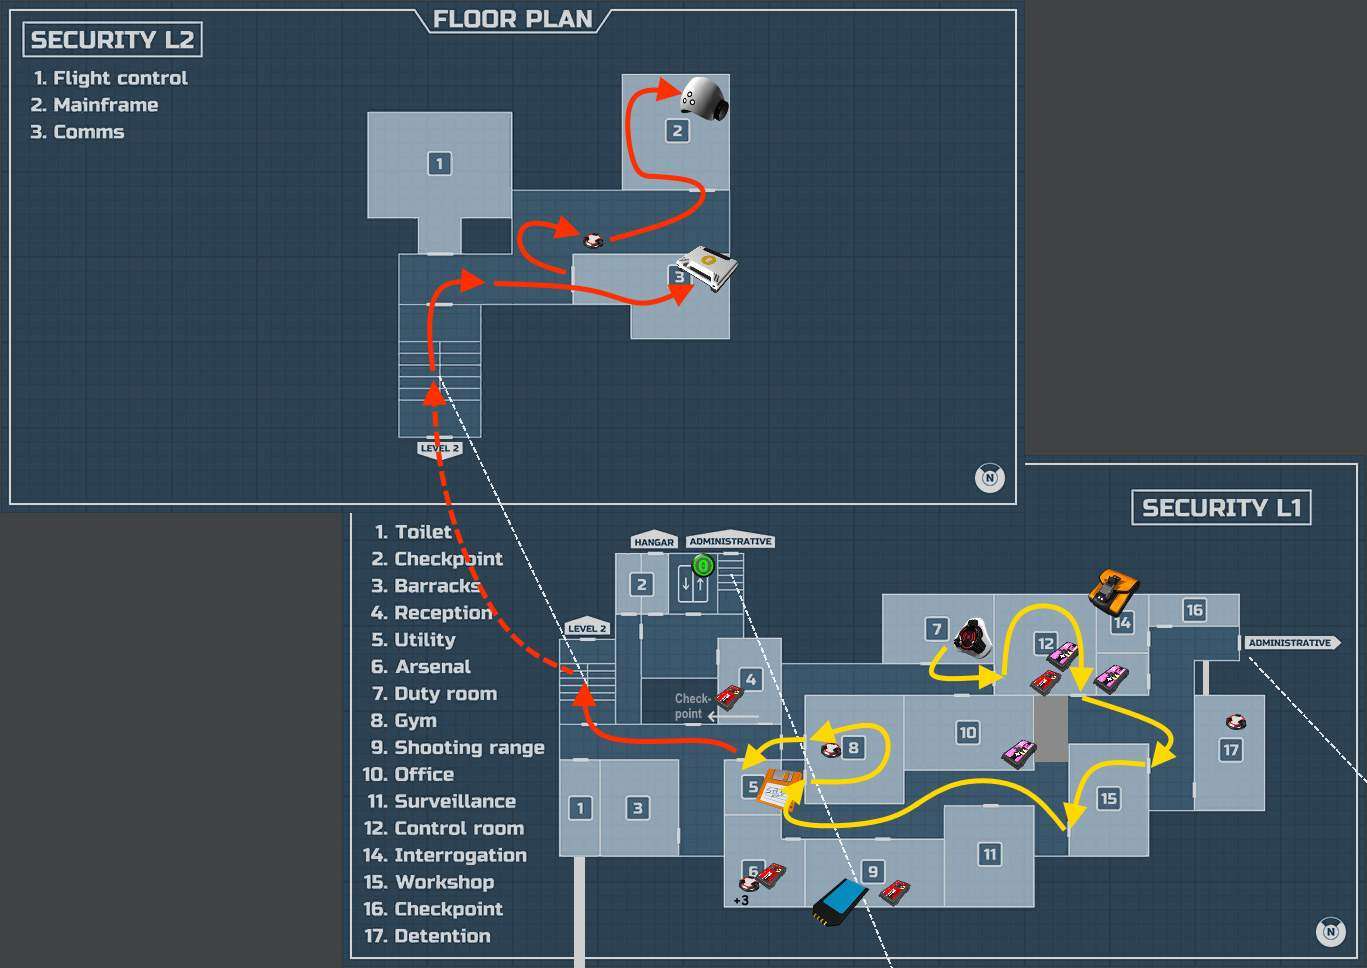
Save: Security, 5 Utility.
Drop Crowbar once you IN Security.
- – Knife (we need it again later, towards the end).
- + Boltcutter for Jammer.
- + Lever for forklift.
Blue Key
Why: We need the Blue keycard to access another pouch upgrade (and the hangar at the end).
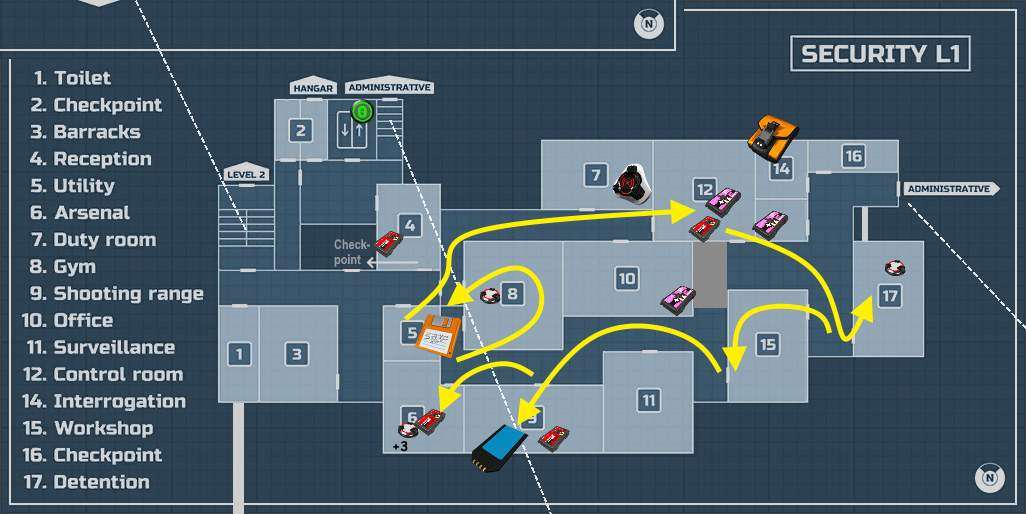
Save: As before in 5 Utility.
- + Blue
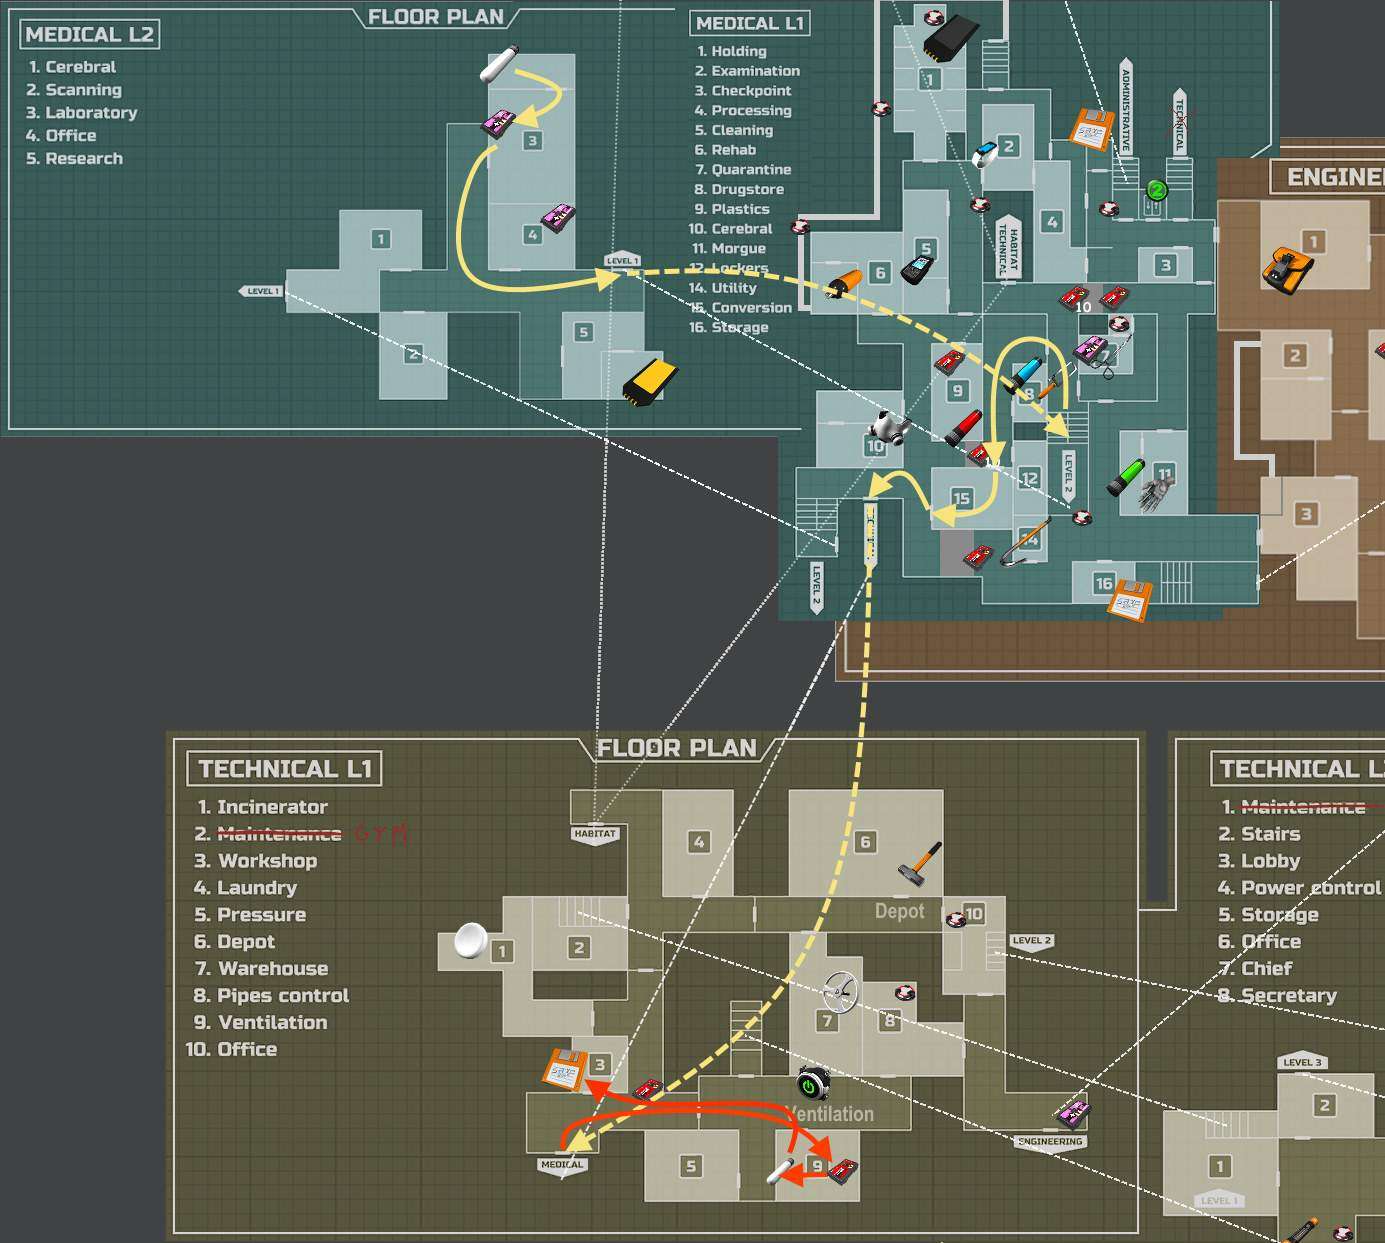
Jammer + NVG
Why: We need the Jammer to get the night-vision goggles (NVG).
From Jammer to NVG:
Save: Again in 5 Utility, before and/or after you get the NVG.
Drop Boltcutter once you’re OUT of Security + Drop or leave Jammer.
- – Blue.
Hammer
Why: The Hammer breaks a wall to get the Gas Mask (which we need for the Yellow key).
- All the way down, two stairs to Medical
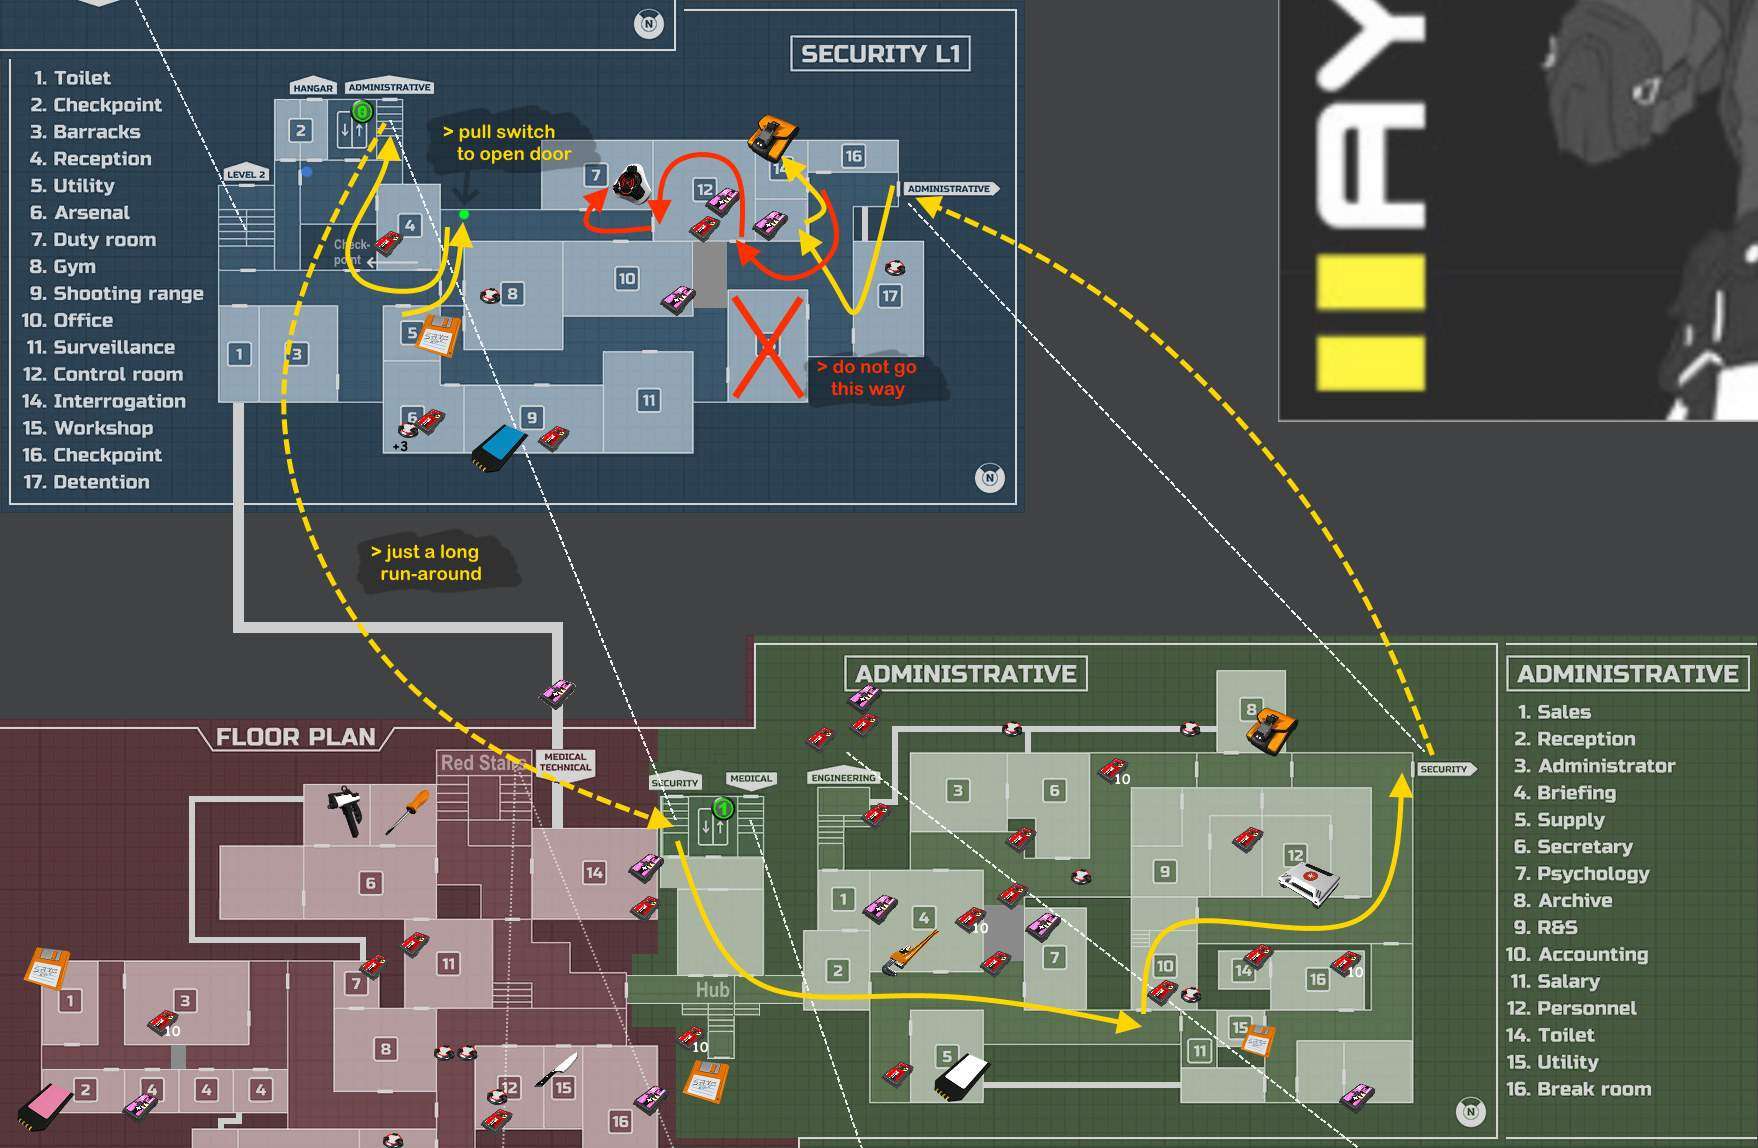
(You might want to save BEFORE going into Depot! It’s pitch black, there are 6 enemies, and the Hammer is hard to find.)
(Right-click and ‘View Image’ for a larger version).
Save: Down the stairs near Power gate, 5 Storage.
- + 60 ammo.
Power 2 Ventilation
Why: We can easily go up to Medical from the other side, and we need to do that twice.
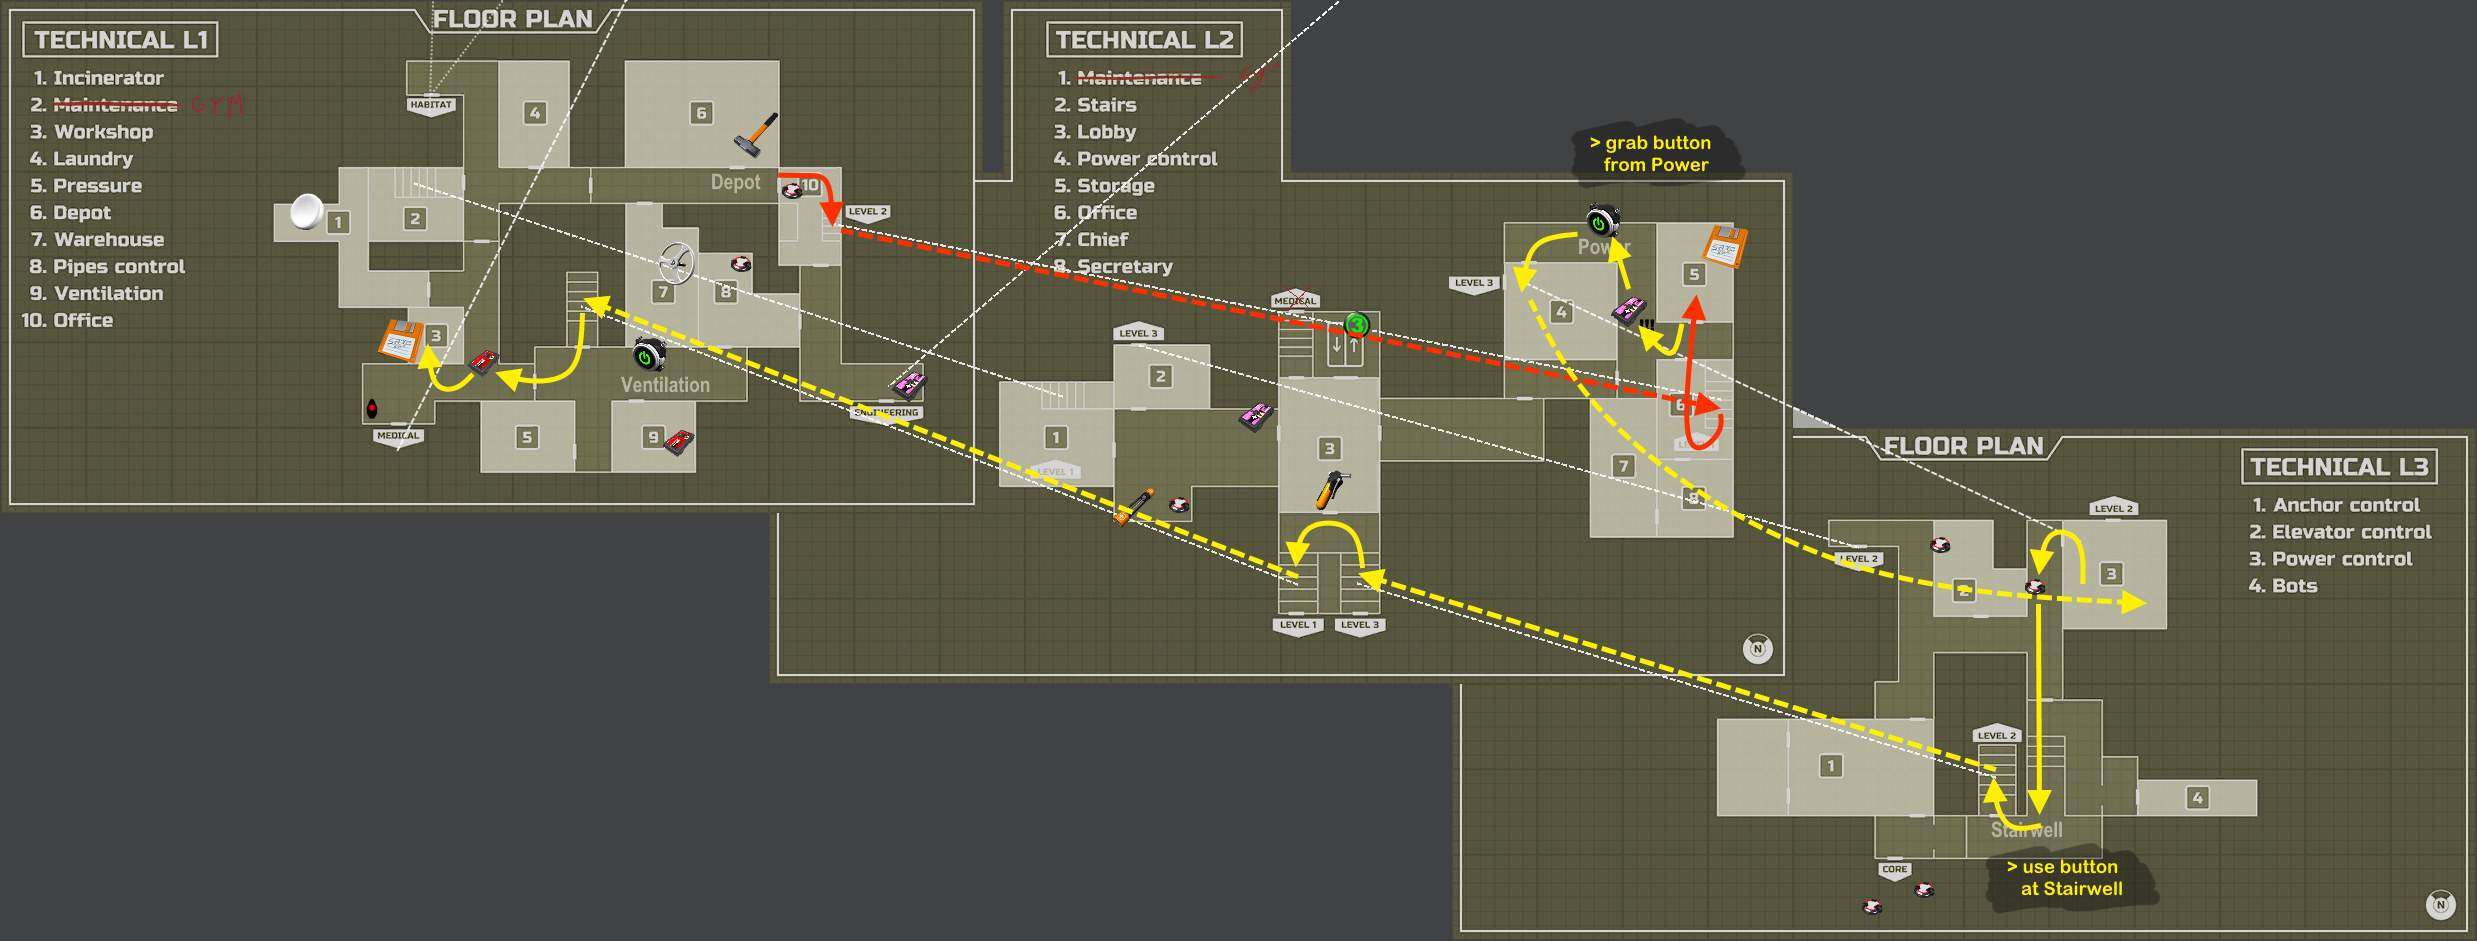
Save: Near Ventilation, 3 Workshop.
- + Hammer.
- + Teal keycard.
Gas Mask + Agent
Why: Grab all 3 flasks (red, blue, green) to create a white Agent that clears Medical L2 (required to get to the Yellow key).
Back the same way:
Drop Hammer after use (Save before and after Ventilation).
Save: Same, near Ventilation, 3 Workshop.
Yellow Key
Why: Required to restore power (then activate the elevator to bring us to the finale).
- Same way up and back.

Save: Same, Ventilation, 3 Workshop.
Drop Teal once you have Yellow.
- + Wifi remote.
- + Wifi receiver button.
- + Knife.
Repair Valve and Fuse
Why: Valve to get the Fuse, and Fuse to open the double-doors (to finally restore power).
Save: Near Power, 5 Storage.
- + Yellow.
- + 60 ammo.
Restore Power
Why: Finally we have the lights back on! Once the Elevator is running we can get to the finale.
- Prepare for surprising slasher attacks.

Save: One flight up the red stairs, in Medical, 16 Storage.
Drop Yellow after use + Drop Knife after use.
- + Wifi Remote.
- + Wifi Receiver button.
- + Blue.
- + 60 ammo.
Finale
- Call the elevator and go to level (3).
- Grab the blowtorch (highlights in the dark in case you dropped the NVGs).
- Enter the elevator again and go to level (2).
- Use the Blowtorch to get into 3 Checkpoint and press all buttons (once).
Save: In the room behind the mine.
- + all remaining ammo.
Black Keycard
Why: To start the escape ship.

Save: If you have more than 3 minutes on the timer you can save again, same place.
- Use the elevator to go to level (0).
Hangar
- Use Blue to access 2 Checkpoint.
- Put the Wifi Receiver on the button (don’t press it yet).
- Enter other side of Checkpoint.
- Press Wifi Remote to enter the Hangar.
- Go up the stairs and board the ship at the back side.
- Use Black key to pilot the ship.
- Check Flight Log and select Previous Destination.
- Select Auto Flight and Operational Base 5.
- Start Flight.
Congrats! You fought well!
Summary
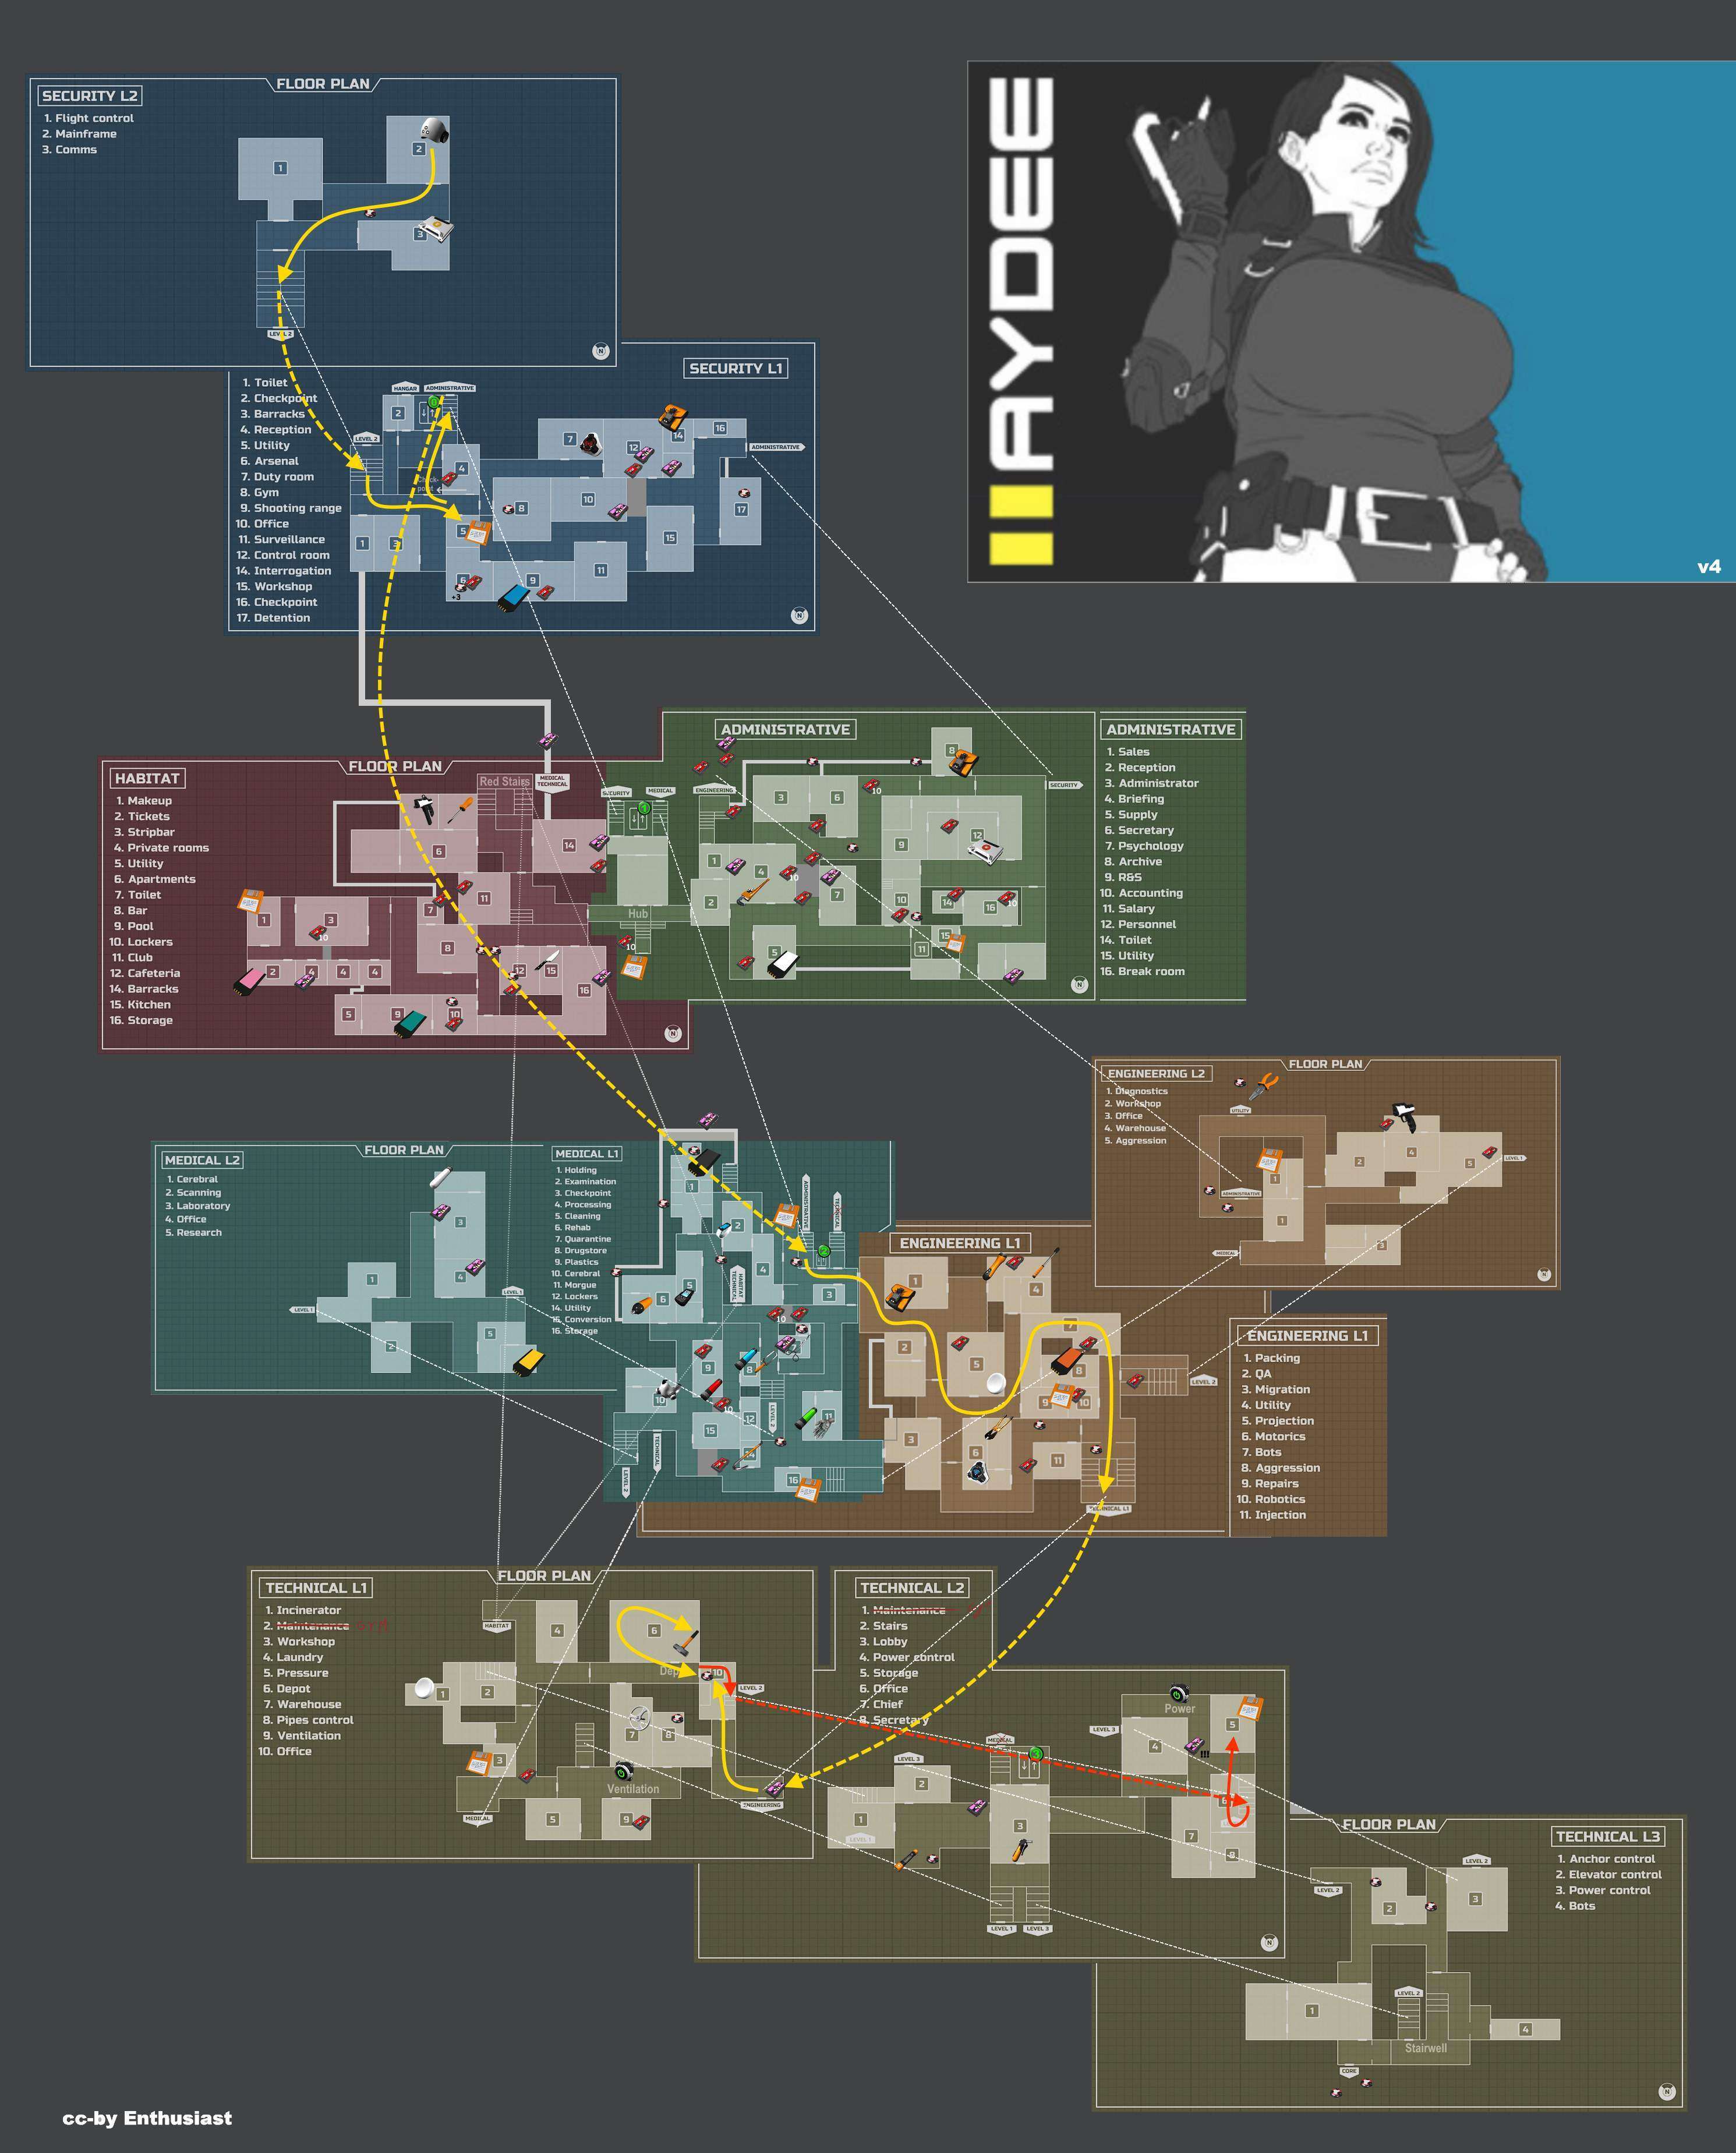
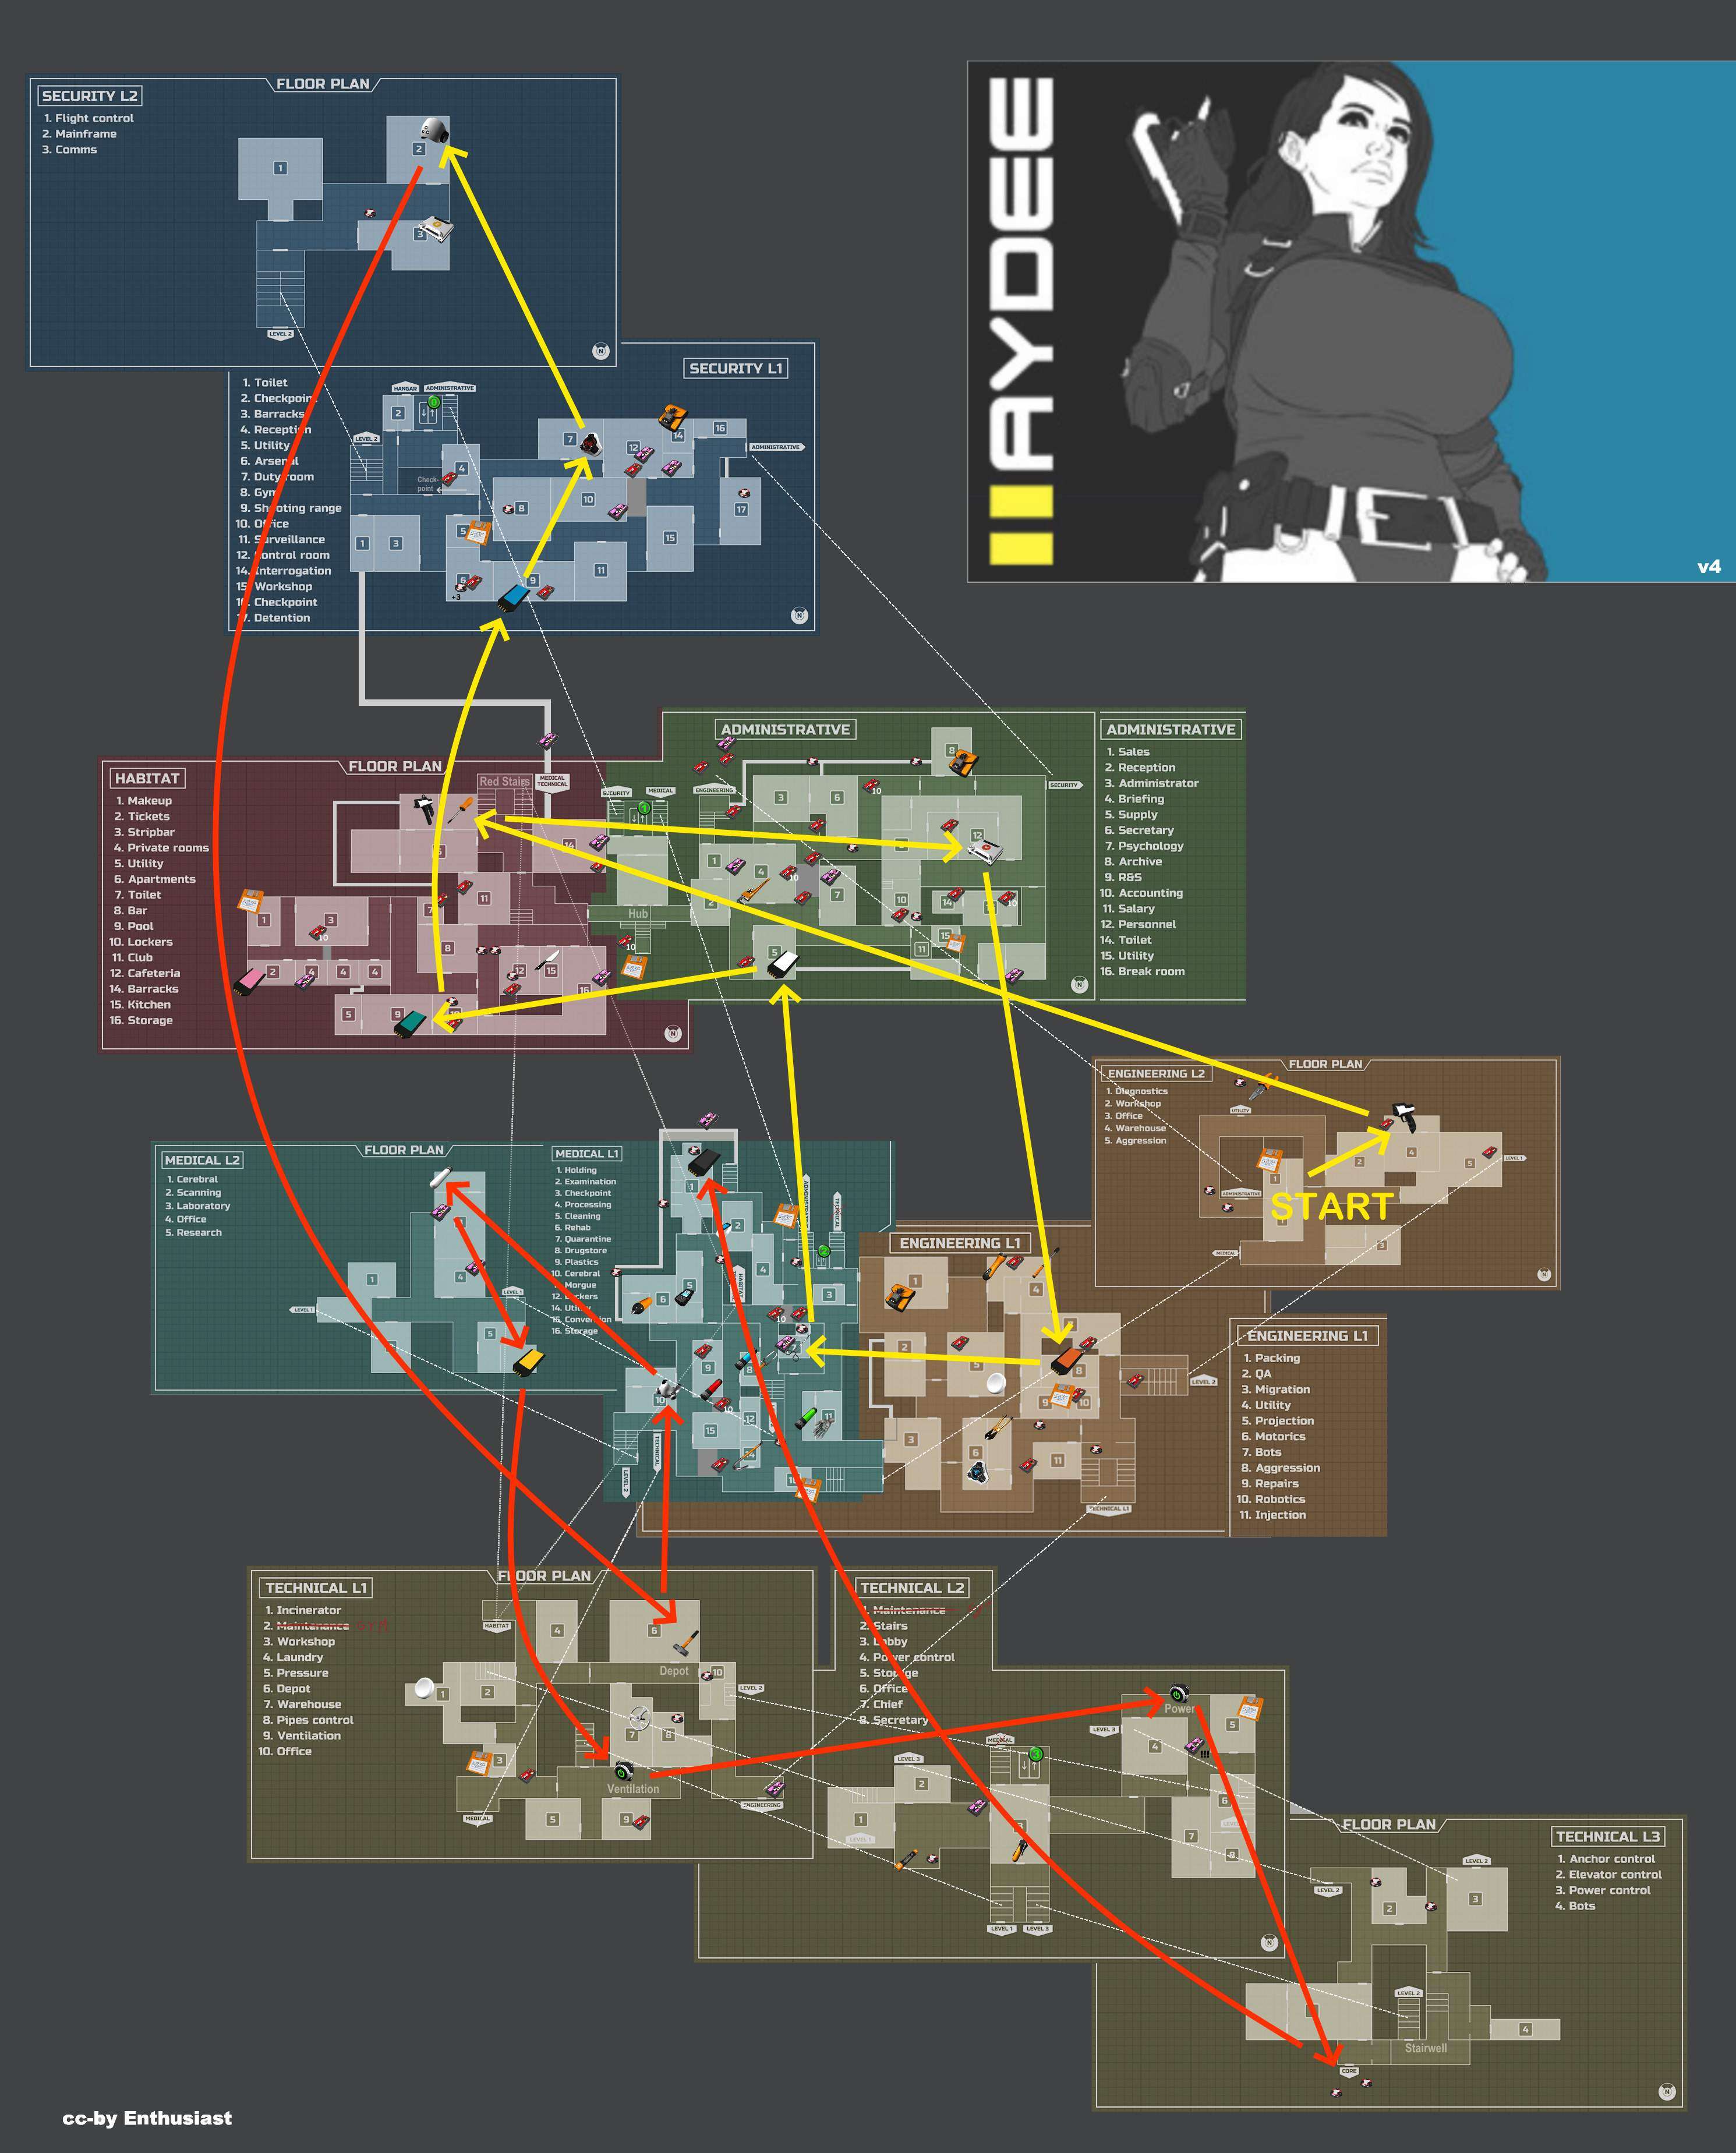
Here is an overview of the steps we took from one save station to the next:
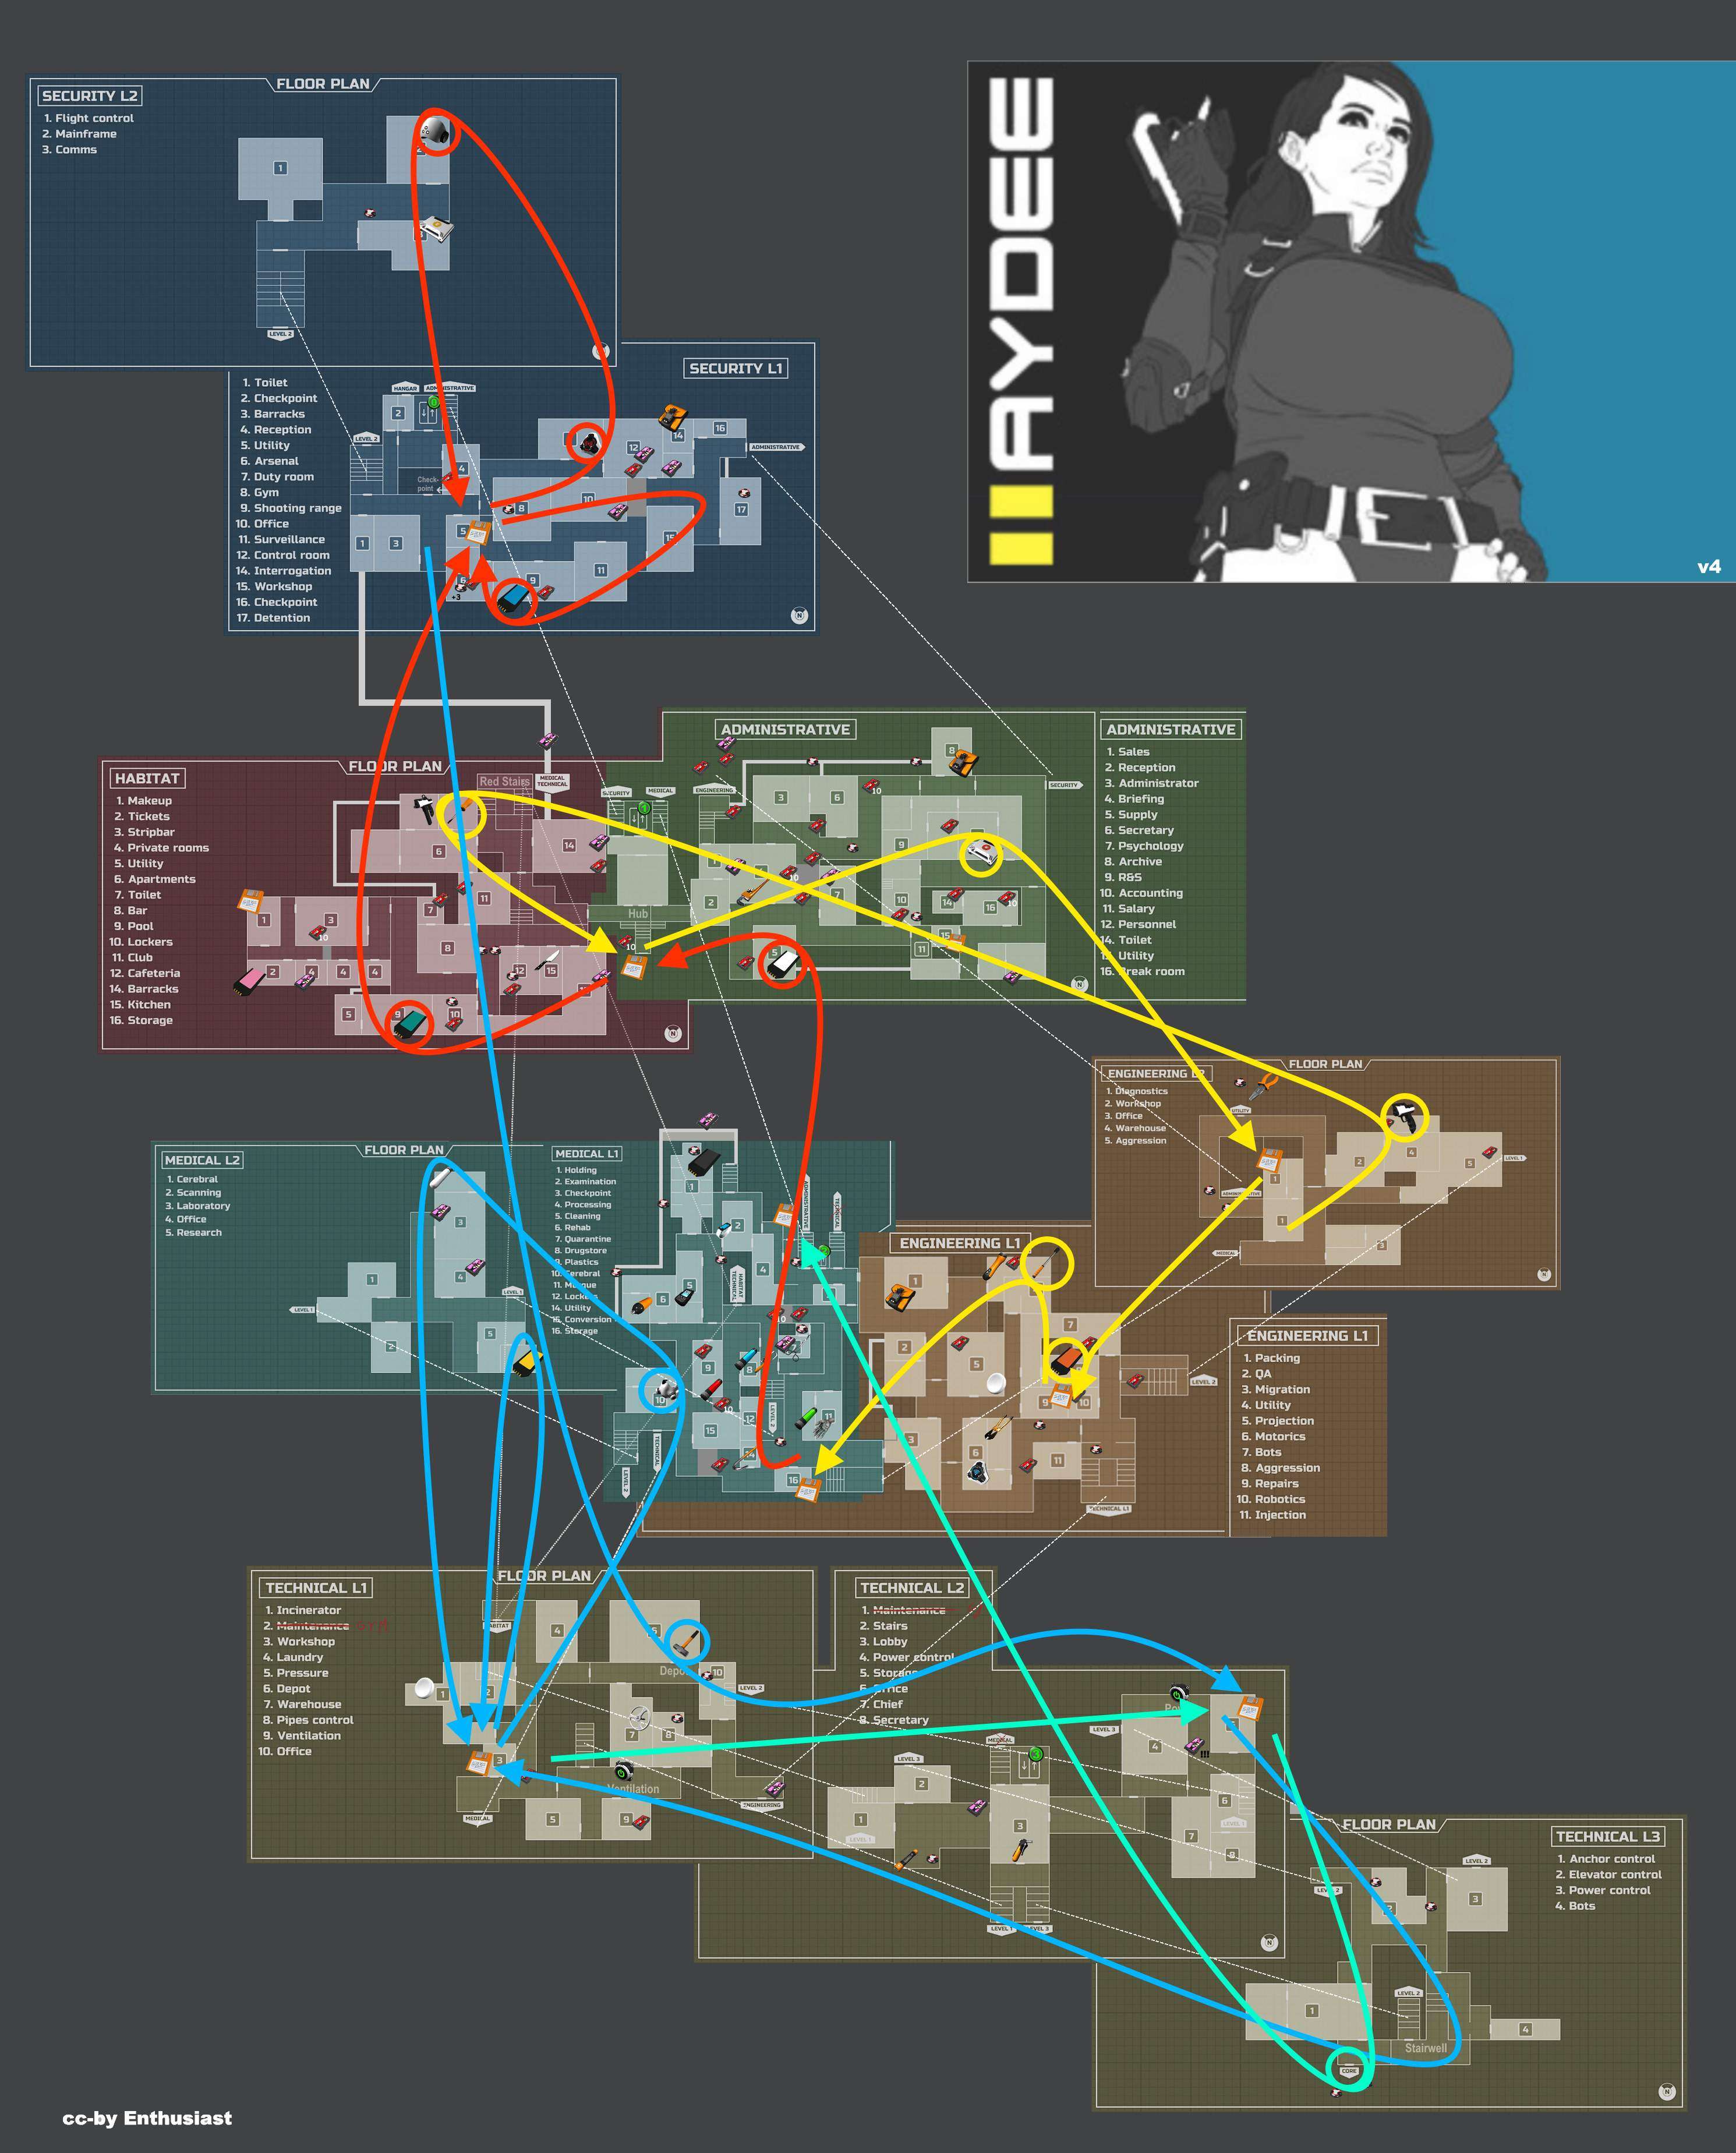
And here’s another view with just the main items in the order we collected them:
You likely understand the basic controls for aiming (right mouse button), reloading (R key), and sprinting (Shift key).
There are a couple of other useful actions you might not be aware of. If you use the right mouse button on an item, you can either move it to your storage or drop it.
Additionally, when you have your inventory open (Tab key) and hover your cursor over an item in your pouch, pressing the number keys 1 through 4 will assign that item to a quick slot.
Finally, to use an item like a keycard on a colored button, you can look at the button, open your inventory (Tab key), and double-click the keycard to activate it.
Headshots double the amount of damage you deal. So, yeah, that’s very important. You should be fine (with pistol-only and shooting mines) if you have no more than one miss on average and collect every ammo pack there is.
To save ~100 rounds you could get the pliers and use mines against enemies, it takes ~5 minutes longer. As to how to take mines: point your mouse at the edge of the mine until it’s highlighted and press the hotkey for the pliers (yes, have a hotkey for that).


Be the first to comment