
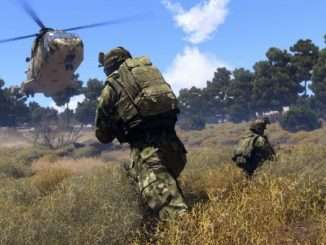
The helicopter time trials are very challenging, and were ‘balanced’ around the advanced flight model. I’ve collected some insights that might have helped me out when I started going for gold medals with the standard model. I have done the trials using mouse and keyboard, but I’ve seen people strongly recommend controller – so its really up to whatever you prefer.
This guide is intended for people that might just want to get the gold medals without having to relearn flying with the Advanced model. It tries to keep thing simple and accessible for everyone, and will not get into advanced flying techniques.
Contents
Warning
All credit goes to MrTipson !
At some points, this guide suggests temporarily switching to the Advanced Flight Model. In those situations, I tried to make it clear whether I believe it is necessary/optional and how much time it can save.
TT6: Runway Lap
This map is relatively short, but features a very long section along the runway, which requires a lot of speed.
I used this video to help with the setup for checkpoint 4, which can gain upwards of 250 speed, but in reality even speeds lower than that can be fine (> 235). Pay close attention to the helicopter’s angle between checkpoints 3 and 4 that sets up for the sharp turn that gains the speed.
When going along the runway, minimize vertical movement to keep as much speed as possible.
The ending can be quite tricky, depending on the speed you carry through checkpoint 6. Sometimes you might see that you won’t be able to make it, in which case you should try not to crash and start another lap instead (don’t reset!). This will save you a few seconds at the start, where you normally have to accelerate.
TT7: Hillside Groove
This map has a very hard target time for gold medal – for standard flight model at least. Initially, my best attempts were able to get to about 2:30:5, and I could hardly imagine ways to improve (with 1 second still needed). Luckily, I found that using Advanced Flight model at the start you are able to save about 2 seconds, which just about allows you to get the gold medal with precise flying.
You should be able to get pretty consistent with checkpoints 1-8; try to keep the flow going so you don’t lose speed (in the video, 7 and 8 could have been done a bit better).
Checkpoints 9 and 10 are important, as you set up to carry speed through 11, all while dodging trees and the terrain.
Coming out of 14, you need to start setting up for 15 pretty much immediately, otherwise overshooting/undershooting can lose you a lot of time.
The final few checkpoints are nothing special, just be careful not to crash into a tree at the finish, as your time might not get saved.
TT8: King of the Hill
This map is very technical with sharp turns and tight transitions. A good reference video to look at is:
You should focus on the following sections:
Take checkpoints 5 and 6 at the edge and use that trajectory to launch yourself up from checkpoint 7. The video has a very good example of how it should look, although you don’t need to get checkpoint 7 so high. You can see how early he can start turning to the left, in order to be able to lean into the pocket next to checkpoint 10. Otherwise, checkpoint 11 can be very tricky.
You want to take checkpoint 15 pretty sharp, in order to be able to change direction for the left turn that follows. Its quite important that your trajectory heading into checkpoint 18 is not too sharp, so you can climb along the mountain.
When reaching the top of the mountain (c21), make sure to help yourself out with the tail rotor if needed, so you have a better orientation to start gaining speed again.
Lastly, the finish is quite close to the ground, so be weary of your trajectory, as the final turn is very sharp.
Also, remember that you can do a hotlap, which will save you a couple of seconds (the start is a little bit to the right after you finish).
TT9: Kiss the Ground
Kiss the Ground has a lot of leeway when it comes to the target time, which makes it a bit easier compared to previous maps, but some parts of it can feel frustrating if you don’t have much flying experience.
First of all, you can keep it really simple. You can use the following video to get an idea how fast you need to be in certain sections (talking about your timer, not actual speed) , although I’ll give you some extra tips that should save you some extra time as well.
Ideally, you should be consistent at the 1. checkpoint landing. Times around 14s are what you’re going for, but don’t worry if you lose 5 or even 10 extra seconds.
You can use auto hover for the two tower checkpoints, but try to make it so as the auto hover is stabilizing you, you are entering the area, to save as much time as possible. This won’t always be the case, but you can help yourself with 3rd person view when correcting for better spatial awareness. Its okay if you are a bit short, just try not to overshoot, as going back takes more time.
If you set yourself up for checkpoint 6 well enough, you can take a lot (>30) more speed compared to the video, which should help you in the straight.
If you know how to do quick landings, then you can save a couple of seconds on checkpoint 9, although the long approach works just fine (just make sure you don’t lose too much speed too fast). Again, its better if you are a bit short instead of overshooting.
Lastly, checkpoint 13 requires you to slide along the runway (technically you’re not forced, but lose a lot of time otherwise). Sliding with Standard Flight Model is possible at <80 speed (before damaging the helicopter). Depending on how fast you were up until now, you might be able to get gold this way. If you need to save some extra time, you can switch to Advanced Flight Model just before checkpoint 12, which will allow you to slide at speeds <170.
TT10: Kart Delivery
This one can be quite frustrating, because a lot of control is needed to reliably and quickly pick up the kart and quad bike. You can learn a lot by watching this video, but don’t try to copy all the tricks if you don’t have the experience to do them (I for sure didn’t). Just keep in mind that you can lose about 45 seconds compared to him.
Sling loading can be quite annoying here, as the zones for attaching can feel very small. If you can manually hover above the pickup, it will definitely save you extra time when compared to auto hover. Don’t forget to open the sling assistant before starting the trial, and be low enough when picking up.
When climbing up towards checkpoint one, you can use Advanced Flight Model, which will save you 7-8 seconds, but is not necessary to get the gold medal.
If you’re using auto hover at checkpoint 5, try to set it up such that as the auto hover is stabilizing, its entering the zone (just don’t do that with too much speed).
After checkpoint 5, you’ll want to nosedive down to lose height, but also lose all that extra speed. You can check out this video to see one way of losing a lot of speed:
Towards checkpoint 13, you can use whatever approach you’re comfortable with (I did it slowly). Checkpoint 14 is a bit tricky, make sure you’re low enough and drop the cargo when the radio says its okay. You’ll also want to be partially rotated to the right (towards checkpoint 15).
The turn towards checkpoint 17 can be pretty sharp, otherwise the only thing left is the finish landing. Check your time to assess whether you need to risk the finish or if you can take it a bit slower.

Be the first to comment