A guide to help new players get into the game for the first time they play without anything overtly complicated.
Guide for New Players
Starting Up
The game features several characters, new players are highly recommended to pick Purse for the most vanilla experience, but the other characters are perfectly beginner-friendly.
Depending on the version of the game you have, you will either press M, pick your character and then start a new game or pick “start custom game”, then click on the question mark and pick the option to start with Matthew.
If you have done this correctly a character will immediately appear and will propose the player 1 out of 4 bonuses, pick whichever one you prefer, but not the archer option.
Afterwards, you will be presented a bifurcated path into the crypt and the bramble, neither area presents enemies too difficult to defeat, therefore, pick whichever sounds more fun to you.
The Best Set (or Build) for Beginners
If you have discovered this game from YouTube, you may have witnessed some pretty powerful backpack sets, also known as “builds” by the community. Frequently, it comes in the form of many cleavers clustered together or many shields clustered together.
Although that may be fun, it is very difficult to build and requires a ton of foresight and their unique purpose is to bring the player as far as possible into the endless mode which is the secondary goal of the game after defeating the final boss.
In this guide however, you will build to survive as best as possible the dungeon.
This game makes use of many elements from Rogue (other than what is already evident), in Rogue you can only recover health at the right occasion, this holds true for this game: Most of the healing items in the game are consumables and they are not the most common occurrence in the dungeon. Healers may appear occasionally, but they are rare and your money is better spent increasing your health cap.
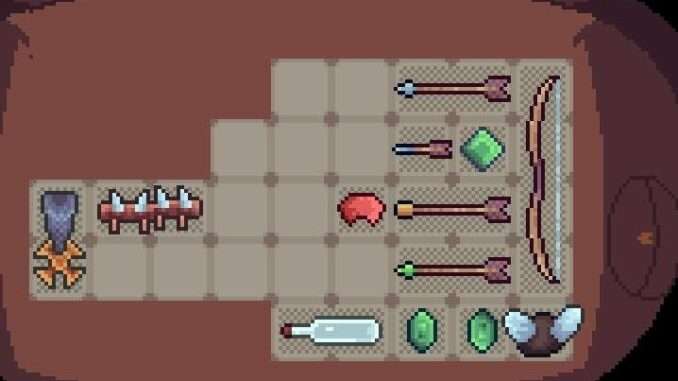
You will want to get your hand on any accessory that can heal you, including: Bandages, Heart Gemstones, Vampiric Daggers and Vampiric Gemstones, but you are the most likely to come across a very potent item titled “My First Wand”. Per mana, this item adds 1 regen which means that on the next turn you will recover this amount of health back. Because it is dependent on mana, you will need to pick up manastones as often as possible and possibly an item that helps recover mana back such as a spellbook.
You will want to be a mage build for the reason above, but also because mana items provide you a way to deal with enemies without worrying about your energy.
Another thing you should consider doing is to maximize your “blocking”, “blocking” is your armor and each time you get hurt while you have any “blocking” left you will not take damage, at least not from direct attacks and fire. In order to maximize your blocking, discard any shield* you may have in favor for armor, the tunic costs no energy for 5 block + 1 per nearby helmet and shoe. Out of all the common helmets in the game, the spiked helmet is the best common headgear to get thanks to its +4 spikes to self which means that enemies you encounter will hurt themselves attacking your character.
Because you will likely not have a proper build in the early game, including a proper mage build, you should carry a club. A club is a weapon that adds +1 weak to enemies which mean they will inflict 1 less damage to you. This will ensure your survival.
Additionally, get every 0 energy cost items you can, especially shivs and hatchets as they provide damage for free. Hatchets will deal 1 base damage (Because of armor, otherwise it is 5) and shivs will deal 2 base damage. That damage can be improved with items.
Because the above is serviceable in the first area, but because enemies will start hitting harder by area 2, get the common item broken ring (+4 block on use with a cost of 1 mana) and put it near by your manastones.
Each time you defeat a boss, you will be rewarded a relic. To avoid spoiling too much of the game, the relics will not be mentioned here, however, do note that there are relics that are completely innocuous if not outright useless and others that are useful, but extremely situational or impractical.
In summary:
- Get armor pieces, helmets, gloves and shoes to boost your defenses without the need of using your energy. Your energy is an important resource in this game and you want to have as much of it as possible.
- Get a weapon called club for its positive and often very useful effect early game.
- Get every 0 cost weapons you come across.
- Get your mage build started by picking up manastones, carry a Your First Wand and Broken Ring which will help you keep yourself alive in the latter part of the game.
*If you get really lucky and find either a Mirror shield, a Pavise or a Soldier’s buckler, you better keep them since eventually they will be very useful under certain circumstances regardless of your current build. If you obtain a Fox Rapier, do keep a shield around. It is improbable since it is so incredibly rare however, after numerous attempts you could possibly get your hands on that weapon.
Area 1
The section contains spoilers for the game!
The Bramble
Enemies do not have anything to really worry about in this area.
Bees are your worst enemy because they can curse you, so you should kill them first which happens to be fairly simple since they have 16 health points which even the basic wooden sword can do in 3 swings.
Hermit crabs are another notable nuisance because in spite of their low health, they start off with 31 blocks and regain 6 blocks each turn. If you have a thorn helmet as suggested on the previous section, you can simply watch as they whittle their own health down to 0.
The bosses include:
- A musketeer which starts the fight off with evasion, they will periodically switch from a single attack to 3 attacks, so using a club to weaken them is highly encouraged.
- An eagle whom has the ability to heal themselves and I think they can curse you. Kill them as quickly as possible.
The Crypt
Enemies do not have anything to really worry about in this area.
Bees are your worst enemy because they can curse you, so you should kill them first which happens to be fairly simple since they have 16 health points which even the basic wooden sword can do in 3 swings.
This area features voles in the second floor which deal a ton of damage thanks to their rage, and they are always accompanied by either 2 annoying enemies or 1 really annoying enemy. You will most likely start losing health by this point of the game, but you should still be able to defeat them.
The bosses include:
- The queen bee, it can poison you and it summons reinforcement every 2 turns, so make it quick to avoid losing against it. Thankfully, it is the boss with the lowest health in the game.
- The king ferret, if you encounter them, you are particularly unlucky because they are considered by many in the community as one of the most difficult bosses in the game although stat-wise they can not compete against area 2 and 3 bosses. The king will summon rabbits every 2 turns and their rage will increase by 1 each time you use a shield which means that it is another reason to focus your build entirely on armor.
- A rooster who has a bad temper, each time they get hit they get +1 rage. This may sound bad, but unlike the other bosses they do not summon allies, and regardless, the club keeps them in check. Additionally, their health is pretty flimsy, so the fight should not take too long. You are very lucky if you encounter them, they are one of the easiest bosses in the game.
Area 2
The section contains spoilers for the game!
Although this guide encouraged you to choose between 2 areas, here you must always go toward the deep caves, if you do not you may lose the game because the enemies in the enchanted swamp are inappropriately powerful.
Among the worst enemies from the enchanted swamp, the salamenders have the shared ability of red slimes to curse and attack the player simultaneously on the same turn every turn all the while having a jaw-dropping 90 hp.
Plus, this area features the cult leader boss and the sage toad boss, both of them are obnoxious for long-time players and they might be the downfall of new players. The cult leader summons 3 enemies on the first turn and those enemies belong in the third area, this is evidenced by the fact that before the introduction of the boss, the cultists that give to the player ailments including slow, weak, etc could be found inside the third area.
They are all hard to kill and the leader will continue spawning one of them every 2 turns.
The sage toad however, summons plants, they have 6 hp and can be killed easily and the boss can easily be chessed by experienced players by not killing the spike plants while using ranged weapons or a necronomicon for poison damage. But, for newer players, and assuming you paid attention to the guide, unless you have a windmill relic or a working electric wand, this boss is hard to kill because it takes 3 energy to kill the plants then another one for the boss and the worst part of the boss fight that even players do not like is its evasiveness, each time the boss gets hit, they become invulnerable for the remainder of the turn, so it is impossible to rush them down.
If you have a reliable ranged weapon such as a bow and arrows, kill the poisonous plants and keep the spike plants alive to best deal with them. However, keep in mind that you will spend a good 5 minutes fighting them due to their gimmick.
Regardless, you should not have picked the enchanted swamp, if you did. The remainder of this section will focus on the deep caves.
The worst enemy you will encounter in the deep caves are up to argument, there are a few run-ending enemies that can be dealt with if you play smart, but they will still pose a significant nuisance to you.
You should be wary of those enemies:
- Red slimes as mentioned earlier. Thankfully, the curse is always a curse of slime which is not that big of a deal and they only have 35 hp.
- Blue slimes are very tanky and can curse you every 2 turns.
- Sables can hit you 3 times in a single turn, if you followed the guide to its fullest they should not be a real problem.
- Repxecutors receive +1 spike each time they get hit, it is better to let them attack you and watch them as your own spikes slowly kill them.
And the worst enemy in the area are the bats, bats deal a huge 21-23 damage and this damage can not be lowered via the club. Additionally, they can poison you. Kill them as quickly as possible to avoid taking too much damage.
By this point, if you upgraded your gear correctly and obtained better manastones the 2 bosses here should not pose any problem.
The first boss is a green lizard that starts off with 7 spikes and 3 regen, all you have to do is wait until it runs out and then smack them down with either your club or your brand new weapons you have come across on your way there.
The second boss is much more difficult, it is a giant badger that summons more badgers as reinforcements. It has the most significant amount of health in the game other than the final boss which makes it difficult to kill. Prioritize killing their summons to prevent yourself from being overwhelmed, although if you can not kill them in a single turn, prioritize the boss instead.
Area 3
The section contains spoilers for the game!
There is no bifurcated path for the third area, you will be transported into the magma core which features the strongest enemies in the game.
There is no “worst enemy” here, all enemies are equally as awful to you. If you have kept your full set of armor as recommended at the start of the game and continually upgraded it (With the Archangel armor preferably) continually, this will make 90% of all encounters much easier. You will still have to worry about the snakes however, since they can poison you and poison bypasses blocks.
In the second floor of the magma core, you are expected to fight the bosses you have encountered in previous floors. This includes the badger, the queen bee, the lizard and the ferret king.
By the third floor, you will have to fight either the king or the grandmaster.
The king must be taken slowly in order to defeat, his gimmick is that each time he gets hit he gains +1 rage and +1 spike. If you obtained the candle relic from a previous floor, this should not be a problem however.
The king will summon reinforcement, rabbits and blue slimes actually.
The grandmaster is the polar opposite of the king, you must take him down quickly.
The grandmaster will continually set you on fire which will crank up damage against your armor and eventually your health too!
This boss is easy if you have an electric wand and a way to recover mana – For example, spellbooks or the frog totem.
If you have the ring of rage, the ring of doom or a weapon with +1 rage modifier from the forge then use it, you need to deal as much damage as possible in order to defeat this monster.
And if you have been successful in completing the whole game then it is a mixture of luck and following the guide. Try out other builds that are harder to set up, but still very satisfying to use like the cleavers build, a berrserker build or an archer build!


Badger Boss appearing as a regular enemy was a bug. I apologize for not checking this sooner.
With that out of the way, I think you can pick whichever area you find the most interesting because neither area would be too difficult.
I would recommend players to go into the Enchanted Swamp instead of the Deep Caves. Badger Bosses spawn as regular enemies in the Deep Caves and they are way too strong to handle at this point in the game, unless you are very lucky.
Furthermore, Salamenders have been nerfed