Gameplay Tips
During the Wave
In addition to just trying to survive the wave, there are some things to keep in mind during a wave:
- Trees: Remember to circle around the map looking for trees.
- Special Enemies: Some enemies keep their distance. You should hunt down enemies that shoot projectiles, buffers, and Eggs as they spawn, otherwise they will make the wave very difficult to survive.
- Stay on the Move: I like to move around the map. This keeps more enemies behind you rather than around you. It prevents projectiles aimed at you from hitting you. It makes it easier to deal with charging enemies, and helps you not get pinned by enemies such as tentacles.
- Pick up Materials: Remember to pick up materials during the wave. It can make the difference between leveling up now, or having enough money to buy an extra item instead of having to lock it. Note that materials that you don’t pick up are bagged and saved for the next wave, so nothing is lost. But that is no excuse.
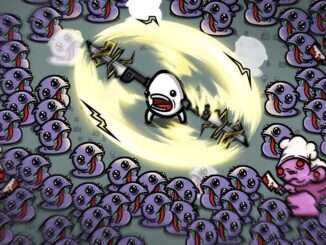
- Play Offensive – Clear the Map: While it’s important to survive, it’s also important to play offensively. Enemies drop materials on death, so the more enemies you kill, the more you earn. Most deaths happen when you’re behind on damage, and enemies pile up.
- Play Defense – Survive: Later in the game, wave 13+, it gets much harder to clear the map, as more enemies spawn, and stronger enemies. Once you get to the late game, your goal for a wave is just to survive. You don’t have to kill Elites or Bosses to win. Surviving is enough.
- Save the Fruits: Enemies and Trees drop consumables/fruits that heal you for 3 HP. Picking up a Loot Crate also heals you for 3 HP. You should let these pile up on the ground until you need them. Having a storage of healing around the battlefield is powerful. Note that you pick up all consumables at the end of the round, so you still get crates if you don’t pick them up.
Weapons
These are guidelines aimed at newer players. There are a few exceptions for each tip, which you might learn over time as you play.
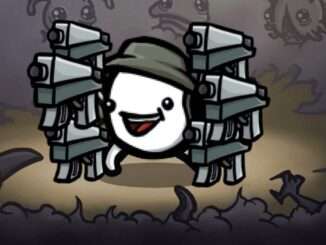
- Always have 6 Weapons: One of your first goals during each game is to get to 6 weapons, as it provides set bonuses and damage. When combining weapons, you don’t want to combine to less than 6 weapons.
- Combine lowest Tier Weapons: When combining weapons, you should generally try to combine the lowest tier weapons first. So you combine the two Tier 1 weapons before you combine the two Tier 3 weapons.
- Weapon Classes: Each Weapon has 1-2 Weapon Classes. You get a bonus to your Stats when you have 2-6 of a Weapon class. So there is a benefit to match weapons.
- Damage Types: Weapons typically scale with one or sometimes two of the Four Damage Scaling Stats: Melee Damage, Ranged Damage, Elemental Damage, and Engineering. Generally you want to use weapons that scale with the same stat, so you can focus on increasing only one of these.
- Use 6 of the Same Weapon: In most cases it is best just to use 6 of the same weapon. This ensures the weapons scale with the same stats, and are predictable. It makes the weapons easier to find in the shop and easier to combine. I see a lot of players with a decent amount of hours under their belt, mixing weapons way too often. (But remember you’re playing for fun, so it’s fine to explore and go crazy)
- Mixing Weapons: However there are some exceptions. For example, Guns usually play well together, and can be mixed (But I still mostly don’t). Some builds have Higher Tier, cooler weapons you can add to the build. For example Picking up Powerfist when using Fists, Rocket Launcher when using Shredder, Plasma Sledgehammer when using Plank. Minigun when using Guns. The list goes on. Once you become experienced with the game, I highly recommend you to explore different combinations. Even after 1000 Hours, I still learn new things every day.
Items
- Items can be bought in the Shop or found in Loot Crates. They typically give an increase to one more or more stats, and a smaller decrease to another stat.
- Rarity: Items come in 4 Tiers, Common, Rare, Epic, and Legendary. Unlike Weapons, each item has a fixed rarity which it always appears as. Items cannot be combined.
- Cost: Items have a base price based upon its Tier and how powerful it is. Common items cost 8-30 gold, Rare items cost 25-65, Epic items cost 50-100, and Legendary items cost 80-120. (Note that the actual prices you see in the shop is with inflation, so they will be significantly higher)
- Unique/Limited x: Some items are unique, meaning you can only have 1 of the Item. Limited x means you can only have x number of the items. Unique items typically have special abilities and Limited items typically give % chance for something to happen, and are limited to 100%.
- Cost Efficiency (CE): Not all items are equally good. Some are very expensive for the stats that they give, while others are a bargain. So this means that an item like coffee, which is super cheap, is something you want to buy most of the time, while Injection is something you can pick up if you need damage, but you’re also more than fine to skip. And then you have terrible items like Mutation or Terrified Onion, which you want to avoid in most cases. I’ve done some calculations for this efficiency later in the document.
- Avoiding downsides: One way to make the most out of items is to be able to avoid their downside. For example, for items that give negative Melee, Ranged, Elemental Damage, or Engineering, it is easy for that downside not to have any effect for you. Making the items better. But note that for those stats, the items are often balanced with that in mind, so don’t assume you’re getting a super good deal just because you don’t use melee damage.
- Character – Downsides: Some characters have abilities that allow them to skip downsides. Chunky can’t modify his speed, so items with negative speed become better. Since it isn’t normal to be able to ignore speed, Chunky is actually able to get some great deals by abusing this. There are other cases like Ghost -> Armor, Hunter -> Harvesting, Crazy -> Dodge. Pacifist -> Damage.
- Items with Stats over effects: I often see newer players buy a lot of items that grant cool effects; Tardigrade, Cyberballs, Alien Eyes, Turrets, pocket factory, Adrenaline, wandering bot. All of these have spots where they are great. But Cyberballs without luck, turrets without engineering and Adrenaline without Dodge all suck. Getting a ton of stats is the primary benefit you want from items. These cool effects are all mostly situational, so you shouldn’t be buying them unless your build works with them.
- Loot Crates: When you find an item in a loot crate, you have the option of recycling it for 25% of its value. So if an item costs 100 gold in the shop, you can recycle it for 25 gold. So since the “price” of items in loot crates are only 25%, suddenly a lot of items become much more cost efficient, and you generally want to pick up most items you find in crates, if the stats are useful to you. (Recycling Machine increases this to 60% of the value, making it a harder choice)
Economy & Scaling
In Brotato your goal is to survive 20 waves. This includes the Elite/Horde Waves, and the Boss waves later in the game. So your goal is to get strong enough to handle these.
Killing enemies gives materials which give both Experience and Money. This is by default your primary source of income. And generally, the best way to improve your economy is to have enough DPS to keep clearing the map. It also keeps you safe. – If you’re falling behind on clearing the map, getting more DPS will be your best way to increase your economy.
However, it doesn’t take too much to clear the map early, and the Economy Items are some of the strongest items in Brotato. They allow you to invest in the late game. Economy comes in the following forms:
- Eco Stats: There are three Economy Stats: XP Gain, Luck, and Harvesting. And then there are tons of items that boost your income.
- Harvesting: One of the most broken Stats in Brotato. It gives both Money and Experience. Look for that +5 Harvesting upgrade early. It is super strong.
- XP Gain: I like XP gain, but due to the exponential nature of XP required to level up, the stat has diminishing returns. That said, I like the Stat. Scar, Bean, and Peacock are all great items. A level translates to +1 Max Hp and maybe a Tier 2-3 Upgrade. That’s a lot of stats. XP Gain also multiplies XP from harvesting. So they multiply well.
- Luck: The value of the Luck stat has been quite contested. But I still like the stat. It is best to get through items. I don’t like using Upgrades for it. Luck gives you higher tier items and upgrades. It gives you more Loot crates, and provides you with more consumable healing.
- Get your first Harvesting: Since Harvesting’s 5% increment rounds up at the end of each wave, just getting 5 harvesting will increase by +1 at the end of each wave. So you should always at least get the ball rolling. The Breakpoints are 1, 21, 41, 61, etc Harvesting. If you can get that 21 harvesting early, it will set you up for a great game.
- Eco Items: Some items have economic benefits aside from just Eco Stats: Piggybank, Bag, Metal Detector, Hunting Trophy, Recycling Machine, Dangerous Bunny, Tree.
The thing to note about all of these stats, is that they don’t immediately increase your power, but instead provide accumulating benefits the longer you have them.
With each wave that passes, the value of any investment decreases, as you are one wave closer to the final Wave 20 test. (unless you’re doing Endless mode, where you just go crazy with stacking as much economy as possible.
If you looked at the item tier list, you have likely noticed that I rate a lot of the Economic items as S tier. That is for good reason.
I buy the following items ON SIGHT if I see them in the early game:
- Coupon
- Fertilizer
- Recycling Machine
- Bag
- Tree
- Tractor
- Dangerous Bunny
The Following items are great if you can handle them:
- Gentle Alien (More enemies = More money)
- Mouse (More enemies = More money)
- Crown (Buy if you have enough Harvesting)
- Hunting Trophy (Buy if you have enough Crit)
So you have my blessing to be Greedy with your builds. Not only is it strong, it is also super fun to reach those overpowered endgame builds that just annihilates bosses in seconds.
Offense & Defenses
As mentioned, you want to be able to clear the map as a minimum for your offense. And for defense you typically want to be able to at least survive 2 hits. But ideally you want more of both.
As you get better at the game, you can get away with less and less defenses. Once you’re really comfortable with the game, you can go Glass Cannon, where you forgo investing in defense entirely for some parts of the game, or even all the way to the boss wave.
I’ve found myself and other experienced players tend to forgo defenses until the mid game which is wave 10+ for this case. This is when enemies begin to spawn all around you, making it really hard to not take damage.
As a newer player, you will have to invest more and earlier into defensive stats to survive.
As you become better with the game, get hit less often, and understand which upgrades and items to buy at which time, new paths open up to you.
The most important one is that you’ll need less Defense and Healing until Wave 10+. Instead I just get a bit of additional Max HP. Instead I invest into Consumable Healing and the Luck stat, since that also gives other economical benefits. Pick up Lemonade and weird food for extra consumable healing.
It also highly depends on your Build. Long ranged weapons clear the map better, and will get hit less as a result. Melee builds, especially with short 150 range weapons, will take more hits.
More specific advice on these can be in the following chapters.
Glass Cannon
To go glass cannon is to forego defense mostly throughout the game. Your plan is that you’ll deal so much damage that enemies won’t have a chance to even get near you.
I would Contrast this with a Squishy build. A squishy build is focused on offense rather than defense, but can still take some hits and recover, whereas a more Hardcore Glass cannon build might not even survive a single hit.
- Difficult: Going glass cannon requires a bit of skill and player experience, since you need to be able to predict and evade projectiles and charging enemies. It only takes a few hits to kill you.
- Range and Damage: Glass Cannon builds often rely on having enough range to kill enemies safely. The money saved on defenses is pooled into more Damage, so you can kill enemies quickly before they can threaten you.
- Characters: Common glass cannon characters are: Ranger, Hunter, Demon, Soldier, Apprentice, Artificer, Jack, Speedy.
- Items: Sunglasses, Triangle of Power, Glass Cannon, and Community support are great items if you just want to go all out. They allow you to dump defensive stats for more offense.
- Tardigrade: Tardigrade allows you to survive an extra hit, making it the perfect item for Glass cannons.
- Defensive Stats: On a Glass cannon build, you don’t want to invest in dodge ever, since you can’t take enough hits to rely on it. Rather, I would focus on Max HP such that I can survive a hit or two. Perhaps a bit of armor if it is a soft glass cannon build. But you can also just go hardcore and go to 1 Max HP and rely on Tardigrades.
- Healing: Glass cannon builds tend to stay at max HP for the most of the wave and not take a lot of damage. So you need Burst healing. For this reason I mostly, if not only invest in Consumable healing when doing a big Glass Cannon build.
Quick Tips
- Dont buy bad weapons or items, buy the good ones. No I’m not going to list whats good or bad. It also depends on the class. Some items that are universally good on almost every class is Tree, Bag, Coupon and Piggy Bank.
- For the first 5ish waves, focus on getting more weapons and Luck and/or Harvest. Usually you just want more of the same weapon you started with. Dont mix unless you know what youre doing. For the first 5 level ups pick Luck or Harvest.
- Lot of it comes down to experience, knowing how much to spend on rerolling level ups or shop.
- After the first 5 waves, focus on getting more dps. Usually in the form of ranged/melee dmg and attack speed. Attack speed is usually most important for your DPS, unless you have SMG’s (then its ranged dmg).
- For the last 5 waves you can go for some defensive stats like max hp, armor. Glass cannon builds though are very viable, atleast for ranged builds.
- Dodge, HP regen, lifesteal are often not worth investing into. Luck boosts consumable drops, together with some consumable healing boosting items it provides the best healing in the game (outside getting like 3 healing turrets with Engineer)
- Try to beat the game on D0 with all classes before you move on to higher difficulties, so you unlock all the items.
- The key in this game is to build enough DPS quickly enough that you always stay ahead of the curve and can keep killing quickly and efficiently. Defense is secondary (or useless in many cases). If you start falling behind on dps and start getting overwhelmed, no amount of armor or dodge will save you.
I hope you found this useful. Wishing you luck!


Be the first to comment